

Cam only, winter upgrades. Bitch in on a diet
 04-26-2009 | 07:03 PM
#61
Thread Starter

Joined: Nov 2005
Posts: 5,556
Likes: 6
From: Rochester, NY
thanks
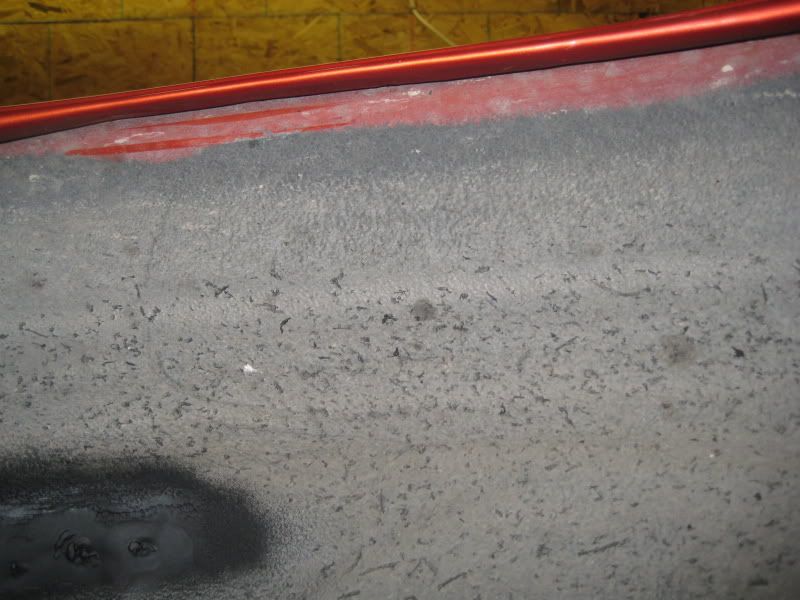
oddesy PC680 this is its 4th year, jumps fine after sitting NY winters. I need to get a better mount, no problems local TnT. But at NMCA they yanked it right out. safe is safe, the stock dosnt hold it down just pinches it there.
oddesy PC680 this is its 4th year, jumps fine after sitting NY winters. I need to get a better mount, no problems local TnT. But at NMCA they yanked it right out. safe is safe, the stock dosnt hold it down just pinches it there.
 04-28-2009 | 05:01 PM
#64
Thread Starter
Joined: Nov 2005
Posts: 5,556
Likes: 6
From: Rochester, NY
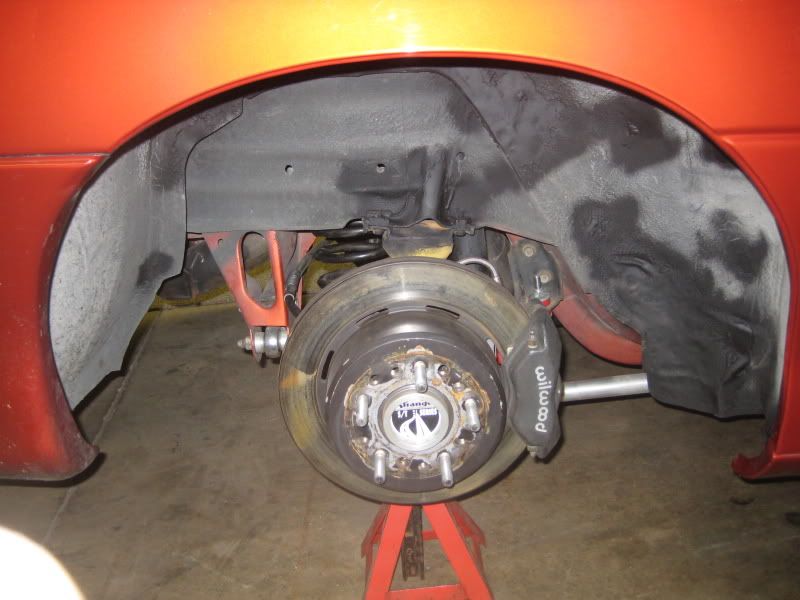
I rented a freinds fender roller, thanks agian (I still owe you) used my heat gun. 1st side too my time, the other I knew what I was doing and went a lot faster. But it came out mint, the paint did not crack But started to chip a few flakes right on the lip were its spot welded to the outer wheel well on one side. They were a little miss alined so the paint didn't get in there that good, but its basically inside up under the wheel well now. I touched it up and its fine. And hammered a few spot more for the etdrags (28x10.5) touched up the welded up holes foprm the wolfe bolt in. Once I drive the car thew some rain it will match the rest of the undercoating. I cut one coil off the rear springs too. Got the brakes last year from a local, in tradwe for $100. The Ebrake works great still. And orderd some M&H DRs, thay have a new PN out thats wider then the old. The 28inch 275x55x16 are now 10.4 section width. The 285/55/16 MTs DR (only like 27.7 tall) have been on back order now for like 6months so said f it, and get thouse for street tires, there a few puinds lighter, aere alot better then the rain and lost longer too.
05-08-2009 | 11:04 AM
#65
Thread Starter
Joined: Nov 2005
Posts: 5,556
Likes: 6
From: Rochester, NY
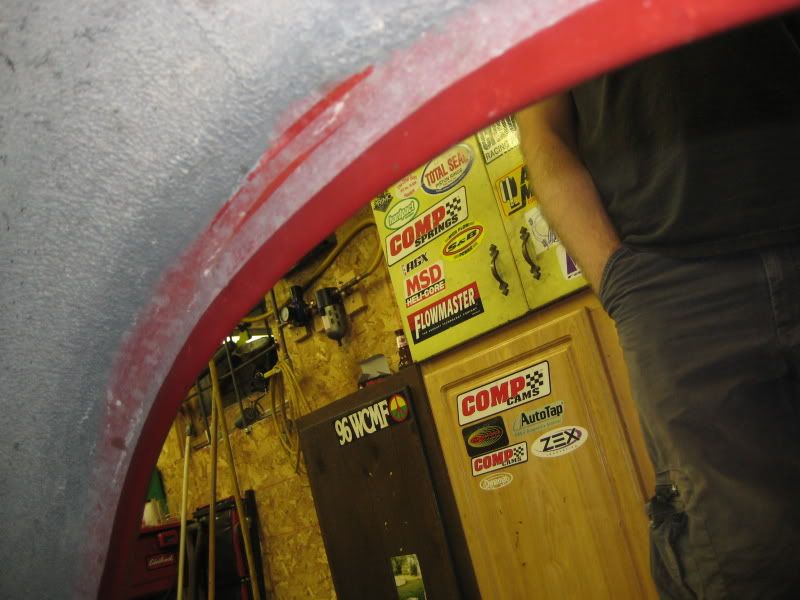
Tring to keep the lip on the hood sucks, I cut the rails down any everything. But the inside corner on the hood is still big, so a dug it out with a tighter 1/4 sand roll, and even sanded the lip thinner a little. Its still tight at the ends over the rails, so you have to shim them out with some washer like I saw some other do. And even over bend the flats, and the ends of the rials for the hood corners. It would fit but it was still going over the rails tight, and pulling the hood. I could see what robbie in his "11.03 SI" build was telling me. It was gona to crack in time bumping the sides of the hood on things, and with thinning the lip down. I wanted the leave them on to keep the hood stiff thinking that would make it easier to remove it 1 person. But it was acutly gona do more damage with the rails. With the lip if you move the hood wrong while you setting it on or off. You can easily snap the lip right off the hood. When its stuck in the gap between the fender and the cut down rails, it flexs a bit with one person to controal the other side of the hood. Cut the **** right off, cut off wheel cuts like butter. Only cut like 80% off, then some 40-60 3M roloc sand disk it flush with the hood thickness. I wish I did that 1st  But it might be better that I cut the rails down, so your not going to see the ends of them on the hood line. I'll see after the paint the hood what you see and don't and how it looks. Its still a GM for fit/finish for the rest of the body, and not a show car or anything.
Then its easy, just keep adjusting the rails so the hood is flush with the fenders (I keep the front of the hood a little lower so no wind gets under it) You can write right on the painters tape were a low or high spot is in the rail. You will have to just bend all the dzus pad up so they hit under the hood, there not 90* off the fender like there made. JMost just need to be like 95-120* to match the body lines, your see looking up the headlight holes with a light. Test fit the hood 30 more times, then you can mount the dzus on the hood. Mark them like this, no idea how others do it but this worked for me. Mark the centerlike of the hood, and the front bumoper. Always work 90* off the fenders edge or the bumper cover with a sqare. This is how you fins the center line of the spring under the good. mark the left and right side, its like a .700 hole. So the center of thouse marks is .350. And mark how far the spring in off the body line, OD (all the fronts should be .925 for the camaro racecraft rails) the sides change a little, measuer them all. I started in one form corner nixt to the headlight, then other other headlight corner. All the fornts. Then down the sides, worked good.

Then put the hood back on, I used some long welding style vise grip arm clamps to holw the hood. and mark the center of the spring. drill a little 1/8 hole and see if its nuts over the spring. WORK OFF THE OUTSIDE OF THE BODY GAP

Its should be, its its not can can move it a little untill you have the full big hold for the dzus body, Mike were all preatty good but some that were hard to mark form the body line. Take the hood off, I used some saw horses and a unibit to open the holes up. Then a sand roll and a die grinder to put the little chanfer for the dzus raduils to not hit.

Then put the hood back on, and look how its lines up and test the dzus. might have to tighen them springs up a little on the front more, the hood in thicker. After to have the 1st one fit and tighting good, you can have to do 13-25 more

I still have to rivit them to the hood. Get some fiberglass resin? to fix some chips in the back were they cut the full windsheild extetion off. I'm not sure how to do that, never worked with fiberglass. I'll look into that more.
Got the 28* 275 DRs on, the look really good fill up the wheel well nicely did a compression test all 177-180, 7,8 are fine. 4 was 175, and 6 was 183 weird I did that side agian, and they backed up. I have to wash the car and get some outside pics, and get some miles on it. I'd like to get a fast intake for the car soon. I'm porting some 243s that are coiming out good. I'd still like to go 10.9s on the stock heads,maf,TB,ls6 intake.
But it might be better that I cut the rails down, so your not going to see the ends of them on the hood line. I'll see after the paint the hood what you see and don't and how it looks. Its still a GM for fit/finish for the rest of the body, and not a show car or anything.Then its easy, just keep adjusting the rails so the hood is flush with the fenders (I keep the front of the hood a little lower so no wind gets under it) You can write right on the painters tape were a low or high spot is in the rail. You will have to just bend all the dzus pad up so they hit under the hood, there not 90* off the fender like there made. JMost just need to be like 95-120* to match the body lines, your see looking up the headlight holes with a light. Test fit the hood 30 more times, then you can mount the dzus on the hood. Mark them like this, no idea how others do it but this worked for me. Mark the centerlike of the hood, and the front bumoper. Always work 90* off the fenders edge or the bumper cover with a sqare. This is how you fins the center line of the spring under the good. mark the left and right side, its like a .700 hole. So the center of thouse marks is .350. And mark how far the spring in off the body line, OD (all the fronts should be .925 for the camaro racecraft rails) the sides change a little, measuer them all. I started in one form corner nixt to the headlight, then other other headlight corner. All the fornts. Then down the sides, worked good.
Then put the hood back on, I used some long welding style vise grip arm clamps to holw the hood. and mark the center of the spring. drill a little 1/8 hole and see if its nuts over the spring. WORK OFF THE OUTSIDE OF THE BODY GAP
Its should be, its its not can can move it a little untill you have the full big hold for the dzus body, Mike were all preatty good but some that were hard to mark form the body line. Take the hood off, I used some saw horses and a unibit to open the holes up. Then a sand roll and a die grinder to put the little chanfer for the dzus raduils to not hit.
Then put the hood back on, and look how its lines up and test the dzus. might have to tighen them springs up a little on the front more, the hood in thicker. After to have the 1st one fit and tighting good, you can have to do 13-25 more
I still have to rivit them to the hood. Get some fiberglass resin? to fix some chips in the back were they cut the full windsheild extetion off. I'm not sure how to do that, never worked with fiberglass. I'll look into that more.
Got the 28* 275 DRs on, the look really good fill up the wheel well nicely
did a compression test all 177-180, 7,8 are fine. 4 was 175, and 6 was 183 weird I did that side agian, and they backed up. I have to wash the car and get some outside pics, and get some miles on it. I'd like to get a fast intake for the car soon. I'm porting some 243s that are coiming out good. I'd still like to go 10.9s on the stock heads,maf,TB,ls6 intake. Last edited by studderin; 05-10-2009 at 12:25 PM.
05-08-2009 | 11:32 AM
#68
Thread Starter
Joined: Nov 2005
Posts: 5,556
Likes: 6
From: Rochester, NY
Cool, get one thouse 90* angle stubby open end wrenchs, for he rails nyloc nuts, right over the wheel wells there not much room. I forgot the size.
http://tbn0.google.com/images?q=tbn:.../558301_lg.jpg
******Edit the nut sizes are 5/32, from the offset wrench. I wouldn't buy a cheap one. You don't want it bulky. I have a craftsmen, the professional polished series, and its nice there slim and small on the wrench head. The allen in 5/64s, a ball end is nice to have too. Don't tighten up the bolt the allen is really small. Tighten the nut
Last edited by studderin; 05-11-2009 at 10:38 PM.
05-10-2009 | 01:11 AM
#73
Thread Starter
Joined: Nov 2005
Posts: 5,556
Likes: 6
From: Rochester, NY
thanks,
Also a big help.. buy one if you done have one. A machinst 6inch scale, the nice flexable ones. Works great for measuering on the side rails how far in to drill the holes for the Dzus. I've had my starret for a while now
http://littlemachineshop.com/Product...80.C305R-6.jpg
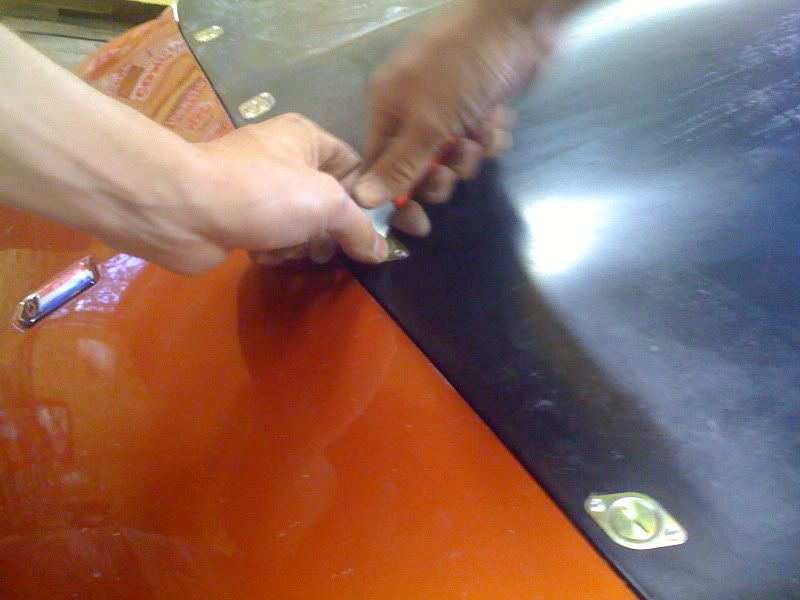
As you drill for each one, tighen them up as you still fit the hood. Dont do them one at a time, and just more the hood the way you want it to fit. After all the dzues are fit. Tighen them all up, with the hood were you want it, then take one out at a time and you can bend the top plate so it fits the hood good for that spot, sence the hood isn;t gona be flat were all of them are. You can bend a little shape into them, it looks really good when yo do that. Then you tight them up so they all line up, I used a ruler so the flats were parrell with the next dzus, and just look how they look to the body line. If you like them up right, when you rivit them to the hood the botten seid of the rivit fits inside the other holes in the rails. When there ALL tight and linded up. Drill the 1/8 holes thu the hood for the rivits, (has to be tight holes for your 1/8 rivits, so the Dzus's can't move around after then tighen up were they what to be) Then take them all off, but don't mix up the way they fit. You can keep them right in that hole if you carfully move the hood to some saw horses. And rivit them Dzuses to the hood. Use a backer washer under the hood. I used a normal small 1/8 alum rivits on the sides, But the front you need some longer ones, the hood is thicker. I bought a 250 pack of some orange alum rivits but not going to use them till after I get the hood painted.
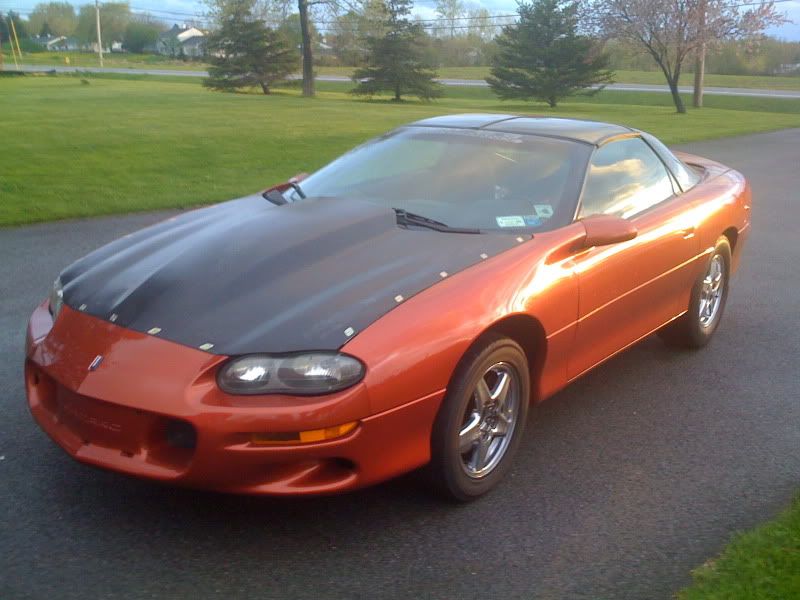
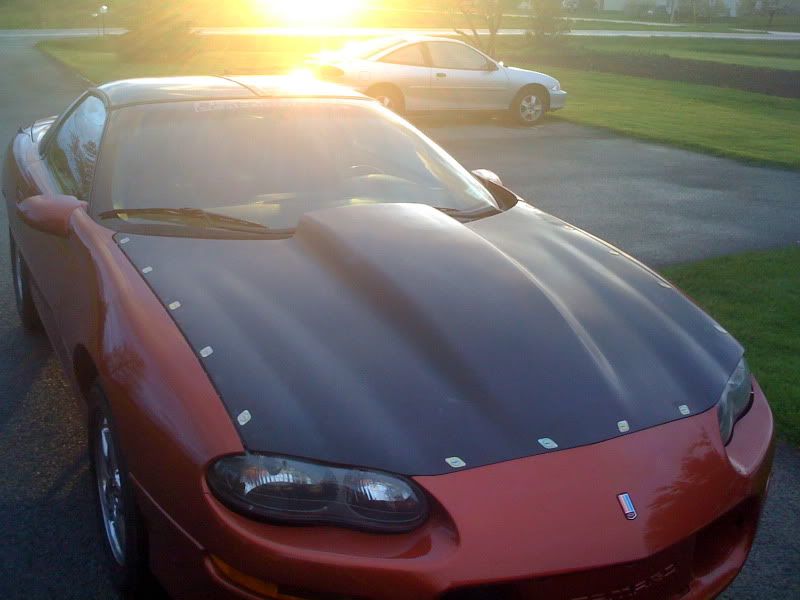
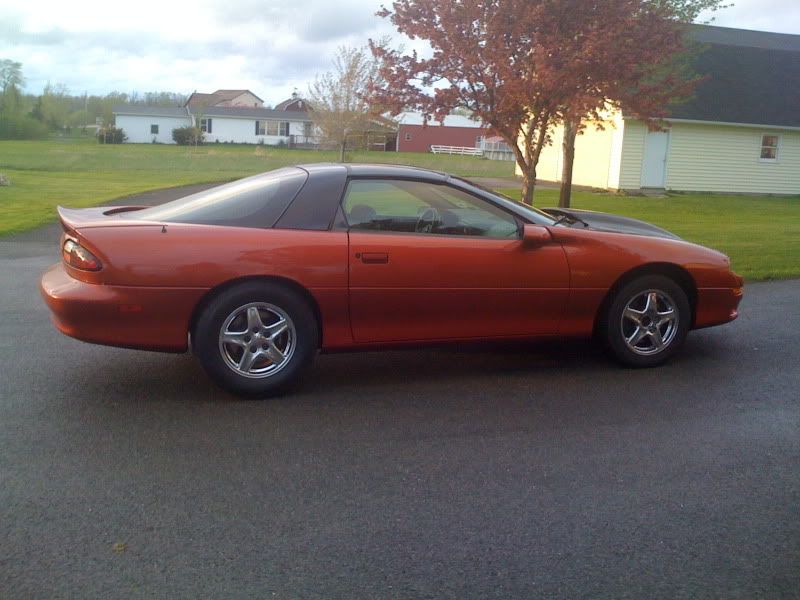
Heres some pics of the hood, it fits really nice for just being a 14# skin. The front point is a little over sanded round, but no one will ever notice. Don't mind the 4x4 front, I couldn't find my spanner wrench to lower the shocks, now with the 28's and the back lowerd. And the front end alot lighter
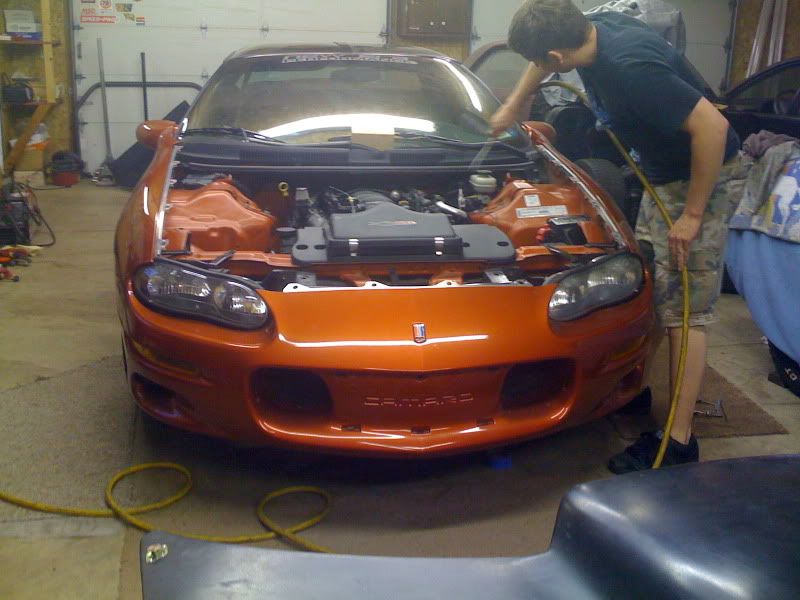
And today I noticed you dont really need the front hood latch brakets. I thougth the stock fiberglass braket that holds the bumper cover needed it. But its fine without them. Its all held up in the 4 side 10mm nuts on the rad. support studs. If anything not running the front bumper support. The front bumper cover is siffer now with the pin on hood and the rails. Everything is tightly one piece holding everything together now, no floating body lines.
I'll get a real weight on this stuff. But this is everything removed going to a pin on hood. (- the latch cable, and hood 45-47#s ?) I guess the box of this stuff was 16#s (my bowling ball) alot more then you think. The hidnges weight a lot, and the orange latch braket, the black other braket off the latch wasn't that much. But with the bolts and everything it all adds up more then you think looking at a small braket.
Fitting this hood and doing all this took a ton of time, like 3-5 nights with a helper. But if you just cut the lip off the hood and knew what you were doing it would be alot better. I just bought this hood off somone used, and the reaccraft rails becuse I though t hey looked cool, but had no idea how to do all this stuff.
Only put like 20miles with the hood so far, and it was windy as hell but I htink I'm gona have to make 2 more brakets with dzus's for the rear sides of the cowl. The hood dose do some bouncing at speed, not sure if I like it.
Also a big help.. buy one if you done have one. A machinst 6inch scale, the nice flexable ones. Works great for measuering on the side rails how far in to drill the holes for the Dzus. I've had my starret for a while now
http://littlemachineshop.com/Product...80.C305R-6.jpg
As you drill for each one, tighen them up as you still fit the hood. Dont do them one at a time, and just more the hood the way you want it to fit. After all the dzues are fit. Tighen them all up, with the hood were you want it, then take one out at a time and you can bend the top plate so it fits the hood good for that spot, sence the hood isn;t gona be flat were all of them are. You can bend a little shape into them, it looks really good when yo do that. Then you tight them up so they all line up, I used a ruler so the flats were parrell with the next dzus, and just look how they look to the body line. If you like them up right, when you rivit them to the hood the botten seid of the rivit fits inside the other holes in the rails. When there ALL tight and linded up. Drill the 1/8 holes thu the hood for the rivits, (has to be tight holes for your 1/8 rivits, so the Dzus's can't move around after then tighen up were they what to be) Then take them all off, but don't mix up the way they fit. You can keep them right in that hole if you carfully move the hood to some saw horses. And rivit them Dzuses to the hood. Use a backer washer under the hood. I used a normal small 1/8 alum rivits on the sides, But the front you need some longer ones, the hood is thicker. I bought a 250 pack of some orange alum rivits but not going to use them till after I get the hood painted.
Heres some pics of the hood, it fits really nice for just being a 14# skin. The front point is a little over sanded round, but no one will ever notice. Don't mind the 4x4 front, I couldn't find my spanner wrench to lower the shocks, now with the 28's and the back lowerd. And the front end alot lighter
And today I noticed you dont really need the front hood latch brakets. I thougth the stock fiberglass braket that holds the bumper cover needed it. But its fine without them. Its all held up in the 4 side 10mm nuts on the rad. support studs. If anything not running the front bumper support. The front bumper cover is siffer now with the pin on hood and the rails. Everything is tightly one piece holding everything together now, no floating body lines.
I'll get a real weight on this stuff. But this is everything removed going to a pin on hood. (- the latch cable, and hood 45-47#s ?) I guess the box of this stuff was 16#s (my bowling ball) alot more then you think. The hidnges weight a lot, and the orange latch braket, the black other braket off the latch wasn't that much. But with the bolts and everything it all adds up more then you think looking at a small braket.
Fitting this hood and doing all this took a ton of time, like 3-5 nights with a helper. But if you just cut the lip off the hood and knew what you were doing it would be alot better. I just bought this hood off somone used, and the reaccraft rails becuse I though t hey looked cool, but had no idea how to do all this stuff.
Only put like 20miles with the hood so far, and it was windy as hell but I htink I'm gona have to make 2 more brakets with dzus's for the rear sides of the cowl. The hood dose do some bouncing at speed, not sure if I like it.
Last edited by studderin; 05-10-2009 at 12:33 PM.


 05-10-2009 | 02:38 PM
#75
Looks awesome man!! Job well done.
I did mine yesterday (Sunoco wide) with the Racecraft rails too. I was suprised how well and everything went together, and how good the VFN hood fit. Only thing I can't quite figure yet, is how the rear Racecraft Dzus brackets go on. Thanks for taking the time to do a write up with so much detail.
-Coleman
05-10-2009 | 09:22 PM
#76
Thread Starter
Joined: Nov 2005
Posts: 5,556
Likes: 6
From: Rochester, NY
ya thanks alot, I'm really happy with them.
check there site, thay have a 4 page instrucions on there rails. The rears they have pics, and a page you print out, and cut out a templet that matches some factory holes for tghe cowl trim. Then you use there templet to drill holes to pop rivit the rear brakets on. I might add 2 on the sides of the cowl, is a few days. I need to get the wolfe fully welded in and painted 1st. The new hoop fit a LOT better, still about 3/8 closer to the driver side. But its sqare, and the same height ect. I fitand tacked everything in. Then took the hoop with the seat bar and the hoop plates to my buddy to TIG, same with the rear bars to the plates. Then they get Tigs in the car and the door bars last, and the plates to the floor last. I cut the top of the oevr the seat bars down like 1.75 so there over a stronger spot, were there more brakets over lapping in the front corners of the gas tank hump. Were the top of stock brackets are, over them just wleding to the back of the plates over single sheet metal that flexs bad when you sit on the hump I'm keep this updated, I might go to the track without the rollbar, and no intior. I just have the front seats, so the car is like 150-200#'s lighter right now 
check there site, thay have a 4 page instrucions on there rails. The rears they have pics, and a page you print out, and cut out a templet that matches some factory holes for tghe cowl trim. Then you use there templet to drill holes to pop rivit the rear brakets on. I might add 2 on the sides of the cowl, is a few days. I need to get the wolfe fully welded in and painted 1st. The new hoop fit a LOT better, still about 3/8 closer to the driver side. But its sqare, and the same height ect. I fitand tacked everything in. Then took the hoop with the seat bar and the hoop plates to my buddy to TIG, same with the rear bars to the plates. Then they get Tigs in the car and the door bars last, and the plates to the floor last. I cut the top of the oevr the seat bars down like 1.75 so there over a stronger spot, were there more brakets over lapping in the front corners of the gas tank hump. Were the top of stock brackets are, over them just wleding to the back of the plates over single sheet metal that flexs bad when you sit on the hump
I'm keep this updated, I might go to the track without the rollbar, and no intior. I just have the front seats, so the car is like 150-200#'s lighter right now
05-11-2009 | 06:57 PM
#77
Thread Starter
Joined: Nov 2005
Posts: 5,556
Likes: 6
From: Rochester, NY
hummm I lowered my strange front shocks 1/2 on the shock. drove the car all around and it settled only 1/8?????
I have the lower bearing kit, nothing is binding. I guess I'll lower it another 1/2 and hopefully it moves. Its always made ride adjustments fine 1/2 = 3/4-1 at the wheel well.
thanks, hopefully your right
I have some really nice 243s I ported that are about done, and I need to get a fast intake, TB, and maff setup, when I want to go fast.
I have the lower bearing kit, nothing is binding. I guess I'll lower it another 1/2 and hopefully it moves. Its always made ride adjustments fine 1/2 = 3/4-1 at the wheel well.
I have some really nice 243s I ported that are about done, and I need to get a fast intake, TB, and maff setup, when I want to go fast.
05-11-2009 | 07:04 PM
#78
Looks awesome man!! Job well done.
I did mine yesterday (Sunoco wide) with the Racecraft rails too. I was suprised how well and everything went together, and how good the VFN hood fit. Only thing I can't quite figure yet, is how the rear Racecraft Dzus brackets go on. Thanks for taking the time to do a write up with so much detail.
-Coleman
I did mine yesterday (Sunoco wide) with the Racecraft rails too. I was suprised how well and everything went together, and how good the VFN hood fit. Only thing I can't quite figure yet, is how the rear Racecraft Dzus brackets go on. Thanks for taking the time to do a write up with so much detail.
-Coleman

