


The Turbo Ta Build Thread
Look on his website, he has them listed

Chris
thanks, Chris
9 Second Club


Joined: Oct 2006
Posts: 1,194
Likes: 247
From: IL
Jerry,
In the last pic you can see the line going to the radiator just above the catch can. We used a 45 degre fitting on the block to go up over the valve cover and then just routed it to the radiator. It was a little bit of a pain in the *** getting the line through the runners on the intake because the intake is so tall, but we got it done.
Sean
LS1 Tech Stories
The Best V8 Stories One Small Block at Time

Gas Monkey Built a 6-Wheel Ferrari Testarossa With a Corvette LT4 Engine
Verdad Gallardo
7 Most Reliable High-Performance Engines GM Has Ever Built
Verdad Gallardo
Amazing '71 Camaro Restomod Is Modern Muscle Car Under the Skin
Verdad Gallardo
6 Common C5 Corvette Failures and What's Involved In Repairing Them
Pouria Savadkouei
Retro Modern Bandit Pontiac Trans AM Comes With Burt Reynolds' Autograph
Verdad Gallardo
Top 10 Greatest Cadillac V Series Performance Models Ever, Ranked
Pouria Savadkouei
Top 10 Most Powerful Chevy Trucks Ever Made!

Hennessey's New Supercharged Silverado ZR2 Has 700 HP
Verdad Gallardo
Coachbuilt N2A Anteros Is an LS2-Powered C6 Corvette In Italian Clothes
Verdad Gallardo9 Second Club
Joined: Oct 2006
Posts: 1,194
Likes: 247
From: IL
Im not sure what video you are talking about. The only one that shows the oil gauge you can see it a little under 50psi untill Chris hits the gas then it goes up to around 50psi, then when the RPM drop again it goes back to a little under 50psi. We have not seen any issues with the oil pressure that I know of, and I know we kept a close eye on it when it was on the dyno.
Sean
Sean
reason i ask is because my car idles with 20 psi and once i get on it it hits 40 psi and stays there. gets me a little nervous because it should be more so aroudn 60-80 at wot right ?
When i had the stock oil pump mine probably idled are 25, and higher in the rpm's in the 40's. Now i have the meiling hi flow oil pump, so i have higher pressure.
Thanks, Chris
9 Second Club
Joined: Oct 2006
Posts: 1,194
Likes: 247
From: IL
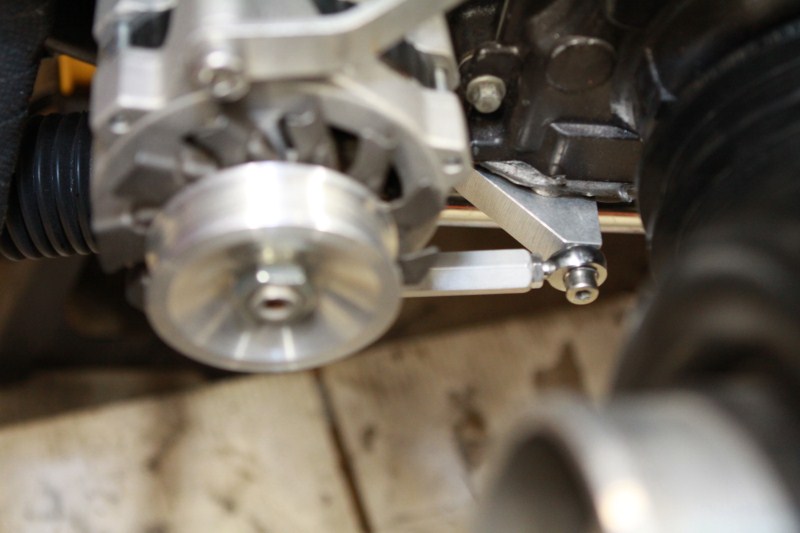
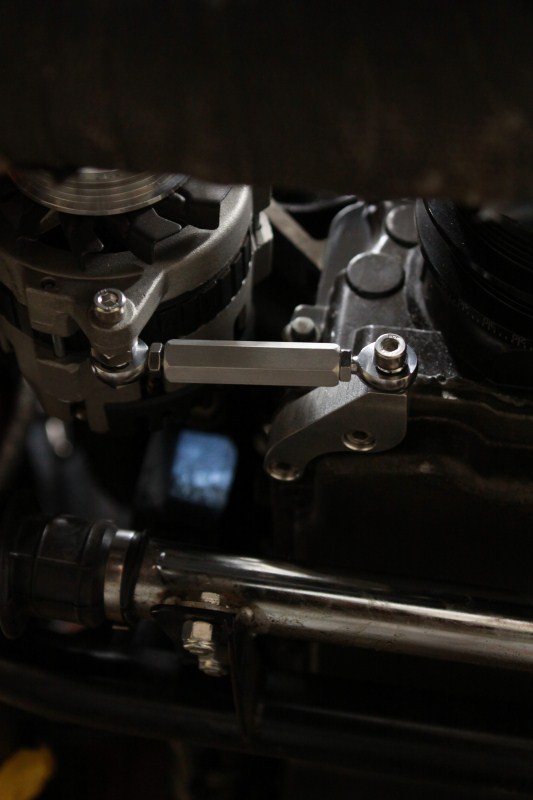
Well another weekend of work has come and gone! It is getting very close now, and we are dying to wrap it up and make some passes!! Anyway, we are not racing yet of course but we did wrap up a bunch of smaller projects. Friday night I got started on mounting the alternator. We were doing some testing for AEI CNC who makes all kinds of pieces for various applications. They have been working on an alternator mount for LS motors with truck manifold turbo kits. I believe that he has only tried this kit on a car that had V-Bands welded to the manifolds, which we do not (yet). So the first kit he sent out didn't work for us even though the brackets fit absolutely perfect. So we got on the phone with Bob and started brainstorming a solution and came up with two. He had them cut, machined, and on the way to us Monday so we could try them this weekend. Here is a quick shot of all three kits laid out (with the exception of the stainless steel bracket for the original kit).
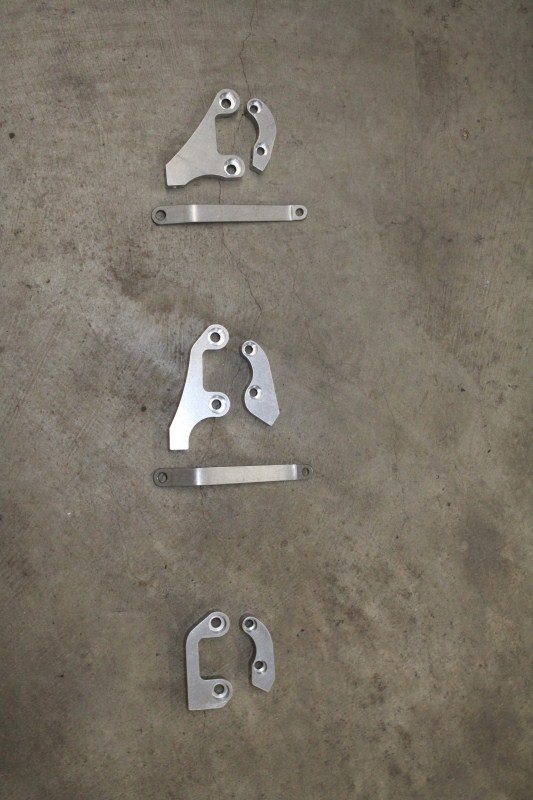
The very bottom set is the original which holds the alternator tight to the block and catches the 4 rib portion of the crank pulley. It would work great if you have a v-banded truck manifold. The top set moves the alternator straight down from the original location and clears everything for us, but is a little tight. The middle one was just right! It moves the alternator down some, and forward to catch the 6 rib portion of the crank pulley. Keep in mind that he made the other two kits with nothing more than a phone call and a couple of pictures. He does not have a LS in the shop to try these on before he sent them to us, and they all fit like OEM pieces.
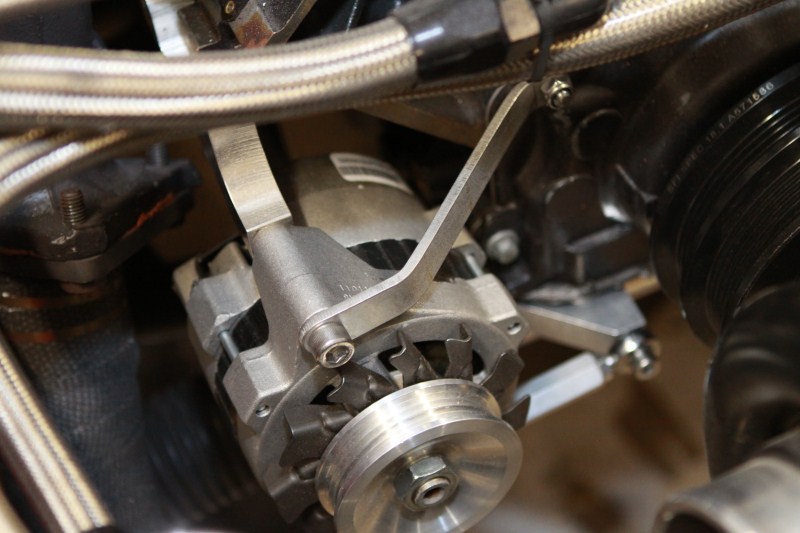
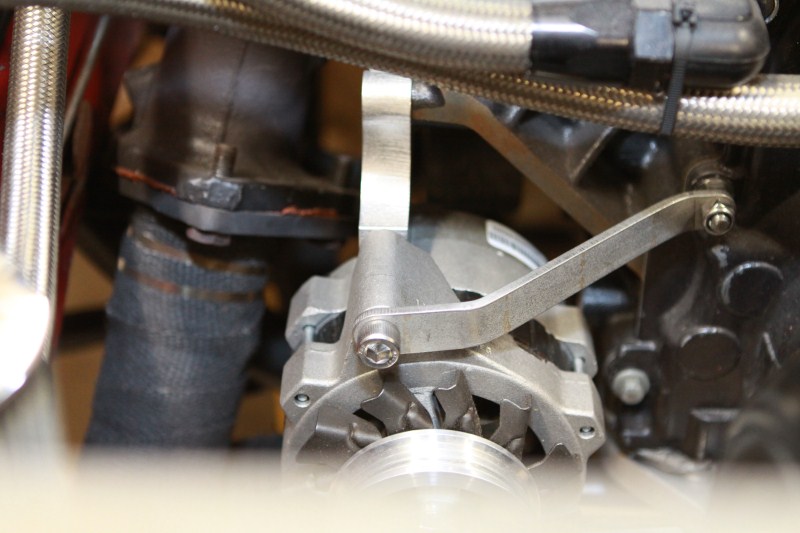
Here are some pics of the one we left in the car.
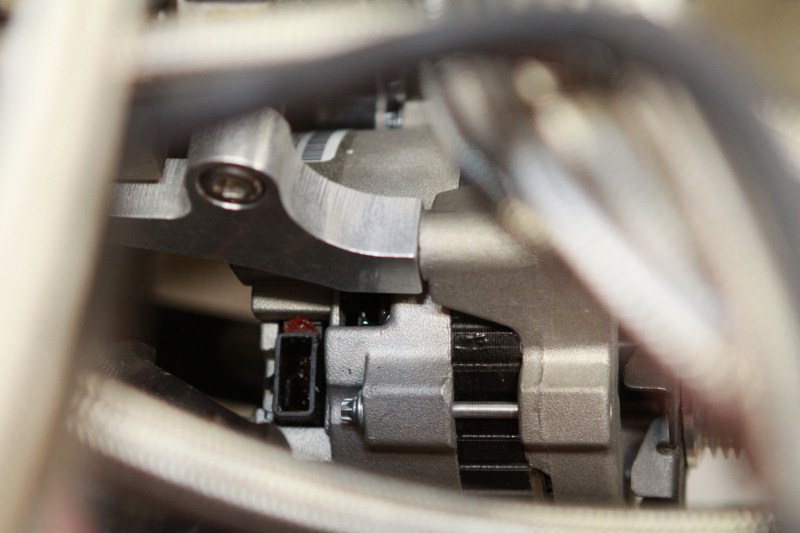
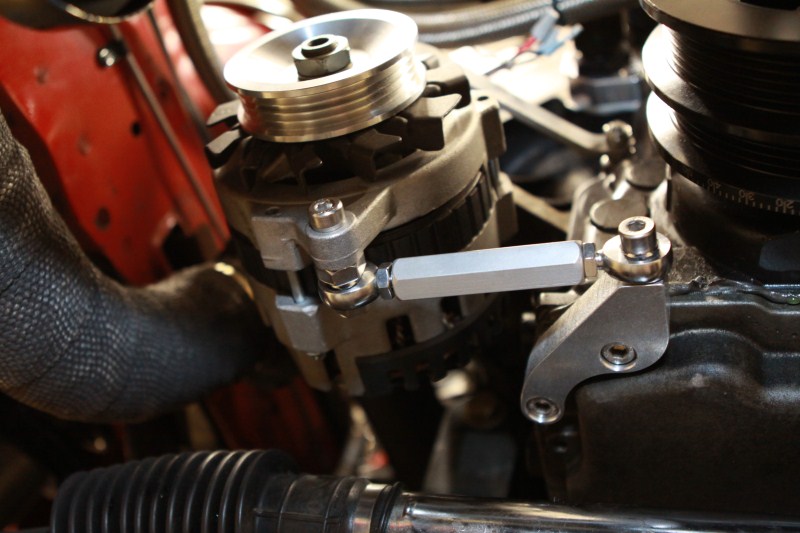
Unfortunately I cant be trusted, and I broke the alternator! We tried to clock it so that the plug was further from the manifold, but I separated it and it all came apart. So we did have a chance to throw a belt on and tension it to make sure it was all good, but I never got any pics of that. Chris ordered up a new alternator and I will have finished pics next weekend.
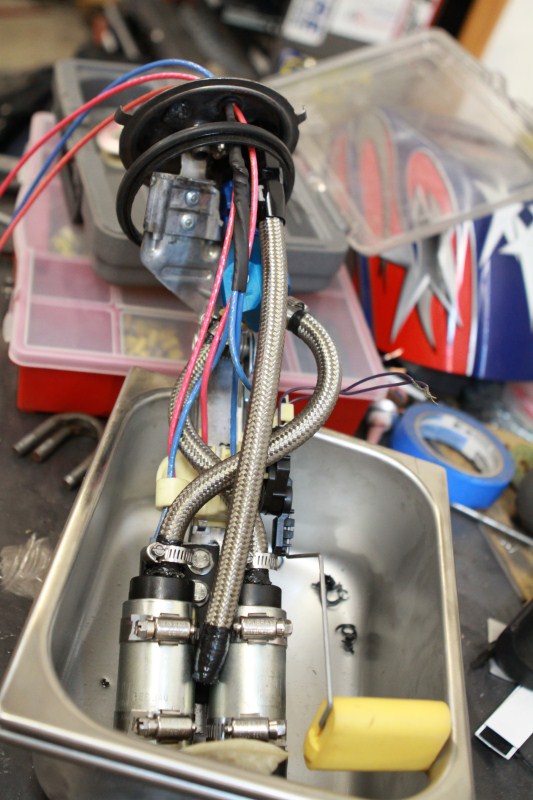
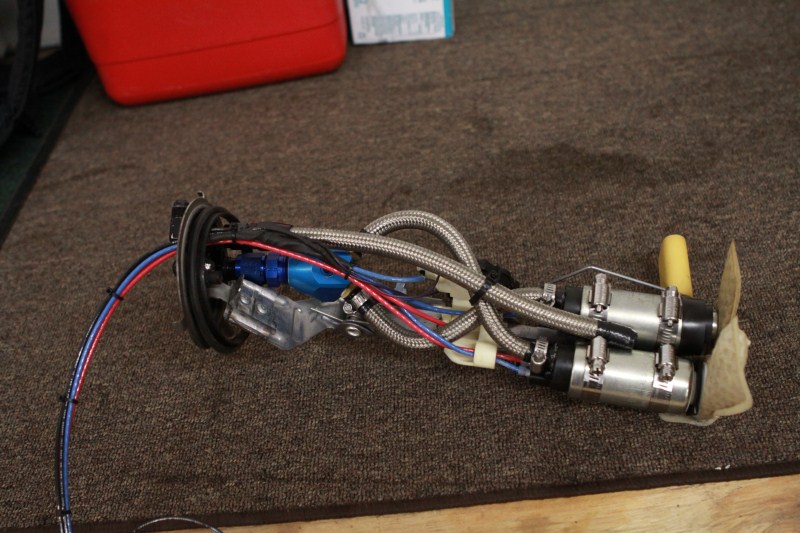
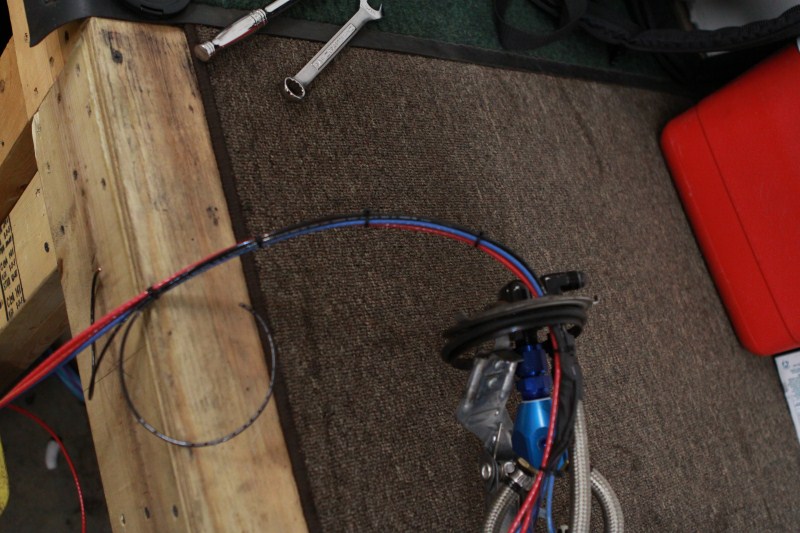
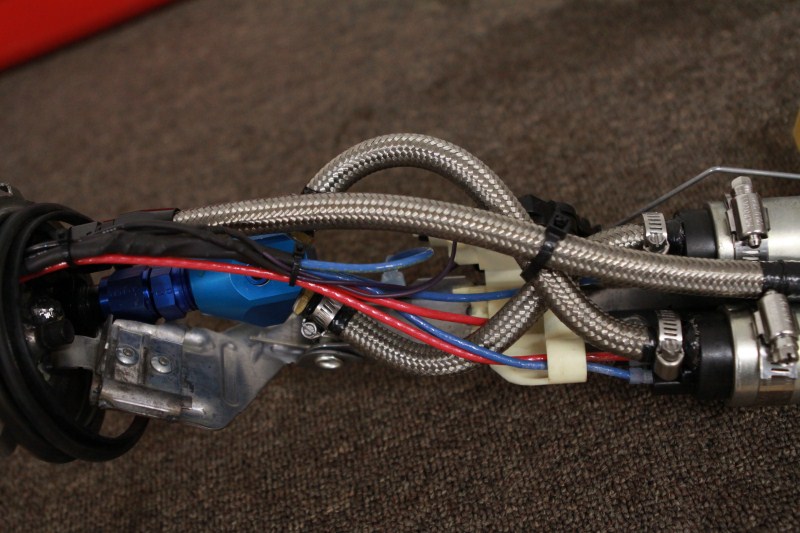
Chris got crackin' on the fuel pumps. I'm sure you all remember that we had minor fuel issues that showed up while we were on the dyno (luckily). We weren't really sure what the problem was, just that we were lower on pressure than we should have been. Well as soon as we got the pumps out of the car the problem was obvious, one of the rubber hoses from the pump to the "Y" block had a 1" long split down it. So we replaced both lines with some AN, and while they were out beefed up the wiring. Chris ran a new 12ga power and ground from each pump out of the tank. Both pumps are now fed by their own independent 10ga power wire (10ga back to the their own relays, then 12ga from the relays to the pump), and they both have beefed up grounds. Now we can test each pump independently of one another, and they are both working to the best of their ability's.
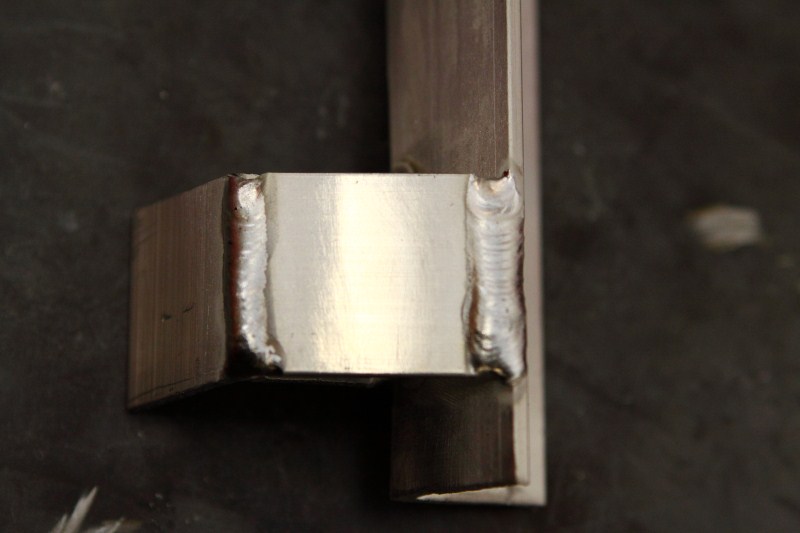
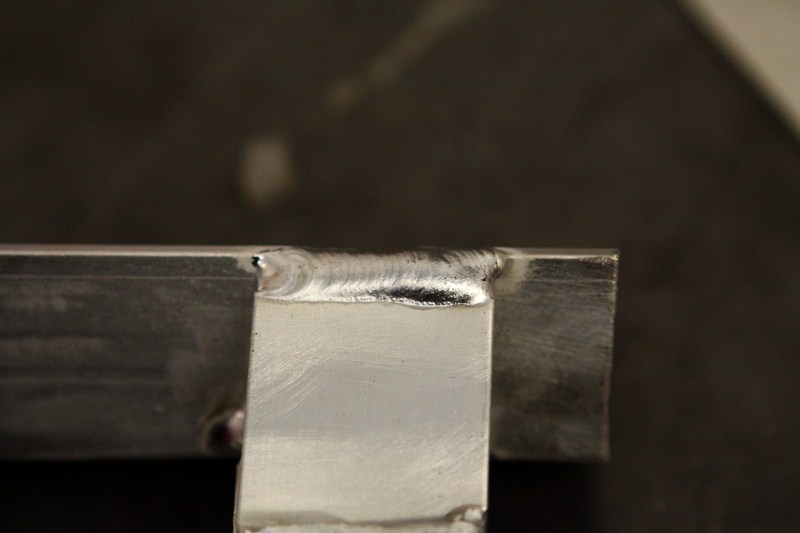
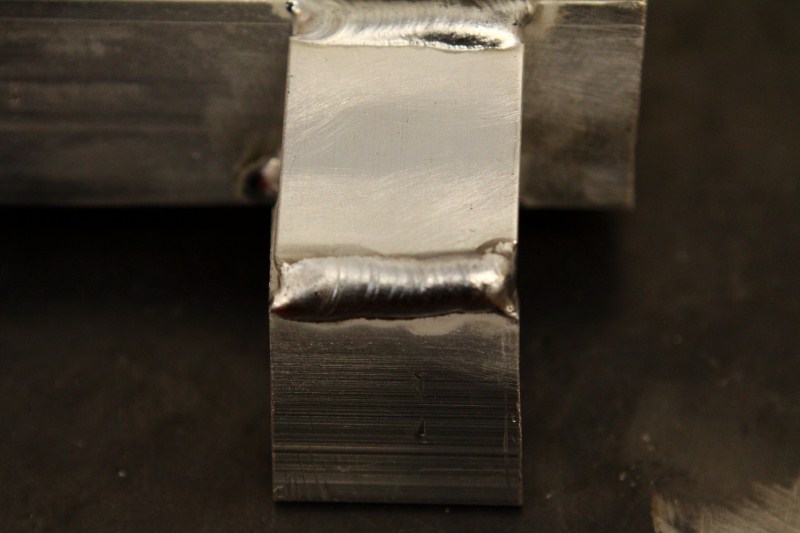
Saturday Chris got to work installing the new bigger battery, final installing the battery box, and the last of the battery wiring. He didn't however finish cleaning up the back when he was done, so I have no pics I whipped up a mount for the new passenger seat. I more or less copied the mount the Eric at Midwest Chassis had made for the driver seat out of some aluminum angle. The problem however is that the passenger side that the famous bump where the front of the seat mounts. So I had to raise the rear of the brackets up to make the seat sit properly. I didn't get pics of the whole set up because I forgot, but we need to take it out to paint it so I will get some next weekend. In the meantime I am happy with my aluminum welding so far, so I DO have pics of that!!

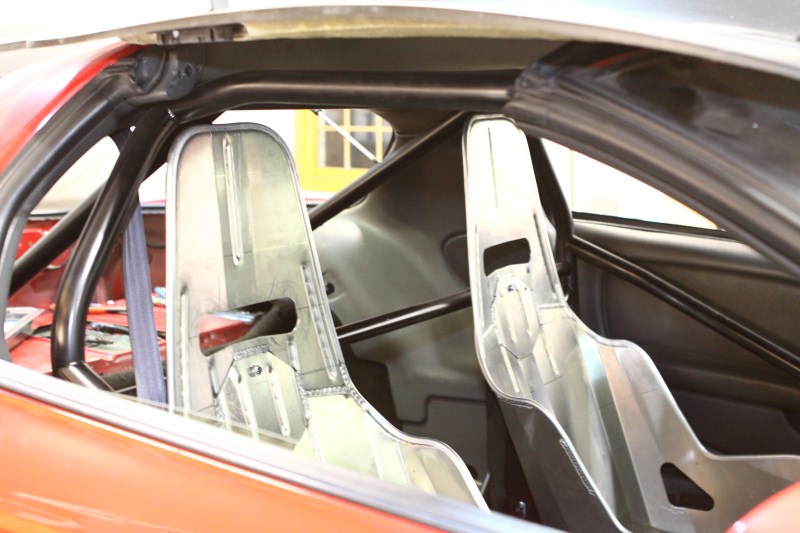
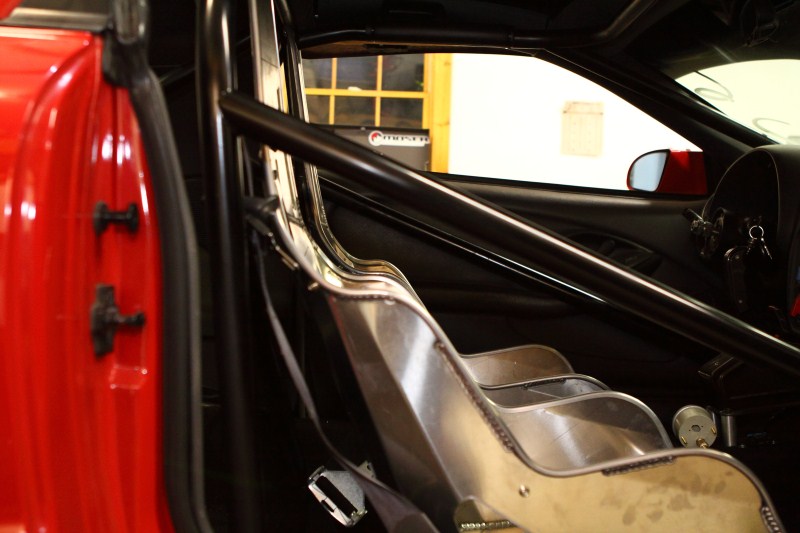
And a couple quick shots of the seat in the car.
Then we threw the drive shaft in, set it on the ground, and drove it outside so we could clean up a little. Here is the video of it moving for the first time this year!
http://www.youtube.com/watch?v=VBNhgFKaYzE
And since I didn't feel like sweeping, I pretended like I was taking pictures of the car
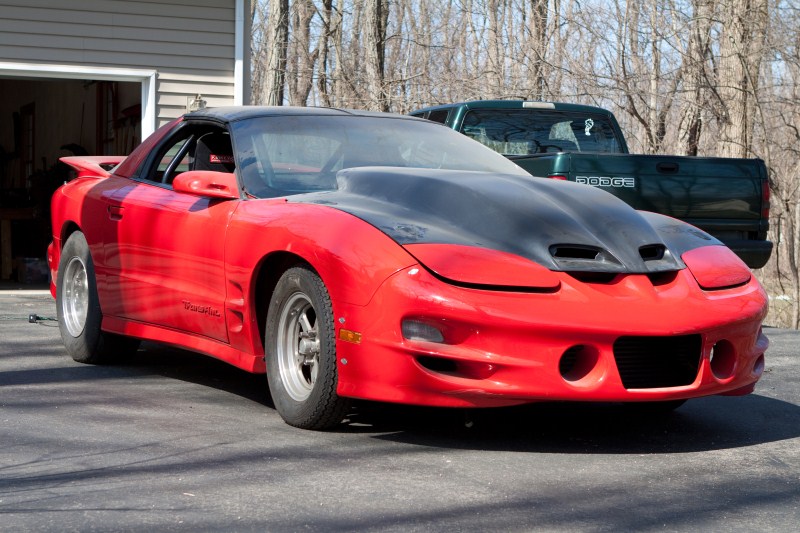
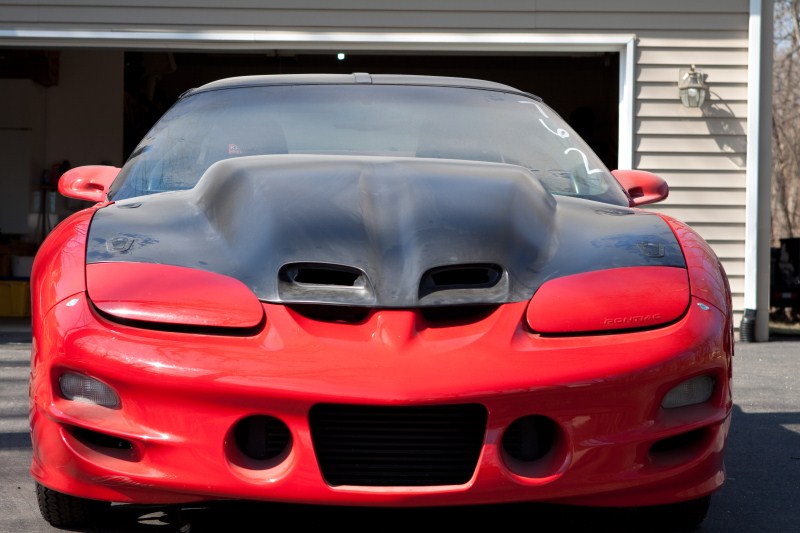

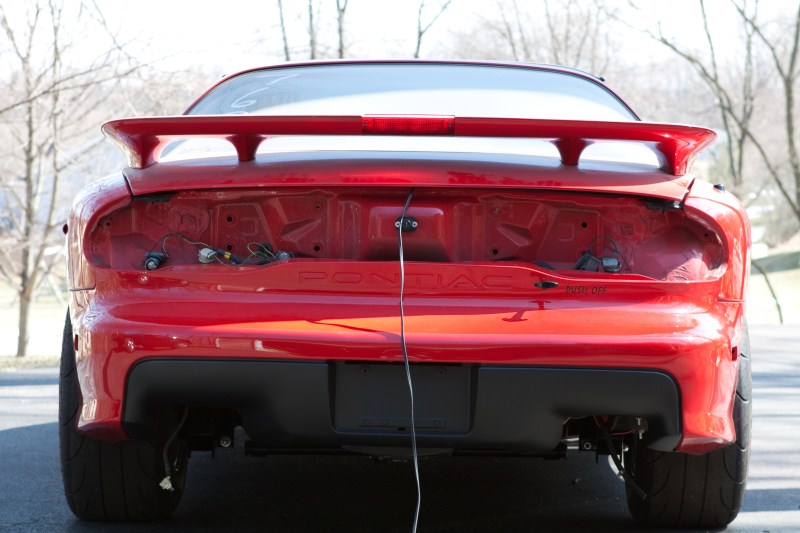
Yes the car is dirty as hell, but at least its in the sun. The tail lights are off because we just had the bumper off, and it needs to come off again soon so why bother. And the cord is for the battery charger since for some odd reason we still don't have an alternator
Anyway thats all for this weekend, now we just have to wait for a couple things to be all finished up. We should be 100% and on the dyno with in a few weeks I hope, then its off to the track to run 12's Thanks for following along!
Sean
The very bottom set is the original which holds the alternator tight to the block and catches the 4 rib portion of the crank pulley. It would work great if you have a v-banded truck manifold. The top set moves the alternator straight down from the original location and clears everything for us, but is a little tight. The middle one was just right! It moves the alternator down some, and forward to catch the 6 rib portion of the crank pulley. Keep in mind that he made the other two kits with nothing more than a phone call and a couple of pictures. He does not have a LS in the shop to try these on before he sent them to us, and they all fit like OEM pieces.
Here are some pics of the one we left in the car.
Unfortunately I cant be trusted, and I broke the alternator! We tried to clock it so that the plug was further from the manifold, but I separated it and it all came apart. So we did have a chance to throw a belt on and tension it to make sure it was all good, but I never got any pics of that. Chris ordered up a new alternator and I will have finished pics next weekend.
Chris got crackin' on the fuel pumps. I'm sure you all remember that we had minor fuel issues that showed up while we were on the dyno (luckily). We weren't really sure what the problem was, just that we were lower on pressure than we should have been. Well as soon as we got the pumps out of the car the problem was obvious, one of the rubber hoses from the pump to the "Y" block had a 1" long split down it. So we replaced both lines with some AN, and while they were out beefed up the wiring. Chris ran a new 12ga power and ground from each pump out of the tank. Both pumps are now fed by their own independent 10ga power wire (10ga back to the their own relays, then 12ga from the relays to the pump), and they both have beefed up grounds. Now we can test each pump independently of one another, and they are both working to the best of their ability's.
Saturday Chris got to work installing the new bigger battery, final installing the battery box, and the last of the battery wiring. He didn't however finish cleaning up the back when he was done, so I have no pics
I whipped up a mount for the new passenger seat. I more or less copied the mount the Eric at Midwest Chassis had made for the driver seat out of some aluminum angle. The problem however is that the passenger side that the famous bump where the front of the seat mounts. So I had to raise the rear of the brackets up to make the seat sit properly. I didn't get pics of the whole set up because I forgot, but we need to take it out to paint it so I will get some next weekend. In the meantime I am happy with my aluminum welding so far, so I DO have pics of that!!And a couple quick shots of the seat in the car.
Then we threw the drive shaft in, set it on the ground, and drove it outside so we could clean up a little. Here is the video of it moving for the first time this year!
http://www.youtube.com/watch?v=VBNhgFKaYzE
And since I didn't feel like sweeping, I pretended like I was taking pictures of the car
Yes the car is dirty as hell, but at least its in the sun. The tail lights are off because we just had the bumper off, and it needs to come off again soon so why bother. And the cord is for the battery charger since for some odd reason we still don't have an alternator
Anyway thats all for this weekend, now we just have to wait for a couple things to be all finished up. We should be 100% and on the dyno with in a few weeks I hope, then its off to the track to run 12's
Thanks for following along!Sean

BAD ***!!!! i love the little fabricated parts. the alternator bracket is sweet too. i would love to move my alternator down low. only problem is my crossover pipe turns towards that way from the passenger manifold. anyway, very nice build. seems to spool pretty fast. i think i need some land.
oh yeah, why didnt you use 1/4" plastic line with the pushlock fittings like used for airbrakes on trucks?
oh yeah, why didnt you use 1/4" plastic line with the pushlock fittings like used for airbrakes on trucks?