



The Turbo Ta Build Thread

Thanks for the comments!
Only reason i didnt go push lock was we always change stuff, still will be at its pretty expensive, i did look at it though. the pulley is the slp one.
thanks, chris
Only reason i didnt go push lock was we always change stuff, still will be at its pretty expensive, i did look at it though. the pulley is the slp one.
thanks, chris
Thanks bob! The alt is on and charging! We went on saturday to look at a 24ft enclosed trailer that was a good price, but needed to much work for what he wanted. long story short is we didnt get alot of pictures. I clocked the new alt, got your pulley on, and its working 

9 Second Club


Joined: Oct 2006
Posts: 1,194
Likes: 247
From: IL
Thanks bob! The alt is on and charging! We went on saturday to look at a 24ft enclosed trailer that was a good price, but needed to much work for what he wanted. long story short is we didnt get alot of pictures. I clocked the new alt, got your pulley on, and its working
Sean
Then we will have 1-2 weeks of work to swap on the ecu to a 99+ and 3 bar map, and cleaning up little odds, and ends. We will hopefully find some time to get it on the dyno and tuned before may 7th because i have a chassis cert scheduled @ the track, and as always we will take photos and video!
Thanks, Chris
He does have a website. It is www.aeicnc.com
He is a sponser on this site, and makes a bunch of different products. I believe the kit is 219, that is all the mounting brackets, and ss hardware, and a cnc pulley that is the right size for the alternator so its spinning the correct speed with our ls motors.
Thanks, Chris
He is a sponser on this site, and makes a bunch of different products. I believe the kit is 219, that is all the mounting brackets, and ss hardware, and a cnc pulley that is the right size for the alternator so its spinning the correct speed with our ls motors.
Thanks, Chris
LS1 Tech Stories
The Best V8 Stories One Small Block at Time

Gas Monkey Built a 6-Wheel Ferrari Testarossa With a Corvette LT4 Engine
Verdad Gallardo
7 Most Reliable High-Performance Engines GM Has Ever Built
Verdad Gallardo
Amazing '71 Camaro Restomod Is Modern Muscle Car Under the Skin
Verdad Gallardo
6 Common C5 Corvette Failures and What's Involved In Repairing Them
Pouria Savadkouei
Retro Modern Bandit Pontiac Trans AM Comes With Burt Reynolds' Autograph
Verdad Gallardo
Top 10 Greatest Cadillac V Series Performance Models Ever, Ranked
Pouria Savadkouei
Top 10 Most Powerful Chevy Trucks Ever Made!

Hennessey's New Supercharged Silverado ZR2 Has 700 HP
Verdad Gallardo
Coachbuilt N2A Anteros Is an LS2-Powered C6 Corvette In Italian Clothes
Verdad Gallardo


Thanks, Chris
damn i hate finding new stuff to buy lol, i was forced to buy speedincs kit cause nobody really made a good kit, got my whole kit built around speedincs alt setup and Now I find this would love to try to hide the alternator hmmm might be selling my alternator kit now lmao

9 Second Club
Joined: Oct 2006
Posts: 1,194
Likes: 247
From: IL
Well this year we are just planning on turning the power up, and getting a handle on it. We haven't touched the suspension at all, and while it worked fine last year I'm sure with the added power we will have to play with it. More or less we are both going to be getting some seat time, and really work on making the car as consistent as possible. Next year we will have to see what is around us. It will be on a DR for sure, probably a 275, so whatever we can find. We may try a couple races later in the year if we feel we have a handle on the car, and it looks like it will be competitive.
Sean
Sean
9 Second Club
Joined: Oct 2006
Posts: 1,194
Likes: 247
From: IL
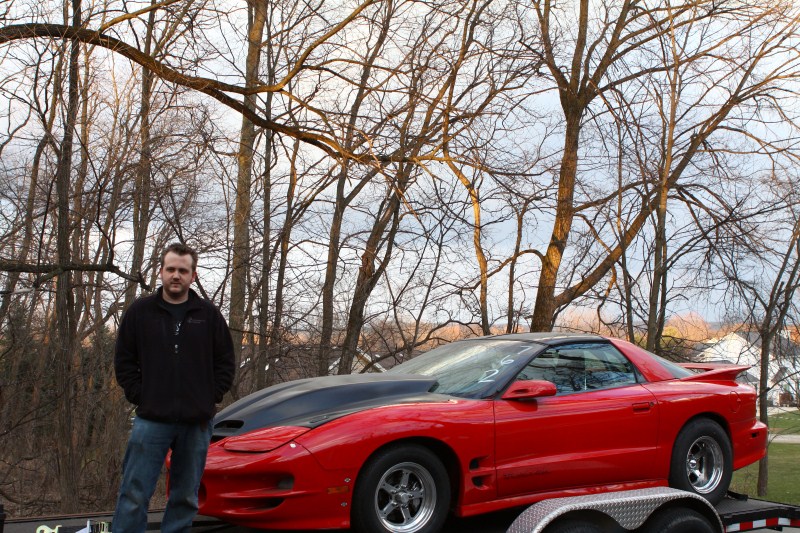
So this weekend the main goal was to get the car down to Eric at Midwest Chassis to get the chute mount and window net installed. So Friday night we loaded up the car and got everything ready, we needed to be up EARLY Saturday. Here is a shot of the proud owner (Chris) with his baby.
He looks so happy
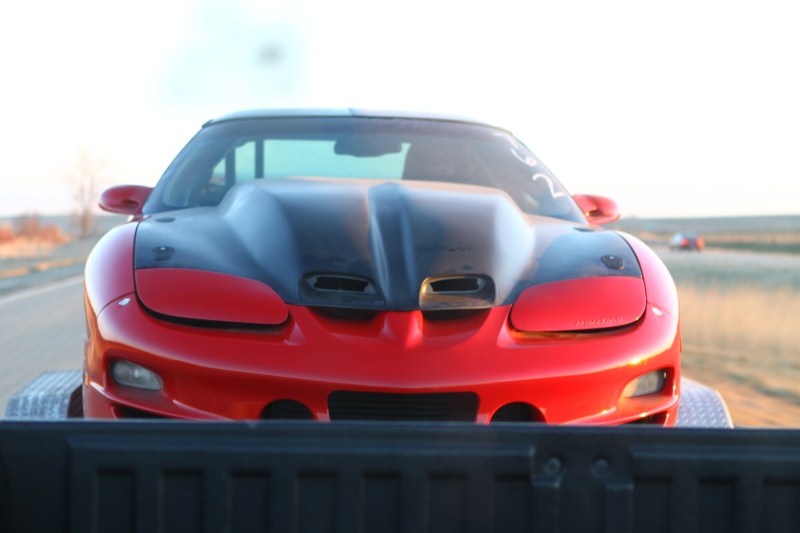
Saturday morning we go up at 5:30 and hit the road about 6AM. Here is a shot of the car on the way down as the sun came up.
We got to Eric's about 8:30 in the morning and unloaded the car. I'm sure his neighbors liked the TA alarm clock Eric got to work on the window net first, and we went to go get some breakfast. Here are some quick pics of what he had when we got back.
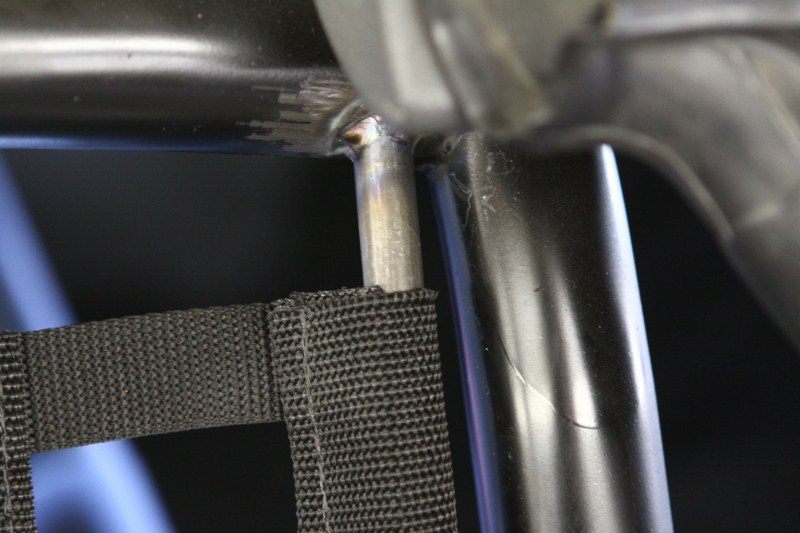
Shot of the top side of rear bar. This is the only one that is permanently attached to the car. This makes it nice if you want to pull the net out, there is nothing in the way.
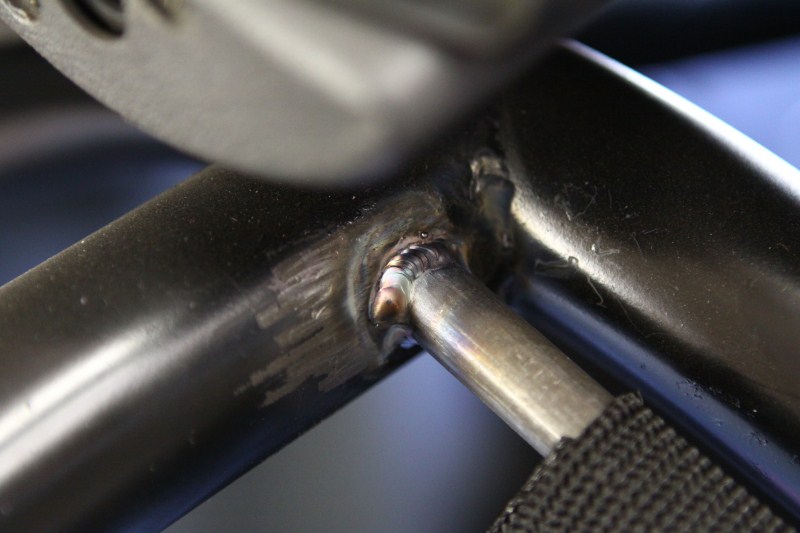
Close up of the weld
Here is the lower side of the same bar. You can remove the bolt, and move the bar out enough to slide the net off.
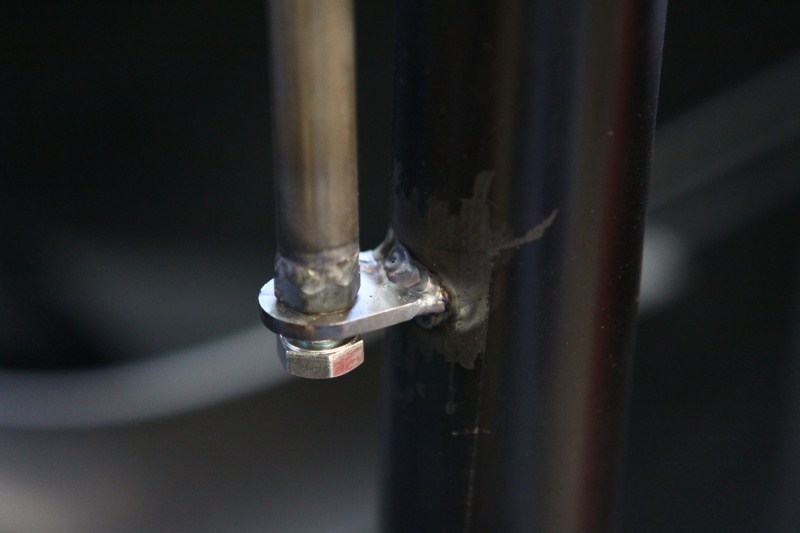
This is the lower part of the front bar. This is on a heim joint to allow plenty of movement so the net can get out of the way for getting in and out. This bolts to a threaded insert on the cage so you can remove the whole bar.
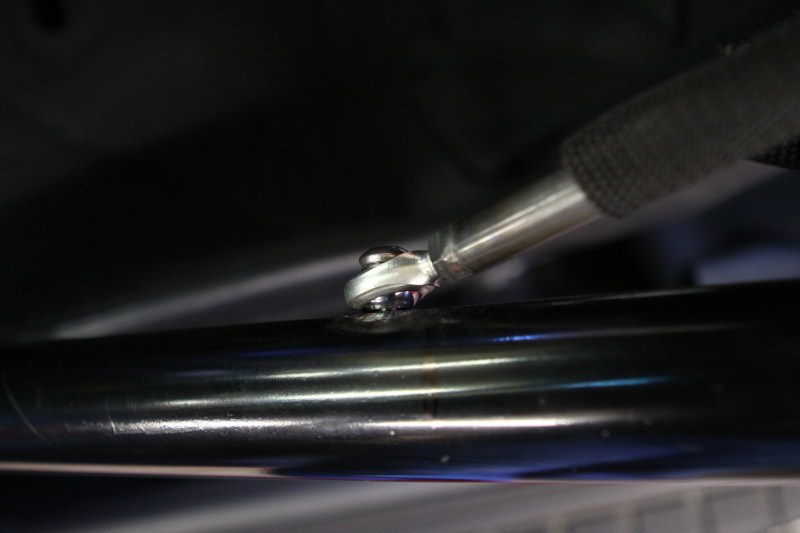
Same part from the inside
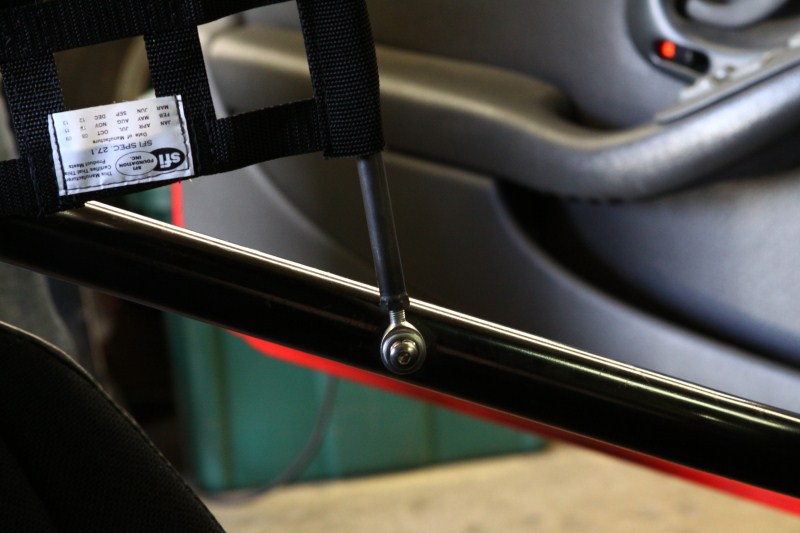
Here is the seatbelt clip that locks the net into place.
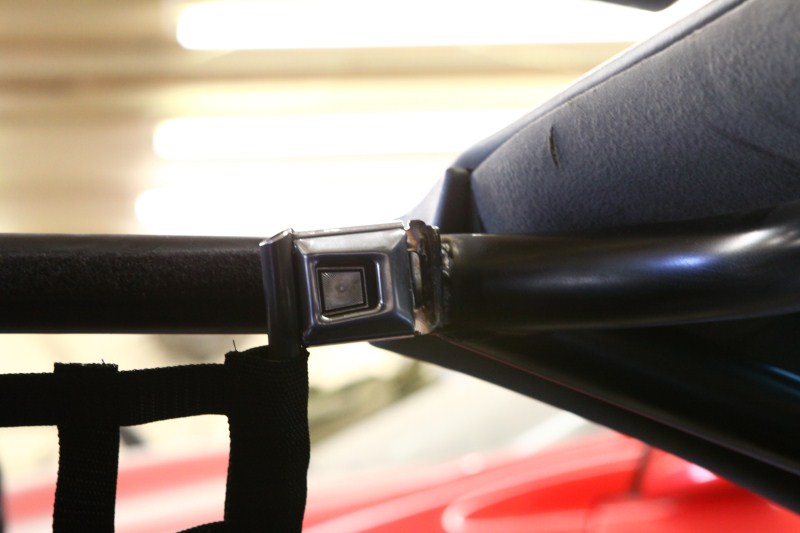
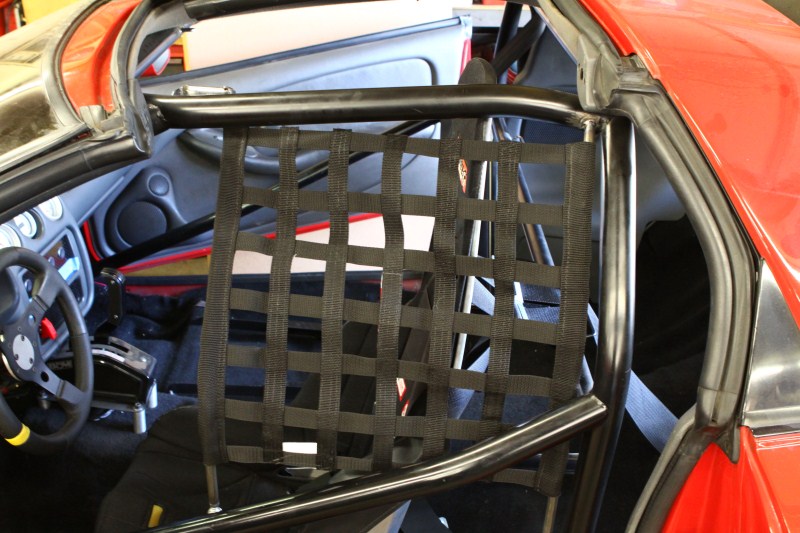
And the final product! You can see how the front bar bends out to give you a lot more arm room, a nice touch.
Next up was the chute mount. Eric started by bending up a piece of molly tubing, and tacking it to some molly plates the Jason made earlier.
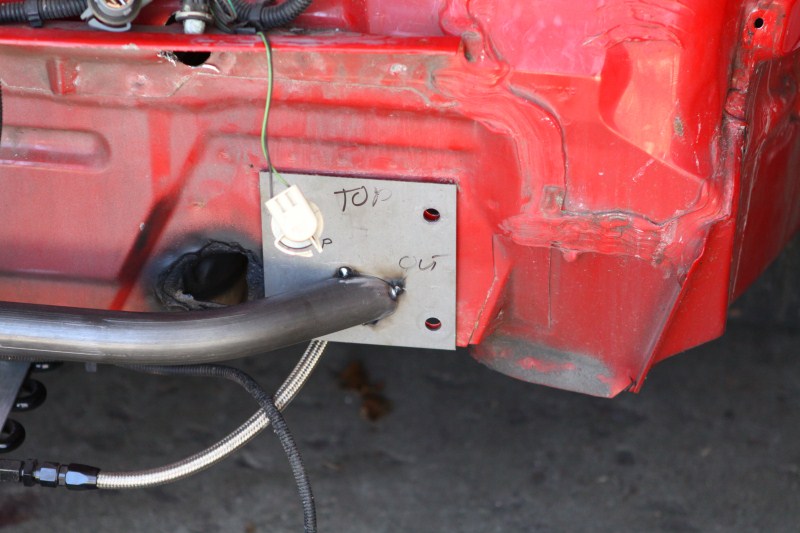
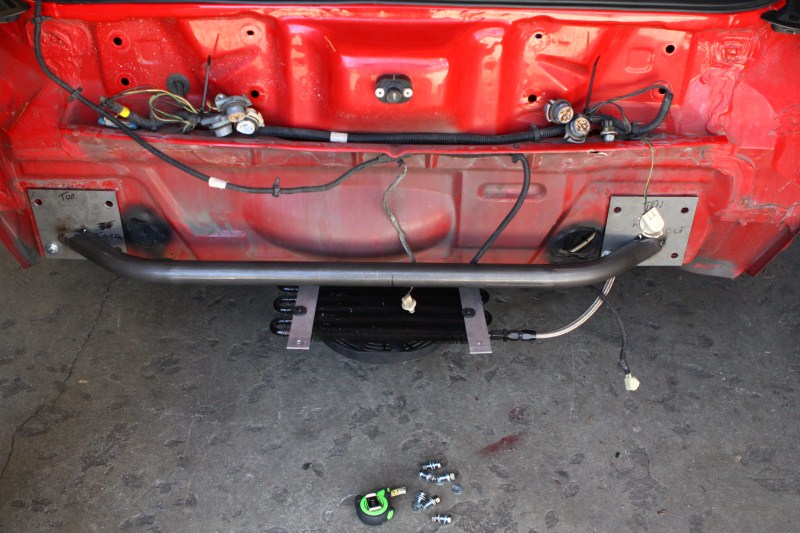
You can also see that he had already marked the tube for the piece that comes through the bumper.
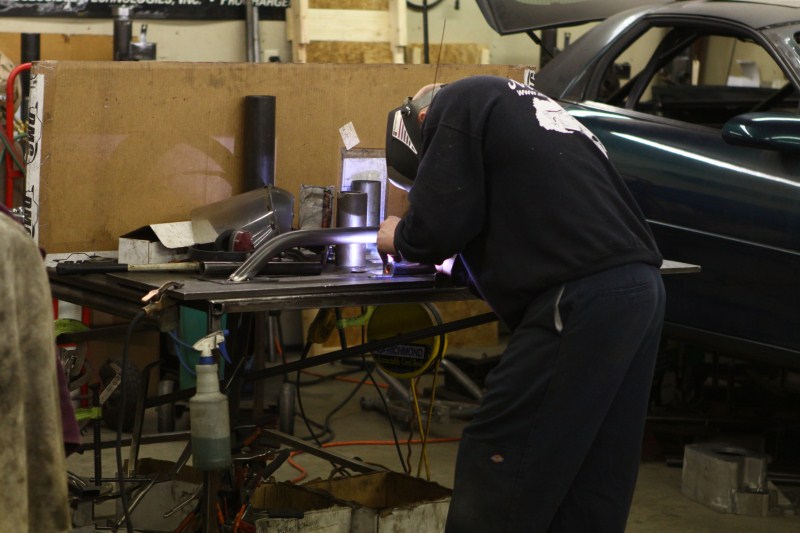
Here you can see Eric welding up the piece that slides into the receiver on the car, and holds the chute cable.
And here is that same piece all welded up, and drilled for the pin.
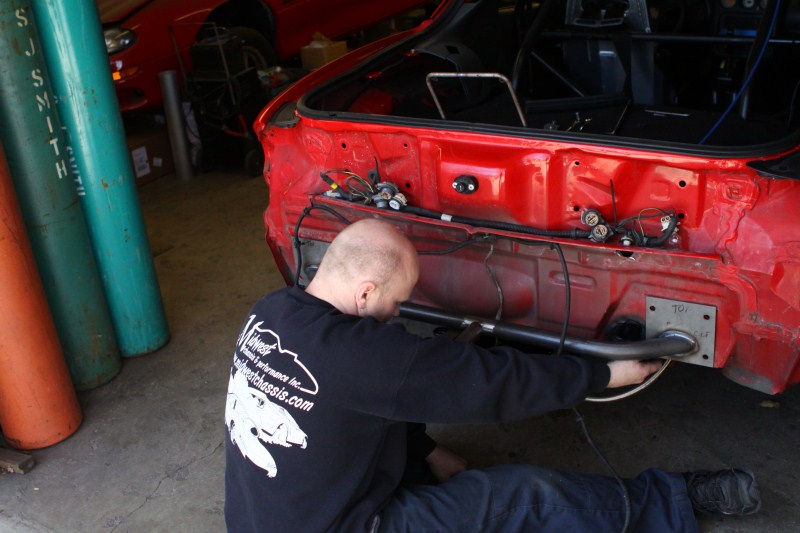
Eric is bolting the fully welded cross bar onto the car so that he can check the alignment of the receiver in the center be fully welds it in.
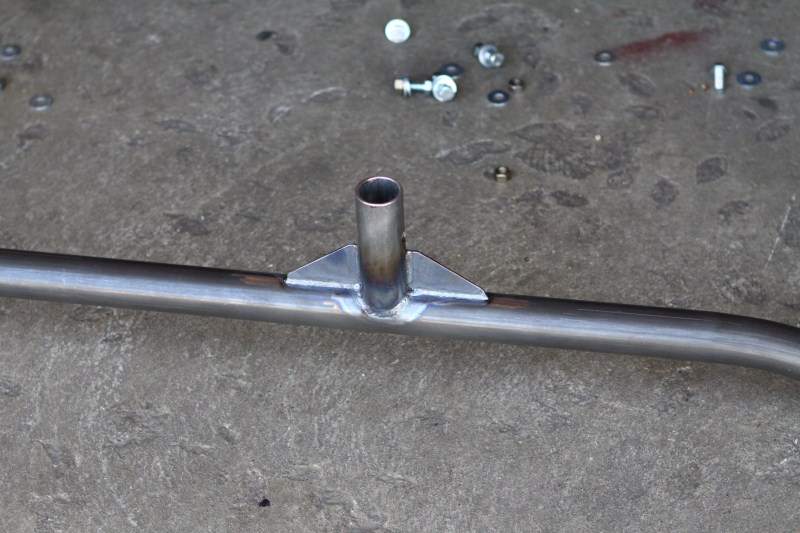
Got it perfect, and welded it fully along with adding a couple gussets for strength.
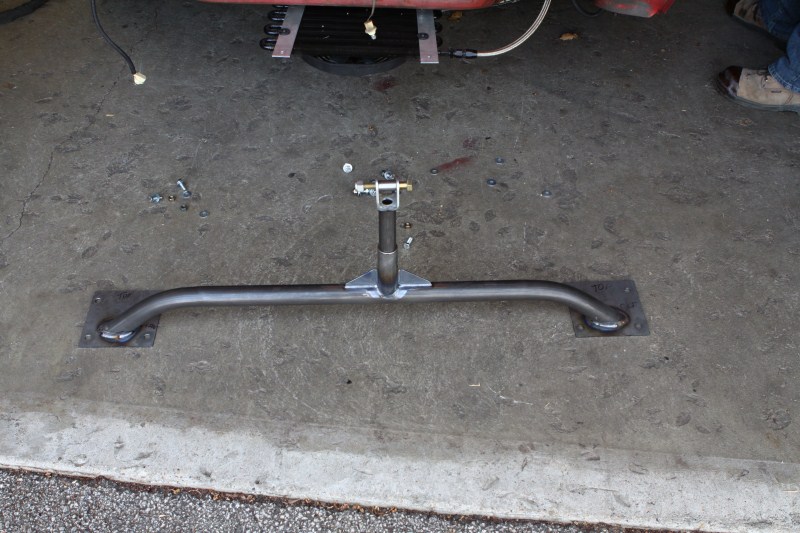
Here is the whole thing minus the chute holder.
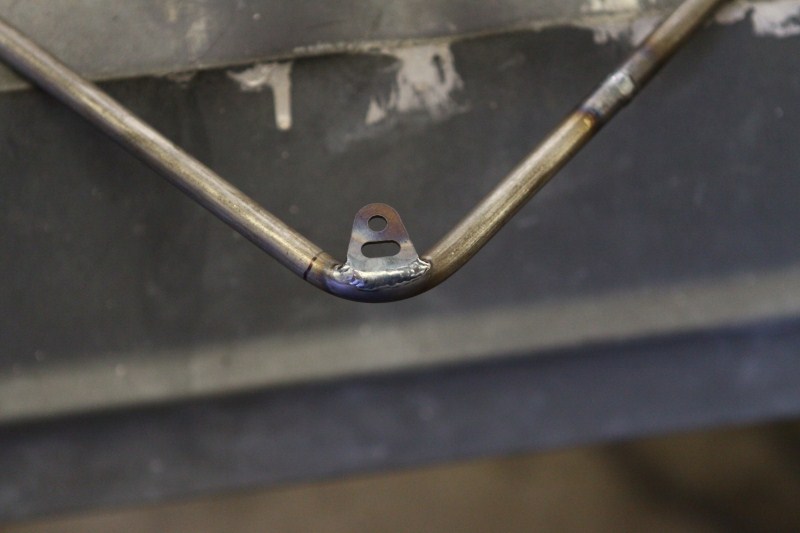
Somewhere in that whole deal Eric whipped up the ring that holds the chute and the launcher. Here is a pic of the weld on one of the 4 tabs that the launcher will bolt to.
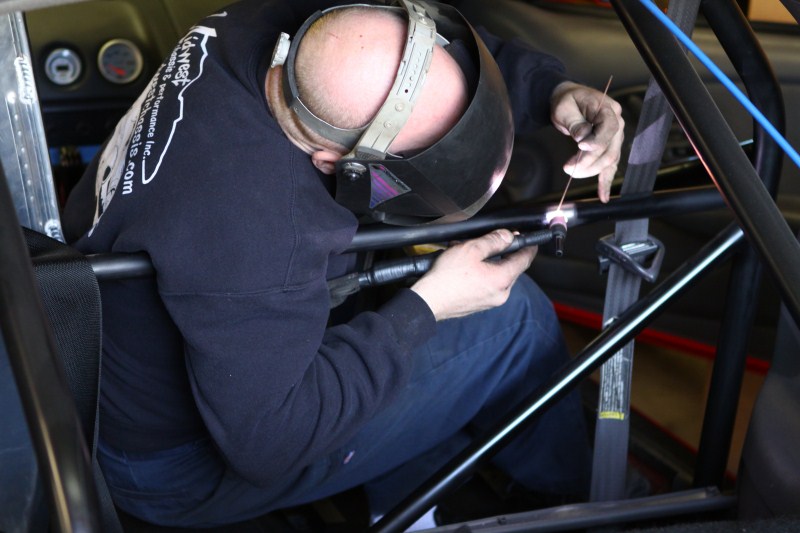
While the mount was cooling off he did us a favor and welded in a sleeve for the passenger seat back bolt to go through. You can see him working the TIG pedal between his legs to get this done!
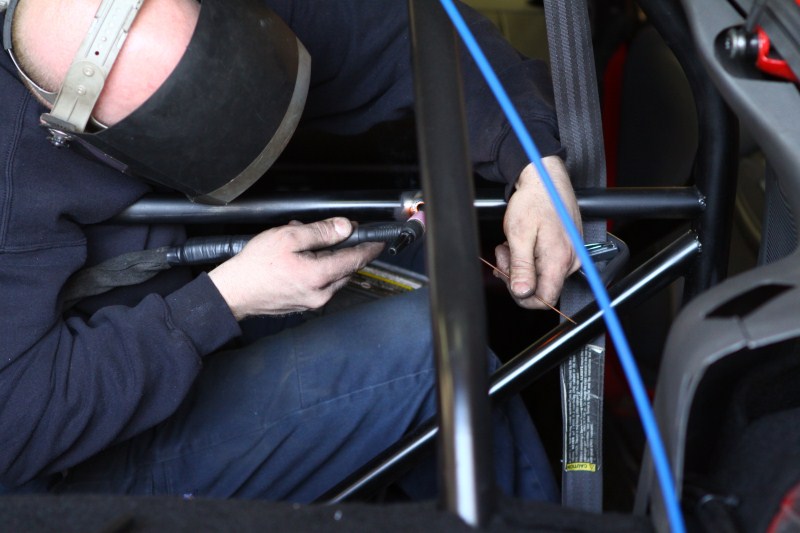
He also added piece to hold the shoulder belts in place. I didn't get a pic of him doing that, but it didn't look easy
Once that was all finished he got back on the chute mount. He started with the two lower pieces to hold the ring in place.
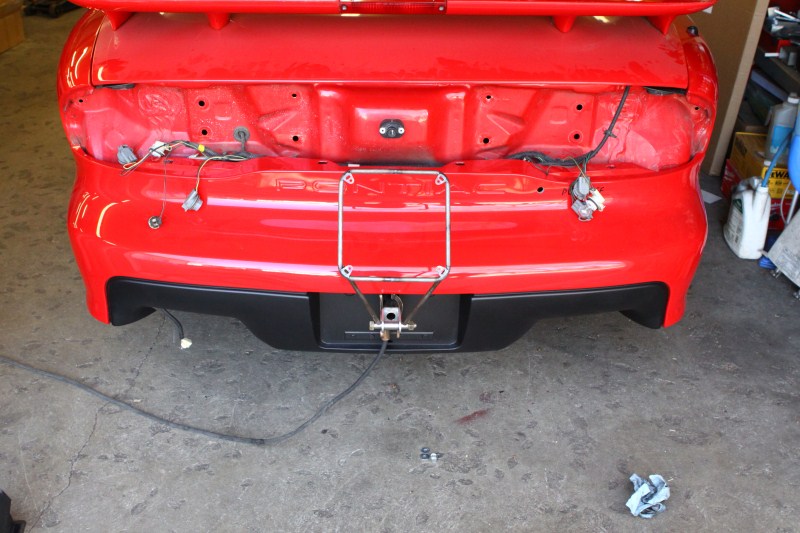
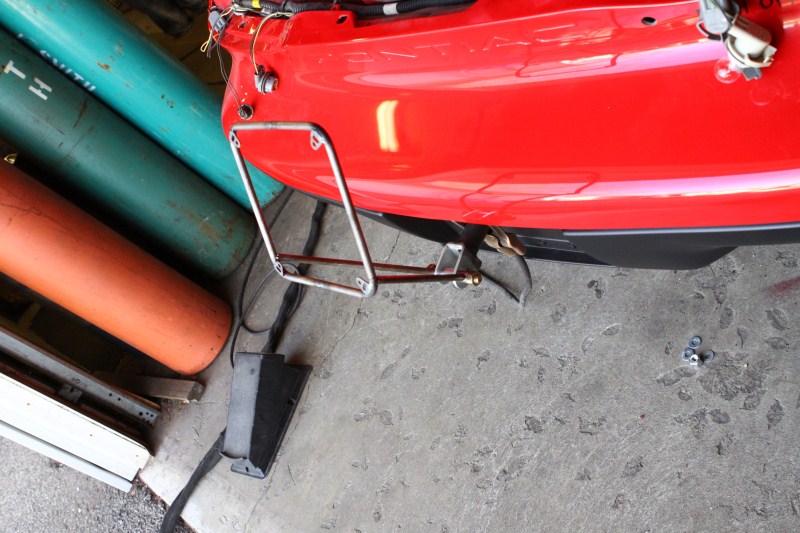
Then after measuring, checking, measuring, and checking a few dozen times he made up the top two pieces. These have threaded inserts in the end of them (on the car side) so that the whole thing can be removed. The he added the two braces on the sides for extra strength
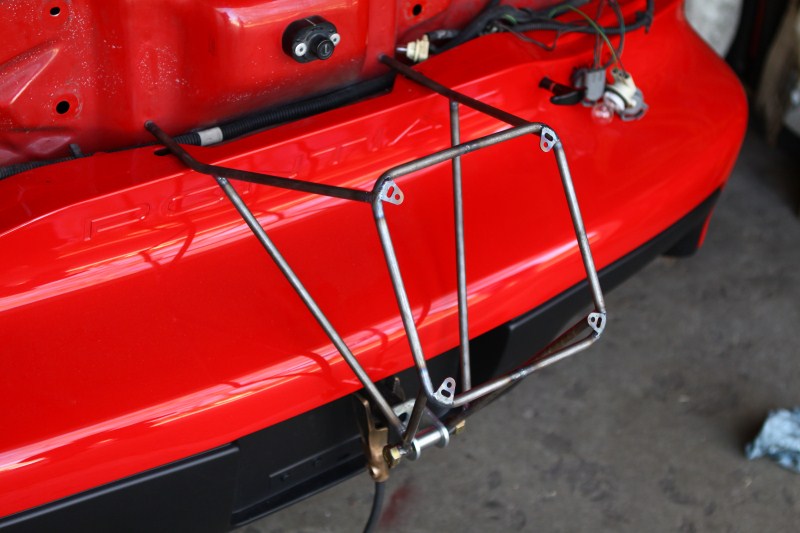
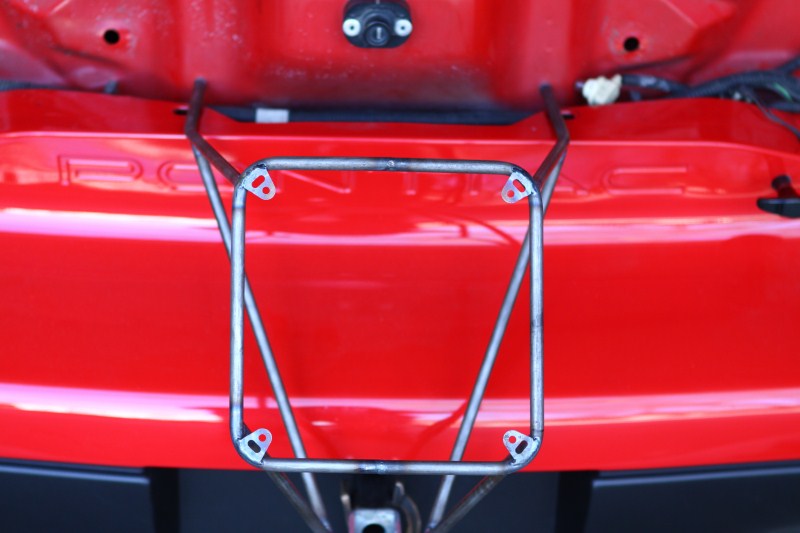
We planned on getting some more small things done to the car Sunday, but it didn't work out. The only big project left is swapping out the ECU so that we can crank up the boost. Then we have some dyno tuning, chassis cert, and finally RACING!!! We will keep you all up dated, and thanks for following along!
Sean
He looks so happy
Saturday morning we go up at 5:30 and hit the road about 6AM. Here is a shot of the car on the way down as the sun came up.
We got to Eric's about 8:30 in the morning and unloaded the car. I'm sure his neighbors liked the TA alarm clock
Eric got to work on the window net first, and we went to go get some breakfast. Here are some quick pics of what he had when we got back.Shot of the top side of rear bar. This is the only one that is permanently attached to the car. This makes it nice if you want to pull the net out, there is nothing in the way.
Close up of the weld
Here is the lower side of the same bar. You can remove the bolt, and move the bar out enough to slide the net off.
This is the lower part of the front bar. This is on a heim joint to allow plenty of movement so the net can get out of the way for getting in and out. This bolts to a threaded insert on the cage so you can remove the whole bar.
Same part from the inside
Here is the seatbelt clip that locks the net into place.
And the final product! You can see how the front bar bends out to give you a lot more arm room, a nice touch.
Next up was the chute mount. Eric started by bending up a piece of molly tubing, and tacking it to some molly plates the Jason made earlier.
You can also see that he had already marked the tube for the piece that comes through the bumper.
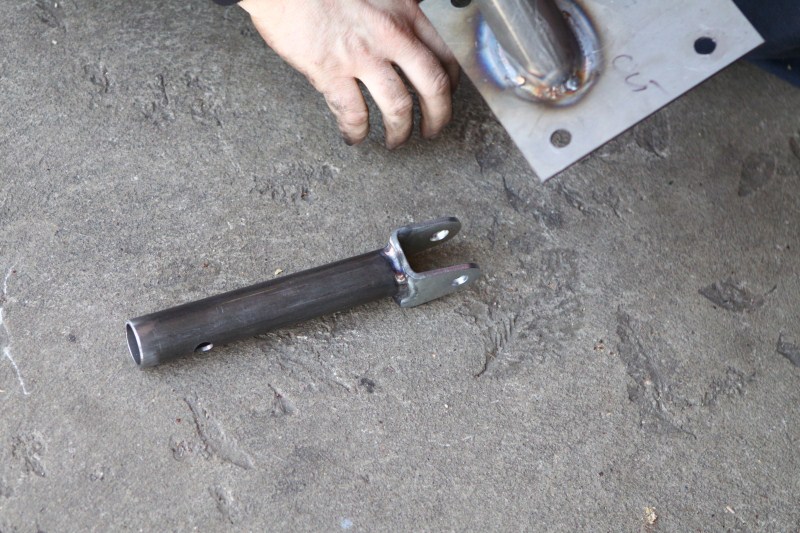
Here you can see Eric welding up the piece that slides into the receiver on the car, and holds the chute cable.
And here is that same piece all welded up, and drilled for the pin.
Eric is bolting the fully welded cross bar onto the car so that he can check the alignment of the receiver in the center be fully welds it in.
Got it perfect, and welded it fully along with adding a couple gussets for strength.
Here is the whole thing minus the chute holder.
Somewhere in that whole deal Eric whipped up the ring that holds the chute and the launcher. Here is a pic of the weld on one of the 4 tabs that the launcher will bolt to.
While the mount was cooling off he did us a favor and welded in a sleeve for the passenger seat back bolt to go through. You can see him working the TIG pedal between his legs to get this done!
He also added piece to hold the shoulder belts in place. I didn't get a pic of him doing that, but it didn't look easy
Once that was all finished he got back on the chute mount. He started with the two lower pieces to hold the ring in place.
Then after measuring, checking, measuring, and checking a few dozen times he made up the top two pieces. These have threaded inserts in the end of them (on the car side) so that the whole thing can be removed. The he added the two braces on the sides for extra strength
We planned on getting some more small things done to the car Sunday, but it didn't work out. The only big project left is swapping out the ECU so that we can crank up the boost. Then we have some dyno tuning, chassis cert, and finally RACING!!! We will keep you all up dated, and thanks for following along!
Sean
I'm running the same intake, TB, and rails. Just not F/I. Just wondering what you did for fuel system. I saw in some pictures but just couldn't put it all together. Can you give me some detail and maybe some pics later. I'll be running a rear mounted 15gl fuel cell, A1000 pump, and all necassary fittings and hoses. Just wondering how you did yours off the rails to the pump and FPR.
I run a single -8 up to a y under the hood, which goes to 2 -6's which feed into the back of the rails. Out of the front of each rail to the fpr, then one -6 return from fpr to tank. This is the way the directions wanted for the fpr for the best regulation.
Thanks chris
Thanks chris
Thanks Chris for getting back soo soon. I guess I am going to have to use a FPR and gonna need a guage. I don't know much about fuel systems or what would be needed to make the work properly. That's what this forum is here for right!!! Lol. Thanks for all the input Chris.
Also, what bolts did you use to bolt it down to the heads. I can't believe this doesn't come with any or bolts to mount the TB. Just disappoints me. Edelbrock is always know for great products. Now I have to go search around and find all the right bolts.
Ok, sorry for the shortesh response earlier. It was from my phone.
I got the proflow intake, and also got the proflo Throttle body. The throttle body came with bolts, and a new gasket, so i used those. Its definatly going to be a sae thread, cause its edlebrock.
The Directions that came with the intake tell you the size, and length of the bolts to get. They call for a m6x1x50mm length. I got some from mcmaster car that were allen head, and used a m6 washer. IF you have never bought from mcmastercarr google them, and you will love them.
Let me know if you have anymore questions about the fuel setup. IF you go through the thread im sure i have pictures of all of it.
On a side note, i have a really nice Fuel lab pressure regulator, because i wasn't going to used a boost referenced one at first. I put it on the car, and never used. I have the regualtor which was around 130 bucks, and all the npt fittings to adapt to 3 -6's out of the regualtor. Probably 30 bucks in an fittings. I will give you the regulator for 100 shipped if you want it. Its just sitting on my bench in the garage.(i can get you pictures if you like) As far as a gauge goes, the FPR has a gauge port on it. You can get the cheapy speed inc marshall fuel pressure gauge that will spin right in. This gauge does not have to be super accurate. Just get you in a ballpark, and then the car is tuned for that fuel pressure.
Let me know if you need anything else.
Thanks, Chris
Last edited by Sideways240sx; Apr 6, 2011 at 10:03 PM.