


1LE LT1 drag project build thread
Progress!
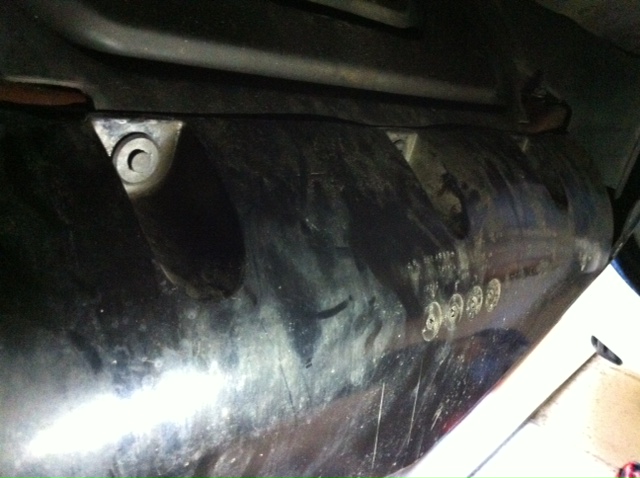
I replaced the rear main seal,
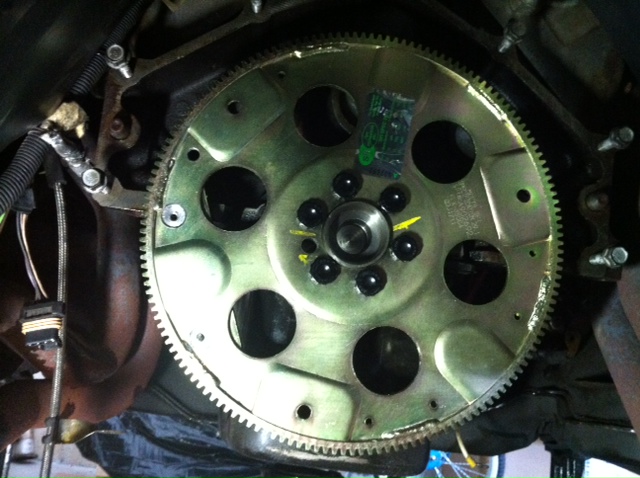
and put on the flexplate today.
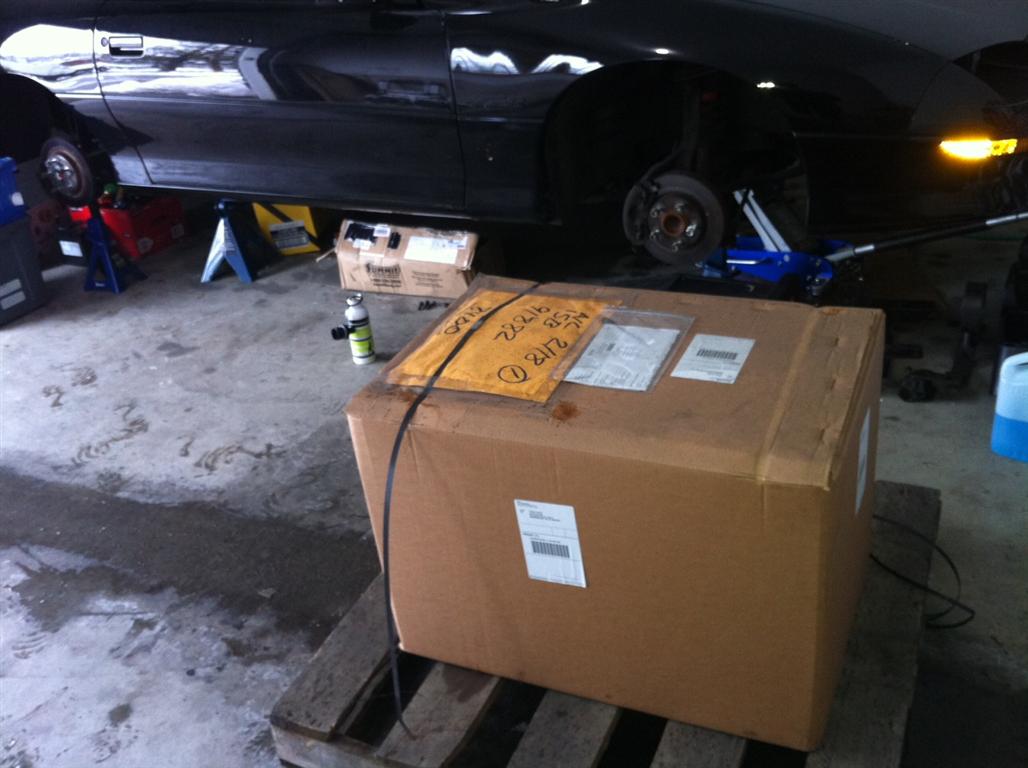
Now I just need to jack the TH400 in there and get the driveshaft made.
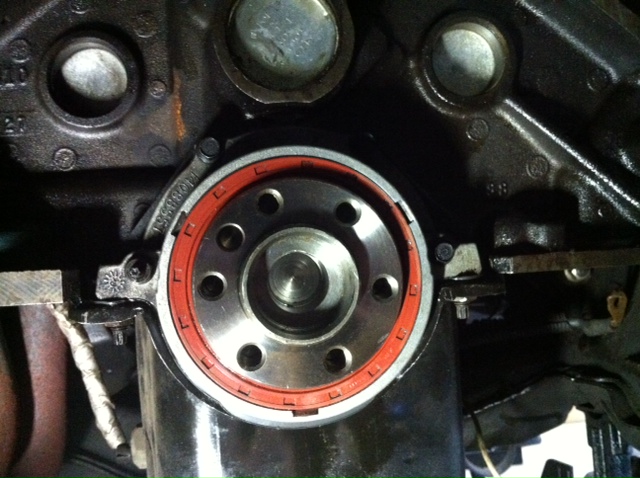
I replaced the rear main seal,
and put on the flexplate today.
Now I just need to jack the TH400 in there and get the driveshaft made.
Last edited by Jason94z; Aug 9, 2015 at 07:20 PM.
I kept staring and staring and it just wouldn't go in.
I guess I need to work the jack up a bit higher and try again
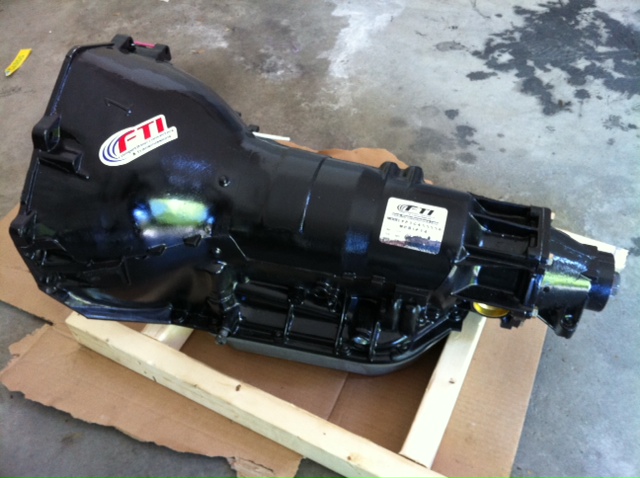
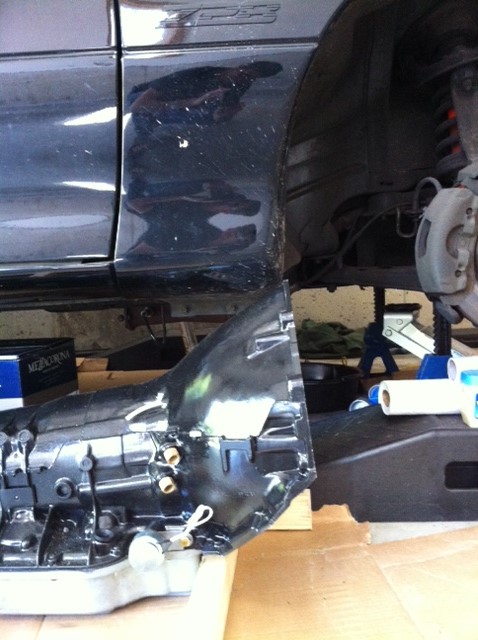
I guess I need to work the jack up a bit higher and try again
Last edited by Jason94z; Aug 9, 2015 at 07:20 PM.
Realistically I need to start getting the car back together or it's going to be winter time again and I'll have one of those never-run 5 year track car projects. I need to hit the track soon or I'll freak out LOL
To get there this year I'm skipping stuff like installing the spool. I'm going to run the posi 4.10's until I see where my mph is at, then, I can choose the right gears and go to a spool then. At the same time I can then drill the axles out for 5/8 or 1/2 studs, get the rear drag brakes etc.
So I decided to reverse the dismantling mode and start just putting the car back together to get some runs in. I can always do a mod at a time later while it's running, rather then keep striping down to a 5 year project
Realistically I need to start getting the car back together or it's going to be winter time again and I'll have one of those never-run 5 year track car projects. I need to hit the track soon or I'll freak out LOL..........So I decided to reverse the dismantling mode and start just putting the car back together to get some runs in. I can always do a mod at a time later while it's running, rather then keep striping down to a 5 year project
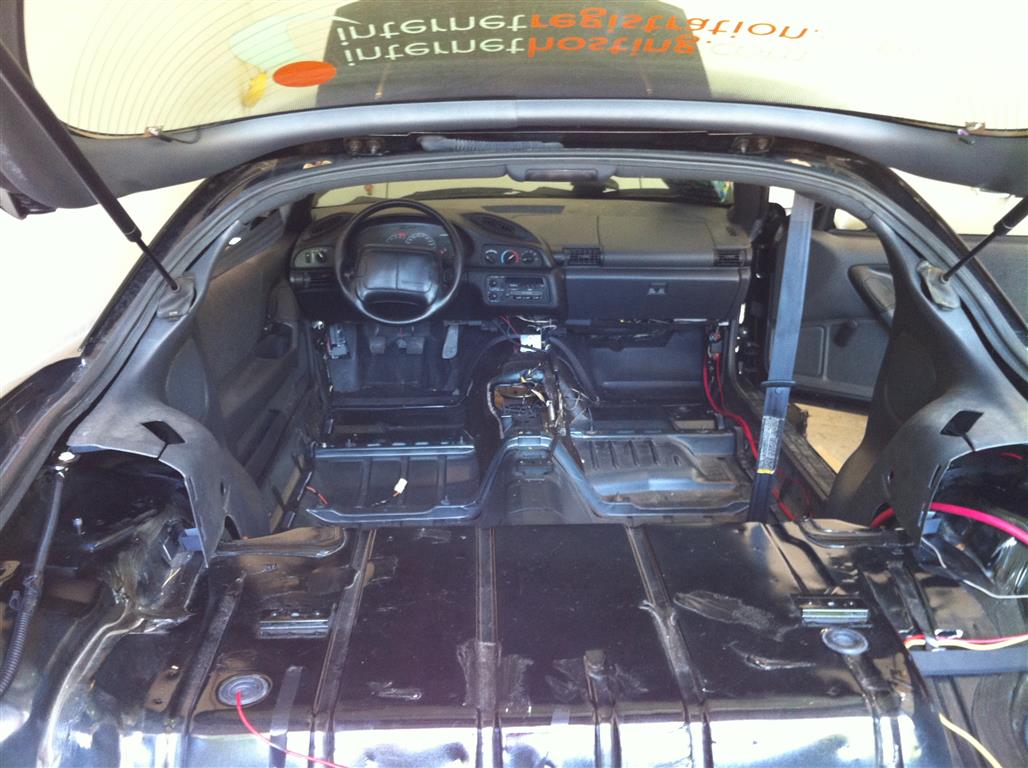
I ripped out 156 lbs today in an hour! Anyone need a PERFECT graphite interior with just a few thousand miles on it? Carpet just has leaves on it, vacuum and it's perfect too.
Floor mats 9
Grey cloth manual passenger seat 31
Grey cloth manual driver seat 36
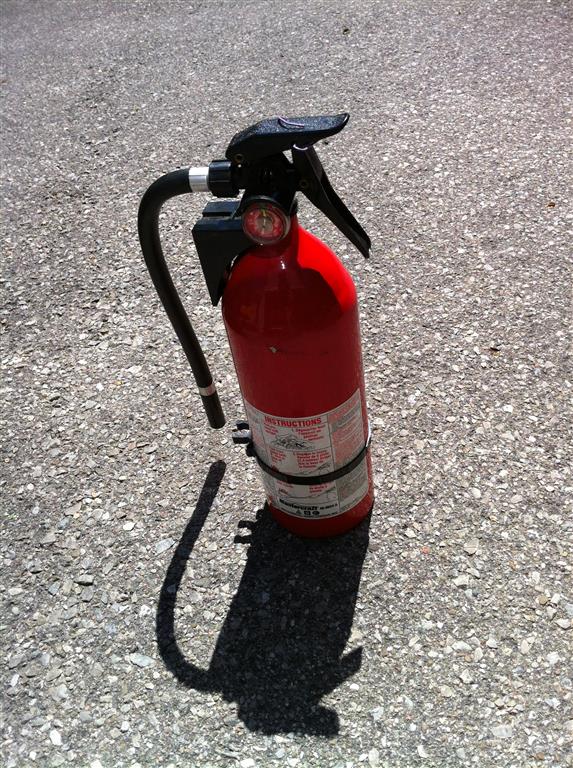
Fire extinguisher 8
Rear cloth seats and belts 29
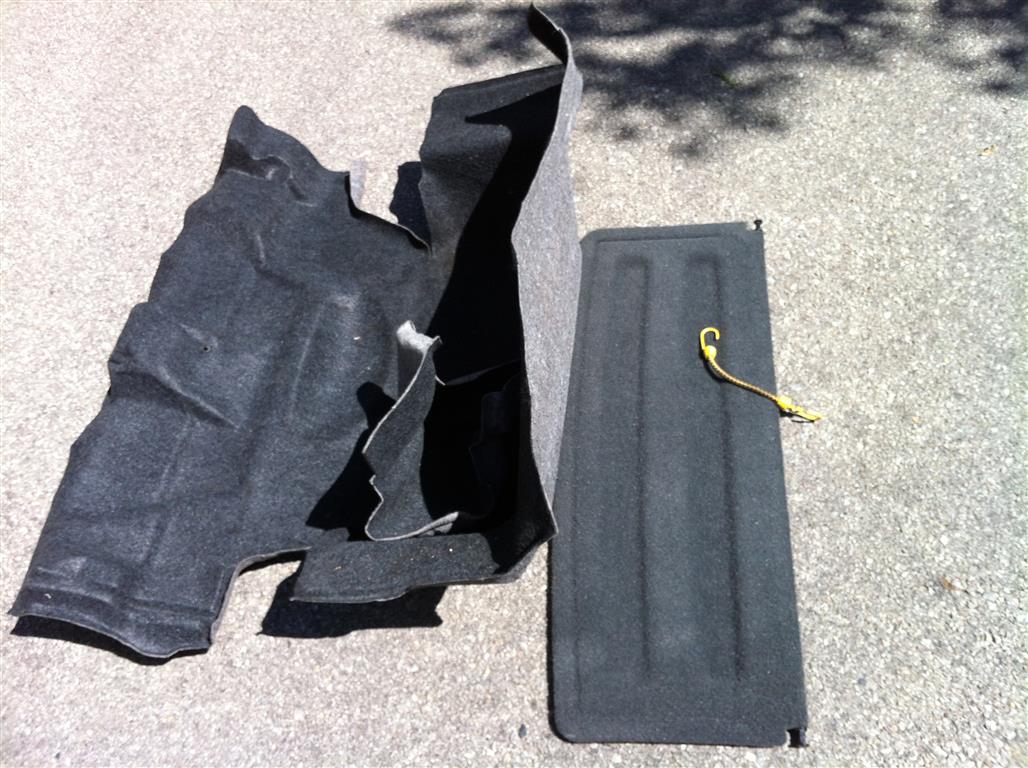
Rear flappy thing and carpet 6
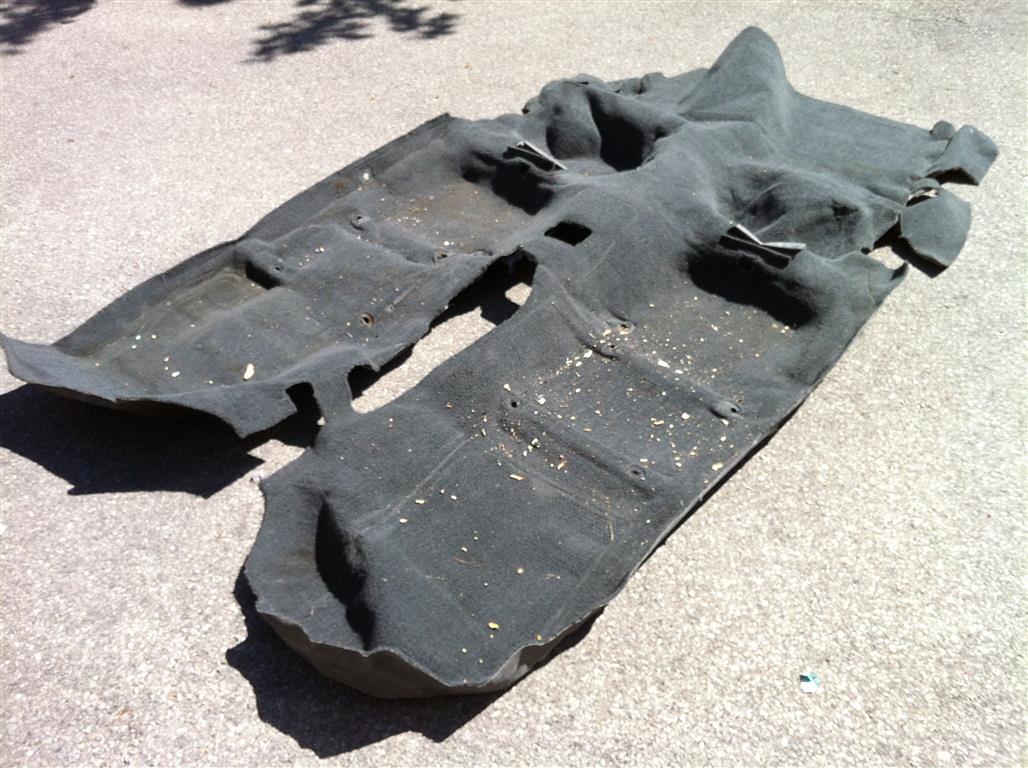
Carpet with padding 31
Console 6
Total today 156 lbs. It was easy!
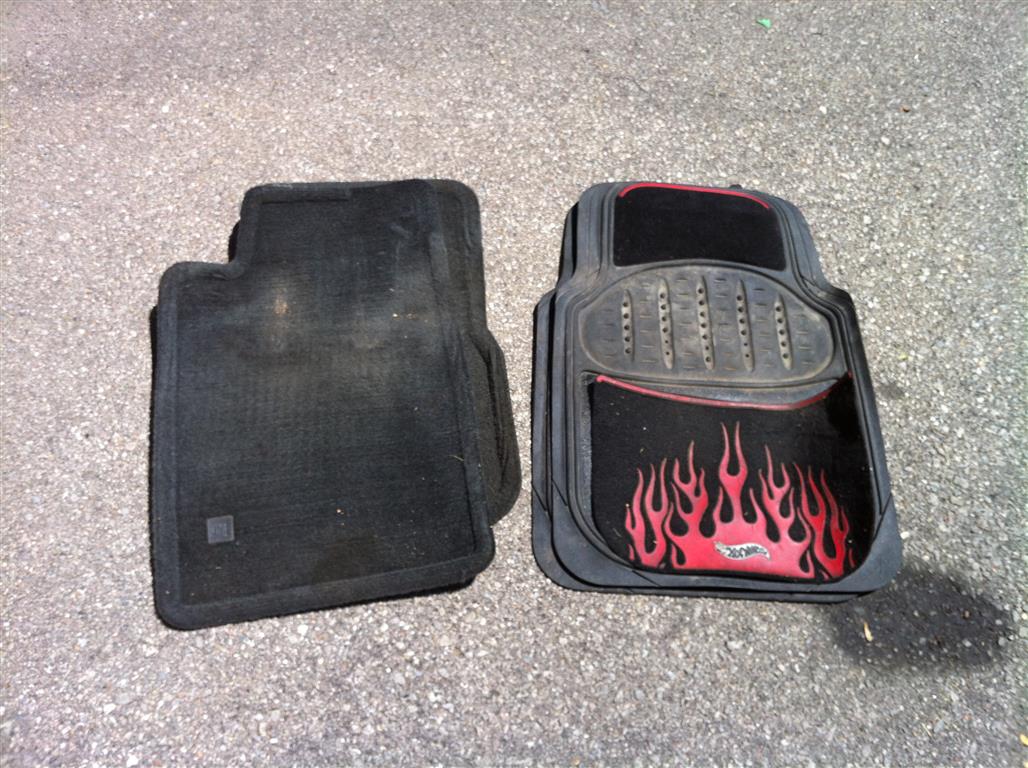
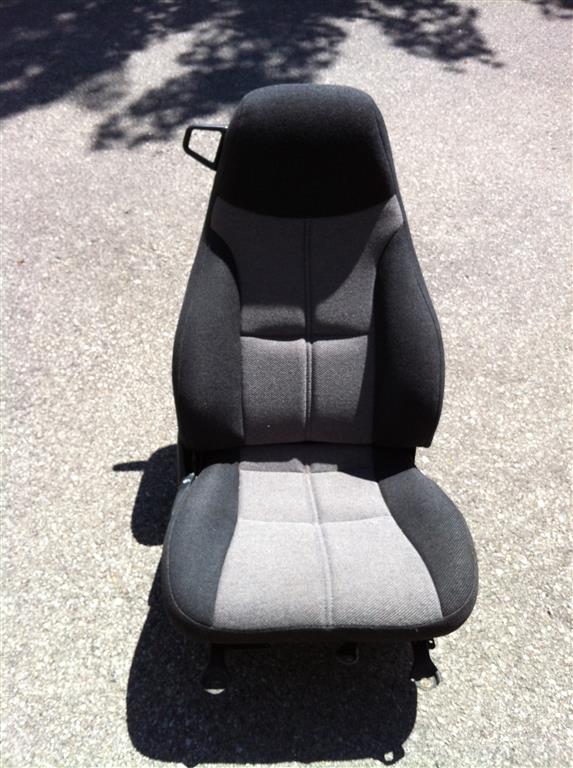
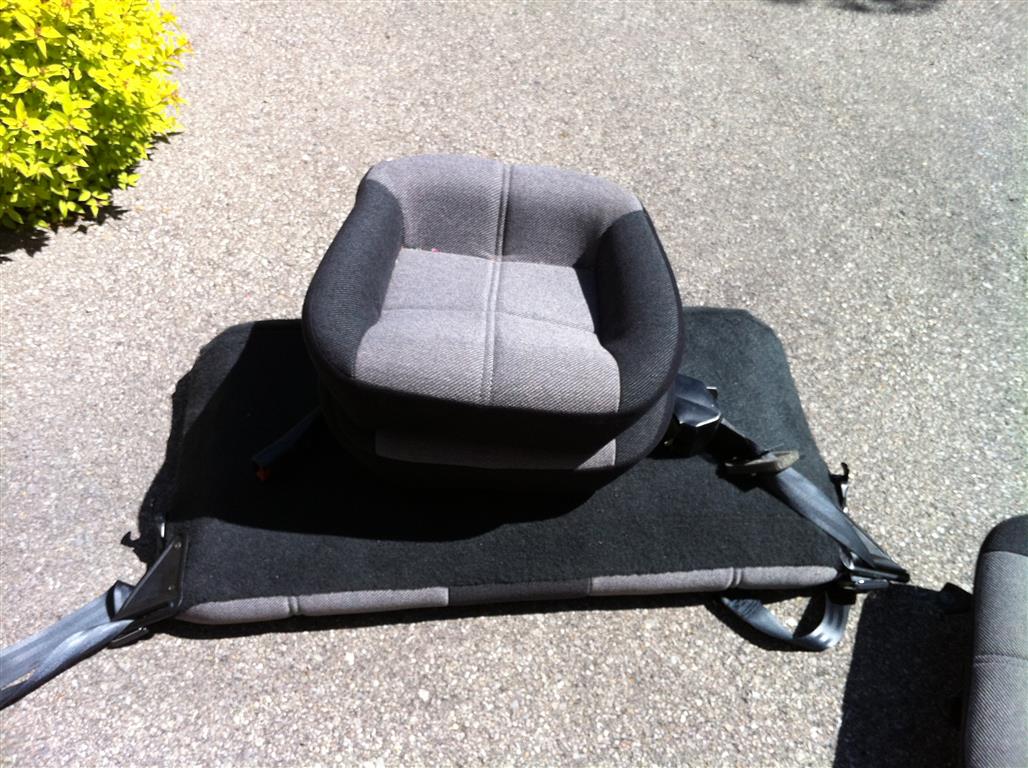

Floor mats 9
Grey cloth manual passenger seat 31
Grey cloth manual driver seat 36
Fire extinguisher 8
Rear cloth seats and belts 29
Rear flappy thing and carpet 6
Carpet with padding 31
Console 6
Total today 156 lbs. It was easy!
Last edited by Jason94z; Aug 9, 2015 at 07:21 PM.
LS1 Tech Stories
The Best V8 Stories One Small Block at Time

Gas Monkey Built a 6-Wheel Ferrari Testarossa With a Corvette LT4 Engine
Verdad Gallardo
7 Most Reliable High-Performance Engines GM Has Ever Built
Verdad Gallardo
Amazing '71 Camaro Restomod Is Modern Muscle Car Under the Skin
Verdad Gallardo
6 Common C5 Corvette Failures and What's Involved In Repairing Them
Pouria Savadkouei
Retro Modern Bandit Pontiac Trans AM Comes With Burt Reynolds' Autograph
Verdad Gallardo
Top 10 Greatest Cadillac V Series Performance Models Ever, Ranked
Pouria Savadkouei
Top 10 Most Powerful Chevy Trucks Ever Made!

Hennessey's New Supercharged Silverado ZR2 Has 700 HP
Verdad Gallardo
Coachbuilt N2A Anteros Is an LS2-Powered C6 Corvette In Italian Clothes
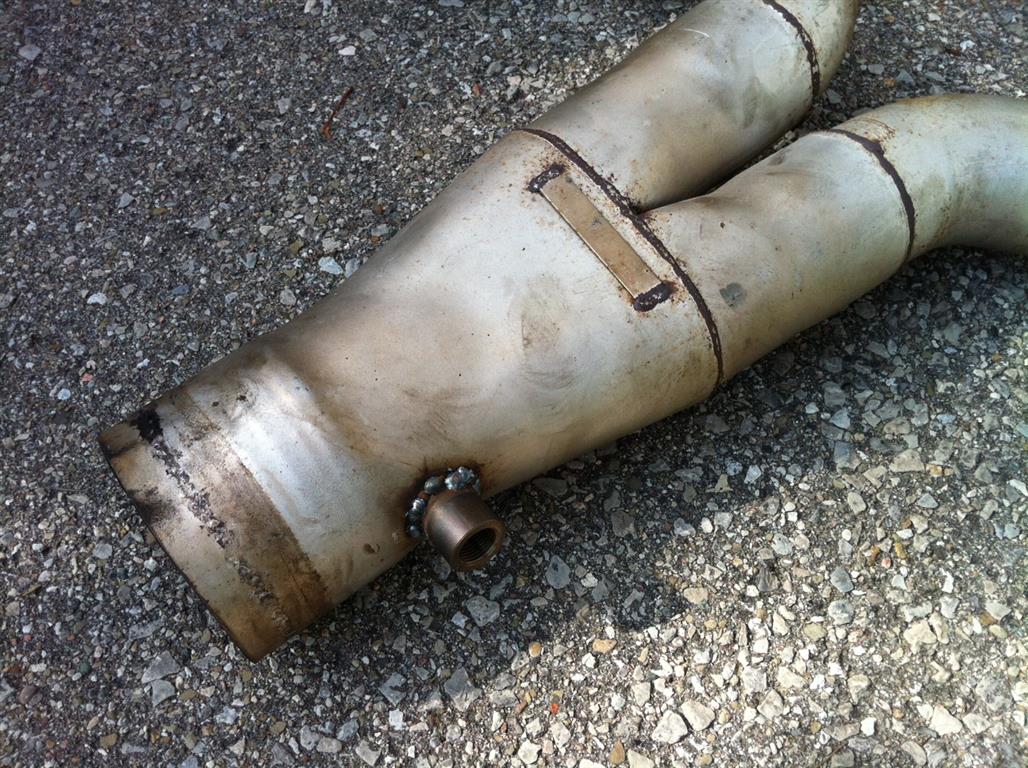
Verdad Gallardo Got my wideband o2 bung welded on today,
and I removed the front swaybar and brackets for 15.5 lbs
Total so far 171 lbs removed.
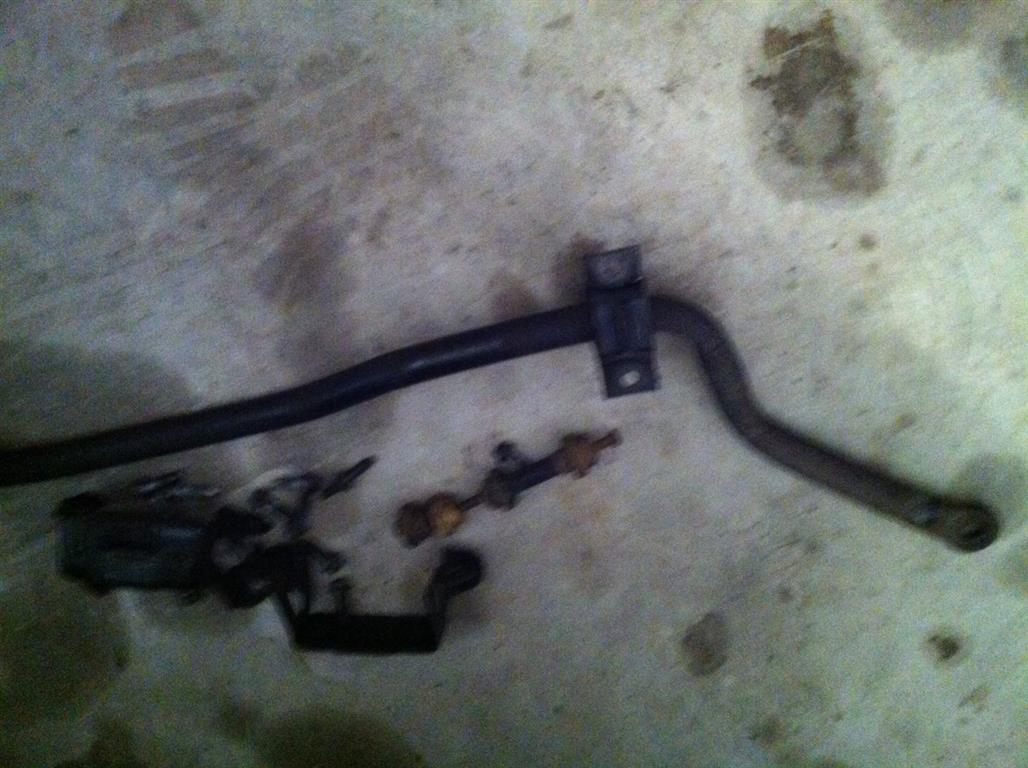
and I removed the front swaybar and brackets for 15.5 lbs
Total so far 171 lbs removed.
Last edited by Jason94z; Aug 9, 2015 at 07:21 PM.
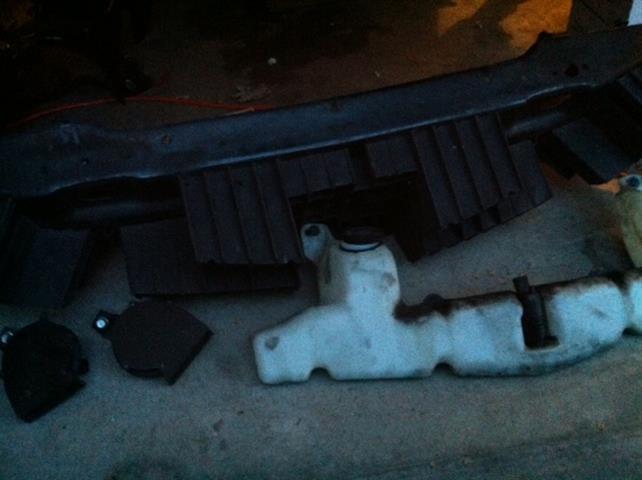
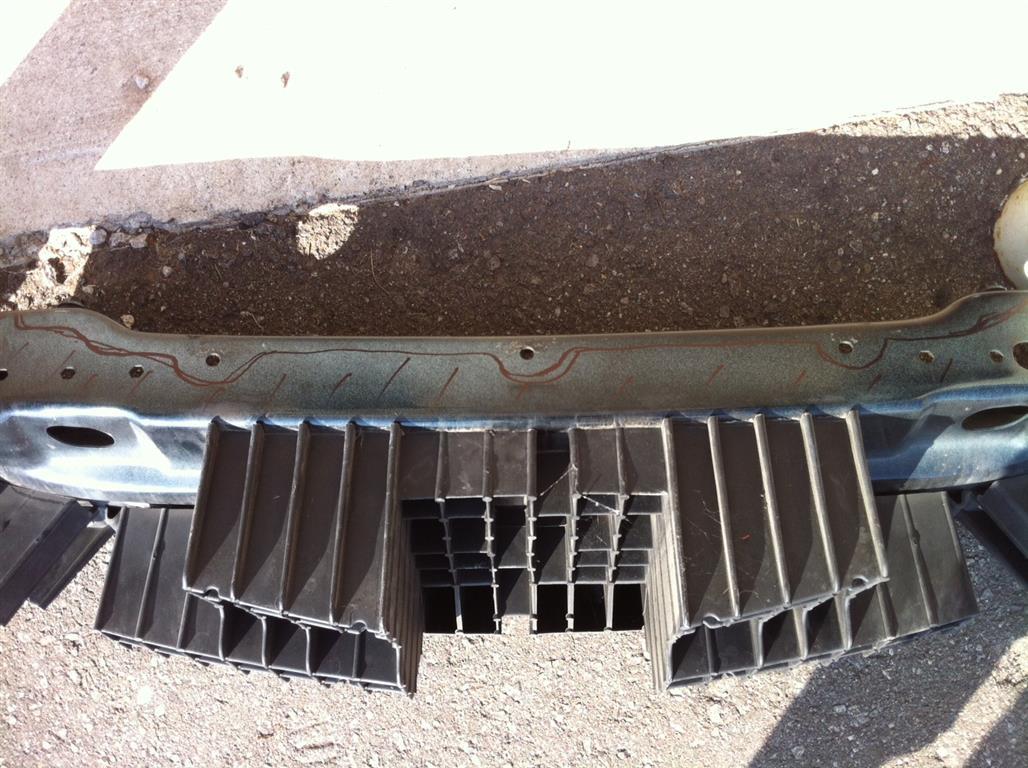
That won't do anything to stop the bumper from flapping if you cut it like that. You will just waste some cut off wheels and time to add some weight back in. The honeycomb presses up against the bumper to hold it from flapping so you need to add something back in there if you want to. Lots of guys get some aluminum from home depot and build something or you can get some MWC supports like I did.

*edit*
After I looked at your pics again that is the bottom of the bumper support right? You could cut that up and keep the bottom from flapping, but I think you would be a lot better off with a couple of aluminum straps to do that same job for a lot less weight, or just trim that part off of the bumper cover and save a couple more pounds
After I looked at your pics again that is the bottom of the bumper support right? You could cut that up and keep the bottom from flapping, but I think you would be a lot better off with a couple of aluminum straps to do that same job for a lot less weight, or just trim that part off of the bumper cover and save a couple more pounds

Ok I did it anyhow and I like the way it turned out. It doesn't support the center point of the bumper in anyway but it does support the bottom. My main deal was those three press in hole things that now work again. If it's not good enough and starts drooping I'll have to order the real deal but for now here is how it turned out. It only added back in 1.5 lbs, and, I removed my alarm horn that was under there and the front licens plate for 2.5 lbs so I am still down another pound today
I only had brown rust paint today but it's all hidden so I just shot it and installed it:
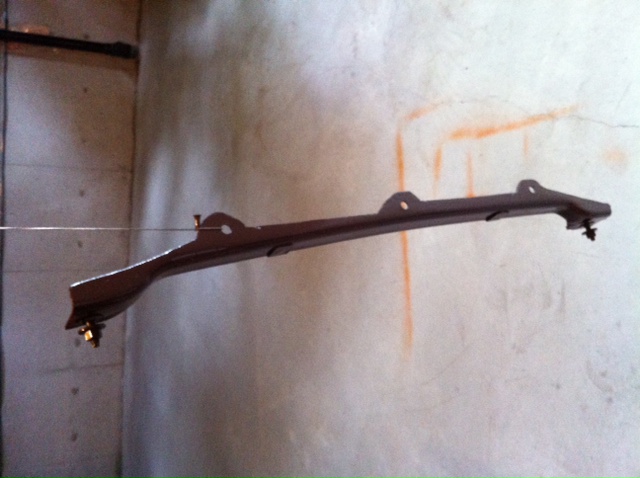
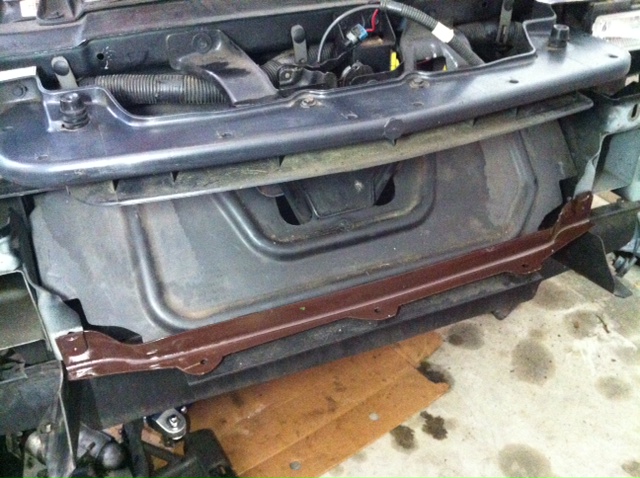
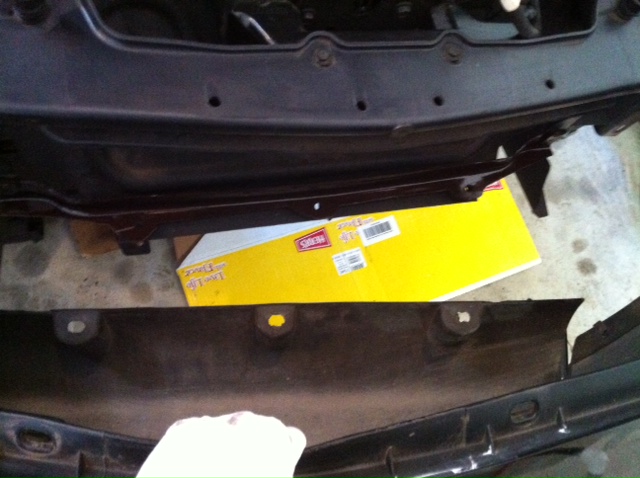
I only had brown rust paint today but it's all hidden so I just shot it and installed it:
Last edited by Jason94z; Aug 9, 2015 at 07:22 PM.
I cut the flap off, were it just gose back up to the bumper support. All the weight is held up with aum bars in the middle on the nose. And 2 going to the lower ends, but more for the front corners of the wheel well openings. that looks like it works good, you still have the frame horns and alll that
Thanks man
This is just round 1 - every year I'll dig more into it and I'm sure when I get a pin on the front frame rails will get chopped back more
Rear support today 20 lbs.
Total so far 222 lbs removed.
I started at 3416 lbs I'm down to 3194 lbs.
My 17" wheels and rubber was 220 lbs and I sold those, so technically I'm at 2974 with no wheels


Is that Vaseline by the transmission?! Hahaha gotta lube it up. This is pretty fun to watch I'm looking to get mine to around 3000lbs with me in it without cutting fenders. Keep up the good work