My 370 buildup (for F1 procharger) WARNING: long post & lots of pics!
 06-29-2009, 07:35 PM
#1

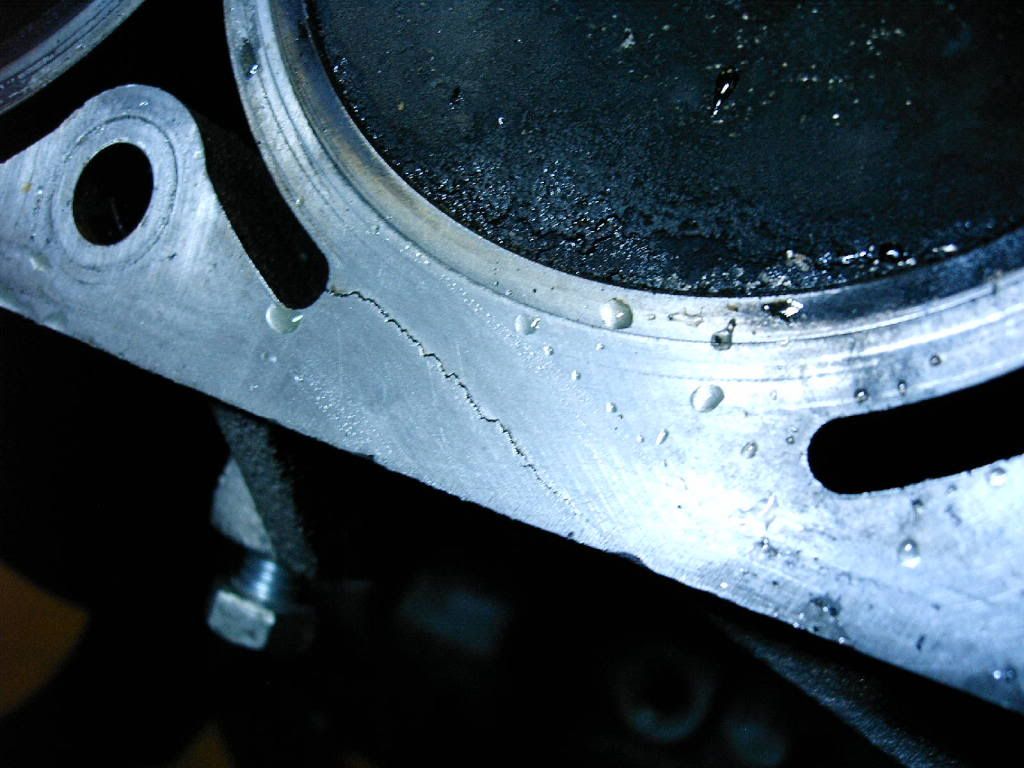
Ok, so this whole journey got started off early this year when something caused my stock LS6 intake manifold to give up the ghost (https://ls1tech.com/forums/forced-in...-manifold.html) The cause is still a mystery to me. After much consideration, I ended up buying a BBK to replace the composite stock manifold. I was hesitant to just slap it on and run with it tho, so I decided to investigate a little further into the engine just for a sanity check. Well, this led to more bad news. I ended up finding a crack in the LS6 block I was running. (https://ls1tech.com/forums/forced-in...ve-caused.html) This truly made me sick! That block had less than 6k on it and was purchased as a completely assembled shortblock from SDPC a couple years ago. Here is the crack that was in the LS6 block:
So off with the rest of the parts

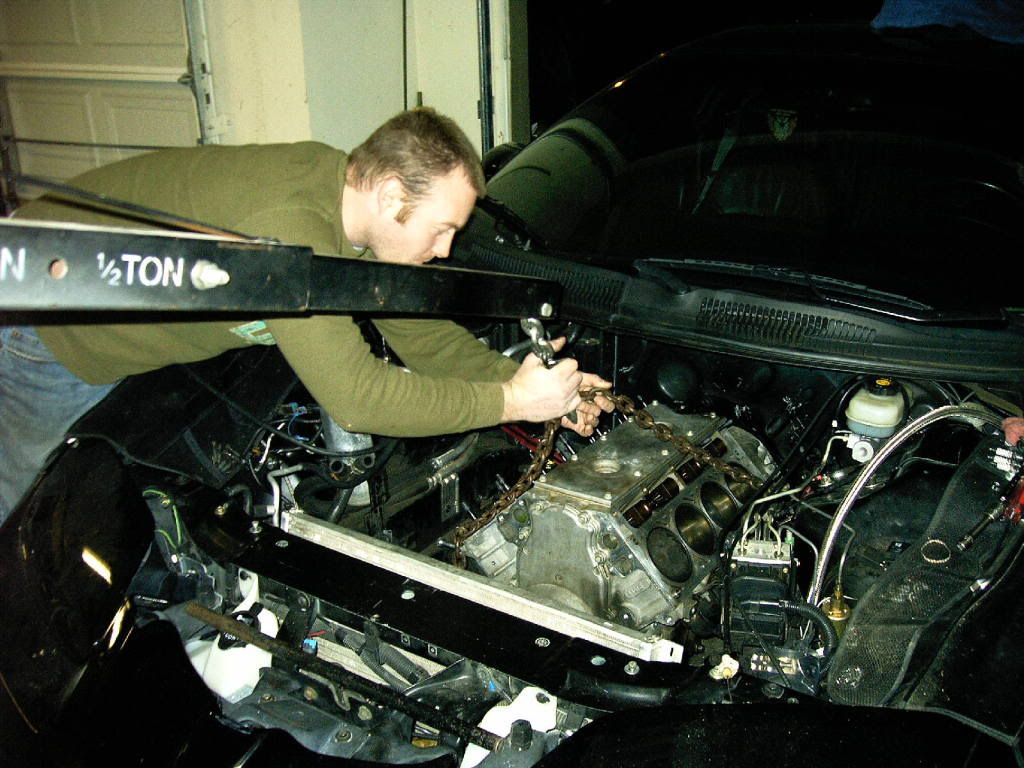
Since the engine was already torn down to the shortblock I decided to go ahead and take it out the top by itself this time (took the stock engine out with the trans attached last time out the top). I supported the trans with a strap tied to the strut bolts.
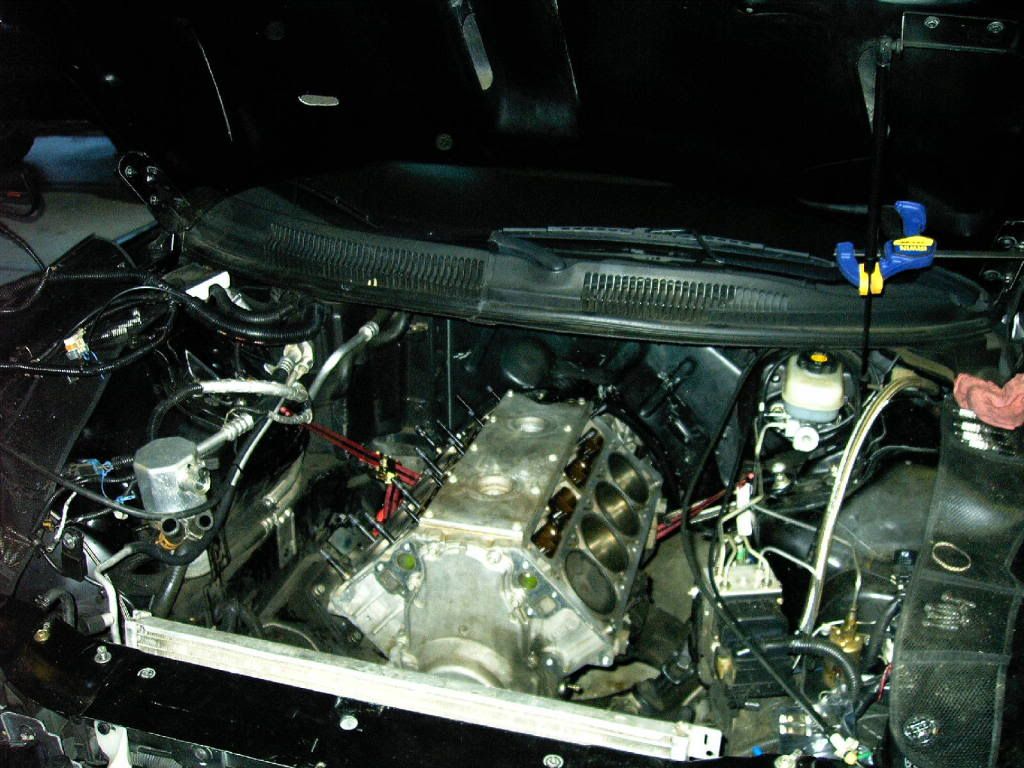
I left the AC compressor and the power steering pump in the car so I wouldn�t have to undo any lines. They are zip tied out of the way on the sway bar lol
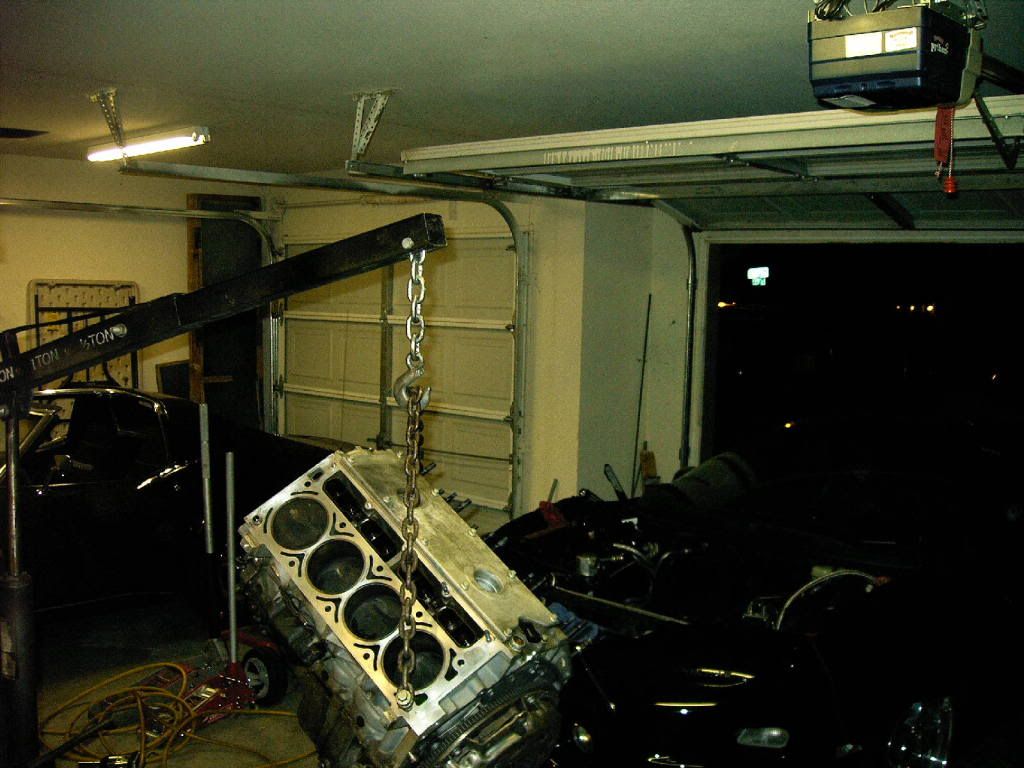
Out with the old
A little help from my brother here too.
After the engine was out, the research began, and I decided to replace the aluminum block with an iron block for strength this time around. After many quotes from shops on what it would cost to have an iron block 370 shortblock to be build (quotes for both new, and with re-using my current crank and rods from my forged LS6) I determined it would be cheaper to just build it myself. I�ve build a few engines in the past, and my brother has built MANY. He is ASE certified, and he has his AMP license and works as an airplane mechanic, so he is no slouch in the wrench turning department! He is a great asset to all sorts of questions and help, and not to mention he has all the tools I don�t such as snap on torque wrenches, engine hoist, dial indicator, etc. Big thanks to him for all his help along the way!
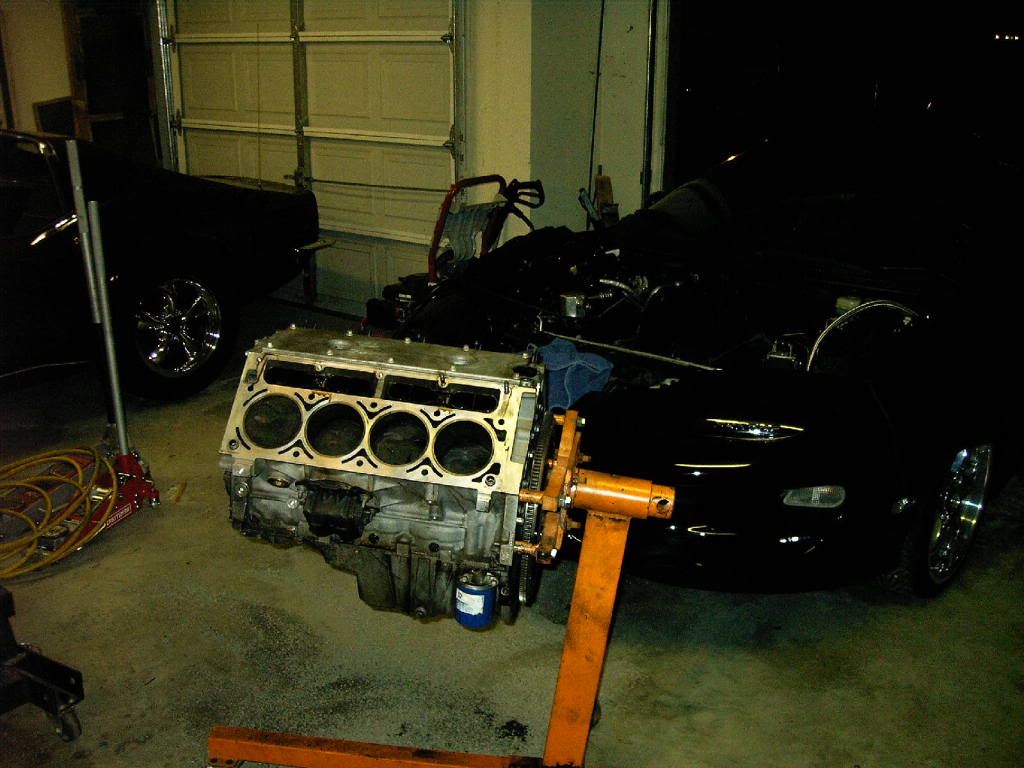
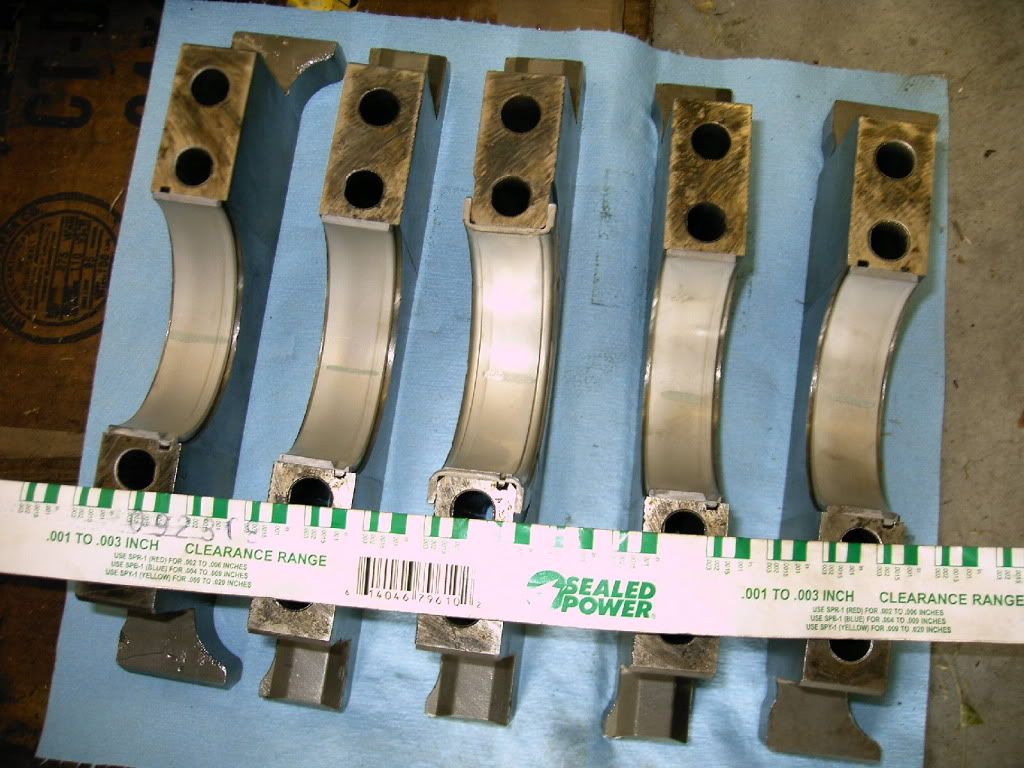
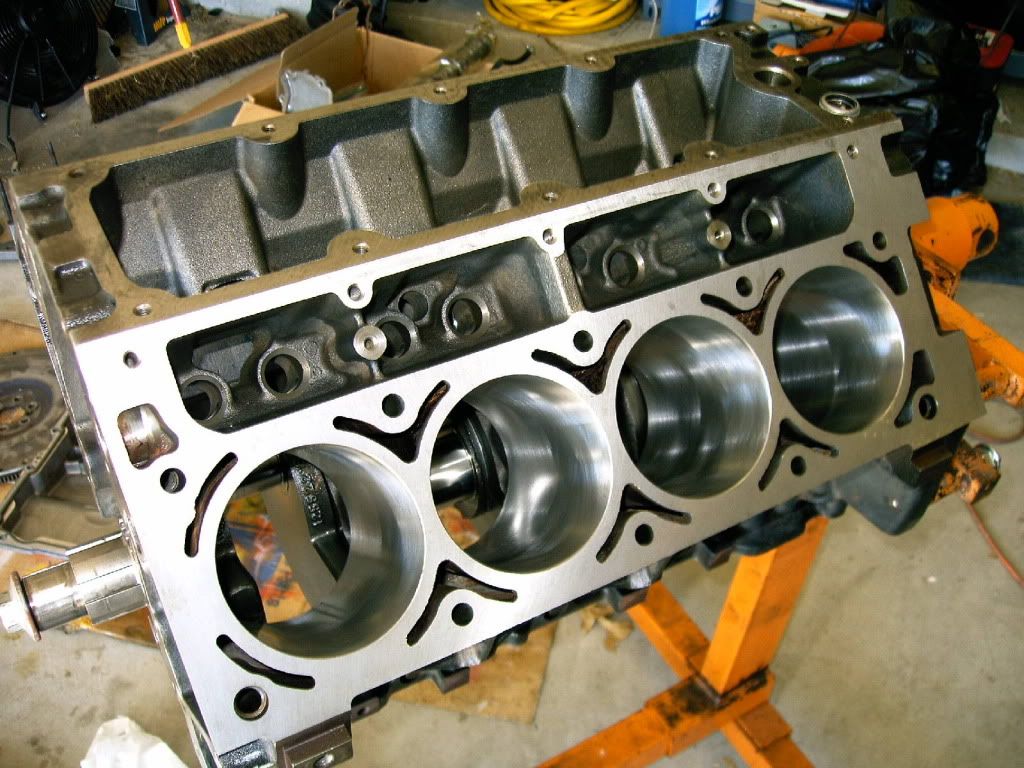
The LS6 crank and the Callies Compstar rods (and even the old Mahle pistons were in perfect condition and completely re-usable. Of course, the old pistons wouldn�t work in the bigger bore, so they were sold to help fund the new replacement pistons. I purchased a 6.0 block that had already had the machine work done on it, but it was bored to 4.020. That wasn�t a huge deal, because I was able to just have it honed to 4.030 by my local machine shop to accommodate the Wiseco -11cc pistons I choose. I also had them go ahead and deck the block while they were at it just for good measure.
So off with the rest of the parts
Since the engine was already torn down to the shortblock I decided to go ahead and take it out the top by itself this time (took the stock engine out with the trans attached last time out the top). I supported the trans with a strap tied to the strut bolts.
I left the AC compressor and the power steering pump in the car so I wouldn�t have to undo any lines. They are zip tied out of the way on the sway bar lol
Out with the old
A little help from my brother here too.
After the engine was out, the research began, and I decided to replace the aluminum block with an iron block for strength this time around. After many quotes from shops on what it would cost to have an iron block 370 shortblock to be build (quotes for both new, and with re-using my current crank and rods from my forged LS6) I determined it would be cheaper to just build it myself. I�ve build a few engines in the past, and my brother has built MANY. He is ASE certified, and he has his AMP license and works as an airplane mechanic, so he is no slouch in the wrench turning department!
He is a great asset to all sorts of questions and help, and not to mention he has all the tools I don�t such as snap on torque wrenches, engine hoist, dial indicator, etc. Big thanks to him for all his help along the way! The LS6 crank and the Callies Compstar rods (and even the old Mahle pistons were in perfect condition and completely re-usable. Of course, the old pistons wouldn�t work in the bigger bore, so they were sold to help fund the new replacement pistons. I purchased a 6.0 block that had already had the machine work done on it, but it was bored to 4.020. That wasn�t a huge deal, because I was able to just have it honed to 4.030 by my local machine shop to accommodate the Wiseco -11cc pistons I choose. I also had them go ahead and deck the block while they were at it just for good measure.
 06-29-2009, 07:35 PM
#2
Before I sold the Mahle pistons that were in it, I weighed all the pistons complete with the pins and clips, and rings. This was all recorded for use in balancing the new pistons. As seen here, the old pistons and rods were in the 1200 gram range.
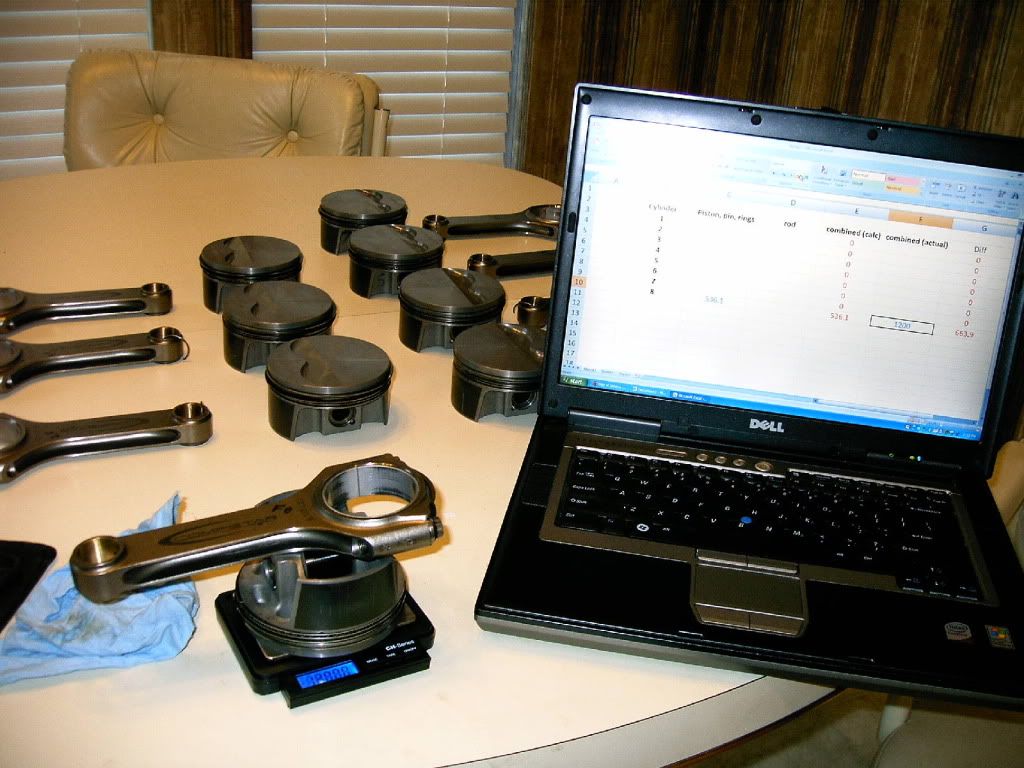
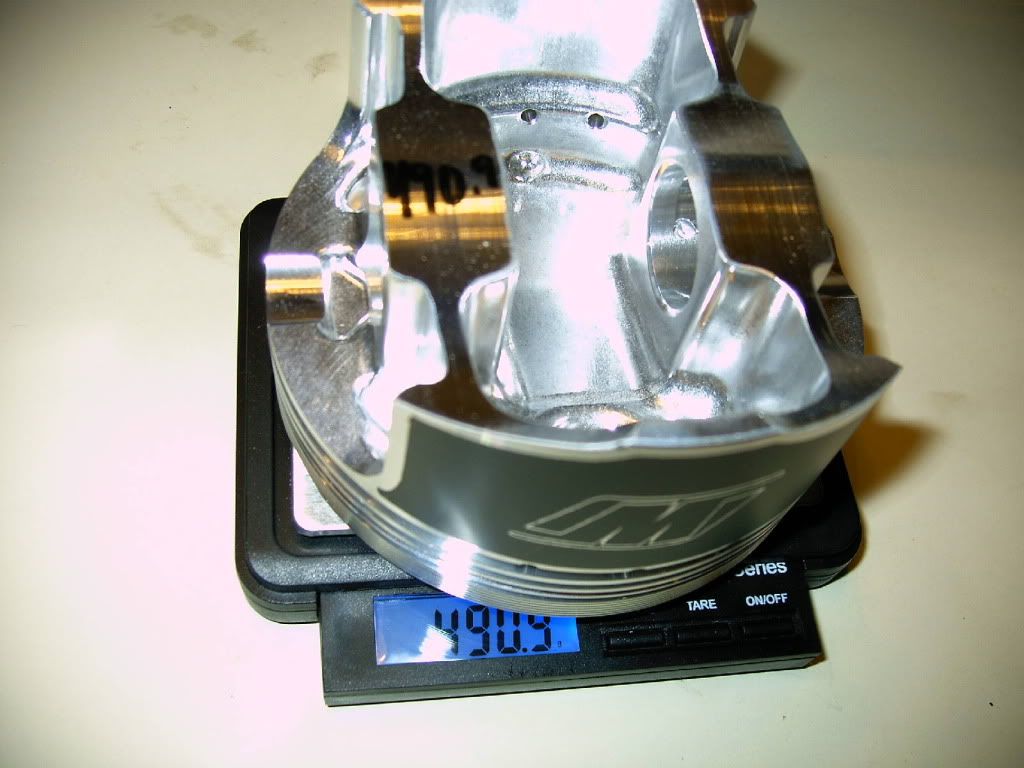
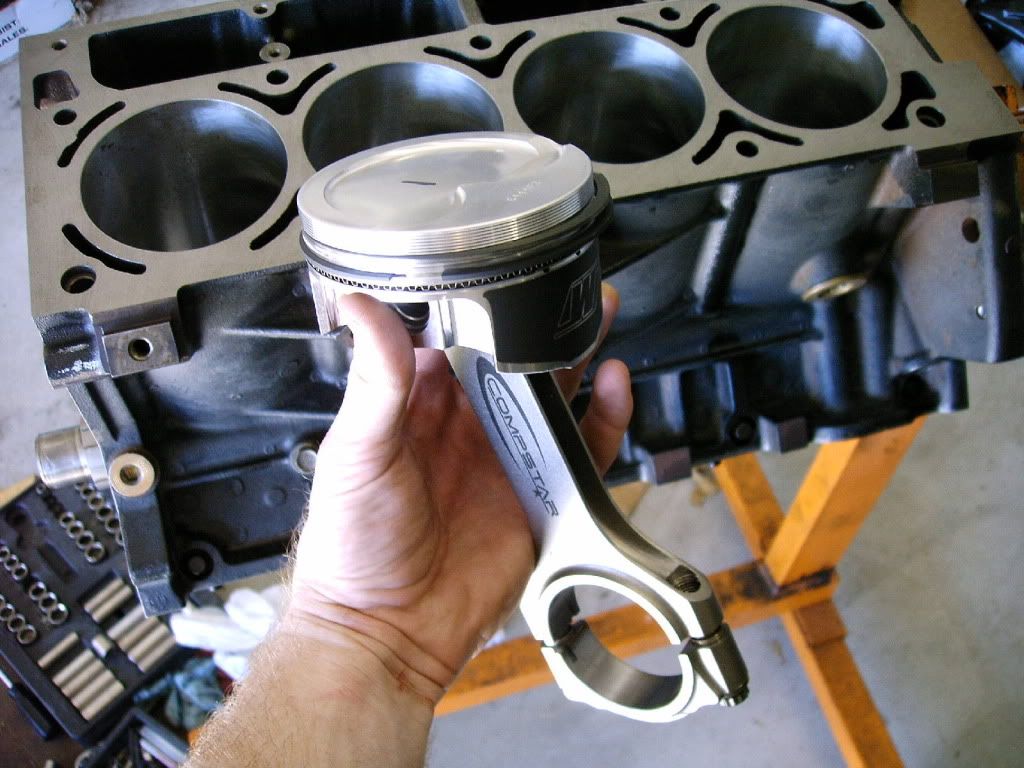
The 3.898 bore Mahle piston assemblies weighed in from 535.0 to 537.1 grams each. The new 4.030 bore Wiseco pistons weighed in at around 490. Keep in mind, that’s just the pistons not including the rings, locks, and pins like what was included in the 535g weight of the Mahle assemblies. They even were pre-weighed from Wiseco and the pistons all were marked with the weight on the back side. This was a good chance to test my scale compared to the scales that Wiseco uses. As seen in this pic, the weight was dead nuts on!
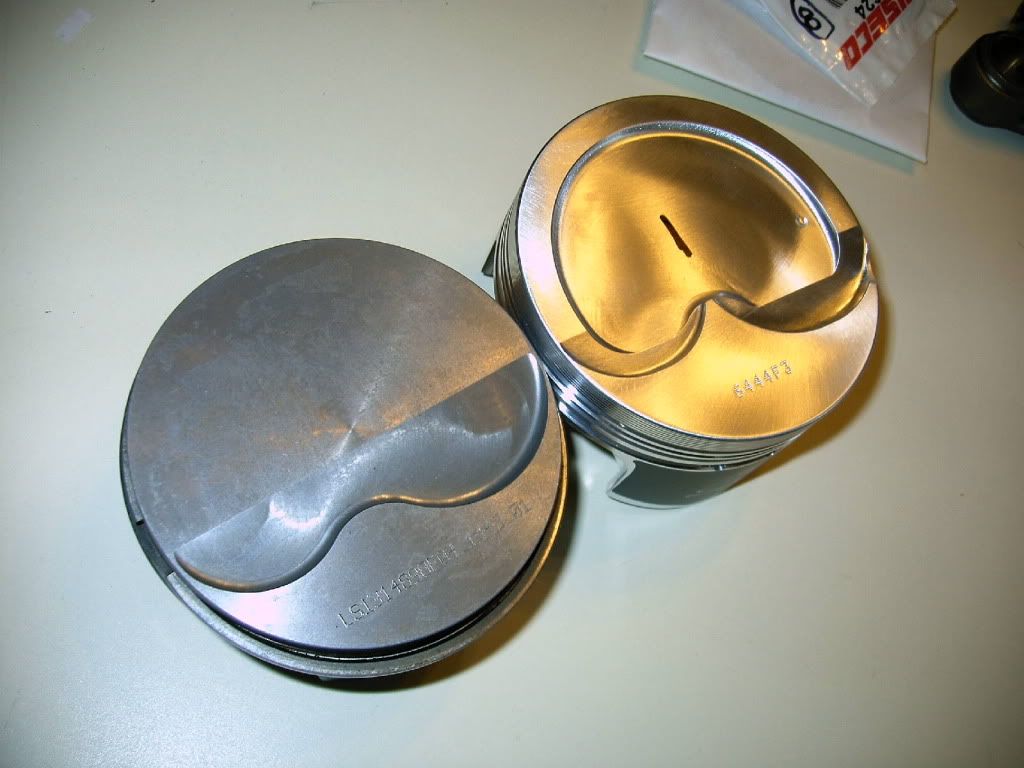
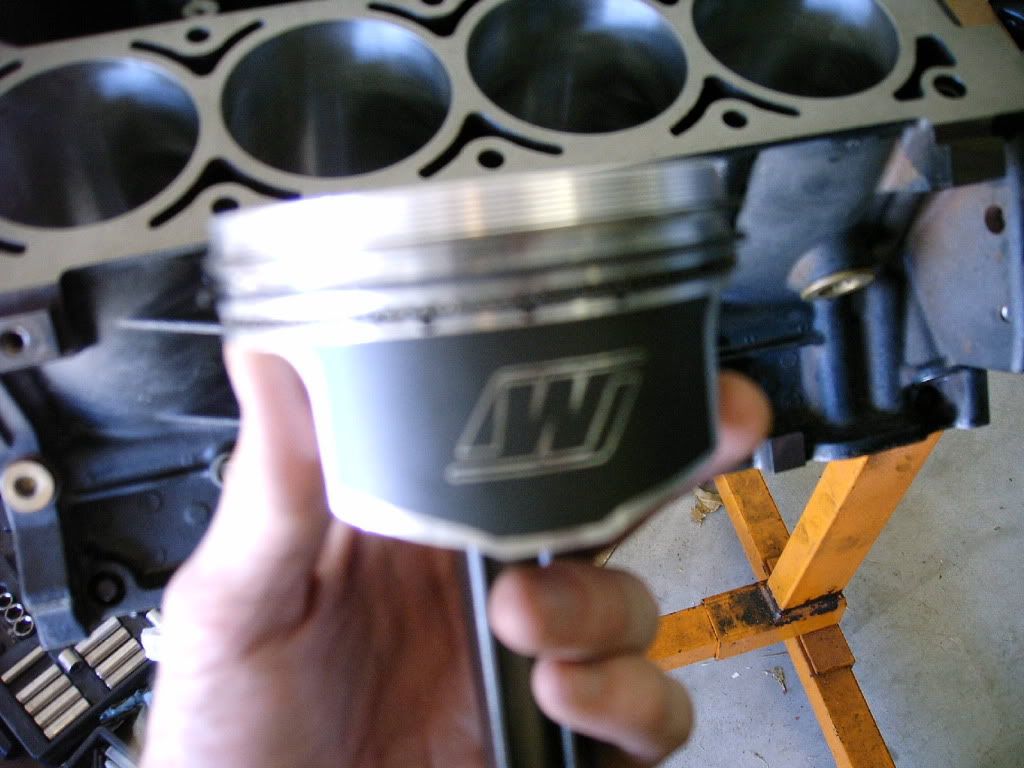
These Wiseco’s are a true work of art! They were polished on the bottom and top, and the sides have a very nice coating on them with the Wiseco logo. I’m very impressed by the workmanship of these beauties! Here is a shot of one of the old Mahles compared to one of the new Wisecos
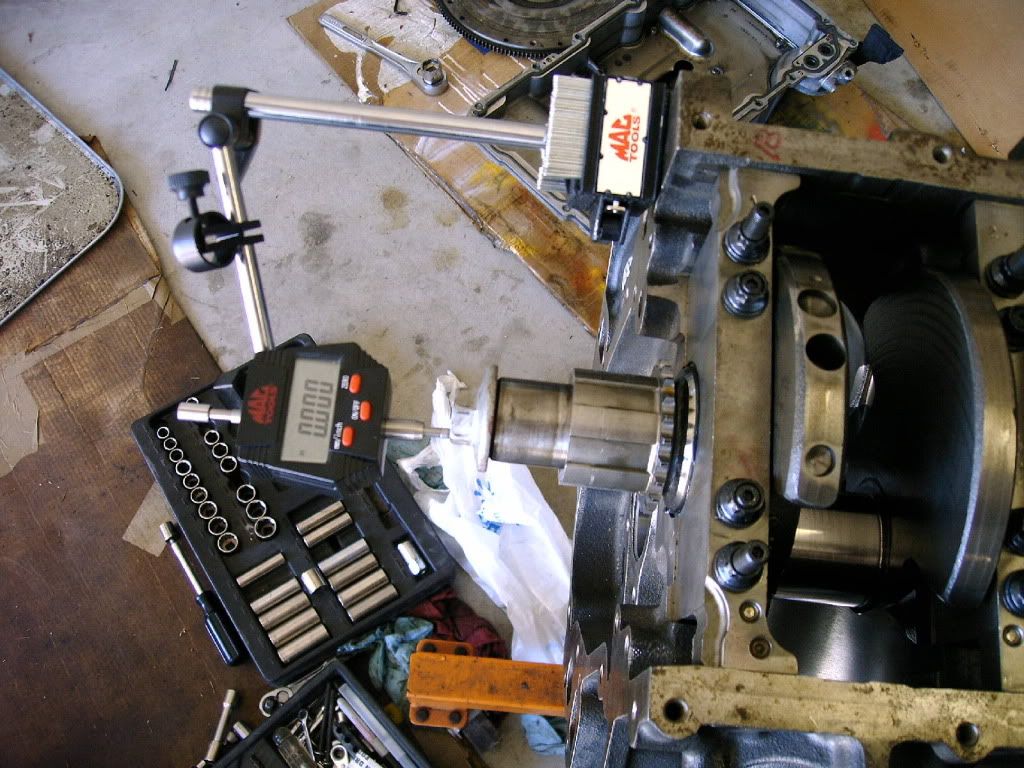
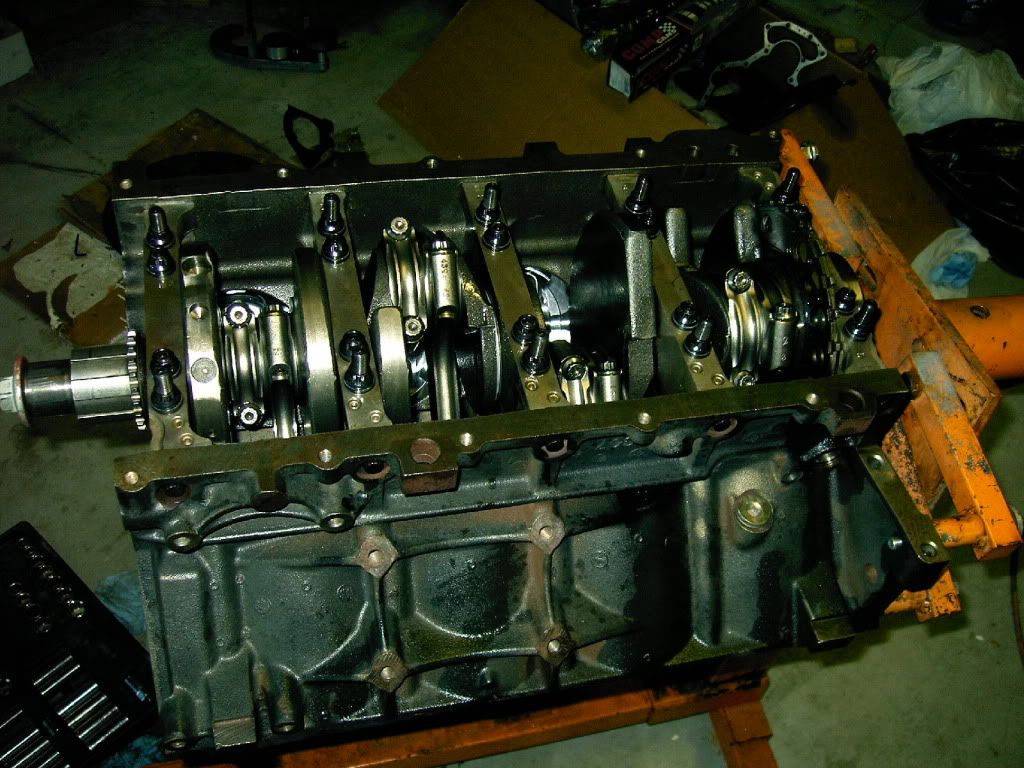
After the new piston assemblies were balanced with the pins, locks, and rings, it was time to move onto checking the clearances on the main caps and journals of the crank. Green plastigage revealed that all the clearances were between .0015 and .0020
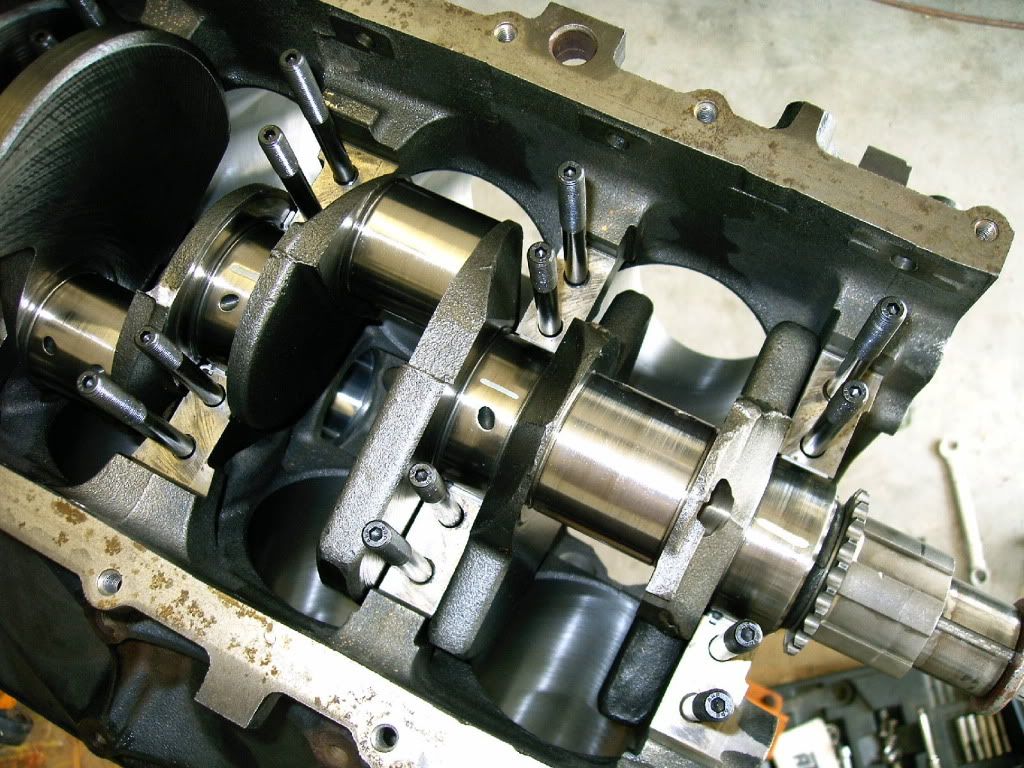

After all the clearances were verified good to go, the crank was re-installed for good this time.
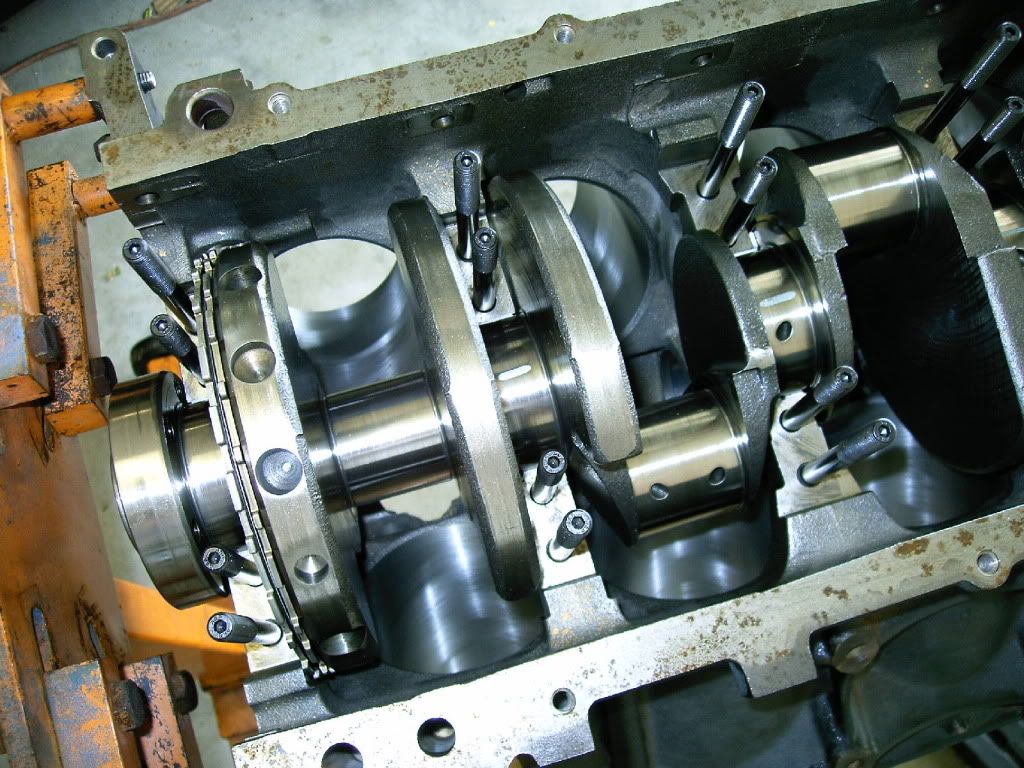
And checking the end play resulted in about .0030
The 3.898 bore Mahle piston assemblies weighed in from 535.0 to 537.1 grams each. The new 4.030 bore Wiseco pistons weighed in at around 490. Keep in mind, that’s just the pistons not including the rings, locks, and pins like what was included in the 535g weight of the Mahle assemblies. They even were pre-weighed from Wiseco and the pistons all were marked with the weight on the back side. This was a good chance to test my scale compared to the scales that Wiseco uses. As seen in this pic, the weight was dead nuts on!
These Wiseco’s are a true work of art! They were polished on the bottom and top, and the sides have a very nice coating on them with the Wiseco logo. I’m very impressed by the workmanship of these beauties! Here is a shot of one of the old Mahles compared to one of the new Wisecos
After the new piston assemblies were balanced with the pins, locks, and rings, it was time to move onto checking the clearances on the main caps and journals of the crank. Green plastigage revealed that all the clearances were between .0015 and .0020
After all the clearances were verified good to go, the crank was re-installed for good this time.
And checking the end play resulted in about .0030
06-29-2009, 07:36 PM
#3
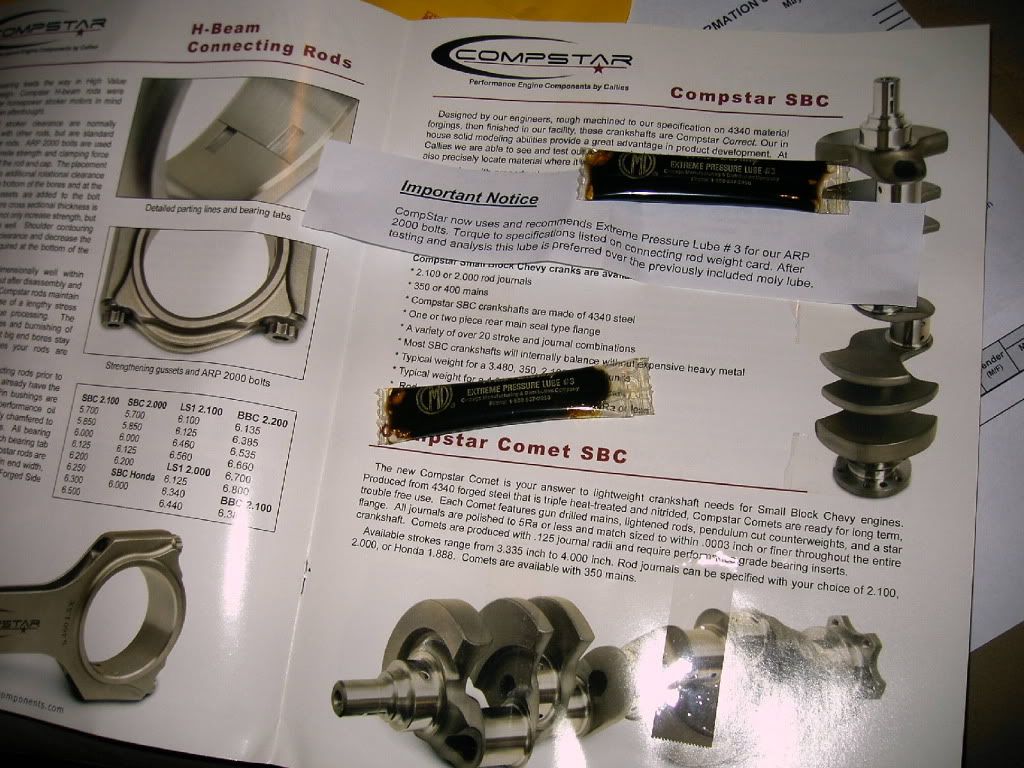
I was now ready for the installation of the piston/ rod assemblies. I know the correct method for doing this is to measure the bolt stretch on the rod bolts, but I didn’t have a good way to do it because the dial indicator I had wouldn’t work. I was prepared to buy the tool, but after visiting Compstar’s website, I saw that they had torque specs, but the catch was the torque specs on their page were to be used only in conjunction with their lube. http://www.compstarcomponents.com/co.../bolt-info.htm So I called up Callies to order some of the EP3 lube, and the guy I talked to was nice enough to send me a sample package taped to the inside of a catalog for no charge! Thanks Callies! Wonderful company in my book for sure! Couple days later, this was in my mailbox:
And now my build could continue. Here are the pistons waiting to go in.
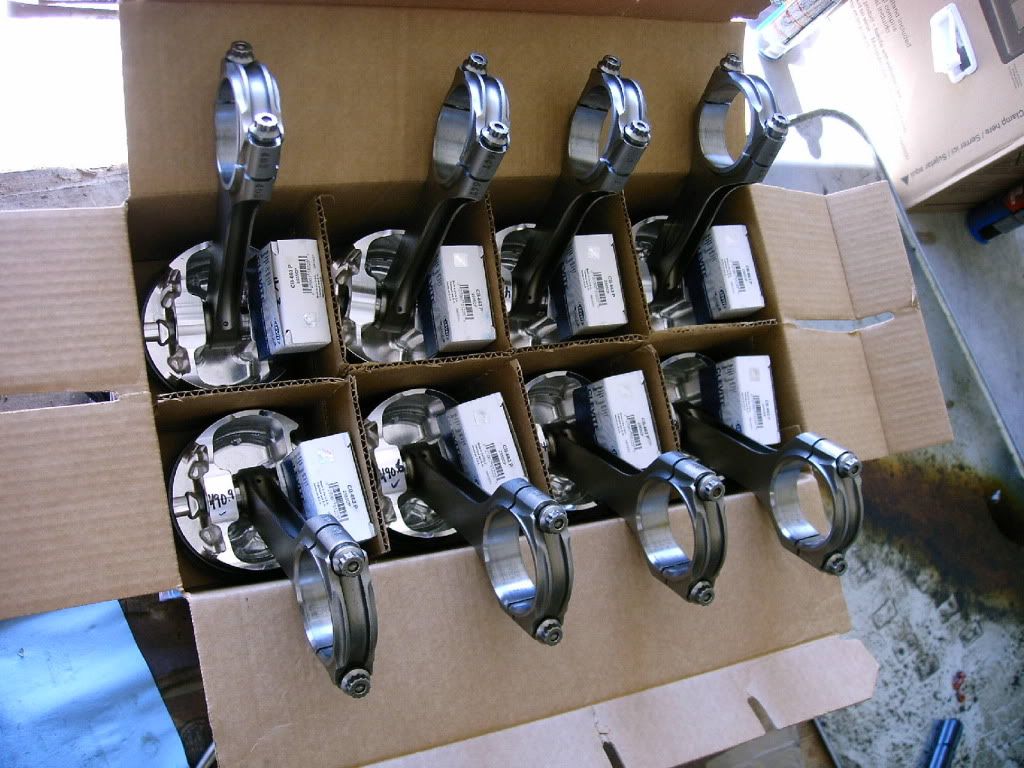
One last look at these fine components before installation
Number 7 going in here.
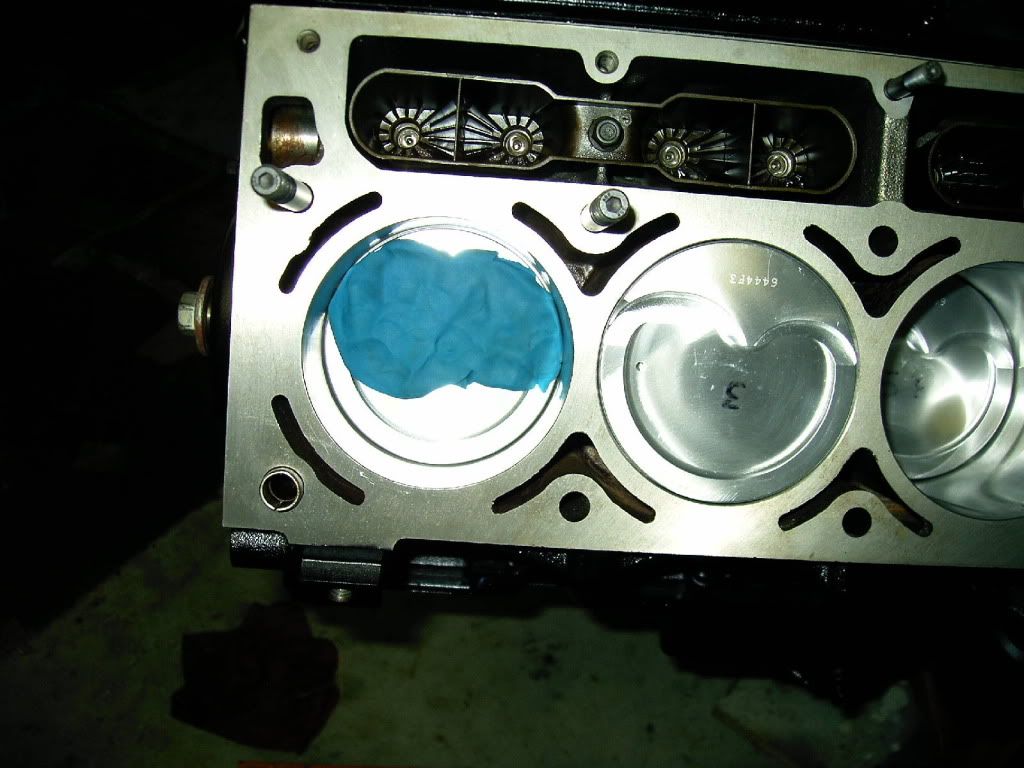
Funny thing about the pistons.. you may realize the crossed out 4. That’s because initially when I was balancing the pistons, I had them all layed out and I noticed that the dots were not facing forward on all the pistons. Oooops! So I had to rebalance them. Can anyone tell me why the dots have to face forward? I understand there is a definite up and down, but why is it that they have to be facing a certain way? They seem to be symmetrical in every other way besides that dot. The Mahles didn’t have dots on them at all..
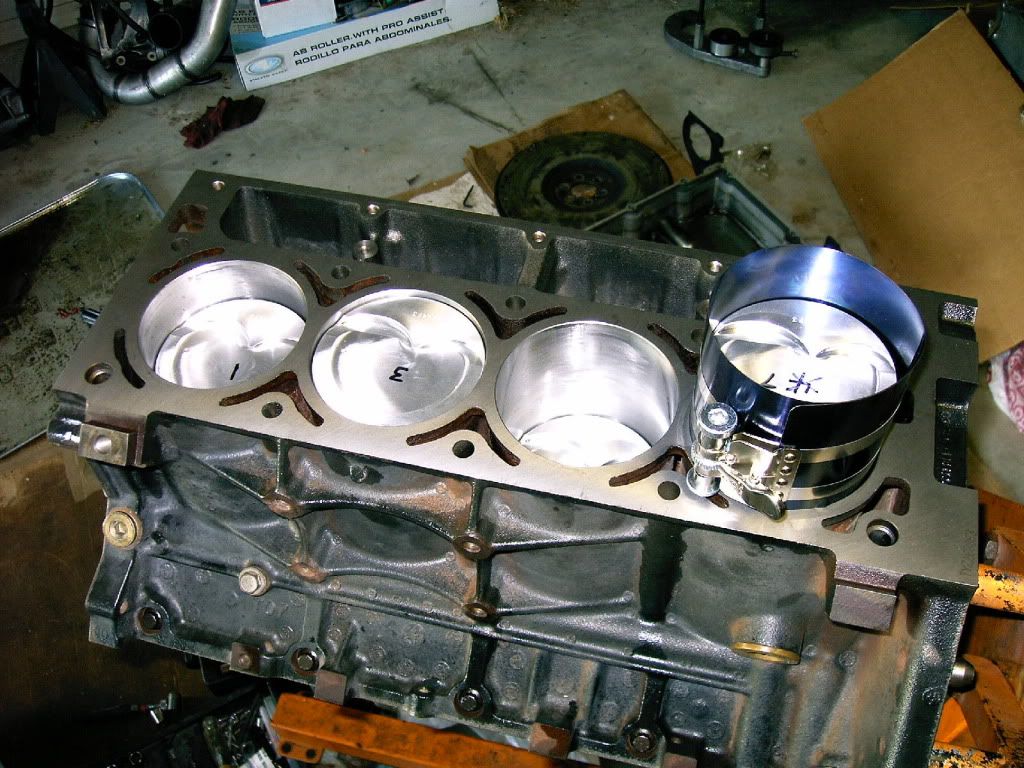
Anywayz, pistons were all in, and I had a completed short block at this point!
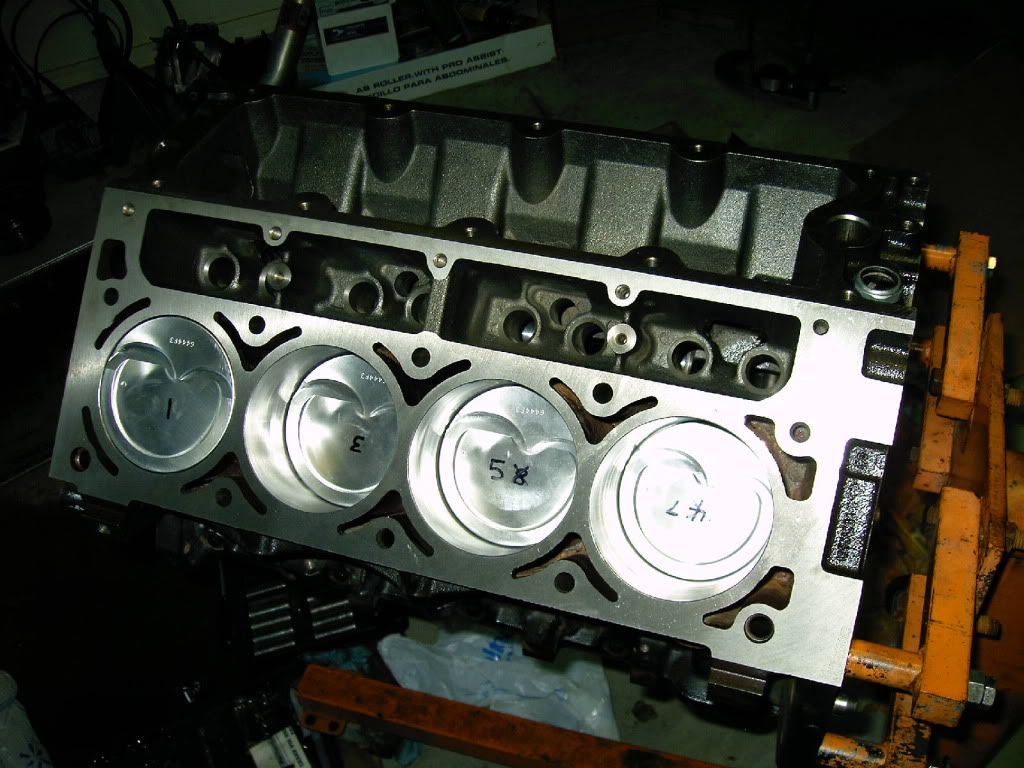
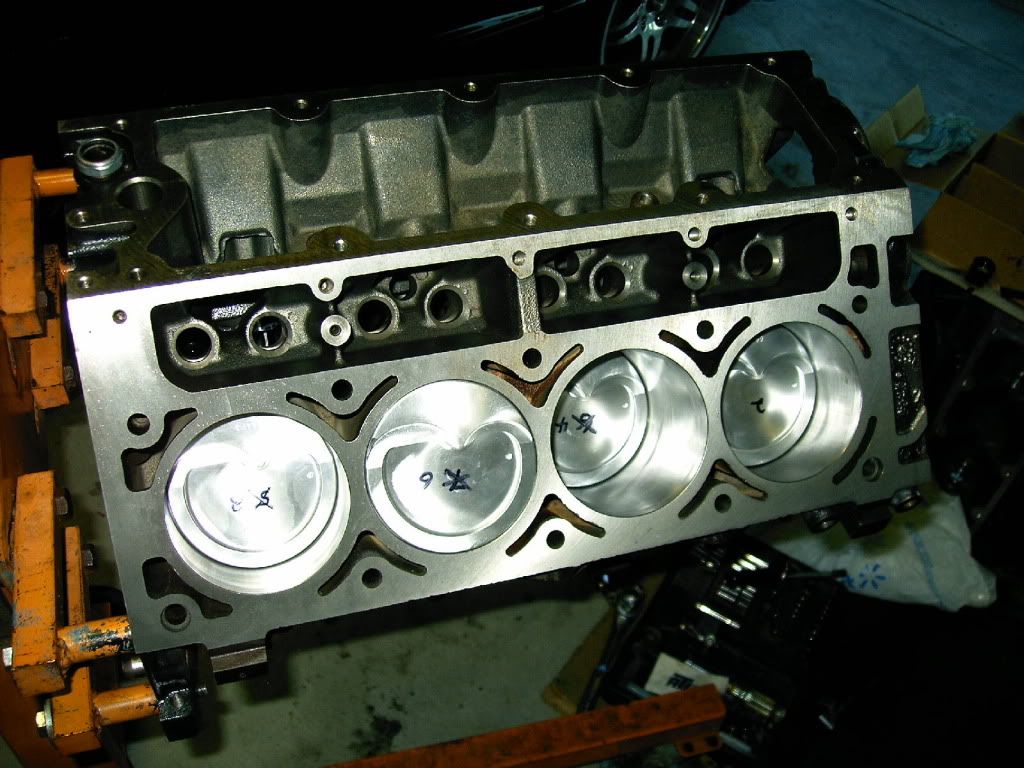
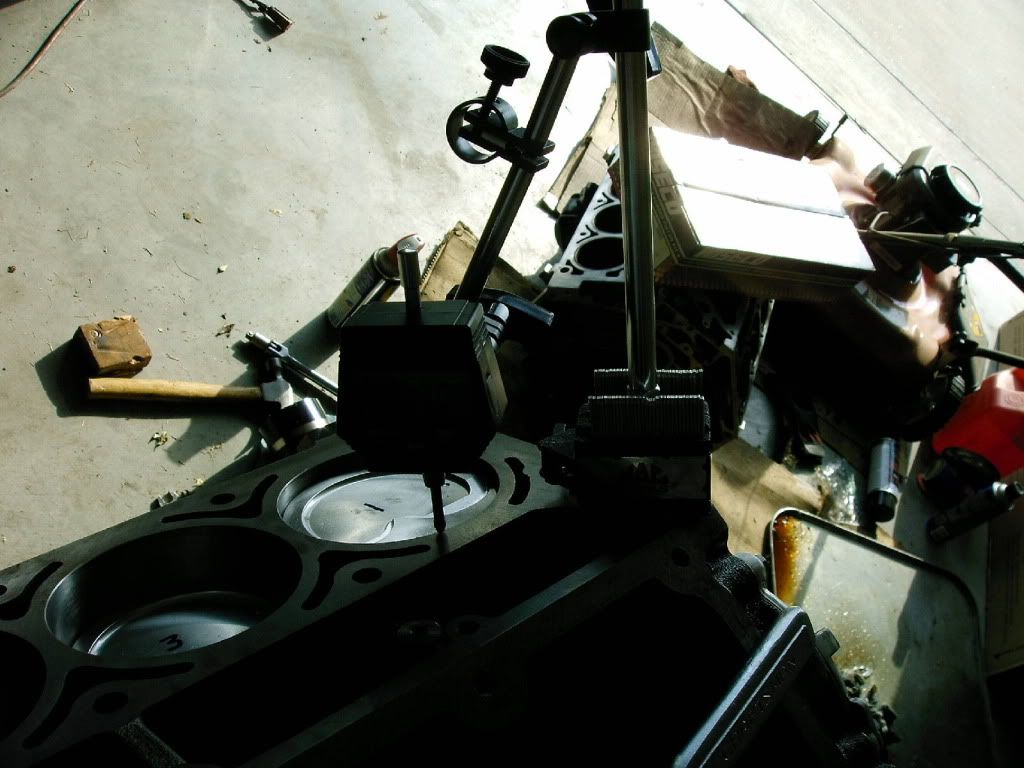
Checked the out of hole measurement, and it was .0045” (I know this pic sux, but you get the idea)
Thanks Callies! Wonderful company in my book for sure! Couple days later, this was in my mailbox:And now my build could continue. Here are the pistons waiting to go in.
One last look at these fine components before installation
Number 7 going in here.
Funny thing about the pistons.. you may realize the crossed out 4. That’s because initially when I was balancing the pistons, I had them all layed out and I noticed that the dots were not facing forward on all the pistons. Oooops!
So I had to rebalance them. Can anyone tell me why the dots have to face forward? I understand there is a definite up and down, but why is it that they have to be facing a certain way? They seem to be symmetrical in every other way besides that dot. The Mahles didn’t have dots on them at all..Anywayz, pistons were all in, and I had a completed short block at this point!
Checked the out of hole measurement, and it was .0045” (I know this pic sux, but you get the idea)
06-29-2009, 07:36 PM
#4
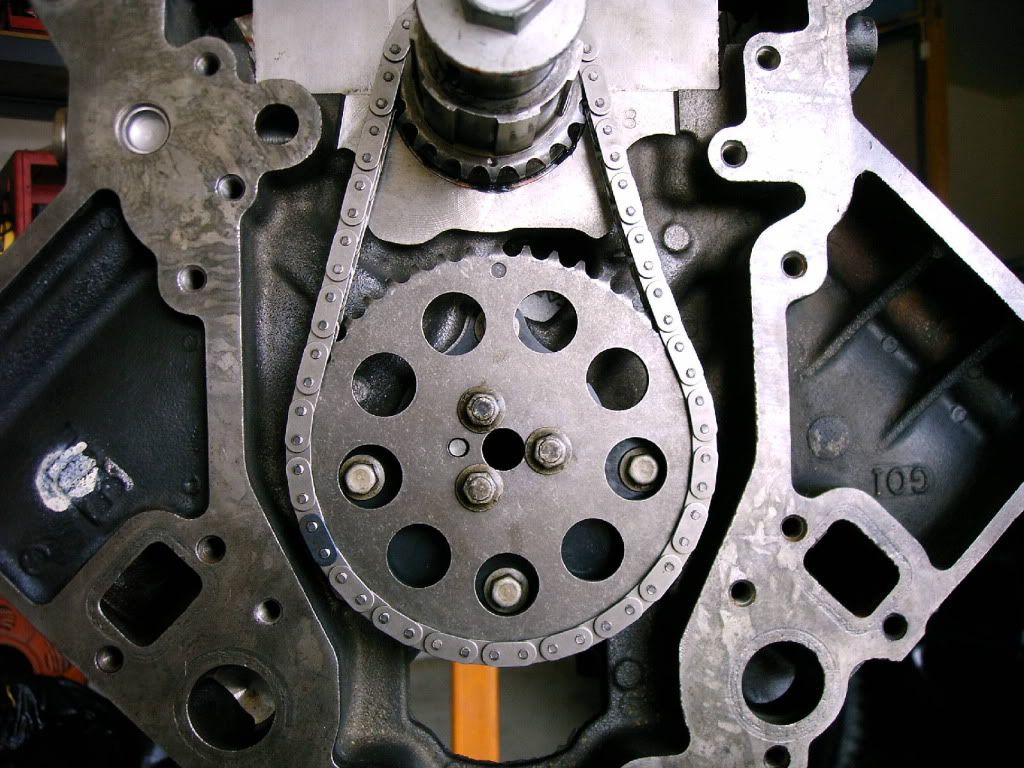
Next was the install of the cam and the timing gear. (Comp SC2 cam from speed inc. 224/232 and .581/.595 114+2 -which is the same cam I had in the 346, and LS2 chain -again, virtually brand new and reused from the 346) dot to dot.
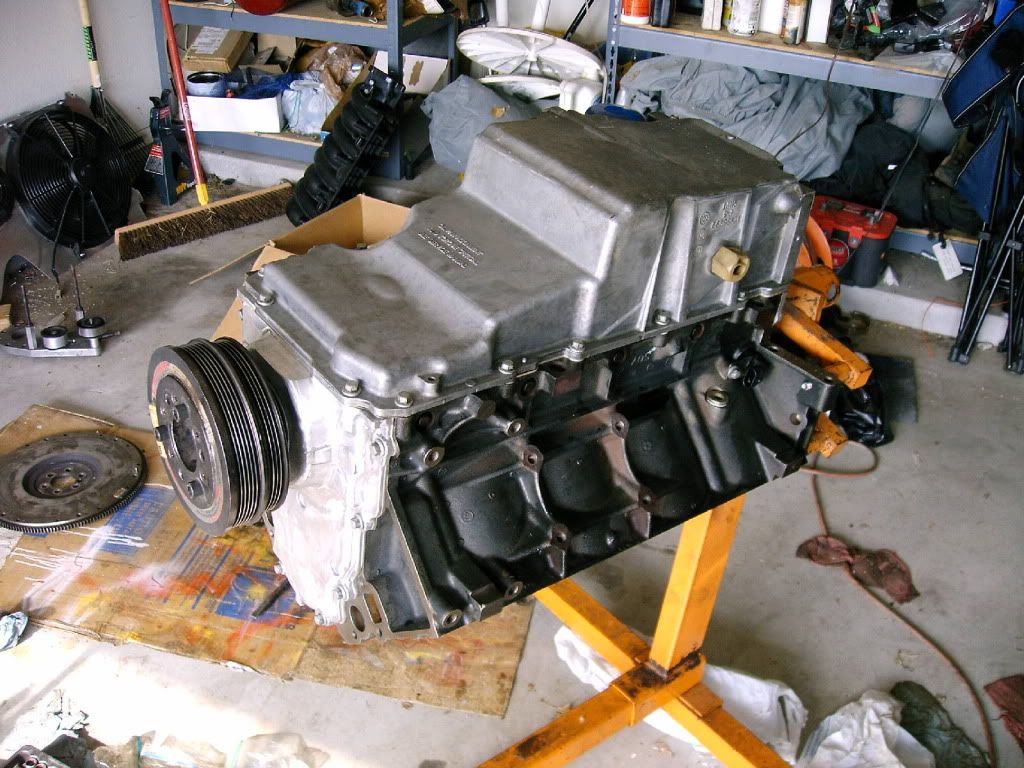
Then comes the windage tray, oil pump, and pickup tube:
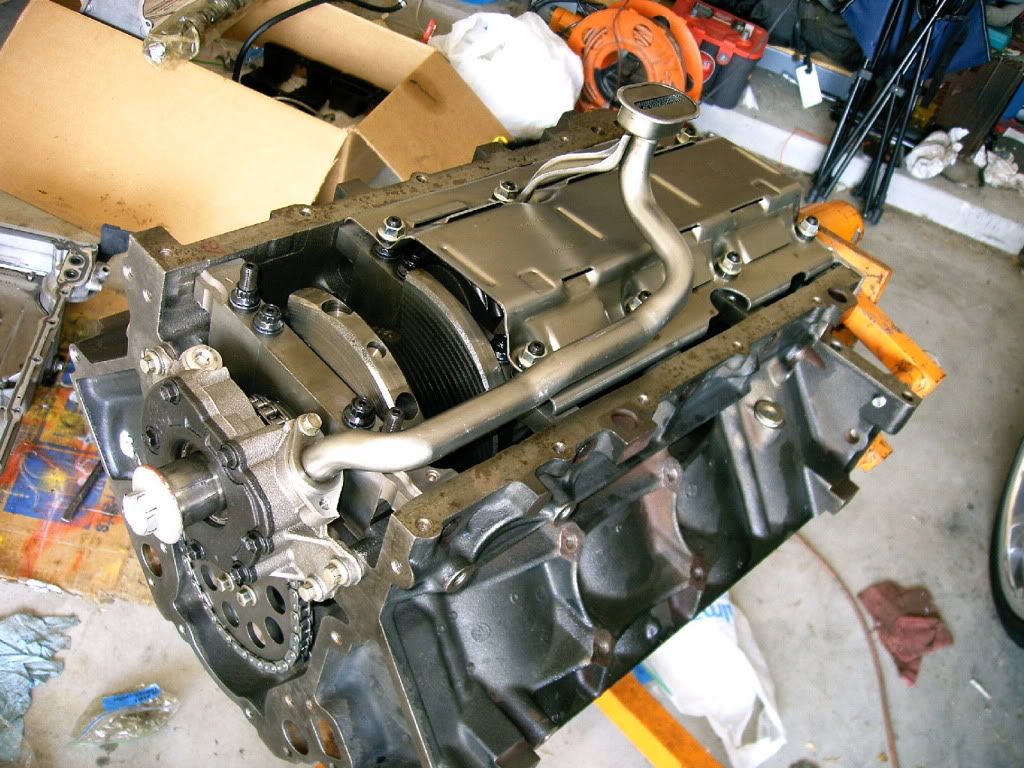
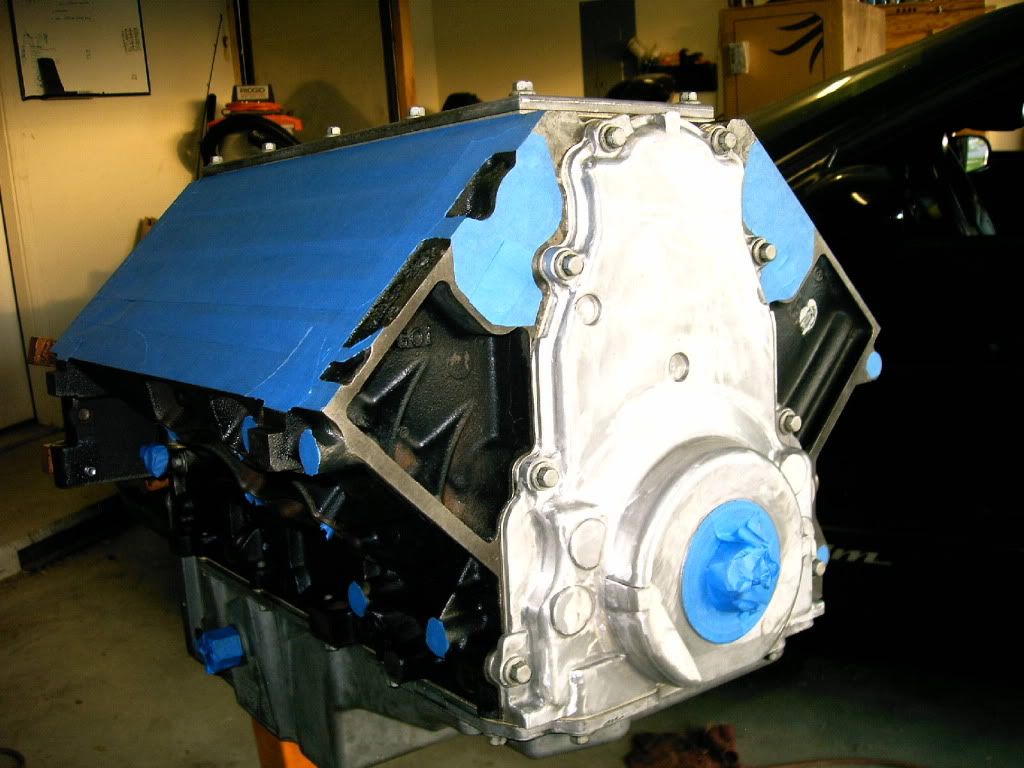
Oil pan and front and rear covers next
Now its time for some paint!
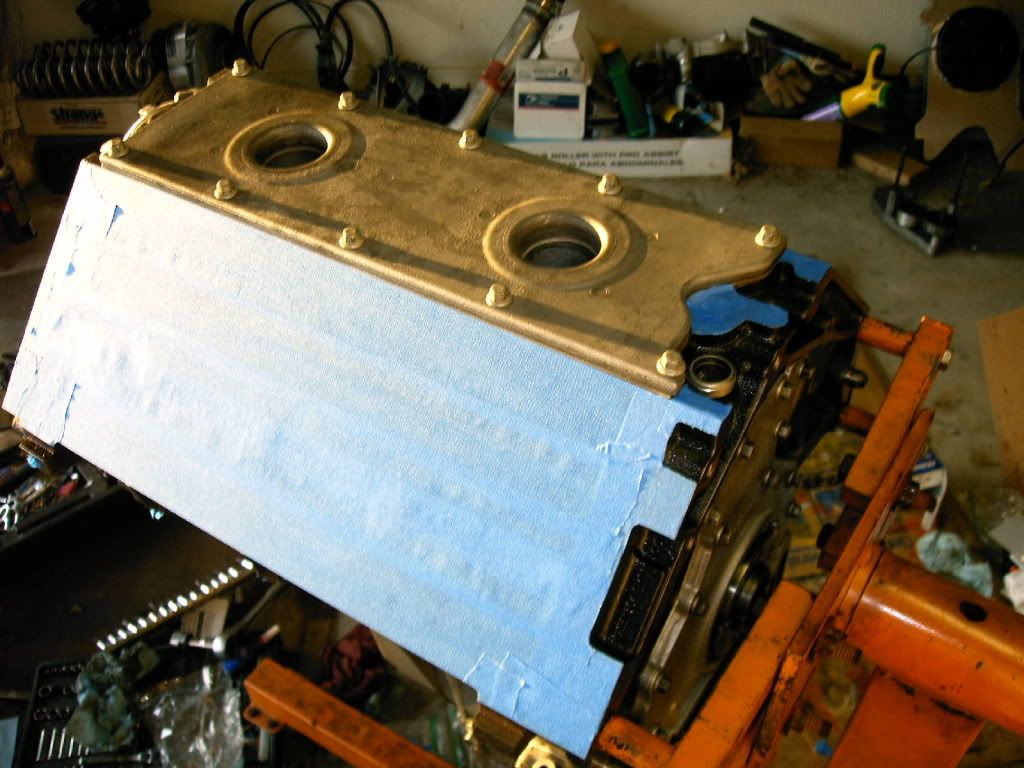
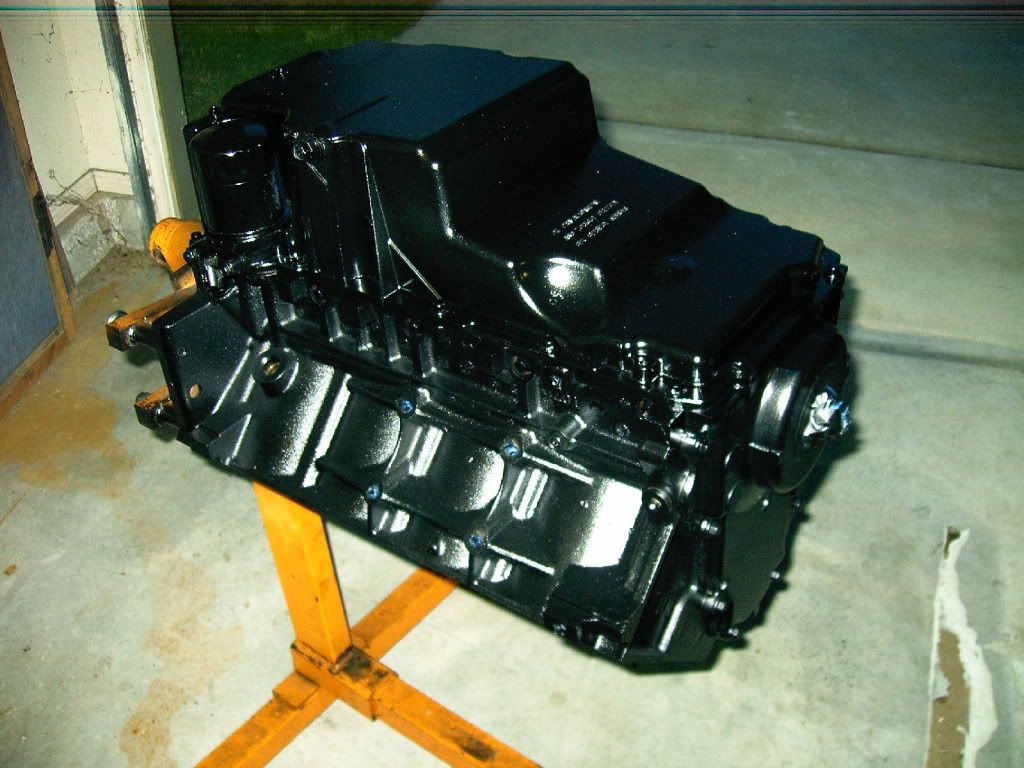
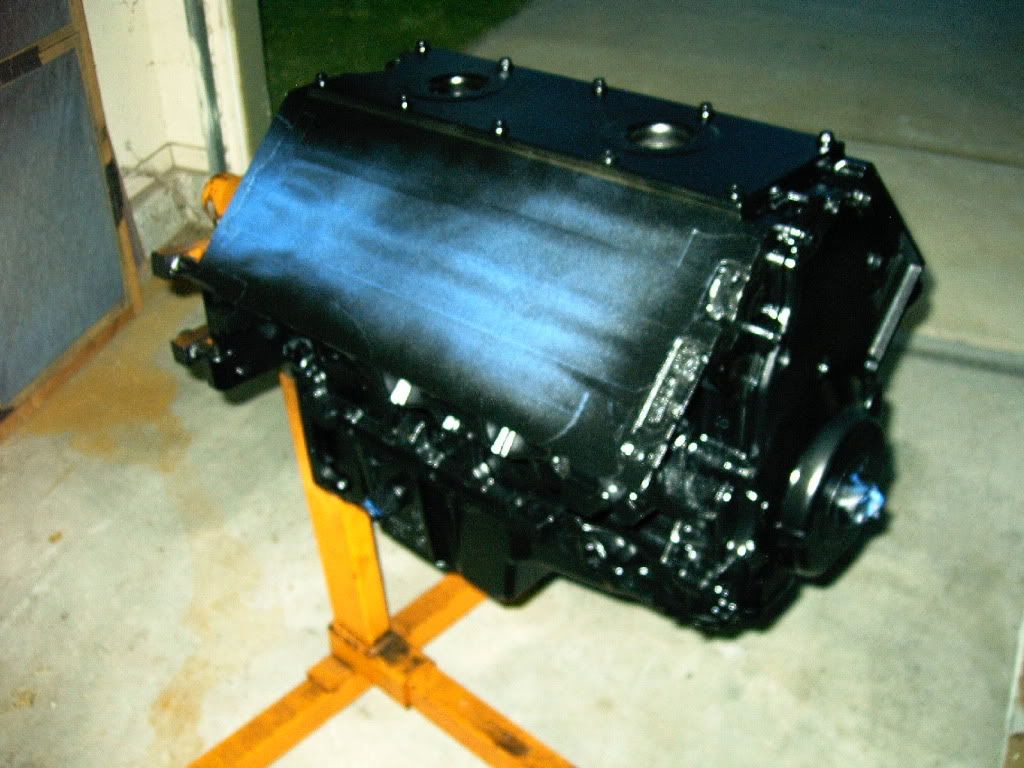
Unmasked.. Aint she purdy!!!!
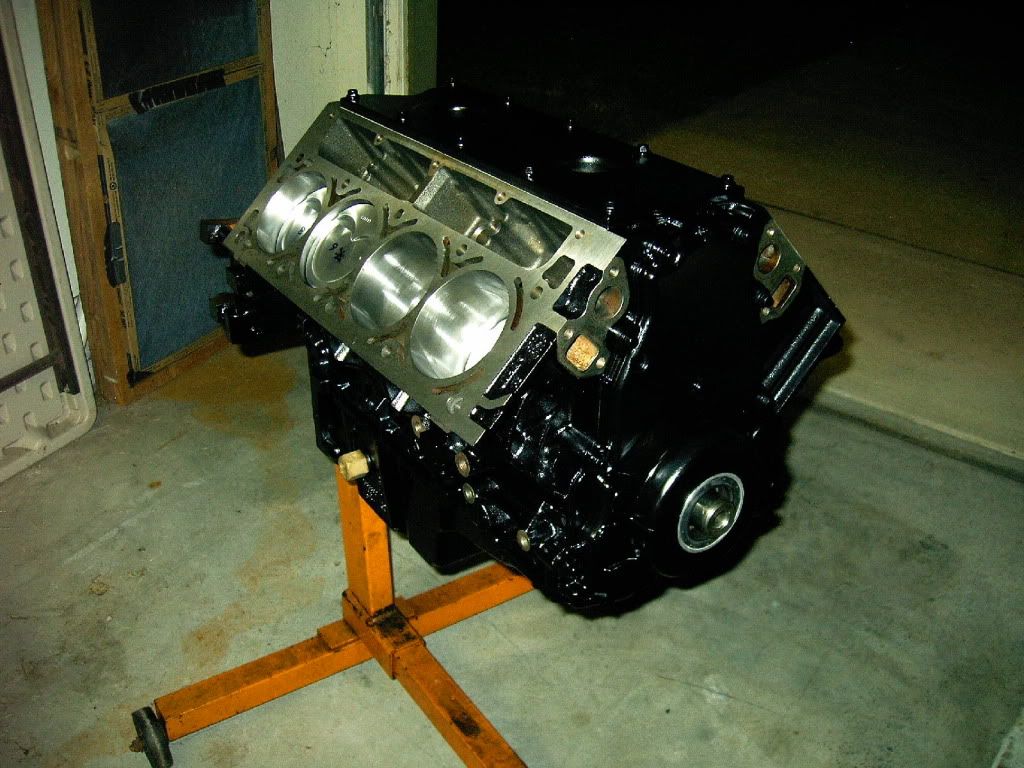
High hopes for this build!!!
Then comes the windage tray, oil pump, and pickup tube:
Oil pan and front and rear covers next
Now its time for some paint!
Unmasked.. Aint she purdy!!!!
High hopes for this build!!!
06-29-2009, 07:37 PM
#5
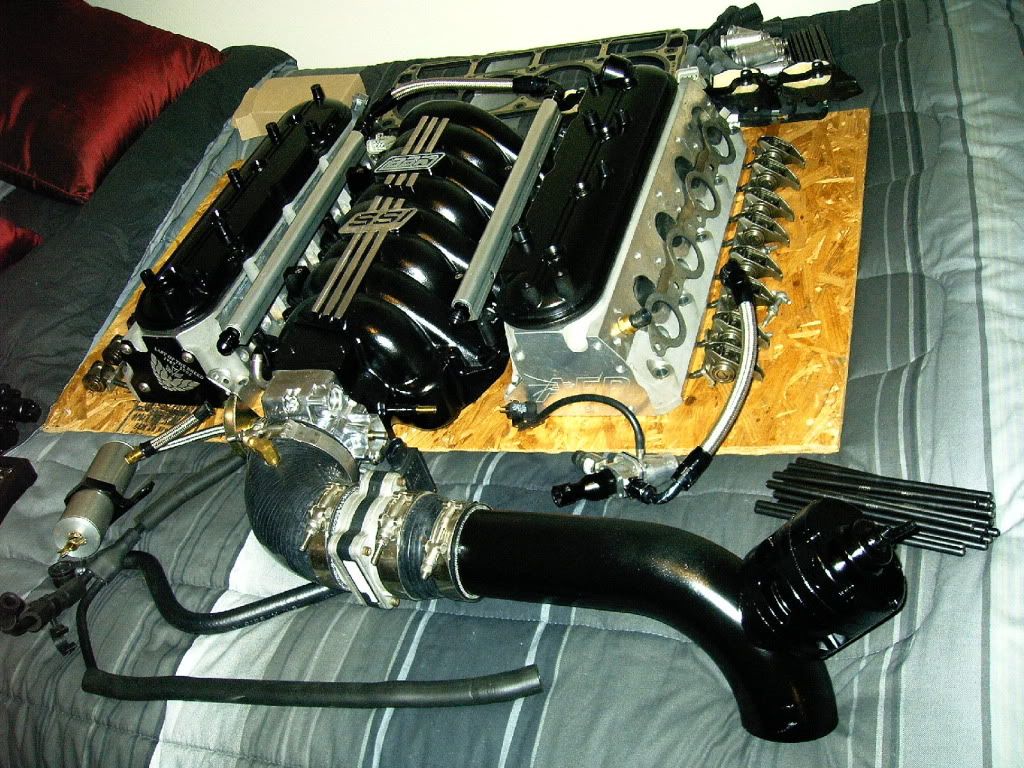
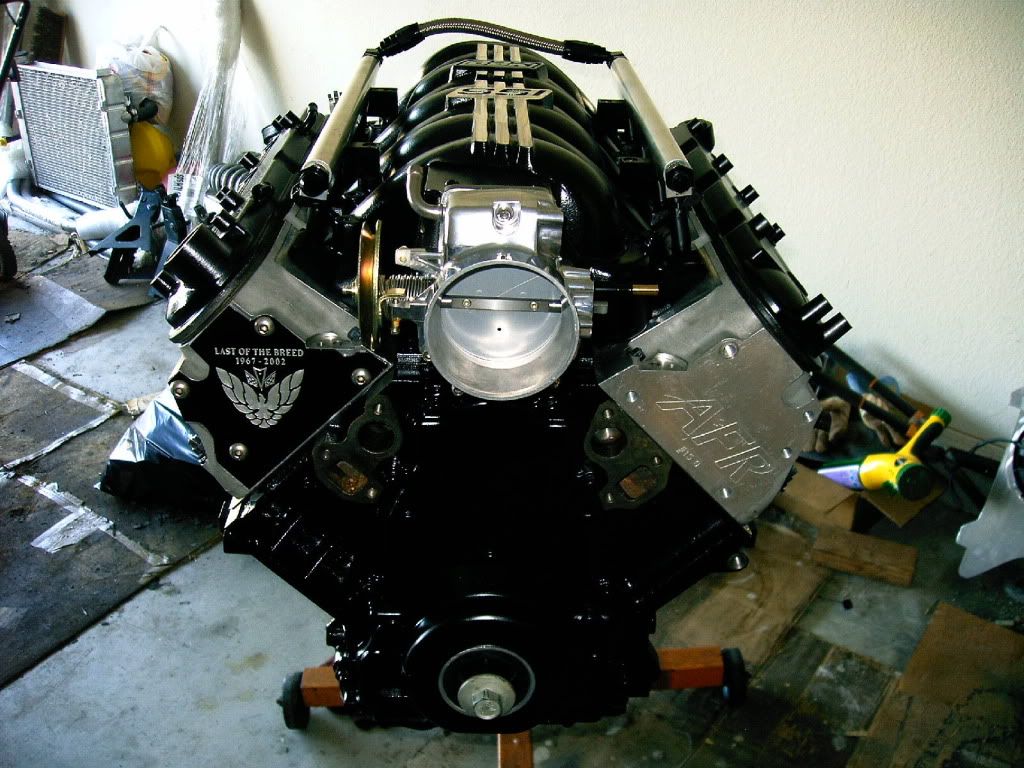
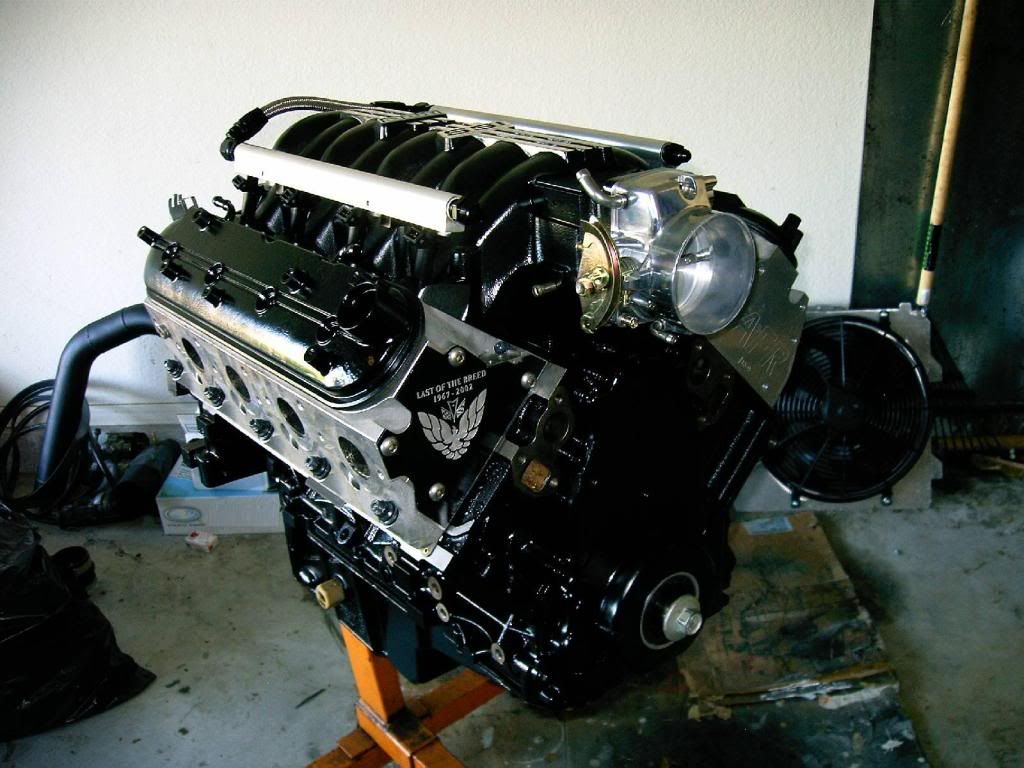
Also painted the valve covers while I was at it.

The top end just chillin in the guest bedroom waiting its turn to be installed.. Life of a bachelor is great!
I was all out of clay, so I used playdough to measure my PTV clearance
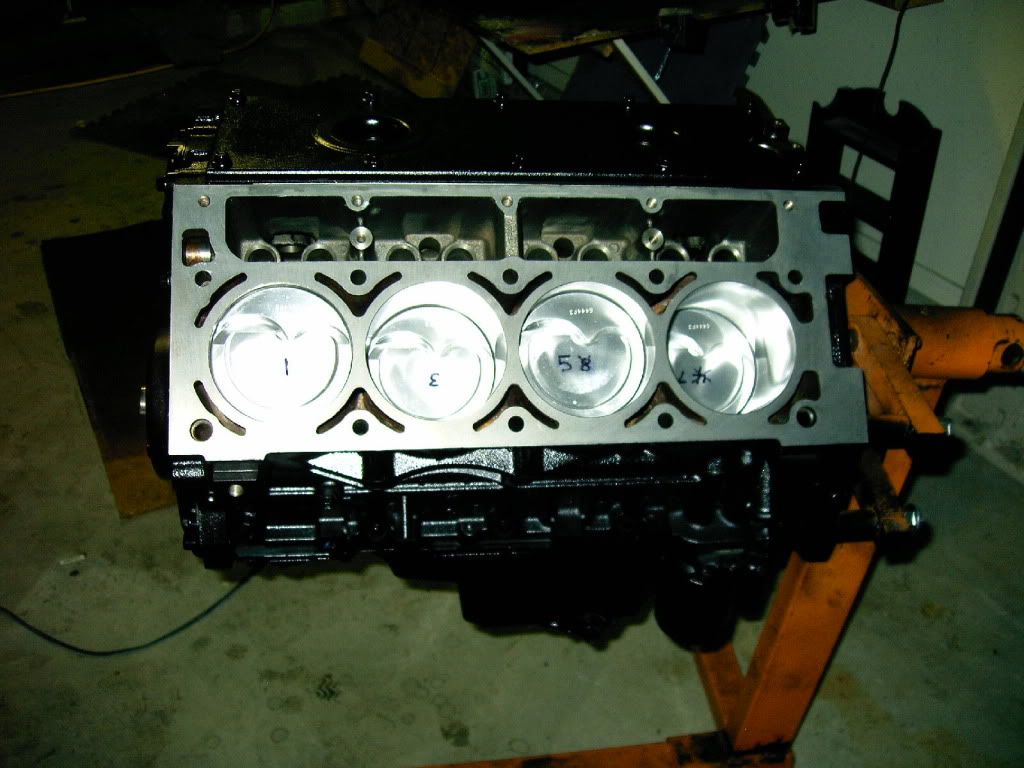
Heads are installed! I wanted to use LS9 7 layer gaskets for this build, but they are on national backorder right now, so I went with the 6.2L 5 layer gaskets. They are close to the chambers on the AFR 225 72cc ‘big bore’ heads, but they barely fit around them. This may be due to the fact mine have been milled a few times. The volume of the chambers are now closer to 70.5cc from the original 72 they started out at. After its all said and done, this setup should result in about 9.2:1 SCR.
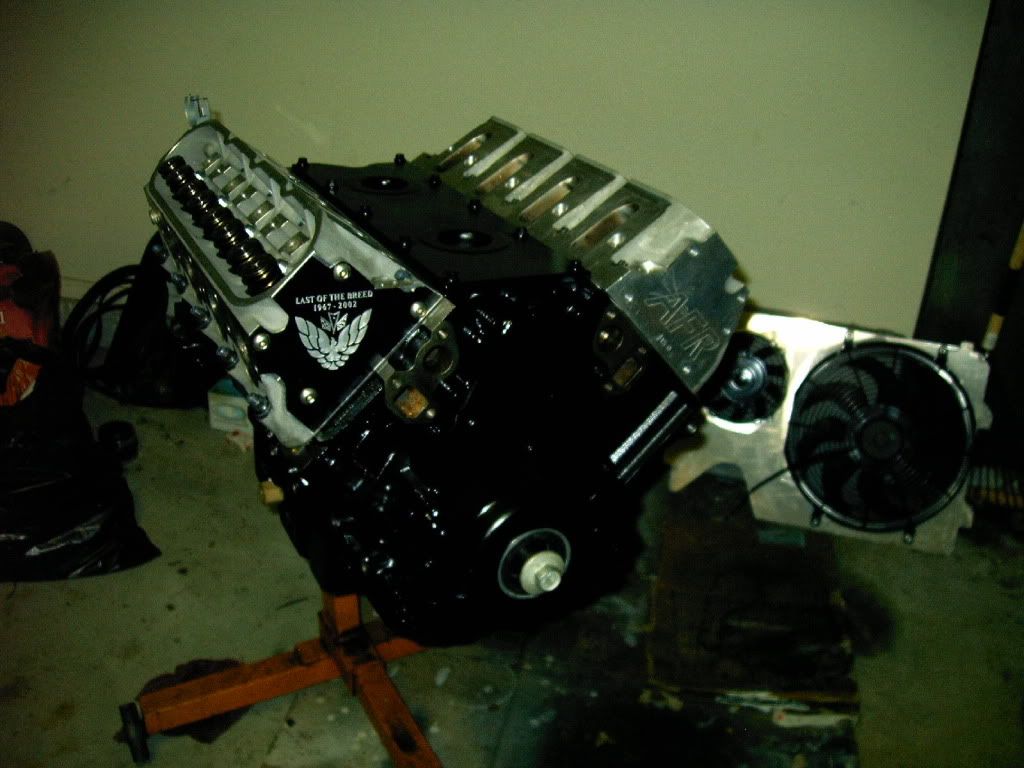
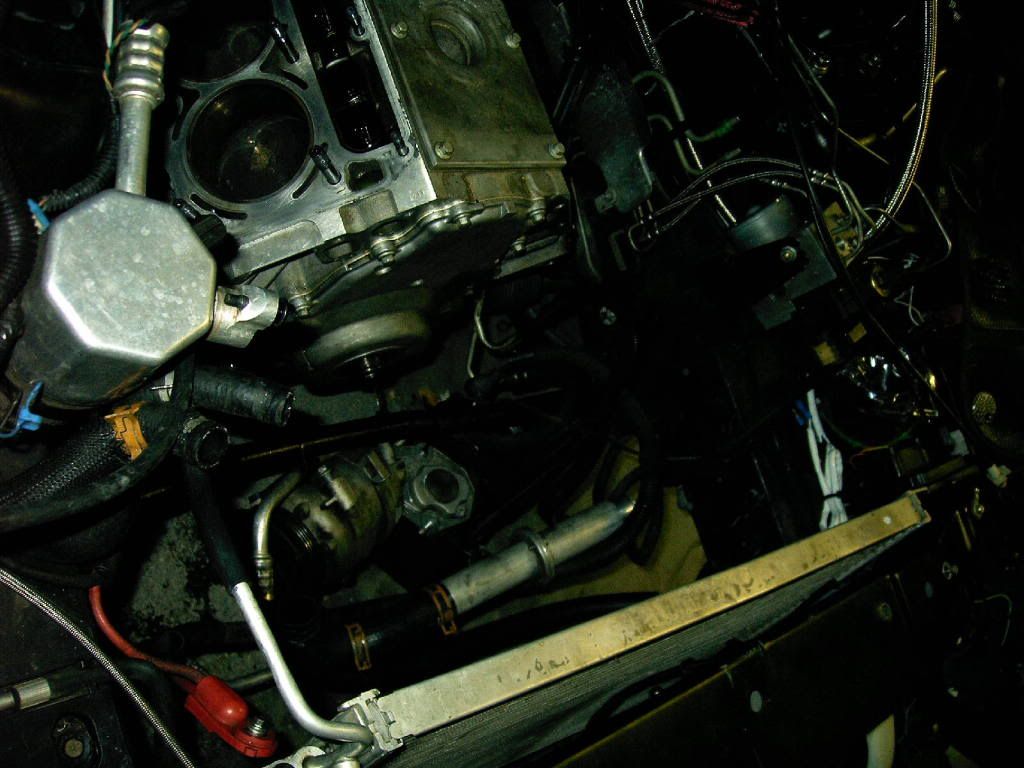
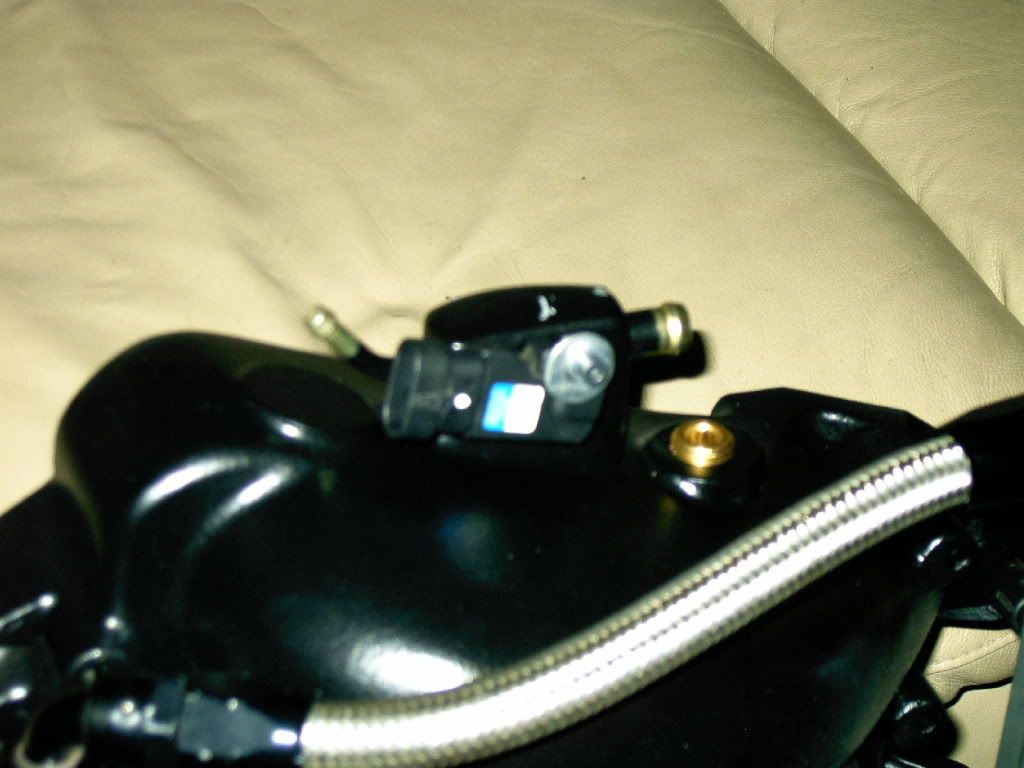
Of course, I had to throw the new manifold on just to get a few pics!
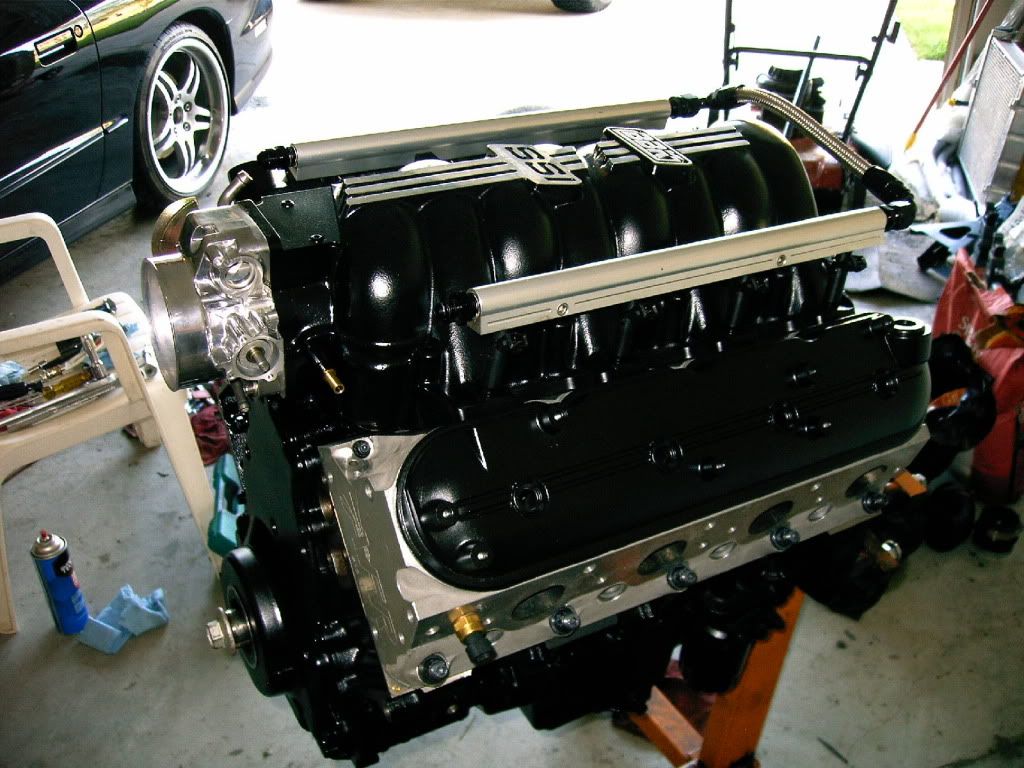
The BBK manifold has a tapped provision in the back for a screw by the MAP sensor, so I used that screw with a couple washers to hold down the MAP.
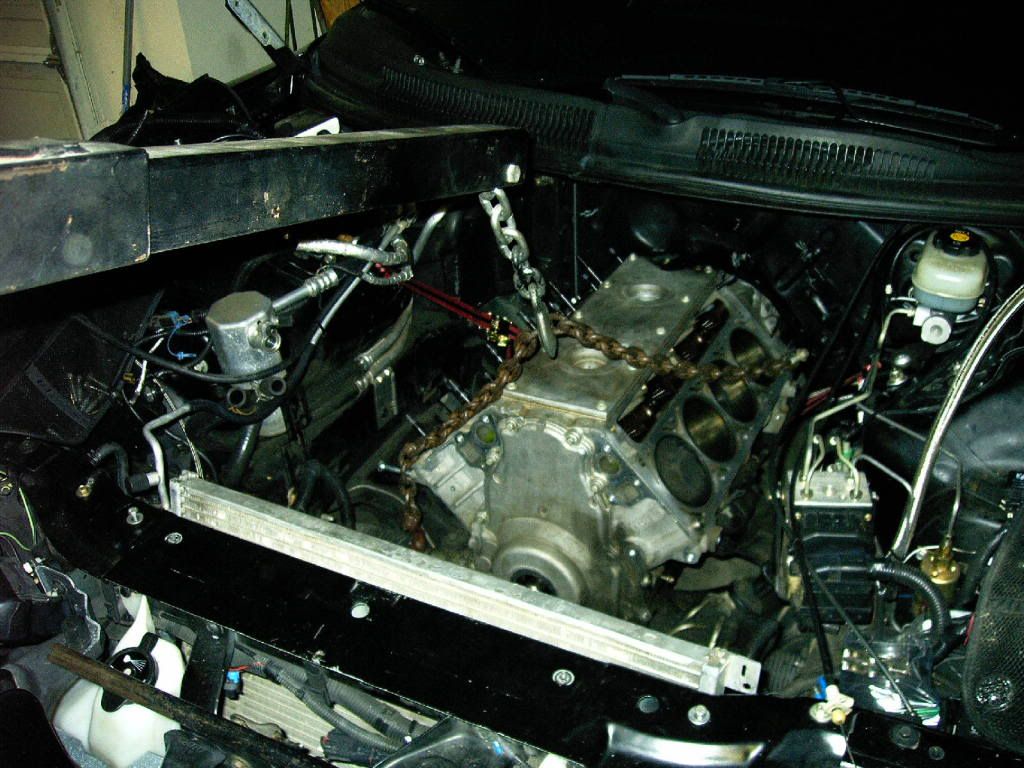
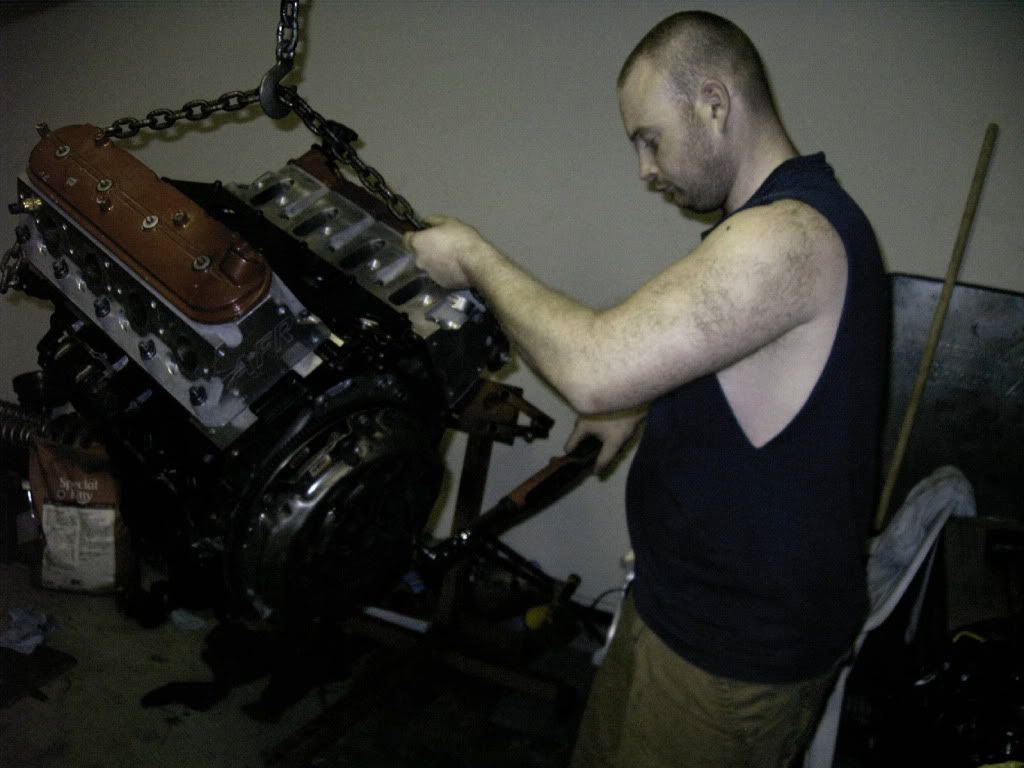
Called my brother over again to help me put the engine in Saturday night. Here he is using his super duty beeping/ vibrating Snap-On torque wrench to secure the pressure plate.
I put some extra valve covers on that will eventually be used on my LS7 transplant for my 69 vette, but for now they are just a spare set of crappy red, so they were perfect for use in installing the 370 into my TA since I didn’t want to scuff up the newly painted black ones.
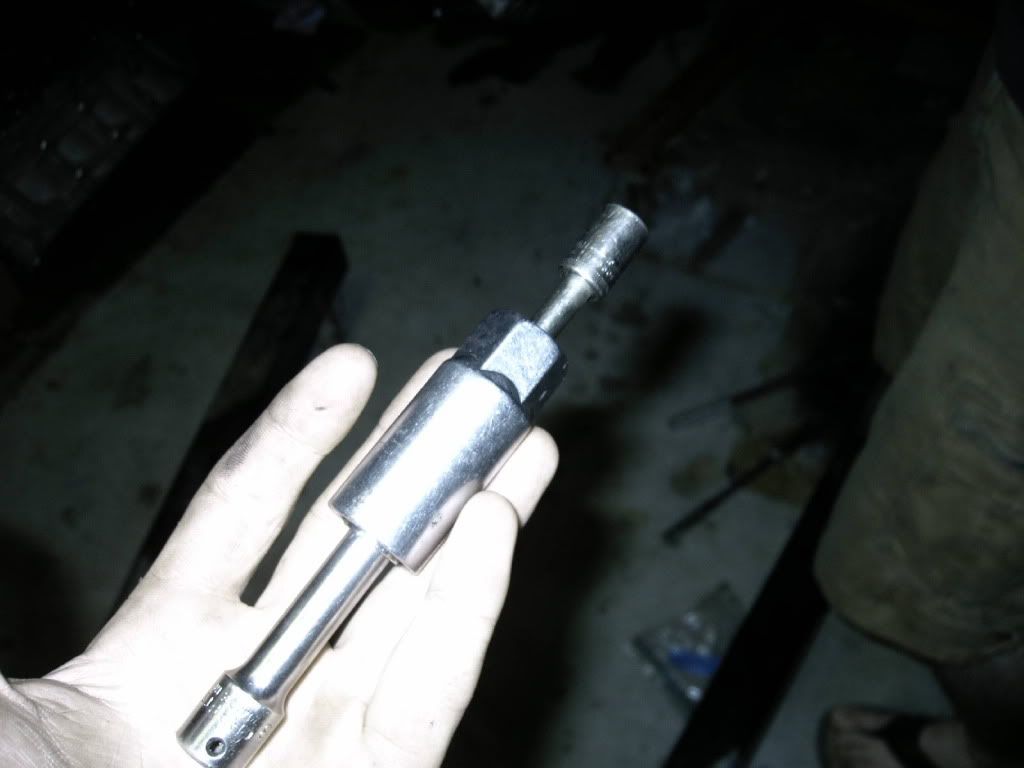
What do you do at 11:30pm when all the auto parts stores are closed and you don’t have a clutch alignment tool? You improvise and make your own
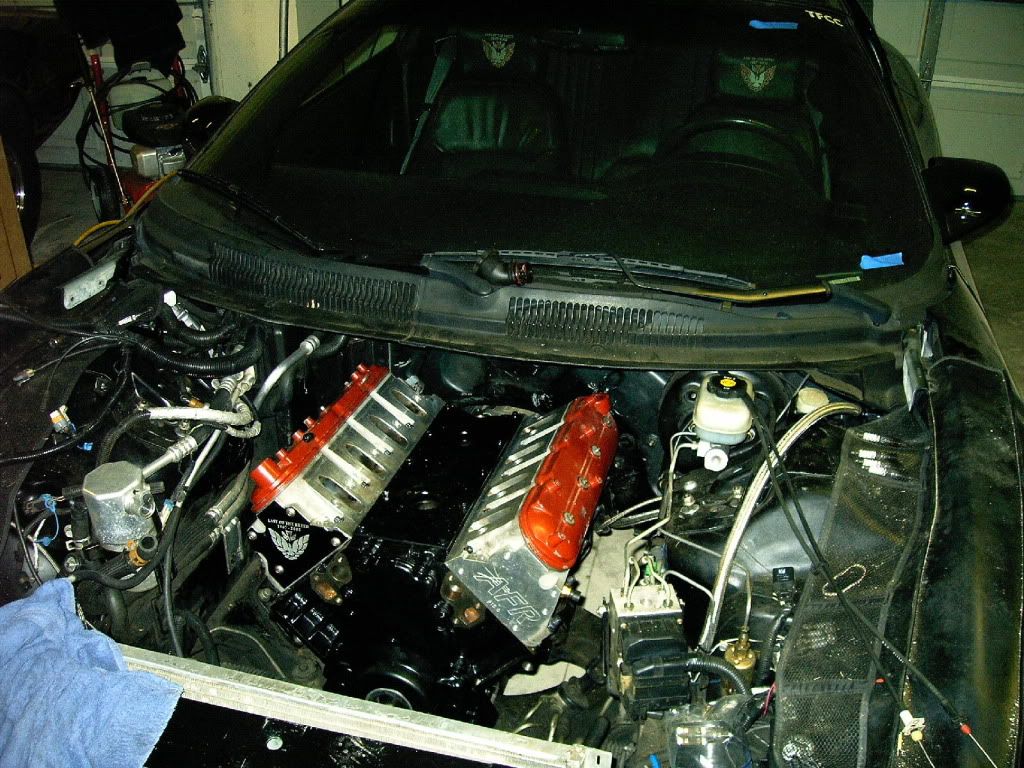
And fast forward a few hours and some blood and sweat, and the engine is in the car finally!
More to come soon.
The top end just chillin in the guest bedroom waiting its turn to be installed.. Life of a bachelor is great!
I was all out of clay, so I used playdough to measure my PTV clearance
Heads are installed! I wanted to use LS9 7 layer gaskets for this build, but they are on national backorder right now, so I went with the 6.2L 5 layer gaskets. They are close to the chambers on the AFR 225 72cc ‘big bore’ heads, but they barely fit around them. This may be due to the fact mine have been milled a few times. The volume of the chambers are now closer to 70.5cc from the original 72 they started out at. After its all said and done, this setup should result in about 9.2:1 SCR.
Of course, I had to throw the new manifold on just to get a few pics!
The BBK manifold has a tapped provision in the back for a screw by the MAP sensor, so I used that screw with a couple washers to hold down the MAP.
Called my brother over again to help me put the engine in Saturday night. Here he is using his super duty beeping/ vibrating Snap-On torque wrench to secure the pressure plate.
I put some extra valve covers on that will eventually be used on my LS7 transplant for my 69 vette, but for now they are just a spare set of crappy red, so they were perfect for use in installing the 370 into my TA since I didn’t want to scuff up the newly painted black ones.
What do you do at 11:30pm when all the auto parts stores are closed and you don’t have a clutch alignment tool? You improvise and make your own
And fast forward a few hours and some blood and sweat, and the engine is in the car finally!
More to come soon.
 06-29-2009, 08:01 PM
#7
Yea, the valve reliefs just determine which way is up and down tho. Not forward and rear.. If the piston has the valve reliefs on the correct side (on the top) they should be the same no matter which side of the engine they are on. The heads can go on either side of the engine, so the pistons should too I would think? 
Last edited by ChevyChad; 06-29-2009 at 08:40 PM.
Trending Topics
06-29-2009, 08:10 PM
#8
cool! Nice write-up Chad!
__________________

Featuring 6 different turbo kits for your F-body!
Check us out on Facebook at: www.facebook.com/HuronSpeed
Featuring 6 different turbo kits for your F-body!
Check us out on Facebook at: www.facebook.com/HuronSpeed
06-29-2009, 08:51 PM
#10
Thanks guys. I know there are more details not posted here, and that I didnt get pics of, but my intentions weren't to make a 'how to' thread or anything, its just another 'my build' thread
I still have a ways to go, but hopefully I can get it all put back together in the next week if I chip away a little bit every night after work. Still on the to-do list is clean all the accessories and brackets, then reinstall them. I also want to paint a few more odds and ends too. I'm glad the major things are over with now though. Now I can concentrate on the fine details.
I still have a ways to go, but hopefully I can get it all put back together in the next week if I chip away a little bit every night after work. Still on the to-do list is clean all the accessories and brackets, then reinstall them. I also want to paint a few more odds and ends too. I'm glad the major things are over with now though. Now I can concentrate on the fine details.
06-29-2009, 09:34 PM
#11
i really dig the painted engine, it looks great!
__________________
Featuring 6 different turbo kits for your F-body!
Check us out on Facebook at: www.facebook.com/HuronSpeed
Featuring 6 different turbo kits for your F-body!
Check us out on Facebook at: www.facebook.com/HuronSpeed
06-29-2009, 09:42 PM
#12
Yea, the valve reliefs just determine which way is up and down tho. Not forward and rear.. If the piston has the valve reliefs on the correct side (on the top) they should be the same no matter which side of the engine they are on. The heads can go on either side of the engine, so the pistons should too I would think?
06-29-2009, 09:50 PM
#14
That is correct about the pistons being the same no matter what side they are on, but you asked why it would matter etc... I can't see the pictures so I can't see them (I'm at work) either another thing is, I know it doesn't apply to you, but some of the skirts have to be notched to clear the reluctor wheels on number seven piston etc... GL! I am sure it will be good. And another thing I have seen very reputible shops put pistons in upside down and it ran fine and didn't know any differnent untill I tore it apart LOL!
 06-30-2009, 06:37 AM
#18
So this is what you have been up to lately huh? ****** NICE homie. Can't wait to hear her growl & take a ride. Everything looks very clean & I really dig the nice new engine paint too. I was really plotting on painting my engine bay gloss black & goin with the same engine color theme you used. And as I thought, it looks pimp. That BBK intake looks really good man & you won't be breaking it, LOL.
Lookin forward to seeing what she lays down too. I can't imagine you not hitting 800hp with a 370, F1, proper fuel system & meth. Shouldn't be too hard with that blower since you were at 633 on the D1 & 347ci.
Lookin forward to seeing what she lays down too. I can't imagine you not hitting 800hp with a 370, F1, proper fuel system & meth. Shouldn't be too hard with that blower since you were at 633 on the D1 & 347ci.
06-30-2009, 07:33 AM
#19
Thanks guys
scapaldo- Thats a good question. I didn't notice the pins being offset, but I wasn't looking for that either. Thats a great suggestion though. I'd like to find out from Wiseco, it really is kinda buggin me.
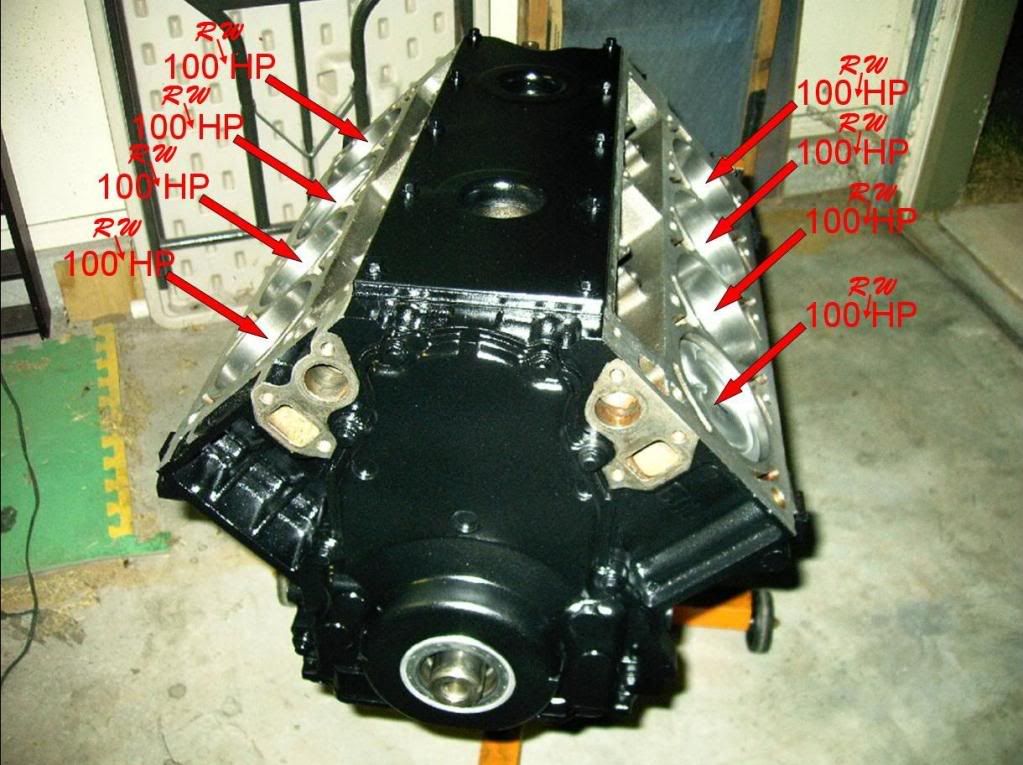
Yep, I'd like to hit 800rwhp thats my goal. We will see if it makes it. Oh, and Mike- it made 632 rwhp with the P1SC on a forged 346 and stock truck heads. I would hope that with 24 more cubes, added methanol kit, AFR heads, and 325 more cfm from the F1 that I could gain 168rwhp more too. Only thing that may hold me back is the 60# injectors. I may have to step up to some of the new 79# high impedance injectors if these don't cut it. We will see how things look on the dyno.
scapaldo- Thats a good question. I didn't notice the pins being offset, but I wasn't looking for that either. Thats a great suggestion though. I'd like to find out from Wiseco, it really is kinda buggin me.
Yep, I'd like to hit 800rwhp thats my goal. We will see if it makes it. Oh, and Mike- it made 632 rwhp with the P1SC
on a forged 346 and stock truck heads. I would hope that with 24 more cubes, added methanol kit, AFR heads, and 325 more cfm from the F1 that I could gain 168rwhp more too. Only thing that may hold me back is the 60# injectors. I may have to step up to some of the new 79# high impedance injectors if these don't cut it. We will see how things look on the dyno.
06-30-2009, 07:44 AM
#20
Thanks guys
scapaldo- Thats a good question. I didn't notice the pins being offset, but I wasn't looking for that either. Thats a great suggestion though. I'd like to find out from Wiseco, it really is kinda buggin me.
Yep, I'd like to hit 800rwhp thats my goal. We will see if it makes it. Oh, and Mike- it made 632 rwhp with the P1SC on a forged 346 and stock truck heads. I would hope that with 24 more cubes, added methanol kit, AFR heads, and 325 more cfm from the F1 that I could gain 168rwhp more too. Only thing that may hold me back is the 60# injectors. I may have to step up to some of the new 79# high impedance injectors if these don't cut it. We will see how things look on the dyno.
scapaldo- Thats a good question. I didn't notice the pins being offset, but I wasn't looking for that either. Thats a great suggestion though. I'd like to find out from Wiseco, it really is kinda buggin me.
Yep, I'd like to hit 800rwhp thats my goal. We will see if it makes it. Oh, and Mike- it made 632 rwhp with the P1SC
on a forged 346 and stock truck heads. I would hope that with 24 more cubes, added methanol kit, AFR heads, and 325 more cfm from the F1 that I could gain 168rwhp more too. Only thing that may hold me back is the 60# injectors. I may have to step up to some of the new 79# high impedance injectors if these don't cut it. We will see how things look on the dyno.If you move up in injector let me know cause those 60#'ers would be perfect for my future plans.