MY Real Street 275 build
 09-16-2013, 05:29 PM
#221

Well, I wish I had more floor pictures to show, but I think Matt will be the first to tell you that the floor section he did today kicked his butt.
His words were, "this is the hardest part I've had to do on this cage".
Basically, if I can type this in words that make sense. We have to form an inner "box section of frame rails" made out of chromoly tubing under the car that boxes the frame rails in along with tying that box we're making back into the rocker bar of the cage and the main hoop. Then a X brace has to be fabricated in the middle of the "inner box section of frame rails" we're making out of chromoly tubing. All of this must be 1x5/8" so it's not easy to fit and route through the car when you have to go through the floor on some of it to make it legal.
I've got faith in ya Matt even if you don't!
Here are a couple pictures I got
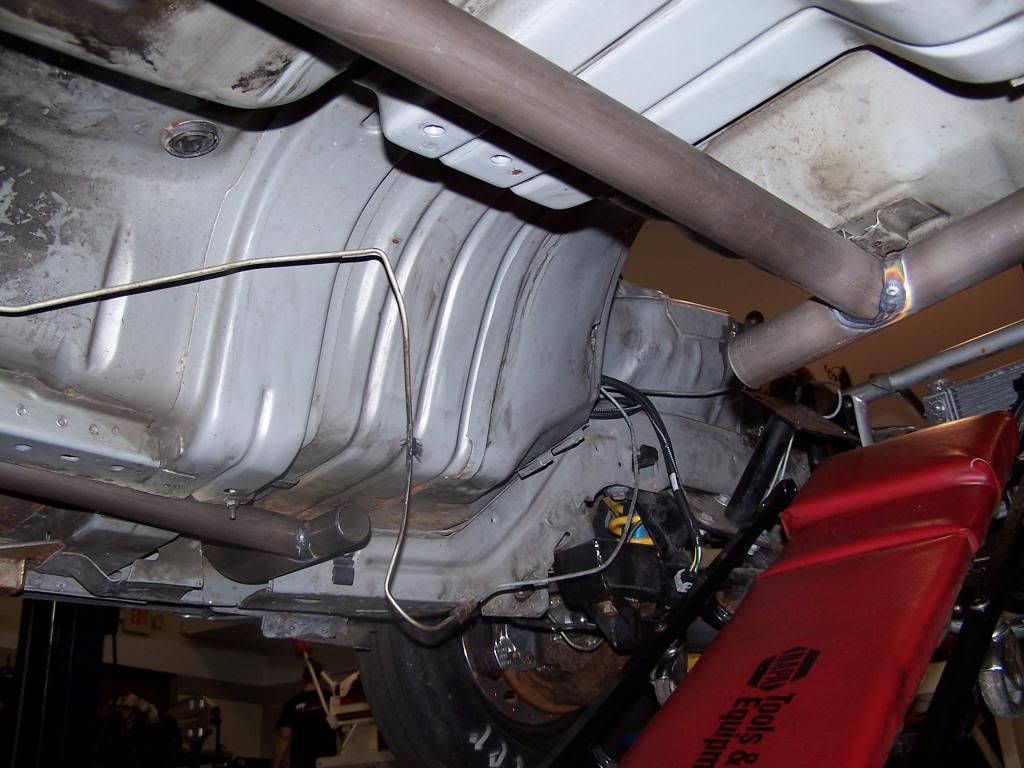
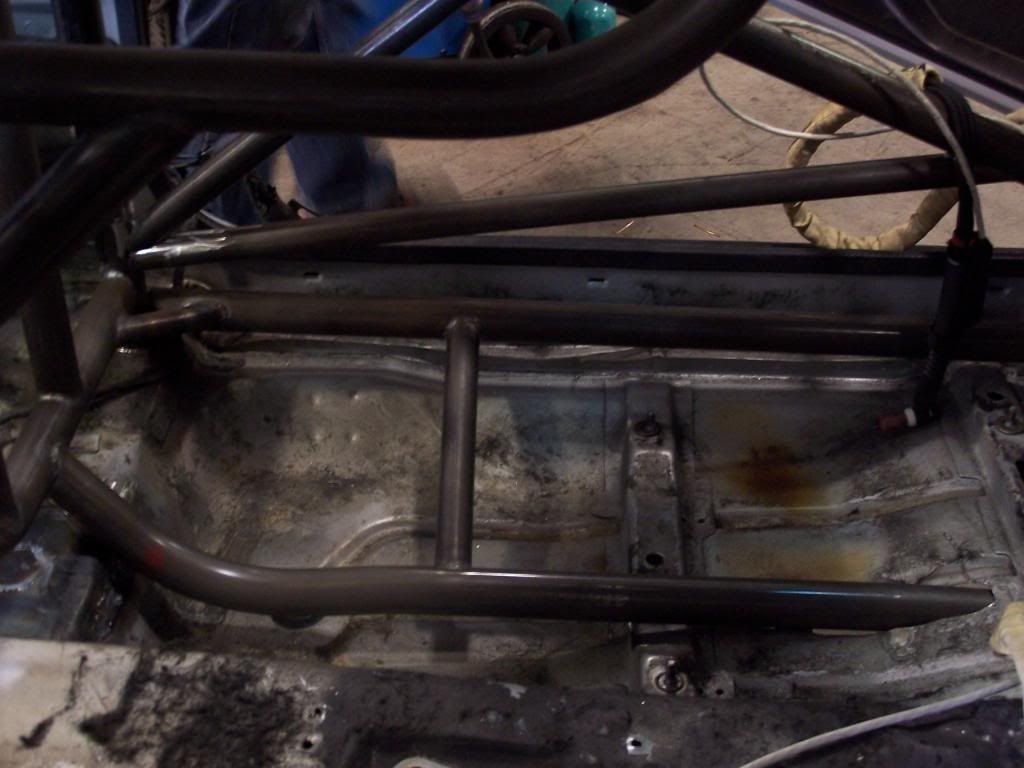
Here you can see the #6A bar I believe that attaches to the #1 bar which is part of the main hoop now that attaches under the car to the 2A bar that attaches to the A-pillar bar. Lot's of attachment points for sure!

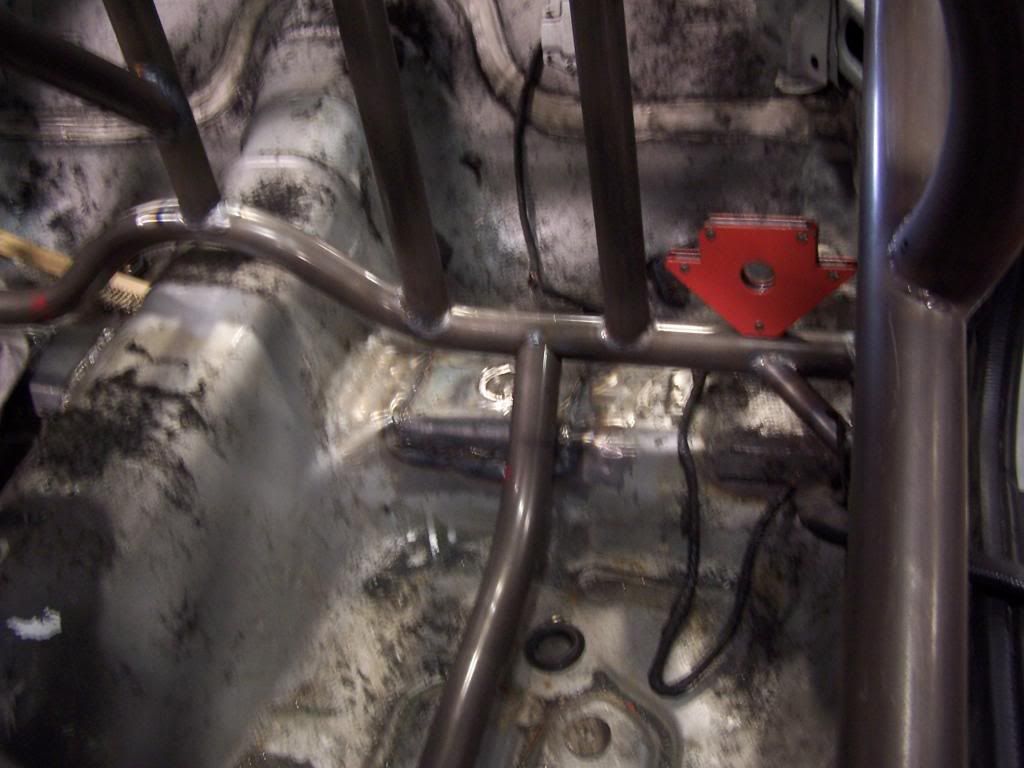
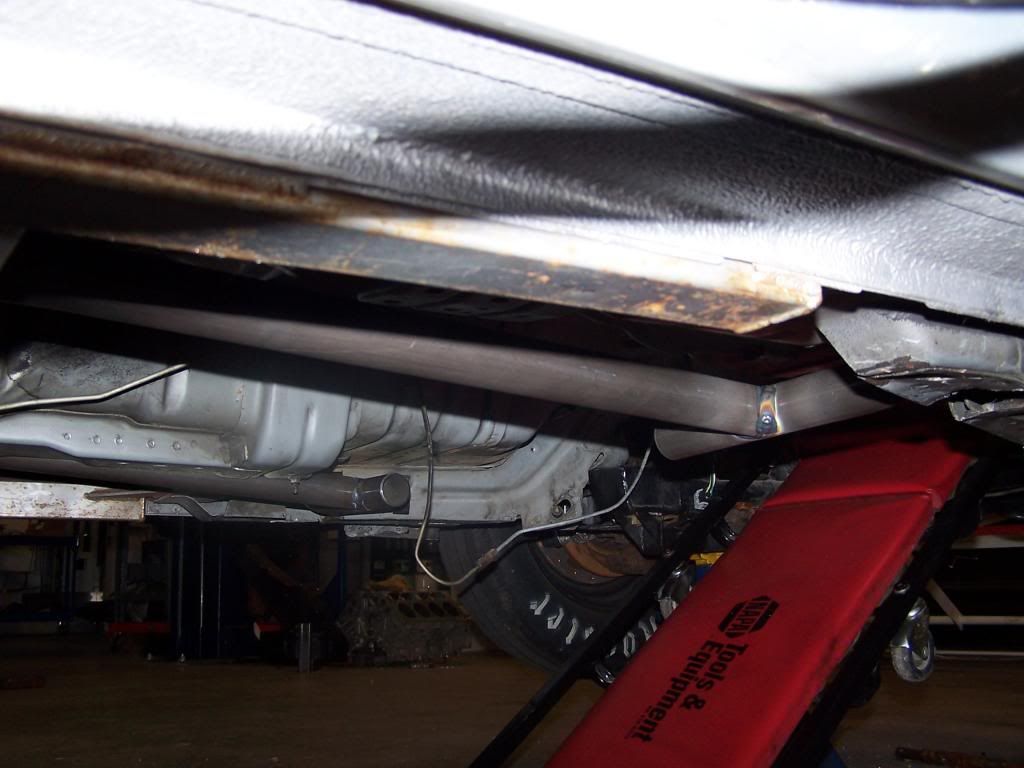
Where it attaches to the 2A bar under the car
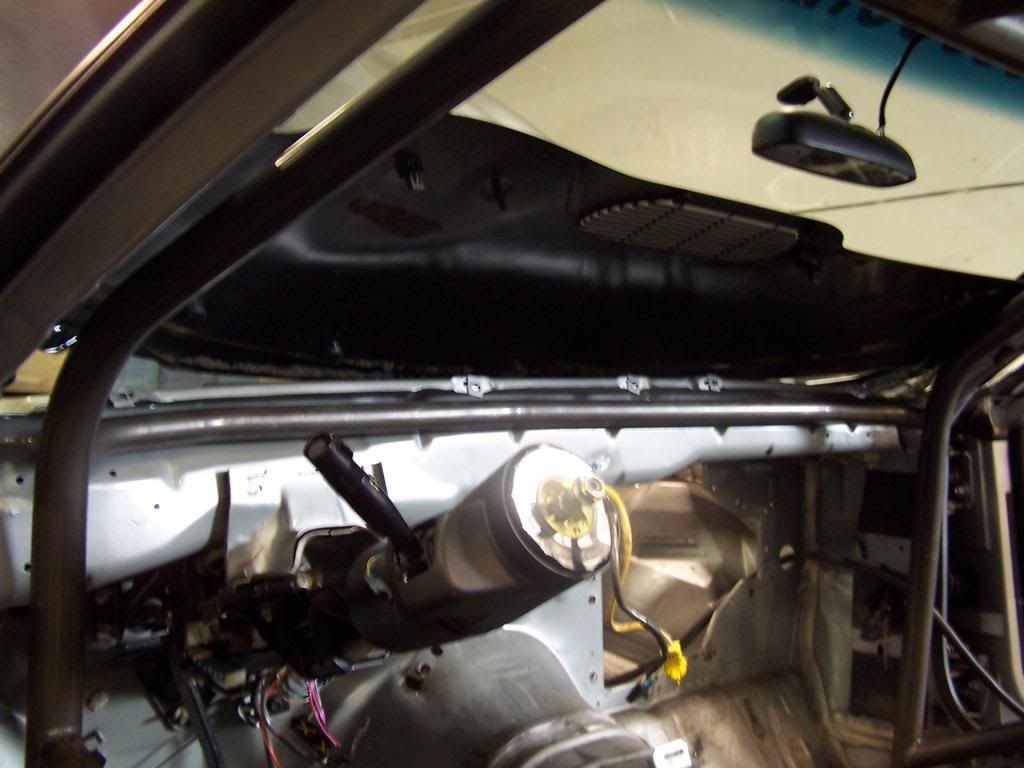
Better picture showing that the dash bar is straight as an arrow while still fitting the curvature of the firewall/dash
His words were, "this is the hardest part I've had to do on this cage".
Basically, if I can type this in words that make sense. We have to form an inner "box section of frame rails" made out of chromoly tubing under the car that boxes the frame rails in along with tying that box we're making back into the rocker bar of the cage and the main hoop. Then a X brace has to be fabricated in the middle of the "inner box section of frame rails" we're making out of chromoly tubing. All of this must be 1x5/8" so it's not easy to fit and route through the car when you have to go through the floor on some of it to make it legal.
I've got faith in ya Matt even if you don't!
Here are a couple pictures I got
Here you can see the #6A bar I believe that attaches to the #1 bar which is part of the main hoop now that attaches under the car to the 2A bar that attaches to the A-pillar bar. Lot's of attachment points for sure!


Where it attaches to the 2A bar under the car

Better picture showing that the dash bar is straight as an arrow while still fitting the curvature of the firewall/dash


Last edited by Sales@Tick; 09-17-2013 at 12:09 PM.

 09-16-2013, 08:28 PM
#225
Teching In

Join Date: Aug 2013
Posts: 11
Likes: 0
Received 0 Likes
on
0 Posts
Here you can see the #6A bar I believe that attaches to the #1 bar which is part of the main hoop now that attaches under the car to the 2A bar that attaches to the A-pillar bar. Lot's of attachment points for sure!
Your close Martin you have #6A confused with #2A.
#2A are your inner frame rails there are two of these, #6A is one of the front crossmember bars also known as the foot bar. Luckily we don't have to x the floor just gussets. And the main reason for gussets is the fact we will be using #6C as the transmission crossmember
09-16-2013, 10:36 PM
#226
Thanks Aaron! You going to do a 8.50 cert in yours?
It's a lot of work, more work than I think a lot of people realize. Including myself.
If this car's chassis, and how it performs at the track isn't an indication of what we are capable of at Tick Performance, I don't know what is.
Thanks Doug. Your fab skills are also very apparent and I don't doubt you could do this as well with your friend. That said, it's not easy and it's certainly not like fabricating a turbo hot side/cold side.
Ahh! So the bar I called 6A is really 2A and 2A is serving as our inner frame rails. 6A is the one bar you did first this morning that will be by my left foot.
I'm glad you're doing all of this! I told you from day one, that even though you felt like you might not of been able to do all of this, being the first cage you've EVER done, that I knew you could do it.
Get this too folks, Matt is only what, 22-23 years old? I don't know many 22-23 year olds that have built or are currently fabricating 25.5 cages at work! Everyone gave me crap for the longest about being young, I would like to think that what we put out here at Tick shows you don't have to be 40+ years old, or have been around for 20+ years to know what you're doing.
Now look at what you've built, this car is going to go 5.teens and it's going to do it straight as an arrow due to the chassis being right.
I've already got my starting points on the shock settings in my head along with power management to get this baby down track as fast as possible.
After seeing how Jody has Mooresville hooking lately with Chris Tuten going 4.39@175 1.11 60' 2.97 330' on 275's this past weekend, I don't it's going to take long before we see a 5.20 light up that E.T. board.
And that's just with the cast 76...wait till I get that GT5580US from Jose and a Boost Leash.
It's a lot of work, more work than I think a lot of people realize. Including myself.
If this car's chassis, and how it performs at the track isn't an indication of what we are capable of at Tick Performance, I don't know what is.
Here you can see the #6A bar I believe that attaches to the #1 bar which is part of the main hoop now that attaches under the car to the 2A bar that attaches to the A-pillar bar. Lot's of attachment points for sure!
Your close Martin you have #6A confused with #2A.
#2A are your inner frame rails there are two of these, #6A is one of the front crossmember bars also known as the foot bar. Luckily we don't have to x the floor just gussets. And the main reason for gussets is the fact we will be using #6C as the transmission crossmember
Your close Martin you have #6A confused with #2A.
#2A are your inner frame rails there are two of these, #6A is one of the front crossmember bars also known as the foot bar. Luckily we don't have to x the floor just gussets. And the main reason for gussets is the fact we will be using #6C as the transmission crossmember
I'm glad you're doing all of this! I told you from day one, that even though you felt like you might not of been able to do all of this, being the first cage you've EVER done, that I knew you could do it.
Get this too folks, Matt is only what, 22-23 years old? I don't know many 22-23 year olds that have built or are currently fabricating 25.5 cages at work! Everyone gave me crap for the longest about being young, I would like to think that what we put out here at Tick shows you don't have to be 40+ years old, or have been around for 20+ years to know what you're doing.
Now look at what you've built, this car is going to go 5.teens and it's going to do it straight as an arrow due to the chassis being right.
I've already got my starting points on the shock settings in my head along with power management to get this baby down track as fast as possible.
After seeing how Jody has Mooresville hooking lately with Chris Tuten going 4.39@175 1.11 60' 2.97 330' on 275's this past weekend, I don't it's going to take long before we see a 5.20 light up that E.T. board.
And that's just with the cast 76...wait till I get that GT5580US from Jose and a Boost Leash.
Last edited by Sales@Tick; 09-16-2013 at 10:42 PM.


 09-17-2013, 09:38 AM
#231
Sure!
Me neither Jason I'm getting excited for sure.
I sure miss ol' Black Betty. I would love to be able to jump in that car at lunch today and tear up the streets of Mount Airy with 700rwhp from a stock bottom end and cruise at 70mph down highway 52@2400rpm with the converter locked up in OD.
Ahh those were the days....lol.
I sure miss ol' Black Betty. I would love to be able to jump in that car at lunch today and tear up the streets of Mount Airy with 700rwhp from a stock bottom end and cruise at 70mph down highway 52@2400rpm with the converter locked up in OD.
Ahh those were the days....lol.
09-17-2013, 09:50 AM
#232
TECH Fanatic
Dang that's a lot of bars in there lol. You doing it right man for sure. Any updates on the engine in this rollcage thread lol lol. Im just kidding Martin. Im a big fan of people who take a thousand pictures like MYSELF in their threads of every detail. That's what this forum is best used for to help others an exchange info for the good of the LS engine family! Car is looking great. I know you cant wait to make the first pass. Looking forward to seeing you guys shop October 5th.
09-17-2013, 12:48 PM
#233
Dang that's a lot of bars in there lol. You doing it right man for sure. Any updates on the engine in this rollcage thread lol lol. Im just kidding Martin. Im a big fan of people who take a thousand pictures like MYSELF in their threads of every detail. That's what this forum is best used for to help others an exchange info for the good of the LS engine family! Car is looking great. I know you cant wait to make the first pass. Looking forward to seeing you guys shop October 5th.
The long block will be assembled soon. I sent the heads to our local machine shop to have the push rod passages opened up so I can run 3/8" push rods. Haven't decided if I absolutely need a .130 wall push rod with a hydraulic roller yet. The lobe intensity my cam has(which the lobes I'm using are very smooth, but have a ton of under the curve lobe lift area) along with the RPM it will turn, back pressure it will see on the exhaust valve opening and on top of cylinder pressure it has to open against.
I know I can get away with a .080" wall 3/8" push rod and it will probably be enough push rod for my application, but I like overkill when it comes to valve train components in a race application. That said, the added weight of the thicker wall material could also be detrimental in itself if the added wall thickness isn't needed.
I guess we'll see what happens soon enough!
09-17-2013, 12:53 PM
#234
TECH Fanatic
Thanks Stephen. Looking forward to seeing what your car makes@16psi on our dyno.
The long block will be assembled soon. I sent the heads to our local machine shop to have the push rod passages opened up so I can run 3/8" push rods. Haven't decided if I absolutely need a .130 wall push rod with a hydraulic roller yet. The lobe intensity my cam has(which the lobes I'm using are very smooth, but have a ton of under the curve lobe lift area) along with the RPM it will turn, back pressure it will see on the exhaust valve opening and on top of cylinder pressure it has to open against.
I know I can get away with a .080" wall 3/8" push rod and it will probably be enough push rod for my application, but I like overkill when it comes to valve train components in a race application. That said, the added weight of the thicker wall material could also be detrimental in itself if the added wall thickness isn't needed.
I guess we'll see what happens soon enough!
09-17-2013, 08:21 PM
#235
TECH Fanatic
iTrader: (4)
Join Date: Apr 2005
Location: Shelby twp, MI
Posts: 1,514
Likes: 0
Received 0 Likes
on
0 Posts

Martin how high do you plan to rev this engine? Do you think the LSA heads with the stock valves will go to 8000 RPM on a hydraulic roller without major stability issues?
09-17-2013, 10:08 PM
#236
With stock rockers, LS3 intake valve, LY6 exhaust, Morel .750" wheel lifters, 3/8" push rods, the lobes that are on this cam and 170 on the seat with 470 open I don't see why it couldn't go 8000rpm all day long under control.
I will probably end up having to run it up to 7600-7800rpm if I run it in the 1/4 with the gear set I'll want to run in it which will be a 3.73.
I'm probably going to switch to a 1.58 exhaust housing if this 1.32 chokes the engine too badly. Or try Jose's new 100mm turbine wheel out.
I've found with turbo engines, the turbo has a lot to dictate in terms of where the engine will operate in the RPM range. I've found too that even though power may be fading that doesn't mean to shift! I fully expect this engine to make peak horsepower around 6400-6600rpm with the port volume it has and carry that power to an optimal shift point of 7400rpm.
At least that's what I'm hoping for LOL! I've also been contemplating putting a Super Victor on it over the winter with a nice Wilson elbow with the divider plate in it for some added RPM capability and horsepower.
Last edited by Sales@Tick; 09-17-2013 at 10:14 PM.
09-18-2013, 11:23 AM
#239
Thanks man! It's been a long time coming and we're getting close!
The main thing with a turbo motor is making sure the turbine wheel can support the cubic inches and volumetric efficiency the engine is capable of producing. The higher the VE, the more exhaust volume present the more turbine wheel you will need.
A small motor, large cylinder heads and RPM will produce a pretty respectable VE number so don't expect it to have low drive pressure just because the engine is small in size.
If you look at what member Jakson did with his destroked deal, with a smaller turbine wheel than you're talking about he was able to pull his to 8000rpm and it didn't peak until 7000-7200rpm.
Ok, floor section is 75% completed. All Matt has to do now is gusset the 6A, 6B and 2A bars and then fabricate the 6C bar which serves as the trans cross member now. We are making it removable for easy access and for working on the car.
Here you can see where the trans cross member will go and form the final piece of the floor section.
2A bar going through the floor to connect with the 6B bar.
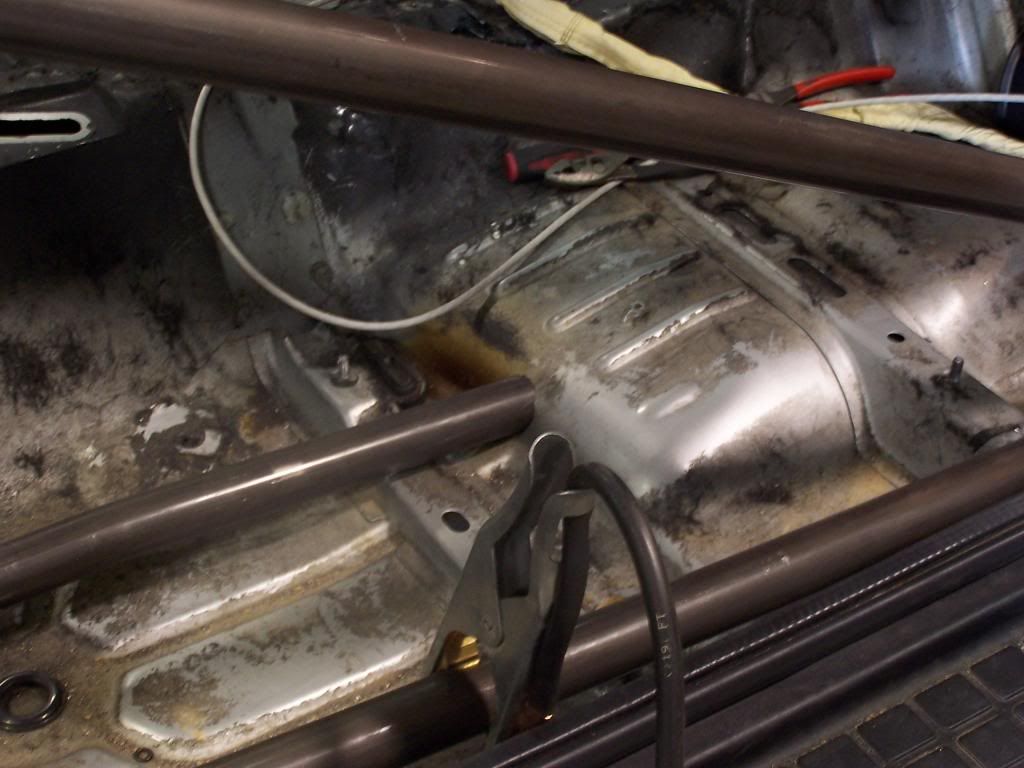
2A bar going through floor again to connect with 6B bar
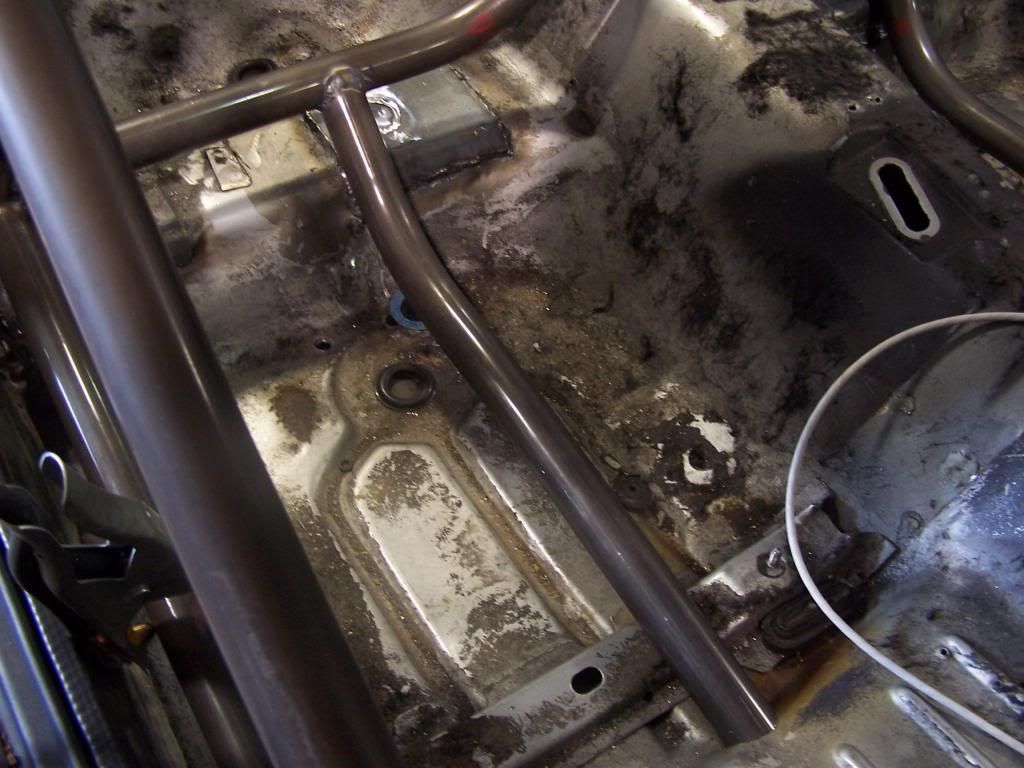
Opposite side 2A bar and what is called the "seat bar" which I can't remember its number designation off the top of my head right now.
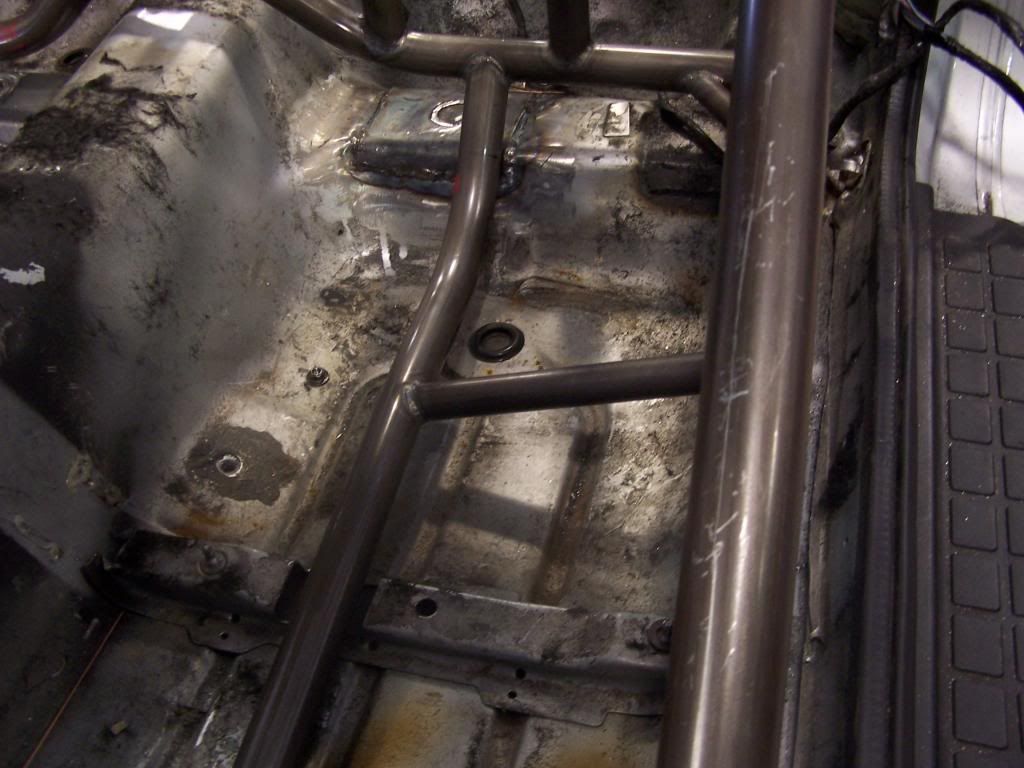
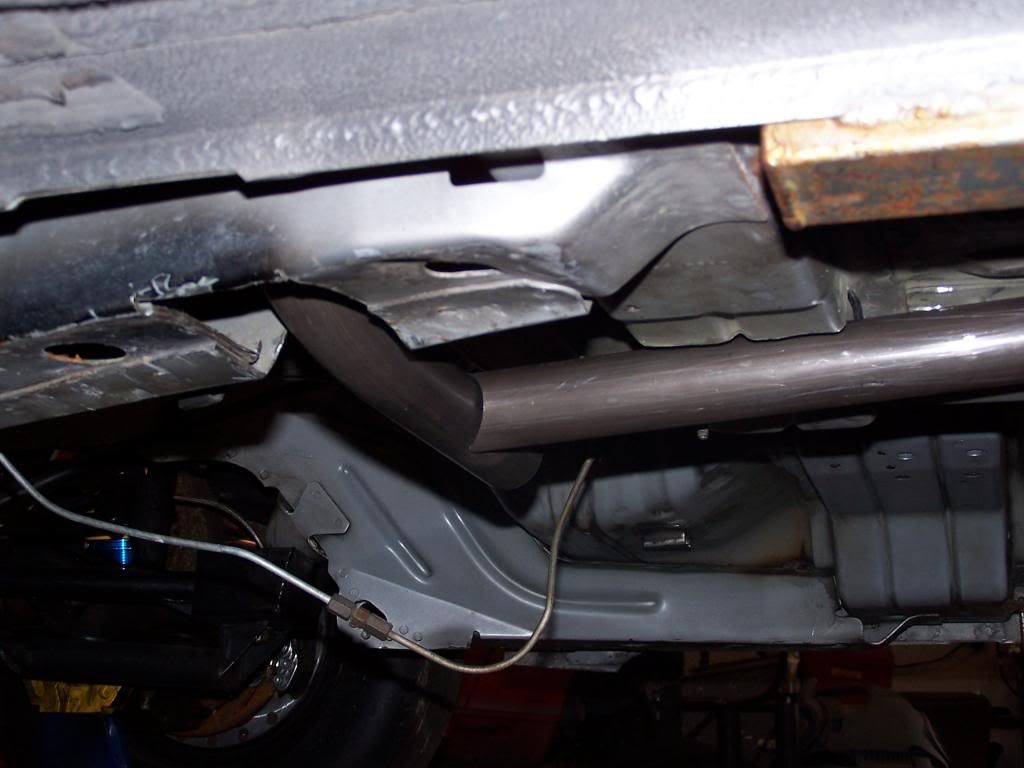
You can kind of get an idea of what's going on under the car from this picture
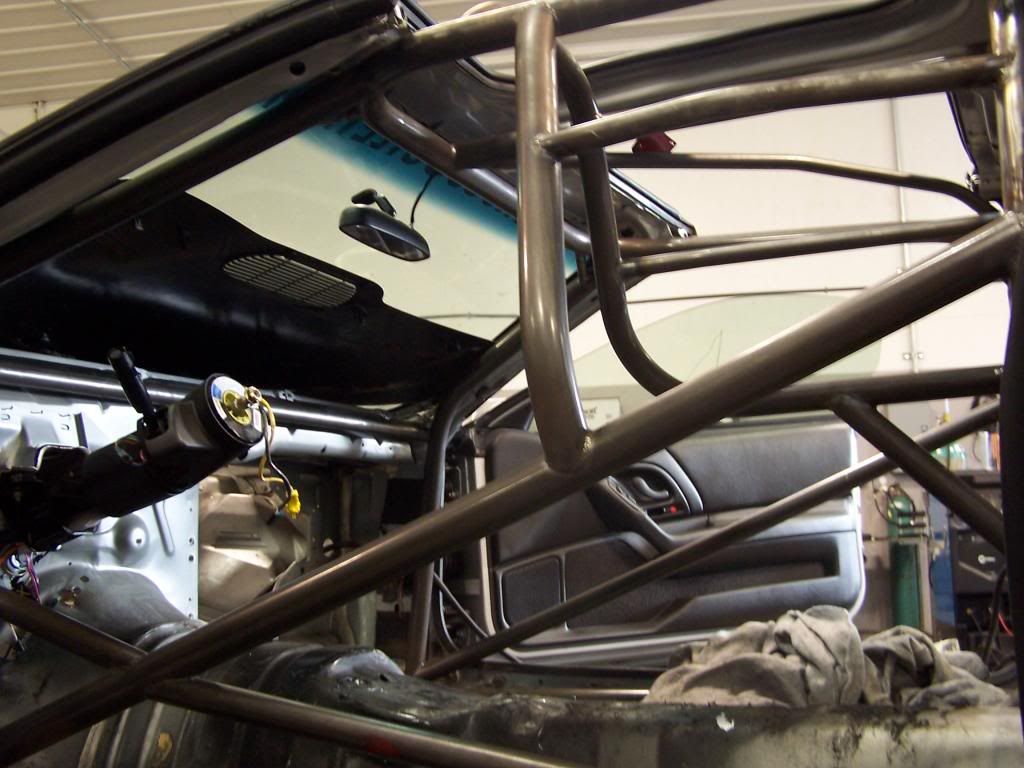
Finally looking like a real cage! Looks better with the seat in there. We had it in earlier and it looked really good.


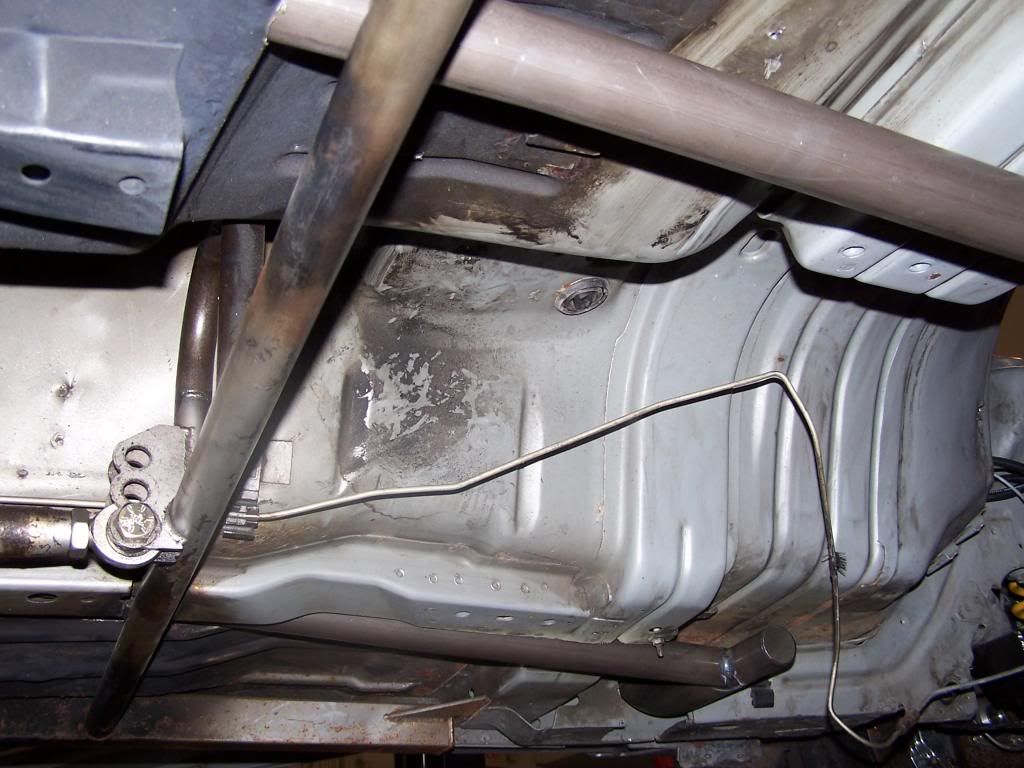
Matt, Jonathan and I were standing around the car last night after we had closed and I am just sick of looking at all of this awful rust from the car sitting outside. I'm going to take a scotch bright pad to the not so rough spots, and some 120 grit to the really rough spots and sand them. Then I'm going to pressure wash/de-grease the entire under side of the car, engine bay and suspension. Then hit it all with some nice silver rattle can paint lol. Including the cage itself. Everything under the car will be silver along with the roll cage and engine bay. Which the engine bay is already silver(of course) and it's not like you're going to be able to see under the car while it's at the track. I don't think doing it all in silver will be too overwhelming with the flat black hood, black t-tops, black wheels and black tail lights breaking up the silver.
We'll see I guess.
It will look 10x better than it does now and it will serve its purpose until I can have it done right. Hell, if I prep it well enough and scuff everything up a little bit, it may last for a few years. The car will never sit outside like that again either.
A small motor, large cylinder heads and RPM will produce a pretty respectable VE number so don't expect it to have low drive pressure just because the engine is small in size.
If you look at what member Jakson did with his destroked deal, with a smaller turbine wheel than you're talking about he was able to pull his to 8000rpm and it didn't peak until 7000-7200rpm.
Ok, floor section is 75% completed. All Matt has to do now is gusset the 6A, 6B and 2A bars and then fabricate the 6C bar which serves as the trans cross member now. We are making it removable for easy access and for working on the car.
Here you can see where the trans cross member will go and form the final piece of the floor section.


2A bar going through the floor to connect with the 6B bar.

2A bar going through floor again to connect with 6B bar

Opposite side 2A bar and what is called the "seat bar" which I can't remember its number designation off the top of my head right now.


You can kind of get an idea of what's going on under the car from this picture

Finally looking like a real cage! Looks better with the seat in there. We had it in earlier and it looked really good.


Matt, Jonathan and I were standing around the car last night after we had closed and I am just sick of looking at all of this awful rust from the car sitting outside. I'm going to take a scotch bright pad to the not so rough spots, and some 120 grit to the really rough spots and sand them. Then I'm going to pressure wash/de-grease the entire under side of the car, engine bay and suspension. Then hit it all with some nice silver rattle can paint lol. Including the cage itself. Everything under the car will be silver along with the roll cage and engine bay. Which the engine bay is already silver(of course) and it's not like you're going to be able to see under the car while it's at the track. I don't think doing it all in silver will be too overwhelming with the flat black hood, black t-tops, black wheels and black tail lights breaking up the silver.
We'll see I guess.
It will look 10x better than it does now and it will serve its purpose until I can have it done right. Hell, if I prep it well enough and scuff everything up a little bit, it may last for a few years. The car will never sit outside like that again either.
Last edited by Sales@Tick; 09-18-2013 at 11:29 AM.
09-18-2013, 12:31 PM
#240

Look into that chassis black stuff Eastwood offers. I want to use it on my car. It's supposed to hold up well, and the black will look better IMO.
http://www.eastwood.com/eastwood-2k-...sis-black.html
Grab that stuff, and a cheap HVLP paint gun and go to town.
http://www.eastwood.com/eastwood-2k-...sis-black.html
Grab that stuff, and a cheap HVLP paint gun and go to town.