
Lightweight DIY vertical FMIC mount for 4th gen F-Body (No welding required)
 10-30-2013, 10:04 PM
#1

I was a bit tired of my stock front end and decided to go ahead and just ditch my horizontal FMIC setup and show off the intercooler through the front license plate opening and the fog lights. So, I set out to make my own mount. Only, I don't have a welder and I did not want to hassle someone else to weld it up for me. Being an aerospace design engineer, I design parts for a living that use fasteners in lieu of welds, so it is no surprise that this is what I came up with..
For materials, I chose aluminum for its light weight and ease of cutting. The whole project can be done by buying a 1"x1"x8' square tube, and a 2"x2"x8' angle stock, and of course some hardware- which I used 1/4" screws & nuts- 2 lengths: 1-1/2" and 3/4".
The whole setup is essentially two brackets- one bracket to attach to the car, and one bracket to attach to the intercooler.
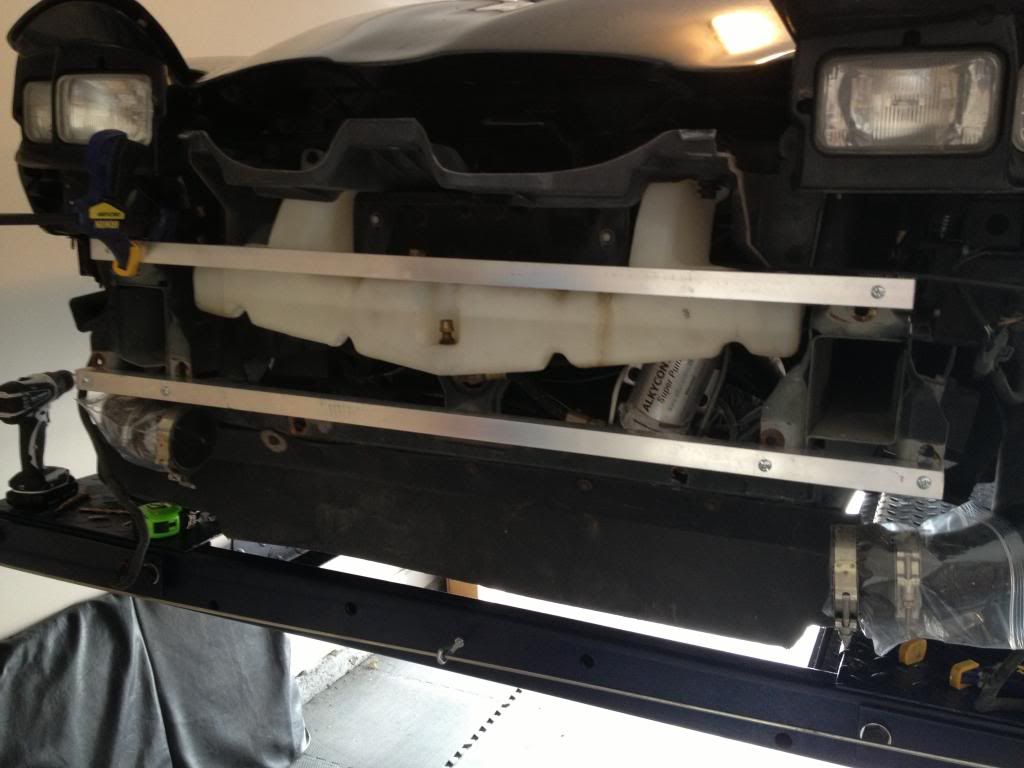
For the first bracket that attaches to the car, cut 2 pieces of tube to fit across the front of the frame horns and mount them as shown here:
Next, Cut 4 legs to hold out the intercooler the desired space from the frame horns, and then attach those angles with a vertical angle:
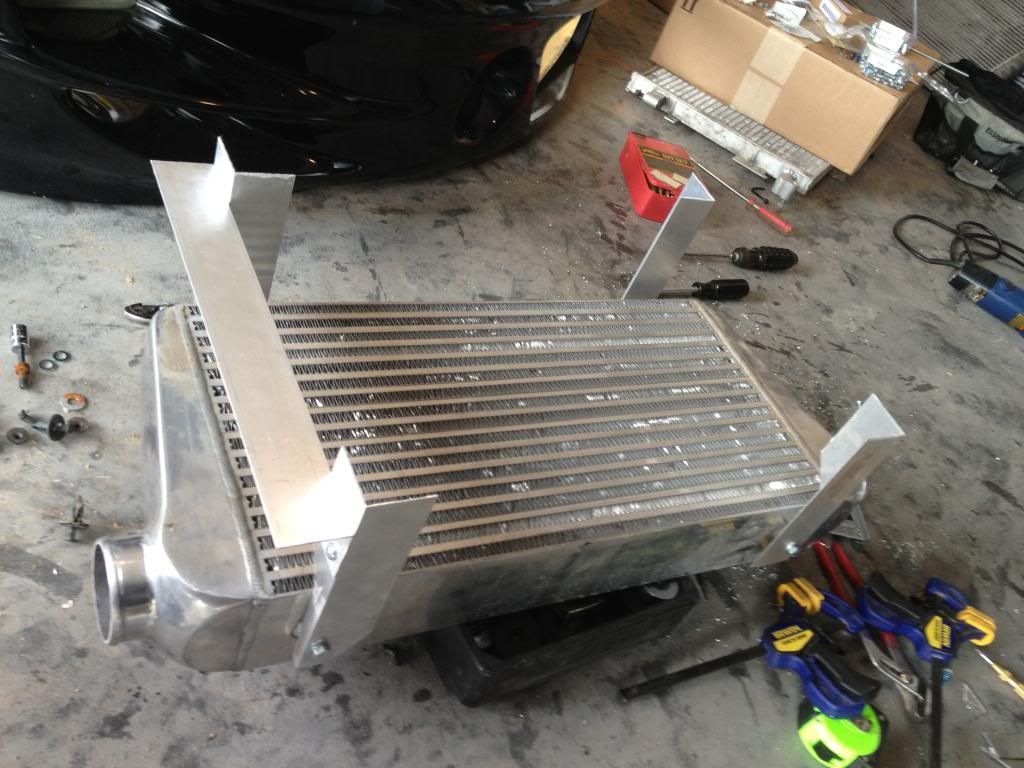
You will need to trim the bottom angles to fit under the intercooler as shown here:
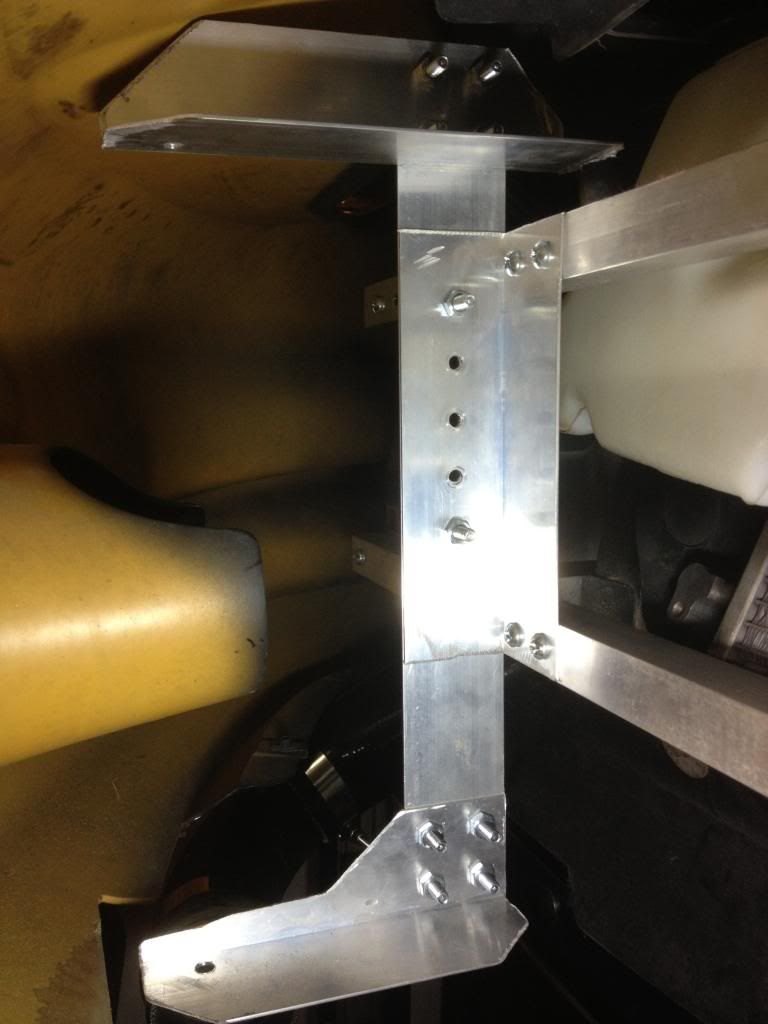
Once you have your vertical angles attaching the legs holding the intercooler, measure the distance between them, and then attach vertical angles to the tubes at the same distance:
Now remove the brackets that hold the intercooler and attach them to the vertical angles on the tubes:
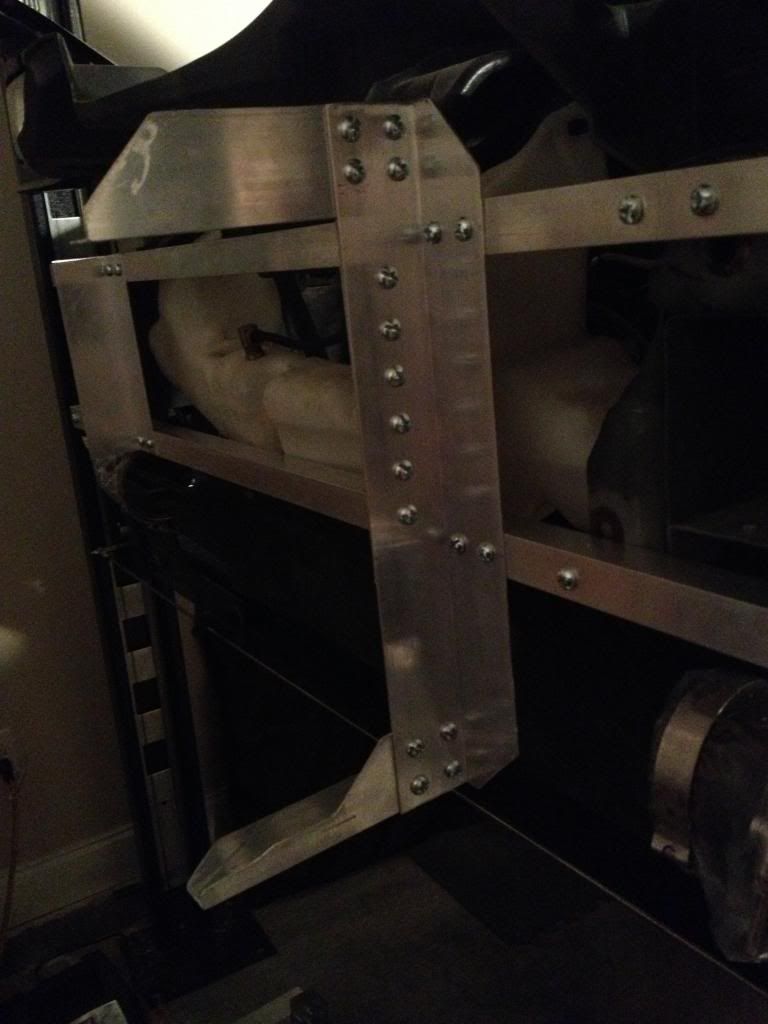
*NOTE* Do not attach them as low as shown here- space them 1" up from what is shown in this pic, you will see why later..
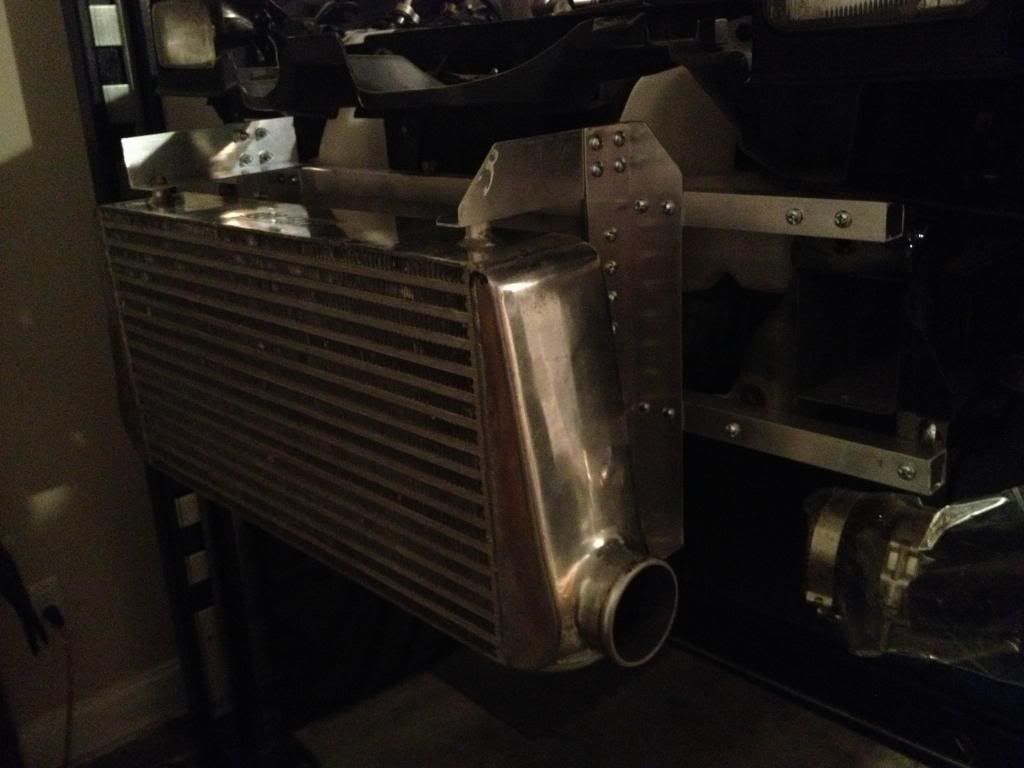
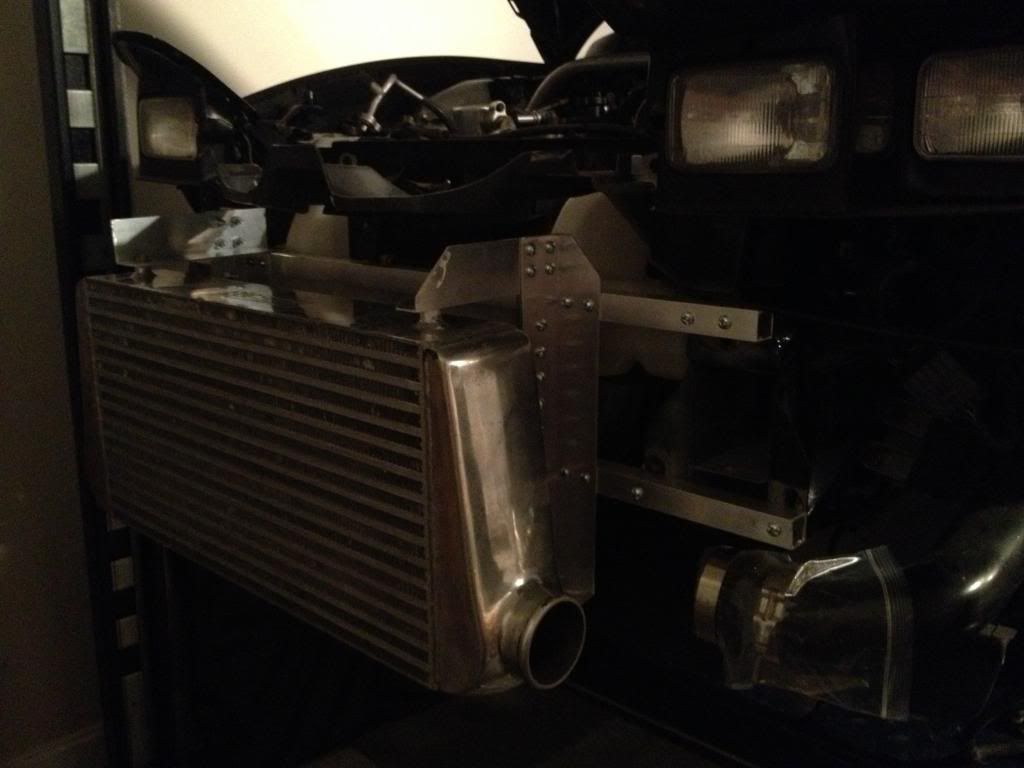
Here is a pic of everything mounted up. You can see how I have started to make some 45� cuts on the driver's side bracket too.

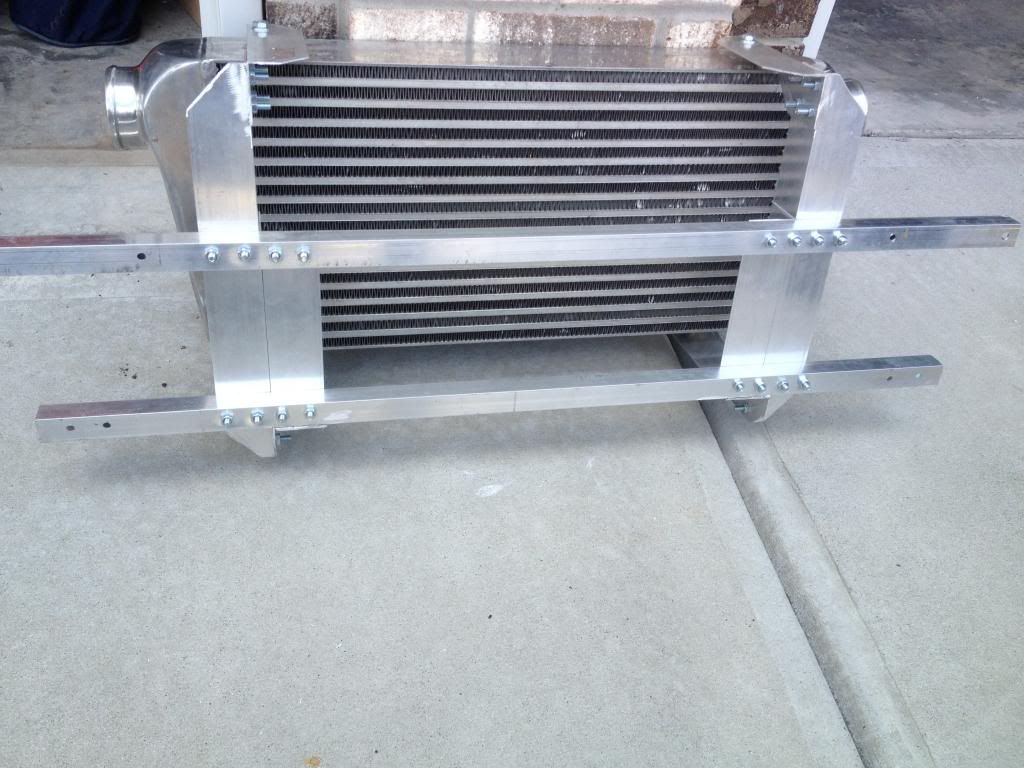
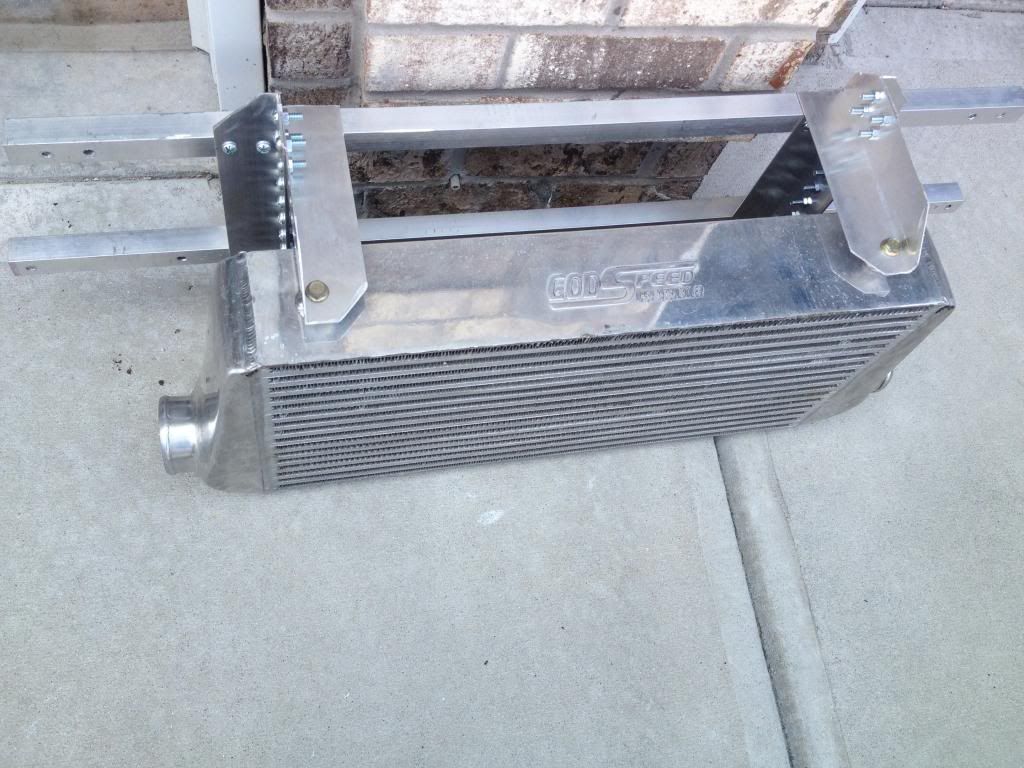
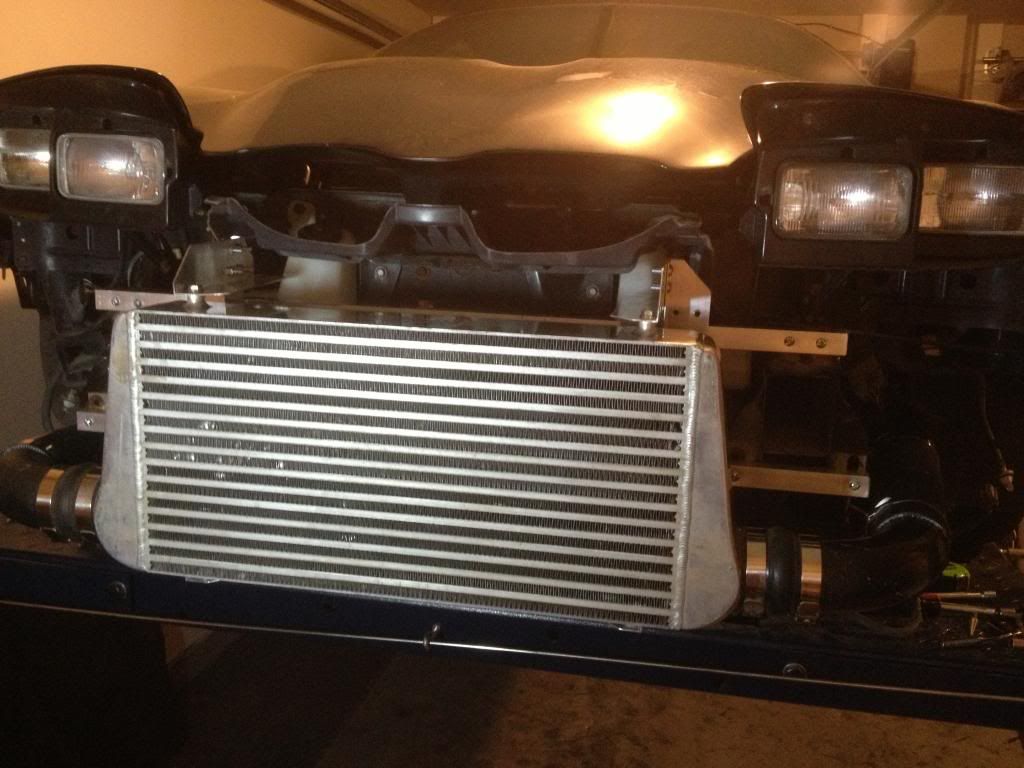
And here it is with the intercooler mounted:
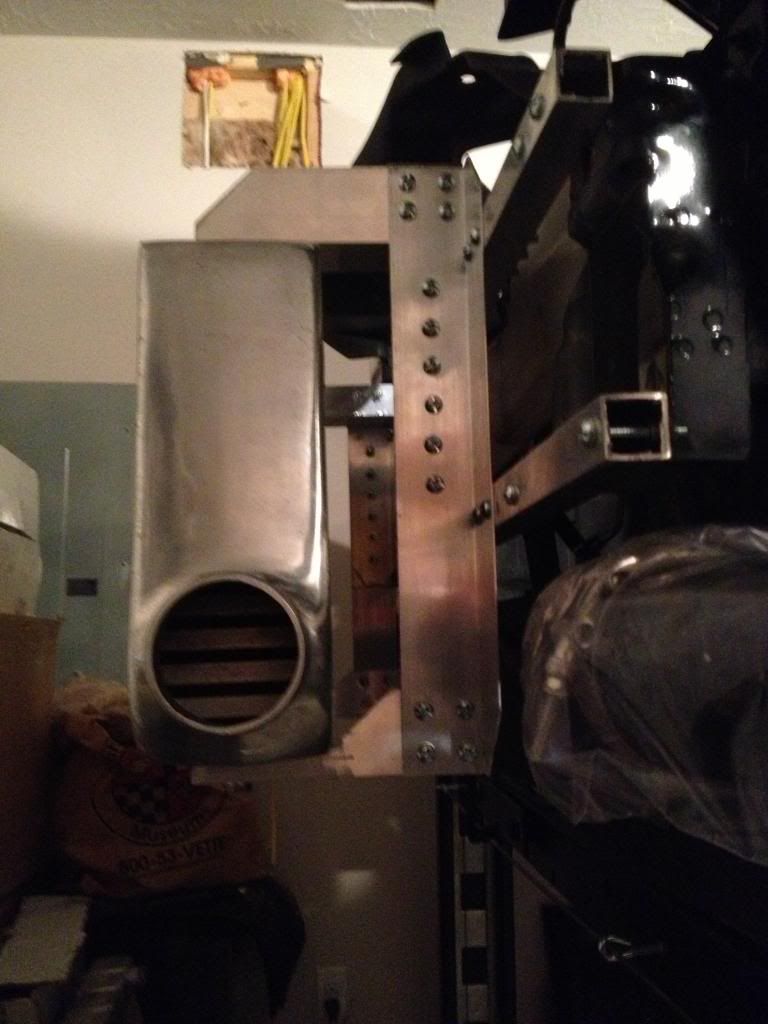

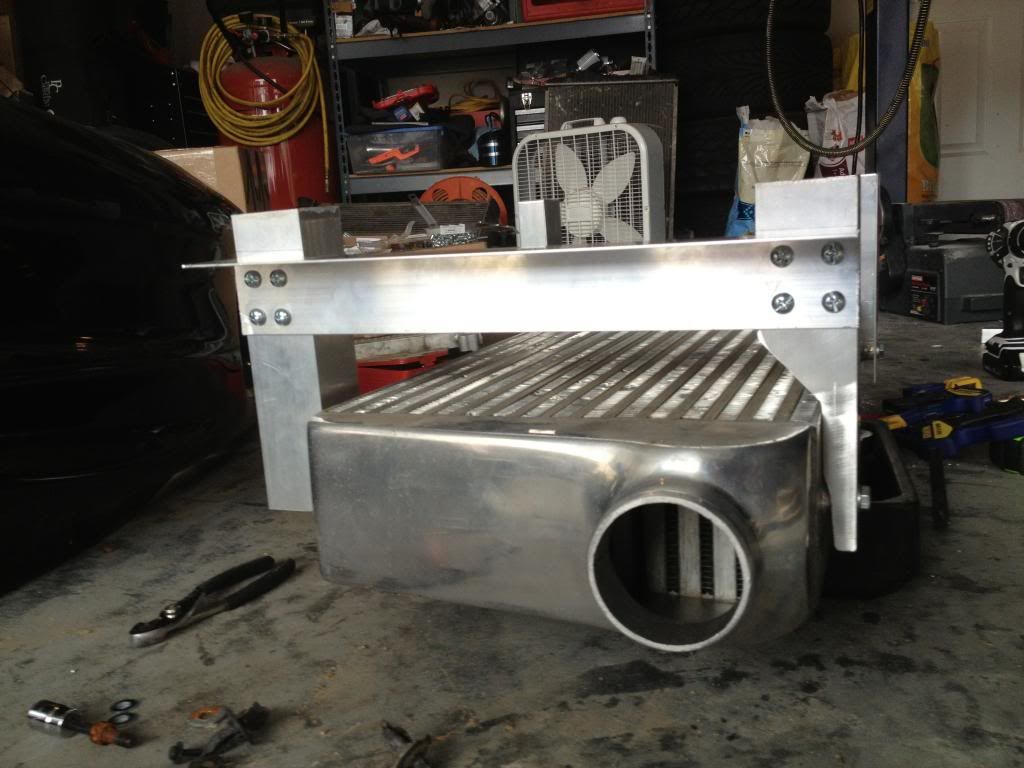
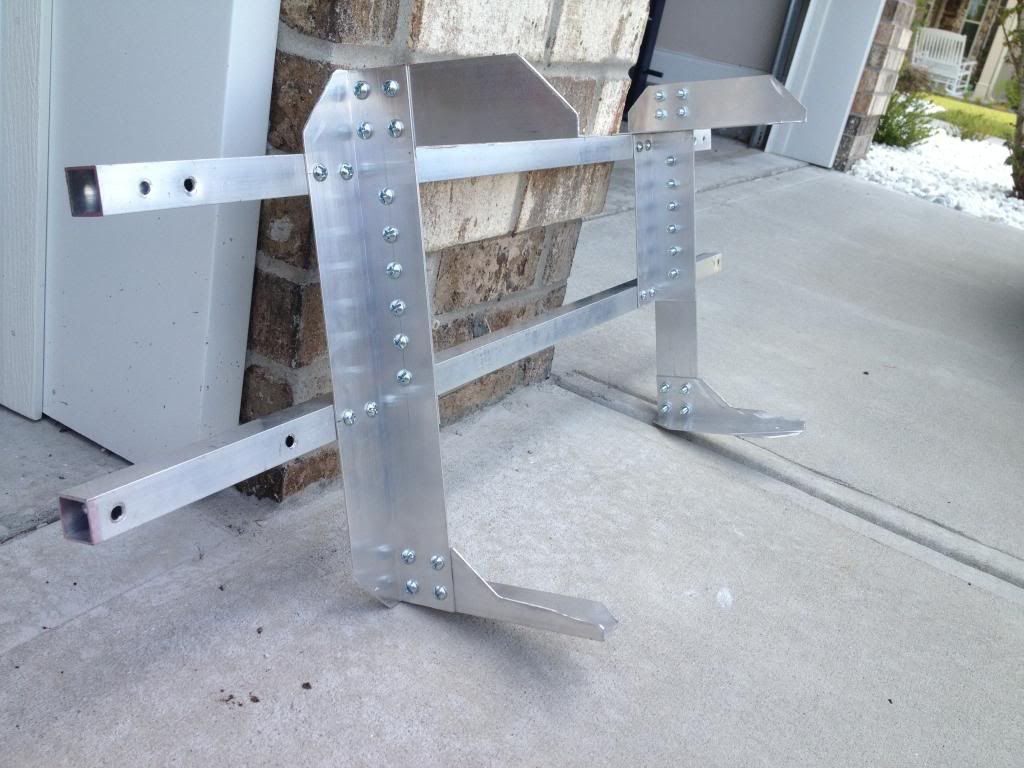
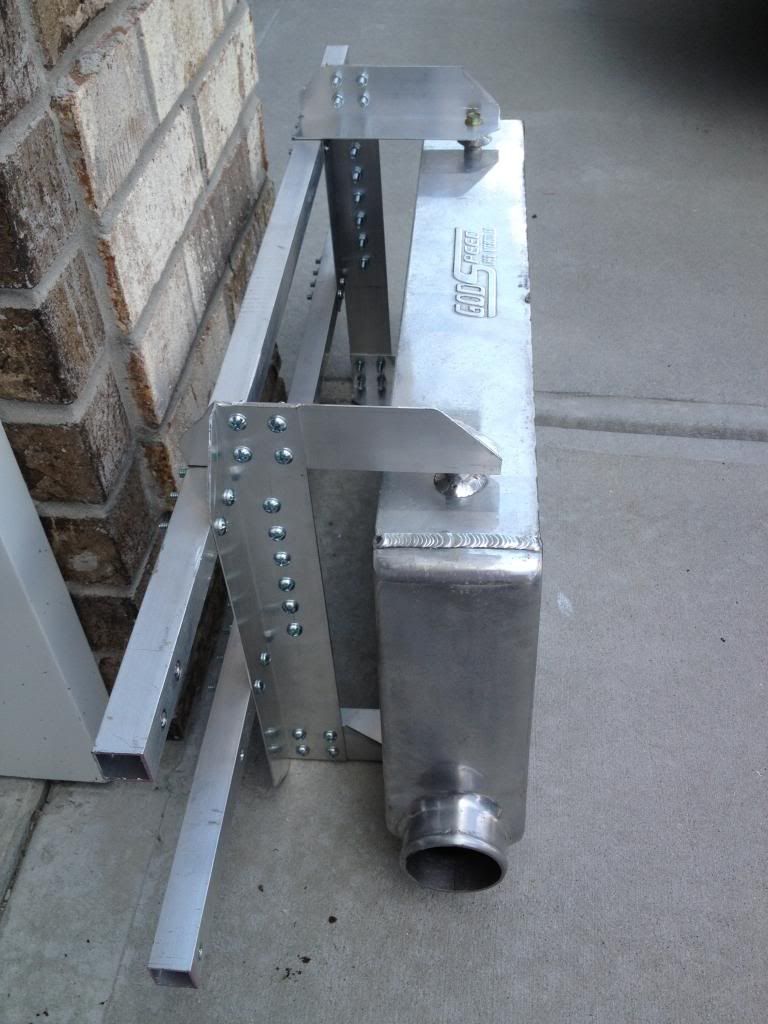
I removed it from the car to redo my piping, so I got a few pics of it off the car too:
Here is a pic of one of the frame horns where I drilled the mounting holes:

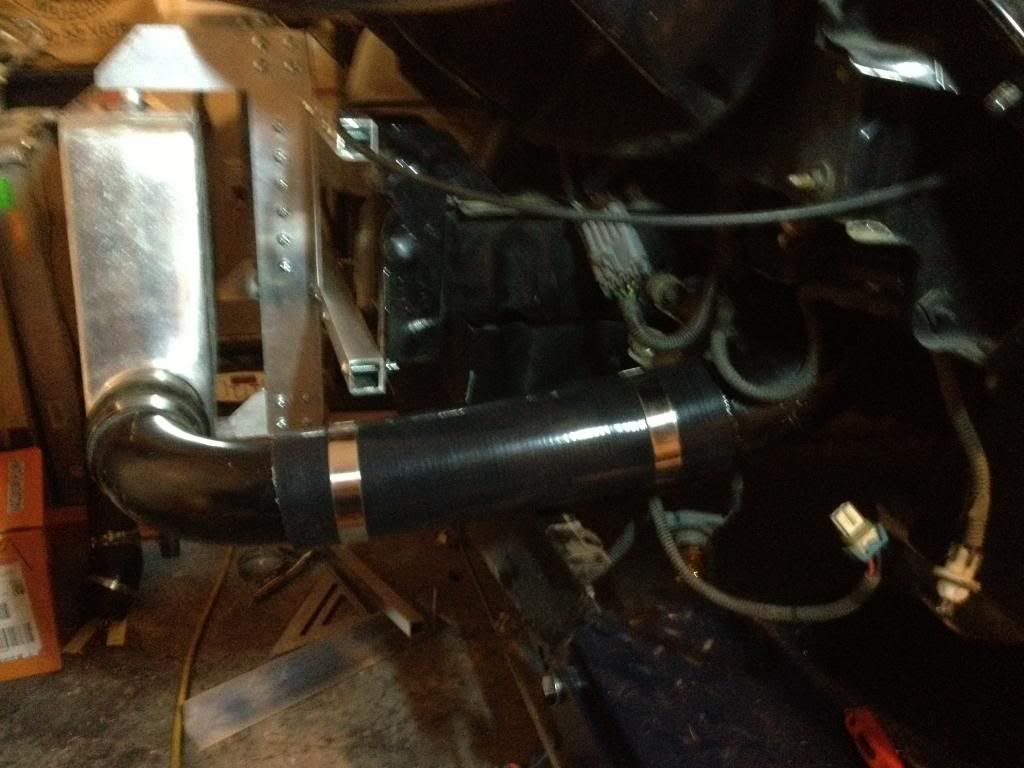
And now, on to modifying my old pipes to accommodate the new mount:
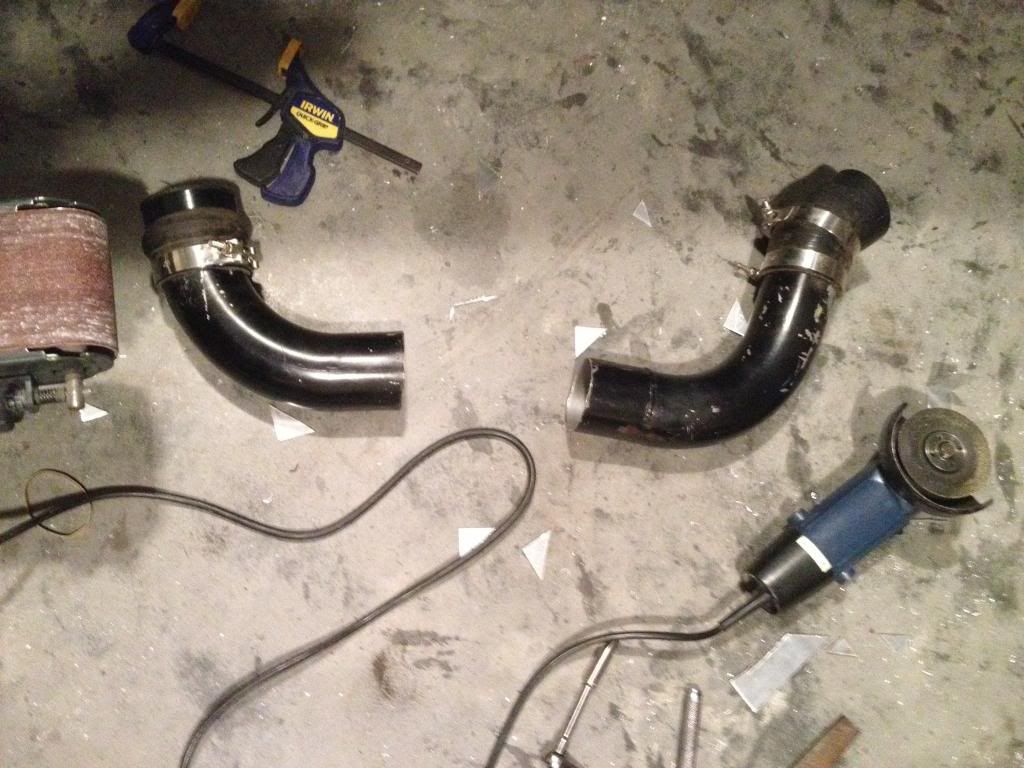
Again- I do not have a welder, and I did not want to bother anyone to weld new pipes, so I just ordered some straight hose from the same place I ordered all my other silicone parts for my piping- siliconeintakes dot com. Great place for DIY systems!
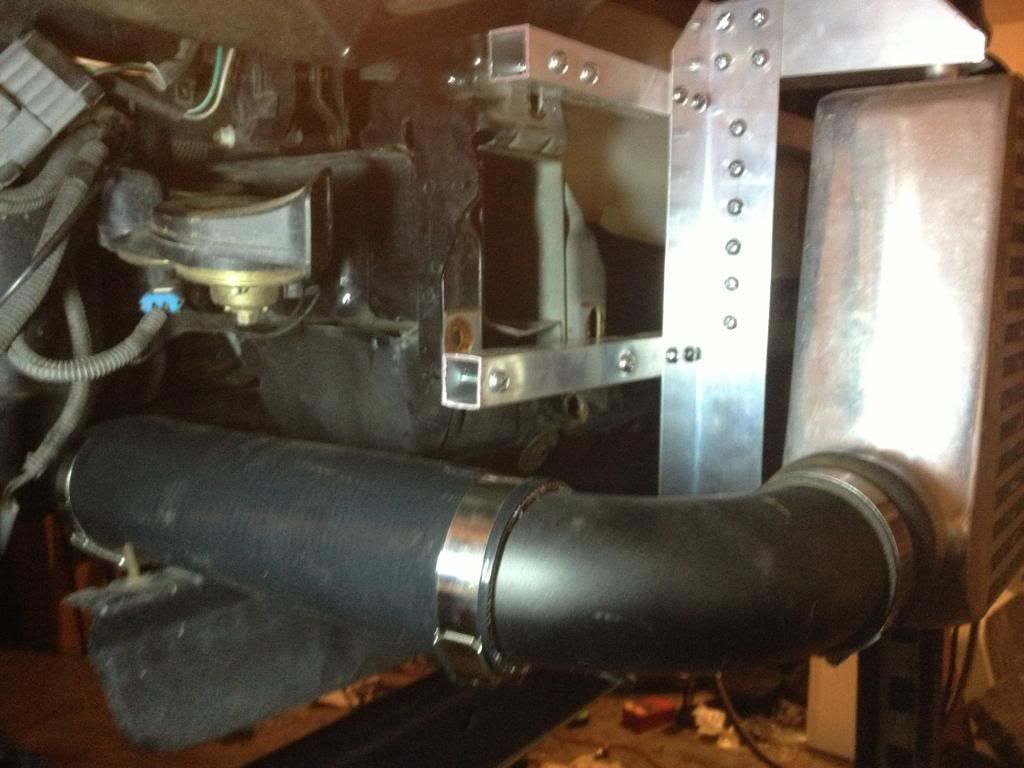
And here is the other side after the same method:
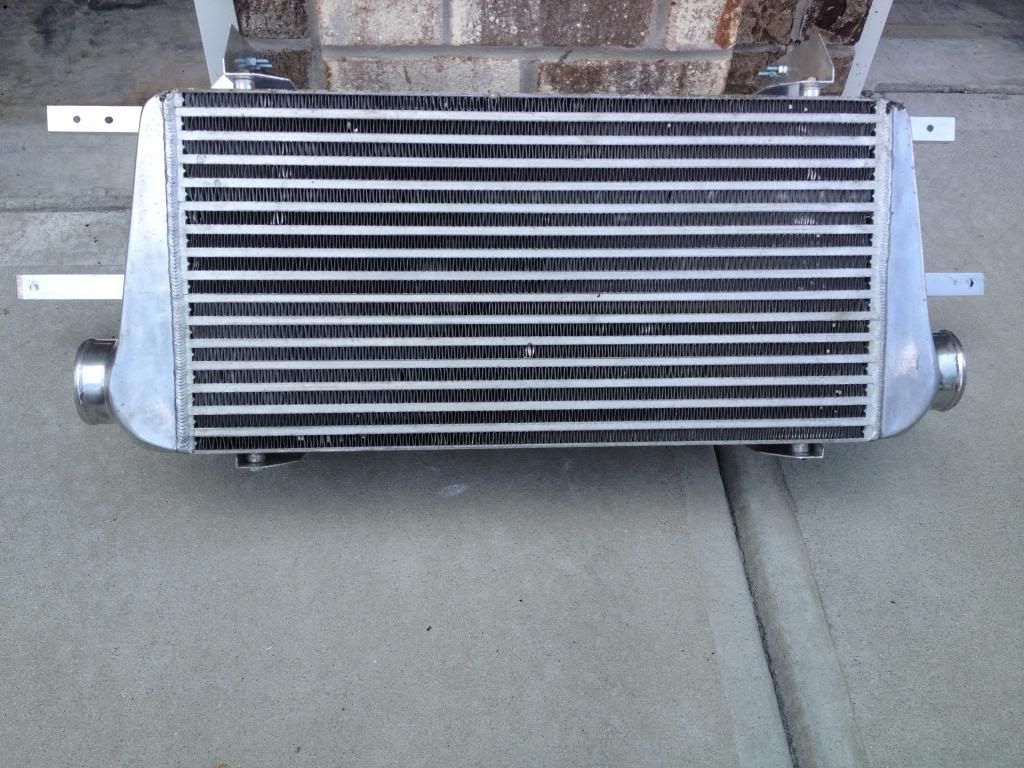
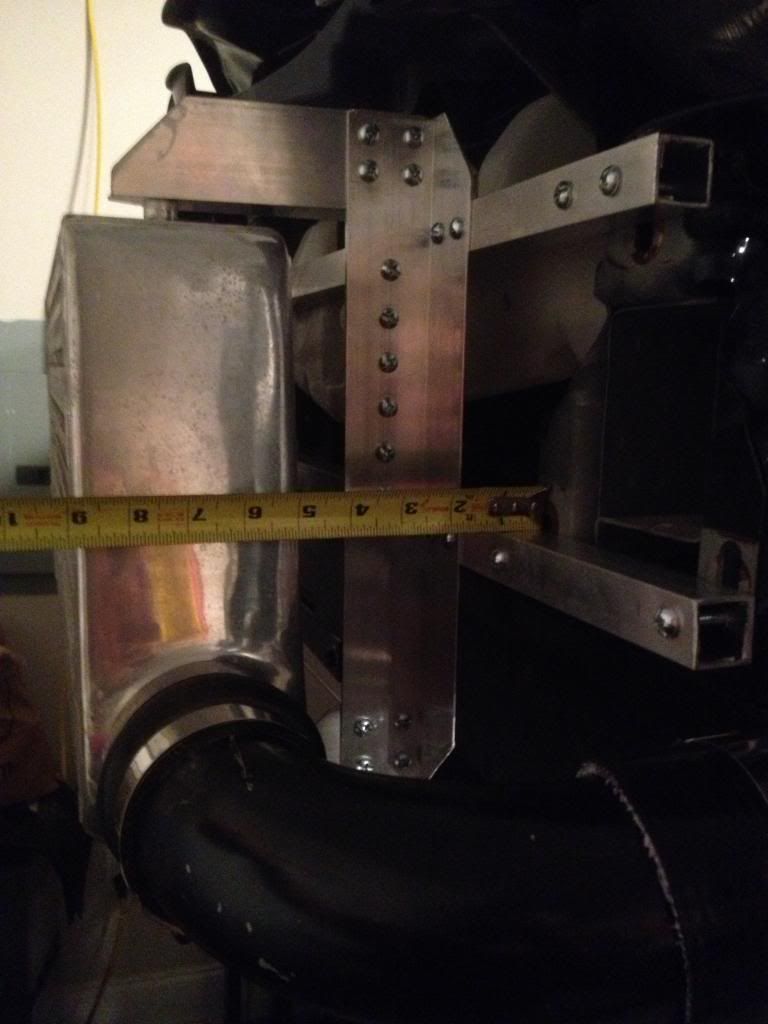
As you can see, the intercooler sits out about 8-7/8" away from the front of the frame horns:
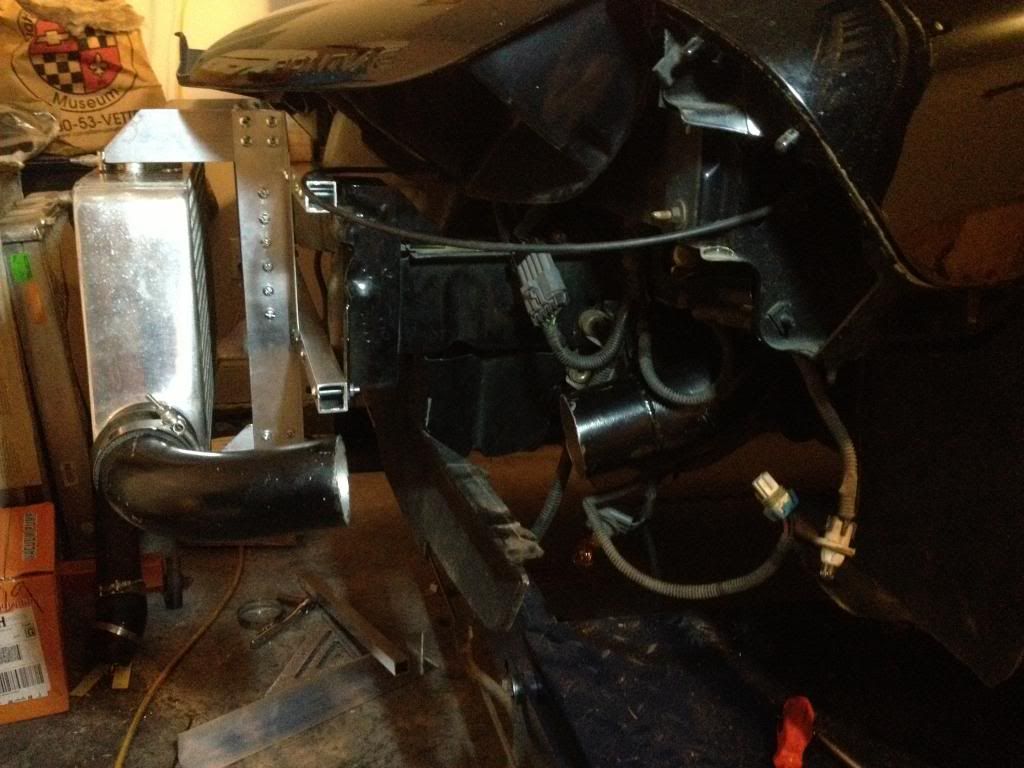
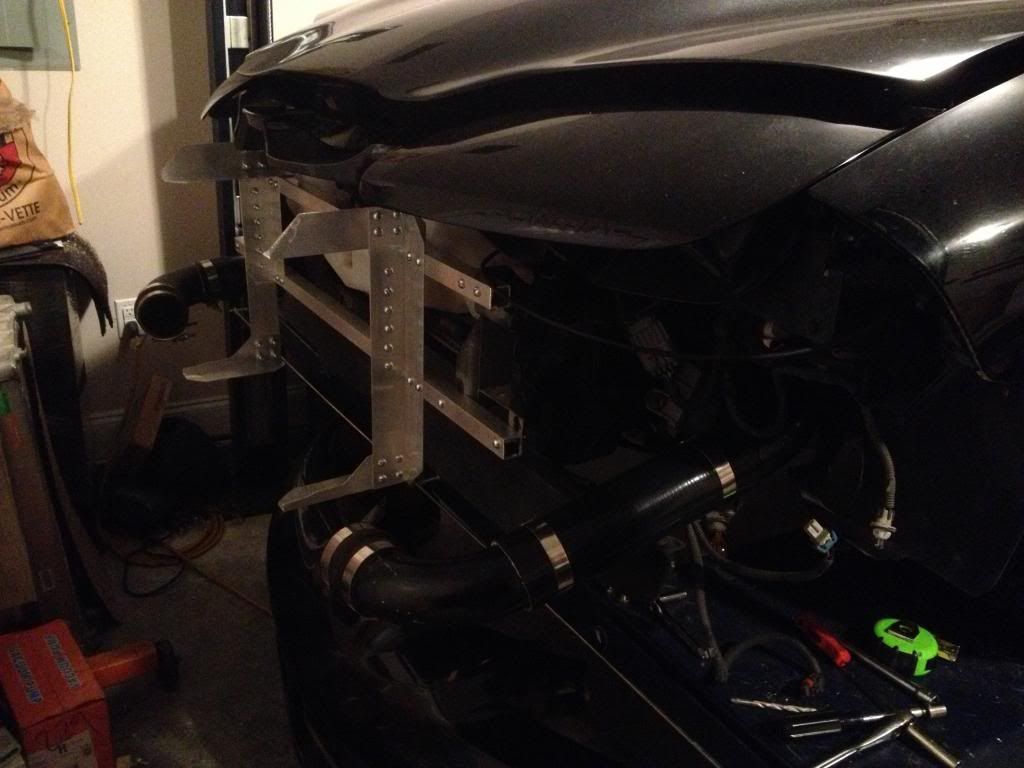
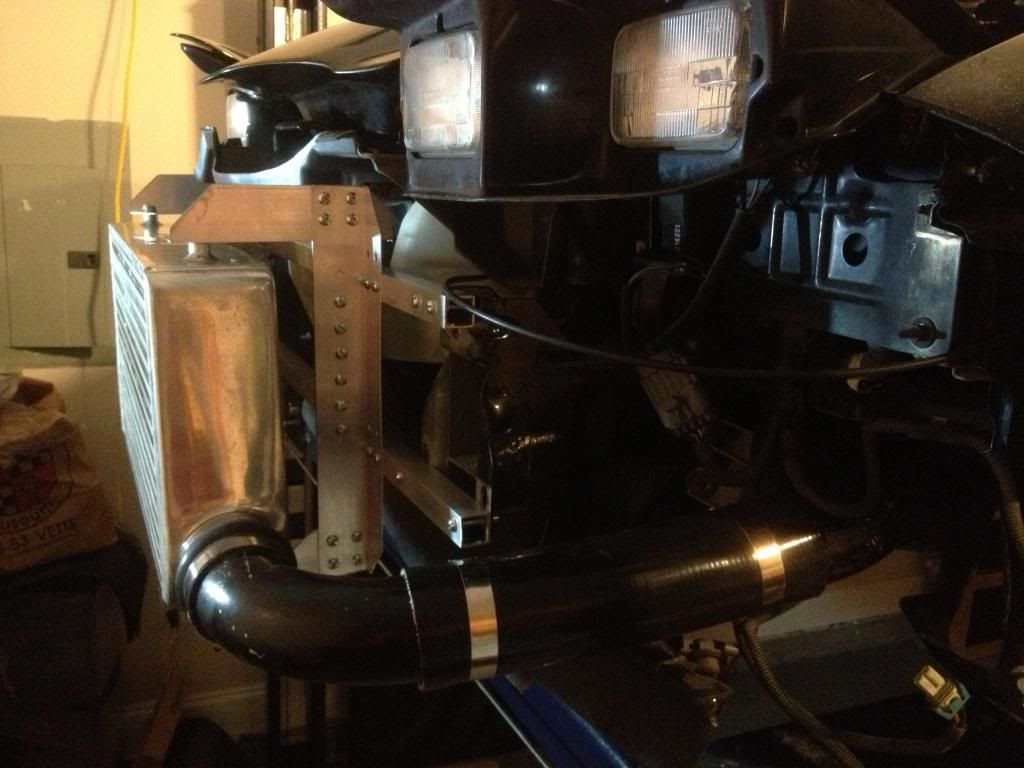
Here is a pic with the mount and the piping. Ready for the intercooler (at least I thought anyways)
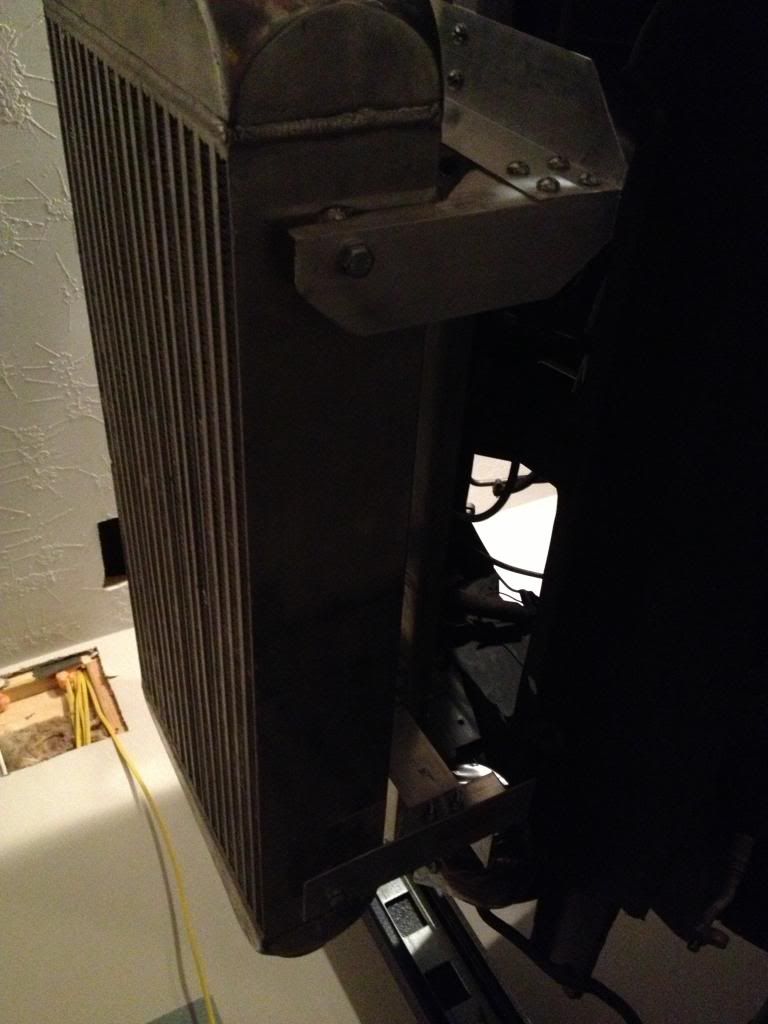
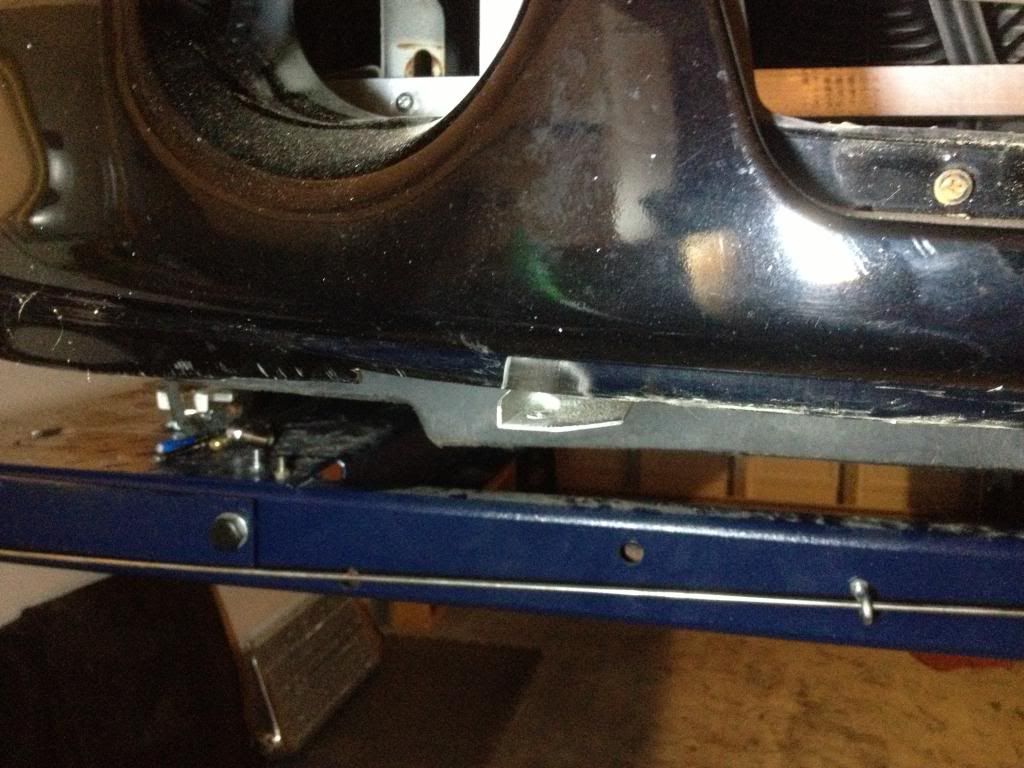
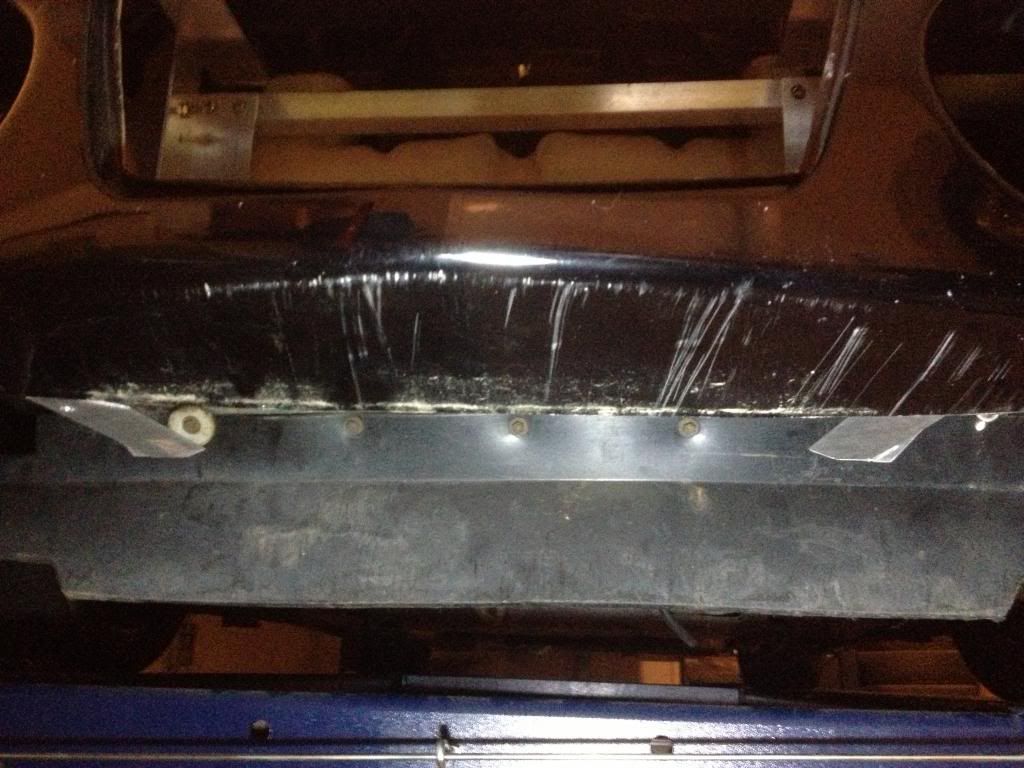
Remember when I said earlier to space it up 1".... Here is why. After I put the bumper on, the lower angles were protruding out below the bumper by a little bit.
So, learn from my mistake, do it this way the first time around:
^^*Note the close proximity to the top angle and the top of the bumper cover in the above pic*^^ Don't think I could have gone up any more if I had wanted to!
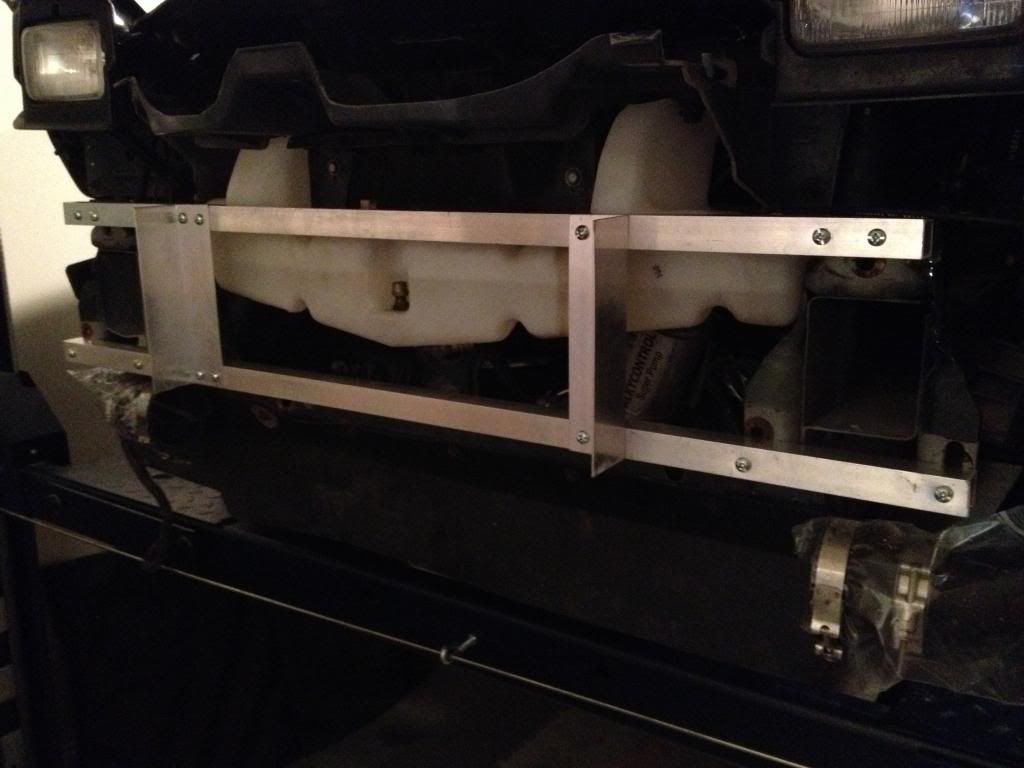
Now this is much better:
Now cut the fog light buckets as required:
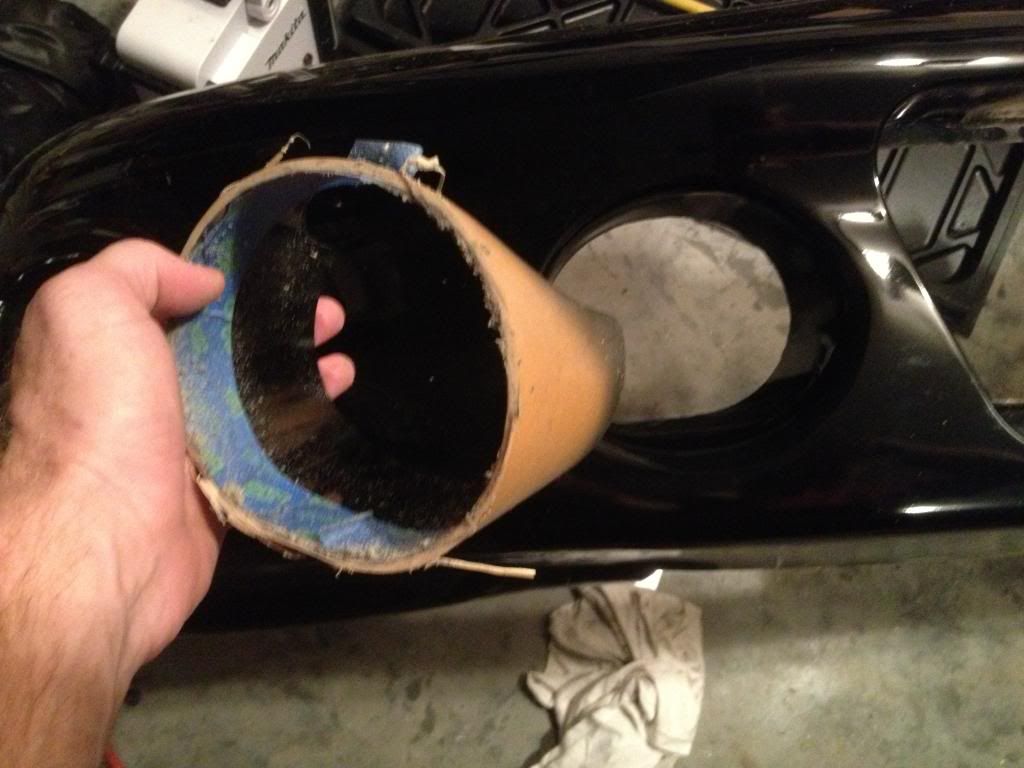
I cut mine 9" from the front of the frame horns which left a nice little 1/8" gap for clearance. You can see the gap here:
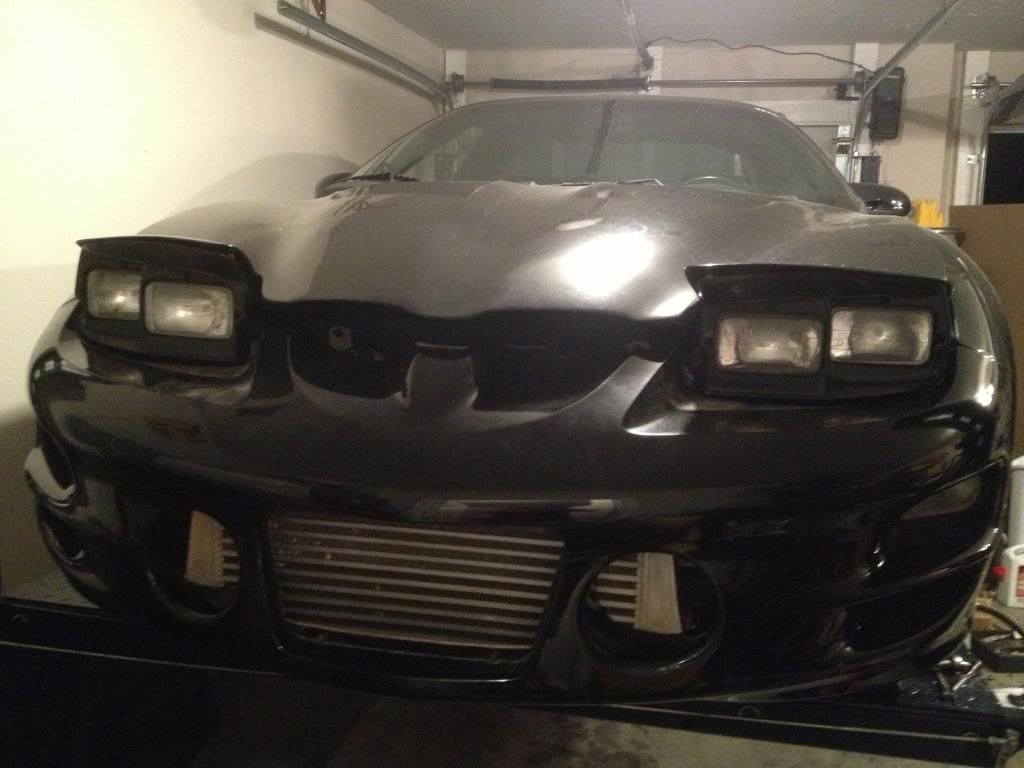
And now, the finished new look:
For materials, I chose aluminum for its light weight and ease of cutting. The whole project can be done by buying a 1"x1"x8' square tube, and a 2"x2"x8' angle stock, and of course some hardware- which I used 1/4" screws & nuts- 2 lengths: 1-1/2" and 3/4".
The whole setup is essentially two brackets- one bracket to attach to the car, and one bracket to attach to the intercooler.
For the first bracket that attaches to the car, cut 2 pieces of tube to fit across the front of the frame horns and mount them as shown here:

Next, Cut 4 legs to hold out the intercooler the desired space from the frame horns, and then attach those angles with a vertical angle:

You will need to trim the bottom angles to fit under the intercooler as shown here:

Once you have your vertical angles attaching the legs holding the intercooler, measure the distance between them, and then attach vertical angles to the tubes at the same distance:

Now remove the brackets that hold the intercooler and attach them to the vertical angles on the tubes:

*NOTE* Do not attach them as low as shown here- space them 1" up from what is shown in this pic, you will see why later..
Here is a pic of everything mounted up. You can see how I have started to make some 45� cuts on the driver's side bracket too.

And here it is with the intercooler mounted:


I removed it from the car to redo my piping, so I got a few pics of it off the car too:


Here is a pic of one of the frame horns where I drilled the mounting holes:

And now, on to modifying my old pipes to accommodate the new mount:


Again- I do not have a welder, and I did not want to bother anyone to weld new pipes, so I just ordered some straight hose from the same place I ordered all my other silicone parts for my piping- siliconeintakes dot com. Great place for DIY systems!
And here is the other side after the same method:

As you can see, the intercooler sits out about 8-7/8" away from the front of the frame horns:

Here is a pic with the mount and the piping. Ready for the intercooler (at least I thought anyways)

Remember when I said earlier to space it up 1".... Here is why. After I put the bumper on, the lower angles were protruding out below the bumper by a little bit.

So, learn from my mistake, do it this way the first time around:

^^*Note the close proximity to the top angle and the top of the bumper cover in the above pic*^^ Don't think I could have gone up any more if I had wanted to!


Now this is much better:

Now cut the fog light buckets as required:

I cut mine 9" from the front of the frame horns which left a nice little 1/8" gap for clearance. You can see the gap here:

And now, the finished new look:


 10-31-2013, 05:31 AM
#6
Actually, they are not. It would definitely be better to use locking nuts tho. 
No plans to sell it. Would defeat the whole purpose of DIY lol. Seriously, anyone can make this. All you need is a drill and a grinder with a metal cutoff wheel. Total cost for all the materials and hardware was less than $70.
No plans to sell it. Would defeat the whole purpose of DIY lol. Seriously, anyone can make this. All you need is a drill and a grinder with a metal cutoff wheel. Total cost for all the materials and hardware was less than $70.

Trending Topics


 10-31-2013, 09:47 AM
#12
My coolant temps seem to be a bit better with this setup, but then again, its hard to do a direct comparison since last time I was driving it regularly it was in a different state and a different time of year lol... IAT comparisons would be just skewed due to different environments, so I really cant offer any scientific insight to that inquiry...
12-06-2016, 08:20 AM
#14
Teching In

Join Date: Nov 2016
Posts: 11
Likes: 0
Received 0 Likes
on
0 Posts
Do you have any info on what pipe, and rubber couplings, etc. that is needed to accomplish this setup? I currently have the twin FMIC on my 2001 SS and want to change to a front mount. Did you reuse some of those fittings or just buy all new?