
First turbo build, 70 GTO...
 03-14-2022 | 10:16 PM
#121
TECH Fanatic

Joined: Nov 2014
Posts: 1,177
Likes: 546
 03-15-2022 | 03:18 PM
#122
Thread Starter

Joined: Mar 2003
Posts: 10,244
Likes: 1,533
From: The City of Fountains
Andrew
03-18-2022 | 10:16 PM
#123
Thread Starter
Joined: Mar 2003
Posts: 10,244
Likes: 1,533
From: The City of Fountains
The Tick Performance intercooler showed up yesterday. I was very impressed with their careful packaging.
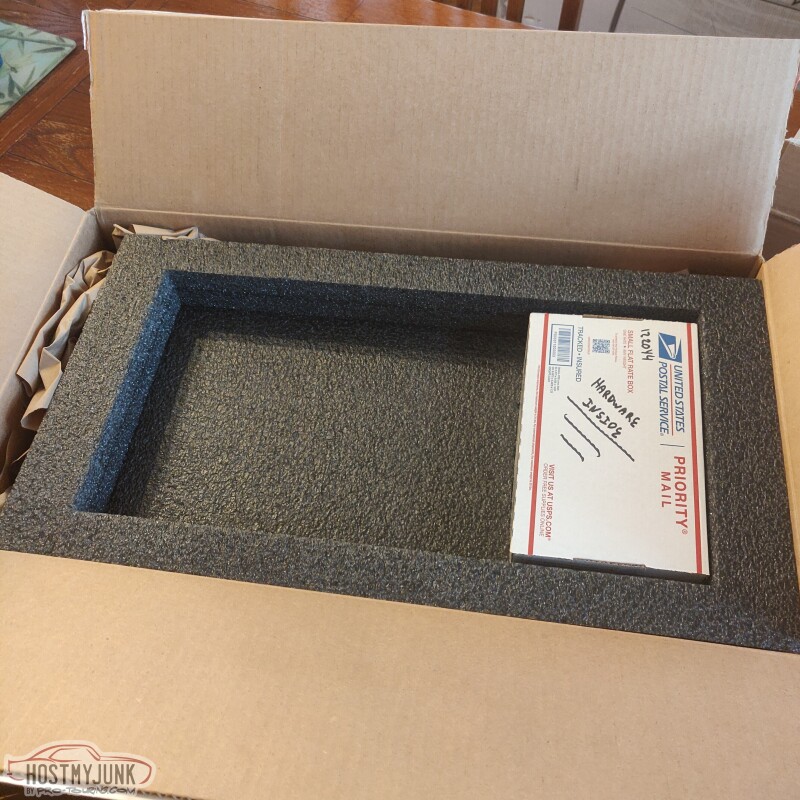
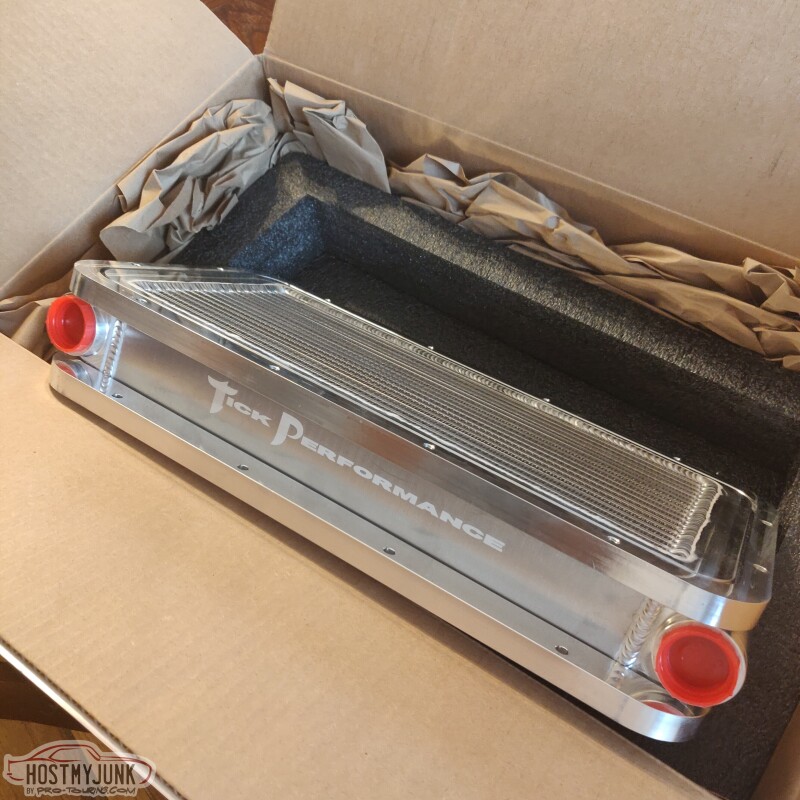
This thing is absolutely gorgeous and is built really well. The intercooler core looks to be a high quality design with a high density of fins.
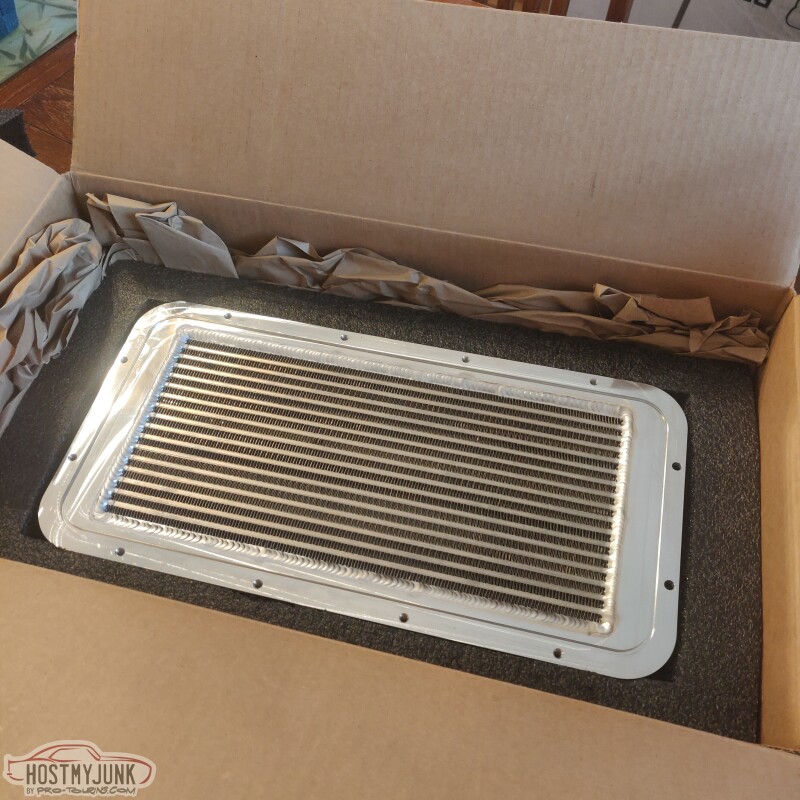
The mounting flanges are billet as are the end tanks.
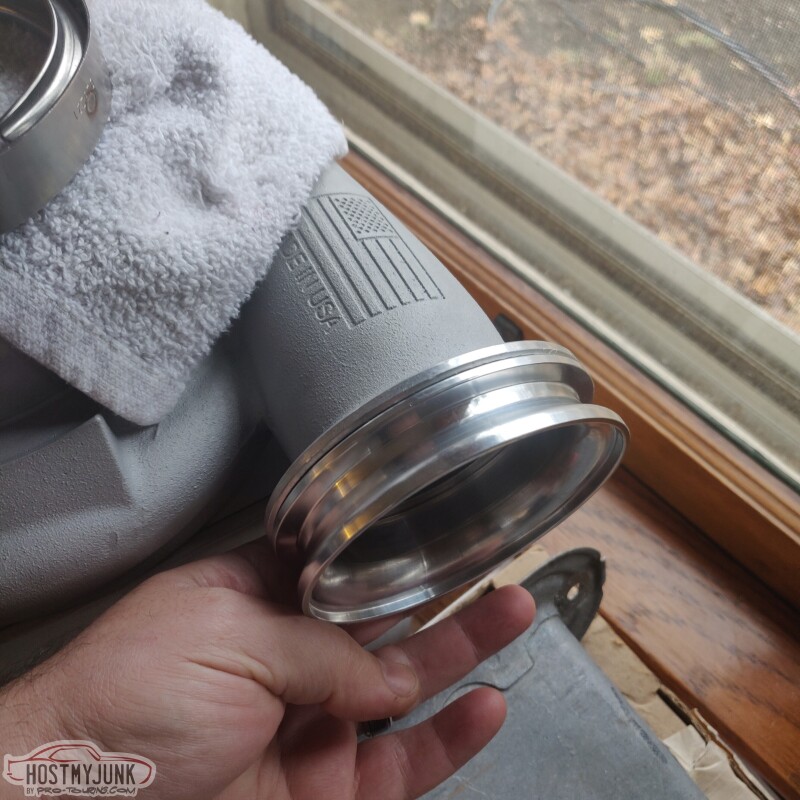
I also received the V-band flange for the compressor discharge piping, which will be 4 inches in diameter.
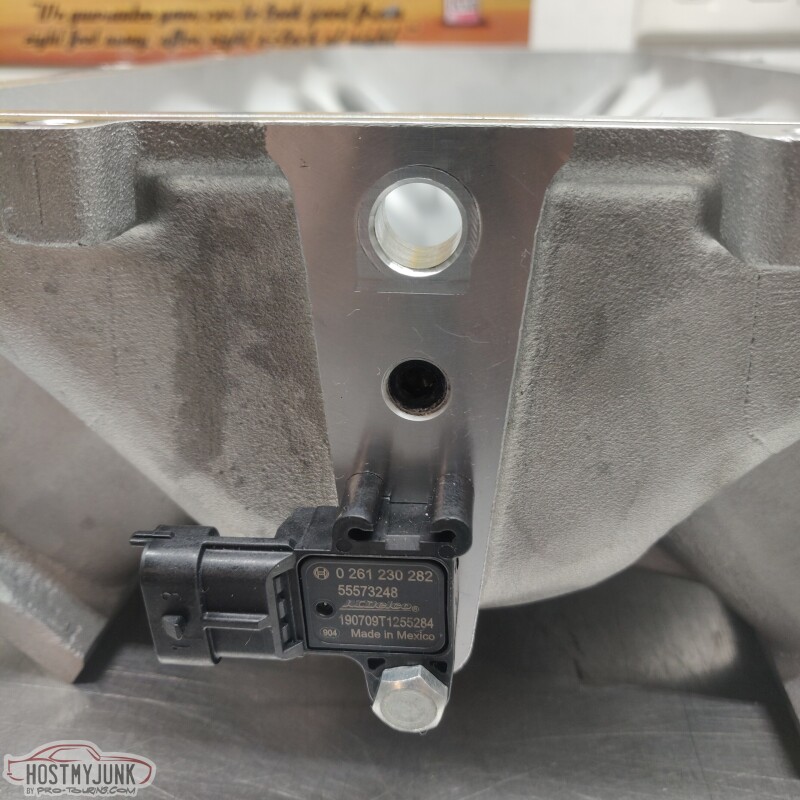
This is the MAP sensor that I will be using. I will actually be using two of them. These are 3 bar, which is a little more than I need, but I don't like running sensors to the limits of their range.
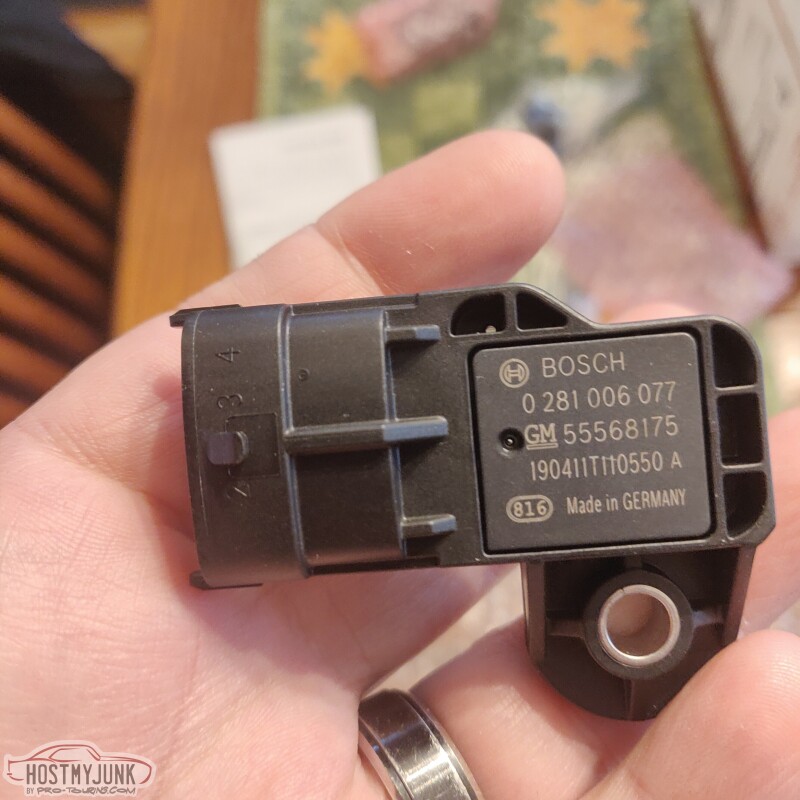
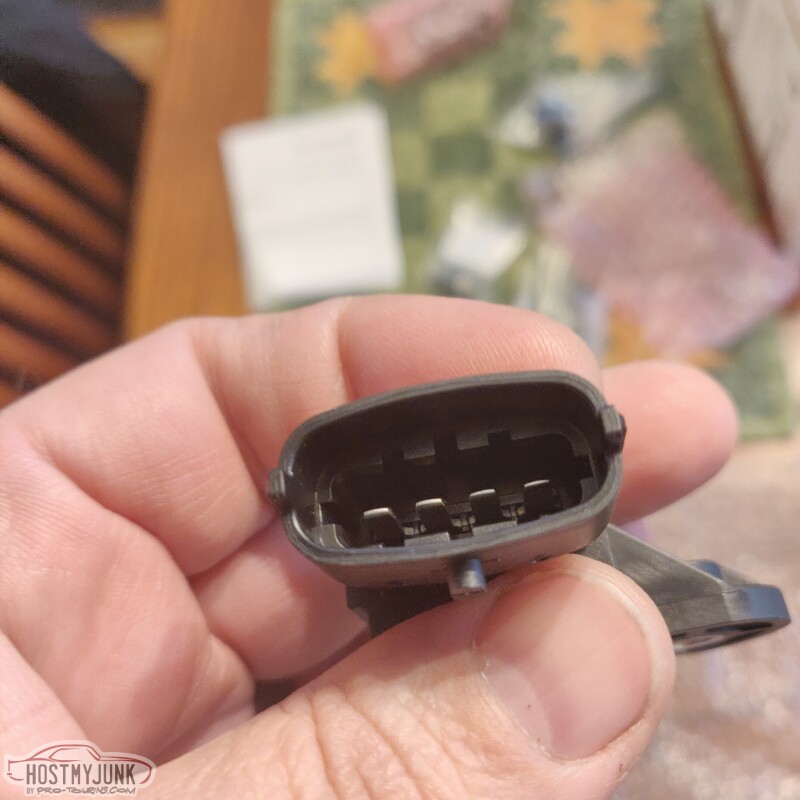
There are 4 wires instead of 3, like you would find on a typical MAP sensor. These sensors have an integral air temperature sensor, which makes for nicer packaging. One sensor will go into the Low Ram intake base, while the other will go in the lid, above the intercooler. This will allow me to measure the pressure drop across the intercooler as well as the temperature change.
Andrew
This thing is absolutely gorgeous and is built really well. The intercooler core looks to be a high quality design with a high density of fins.
The mounting flanges are billet as are the end tanks.
I also received the V-band flange for the compressor discharge piping, which will be 4 inches in diameter.
This is the MAP sensor that I will be using. I will actually be using two of them. These are 3 bar, which is a little more than I need, but I don't like running sensors to the limits of their range.
There are 4 wires instead of 3, like you would find on a typical MAP sensor. These sensors have an integral air temperature sensor, which makes for nicer packaging. One sensor will go into the Low Ram intake base, while the other will go in the lid, above the intercooler. This will allow me to measure the pressure drop across the intercooler as well as the temperature change.
Andrew


The following 2 users liked this post by Novapat67:
G Atsma (03-20-2022), Project GatTagO (03-20-2022)
03-20-2022 | 09:58 AM
#125
Thread Starter
Joined: Mar 2003
Posts: 10,244
Likes: 1,533
From: The City of Fountains
The following users liked this post:
G Atsma (03-20-2022)
03-23-2022 | 01:46 PM
#126
Thread Starter
Joined: Mar 2003
Posts: 10,244
Likes: 1,533
From: The City of Fountains
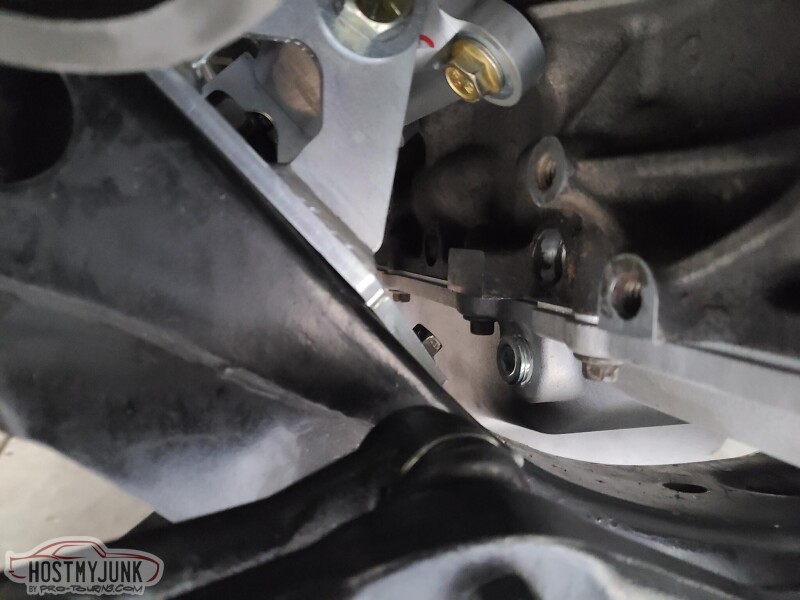
The Mighty Mouse Solutions timing pointer had to be shortened just a little bit in order to work with the ATI balancer that comes with the Holley mid-mount accessory drive.
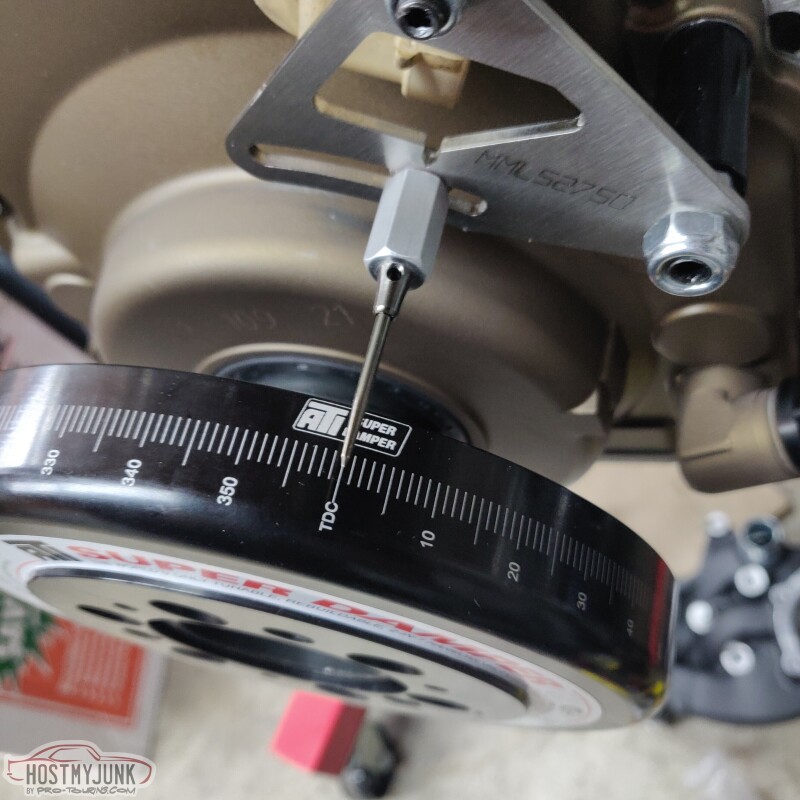
To be honest, I am not sure that it will actually be visible when everything is assembled, but at least it is there and pointing accurately.

Then I noticed this...
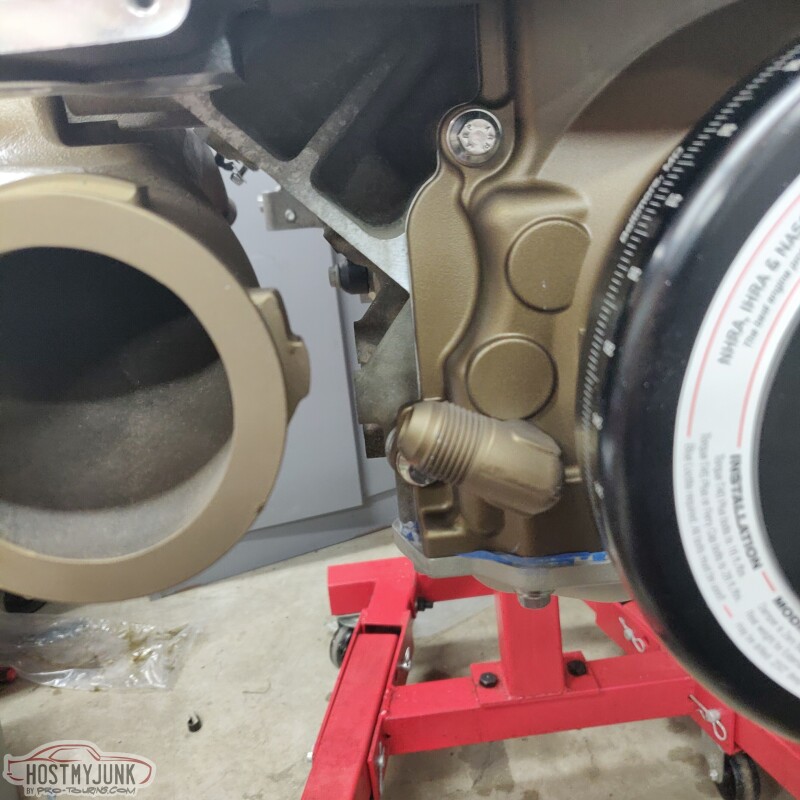
Looks like its back to using the drain ports on the pan. I have a real short fitting that I will try.
Andrew
To be honest, I am not sure that it will actually be visible when everything is assembled, but at least it is there and pointing accurately.
Then I noticed this...
Looks like its back to using the drain ports on the pan. I have a real short fitting that I will try.
Andrew
03-23-2022 | 02:40 PM
#128
Thread Starter
Joined: Mar 2003
Posts: 10,244
Likes: 1,533
From: The City of Fountains
03-23-2022 | 03:29 PM
#129

Staging Lane
Joined: Sep 2018
Posts: 84
Likes: 9
From: Chicago, Il
 03-23-2022 | 09:25 PM
#130
Thread Starter
Joined: Mar 2003
Posts: 10,244
Likes: 1,533
From: The City of Fountains
03-24-2022 | 06:23 AM
#131

I wonder if a "full flow" 45 deg added to it would clear-guessing its a #10? I got the hooker turbo manifold for my new project, kind of thinking I might have been better off with a log manifold, as I have used them in the past on A bodies.
03-24-2022 | 01:15 PM
#132
Thread Starter
Joined: Mar 2003
Posts: 10,244
Likes: 1,533
From: The City of Fountains
That picture was taken by my buddy TJ in his 67 Chevelle. The oil drain on the 302-3 oilpan are right over the front crossmember. He said the picture is misleading and the available space in that area is very limited.
So before installing the engine, I want to have a plan.
Andrew
The following users liked this post:
n2xlr8n66 (03-27-2022)
The following 2 users liked this post by The BallSS:
n2xlr8n66 (03-27-2022), Project GatTagO (03-24-2022)
03-25-2022 | 10:47 AM
#134
Thread Starter
Joined: Mar 2003
Posts: 10,244
Likes: 1,533
From: The City of Fountains
Andrew
Last edited by Project GatTagO; 03-25-2022 at 12:14 PM.
03-25-2022 | 12:14 PM
#135
Thread Starter
Joined: Mar 2003
Posts: 10,244
Likes: 1,533
From: The City of Fountains
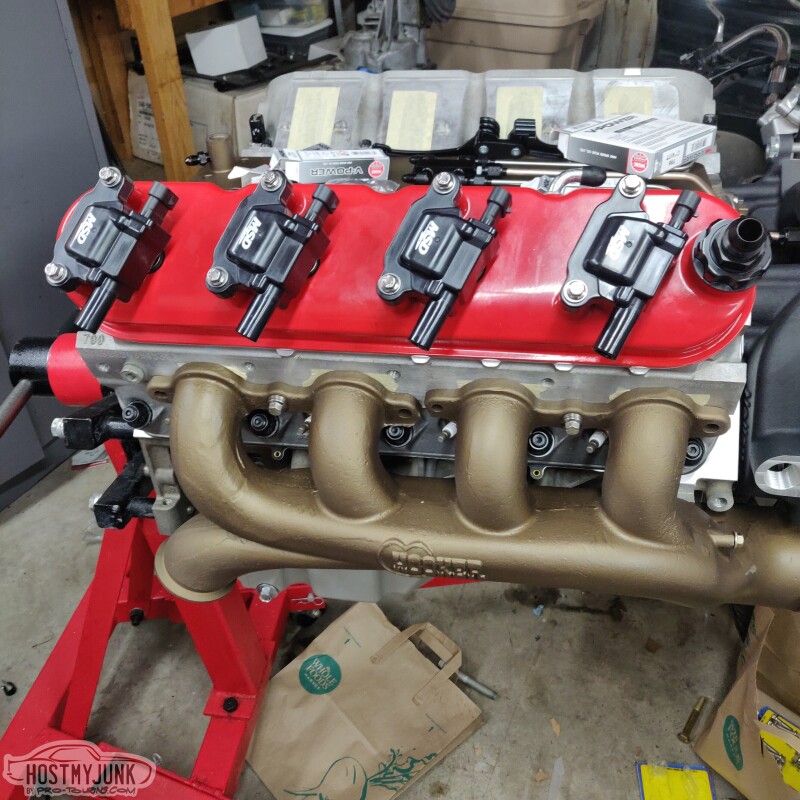
Did a little more mock-up. I was a little worried about the coils and Accel wires playing nicely together with the turbo manifold.
Spark plug access is amazing, which is really nice for quick plug checks.
Cylinders 2 and 4.
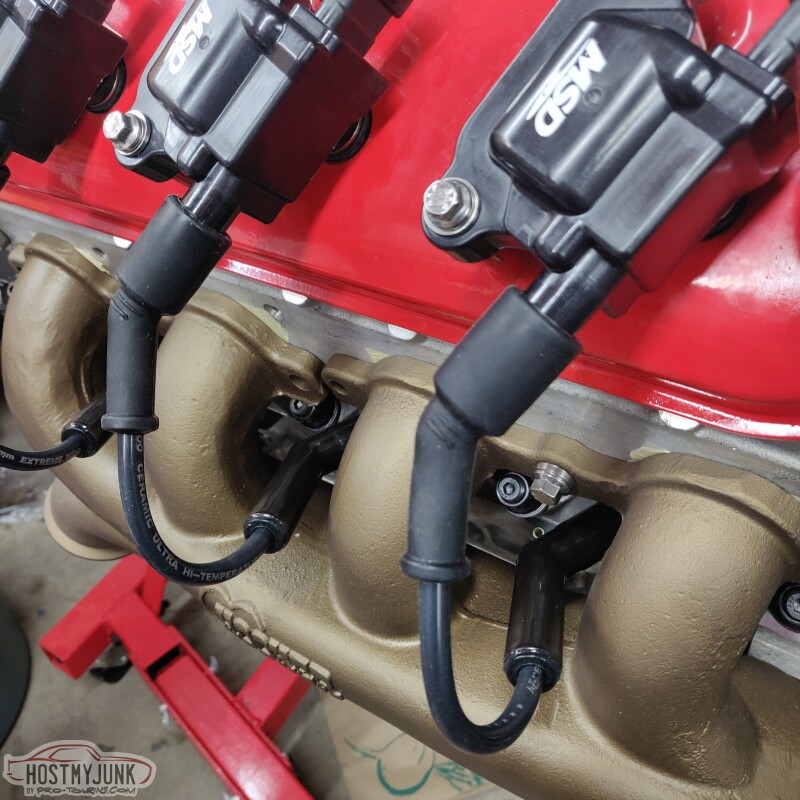
Cylinders 6 and 8.
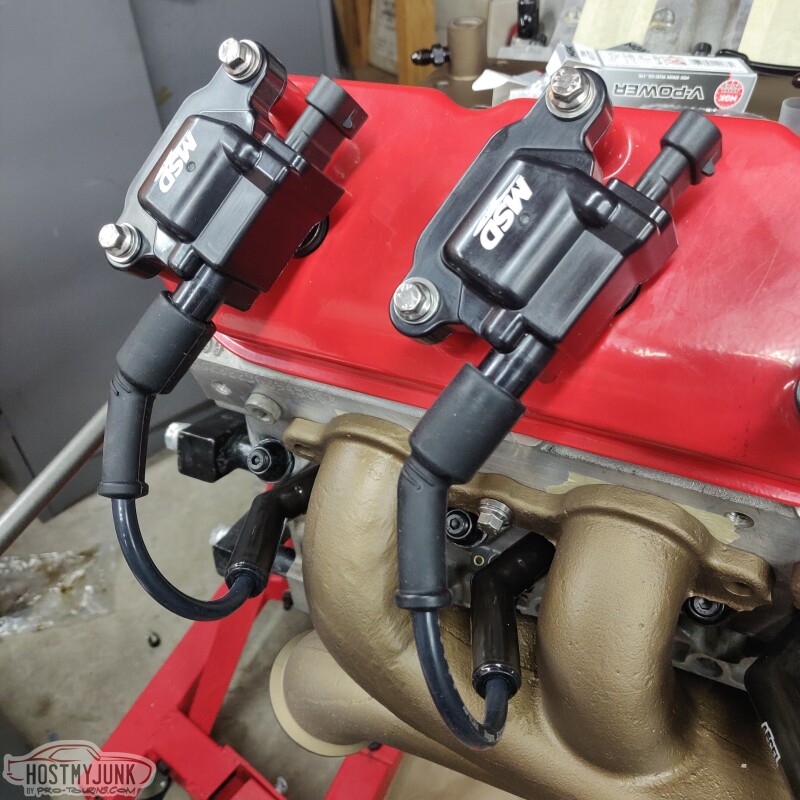
There is a solid 1/2" gap between the ceramic plug boots and the manifold runners.
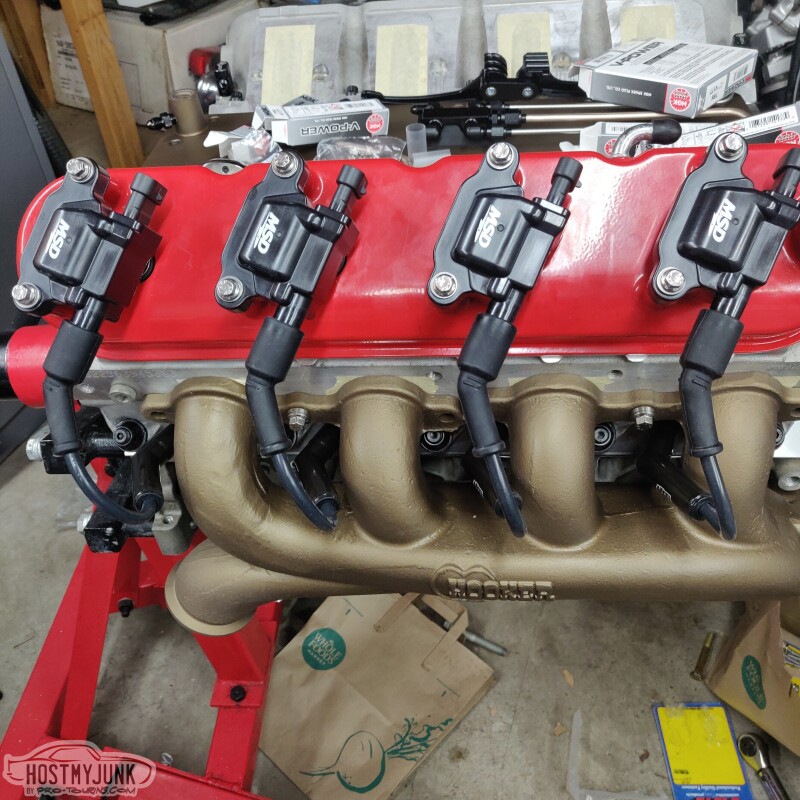
Overall, this is looking promising. It remains to be seen how the downpipes will effect any of this.
Andrew
Spark plug access is amazing, which is really nice for quick plug checks.
Cylinders 2 and 4.
Cylinders 6 and 8.
There is a solid 1/2" gap between the ceramic plug boots and the manifold runners.
Overall, this is looking promising. It remains to be seen how the downpipes will effect any of this.
Andrew
03-26-2022 | 02:21 AM
#136

That is step 2. Make everything work with rubber line, then make it last with real parts. No need to go bending hardline until you have finalized a build, and no need to take chances on the temp lines once you know where everything is going.
The following 4 users liked this post by gametech:
03-30-2022 | 09:55 PM
#137
Thread Starter
Joined: Mar 2003
Posts: 10,244
Likes: 1,533
From: The City of Fountains
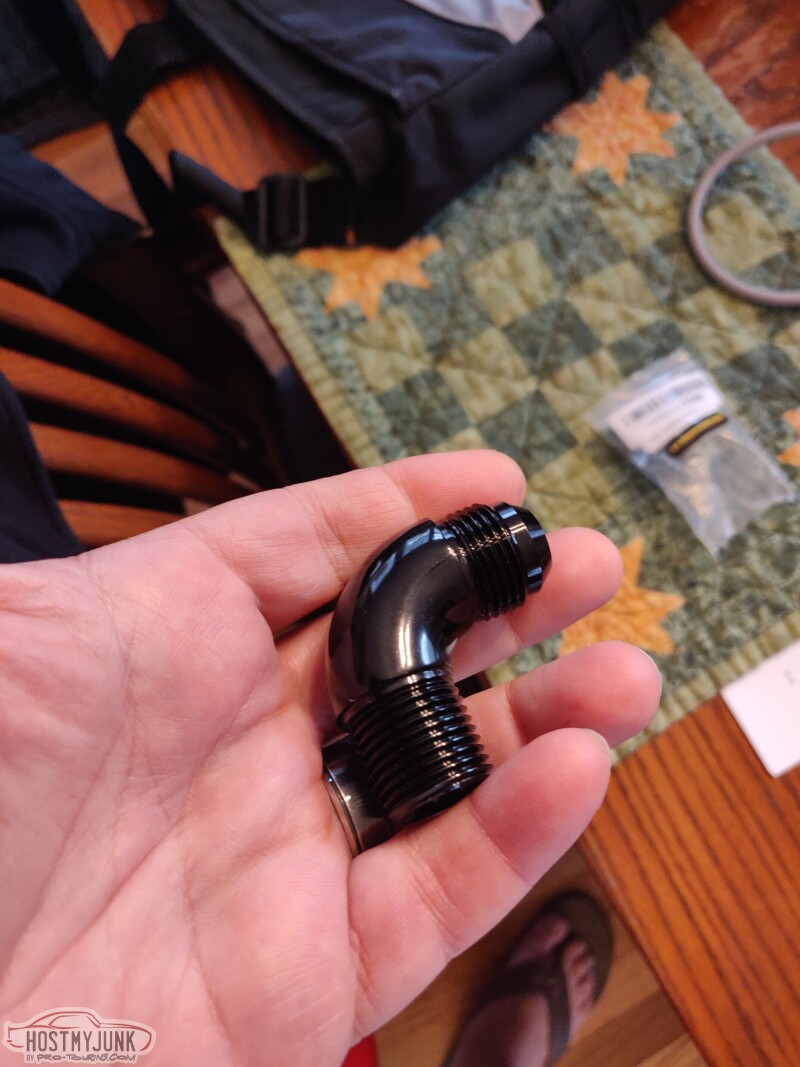
Since I am back to looking at the oil pan for turbo drain, I found this smooth 90 degree fitting on Amazon. I will probably still have to pull the pan to install it, but hopefully that will be the last time!
I also got my first order from Stainless Bros for the turbo up-pipe. I was very impressed that they had everything that needed in stock and it shipped the same day. I placed my order on Monday afternoon and got my parts Wednesday afternoon. I was also pleased to see that everything was thoughtfully bagged and well packaged.
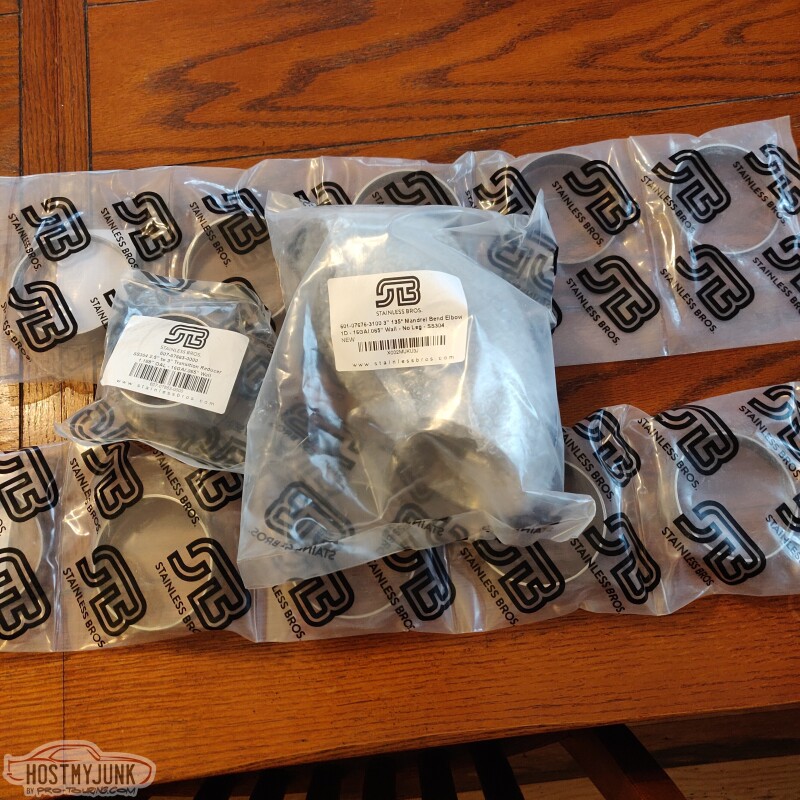
This is a 3" 135 degree bend that will go on the manifold exit.

I also got some precut pie-cuts that will be used to snake around and place the turbo where I want.
Andrew
I also got my first order from Stainless Bros for the turbo up-pipe. I was very impressed that they had everything that needed in stock and it shipped the same day. I placed my order on Monday afternoon and got my parts Wednesday afternoon. I was also pleased to see that everything was thoughtfully bagged and well packaged.
This is a 3" 135 degree bend that will go on the manifold exit.
I also got some precut pie-cuts that will be used to snake around and place the turbo where I want.
Andrew
03-31-2022 | 06:40 AM
#138
Is that a #10 to 1/2 pipe, that could be an option with the 302-3 pan on my new project, if I run into problems. As I remember on my A body Buick, I drilled and tapped in front of the starter for the drain, but if I can use what the pan has so much the better. Does it have a part #, I tend to buy stuff like this just to have, lol.
The following users liked this post:
Project GatTagO (03-31-2022)
03-31-2022 | 08:32 AM
#139
Thread Starter
Joined: Mar 2003
Posts: 10,244
Likes: 1,533
From: The City of Fountains
Is that a #10 to 1/2 pipe, that could be an option with the 302-3 pan on my new project, if I run into problems. As I remember on my A body Buick, I drilled and tapped in front of the starter for the drain, but if I can use what the pan has so much the better. Does it have a part #, I tend to buy stuff like this just to have, lol.
But I do not see it being offered right now. Yes, it is 1/2" NPT to -AN10. I also found an Earl's 1/2" NPT to 5/8" barb that swivels.
Andrew
04-01-2022 | 10:10 PM
#140
Thread Starter
Joined: Mar 2003
Posts: 10,244
Likes: 1,533
From: The City of Fountains
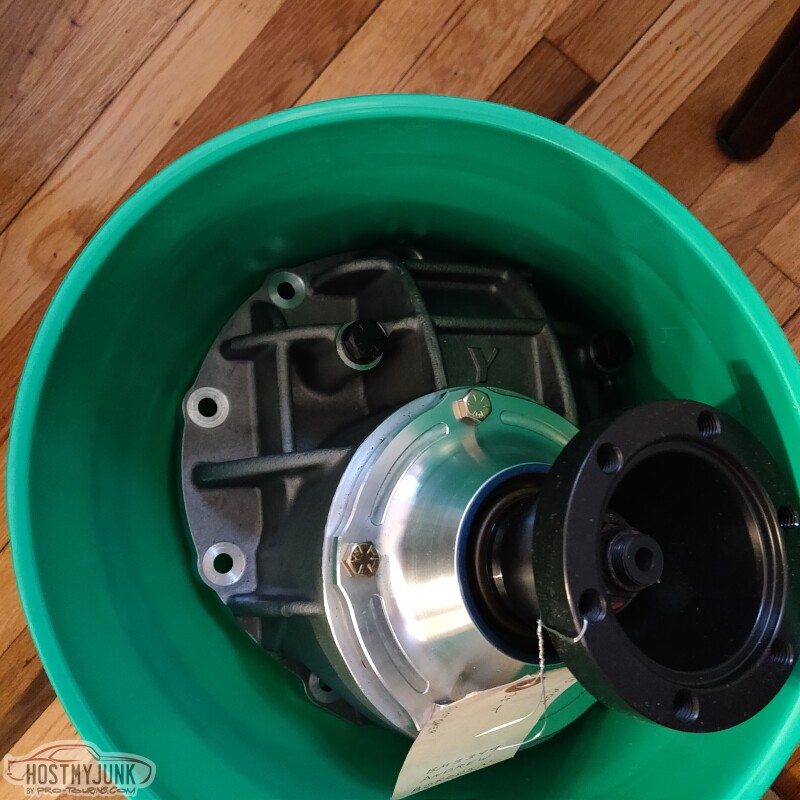
Quick Performance finally sent me that remainder of the rear end parts. Yes, they shipped the carrier in a Menards bucket, which was then packed in a really heavy duty cardboard box. No complaints, just found it funny. It's a Yukon bolt through aluminum carrier with an Eaton 35 spline TruTrack and 3.25 gears, plus the CV pinion yoke, which I sent them.
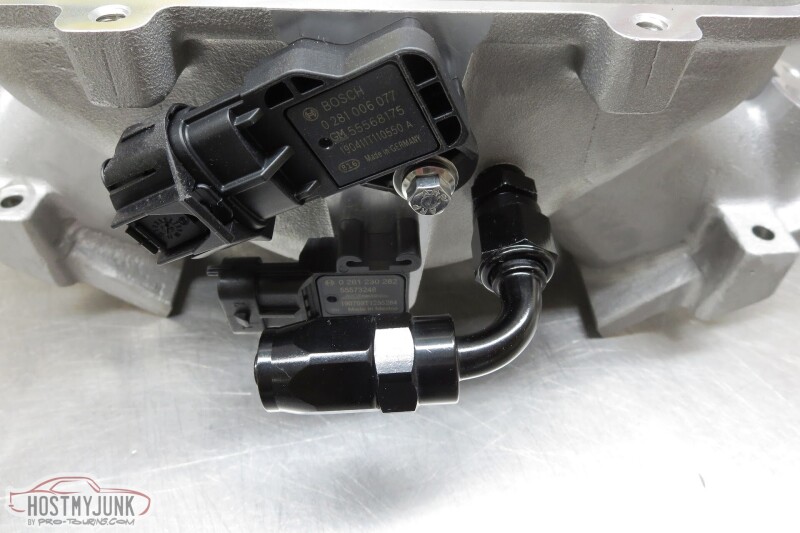
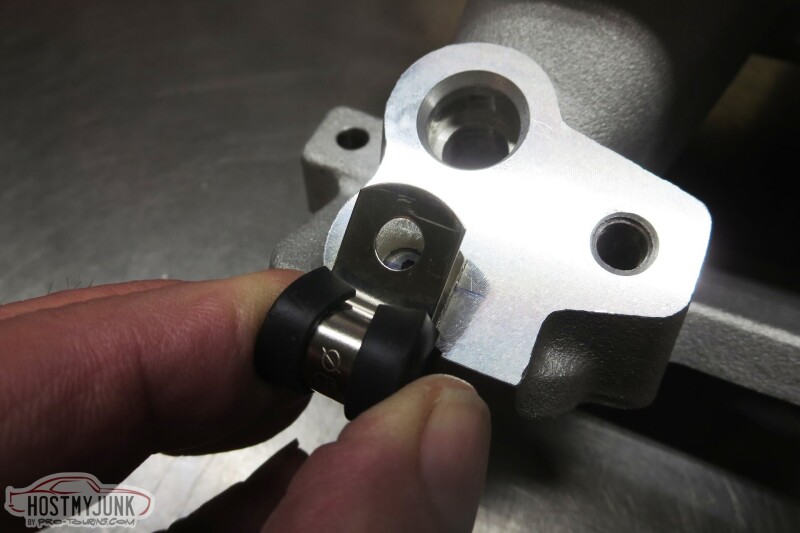
I've also been keeping Vic busy with small machining projects. He used some really heavy duty loctite to install a 3/8" NPT plug into an existing port in the intake manifold, then drilled it out to a 12mm hole. This is for the Bosch TMAP that I will be using as the main vacuum/boost sensor for the Holley EFI.
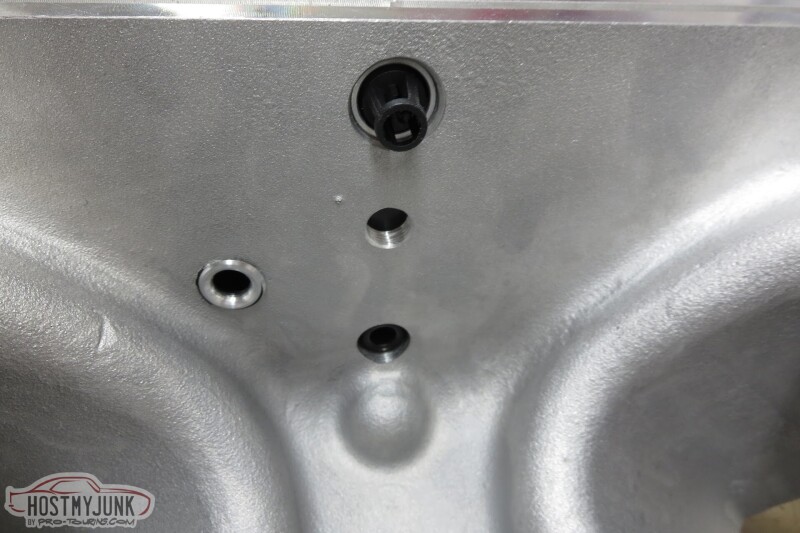
The MAP sensor below it is for the VaporWorks fuel pressure controller. It will adjust rail pressure based on vacuum and boost to maintain a consistent deferential pressure across the injectors. He also added a port for the vacuum line that will go to the catch can.
He is also going to drill and tap little holes for P-clamps that will hold the oil feed line for the turbo.
Andrew
I've also been keeping Vic busy with small machining projects. He used some really heavy duty loctite to install a 3/8" NPT plug into an existing port in the intake manifold, then drilled it out to a 12mm hole. This is for the Bosch TMAP that I will be using as the main vacuum/boost sensor for the Holley EFI.
The MAP sensor below it is for the VaporWorks fuel pressure controller. It will adjust rail pressure based on vacuum and boost to maintain a consistent deferential pressure across the injectors. He also added a port for the vacuum line that will go to the catch can.
He is also going to drill and tap little holes for P-clamps that will hold the oil feed line for the turbo.
Andrew