
First turbo build, 70 GTO...
 04-02-2022 | 05:31 AM
#141


Is that a #10 to 1/2 pipe, that could be an option with the 302-3 pan on my new project, if I run into problems. As I remember on my A body Buick, I drilled and tapped in front of the starter for the drain, but if I can use what the pan has so much the better. Does it have a part #, I tend to buy stuff like this just to have, lol.
04-02-2022 | 06:29 PM
#142

TMAP sensors a freakin awesome.
I think Engine Masters did a video using the Hooker turbo manifolds. They said they thought they found the limit of the setup but I can't remember what it was or the turbo was too small causing high back pressure.
I think Engine Masters did a video using the Hooker turbo manifolds. They said they thought they found the limit of the setup but I can't remember what it was or the turbo was too small causing high back pressure.
The following users liked this post:
Project GatTagO (04-03-2022)
04-02-2022 | 07:58 PM
#143

Wait until you put the TRZ rack in it! Your turning radius is gonna go right in the *******. You�ll need to hide a floor jack behind your garbage cans so you can swing the *** end around when you want to put the car back in the garage. Ackerman angle gets all screwed up when you make a rear steer car front steer.
The following users liked this post:
spray280 (04-04-2022)
04-03-2022 | 08:59 AM
#144
Thread Starter
Joined: Mar 2003
Posts: 10,244
Likes: 1,533
From: The City of Fountains
Andrew
04-03-2022 | 08:12 PM
#145

Teching In
Joined: Dec 2011
Posts: 48
Likes: 3
From: Dimondale, MI
Hey Andrew, that�s a beautiful car. Do you plan on wrapping the manifolds? I have the hooker manifolds going in a g body but haven�t done the research on that yet. I�m thinking you already have as your builds are well thought out. Thanks
04-03-2022 | 09:37 PM
#146
Thread Starter
Joined: Mar 2003
Posts: 10,244
Likes: 1,533
From: The City of Fountains
Andrew
04-04-2022 | 10:10 PM
#147
Thread Starter
Joined: Mar 2003
Posts: 10,244
Likes: 1,533
From: The City of Fountains
This morning Vic sent me a few mock up pictures of the new radiator (I had to get a new one...long story) with all of the tabs ready to weld. The tabs on the radiator will hold the fans, heat exchanger for the A2W intercooler, and the AC condenser.
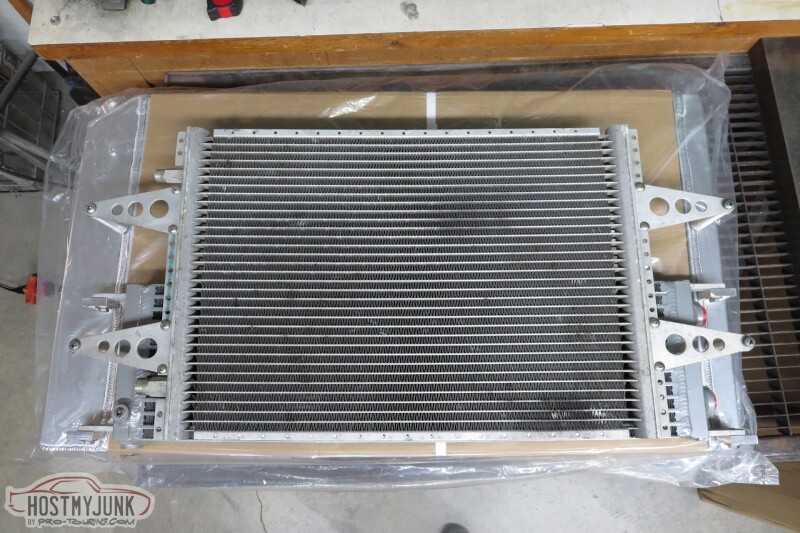

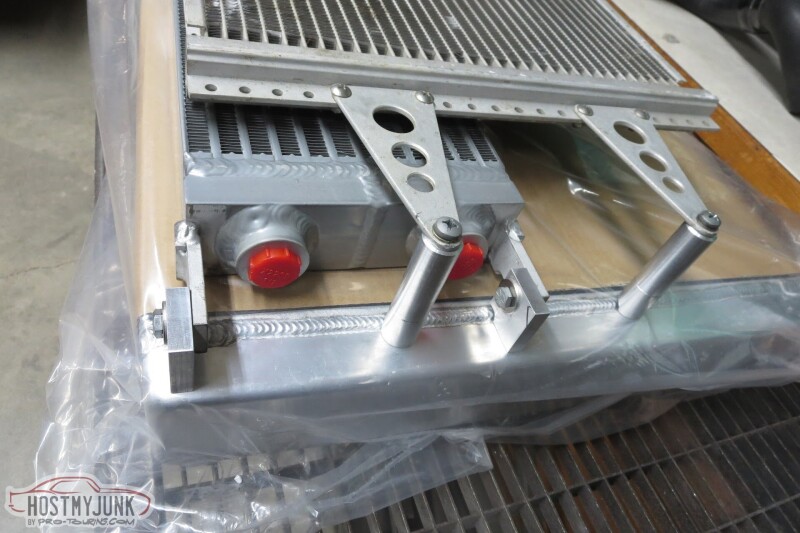
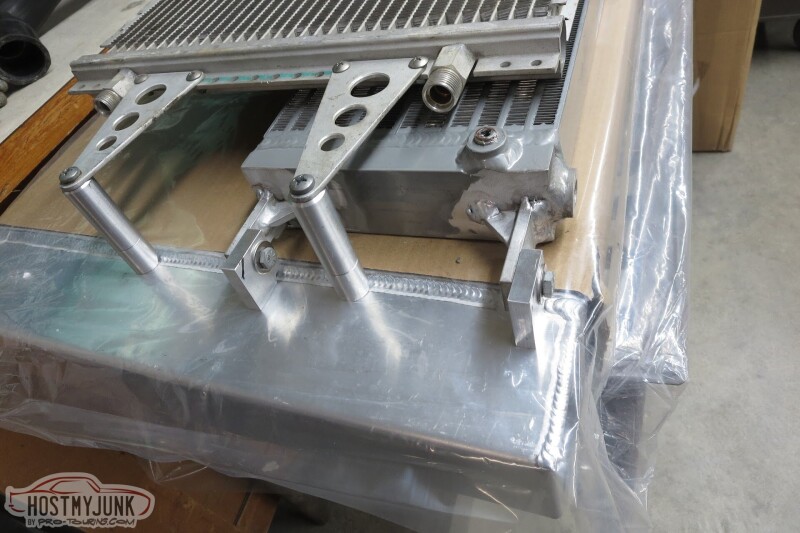
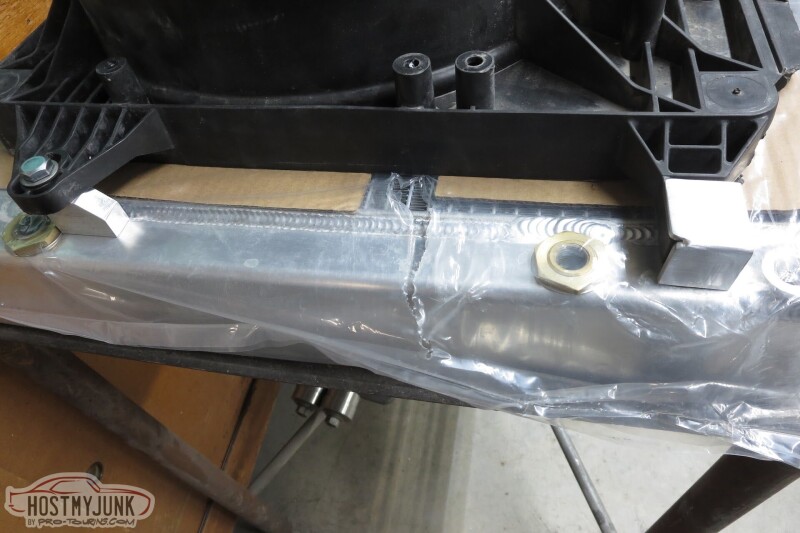
Progress is being made.
Andrew
Progress is being made.
Andrew
04-05-2022 | 11:31 AM
#149
Thread Starter
Joined: Mar 2003
Posts: 10,244
Likes: 1,533
From: The City of Fountains
I am using this as inspiration:
https://radrides.com/builds/1961-brookwood-chevy-wagon/
Not sure if I can get there, but I am trying.
Andrew
https://radrides.com/builds/1961-brookwood-chevy-wagon/
Not sure if I can get there, but I am trying.
Andrew
04-05-2022 | 01:20 PM
#150

On The Tree
Joined: Nov 2021
Posts: 127
Likes: 74
I am using this as inspiration:
https://radrides.com/builds/1961-brookwood-chevy-wagon/
Not sure if I can get there, but I am trying.
Andrew
https://radrides.com/builds/1961-brookwood-chevy-wagon/
Not sure if I can get there, but I am trying.
Andrew
The following users liked this post:
Pro Stock John (04-05-2022)
04-05-2022 | 02:26 PM
#151
Troy builds some nice stuff-back in the day a guy in my neighborhood special ordered a 61 wagon, 348/4sp, was cool to see him rowing gears in a wagon. He sold it, I ended up with it later, for $250. They had taken the engine apart, but I put it back together, added tri power, drove it for a year.
The following users liked this post:
Project GatTagO (04-06-2022)
The following users liked this post:
Project GatTagO (04-06-2022)
04-05-2022 | 04:39 PM
#153
TECH Fanatic

Joined: Nov 2014
Posts: 1,177
Likes: 546
The following users liked this post:
Project GatTagO (04-06-2022)
04-06-2022 | 11:49 AM
#154
Thread Starter
Joined: Mar 2003
Posts: 10,244
Likes: 1,533
From: The City of Fountains
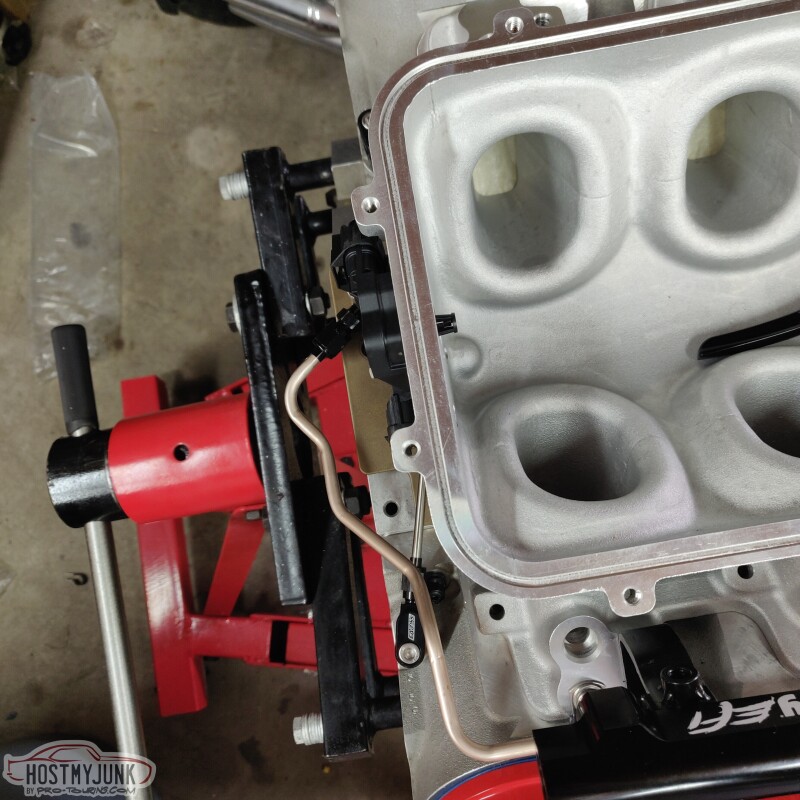
Some of my friends rag on me for not dropping the engine in the car, but this is the kid of stuff that is so much easier to deal with when the engine is still on the stand. This situation is on Holley. Not sure what their thinking was...
This situation is on me...::facepalm::

The added holes for the P-clamps turned out really well. I like the look and how the oil feed line for the turbo will be well supported.
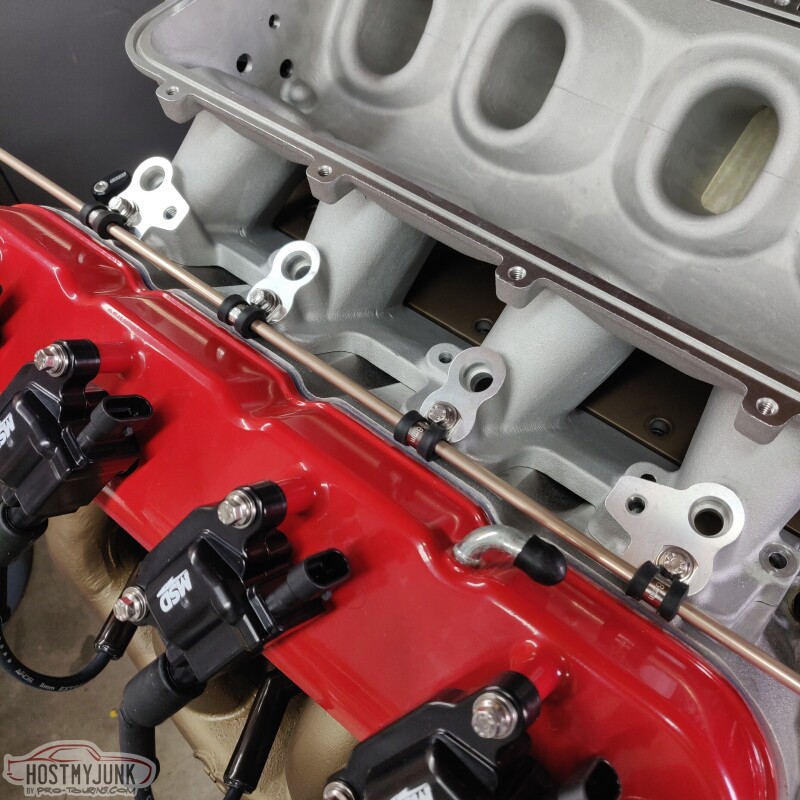
This is with the fuel rail fitted.

Hopefully this oil feed line routing doesn't cause any issues.
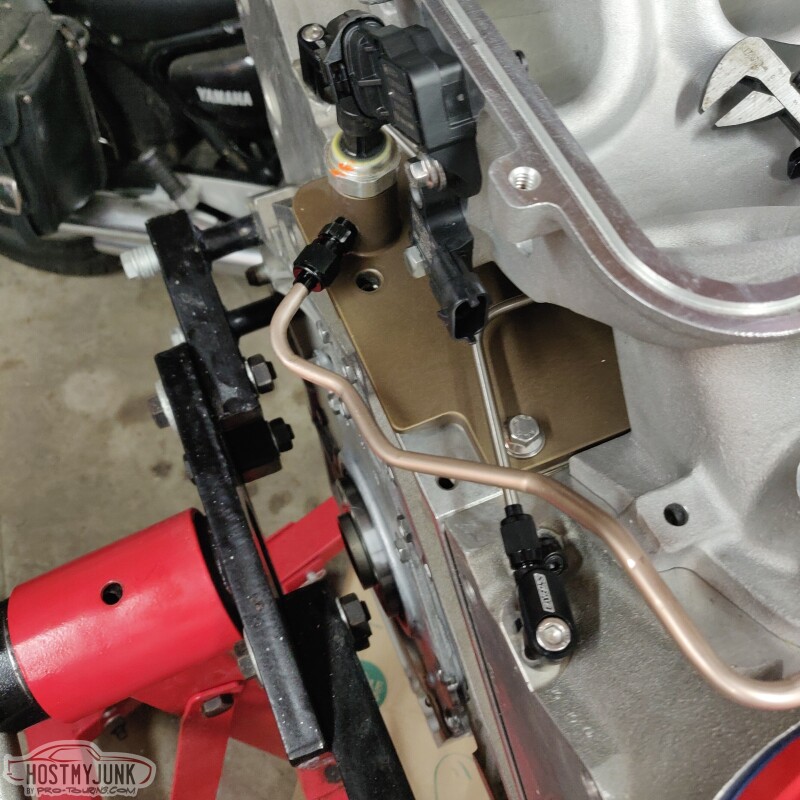
Andrew
This situation is on me...::facepalm::
The added holes for the P-clamps turned out really well. I like the look and how the oil feed line for the turbo will be well supported.
This is with the fuel rail fitted.
Hopefully this oil feed line routing doesn't cause any issues.
Andrew


The following users liked this post:
Project GatTagO (04-06-2022)
04-08-2022 | 04:15 PM
#156
Thread Starter
Joined: Mar 2003
Posts: 10,244
Likes: 1,533
From: The City of Fountains
I masked off the intercooler and then blasted it. Not sure why I didn't get a picture of it after blasting...:hmm:

I also blasted the various machined areas of the intake manifold.


I also went around the whole intake and broke all of the hard corners with a file. It is amazing how sharp the machined edges can be.
All of this is in preparation for Cerakoating when the weather finally warms up a little.
Andrew
I also blasted the various machined areas of the intake manifold.
I also went around the whole intake and broke all of the hard corners with a file. It is amazing how sharp the machined edges can be.
All of this is in preparation for Cerakoating when the weather finally warms up a little.
Andrew
04-11-2022 | 03:36 PM
#157
Thread Starter
Joined: Mar 2003
Posts: 10,244
Likes: 1,533
From: The City of Fountains
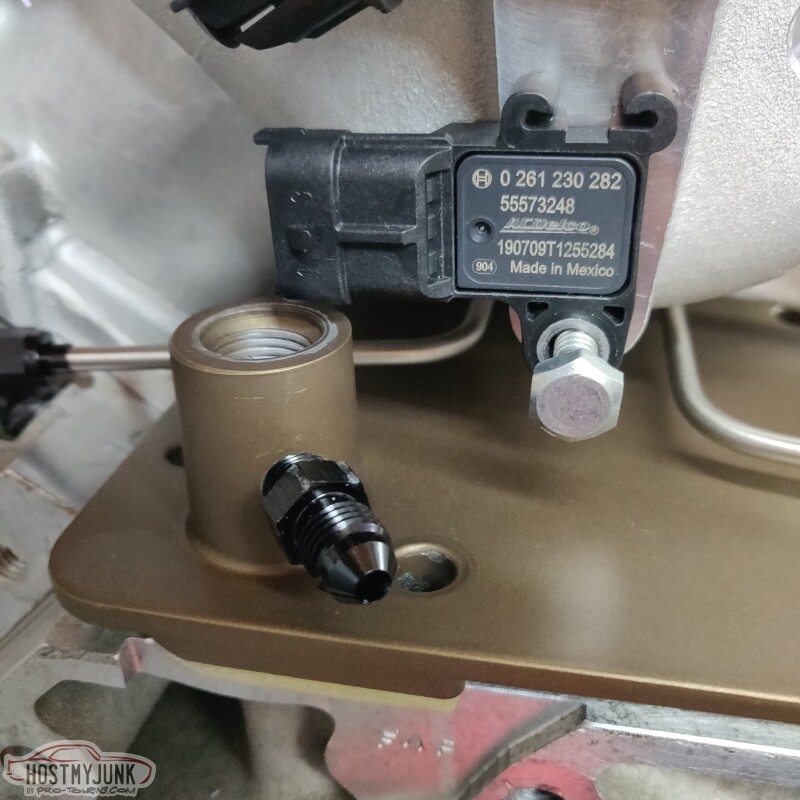
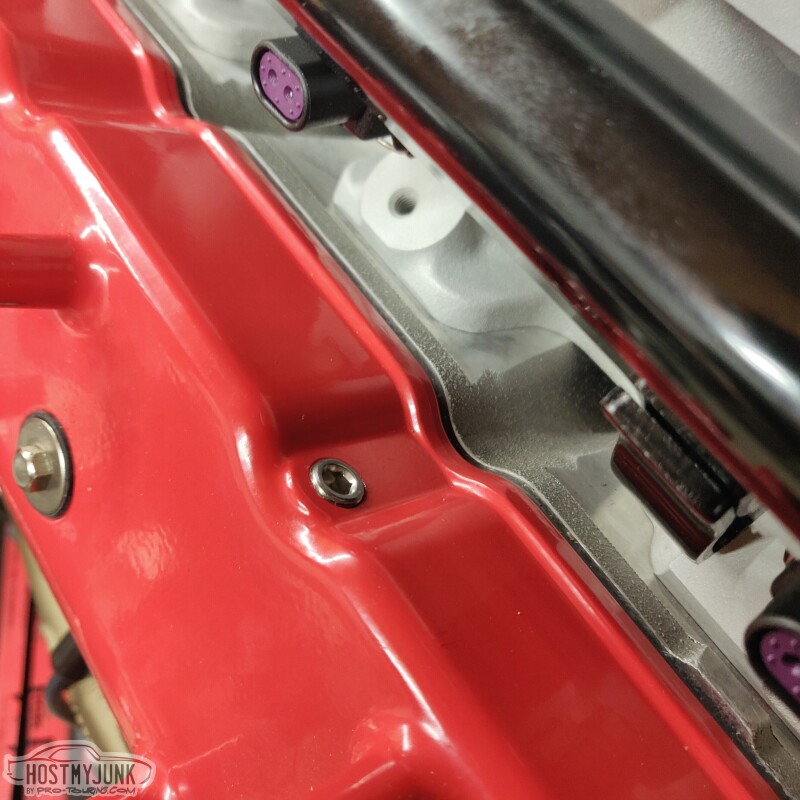
An old oil pressure sensor was turned into a plug.
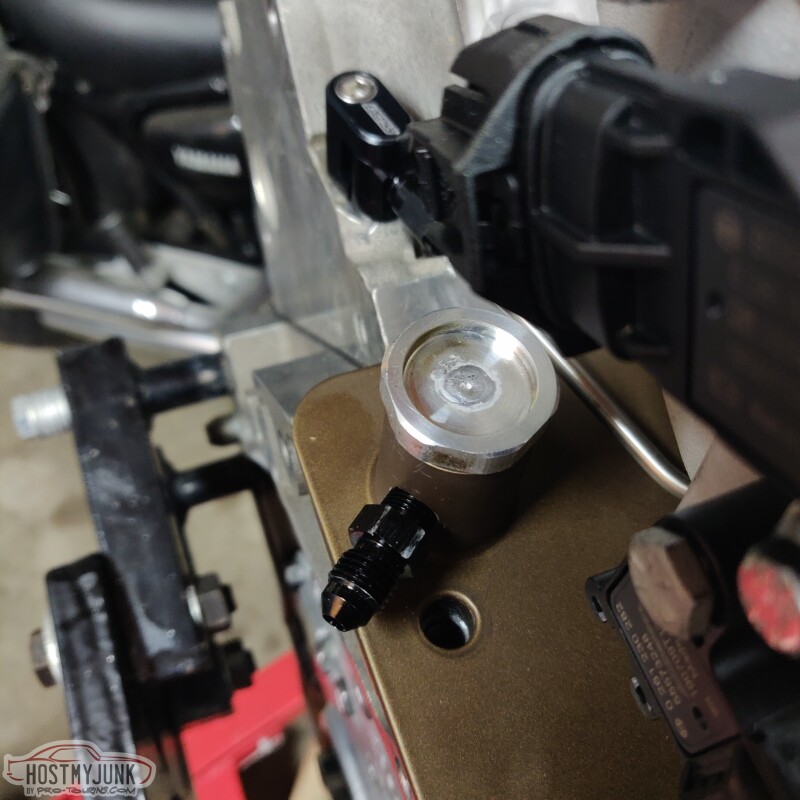
The lower MAP sensor was turned around and a new mounting hole was added for solid retention.
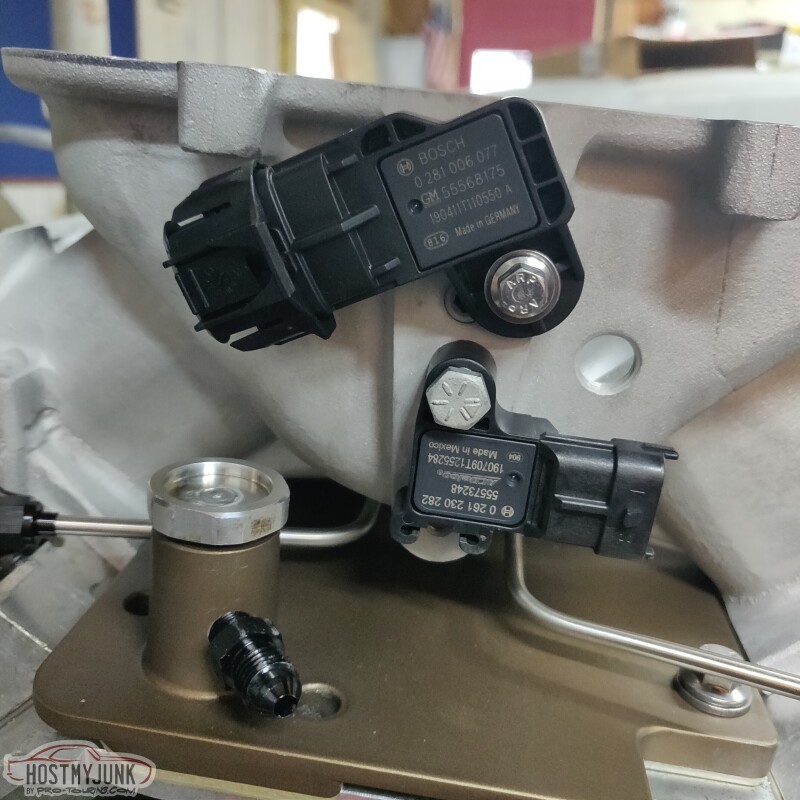
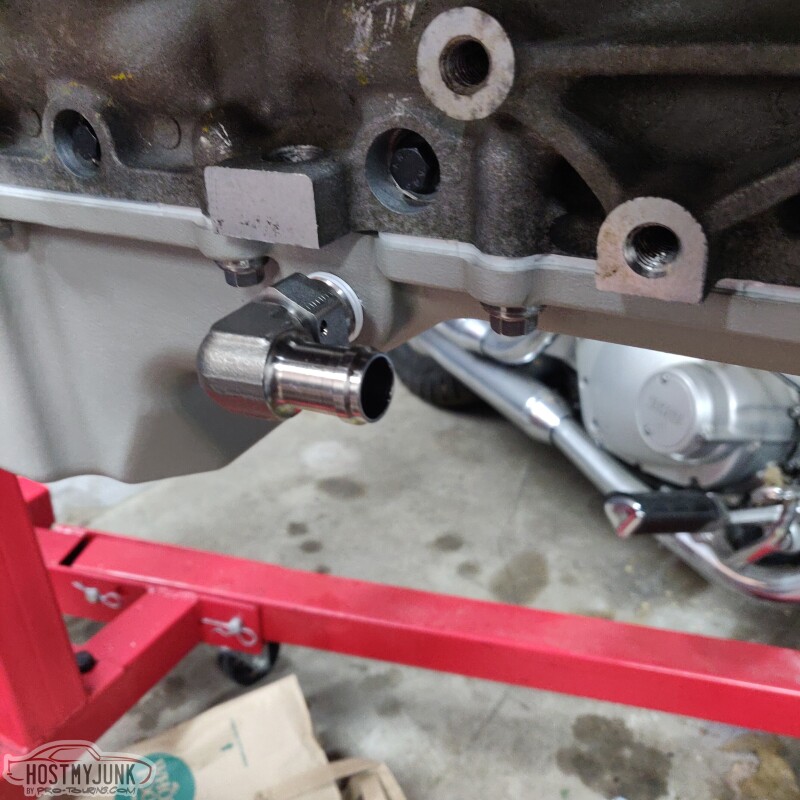
I decided on this fitting for the oil drain. It's stainless and it swivels. As long as it doesn't stick out too far, it should be good to go.

It is about 1.75" from the pan to the end of the fitting. The fact that it swivels will make it easier to fit the drain hose.
I removed the press in nipple off the passenger side valve cover and use a 1/8" NPT tap and added a stainless plug.
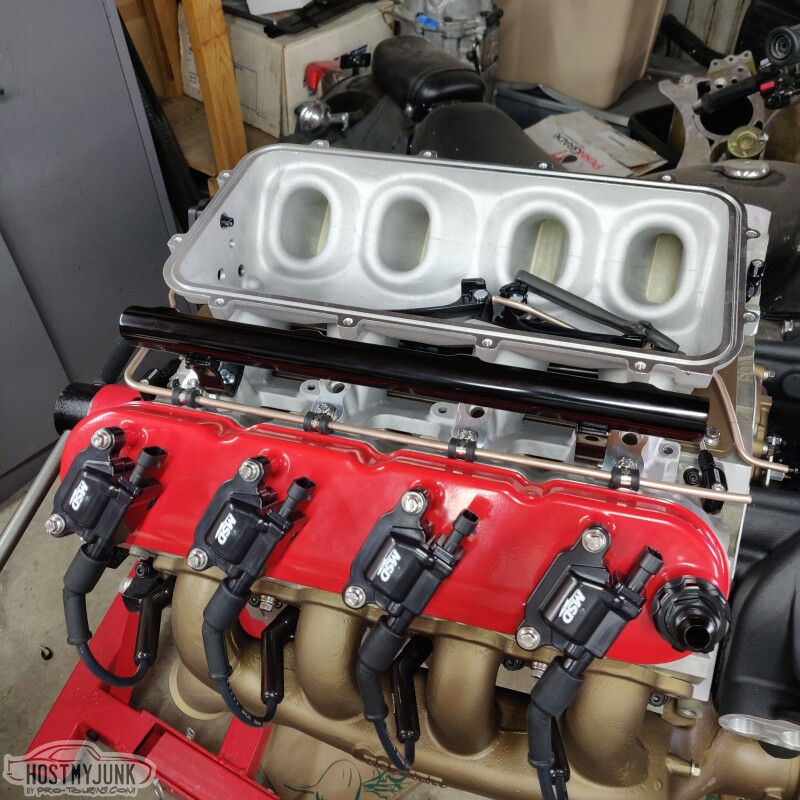
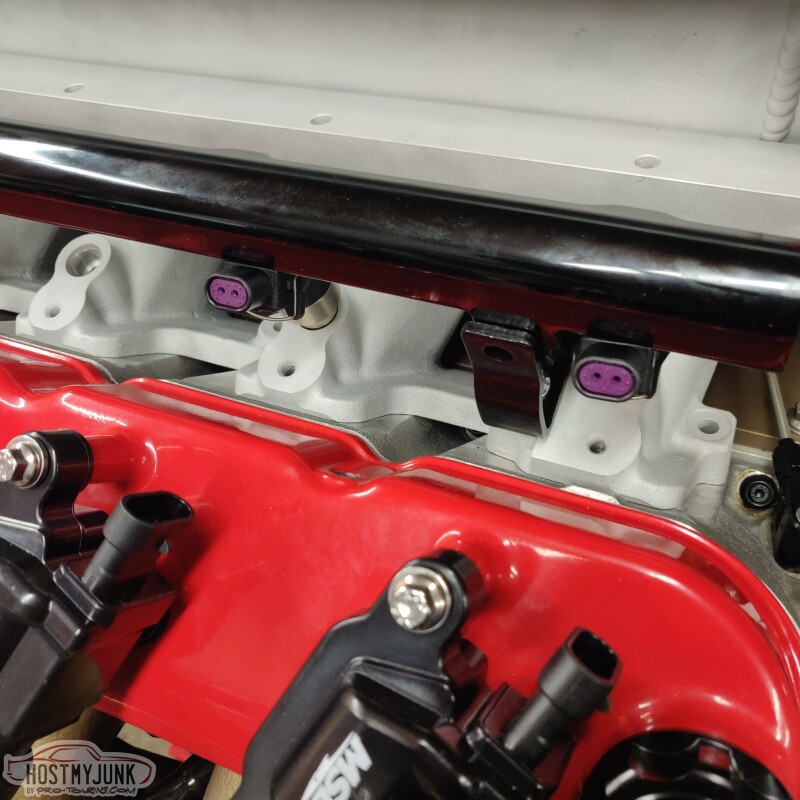
The injectors fit well with the rails and the intercooler brick. I will be able to route the injector wiring and the coil wiring together and run them back to the bulkheads that I showed before. These are Holley 120lb/hr, low impedance injectors.
This is an Earl's oil fill adapter that has an ORB fitting and it will go to the catch can.
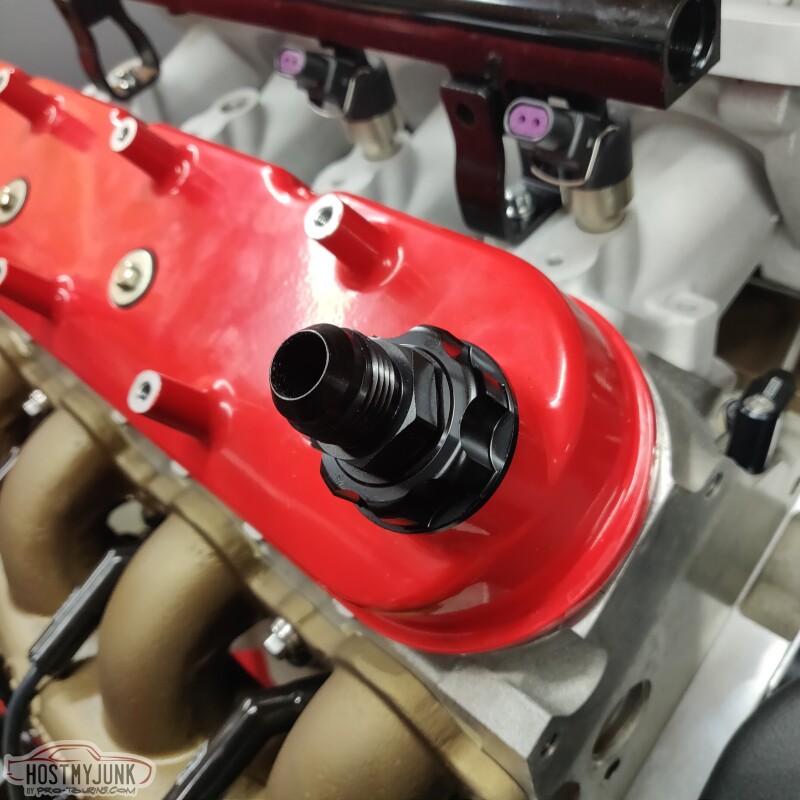
Baby steps...
Andrew
The lower MAP sensor was turned around and a new mounting hole was added for solid retention.
I decided on this fitting for the oil drain. It's stainless and it swivels. As long as it doesn't stick out too far, it should be good to go.
It is about 1.75" from the pan to the end of the fitting. The fact that it swivels will make it easier to fit the drain hose.
I removed the press in nipple off the passenger side valve cover and use a 1/8" NPT tap and added a stainless plug.
The injectors fit well with the rails and the intercooler brick. I will be able to route the injector wiring and the coil wiring together and run them back to the bulkheads that I showed before. These are Holley 120lb/hr, low impedance injectors.
This is an Earl's oil fill adapter that has an ORB fitting and it will go to the catch can.
Baby steps...
Andrew
The following users liked this post:
LS480 (04-13-2022)
The following users liked this post:
LS480 (08-04-2022)
07-06-2022 | 05:35 AM
#159
I was curious how progress was going, mocking up my Hooker manifold to turbo now, wondering if the pipe is strong enough to carry that much weight, and not swivel on the V band. Got a pretty cool T4 to 3" adapter from
Speedway, should make life easier, if it can be with a torn rotator cuff, lol.
Speedway, should make life easier, if it can be with a torn rotator cuff, lol.
07-06-2022 | 10:27 AM
#160
Thread Starter
Joined: Mar 2003
Posts: 10,244
Likes: 1,533
From: The City of Fountains
I was curious how progress was going, mocking up my Hooker manifold to turbo now, wondering if the pipe is strong enough to carry that much weight, and not swivel on the V band. Got a pretty cool T4 to 3" adapter from
Speedway, should make life easier, if it can be with a torn rotator cuff, lol.
Speedway, should make life easier, if it can be with a torn rotator cuff, lol.
One of my customers is building a 57 Chevy, using the Hooker turbo manifolds, and a single BW S475. These are his pictures.
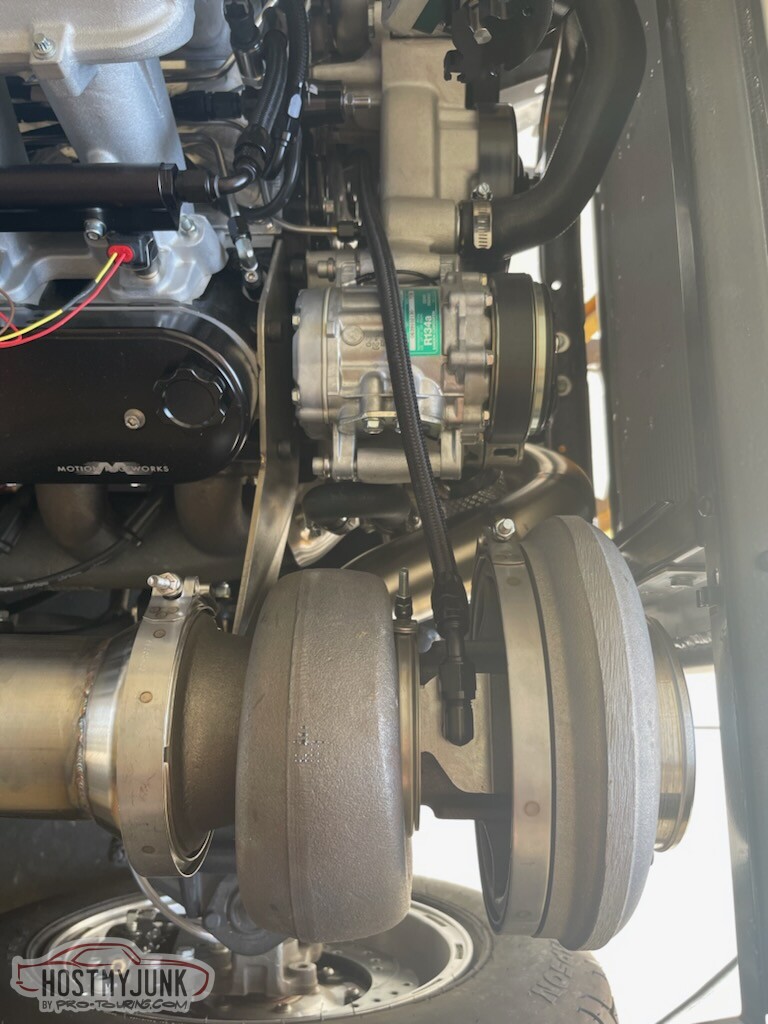
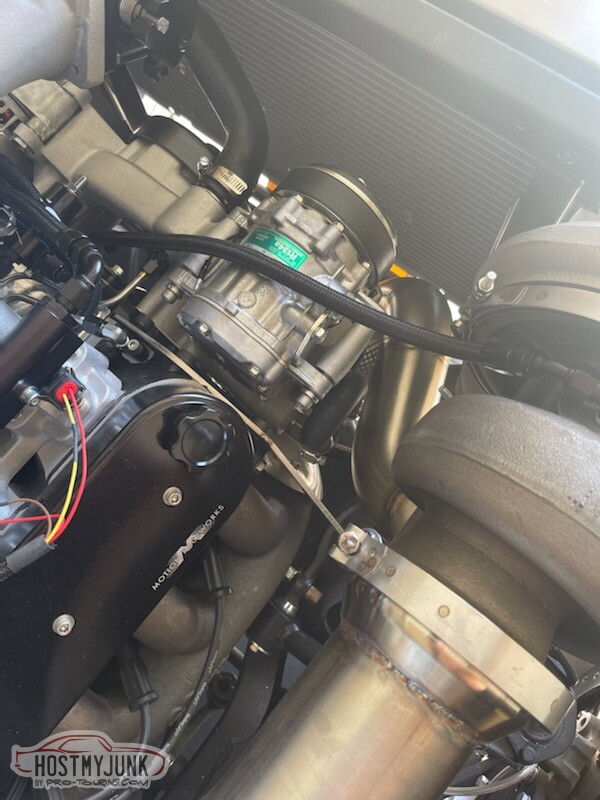
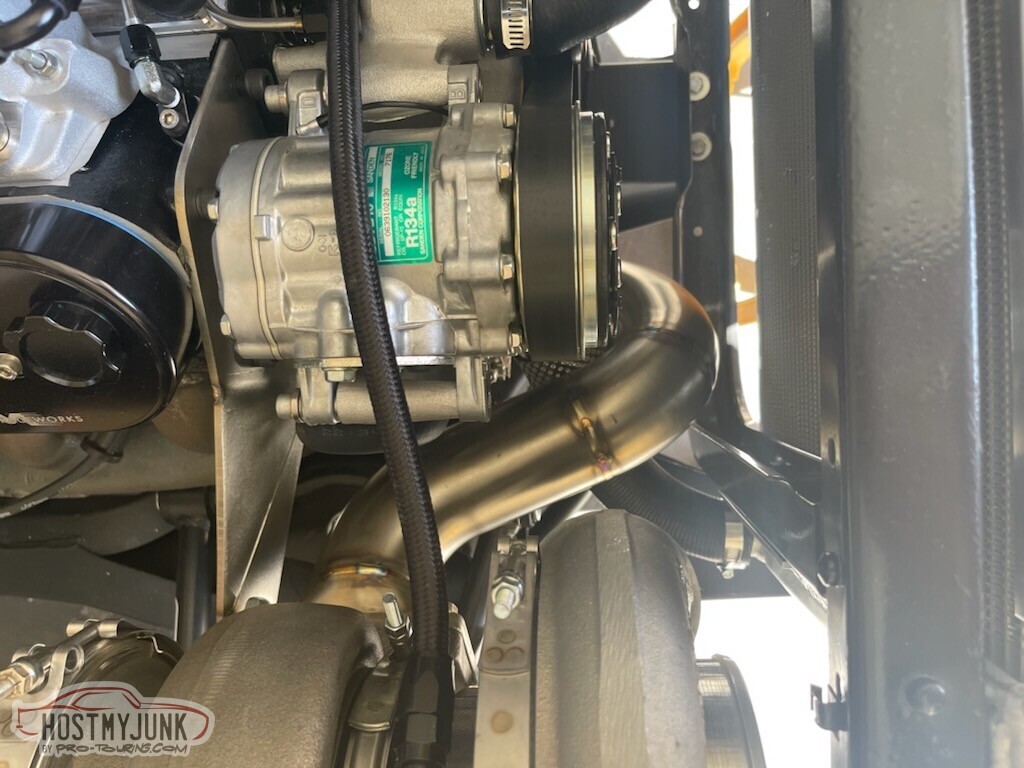
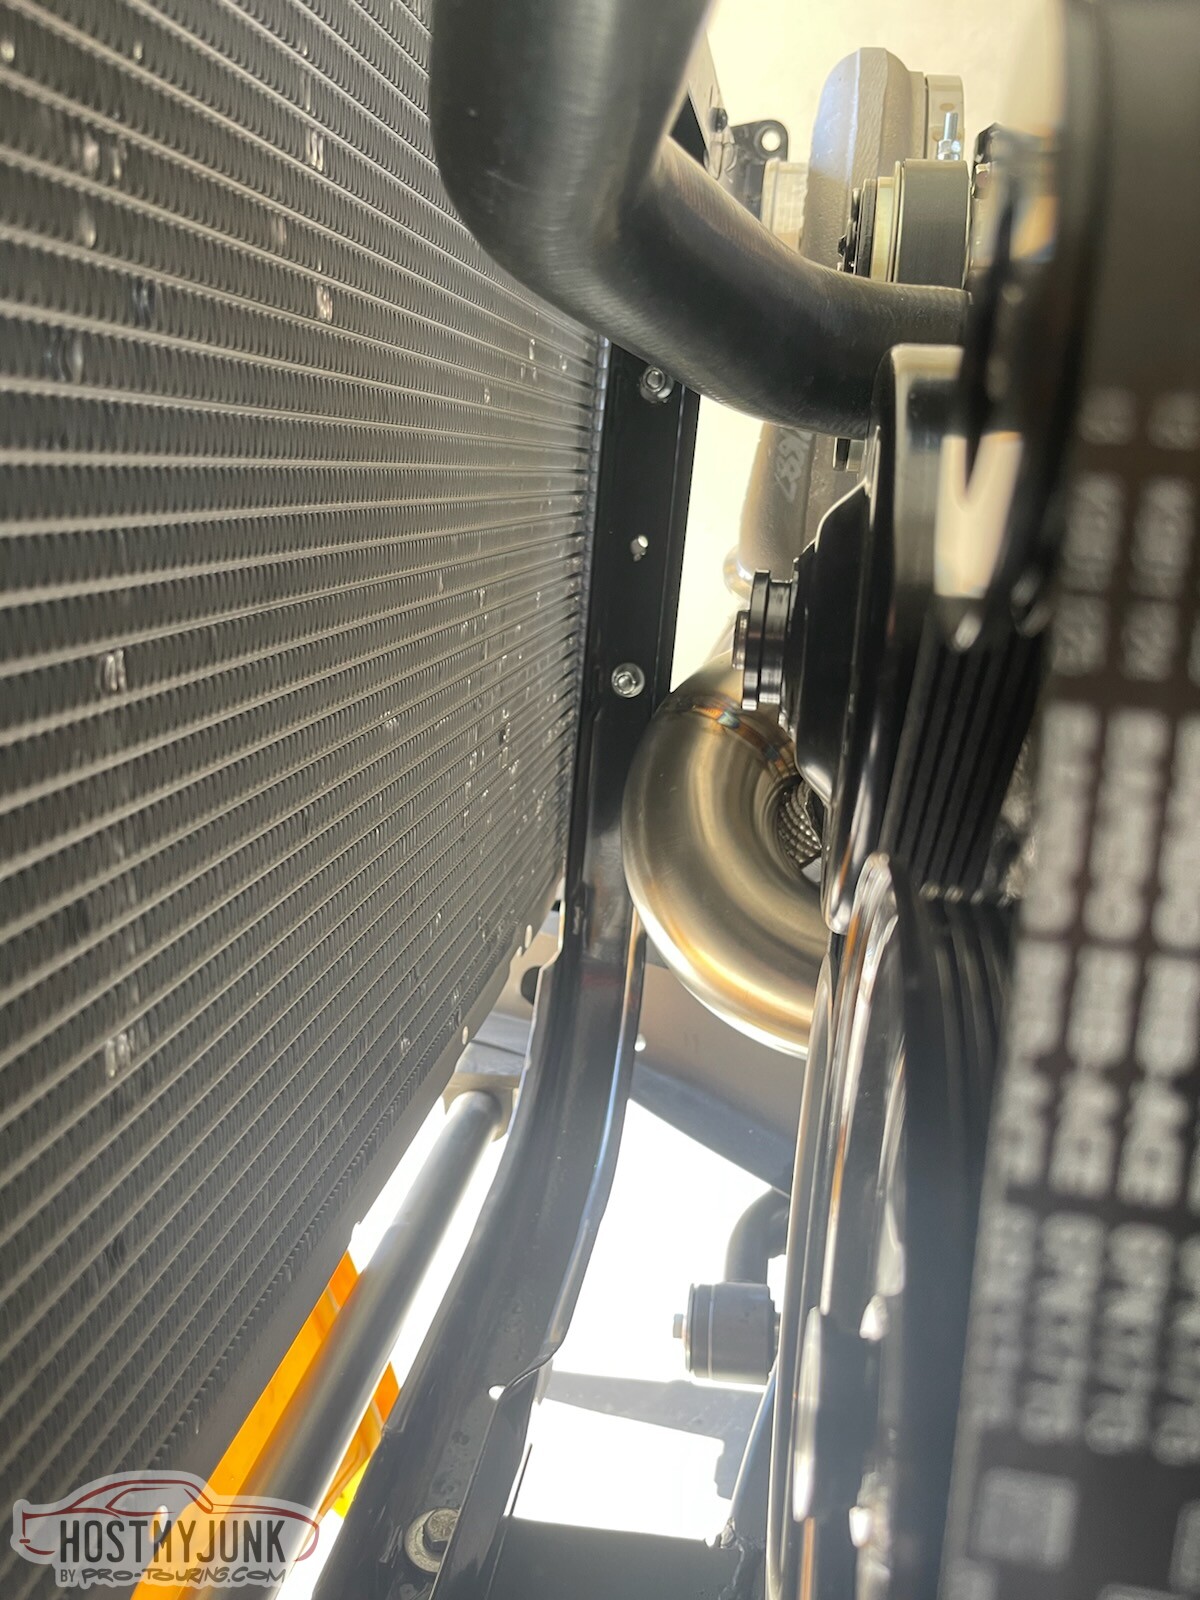

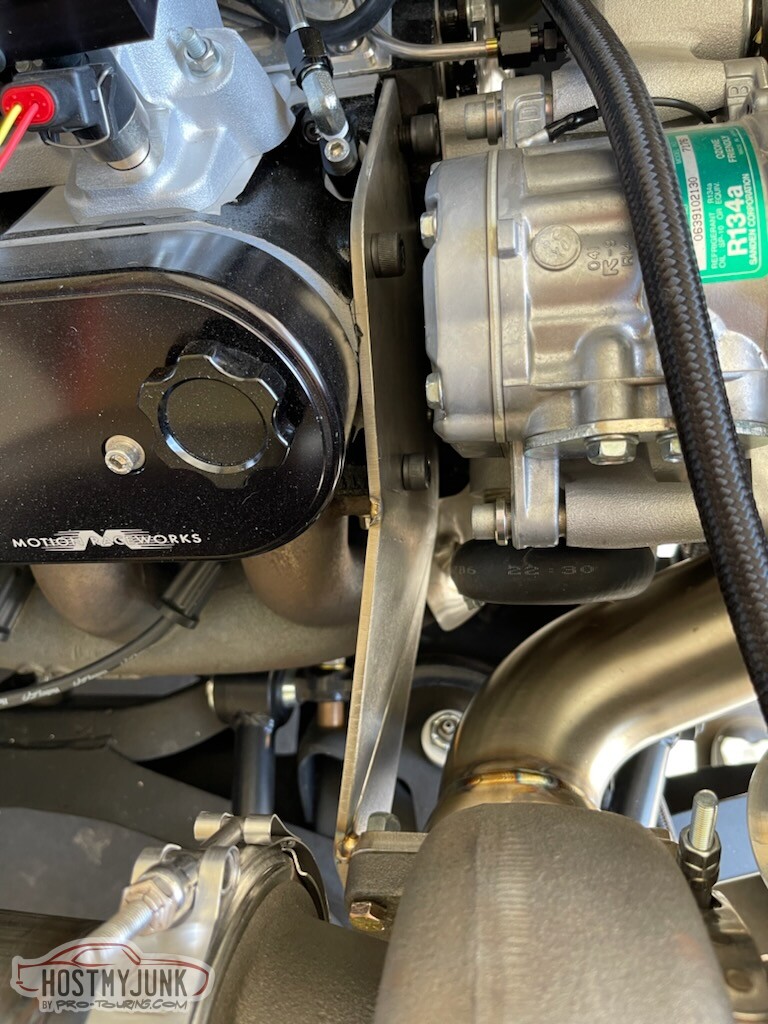

He too is using the Holley mid-mount accessory drive system, and his turbo placement is very similar, if not exactly how I want mine to be. Notice the brace that he added from the head to the turbo.
I think this is an excellent idea and something that I will be adding as well. The turbo is about 35-40 pounds and having it hang on the up-pipe without any support seemed like a bad idea to me.
Andrew