Install Of Aps Twin Turbo!!! Kwikss

 08-24-2007, 03:47 PM
#44
TECH Veteran

Originally Posted by TNTramair
I think its easier installing it while you have it out.
08-24-2007, 06:46 PM
#45
TECH Apprentice
Thread Starter
iTrader: (15)

Join Date: Apr 2007
Location: Fort Worth, TX
Posts: 351
Likes: 0
Received 0 Likes
on
0 Posts

Well I'm fixing to go back out there and put more wrench time in. And yes I may have LME build me an engine while I have it out. Need something good in the $4000 range or less. Will post up more pics tonight. Pulling tank and exhaust, and may do a few other things.
08-25-2007, 05:57 PM
#46
TECH Apprentice
Thread Starter
iTrader: (15)
Join Date: Apr 2007
Location: Fort Worth, TX
Posts: 351
Likes: 0
Received 0 Likes
on
0 Posts
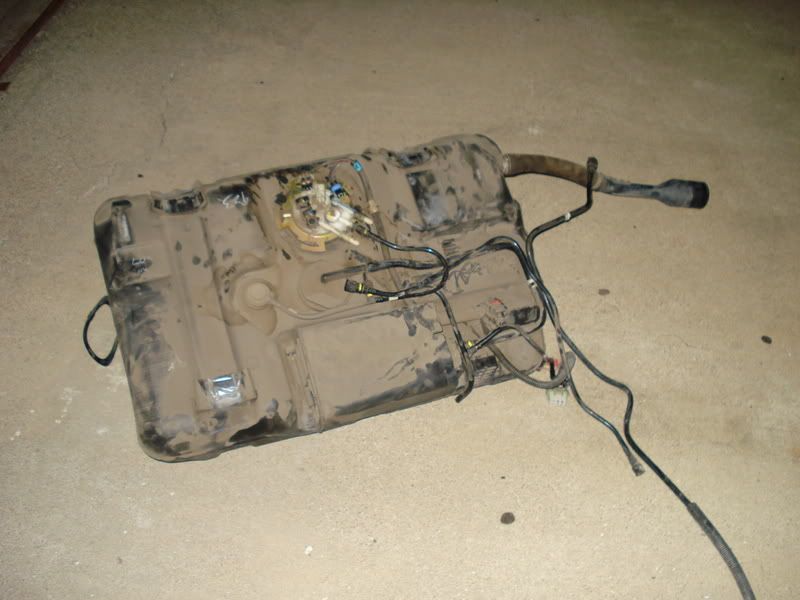
Well Last night we dropped the gas tank, removed all the heat shields. Hint on removing Gas tank. Behind the driver rear tire move the plastic fender shield and there is a 10mm bolt that holds the gas tank filler on. you also need to remove the PHRB and the other brace on top and of course the exhaust. Unplug the sencers and you need a fuel line disconnect tool to do the rest, only one needs it other two use two fingers. Also removed the sender out of the tank and getting it boxed up ready to ship out. Will post up pictures later. I'm on the laptop right now.
08-26-2007, 02:26 AM
#47
TECH Enthusiast
iTrader: (1)
Join Date: Sep 2005
Location: ny
Posts: 615
Likes: 0
Received 0 Likes
on
0 Posts
Wow if you dropped that bad boy out of there in 3 hours for teh first time you should be damn proud of yourselves that job in a dealership pays 14 hours flat rate R&R. That shop is so clean and neat too just how i liek them. I would deffinately go with a forged motor. you might as well get all you can out of that turbo kit, as we all no they are deffinately not cheap lol. Great pics to goodluck ill be watching this thread


 08-26-2007, 01:49 PM
#51
Staging Lane
iTrader: (4)
Join Date: Aug 2004
Location: Tupelo, MS (10% of the time)
Posts: 59
Likes: 0
Received 0 Likes
on
0 Posts
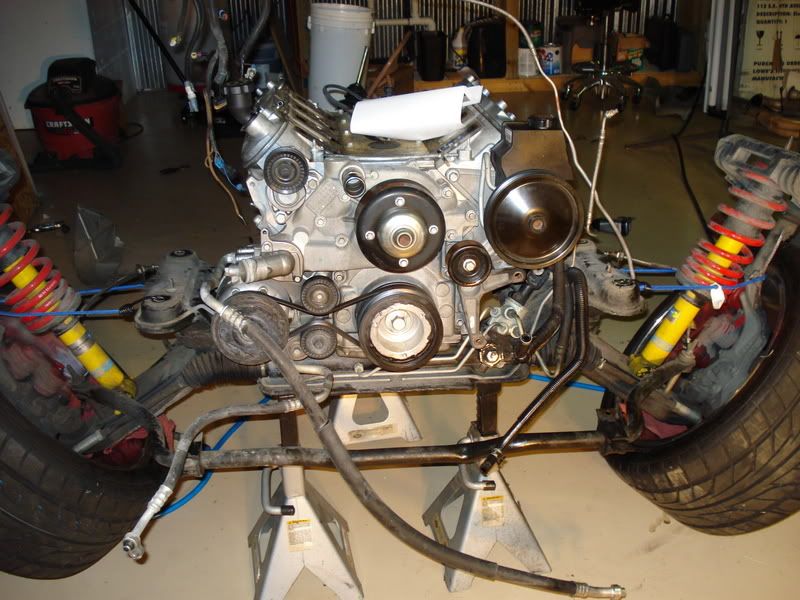
The hardest part of putting the motor back in with the intake on is not breaking the map sensor. It's real easy to crush it against the firewall. I've got small hands, so reaching around the intake is no big deal. I've pretty much memorized where all the vacuum lines are...LOL Be careful not to hang the brake lines when going back in. For god's sake, make a check list for all the ground wires to reconnect. There's nothing worse than being completely finished with everything, then having to chase down that stupid DTC "engine ground poor quality". Or something to that effect.


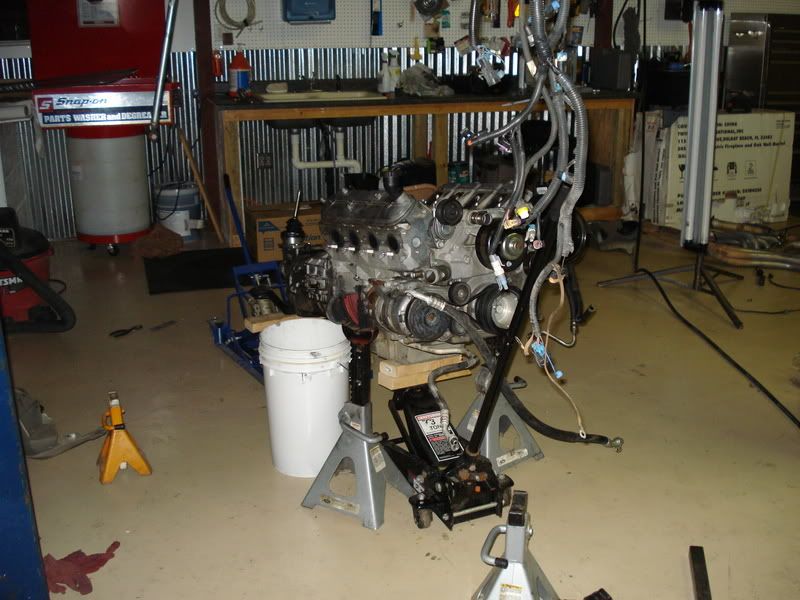
 08-28-2007, 09:44 PM
#57
TECH Apprentice
Thread Starter
iTrader: (15)
Join Date: Apr 2007
Location: Fort Worth, TX
Posts: 351
Likes: 0
Received 0 Likes
on
0 Posts
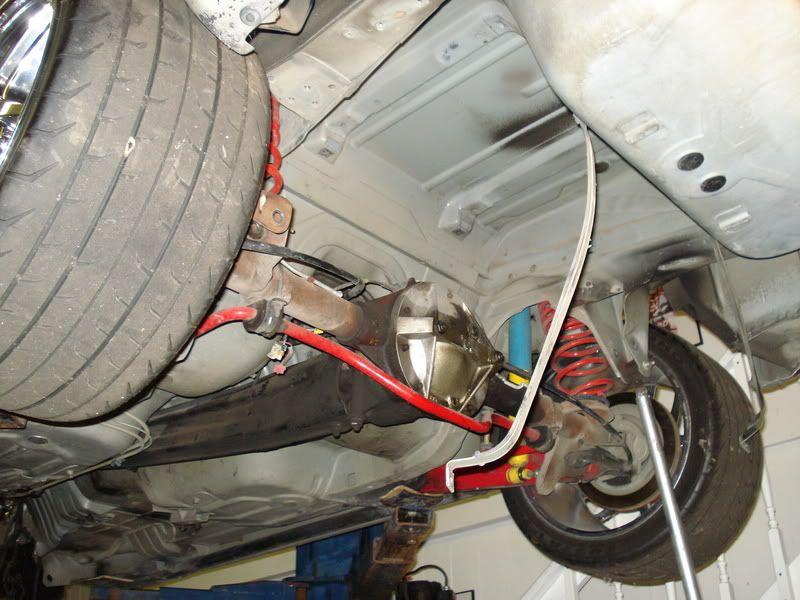
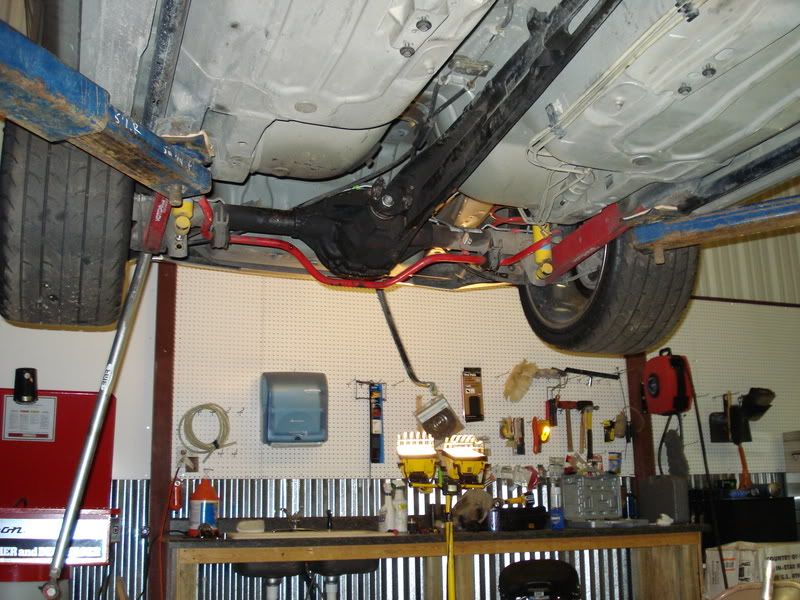
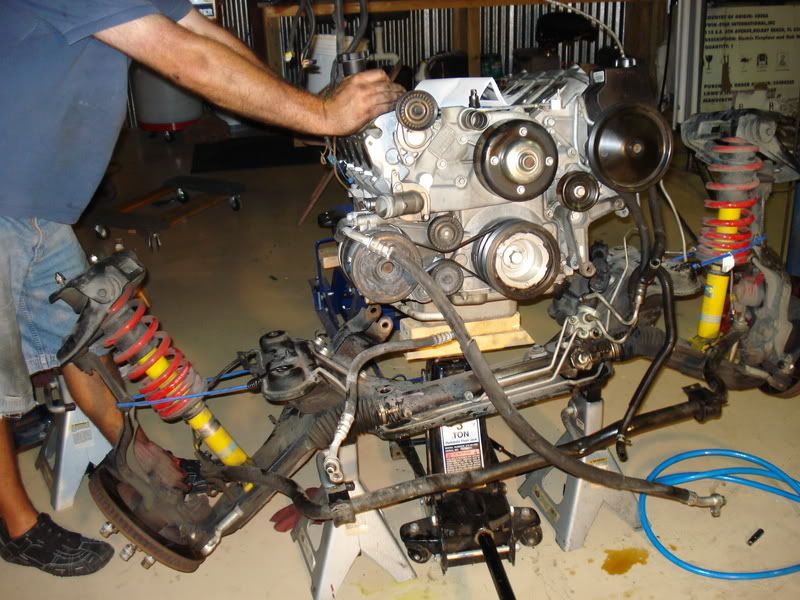
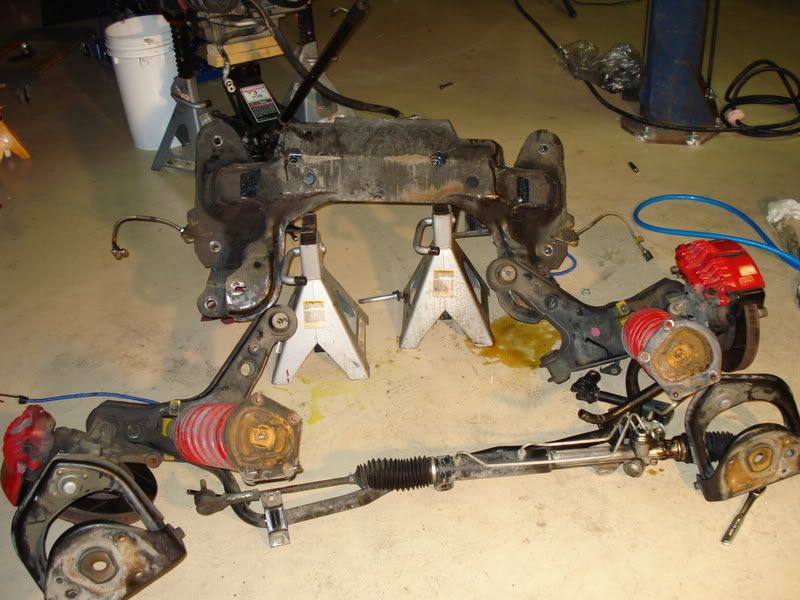
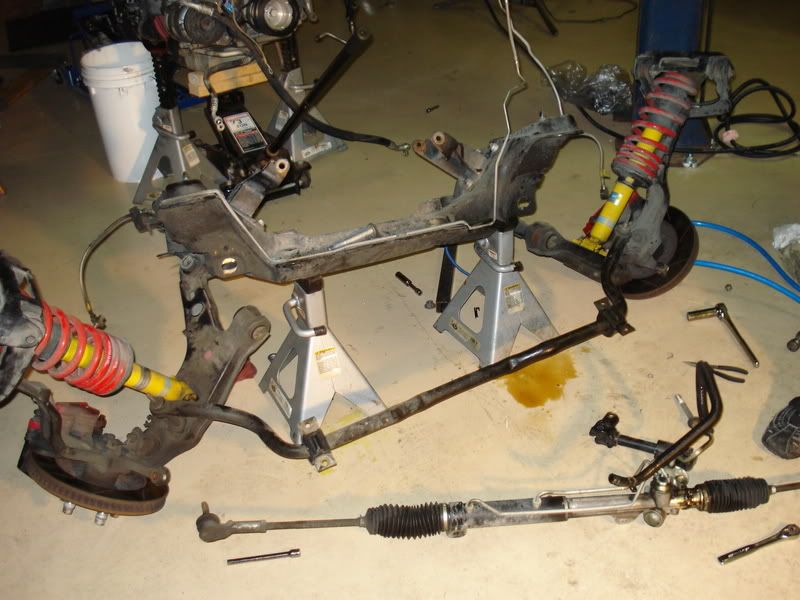
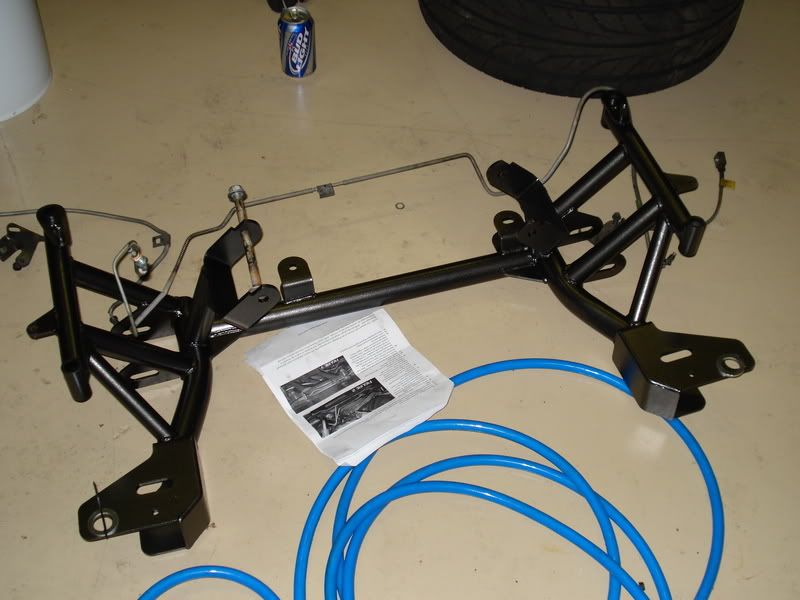
Ok did some more work last night. I took everything off the K member and got the New one in the mail the same day. I must say first I glad BMR did'nt make this Turbo kit because there Install guide was wrote by a 3rd grader. Brake lines are held on by Zip ties and the guide doesn't really show what to do, I really dont understand it. I took the A arms and power steering rack to work and did a little cleaning on them. So far everthing is going pretty good. Can't wait to get to the install of the kit. Heres the pictures.


08-28-2007, 10:07 PM
#58
One quick tip for you if you haven't installed one of the BMR's before. Install A-arms first brake lines then the rack, but when you do the rack install only the pasengerside with the bolt going in from the top and leave it loose. after you get the motor back in you can get the shaft on real easy and install the driverside bolt from the bottom tighten both sides don't worry they are hot nuts and will not back off and if it did the passengerside will keep you steering, and you can still remove the rack without picking the motor up off of the motor mounts for any repairs you might have in the future. Looks good.

