
LSX is ready to be dropped in tomorrow (PICS!)
 06-23-2008, 12:47 PM
#201
10 Second Club
Thread Starter
iTrader: (37)
Join Date: Jan 2004
Posts: 1,935
Likes: 0
Received 0 Likes
on
0 Posts
I have seen a setup similar to what you're doing in a fox body. THe guy had the blower sandwiched between 2 1/4 inch plates, he had it bolted on bu teh mounting holes like you do but he had the inlet also supported by a big 1/4 inch plate as well, the plate was a very precision machined piece that mated around the outside of the inlet to give the blower added support, so it was explained to me.
The car was running a large cogged belt like you are, had a motor plate also made from 1/4 inch alum if I remember correctly, and all 3 were attached together via the large diameter (one inch if I remember right, with 3/4 inch bolts) steel standoff's that had threaded rod in the ends of them to make them like bolts to keep everything together.
I remember there being several of them, and there was large heavy duty mounting tabs that were built with triangle pieces on the back side to support the alum plates. It didn't span the whole width of the engine bay, the motor plate did but the other plate did not.
He had to do a remove water pump like I described to have room for the belt and tensioner and idler pulley, which I remember was a very heavy duty looking pieces. There was a tensioner pulley up near the blower that kept the belt tight, and there was a smooth idler pulley with real tall outer ribs mounted down by the crank pulley that kept the belt centered on the bottom 1/2 of the belt. Also helped to rout the belt away form the water pump lines.
Car had a mandrel on the pulley with a vacum pump on it as well. Engine bay probably had 100 lbs of alum plates in it, wild looking, and it looked like a real bear to change the belt, when it needed it.
I wasn't trying to knock your project, it's awesome and I love these things. I someday would like to attampt something of this type. Until then I'm stuck with my 9 second nitrous car.
That build your talking about sounds nasty, probly a little larger budget and more professional oriented. Mines just for my little hobby and home made. I do need it to hold though so the info you are sharing is very helpful. I think I'm going to add a plate to the head behind the f2 and have a support bar bolted dirrectly to the blower pulley. That should add a lot of extra support and maybe add two more braces from the bracket near where the blower mounts to the block. Just have to figure what I can attach to on the block.
 06-23-2008, 01:00 PM
#202
TECH Fanatic
iTrader: (2)
Join Date: Sep 2004
Location: Kalifornia
Posts: 1,138
Likes: 0
Received 0 Likes
on
0 Posts
ruf instead of running the cog off the front of the crank you should look into something like this, it will give you a larger contact patch and you can build a crank support to help keep the bearing alive.
I can PM you where to get the cogs if you are intrerested


I can PM you where to get the cogs if you are intrerested

 06-23-2008, 01:59 PM
#204
10 Second Club
Thread Starter
iTrader: (37)
Join Date: Jan 2004
Posts: 1,935
Likes: 0
Received 0 Likes
on
0 Posts
I'm already using those for the other bracket I mentioned for the blower pulley, it's hard to explain, I'll post a pic when it's done. I need to find a spot on the actual block to bolt to but there isn't anything open. The water pump is covering any good mounting spots. I'll have to investigate a little more after I get the radiator mounted tonight.
 06-24-2008, 06:49 AM
#215
10 Second Club
Thread Starter
iTrader: (37)
Join Date: Jan 2004
Posts: 1,935
Likes: 0
Received 0 Likes
on
0 Posts
I like how it has the two brackets attached. Tonight I'm going to design the other bracket I mentioned that will go on the head and bolt into the blower pulley. Now that I see how that one is set up, I'm going to try and attach them together like that also. Between the extra weight of the lsx block and now all these brackets, I going to have a pig on my hands. It better make enough power to make up for all this weight
06-24-2008, 07:01 AM
#216
10 Second Club
Thread Starter
iTrader: (37)
Join Date: Jan 2004
Posts: 1,935
Likes: 0
Received 0 Likes
on
0 Posts
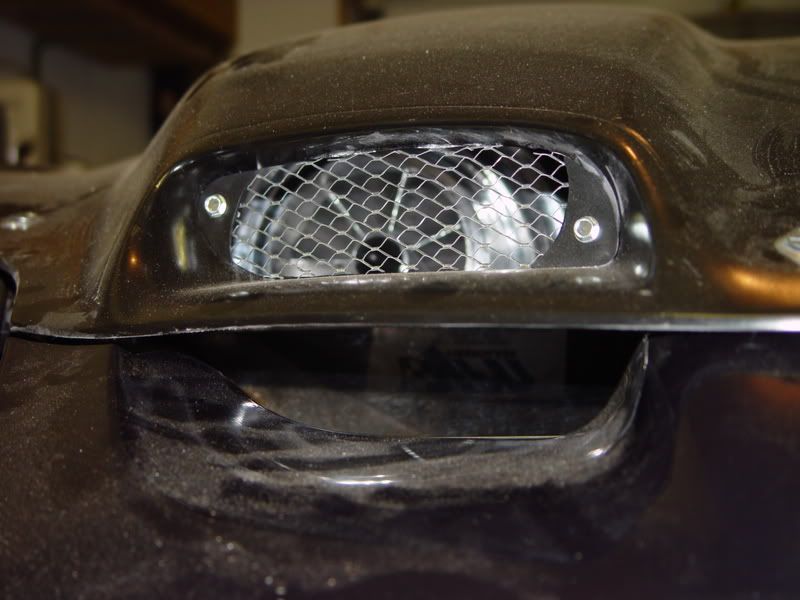
I also got the radiator relocated last night. It's not great but fits. I don't think I'm going to be able to get a air filter on it but I'll try to make some kind of screen so at least my blower won't be eating birds lol.

And this one shows how much room I have for a belt, should be able to squeez a 60mm on there.

Last one is to show the room I have to get the tensioner in there.

I like that other cog set-up but it would be like starting from scratch. I would have to relocate my alternator and buy all new cogs, even then, I still don't like how it doesn't have a lot of belt wrap on the crank. The way mine is set-up bothe pulleys will be more than 75% wrapped
I still need to look into the place that made those cogs for a tensioner though. I'm also going to call procharger to see if they make one like the 8-rib set-up but for a 60mm belt. That's the way I plan to incorporate the tensioner, with a slot that the pulley slides in and then once taunt, just tighten the pulley bolt.
And this one shows how much room I have for a belt, should be able to squeez a 60mm on there.
Last one is to show the room I have to get the tensioner in there.
I like that other cog set-up but it would be like starting from scratch. I would have to relocate my alternator and buy all new cogs, even then, I still don't like how it doesn't have a lot of belt wrap on the crank. The way mine is set-up bothe pulleys will be more than 75% wrapped
I still need to look into the place that made those cogs for a tensioner though. I'm also going to call procharger to see if they make one like the 8-rib set-up but for a 60mm belt. That's the way I plan to incorporate the tensioner, with a slot that the pulley slides in and then once taunt, just tighten the pulley bolt.
06-24-2008, 08:14 AM
#217
8 Second Club
iTrader: (1)
Join Date: Nov 2001
Location: the not so stock tribe
Posts: 3,697
Likes: 0
Received 0 Likes
on
0 Posts

you should look into a spring tensioner , not a solid one. you get some weird harmonics on the belt usind a solid tensioner ( there was a under hood vid floating around of a cogged car doing a run and shredding the belt)
06-24-2008, 09:23 AM
#219
10 Second Club
Thread Starter
iTrader: (37)
Join Date: Jan 2004
Posts: 1,935
Likes: 0
Received 0 Likes
on
0 Posts
Ok, so I'll have to pick one from that site you gave me that will fit and then find the right size pulley to add to it. How am I going to know if the pulley will fit with the tensioner? I'm going to have to do some more research.