


Valve spring change made easy! - Head off
I was spazing out on what tool was needed to change the valve springs on a set of 708 (5.3 Vortec) heads. Proform Comp blah blah blah... Did all the research... And then resorted to YouTube just before dolling out the $ for a tool. Here is what worked FOR FREE!!! *Only applies to off engine heads.
Spring removal is this easy!!! No kidding. I used a BFH and a 19mm deep impact socket. Literally one minute and done. This was a "No F'ing way!" paradigm shift for me here, so ghetto but works like butter. LOL
FF to minute 1:40 to miss the talking.
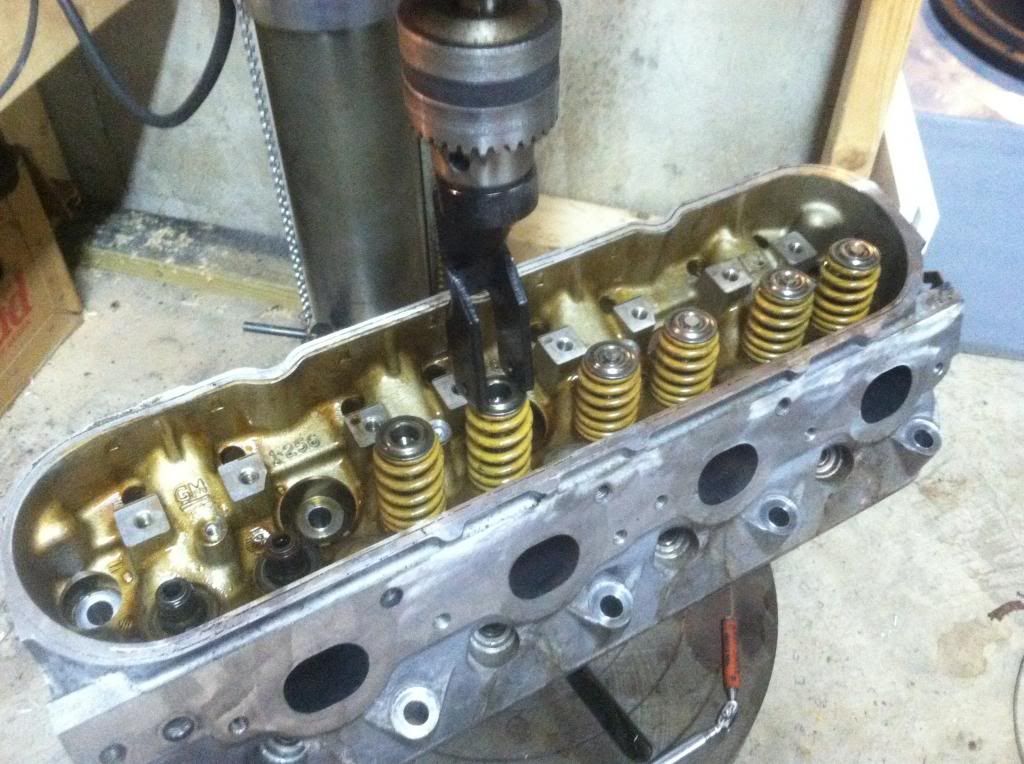
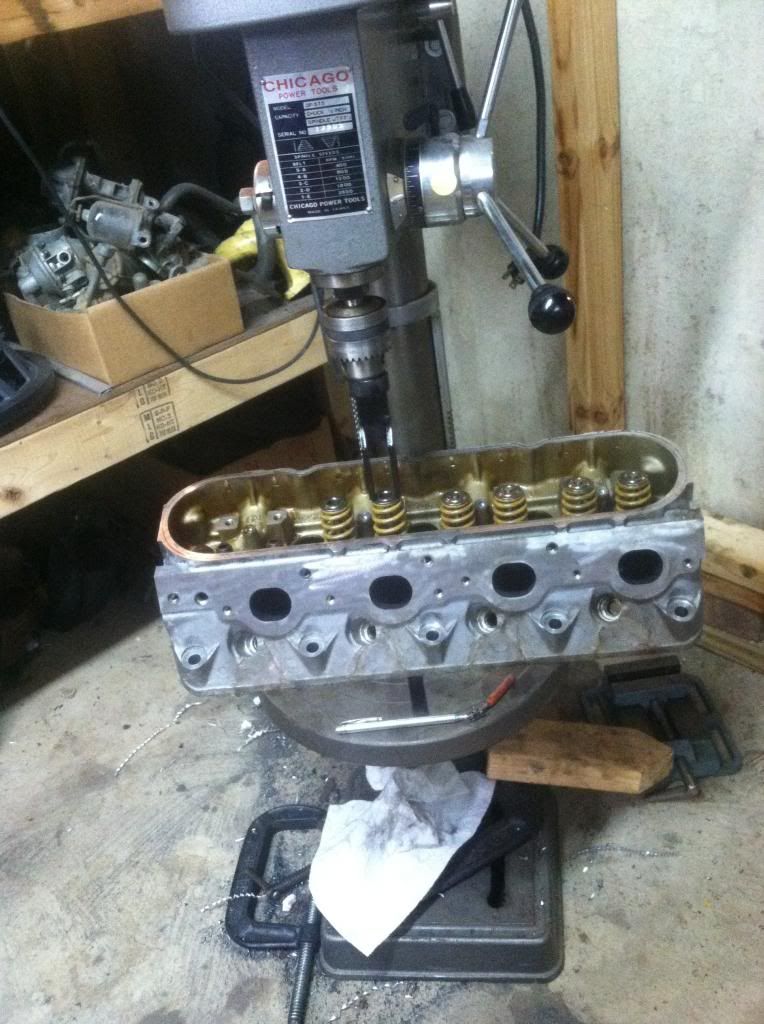
Here is the inspiration I used to repurpose my drill press for a spring compressor! He made a bit to use, but I repurposed a VW spring compressor end. I used a normal 2x4 block of wood to angle the heads to line up with the drill press head. My drill press deck does not adjust for angle.
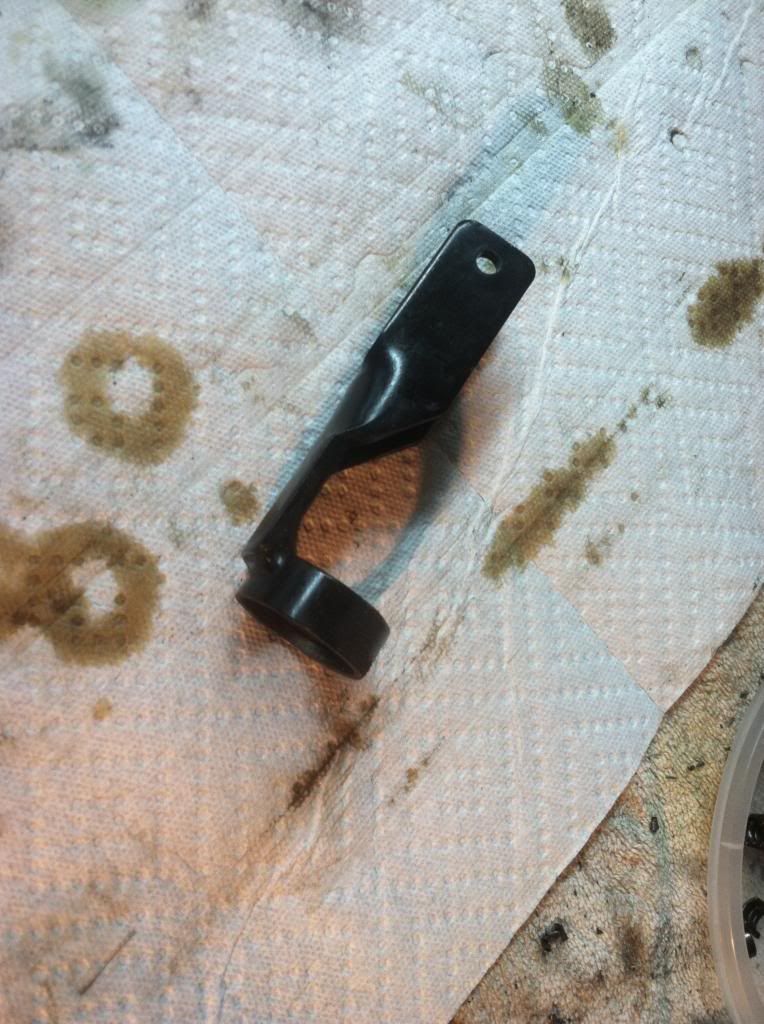
VW Tool
The VW tool can be switched around and used for the larger dual valve spring retainers as well. The beehive retainers are tiny IMO.
Picture of my setup at work:
Yes it is that easy and FREE!!! (provided you have a drill press)
Spring removal is this easy!!! No kidding. I used a BFH and a 19mm deep impact socket. Literally one minute and done. This was a "No F'ing way!" paradigm shift for me here, so ghetto but works like butter. LOL
Here is the inspiration I used to repurpose my drill press for a spring compressor! He made a bit to use, but I repurposed a VW spring compressor end. I used a normal 2x4 block of wood to angle the heads to line up with the drill press head. My drill press deck does not adjust for angle.
VW Tool
The VW tool can be switched around and used for the larger dual valve spring retainers as well. The beehive retainers are tiny IMO.
Picture of my setup at work:
Yes it is that easy and FREE!!! (provided you have a drill press)
Please don't spread that first vid around. That is totally wrong. The problem with that method is when a keeper gets half stuck between the valve tip and retainer it ends up gouging the valve. Not worth the risk IMO.
Please don't spread that first vid around. That is totally wrong. The problem with that method is when a keeper gets half stuck between the valve tip and retainer it ends up gouging the valve. Not worth the risk IMO.
I find it interesting GM uses a single lock as most valves I am used to use a double lock for the retainers which is much more stable for assembly IMO.
Even the Yellow LS2 beehive springs had less pressure than I though they would. Might have to play with the set of duals w TI retainers I have on a diff set of heads and check their tension.
For anything over stock, I would exclusively use the press though for disassembly and reassembly.
I'm cringing watching all these videos thinking of the scratches being put into the deck surfaces of those heads. Maybe NA guys don't care as much, but with a boosted setup, having a perfectly smooth surface is critical and watching the way they are working with the mating surface of the head on a bench is scary.
Trending Topics
Please, show me a picture of an arbor press in action large enough to fit a LS head and jig?
Also remember the head is not flat on the drill press deck, there is a 2x4 on the back giving it angle to line up with the cutting head/valve spring jig.
Also remember the head is not flat on the drill press deck, there is a 2x4 on the back giving it angle to line up with the cutting head/valve spring jig.
LS1 Tech Stories
The Best V8 Stories One Small Block at Time

Gas Monkey Built a 6-Wheel Ferrari Testarossa With a Corvette LT4 Engine
Verdad Gallardo
7 Most Reliable High-Performance Engines GM Has Ever Built
Verdad Gallardo
Amazing '71 Camaro Restomod Is Modern Muscle Car Under the Skin
Verdad Gallardo
6 Common C5 Corvette Failures and What's Involved In Repairing Them
Pouria Savadkouei
Retro Modern Bandit Pontiac Trans AM Comes With Burt Reynolds' Autograph
Verdad Gallardo
Top 10 Greatest Cadillac V Series Performance Models Ever, Ranked
Pouria Savadkouei
Top 10 Most Powerful Chevy Trucks Ever Made!

Hennessey's New Supercharged Silverado ZR2 Has 700 HP
Verdad Gallardo