When you click on links to various merchants on this site and make a purchase, this can result in this site earning a commission. Affiliate programs and affiliations include, but are not limited to, the eBay Partner Network.
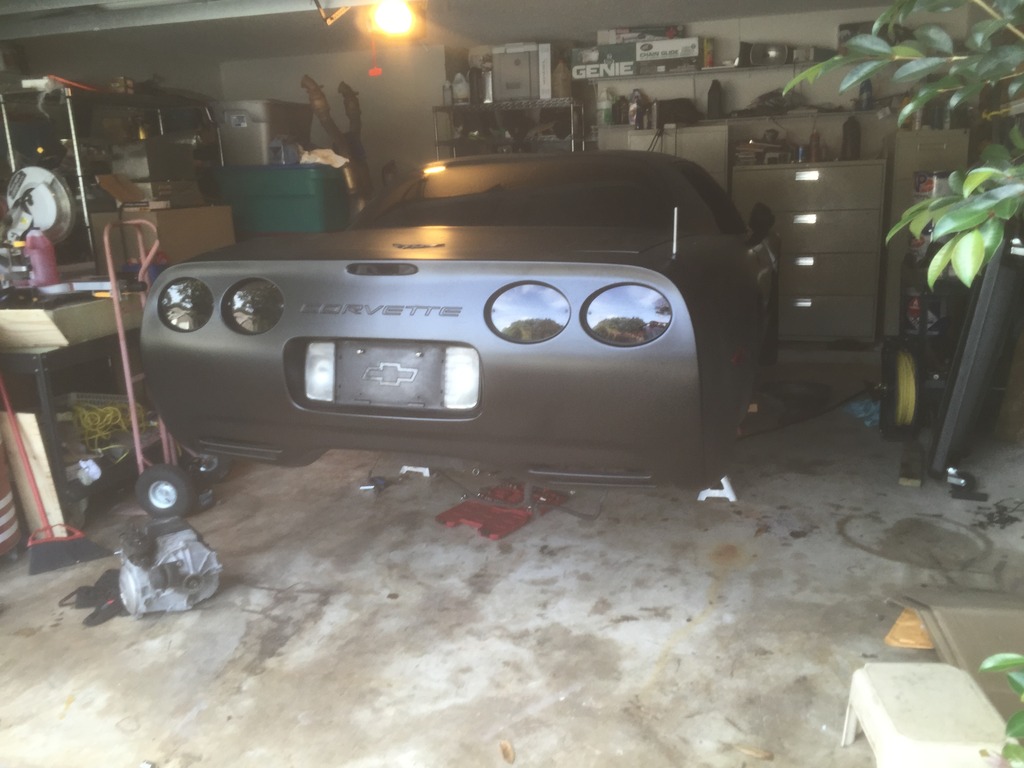
Hello everyone, if you haven't seen my username before its because although I've been a long time ls1tech lurker, i have only just decided to make an account. I have a 2001 corvette Z06 with the LS6.
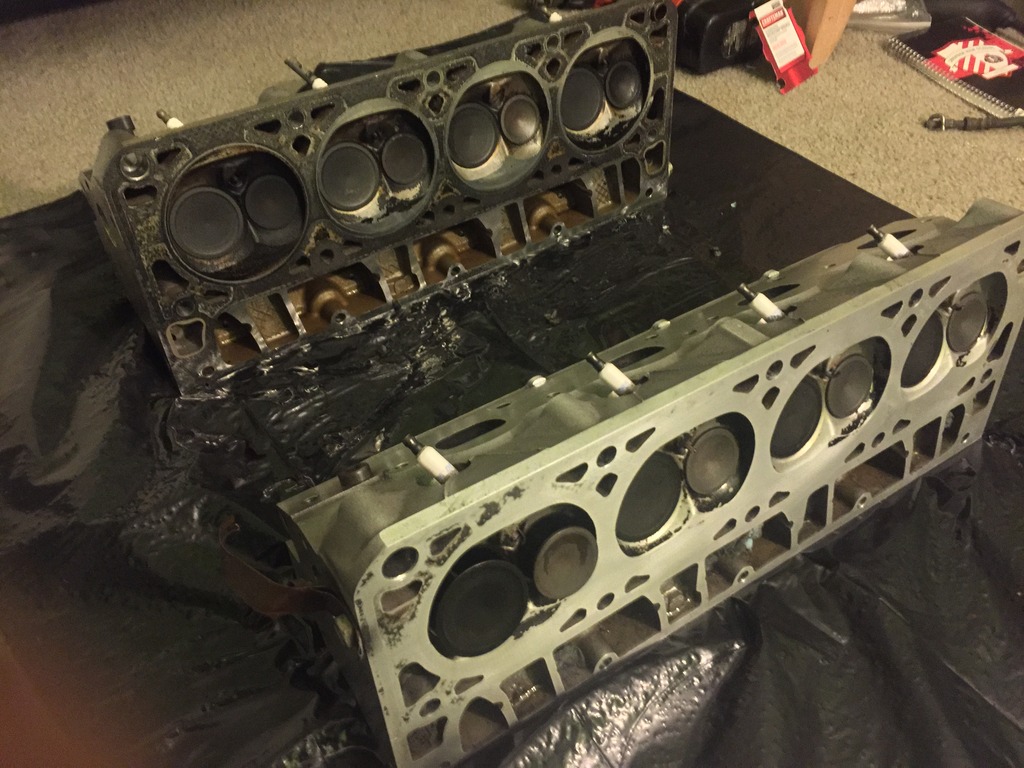
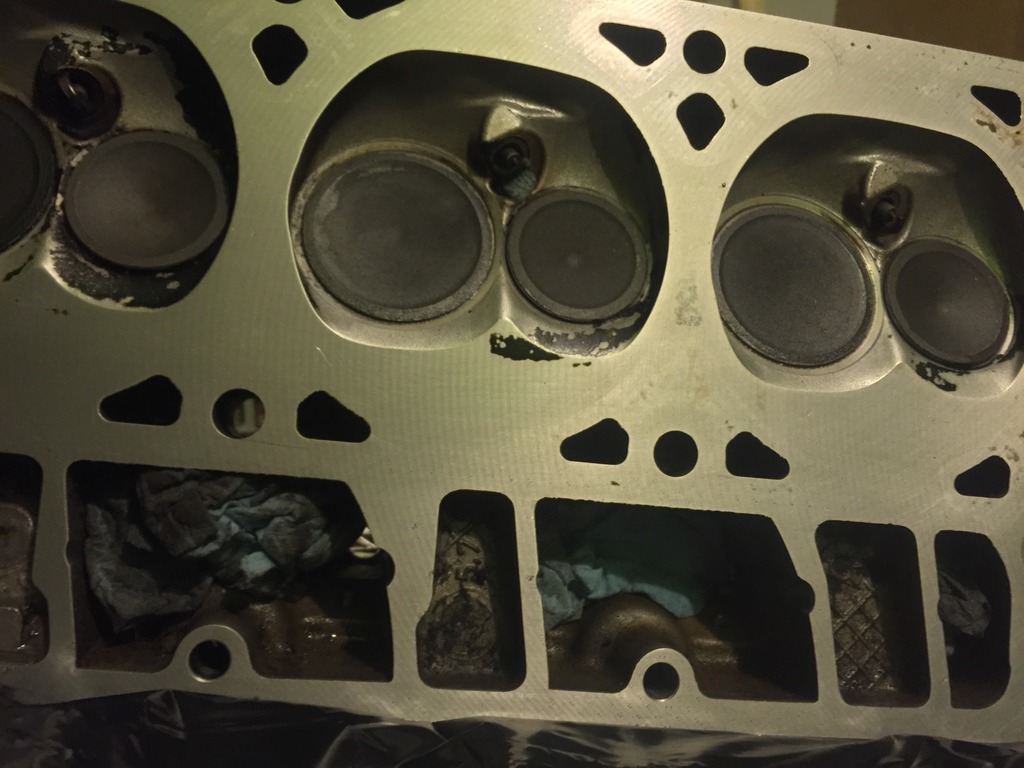
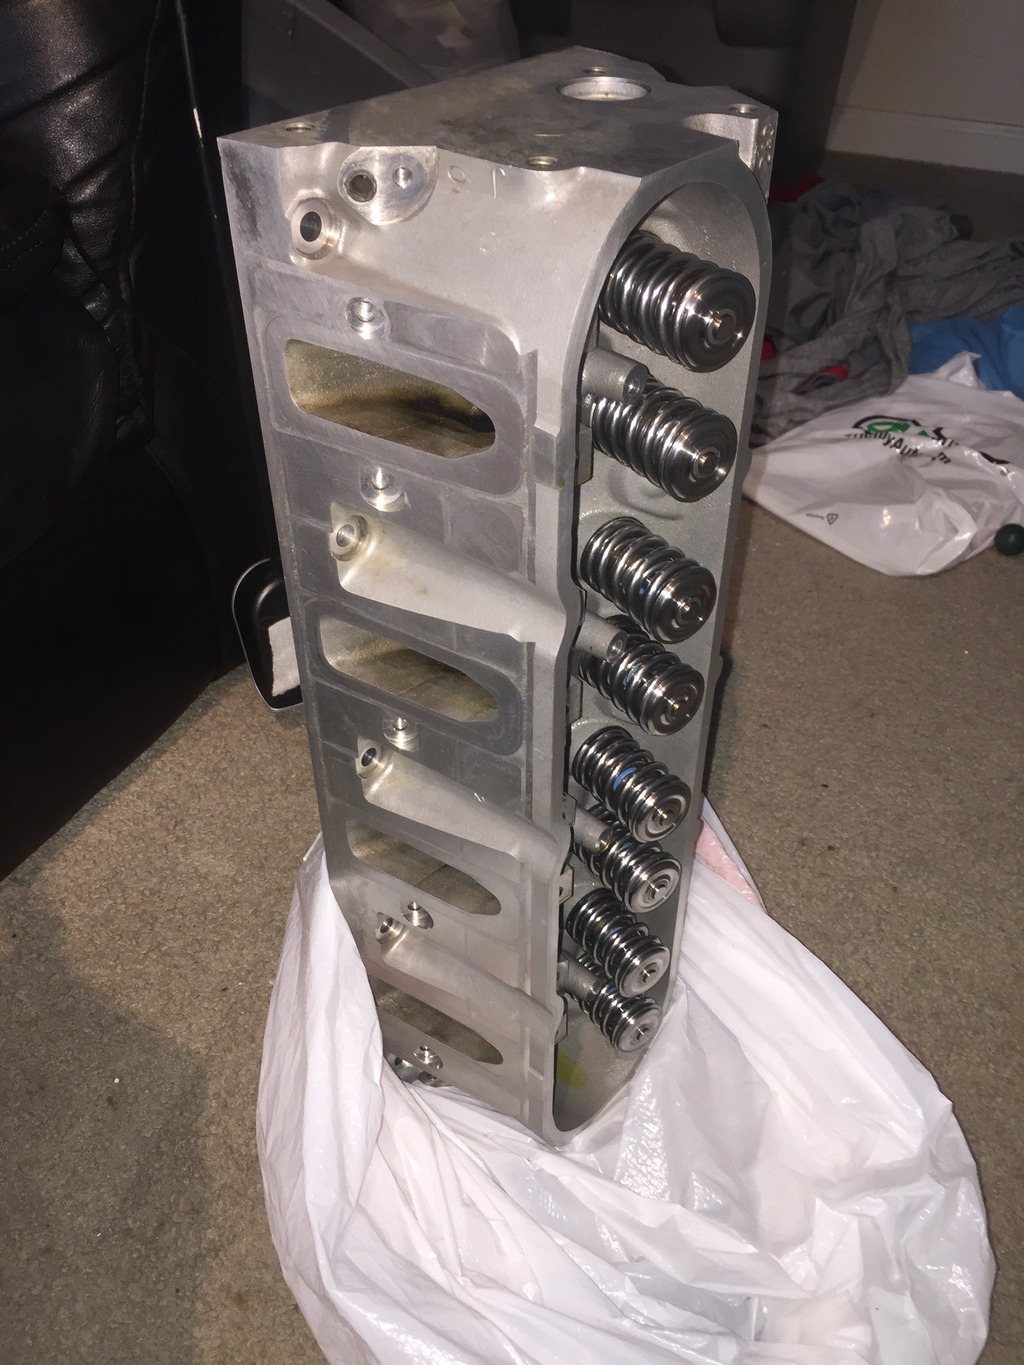
I'm in the process of rebuilding the top end because i had a lifter go out. I finally got the cam out and am ready to start reassembly, but i cannot for the life of me figure out the best conservative way to clean these aluminum heads. I have done countless searches, read countless threads, and watched countless videos only to come to the conclusion that the only thing that WONT scratch aluminum is Nylon bristle brushes and discs. I have seen/read about people using everything from brass wire brushes, steel wire brushes, 3M Roloc bristle discs, Scotch Brite pads, sand paper, and solvents like scrubbing bubbles, Carb cleaner, brake cleaner, pure acetone, soap and water, rubbing alcohol etc. etc.
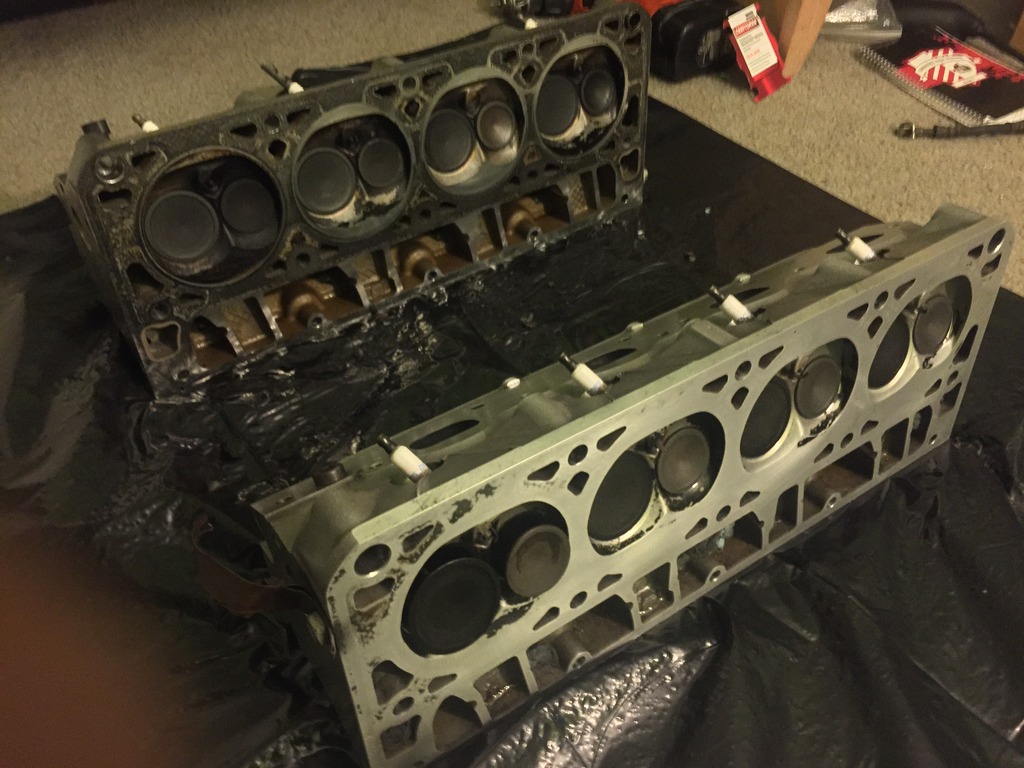
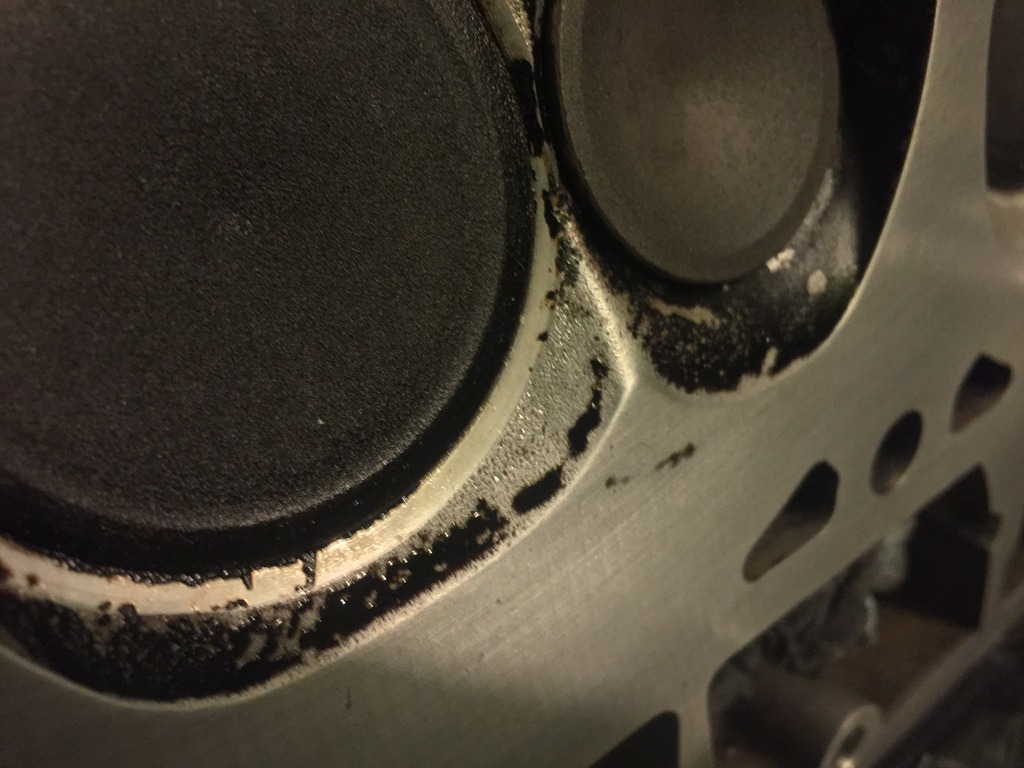
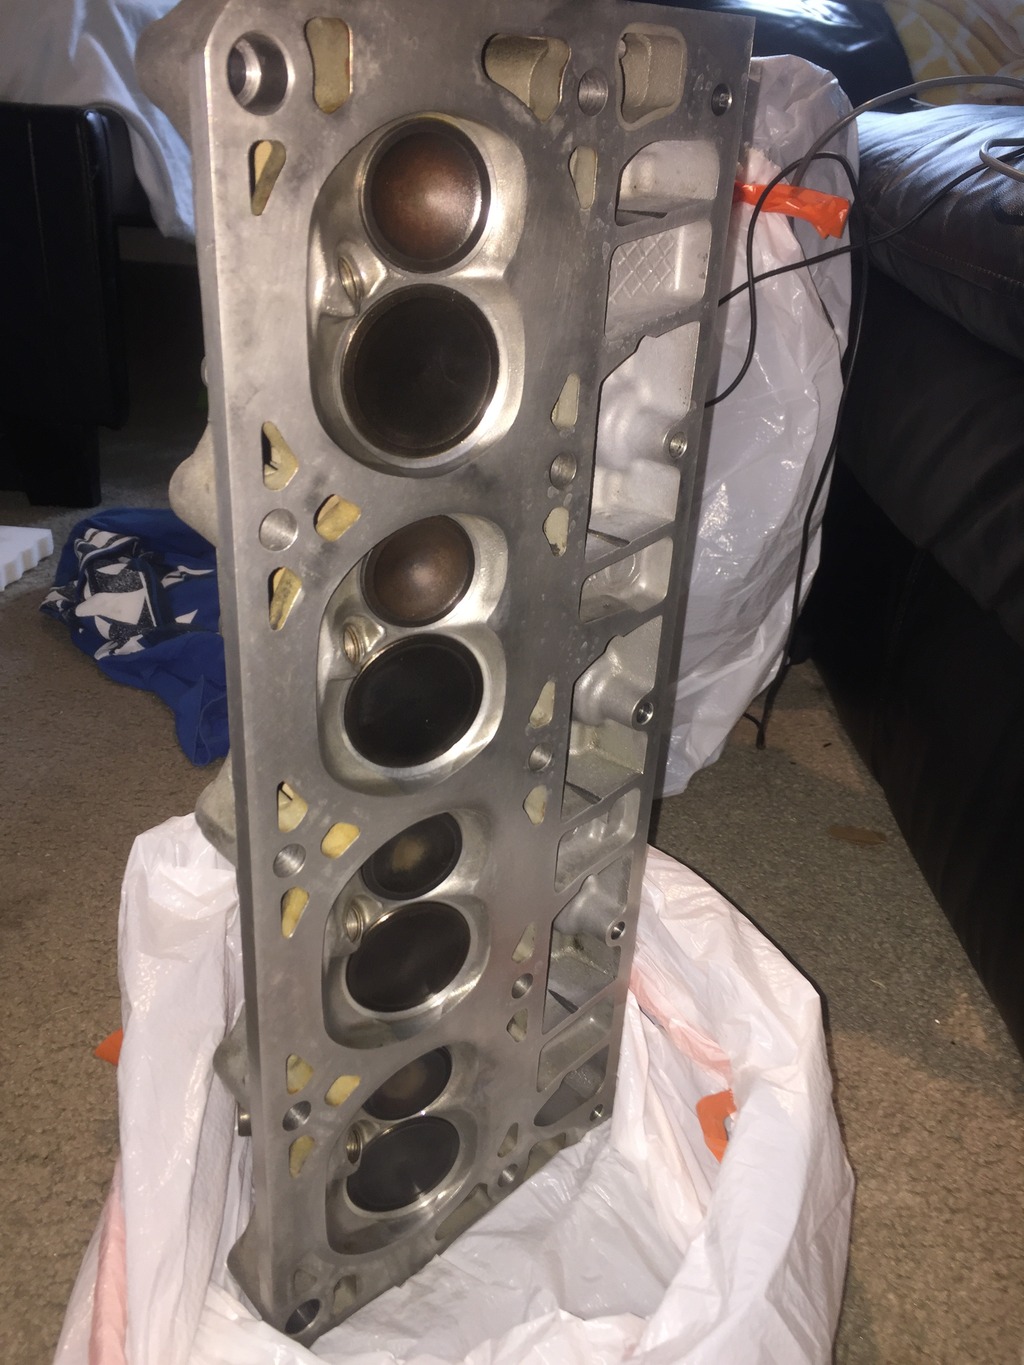
I went with the nylon brushes and brake cleaner at first, but the brake cleaner evaporated far to quick to dissolve, and the nylon brushes far too soft, to remove the stuck on carbon in the combustion cambers or even the old head gasket material. So i thought the next most CONSERVATIVE option would be the Scotch Brite pad, because in a YouTube video i had watched, a guy used maroon pads after white Roloc discs to get a finer finish and claimed it wouldn't hurt anything, so maroon pads is what i had bought and had ended up using, though i did later look it up and find out maroon is 320 grit and there is a range of finer Scotch Brite pads. Well it turns out he/i may have been wrong. I used the maroon pad, lubricated with WD-40, on the head and exhaust gasket surfaces, and although I'm not completely finished they look very clean. I did not use them inside of the combustion chamber to preserve the porous finish around the valves, i just used the nylon bristle brush wheel on the Dremel there. The problem is, looking at the pointed area between the the valve seats where the combustion chamber meets the head gasket surface, it appears i have rounded off these edges and likely every edge more than i had anticipated, hopefully i didn't smooth out the porous finish around the valve seats too much.
Did i damage my head?
How should i finish cleaning it, and clean the other? I would like to use the most conservative method possible, though it seems like i already screwed that up. I will also be using this method on the block surface and pistons with particular caution towards oil contamination and cleanliness.
However as for the coolant ports, stuff is bound to get in there even when plugged up, how can i clean them out when i am all finished? Air Compressor? Coolant flush?
Also how should i rinse the heads of any contaminates before reassembly?
I just can't bear the possibility that i damaged my perfectly good 243 heads, although i guess sourcing a set OEM LS1 or LS6 heads wouldn't be the end of the world, it would use up a lot of time and money that i really can't spend.
SCOTCHBRITE GRIT CHART (courtesy of Charlest) back to top
3M Scotch Brite Nylon Pads:
7445 - White pad, called Light Duty Cleansing - (1000) 1200-1500 grit
7448 - Light Grey, called Ultra Fine Hand - (600-800) 800 grit.
6448 - Green (?), called Light Duty Hand Pad - (600) 600 grit
7447 - Maroon pad, called General Purpose Hand - (320-400) 320 grit
6444 - Brown pad, called Extra Duty Hand - (280-320) 240 grit
7446 - Dark Grey pad, called Blending Pad (180-220) 150 grit
7440 - Tan pad, called Heavy Duty Hand Pad - (120-150) 60(?)
Green Scotch Brite is available EVERYWHERE. It's 600 grit.
Blue Scotch-Brite is considered to be about 1000 grit.
(The value inside the parentheses is directly from 3M.)
3M Chart
Less Aggressive --------> More Aggressive
7445 7448 6448 7447 6444 7446 7440
Finer Finish --------> Coarser Finish
IMO some good degreaser and a brush to clean off most of the carbon then have the heads surfaced by the machine shop to get a fresh flat gasket surface. Should cost about $50 and you know it's done right.
I usually get the old gasket and chambers with a brass wire wheel (soft) and then finish with fine green roloc disc. If it requires a nicer surface then that, it goes to a machine shop to be put on a machine and ground smooth.
I usually get the old gasket and chambers with a brass wire wheel (soft) and then finish with fine green roloc disc. If it requires a nicer surface then that, it goes to a machine shop to be put on a machine and ground smooth.
This is me too.
My friend said he used a product called "Goof Off" and it dissolved and wiped the carbon right off. I might try that next time around.
IMO some good degreaser and a brush to clean off most of the carbon then have the heads surfaced by the machine shop to get a fresh flat gasket surface. Should cost about $50 and you know it's done right.
Or you could opt for them to be milled.
Yeah milling would probably be a good idea at this point, i just like the idea of having a conservative DIY method so that i can take my heads off often to change lifters, head gasket, or porting. and not have them milled each time. I'm definitely considering it, especially since i never had before, but i would be reluctant to mill them again next time i remove them. It just seems unnecessary to remove any material, when i can know for sure that the head surface was and still is perfect and not warped with a straight edge. It has not been overheated. I bought some gunk degreaser in a bottle and the gunk protector/cleaner in the can to go with it, i have not tried it yet.
Originally Posted by DietCoke
I usually get the old gasket and chambers with a brass wire wheel (soft) and then finish with fine green roloc disc. If it requires a nicer surface then that, it goes to a machine shop to be put on a machine and ground smooth.
Originally Posted by speedtigger
This is me too.
My friend said he used a product called "Goof Off" and it dissolved and wiped the carbon right off. I might try that next time around.
Although i cringe at using brass on aluminum, it seems this(a brass brush) is what i may end up using for the chambers. Do you start with the brass wire wheel before the roloc disc on the old gasket material because it is less or more aggressive than the green roloc? Anything wrong with using the green scotch brite hand pads instead? I have 40 green and 6 white scotch brite pads coming in the mail. I'll look into goof off, thanks.
I guess there isn't really a simple answer to this. I'm thinking a combination of all your advice will be my best bet, a good safe degreaser with a nylon brush, brass wire wheel, and Roloc bristle discs, I'm sure green would be fine but could it possibly be better to use a finer Roloc disc? The green is 50 grit.
I cleaned my heads with brake cleaner then used purple power on them. They say not to submerge aluminum into purple power as it will eat into it after a while. I just sprayed the heads down and let them soak for a few minutes. I used a red scuff pad to scrub them, like the 3M maroon scotchbrite. Cleaned up pretty good after about an hour of cleaning. I sprayed them again with brake cleaner and took a airhose and blowed them dry.
Yeah milling would probably be a good idea at this point, i just like the idea of having a conservative DIY method so that i can take my heads off often to change lifters, head gasket, or porting. and not have them milled each time. I'm definitely considering it, especially since i never had before, but i would be reluctant to mill them again next time i remove them. It just seems unnecessary to remove any material, when i can know for sure that the head surface was and still is perfect and not warped with a straight edge. It has not been overheated. I bought some gunk degreaser in a bottle and the gunk protector/cleaner in the can to go with it, i have not tried it yet.
Although i cringe at using brass on aluminum, it seems this(a brass brush) is what i may end up using for the chambers. Do you start with the brass wire wheel before the roloc disc on the old gasket material because it is less or more aggressive than the green roloc? Anything wrong with using the green scotch brite hand pads instead? I have 40 green and 6 white scotch brite pads coming in the mail. I'll look into goof off, thanks.
I guess there isn't really a simple answer to this. I'm thinking a combination of all your advice will be my best bet, a good safe degreaser with a nylon brush, brass wire wheel, and Roloc bristle discs, I'm sure green would be fine but could it possibly be better to use a finer Roloc disc? The green is 50 grit.
The brass wheel is less aggressive then the roloc (aluminium oxide is HARD), but has a TON more mass and can't/doesn't clog. It will remove gasket 10x faster then the roloc. The green rolocs are a fine ~600 grit, not sure where you're getting 50 from.
From: Ottawa Ontario, Canada - where arguing "DA" is for the slow and weak...
Lacquer thinner and a razor blade/plastic scraper gets the carbon off (you can pre-soak rags with the thinner to help soften the carbon), and the residue is taken of with some 220 grit and 400 grit on a sanding block. We're holding 8 psi on our D1SC Procharged LS2 with stock head bolts using this method.
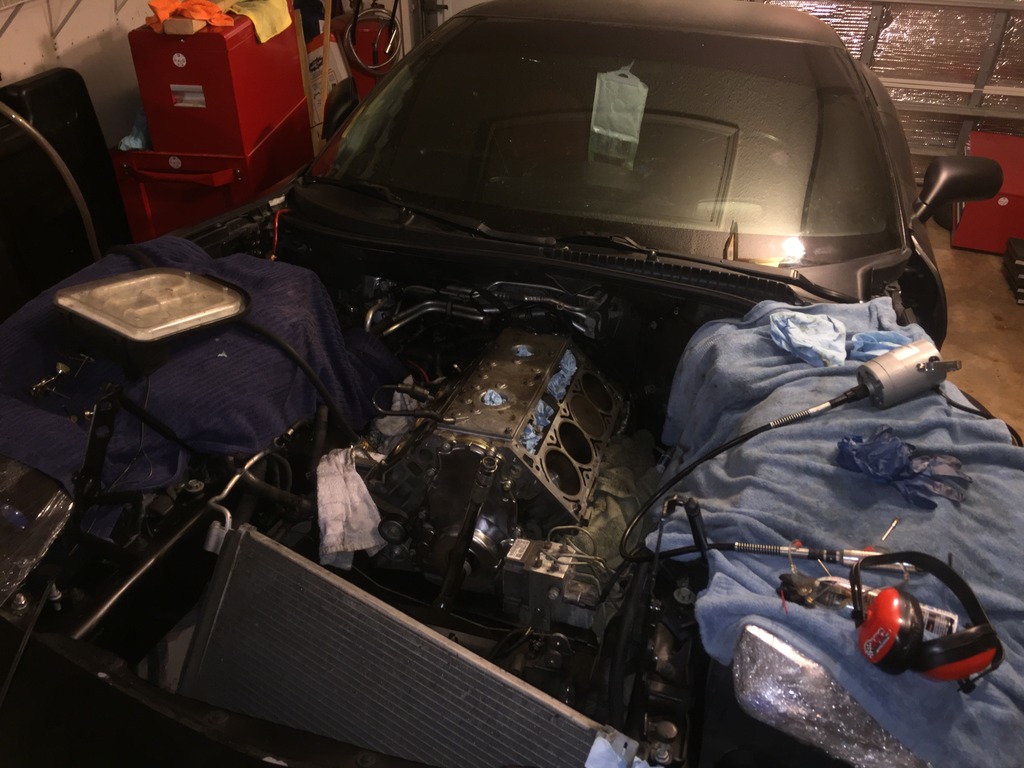
Update
I finally got the heads cleaned up, reassembled, and ready to install. For me, the solution was brass wire wheel as DietCoke recommended.
I used a flex shaft grinder and dremel bristle disks from a five piece kit they sell at harbor freight. The disks wear out and start flinging brass bristles everywhere so i ended up making another trip to HF to get more $6 five piece kits. I used a brass bench grinder wheel on a drill press to clean the valves.
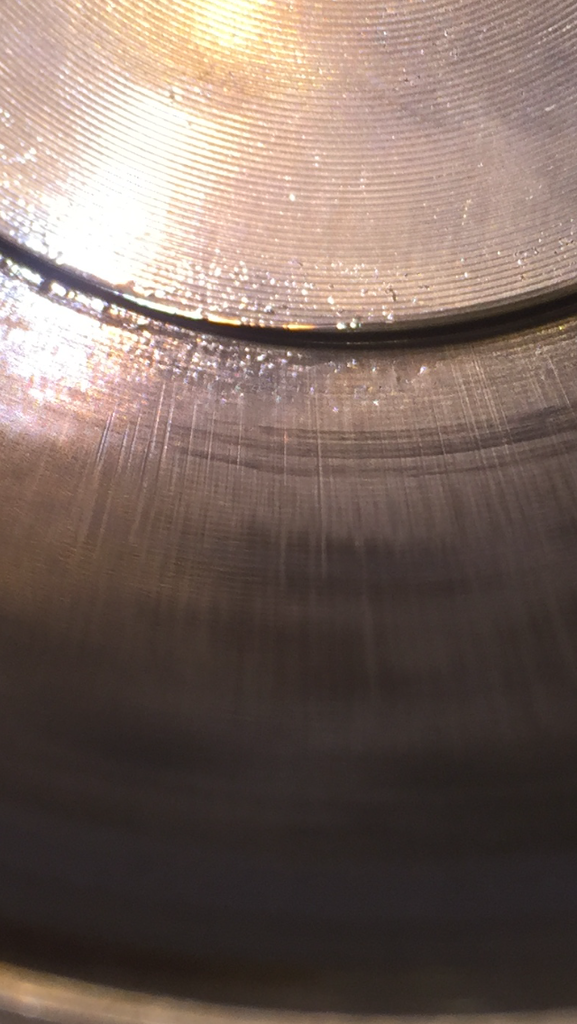
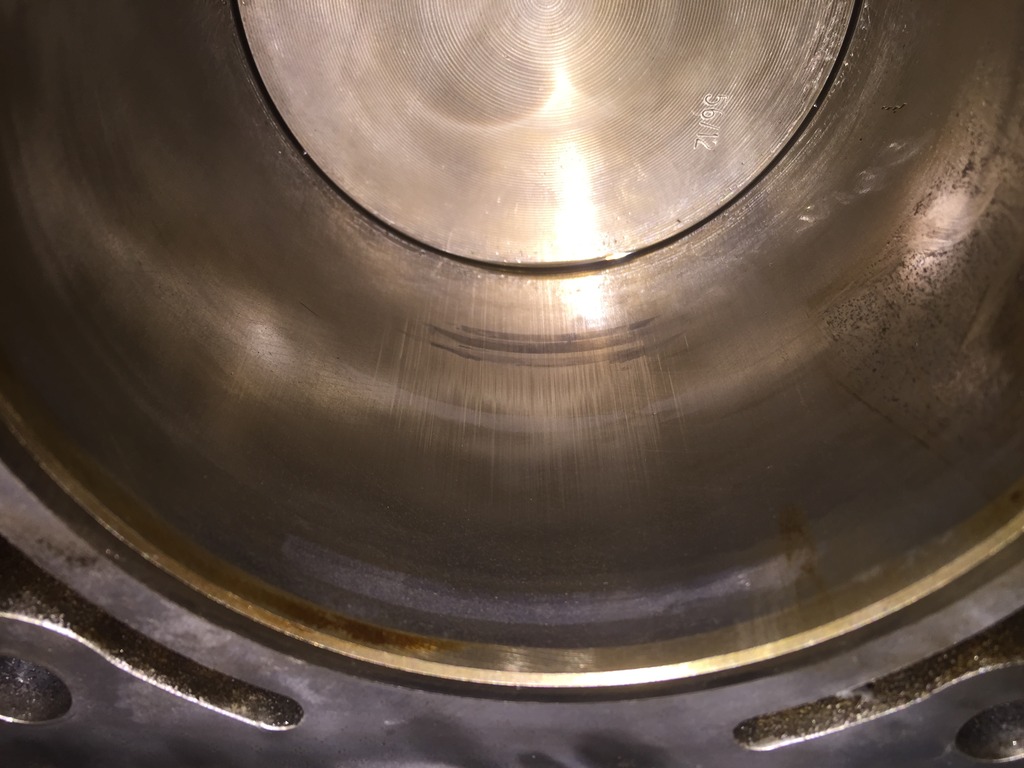
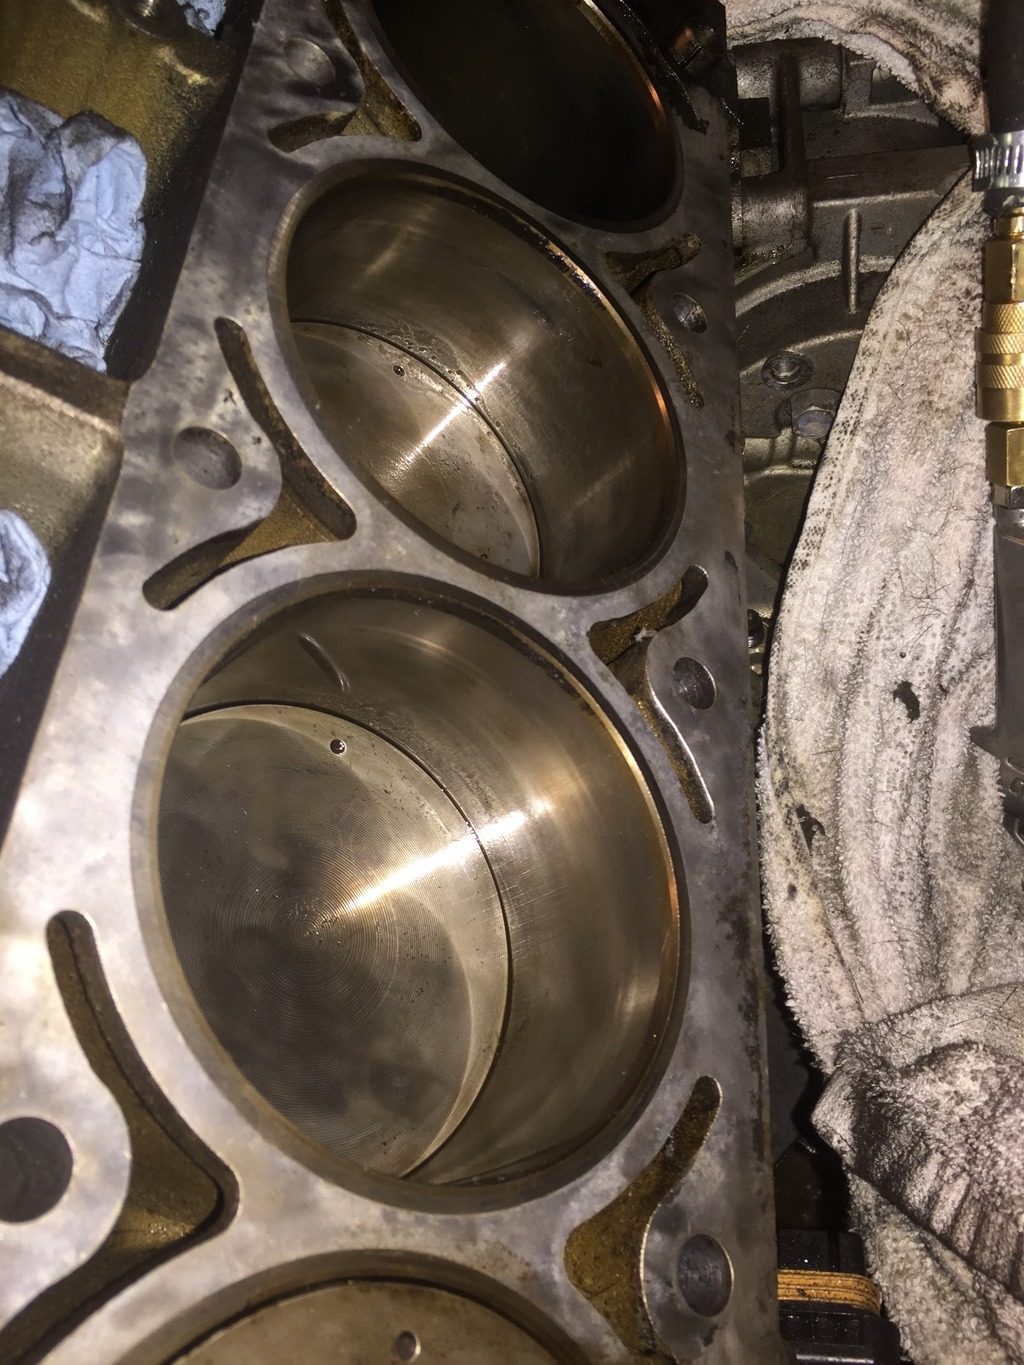
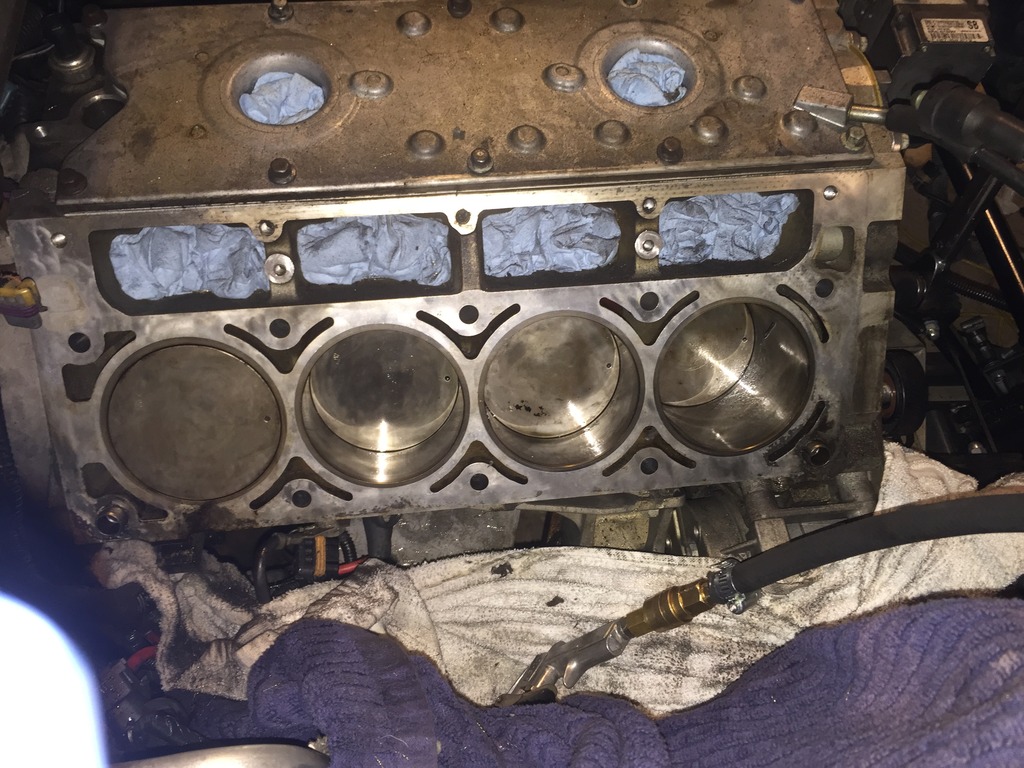
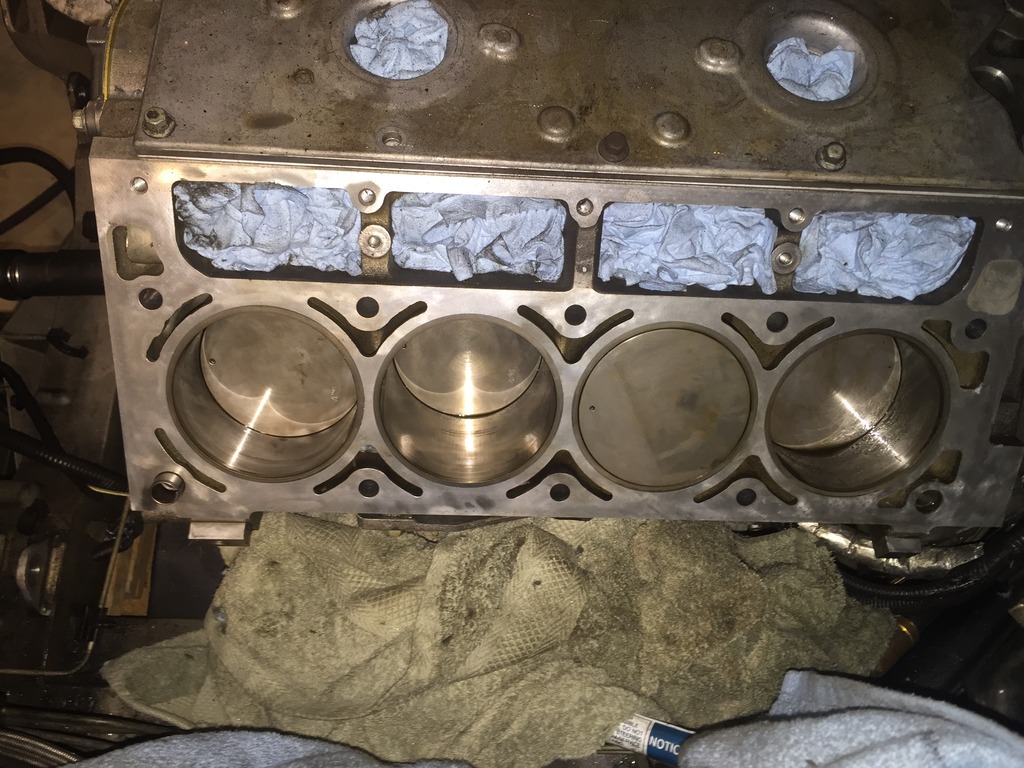
I used the same method to clean the block, but I'm noticing some small scoring on the bores that i want to ask what you all think.
Each time i would put two pistons at TDC and when they were clean, blow out, wipe down, and re-oil every cylinder twice before rotating. I'm positive i got every last brass bristle out each time before rotating, and i even used the the air compressor to blow out any crud around the rings. Did i do something wrong or are those scratches ok? maybe i blew out a protective layer of oil using my air compressor at 100 PSI?
I've scared to spin it since i noticed the scoring , so I'm going to wait until i hear back to finish up, install the heads, and order the pushrods.
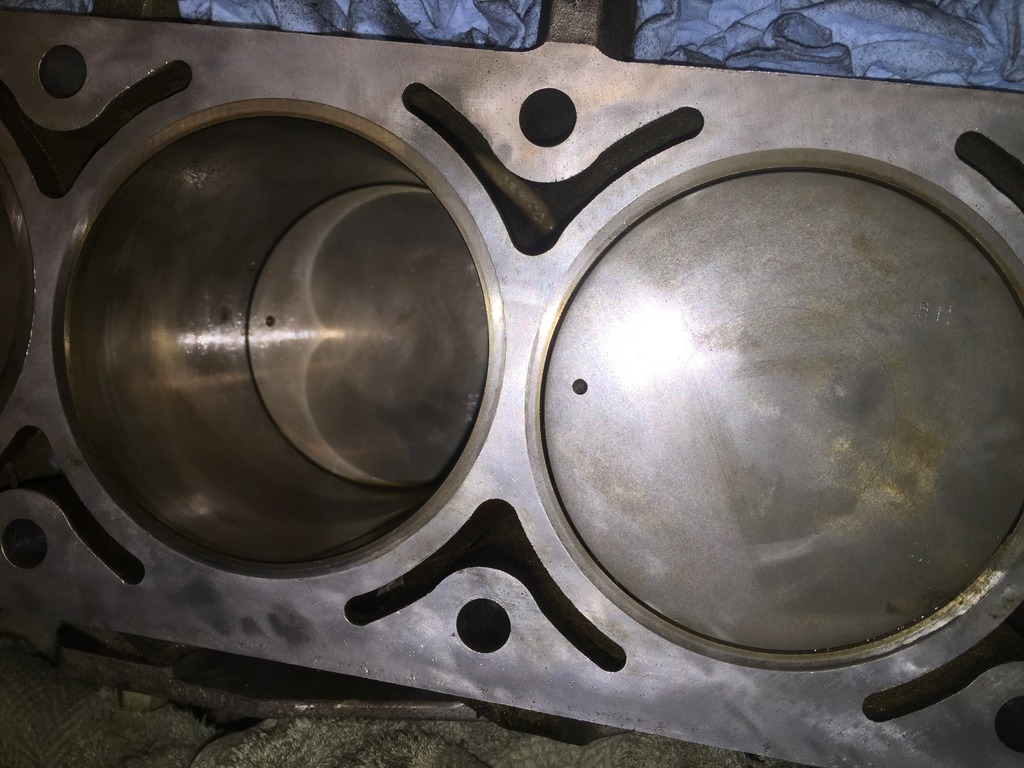
One more thing, anyone know why the #5 piston is far more smooth than the rest? It has the same line pattern, casting numbers, and appears to be OEM, but is this how it came from the factory?
actually it looks like there was small pieces of brass in there. Good thing the sleeve is iron. I got all of the small pieces out with an air compressor but some of the bigger pieces like the ones in the photo won't dislodge using compressed air alone. I have not tried rotating it more. Anyone know how i can get those out?


 03-02-2016 | 11:21 AM