


LS2 Intake Swap... and keeping DoD

Thread Starter
Joined: Feb 2010
Posts: 907
Likes: 367
From: Champaign, IL
Before everyone and their brother tells me I should be doing a LS6 intake swap... I am well aware of that intake's performance, but I want an LS2 intake, fuel rail, injectors for my particular application.
My application is an LS4, but not in a FWD configuration, it doesn't use a cross over pipe nor does it use the stock alternator bracket, so I can not speak for clearances to those items.
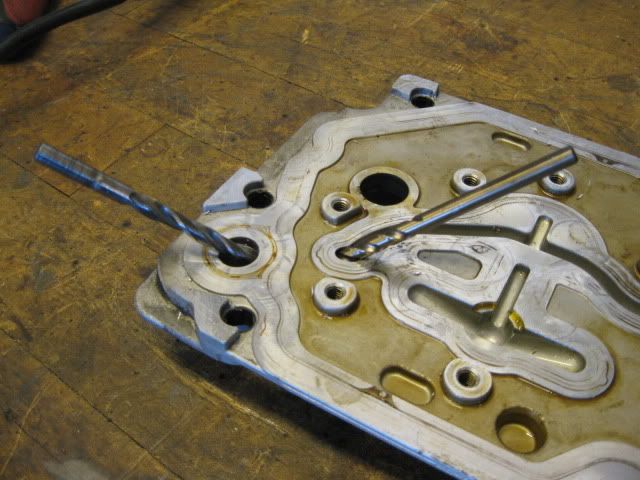
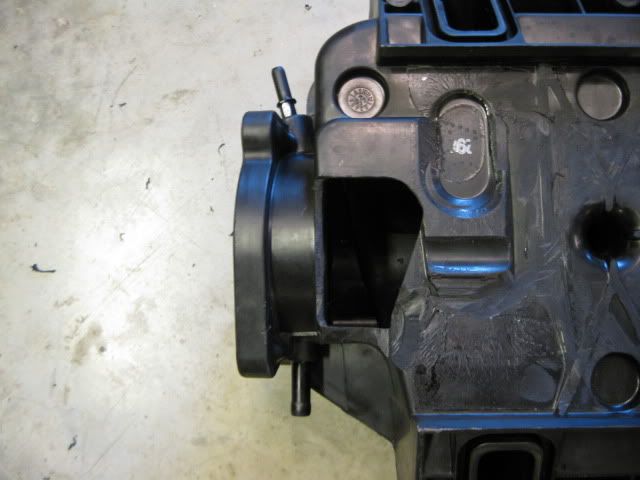
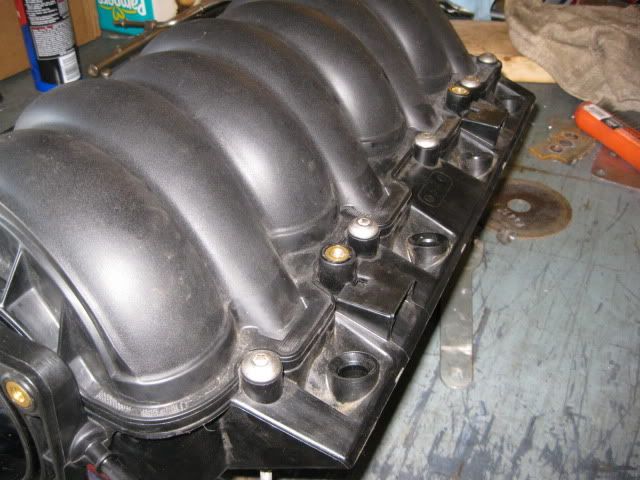
As everyone knows there are major interferance issues between the OPSU and the DoD connector with the LS2/90mm intake...
Even with the OPSU boss cut down about 1/2" in this picture, you can see the valley cover needs to come down another 3/8" to be able to fit... this is going to take a bunch of work!
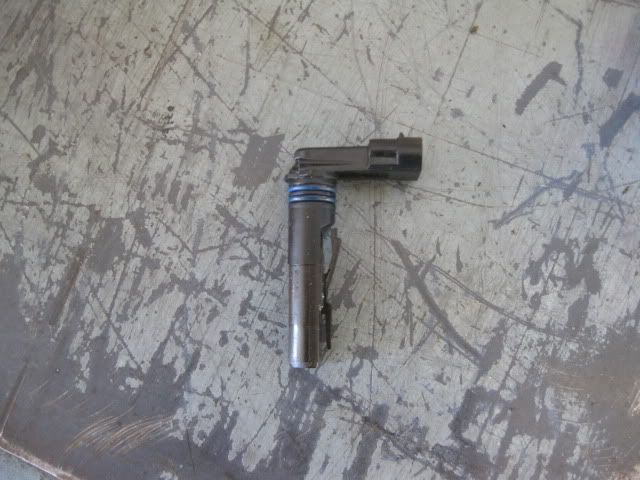
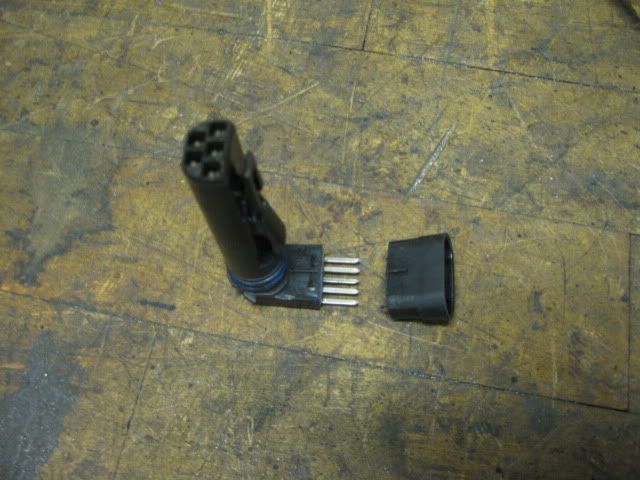
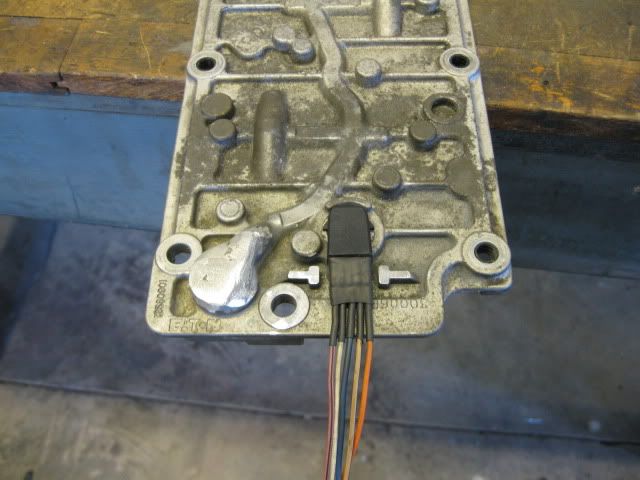
First thing under the knife was the connector. Right behind the flange for the connector, I gently cut through the plastic and eventually was able to pry the end off exposing the 5 terminals:
Call me finicky... but I wanted to know the OEM wire colors for this connection so the new wires (recycled from other GM harnesses) can match.
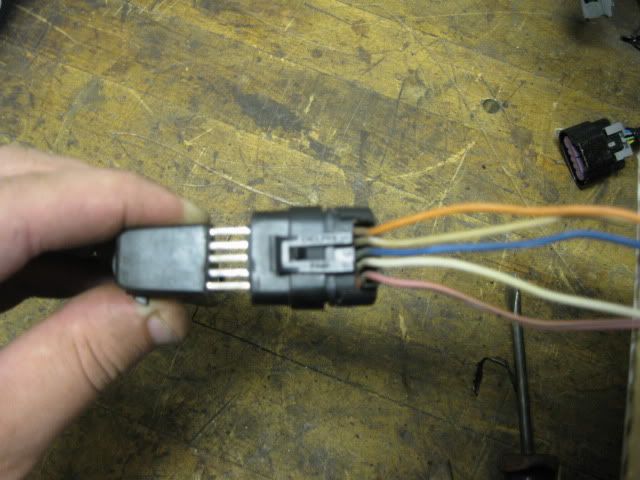
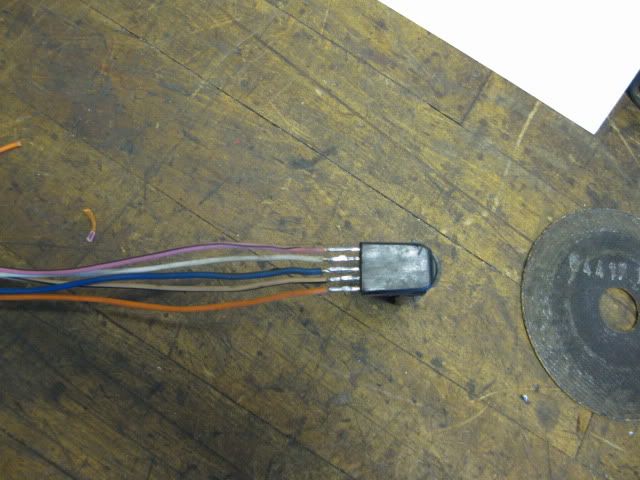
New wires (about 24" in length - way too long) soldered to the appropriate terminals:
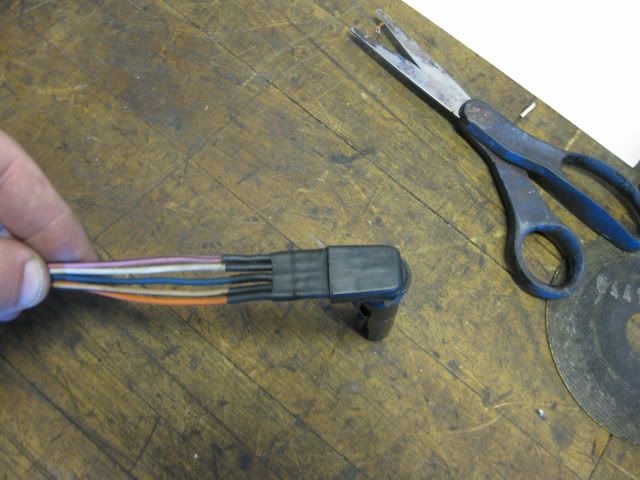
Heat shrink x2:

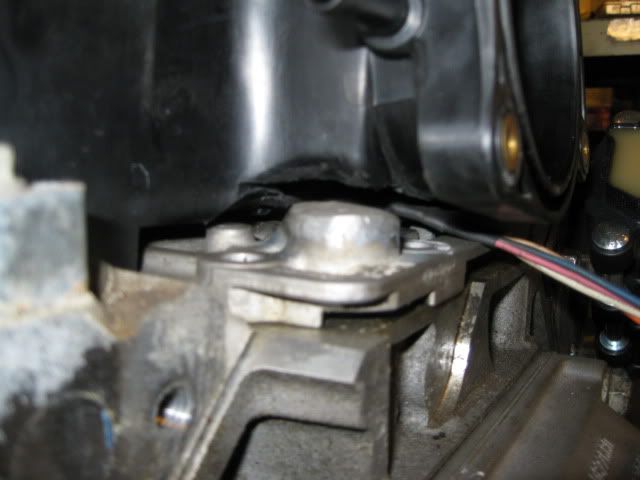
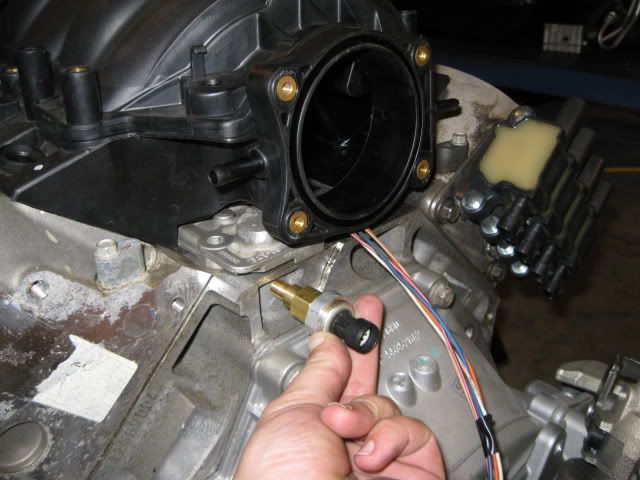
Now onto the OPSU - it will be relocated entirely: I had already cut it down about 1/2" and cut it down another 3/8" to expose the oil passage while still leaving material to drill a new oil passage.

New oil passage:
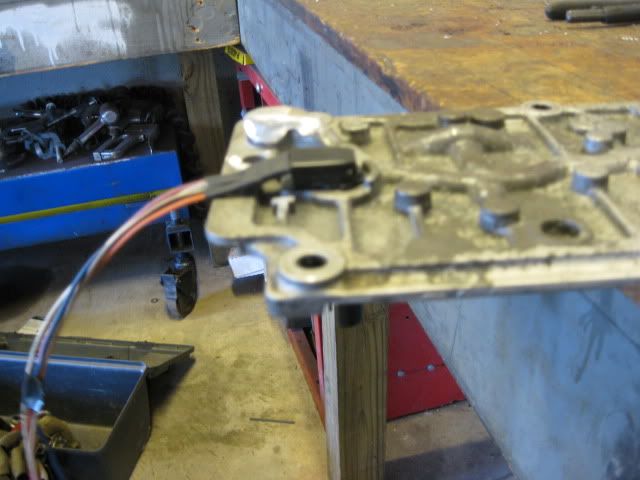
Then the top side of the OPSU boss was welded up to close up the passages. Here is a finished pic of the welded OPSU and the modified connector:
Sadly, the LS2 intake isn't going to accept installation without a fight! Even with the modifications above, it still would not fit and it was time to modify the intake.
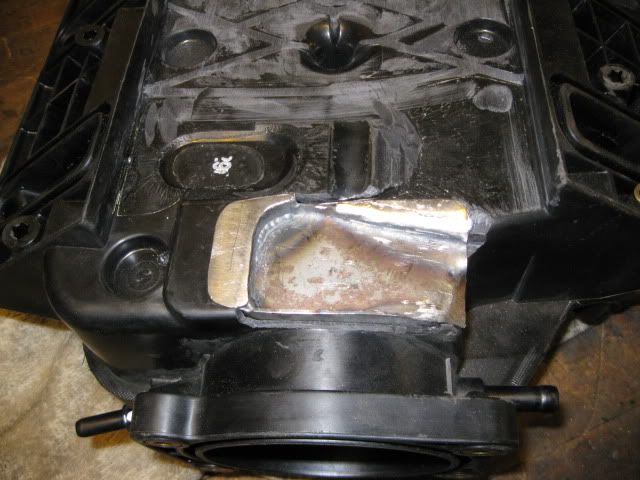
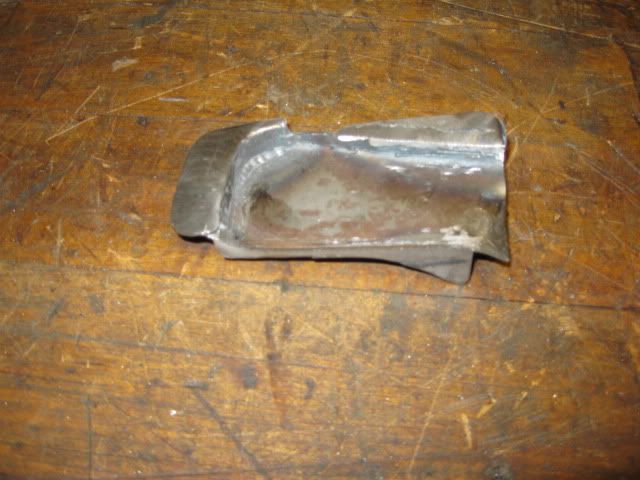
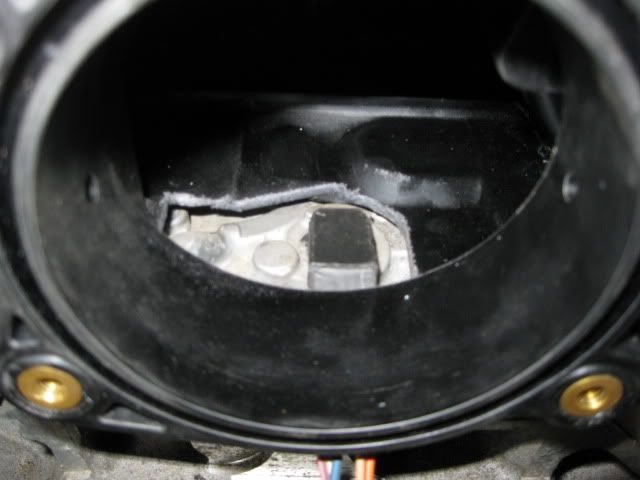
Lower ribs flattened and the area of the connector and OPSU was cut open:
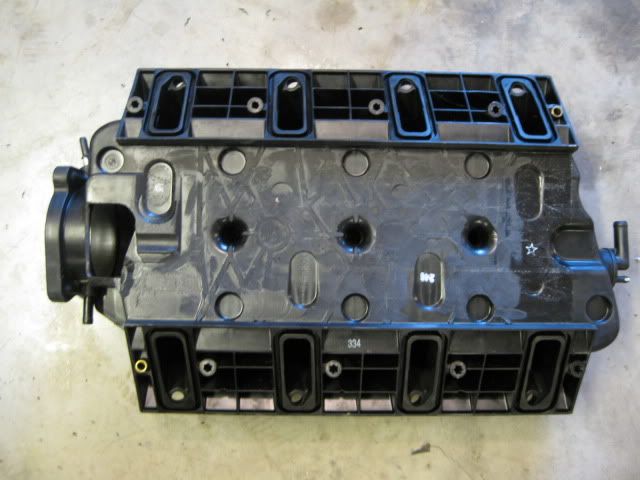
But now the bastard can be installed w/o interferance:
I am planning to fab up a plate (either some sheet metal, or possibly fiberglass) to seal up the hole... hope to make progress on this Sunday.
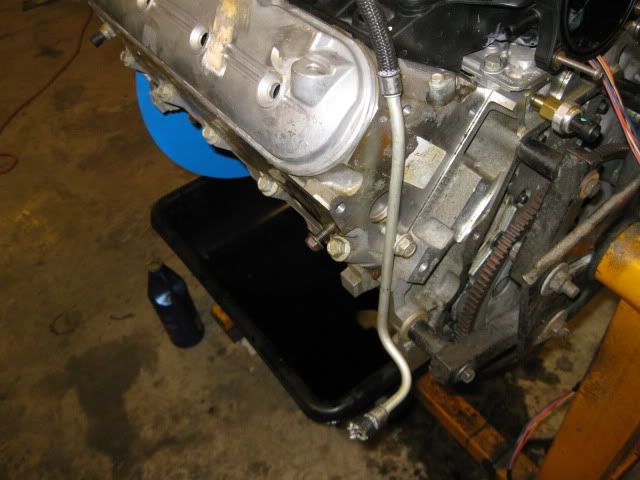
Here is the last shot of where the OPSU will be relocated. I found some brass fittings that will work, just need to drill/tap the oil passage in the block and purge the line of any shavings (by pumping oil through it).
My application is an LS4, but not in a FWD configuration, it doesn't use a cross over pipe nor does it use the stock alternator bracket, so I can not speak for clearances to those items.
As everyone knows there are major interferance issues between the OPSU and the DoD connector with the LS2/90mm intake...
Even with the OPSU boss cut down about 1/2" in this picture, you can see the valley cover needs to come down another 3/8" to be able to fit... this is going to take a bunch of work!
First thing under the knife was the connector. Right behind the flange for the connector, I gently cut through the plastic and eventually was able to pry the end off exposing the 5 terminals:
Call me finicky... but I wanted to know the OEM wire colors for this connection so the new wires (recycled from other GM harnesses) can match.
New wires (about 24" in length - way too long) soldered to the appropriate terminals:
Heat shrink x2:
Now onto the OPSU - it will be relocated entirely: I had already cut it down about 1/2" and cut it down another 3/8" to expose the oil passage while still leaving material to drill a new oil passage.
New oil passage:
Then the top side of the OPSU boss was welded up to close up the passages. Here is a finished pic of the welded OPSU and the modified connector:
Sadly, the LS2 intake isn't going to accept installation without a fight! Even with the modifications above, it still would not fit and it was time to modify the intake.
Lower ribs flattened and the area of the connector and OPSU was cut open:
But now the bastard can be installed w/o interferance:
I am planning to fab up a plate (either some sheet metal, or possibly fiberglass) to seal up the hole... hope to make progress on this Sunday.
Here is the last shot of where the OPSU will be relocated. I found some brass fittings that will work, just need to drill/tap the oil passage in the block and purge the line of any shavings (by pumping oil through it).
Last edited by fieroguru; Sep 18, 2010 at 07:27 PM.
Trending Topics
LS1 Tech Stories
The Best V8 Stories One Small Block at Time

Topdon ONE vs. Artidiag 800 BT2: Which is the Diagnostic Tablet For You?
Pouria Savadkouei
Gas Monkey Built a 6-Wheel Ferrari Testarossa With a Corvette LT4 Engine
Verdad Gallardo
7 Most Reliable High-Performance Engines GM Has Ever Built
Verdad Gallardo
Amazing '71 Camaro Restomod Is Modern Muscle Car Under the Skin
Verdad Gallardo
6 Common C5 Corvette Failures and What's Involved In Repairing Them
Pouria Savadkouei
Retro Modern Bandit Pontiac Trans AM Comes With Burt Reynolds' Autograph
Verdad Gallardo
Top 10 Greatest Cadillac V Series Performance Models Ever, Ranked
Pouria Savadkouei
Top 10 Most Powerful Chevy Trucks Ever Made!

Hennessey's New Supercharged Silverado ZR2 Has 700 HP
Verdad Gallardo Thread Starter
Joined: Feb 2010
Posts: 907
Likes: 367
From: Champaign, IL
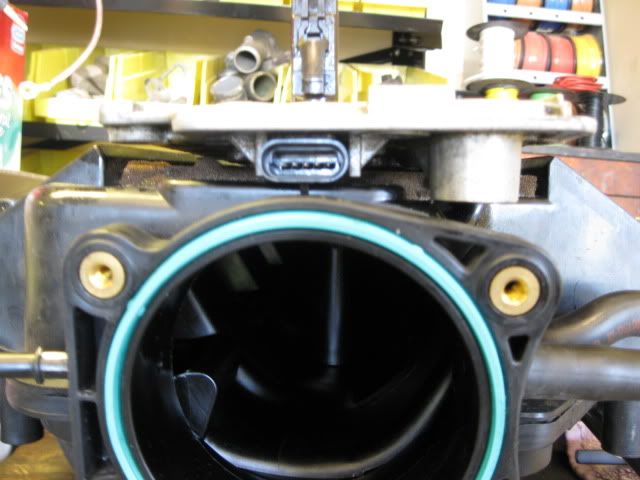
The center posts are hollow, so cutting them out give me another 3 holes to fill. Besides I have no idea how they get that far into the intake to cut them out... need to do some more research on cutting these out.
I was reading up on the runner porting today and figured out the LS2 intake is a three piece unit vs. the single piece LS1/LS6 intakes. Within a couple of inches of the port outlet, there are several transitions between these pieces and they are far from smooth. I will take some sand paper to them to smooth them out, but not looking to remove any significant material.
I was reading up on the runner porting today and figured out the LS2 intake is a three piece unit vs. the single piece LS1/LS6 intakes. Within a couple of inches of the port outlet, there are several transitions between these pieces and they are far from smooth. I will take some sand paper to them to smooth them out, but not looking to remove any significant material.
They're an important structural component of the manifold. They keep the bottom of the manifold from collapsing in under high vacuum conditions. Plastic manifolds just aren't strong enough to remove these.
Doesn't make it a good idea, though. Especially after removing all the external ribbing on the bottom to get the damn thing to fit over the lumpy LS4 valley cover.
Under deceleration, there is 10 psi pushing in on the bottom of the intake, that's nearly a ton of force. A non-reinforced piece of plastic isn't going to hold up to this kind of stress over the long run.
Under deceleration, there is 10 psi pushing in on the bottom of the intake, that's nearly a ton of force. A non-reinforced piece of plastic isn't going to hold up to this kind of stress over the long run.

Thread Starter
Joined: Feb 2010
Posts: 907
Likes: 367
From: Champaign, IL
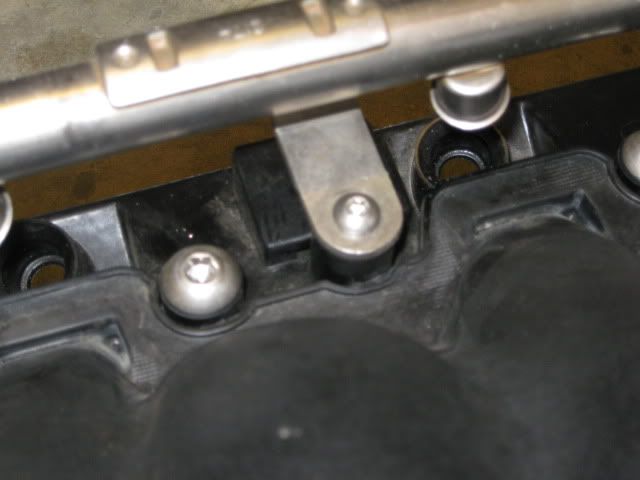
The intake manifold bolt bosses on the LS2 intake are about 1" taller than they need to be... so I cut them down about 1":

I have a sickness for stainless steel button heads and even at this shorter length, they just do not exist in the proper length/thread... so I made some using some other metric stainless steel button heads. Drilled the center, cut the OEM bolts the proper length, pressed them into the bottom of the button heads, weld then together, grind off the excess...

Even have button heads for the fuel rail and throttle body:
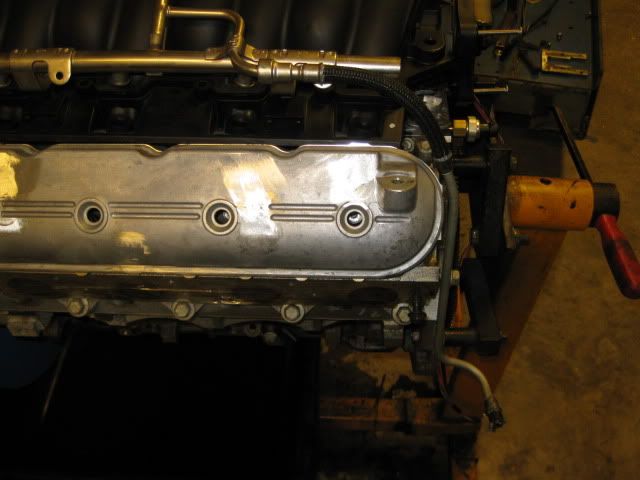
Then I bend the stock LS2 fuel rail so the fuel line will not cross over the valve cover (like the stock LS4) and then rebent the original LS4 fuel line to go down the end of the head (this will be behind the coil mount) and exit down low away from the exhaust.
I have a sickness for stainless steel button heads and even at this shorter length, they just do not exist in the proper length/thread... so I made some using some other metric stainless steel button heads. Drilled the center, cut the OEM bolts the proper length, pressed them into the bottom of the button heads, weld then together, grind off the excess...
Even have button heads for the fuel rail and throttle body:
Then I bend the stock LS2 fuel rail so the fuel line will not cross over the valve cover (like the stock LS4) and then rebent the original LS4 fuel line to go down the end of the head (this will be behind the coil mount) and exit down low away from the exhaust.
The valley tray will sit much lower once bolted onto the engine. The intake will sit much higher so you now have plenty of clearance. A little over kill. Nighthand did the ls2 intake swap and just plugged the opsu port after he cut it down. Good work though.
Or you could use the 97-2000 Corvette OFAC (still available) Part Number 12551587 Comes already drilled and with a metric thread M12 x 1.5 for the OPSU It replaces the part right over the oil filter. But the way GREAT WORK I was toying with the same thing but was no where close to were you are. I going to be following this close, keep up the good work!
Last edited by crashman; Oct 20, 2010 at 11:38 AM. Reason: added stuff
Thread Starter
Joined: Feb 2010
Posts: 907
Likes: 367
From: Champaign, IL
Or you could use the 97-2000 Corvette OFAC (still available) Part Number 12551587 Comes already drilled and with a metric thread M12 x 1.5 for the OPSU It replaces the part right over the oil filter. But the way GREAT WORK I was toying with the same thing but was no where close to were you are. I going to be following this close, keep up the good work!