


Restoring my 1995 Bird..

Thread Starter
TECH Apprentice
iTrader: (1)
Joined: Jun 2008
Posts: 303
Likes: 0
From: Fort Worth, Texas
With the dash still out of my car, I surfed the web like crazy, looking for a really good deal on a ratchet shifter. Never found one that that I was "crazy" about. So, instead, I spent the better part of today, performing surgery on my shifter.. After reading the write up by 1QUIKWS6 here on LS1TECH, he motivated me enough to surgically remove 1" off the shaft on my factory shifter. Here are a few pictures of what I did:
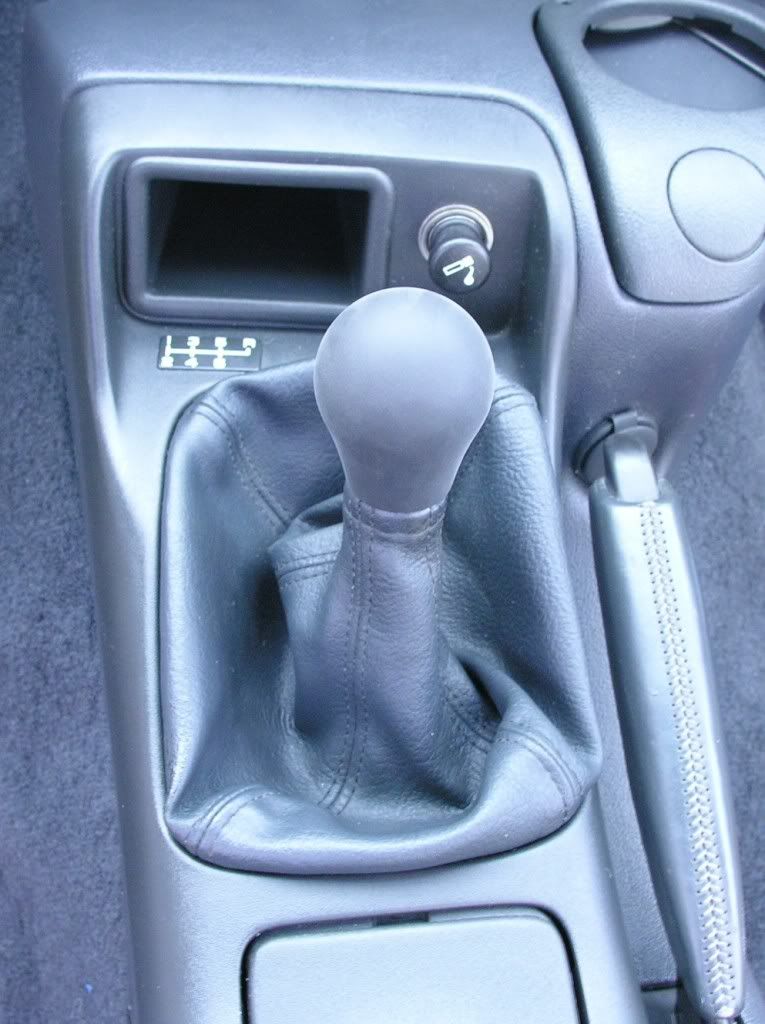
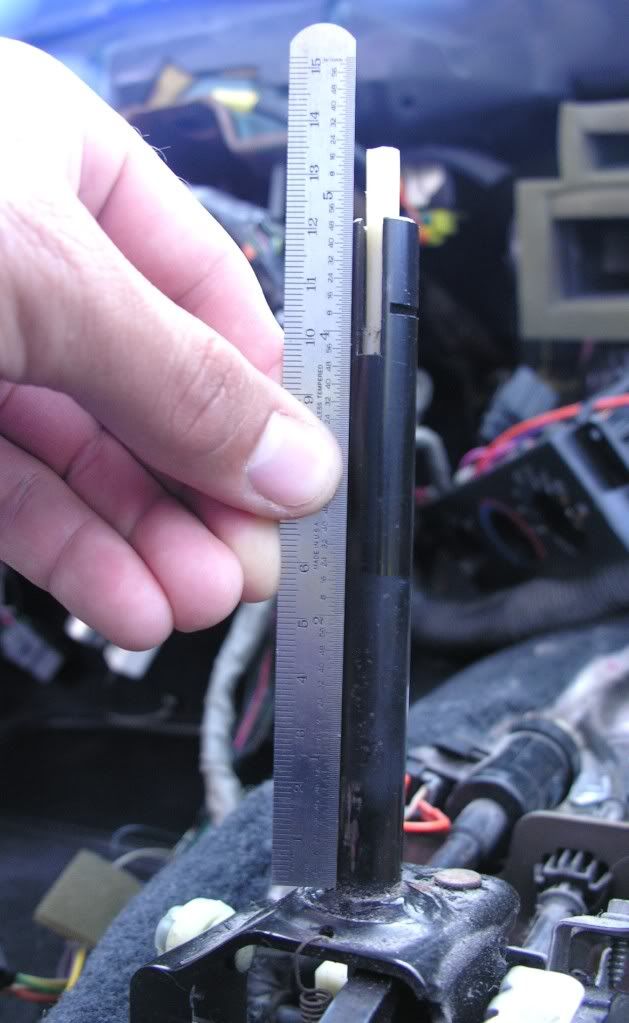
BEFORE (no cutting yet.. everything is still "factory")
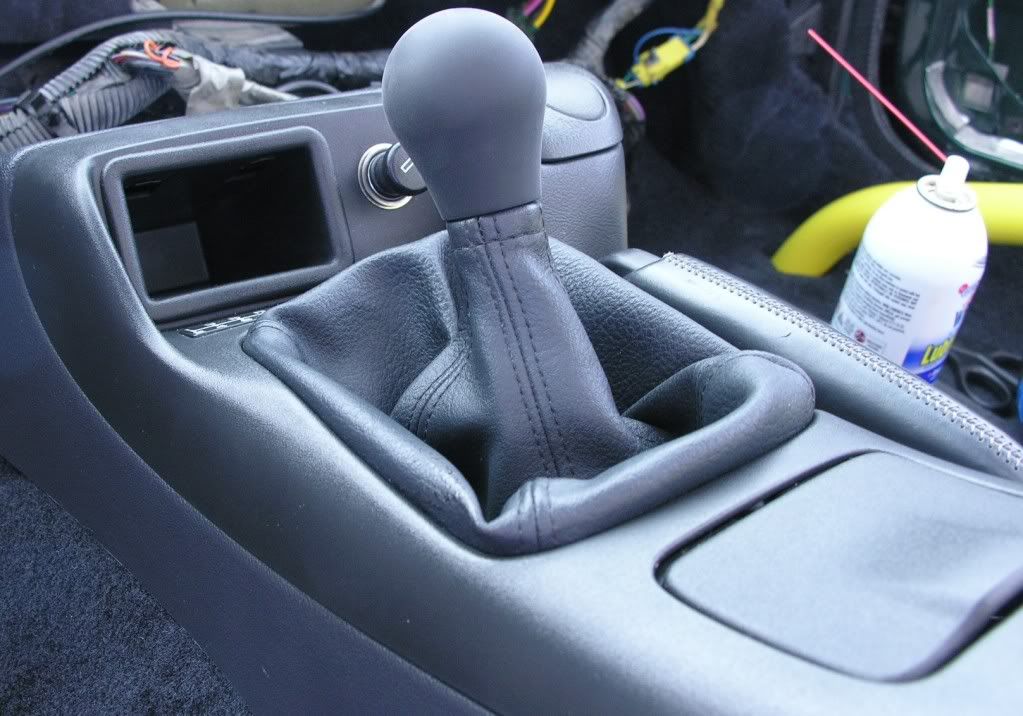
AFTER (I never thought I'd here myself saying this, but, look at my shaft. It is now permenantly 1" smaller than before.. LMFAO):
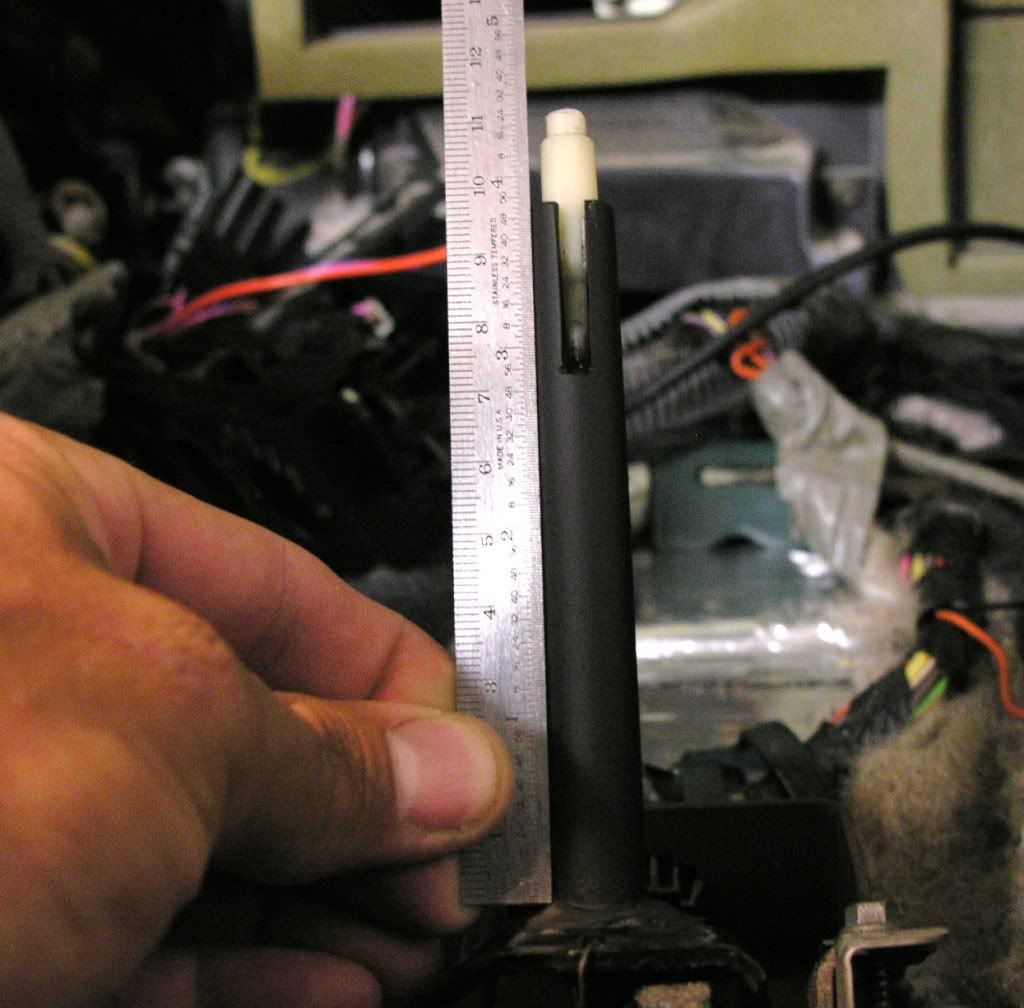
It actually took me a while to do all of this.. The prepping took longer than expected.. Tools needed: (1) rotary tool, (2) cut off carbide disks, (1) roll of painters tape, (1) can of Rust proofing spray paint, (1) large flathead screw driver, (1) metal file, a razor blade, some painters paper for overspray and a whole lotta patience! Since I used 1QUIKWS6's original post as a kind of "guide", I posted all of my detailed information with TONS of pictures on HIS thread. My write up can be found here: https://ls1tech.com/forums/11683549-post50.html
I did all of this because I own one of these:
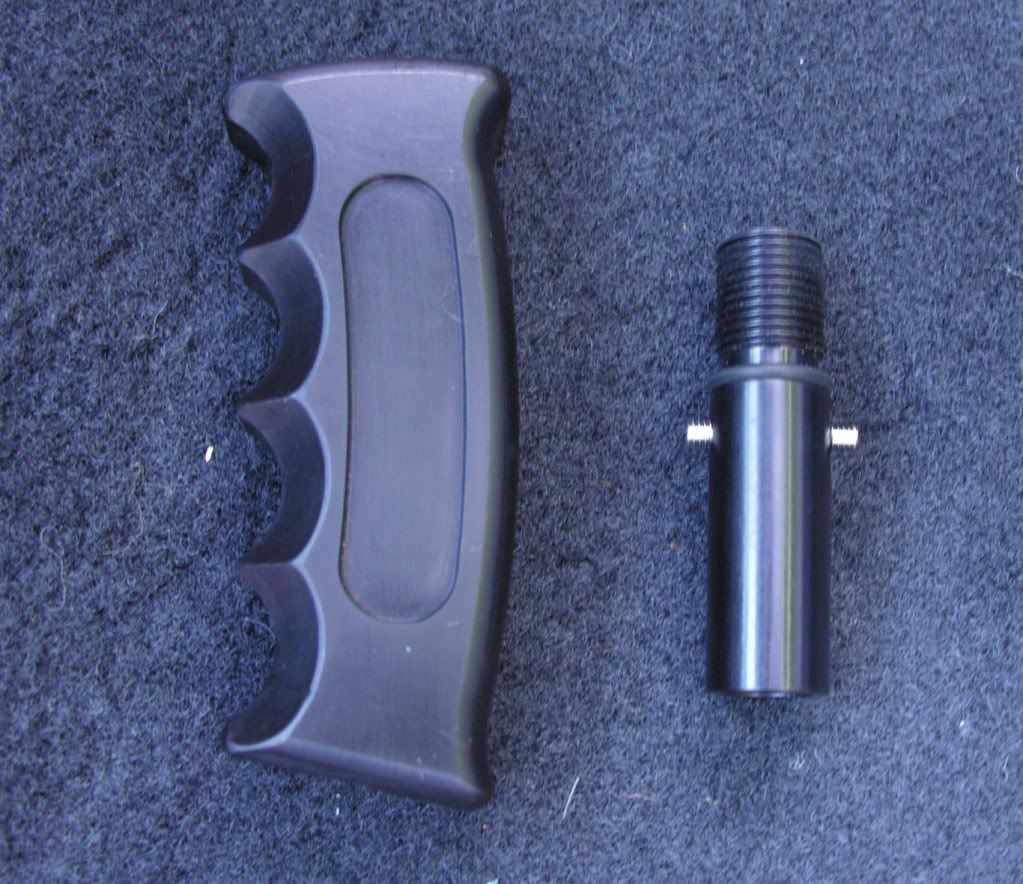
However, I plan on selling my UMI Pistol Grip shift **** because I purchased one of these (its made of CNC'd Delrin). It should look very close to a stock M6 car because I have the M6 center console on my A4 trans):

BEFORE (no cutting yet.. everything is still "factory")
AFTER (I never thought I'd here myself saying this, but, look at my shaft. It is now permenantly 1" smaller than before.. LMFAO):
It actually took me a while to do all of this.. The prepping took longer than expected.. Tools needed: (1) rotary tool, (2) cut off carbide disks, (1) roll of painters tape, (1) can of Rust proofing spray paint, (1) large flathead screw driver, (1) metal file, a razor blade, some painters paper for overspray and a whole lotta patience! Since I used 1QUIKWS6's original post as a kind of "guide", I posted all of my detailed information with TONS of pictures on HIS thread. My write up can be found here: https://ls1tech.com/forums/11683549-post50.html
I did all of this because I own one of these:
However, I plan on selling my UMI Pistol Grip shift **** because I purchased one of these (its made of CNC'd Delrin). It should look very close to a stock M6 car because I have the M6 center console on my A4 trans):
Thread Starter
TECH Apprentice
iTrader: (1)
Joined: Jun 2008
Posts: 303
Likes: 0
From: Fort Worth, Texas
Thread Starter
TECH Apprentice
iTrader: (1)
Joined: Jun 2008
Posts: 303
Likes: 0
From: Fort Worth, Texas
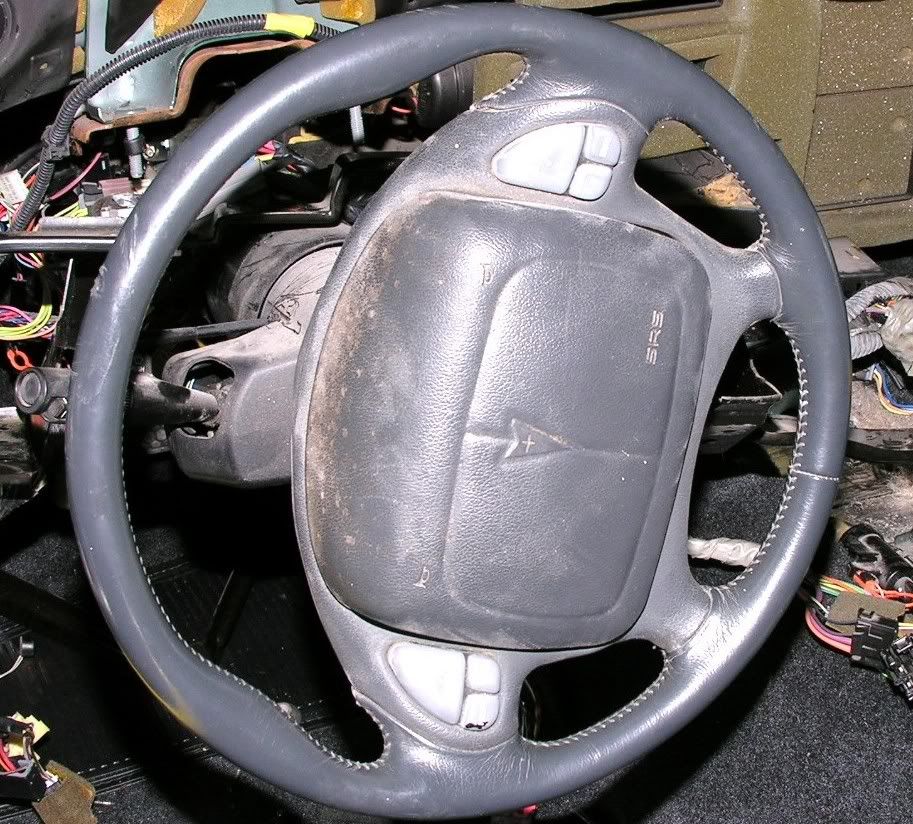
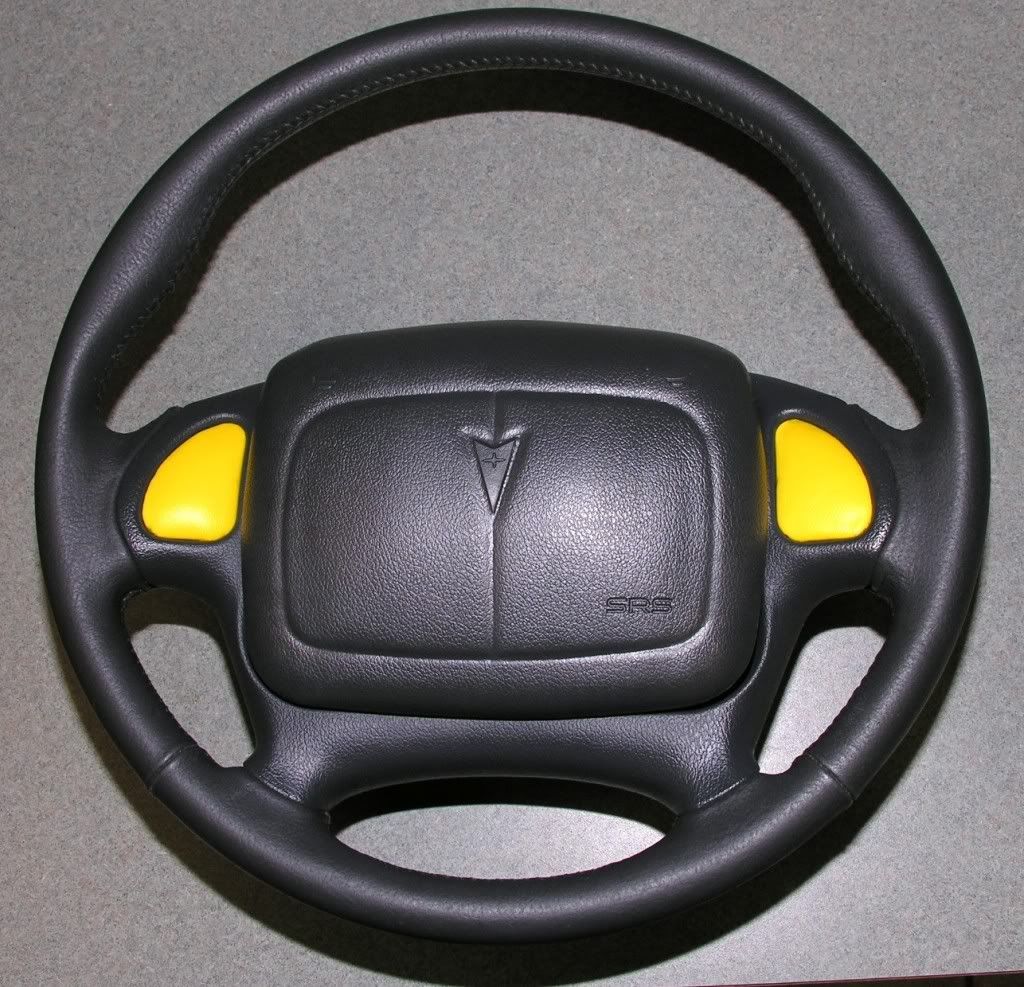
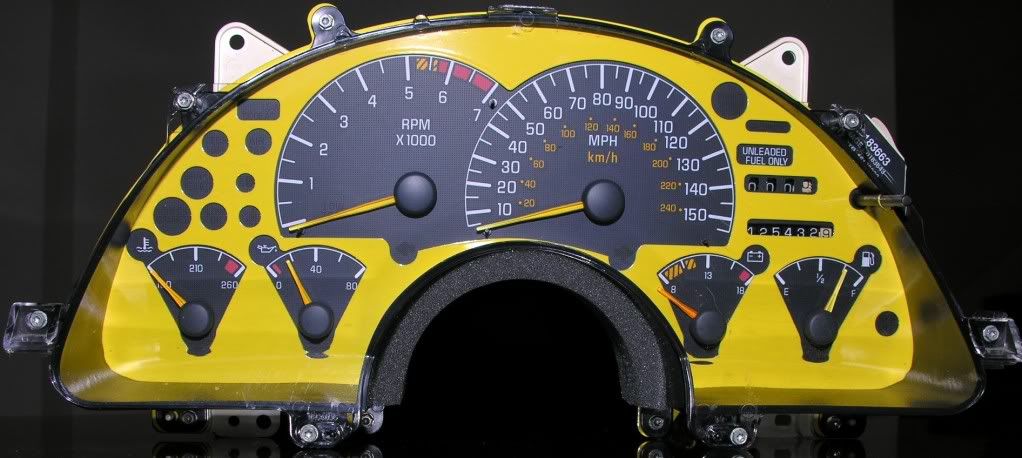
Just a follow-up from Post #73: https://ls1tech.com/forums/11648297-post73.html ..I finally got a hold on some my yellow material and upholstered my unusable steering wheel stereo controls. Everything came out nicely.. Here is a BEFORE and AFTER shot (It's actually the same dark grey color.. One picture I had the flash on, the other picture I did not have the flash on):
Last edited by officermartinez; Jun 5, 2009 at 07:31 AM.
Thread Starter
TECH Apprentice
iTrader: (1)
Joined: Jun 2008
Posts: 303
Likes: 0
From: Fort Worth, Texas
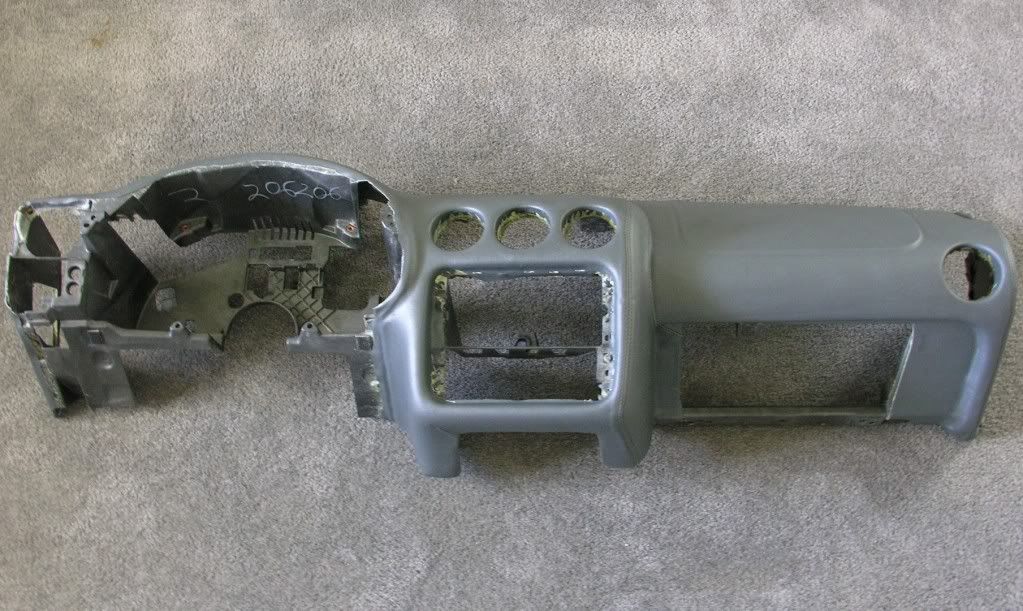
Nothing really to update right now.. I am kind of waiting for others to complete the parts that I sent out.. I am still waiting on Pavlock Performance to send my tail light back to me.. Tyler has had my tail light going on THREE damn months.. ugh! I am also waiting on the upholstery shop to finish my dash and upper dash pad and until yesterday, I was waiting on the powder coater to finish my aluminum gauge cluster cover. I got that back and wow, I love it! Pictures soon to follow..
BTW, I completely pulled off my old steering wheel with a little steering wheel puller that I picked up from Harbor Break.. Oooops, I meant Harbor Freight. It actually did the job nicely.. Not too shabby.
BTW, I completely pulled off my old steering wheel with a little steering wheel puller that I picked up from Harbor Break.. Oooops, I meant Harbor Freight. It actually did the job nicely.. Not too shabby.
Last edited by officermartinez; Jun 11, 2009 at 07:00 AM.
Joined: May 2006
Posts: 3,452
Likes: 3
From: somewhere that doesn't get snow
lol you should switch out the brake pedal for a clutch and smaller brake pedal and wire a kill switch into the clutch pedal so that it must be in the up position to start the car (just imagine if a car thief got in and tried to steal it, they'd always try to start it with the clutch pedal on the floor, and of course it'd never start)
LS1 Tech Stories
The Best V8 Stories One Small Block at Time

Gas Monkey Built a 6-Wheel Ferrari Testarossa With a Corvette LT4 Engine
Verdad Gallardo
7 Most Reliable High-Performance Engines GM Has Ever Built
Verdad Gallardo
Amazing '71 Camaro Restomod Is Modern Muscle Car Under the Skin
Verdad Gallardo
6 Common C5 Corvette Failures and What's Involved In Repairing Them
Pouria Savadkouei
Retro Modern Bandit Pontiac Trans AM Comes With Burt Reynolds' Autograph
Verdad Gallardo
Top 10 Greatest Cadillac V Series Performance Models Ever, Ranked
Pouria Savadkouei
Top 10 Most Powerful Chevy Trucks Ever Made!

Hennessey's New Supercharged Silverado ZR2 Has 700 HP
Verdad Gallardo
Coachbuilt N2A Anteros Is an LS2-Powered C6 Corvette In Italian Clothes
Verdad Gallardo Thread Starter
TECH Apprentice
iTrader: (1)
Joined: Jun 2008
Posts: 303
Likes: 0
From: Fort Worth, Texas

lol you should switch out the brake pedal for a clutch and smaller brake pedal and wire a kill switch into the clutch pedal so that it must be in the up position to start the car (just imagine if a car thief got in and tried to steal it, they'd always try to start it with the clutch pedal on the floor, and of course it'd never start)
Thread Starter
TECH Apprentice
iTrader: (1)
Joined: Jun 2008
Posts: 303
Likes: 0
From: Fort Worth, Texas
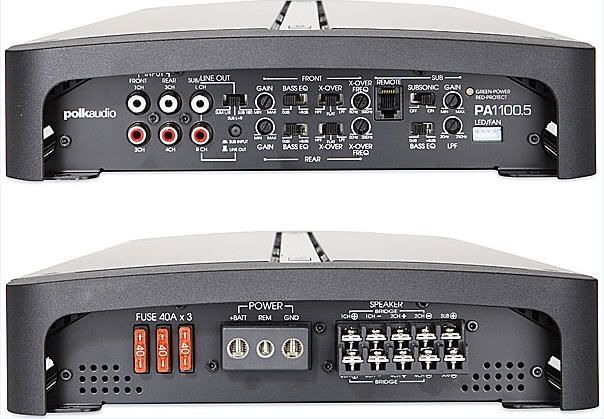
It's been a little bit on my restore.. Again, I am still waiting on my dash to come back from the upholstery shop. I finally received my last tinted tail light. Since it takes about 2 minutes to install those, I will keep them off of the car for a bit (don't want to chip or scratch them). I've been buying a few things here and there to help down the road, mainly stereo components. I purchased (2) sets of Polk Audio MM651 6.5" speakers, a large spool of speaker wire, connectors, etc.. I am about to purchase a huge 5 channel Polk Audio amplifier.
I spoke with the shop owner of the upholstery shop and he said he will try to get my dash back to me, this upcoming Monday. (ugghhhhh). In the mean time, I am still trying to find a buyer for my Toby Ranger Subs/speaker box.
I spoke with the shop owner of the upholstery shop and he said he will try to get my dash back to me, this upcoming Monday. (ugghhhhh). In the mean time, I am still trying to find a buyer for my Toby Ranger Subs/speaker box.
Thread Starter
TECH Apprentice
iTrader: (1)
Joined: Jun 2008
Posts: 303
Likes: 0
From: Fort Worth, Texas
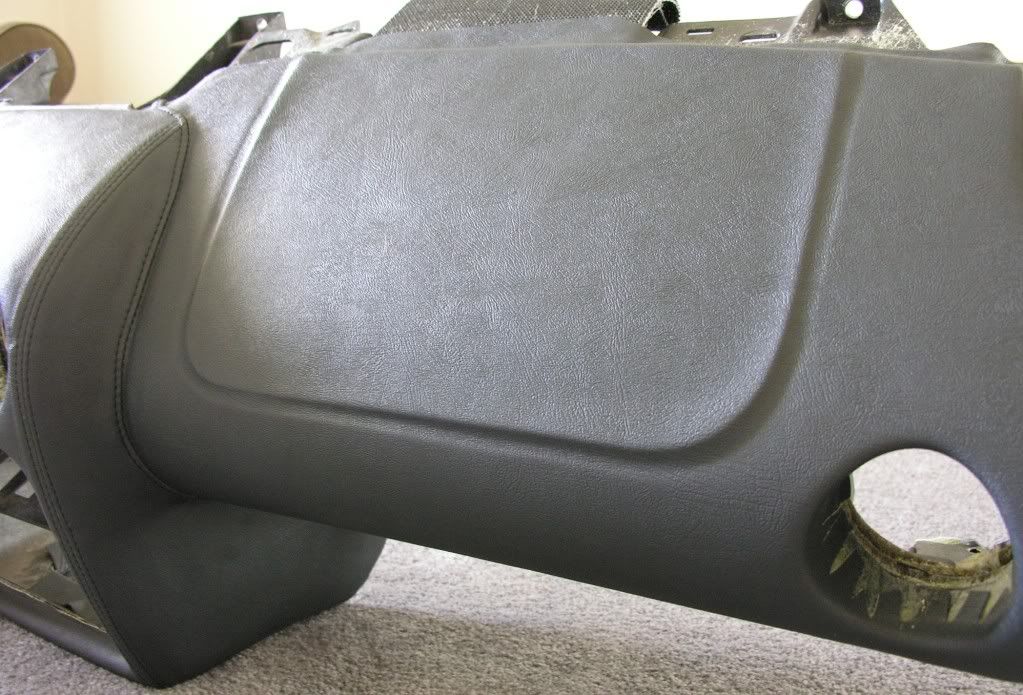
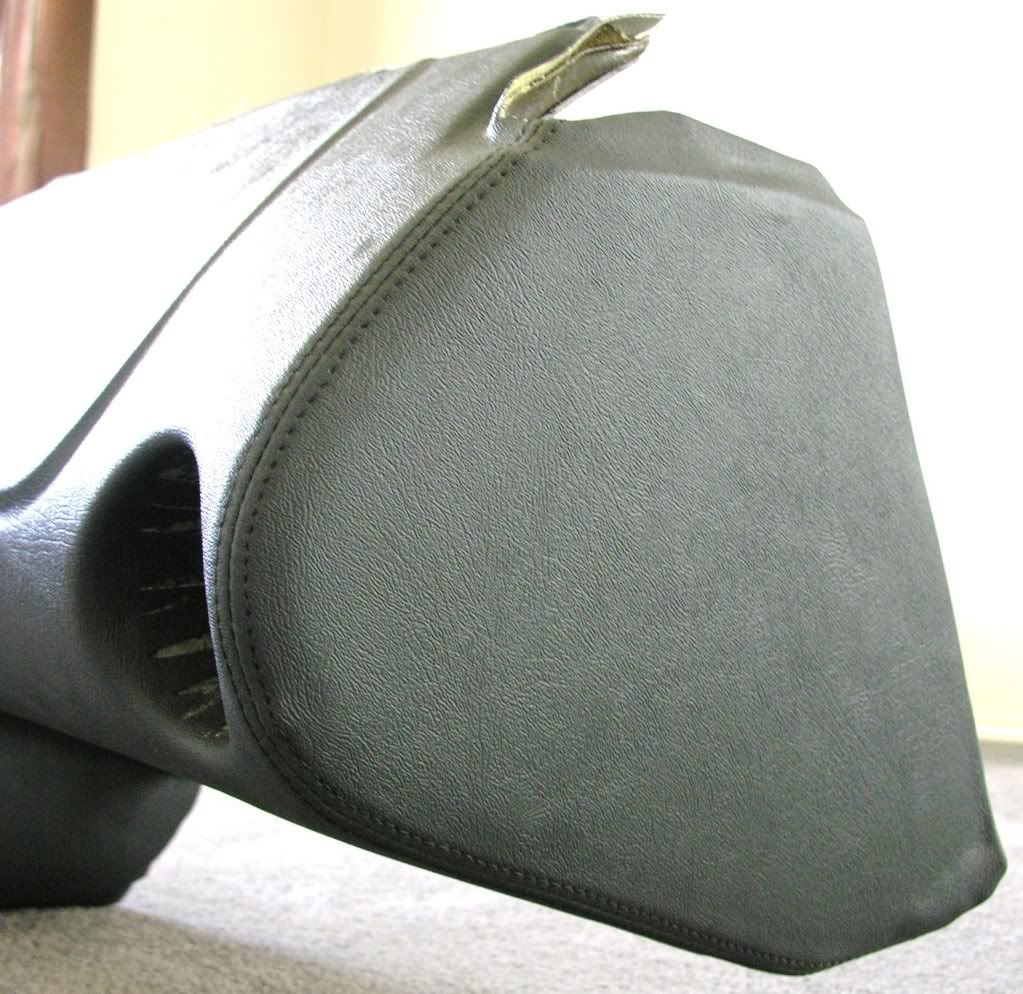
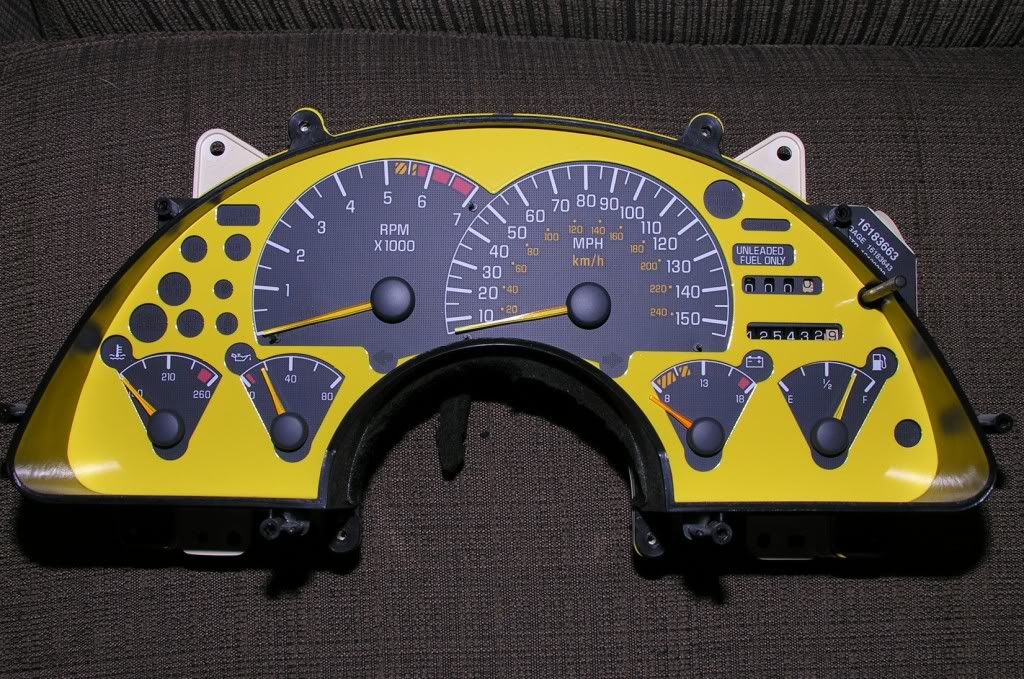
Well, I just got a call from the upholstery shop and they said it was finished.. I ran down there and picked it up and I couldn't be more satisfied with the end result.. As soon as I saw it, my face lit up with a big sh*t eating grin! It's too late in the day today, but I will start on reinstalling it tomorrow. I also had a gauge overlay powder coated to help tie my yellow accents in with my dash.. Man, I love photoshop. It takes the guess work out of stuff so you can see what something will look like before you spend a dime. Here are the pics:


Thats to much yellow for me but its your canvas do it how you want it and thats all that matters. Also props on not parting it out when those punks destroyed it. To many people are parting them out and not putting some work and time (not to mention money) in restoring them. Since your a cop maybe you'll be a little leanit on us F-bod guys when you catch us speeding lol! I know you can catch the mustang guys cause they are already lagging behind lol!!!!
Thread Starter
TECH Apprentice
iTrader: (1)
Joined: Jun 2008
Posts: 303
Likes: 0
From: Fort Worth, Texas
Thats to much yellow for me but its your canvas do it how you want it and thats all that matters. Also props on not parting it out when those punks destroyed it. To many people are parting them out and not putting some work and time (not to mention money) in restoring them. Since your a cop maybe you'll be a little leanit on us F-bod guys when you catch us speeding lol! I know you can catch the mustang guys cause they are already lagging behind lol!!!!


Launching!
Joined: Jul 2007
Posts: 267
Likes: 1
From: Fishers, IN
I think it's looking really good man!! Definitely coming together. I'm loving how the dash was wrapped. I've been pondering just how I wanted to do that, and was going to do french seams in some parts and I think I found out how I'm going to do it, now. haha.
Thread Starter
TECH Apprentice
iTrader: (1)
Joined: Jun 2008
Posts: 303
Likes: 0
From: Fort Worth, Texas

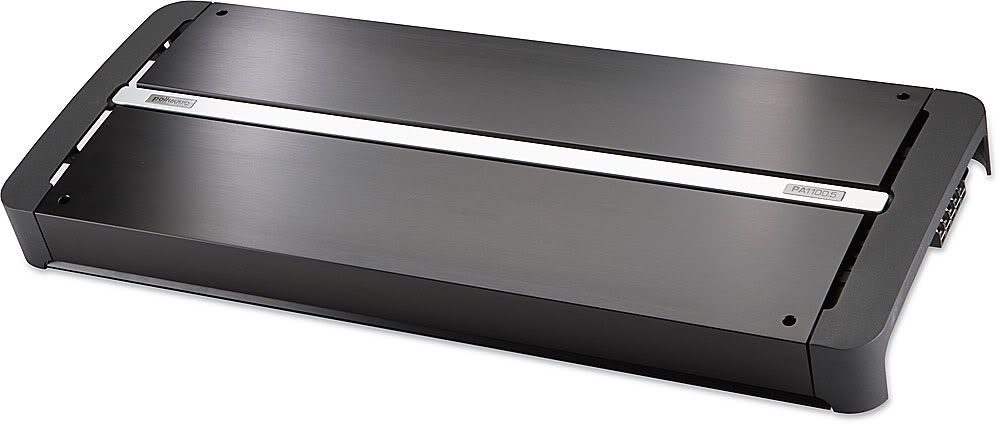
Speaking of radio bezels.. Now that I am about to reinstall the dash, I think now would be a good time to run some audio cables and misc stereo wires / power wires.. It is SOOOO much easier when there is NO dash or center console or front seats in the way.. LOL. For all you audiophiles out there, I just purchased (4) Polk Audio MM651 6.5" speakers and a FREAKIN MONSTER Polk Audio PA1100.5 five channel car amplifier about 10 minutes ago! Holy crap, that amp is over 2 foot long!

Last edited by officermartinez; Jun 22, 2009 at 01:39 PM.
That dash looks really good like that. I was considering doing something extremely similar to mine once I get everything clearanced for the cage. I was already going to have the door panels redone so I'm just going to add that to the list.
Thread Starter
TECH Apprentice
iTrader: (1)
Joined: Jun 2008
Posts: 303
Likes: 0
From: Fort Worth, Texas
Thanks! Can't wait to see your pics once you do it.. As for mine, I removed the "old" factory foam sealant from around the air ducts and reinstalled some new foam sealant material. I also reinstalled the duct work on the back side of the dash. I also reinstalled the lower dash mount and I am prepping everything to be completely reinstalled this upcoming weekend. I will be purchasing some 4 gauge power and ground wire, 12 gauge speaker wire, 6 channel audio interconnects (RCA Cables), fuse block (with fuses), wire terminals, etc.. I will be sure to update with some pictures of the installation.