
383 short block project with LE2 top end.***Now running***Jan. 2011
 10-06-2010, 07:56 PM
#81
TECH Apprentice
Thread Starter
iTrader: (1)
Join Date: Dec 2009
Location: Montreal,Canada
Posts: 301
Likes: 0
Received 0 Likes
on
0 Posts

I bought another brand new set of headers from Summit and sent it to Sanderson Headers in California to have the flange replaced for the Fastburn "D" port style. Matter of fact I should received them tomorrow ( Oct 7 2010 ) .
Here's what they look brand new :

They comes uncoated , all they have is a coat of Black spray paint. I sent the set I bought last year to get a coat of ceramic coating and they came back like this ( still with the wrong "O" style flange )
Left is the set I had last year ( 2009 ) on the car and right are the new one I was running this year ( 2010 ) .

Can't wait to see the new set tomorrow with the right exhaust port flange.
 10-06-2010, 08:02 PM
#82
TECH Apprentice
Thread Starter
iTrader: (1)
Join Date: Dec 2009
Location: Montreal,Canada
Posts: 301
Likes: 0
Received 0 Likes
on
0 Posts
I use the Stage 8 and so far so good .
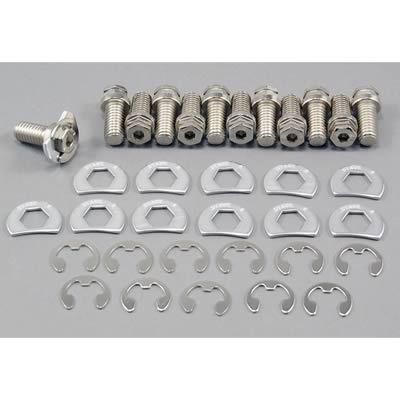
I'm sure there is other products but this one works for me.
10-12-2010, 06:14 PM
#85
TECH Apprentice
Thread Starter
iTrader: (1)
Join Date: Dec 2009
Location: Montreal,Canada
Posts: 301
Likes: 0
Received 0 Likes
on
0 Posts
My own version of the 69640 Hedman headers came in today.


I had them ceramic coated inside out .


They should match better the LE2 heads with the fastburn "D" style exhaust port then the regular "O" style flange.

Stock 69640 flange with "D" style ( fastBurn ) exhaust gasket :

Just a tad thicker then stock 69640 Flange....


Test fit is perfect . This is not my new built motor this is a bone stock LT1 I have for spare just in case if things goes wrong.

Don't look at the headers bolt , they are Home Depot style just for test fit.


I had them ceramic coated inside out .
They should match better the LE2 heads with the fastburn "D" style exhaust port then the regular "O" style flange.
Stock 69640 flange with "D" style ( fastBurn ) exhaust gasket :
Just a tad thicker then stock 69640 Flange....
Test fit is perfect . This is not my new built motor this is a bone stock LT1 I have for spare just in case if things goes wrong.
Don't look at the headers bolt , they are Home Depot style just for test fit.
10-12-2010, 06:17 PM
#86
TECH Apprentice
Thread Starter
iTrader: (1)
Join Date: Dec 2009
Location: Montreal,Canada
Posts: 301
Likes: 0
Received 0 Likes
on
0 Posts
Believe it or not I should get my motor this Friday. ( 5 months after )
The guy said everything is fine except the deck of the block needed some work.
I'll have the exact numbers later this week ( I guess )
The guy said everything is fine except the deck of the block needed some work.
I'll have the exact numbers later this week ( I guess )


 10-16-2010, 10:54 PM
#89
TECH Apprentice
Thread Starter
iTrader: (1)
Join Date: Dec 2009
Location: Montreal,Canada
Posts: 301
Likes: 0
Received 0 Likes
on
0 Posts
I took a stock intake ( throttle body ) gasket but obviously it didn't match the size of the 58MM AS&M so I used a razor blade and made it to work.
Guess what ? No...... but it is no big deal since Friday it was pooring rain so I would have to unload it from my PickUp truck with the cherry picker under the rain so even if it would have been ready I would have not pick it up anyway but next week should that should be it.
but it is no big deal since Friday it was pooring rain so I would have to unload it from my PickUp truck with the cherry picker under the rain so even if it would have been ready I would have not pick it up anyway but next week should that should be it.
10-16-2010, 11:11 PM
#90
I took a stock intake ( throttle body ) gasket but obviously it didn't match the size of the 58MM AS&M so I used a razor blade and made it to work.
Guess what ? No...... but it is no big deal since Friday it was pooring rain so I would have to unload it from my PickUp truck with the cherry picker under the rain so even if it would have been ready I would have not pick it up anyway but next week should that should be it.
Guess what ? No......
but it is no big deal since Friday it was pooring rain so I would have to unload it from my PickUp truck with the cherry picker under the rain so even if it would have been ready I would have not pick it up anyway but next week should that should be it.
10-27-2010, 10:10 PM
#92
TECH Apprentice
Thread Starter
iTrader: (1)
Join Date: Dec 2009
Location: Montreal,Canada
Posts: 301
Likes: 0
Received 0 Likes
on
0 Posts
Oct 27 2010.
Got my Motor today


Here's a quick breakdown of what I have in it :
-385 CI ( 6.3L ) LT1 4 Bolt main Corvette shortblock.
-Scat 9000 lightweight forged crank.
-Scat forged rods.
-Mallory Forged Pistons -5cc.
-4045MS-15 .040" + .005" Mahle rings file to fit.
-Rings gap : 1st .018" , 2nd .020".
-Balanced and Blueprinted.
-ARP main studs.
-Melling 10555 High Volume Oil pump.
-Clevite 77 MS-909H STD bearings crank Bearings.
-Clevite 77 CB-663H STD Connecting rods bearings.
-Cleaned, decked, bored .040 over and honed with deck plates, new frost plugs, etc. ( specifications comming )
-12370835 GM single roller extreme duty timing chain set.
Lloyd Elliot LE2 package.
-Fully Ported heads milled 0.030" with 0.56cc chamber, casting 10128374.
-Manley 2.00/1.56 6000 series valves.
PAC 1218 bee hive springs (145 lbs seat and 340 lbs open)
Steel retainers and locks.
205 cc intake port flow about 275/190 CFM.
-230 PSI Compression. ( compression ratio to be confirm. Around 11.5:1 )
-CompCams Pro-Magnum Roller rocker 1.6:1 7/16" studs "NSF" (None Self Aligned).
-850-16 CompCams Hi-energy hydrolic roller lifter.
-7937-16 CompCams Hi-Tech Pushrods 5/16"X7.050".
-MR-1896 Sealed Power 5/16" Guide Plate.
-Fully ported Intake manifold casting 12552138.
-AS&M 58mm Throttle body.
-Ford Racing SVO 30 Lbs. Injectors.
-Custom camshaft 223/230 .565/.565 112 LSA .
-Fel Pro 1074 head gaskets .039".
-Fel Pro 1284 intake gaskets.
-Autolite #104 0.030" .
I have no idea how much Horse Power this thing will have at the crank ( or the wheels ) with my small camshaft but hopefully this will be as reliable as my actual motor is right now.
Time will tell.
This was quick pictures I took tonight , I'll try to grab better shots with the intake & throttle body on later this week end.
Got my Motor today
Here's a quick breakdown of what I have in it :
-385 CI ( 6.3L ) LT1 4 Bolt main Corvette shortblock.
-Scat 9000 lightweight forged crank.
-Scat forged rods.
-Mallory Forged Pistons -5cc.
-4045MS-15 .040" + .005" Mahle rings file to fit.
-Rings gap : 1st .018" , 2nd .020".
-Balanced and Blueprinted.
-ARP main studs.
-Melling 10555 High Volume Oil pump.
-Clevite 77 MS-909H STD bearings crank Bearings.
-Clevite 77 CB-663H STD Connecting rods bearings.
-Cleaned, decked, bored .040 over and honed with deck plates, new frost plugs, etc. ( specifications comming )
-12370835 GM single roller extreme duty timing chain set.
Lloyd Elliot LE2 package.
-Fully Ported heads milled 0.030" with 0.56cc chamber, casting 10128374.
-Manley 2.00/1.56 6000 series valves.
PAC 1218 bee hive springs (145 lbs seat and 340 lbs open)
Steel retainers and locks.
205 cc intake port flow about 275/190 CFM.
-230 PSI Compression. ( compression ratio to be confirm. Around 11.5:1 )
-CompCams Pro-Magnum Roller rocker 1.6:1 7/16" studs "NSF" (None Self Aligned).
-850-16 CompCams Hi-energy hydrolic roller lifter.
-7937-16 CompCams Hi-Tech Pushrods 5/16"X7.050".
-MR-1896 Sealed Power 5/16" Guide Plate.
-Fully ported Intake manifold casting 12552138.
-AS&M 58mm Throttle body.
-Ford Racing SVO 30 Lbs. Injectors.
-Custom camshaft 223/230 .565/.565 112 LSA .
-Fel Pro 1074 head gaskets .039".
-Fel Pro 1284 intake gaskets.
-Autolite #104 0.030" .
I have no idea how much Horse Power this thing will have at the crank ( or the wheels ) with my small camshaft but hopefully this will be as reliable as my actual motor is right now.
Time will tell.
This was quick pictures I took tonight , I'll try to grab better shots with the intake & throttle body on later this week end.
Last edited by mpcv2000; 10-28-2010 at 03:06 PM.
10-28-2010, 06:33 PM
#93
TECH Apprentice
Thread Starter
iTrader: (1)
Join Date: Dec 2009
Location: Montreal,Canada
Posts: 301
Likes: 0
Received 0 Likes
on
0 Posts
LT4 composite valve cover VS stock valvetrain VS LE2 with CompCams Pro-Magnum Roller rocker 1.6:1 7/16" studs "NSF" (None Self Aligned) result :
Stock Head & valvetrain with LT4 Valve cover

Cover without Gaskets ( fits perfectly )

My set up :


Still no gaskets but I know it will not work.
Sad because I really like the Composite valve covers ( look ) .
I did trim the "drip tabs" but still.

So looks like I have to find some tall "deep" valve covers.
Stock Head & valvetrain with LT4 Valve cover
Cover without Gaskets ( fits perfectly )
My set up :
Still no gaskets but I know it will not work.
Sad because I really like the Composite valve covers ( look ) .
I did trim the "drip tabs" but still.
So looks like I have to find some tall "deep" valve covers.


 11-02-2010, 07:13 AM
#96
TECH Apprentice
Thread Starter
iTrader: (1)
Join Date: Dec 2009
Location: Montreal,Canada
Posts: 301
Likes: 0
Received 0 Likes
on
0 Posts
November 2nd 2010.
I have modified a stock LT1 Water pump to accept a Electric Water Pump.
I removed the impeller and plugged the hole using LB weld stuff and also remove the lover left ( when facing the pump ) tube because in my case I don't use it.


I used a washer with a bolt in the middle to plug it....

Motor is assembled ( just to see how it will look ) .
Not ready to run yet.


This throttle body is like a piece of art.


Running into a small problem here.
Since the heads can go on either side , the machine shop put the left one on the right side etc. I thought no big deal I'll remove the water plugs behing the heads and put them on the front and take the plug for the water temp sender and move it to the right side head.
It all went good until the right rear plug came out with most of the threads in the head....
This one is good.

This is the right rear with damaged threads.

I bought a Pipe tap 3/8" -18 NPT and I was able to redo them but this doesn't look very strong so I don't know what to do yet.
When motor will be in the car I have "0" room to remove the bolt or do anything to fix a future leak.
Any suggestions ?
Loctite Fix-a-thread ?
I know there is no Helicoil for NPT stuff.
I have modified a stock LT1 Water pump to accept a Electric Water Pump.
I removed the impeller and plugged the hole using LB weld stuff and also remove the lover left ( when facing the pump ) tube because in my case I don't use it.
I used a washer with a bolt in the middle to plug it....
Motor is assembled ( just to see how it will look ) .
Not ready to run yet.
This throttle body is like a piece of art.
Running into a small problem here.
Since the heads can go on either side , the machine shop put the left one on the right side etc. I thought no big deal I'll remove the water plugs behing the heads and put them on the front and take the plug for the water temp sender and move it to the right side head.
It all went good until the right rear plug came out with most of the threads in the head....
This one is good.
This is the right rear with damaged threads.
I bought a Pipe tap 3/8" -18 NPT and I was able to redo them but this doesn't look very strong so I don't know what to do yet.
When motor will be in the car I have "0" room to remove the bolt or do anything to fix a future leak.
Any suggestions ?
Loctite Fix-a-thread ?
I know there is no Helicoil for NPT stuff.
11-02-2010, 08:13 AM
#97
I bought a Pipe tap 3/8" -18 NPT and I was able to redo them but this doesn't look very strong so I don't know what to do yet.
When motor will be in the car I have "0" room to remove the bolt or do anything to fix a future leak.
Any suggestions ?
Loctite Fix-a-thread ?
I know there is no Helicoil for NPT stuff.
When motor will be in the car I have "0" room to remove the bolt or do anything to fix a future leak.
Any suggestions ?
Loctite Fix-a-thread ?
I know there is no Helicoil for NPT stuff.
11-02-2010, 08:58 AM
#99
Village Troll 
iTrader: (2)

If it were me I'd take the head off and take it back to the machine shop or ship it to LE to have it fixed.
Other than that, make sure to adjust those valves again before starting the engine.
Other than that, make sure to adjust those valves again before starting the engine.
