'95 Camaro On a Diet
 06-10-2013, 12:38 AM
#181
TECH Addict
Thread Starter
iTrader: (12)
Join Date: Mar 2007
Posts: 2,467
Likes: 0
Received 0 Likes
on
0 Posts
Me too, sad thing is that I didn't put it in yet. I am waiting to work out any bugs I have after I made all of the recent changes before I throw another big change at the same time. I have plans to install the clutch soon though 
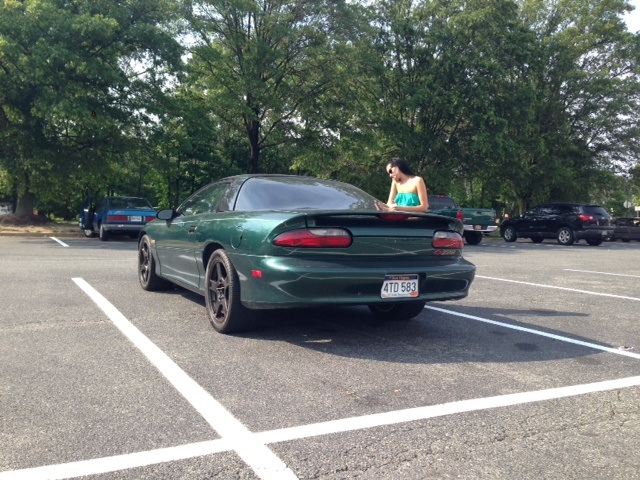
But on a good note I have some new progress pics
Brakes are bled and wheels are bolted on


Good view of the 17x11s up front with a 50mm offset and a 1/4" spacer

Finished engine bay


Dzus rails installed


Fabbed up some aluminum brackets to use LS1 Camaro front rails

Then I installed the springs in the rails


Drilled some holes


And finally how the fasteners will sit


Now that leads me to my latest issue. The parts that Racecraft suggested for the hood did not work. Either the springs are too tall or the fasteners are too short. I can fasten them down without the hood installed and I can almost get them to clip on if I push the spring from the bottom, but it is WAY too tight and I can't quite get it with the hood installed. The springs I have are .375 and the fasteners are .500. I could order some new fasteners that are .550 or some new springs that are .200 or both to save on shipping and hopefully one of the combos works. Or I could go out and do some more measuring and see what I come up with.
And my thermostat housing is leaking so I have to drain some coolant and fix that 2 weeks I want to make a trip to a car show/dyno shootout thats 3 hours away so I need to get some test drives done to make sure it will make the trip.....wish me luck lol
But on a good note I have some new progress pics
Brakes are bled and wheels are bolted on
Good view of the 17x11s up front with a 50mm offset and a 1/4" spacer
Finished engine bay
Dzus rails installed
Fabbed up some aluminum brackets to use LS1 Camaro front rails
Then I installed the springs in the rails
Drilled some holes
And finally how the fasteners will sit
Now that leads me to my latest issue. The parts that Racecraft suggested for the hood did not work. Either the springs are too tall or the fasteners are too short. I can fasten them down without the hood installed and I can almost get them to clip on if I push the spring from the bottom, but it is WAY too tight and I can't quite get it with the hood installed. The springs I have are .375 and the fasteners are .500. I could order some new fasteners that are .550 or some new springs that are .200 or both to save on shipping and hopefully one of the combos works. Or I could go out and do some more measuring and see what I come up with.
And my thermostat housing is leaking so I have to drain some coolant and fix that
2 weeks I want to make a trip to a car show/dyno shootout thats 3 hours away so I need to get some test drives done to make sure it will make the trip.....wish me luck lol  06-10-2013, 01:01 AM
#182
TECH Fanatic
iTrader: (26)

Join Date: Mar 2010
Location: Milledgeville, GA
Posts: 1,909
Likes: 0
Received 0 Likes
on
0 Posts
I've only worked with dzus fasteners once and it was a huge pain. I used them to install a pin-on trunk lid. Figuring out where to drill the holes in my lid to correctly line up with the fastener/spring was nerve racking. I got them all done and it fits, but I think it could have been better. I think your idea about buying both and using whatever combo of parts works is the best plan.
06-10-2013, 01:10 AM
#183
TECH Addict
Thread Starter
iTrader: (12)
Join Date: Mar 2007
Posts: 2,467
Likes: 0
Received 0 Likes
on
0 Posts
I've only worked with dzus fasteners once and it was a huge pain. I used them to install a pin-on trunk lid. Figuring out where to drill the holes in my lid to correctly line up with the fastener/spring was nerve racking. I got them all done and it fits, but I think it could have been better. I think your idea about buying both and using whatever combo of parts works is the best plan.

 06-10-2013, 11:53 AM
#185
TECH Addict
Thread Starter
iTrader: (12)
Join Date: Mar 2007
Posts: 2,467
Likes: 0
Received 0 Likes
on
0 Posts
But it should be a fun comparison once the clutch goes in
BTW thanks, I like them a lot more now. I did not like the black wheels on my car


 06-10-2013, 01:59 PM
#187
TECH Addict
Thread Starter
iTrader: (12)
Join Date: Mar 2007
Posts: 2,467
Likes: 0
Received 0 Likes
on
0 Posts

It has been a ton of work, but I am really digging how it's turning out.
I have some more tricks up my sleeve to remove some more weight, but those will have to wait until next winter, I'm ready to get some miles on it this year.
06-11-2013, 02:08 AM
#188
TECH Addict
Thread Starter
iTrader: (12)
Join Date: Mar 2007
Posts: 2,467
Likes: 0
Received 0 Likes
on
0 Posts
I ordered some .650 fasteners from Jegs today. The fasteners clip on without the hood installed and the hood is .155 thick IIRC so going to a fastener .150 longer should be perfect. I can squeeze the springs a touch if I have to.
Now I am just waiting again, I don't want to drill the 1/8" holes for the fasteners just incase the new ones are slightly different.
I also ordered a LTX hat from RPM Graphics today too, looking forward to getting that
Now I am just waiting again, I don't want to drill the 1/8" holes for the fasteners just incase the new ones are slightly different.
I also ordered a LTX hat from RPM Graphics today too, looking forward to getting that
06-12-2013, 03:21 AM
#190
TECH Addict
Thread Starter
iTrader: (12)
Join Date: Mar 2007
Posts: 2,467
Likes: 0
Received 0 Likes
on
0 Posts
 I had to cut off the bumpstop bracket flush and some light massaging of the front area but other than that the rear wheels fit great. I have a watts link so I can get the rear axle perfectly centered and that makes a big difference. On the front I asked my tire guy to use stick on wheel weights and he used the ones that go on the lip on the insides and they slightly rub on the spindle, just enough to scrape the paint off of the spindle lol
06-12-2013, 05:08 AM
I had to cut off the bumpstop bracket flush and some light massaging of the front area but other than that the rear wheels fit great. I have a watts link so I can get the rear axle perfectly centered and that makes a big difference. On the front I asked my tire guy to use stick on wheel weights and he used the ones that go on the lip on the insides and they slightly rub on the spindle, just enough to scrape the paint off of the spindle lol
06-12-2013, 05:08 AM
#191
I got my rears to clear the bumpstops last night with 5/16 spacer plus all the hammering I did to fit the 27x10.5s last year, at full hang my 18s I think have an advantage over your 17s with the bumpstops since my lip is 1/2 inch higher than yours, I don't need to worry about cutting a tire but the rim could hit the lip with my poly SA phb, you definately have the ticket with that Watts link. I've got about 1/4 inch between the bumpstops and wheel lip now, gonna put it at ride height tonight, hoping I don't have to cut the bumpstops like you. I am a little worried about the outer lip with my BMR lowering springs but like you my car is pretty light at 3070lbs. My wheels are semi gloss black and 1 inch taller and tires 1/2 inch narrower, but other than that my polo green hardtop is practically your twin haha.
Last edited by bufmatmuslepants; 06-12-2013 at 05:25 AM.
06-12-2013, 01:27 PM
#192
TECH Addict
Thread Starter
iTrader: (12)
Join Date: Mar 2007
Posts: 2,467
Likes: 0
Received 0 Likes
on
0 Posts
I got my rears to clear the bumpstops last night with 5/16 spacer plus all the hammering I did to fit the 27x10.5s last year, at full hang my 18s I think have an advantage over your 17s with the bumpstops since my lip is 1/2 inch higher than yours, I don't need to worry about cutting a tire but the rim could hit the lip with my poly SA phb, you definately have the ticket with that Watts link. I've got about 1/4 inch between the bumpstops and wheel lip now, gonna put it at ride height tonight, hoping I don't have to cut the bumpstops like you. I am a little worried about the outer lip with my BMR lowering springs but like you my car is pretty light at 3070lbs. My wheels are semi gloss black and 1 inch taller and tires 1/2 inch narrower, but other than that my polo green hardtop is practically your twin haha.
06-12-2013, 01:32 PM
#193
TECH Addict
Thread Starter
iTrader: (12)
Join Date: Mar 2007
Posts: 2,467
Likes: 0
Received 0 Likes
on
0 Posts
Woke up early today hoping that the fasteners showed up and no such luck for this guy
Maybe after work I will have some ambition and get them installed so I can get the heap out of the garage and get some miles on it.
I have a very short list of things to do now....
Install hood fasteners
Pull door panels to remove speakers
Pull rear bumper to install MWC support
Install rear carpet & plastics
Fix wipers......I may have cut one too many wires lol