


'95 Camaro On a Diet
You can go to home depot and get some aluminum straps and build some braces to hold up your bumper, but I prefer something like this, it looks a lot better and will hold up better than some straps if I hit a deer. I'm not saying the support will take the hit and still be usable, but it will be a lot better than some thin pieces of metal.
I'm waiting for my bumper supports to come before I cut off any metal from the
frame rails. And I was looking at the rad support area the other night and trying
to get some ideas since I need to keep the air dam in place. It will at least get
a bunch of holes drilled into it, but I think I can cut a lot off and still be able to
bolt the air dam back in place.
frame rails. And I was looking at the rad support area the other night and trying
to get some ideas since I need to keep the air dam in place. It will at least get
a bunch of holes drilled into it, but I think I can cut a lot off and still be able to
bolt the air dam back in place.
ya I did that check it out, cut the bottom metal off but left 3 strips with the holes for the airdamn. (3 of the 5) and left the top mteal for the rad to sit into. Trimmed off the tab for the hood brace, and any other extra stuff. Cut the frame horns off, and angled them back. and the sides triangle parts that go to the lower core support.
Airdamn still bolts on like stock 3 holes. Then I can some alum bars to the bumper cover, 2 lower ones going out to front of the wheel wells. And put a tab off them for the outside air damn ends.
https://ls1tech.com/forums/drag-raci...h-diet-16.html PAGE 16
https://ls1tech.com/forums/drag-raci...h-diet-36.html PAGE 36
Last edited by studderin; Feb 14, 2013 at 10:13 PM.
^^Thanks man, I must have missed that in your thread before.
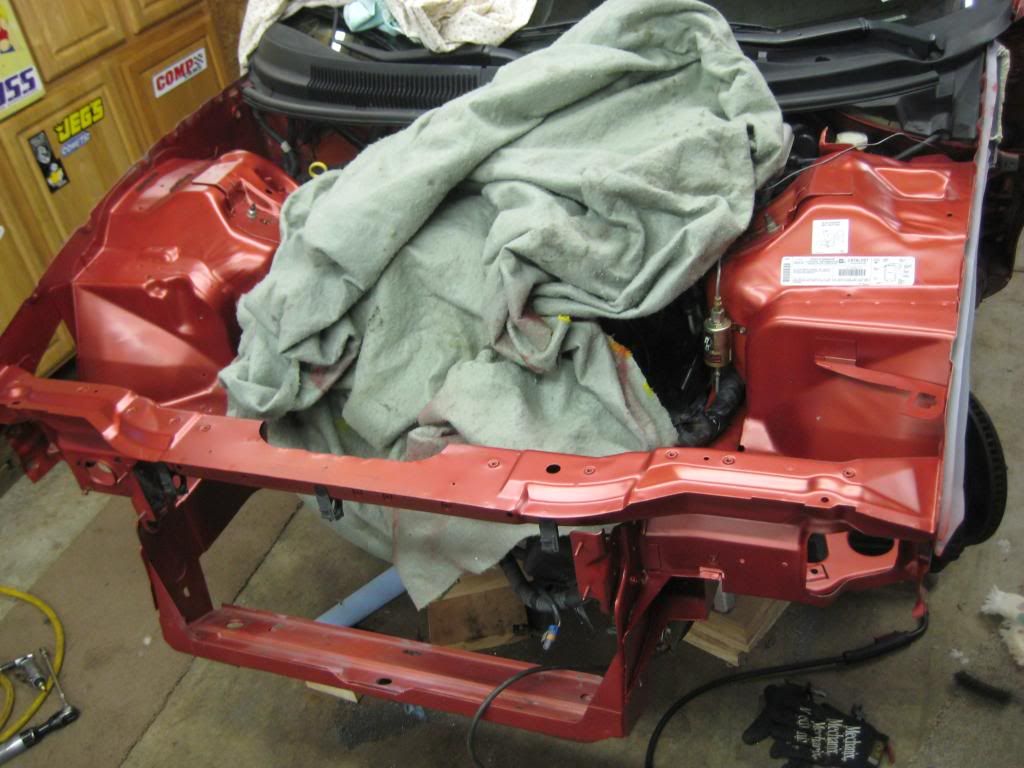
I'm not going to cut that much off of my frame horns since I bought the MWC bumper supports and those bolt onto the stock location Today I have to help my wife paint her scrapbook/card making room then I'm going to lock myself in the garage to get something done. Front is going on jack stands, fenders are coming off, upper rad support is getting cut out, hood supports cut off, then I'm going to move into the interior brackets and start cutting those out too if I have the energy.
I'm also going to make a list of weights since a lot of the ones I have seen don't match up with LT1 cars. Then I can get rid of the huge pile of **** taking up my garage space
I'm not going to cut that much off of my frame horns since I bought the MWC bumper supports and those bolt onto the stock location
Today I have to help my wife paint her scrapbook/card making room then I'm going to lock myself in the garage to get something done. Front is going on jack stands, fenders are coming off, upper rad support is getting cut out, hood supports cut off, then I'm going to move into the interior brackets and start cutting those out too if I have the energy.I'm also going to make a list of weights since a lot of the ones I have seen don't match up with LT1 cars. Then I can get rid of the huge pile of **** taking up my garage space
Took both front fenders off today and the PO/POs must not have known how to jack up the car and bend over both lower fender lips. Both of them are broken so I think I may just cut them off and rivet in a piece of aluminum L along the bottom to "fix" them.
Now I need to order some fender front brackets since the one on the drivers side has been hacked to **** and rusted.
I'll get some pics later tonight now back to cutting
Now I need to order some fender front brackets since the one on the drivers side has been hacked to **** and rusted.
I'll get some pics later tonight now back to cutting
one on mine was bent over and cracked most of the way but not broke off 100%.
I took the bolts out and cleaner the fender and tab up good, dont think I sanded in the crack at all, if it was broke off I would scuff the ends up. But just bent the metal tab back down, and mixed up some good 2 part plastic expoy, the white/cream stuff in the black dual injector tube form the parts store. Put some expoy in the crack and put the bolts back in to they held the tab back on better. And its been fine since, Ive taken the fenders off, and was carful with the glued and and it was fine. You cant see under there to tell, but there is some extra glue squeezed out but it looks fine.
try that, you can makbe see it in some pics under my car?
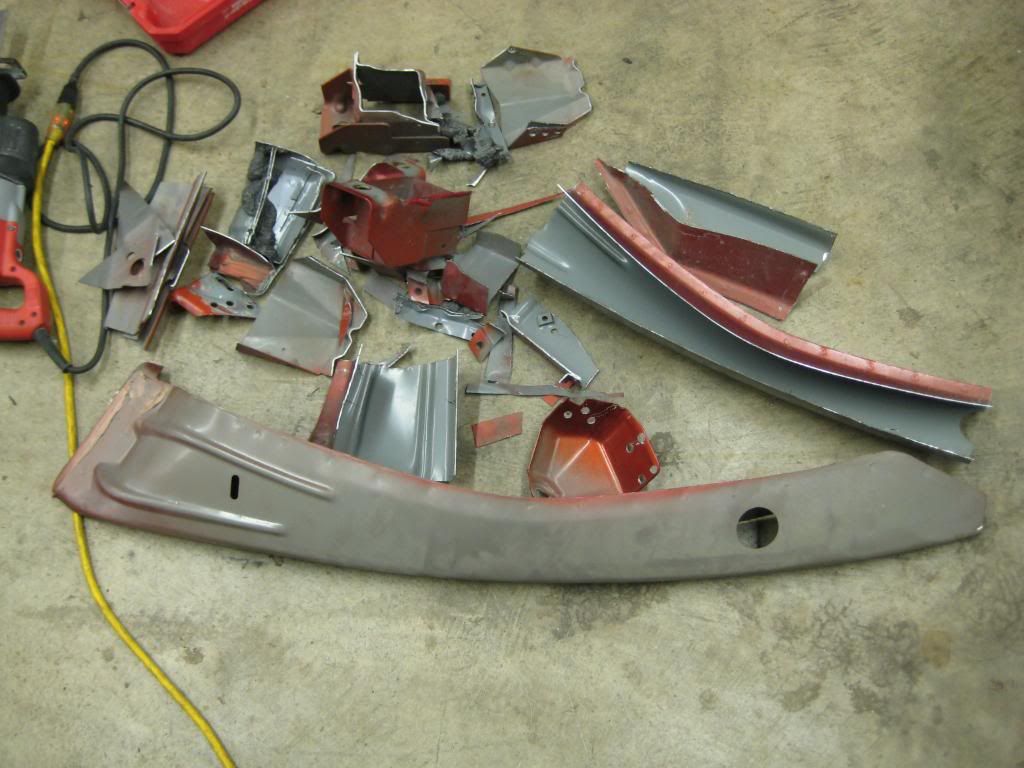
Here's my progress from the past 2 days. I cut 5# of metal off each side so 10# total. I think I'm going to cut the sides back a little more to clean up some rust that was inside my fender metal. I left a lip on the bottom to hold the wires off the tires when I hide the wires in the inner fenders. If th wires don't lay the way I want I plan on cutting the lip off the bottom. I still need clean up the top and paint everything, still a lot more work to do


LS1 Tech Stories
The Best V8 Stories One Small Block at Time

Gas Monkey Built a 6-Wheel Ferrari Testarossa With a Corvette LT4 Engine
Verdad Gallardo
7 Most Reliable High-Performance Engines GM Has Ever Built
Verdad Gallardo
Amazing '71 Camaro Restomod Is Modern Muscle Car Under the Skin
Verdad Gallardo
6 Common C5 Corvette Failures and What's Involved In Repairing Them
Pouria Savadkouei
Retro Modern Bandit Pontiac Trans AM Comes With Burt Reynolds' Autograph
Verdad Gallardo
Top 10 Greatest Cadillac V Series Performance Models Ever, Ranked
Pouria Savadkouei
Top 10 Most Powerful Chevy Trucks Ever Made!

Hennessey's New Supercharged Silverado ZR2 Has 700 HP
Verdad Gallardo
Coachbuilt N2A Anteros Is an LS2-Powered C6 Corvette In Italian Clothes
Verdad Gallardo The grinder got a workout today 


It's really surprising how rusty everything is on my car thanks to the nice northern winters and all the salt they put on the roads. I haven't ever had it on salty roads, but last owners sure have. I need to get some Eastwood rust converter or something to spray on there before I paint anything.
But so far so good. I have a couple more brackets to cut off or trim down and then I get to do the interior. Almost time to start putting the puzzle back together
Oh and I started to clean up my garage and weigh everything so I can start throwing
stuff away. I got down to the last handful of things and I went to weigh my front
bumper support and it slipped out of my hand and smashed the screen on my new scale.
So after that I had enough fun for one day.
I'll add it all up tomorrow or later tonight and see what I have taken out so far. I didn't
get to weigh the wiring I took out of the interior or the headlight harness, stock radio,
speakers, and a few brackets that aren't going to go back in. I may buy a new scale,
but I don't know, I a little pissed about smashing it the first time I really used it.
I added up my list and I'm at 194.15# right now. That total doesn't include the wiring I cut
out, the radio, all of the speakers, the rear seat brackets, and so on.
I would love to have my car sitting at 29XX without me, but I think I may be stretching it a
bit, but there is only one way to find out.
out, the radio, all of the speakers, the rear seat brackets, and so on.
I would love to have my car sitting at 29XX without me, but I think I may be stretching it a
bit, but there is only one way to find out.

Yes sir, I have a piece of 1/2" DOM tubing that I plan on plug welding in and I
will be capping the ends off too. Should be just as strong with a lot more room
I don't think its really worth doing for "weight savings" but I had to cut the top
to fit the LS1 lid and a lot of the cars I see look like ****, so I figured worst case
scenario I'll buy the griffin radiator and stand it up. Then I'll build a custom CAI
again.
The chunk of metal I cut out was only 4.95#s, I figured it would be closer to 8#
but whatever. It all adds up over time
Tomorrow I going to get rid of the heater hoses. I'm going to try to get the metal lines out
of the pump and tap them for pipe plugs so if I decide to put a heater back in it I will make
it easy on myself.
Then time to start cutting brackets out of the inside of the car
of the pump and tap them for pipe plugs so if I decide to put a heater back in it I will make
it easy on myself.
Then time to start cutting brackets out of the inside of the car


I was at 3010 with a heavy 9" and heavy BMR rear suspension, and I had not cut a single thing. You should easily hit your goal of 29xx without you. I wouldnt be suprised if you can get down to 28xx if you use lightweight seats and do all the front suspension. Is it a T top car with power windows/locks? Mine is hard top manual windows/locks, so I dont know how much that helps weight though.
I have 6LE seats which are lighter than stock, but not a lot lighter. UMI K member, chromoly
front lower arms, all chromoly rear suspension parts, light 9". I have a hard top with power
windows. The hardtops are 4-6# lighter than the ttops and power windows are ~2# lighter
than manual windows for some reason.
I really hope to be at 28XX but I highly doubt it with my wheel and tire combo.
front lower arms, all chromoly rear suspension parts, light 9". I have a hard top with power
windows. The hardtops are 4-6# lighter than the ttops and power windows are ~2# lighter
than manual windows for some reason.
I really hope to be at 28XX but I highly doubt it with my wheel and tire combo.
I took out my heater hoses, cut off the passenger side hood strut mount, and cut the
rear seat brackets out of the driver side. My god are those a PITA for a big guy. I still
need to cut out the brackets in the hatch area on the driver side, but I made a little
more progress today. I also cleaned up my garage so I could actually move around
again, there were piles of junk everywhere.
Now I have to go out to my parents and fab up and exhaust for my dad's project truck so
I can borrow his welder.
