
Cam only, winter upgrades. Bitch in on a diet
 03-18-2012, 12:20 PM
#701
Got the oil pan out,without having to take the headers off, the intake, or lower the Kemeber. 
Saw in the rod bolt write up to jack you on the pan all the way, then hold to motor and remove the jack, then lower the Kmeber still. When you jack up on the pan it kinds tips the motor forward and the header collectors hit after only going up a little, with still a ton of room on the back of the heads and the intake. Trans is out, and Ypipe BTW.. and the Lid/maff.. disconnect the battery ect.. I tried a different way and it worked out really well, making a wood motor mount stand and jack that up. The pan came right off around it, you have room to work still with the little alum jack in the middle you could do rod bolts like this, working in front and behind it alot better then having **** to tip the cradle back, or the engine stand legs. The 2x4s were spaced 15", go between the open forks on the Kmeber, set them right under the mounts (stock with poly I have) I trimmed them down on the ends so whey not so wide to fit better, and a little 45* notch for the header tube on the driver side Still have 1.5x3 not sure if I would do a LSX block, but its super strong upright, look at the wood use some clean strait grain, no knots or cross grain on them.
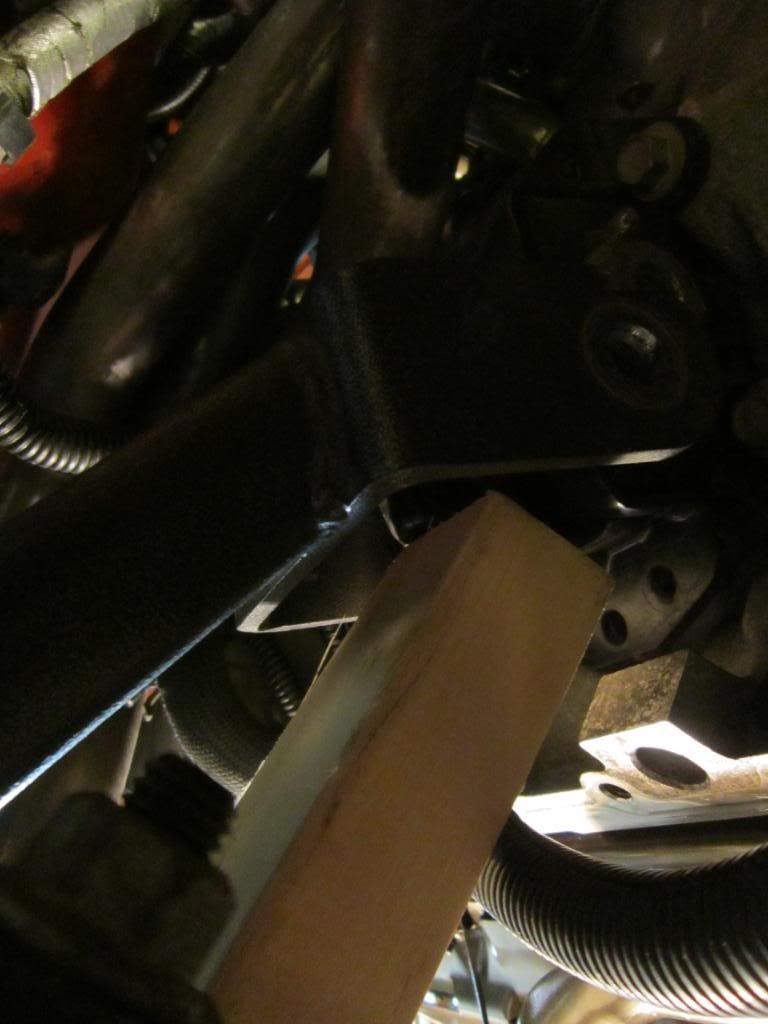
Used 2 15" upright, anything form 12-17 would work I bet. If you can get the jack under it, I went long so the jack had less swing.
Stand the uprights on the 15" wide 2x4s (fits under the mounts), used some 3inch screw predrilled, thu the 1st plate one, up into them. was gona make a side brace, you would have to tip it bad to have them pull out, its gona fall off the jack then anyway.
Picking up on the mounts worked great keeps the engine more level for what you need to not hit, to jack it up. I kept the motor mount in the Kmember stand things. If you go up past them, THE ENGINE COULD FALL OUT!!! I did this alone, just watched things, when the intake was close, and the mounts were still on the stand a safe amount. Buzzed the bolts out and the pan came right out. I'm sure on the way up its not perfectly balanced and it tipping a little inside the Kemeber stands, just dont be a dumbass and pull in the headers, or the TB. Only had about 4 bolt in the pan and broke it loose already, I would do that before with in not jacked up or just a little for room. So is its ready to come out easy withing pulling in it hard.
Think this is jacked up?
This might be lowered back down?

Saw in the rod bolt write up to jack you on the pan all the way, then hold to motor and remove the jack, then lower the Kmeber still. When you jack up on the pan it kinds tips the motor forward and the header collectors hit after only going up a little, with still a ton of room on the back of the heads and the intake. Trans is out, and Ypipe BTW.. and the Lid/maff.. disconnect the battery ect.. I tried a different way and it worked out really well, making a wood motor mount stand and jack that up. The pan came right off around it, you have room to work still with the little alum jack in the middle you could do rod bolts like this, working in front and behind it alot better then having **** to tip the cradle back, or the engine stand legs. The 2x4s were spaced 15", go between the open forks on the Kmeber, set them right under the mounts (stock with poly I have) I trimmed them down on the ends so whey not so wide to fit better, and a little 45* notch for the header tube on the driver side Still have 1.5x3 not sure if I would do a LSX block, but its super strong upright, look at the wood use some clean strait grain, no knots or cross grain on them.
Used 2 15" upright, anything form 12-17 would work I bet. If you can get the jack under it, I went long so the jack had less swing.
Stand the uprights on the 15" wide 2x4s (fits under the mounts), used some 3inch screw predrilled, thu the 1st plate one, up into them. was gona make a side brace, you would have to tip it bad to have them pull out, its gona fall off the jack then anyway.
Picking up on the mounts worked great keeps the engine more level for what you need to not hit, to jack it up. I kept the motor mount in the Kmember stand things. If you go up past them, THE ENGINE COULD FALL OUT!!! I did this alone, just watched things, when the intake was close, and the mounts were still on the stand a safe amount. Buzzed the bolts out and the pan came right out. I'm sure on the way up its not perfectly balanced and it tipping a little inside the Kemeber stands, just dont be a dumbass and pull in the headers, or the TB. Only had about 4 bolt in the pan and broke it loose already, I would do that before with in not jacked up or just a little for room. So is its ready to come out easy withing pulling in it hard.
Think this is jacked up?
This might be lowered back down?
 03-18-2012, 12:44 PM
#702
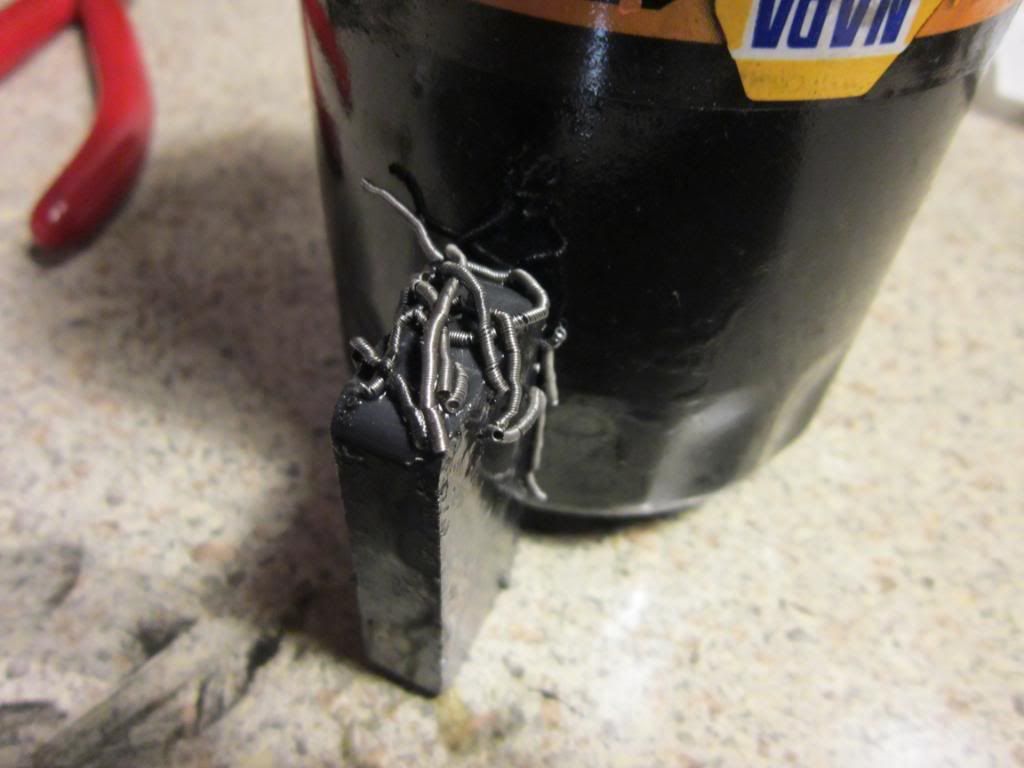
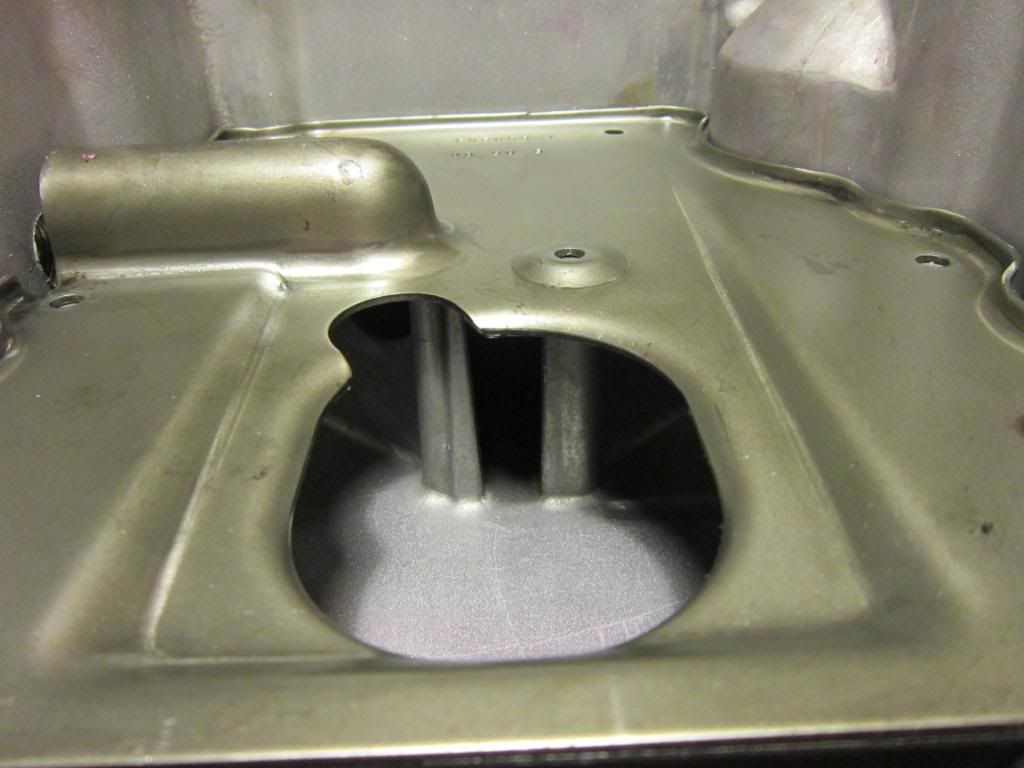
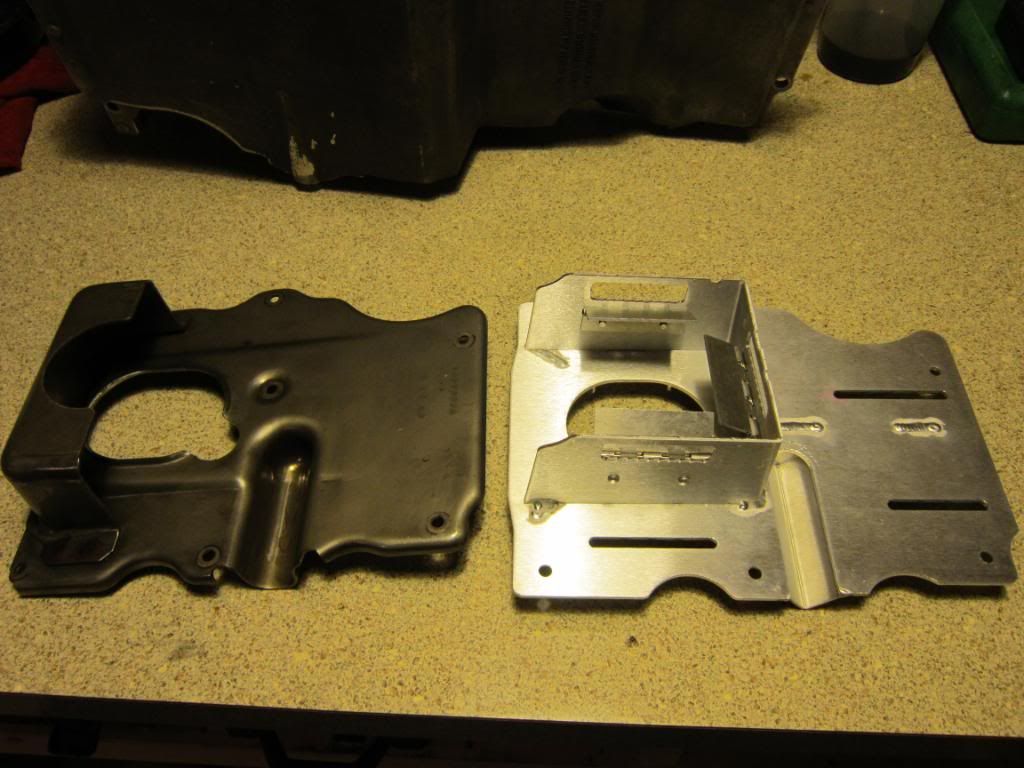
Pan looked really dirty  Not sludge, I change the oil every 1-2K miles and cleaned it out a few years ago when I did rod bolts. The oil is clean, but the stock baffle had a nice coating of dust clinging to it, no flakes, or chucks. Found some valve seal springs, a few in the pickup screen. 1-2 little black RTV boogers off the timming cover.
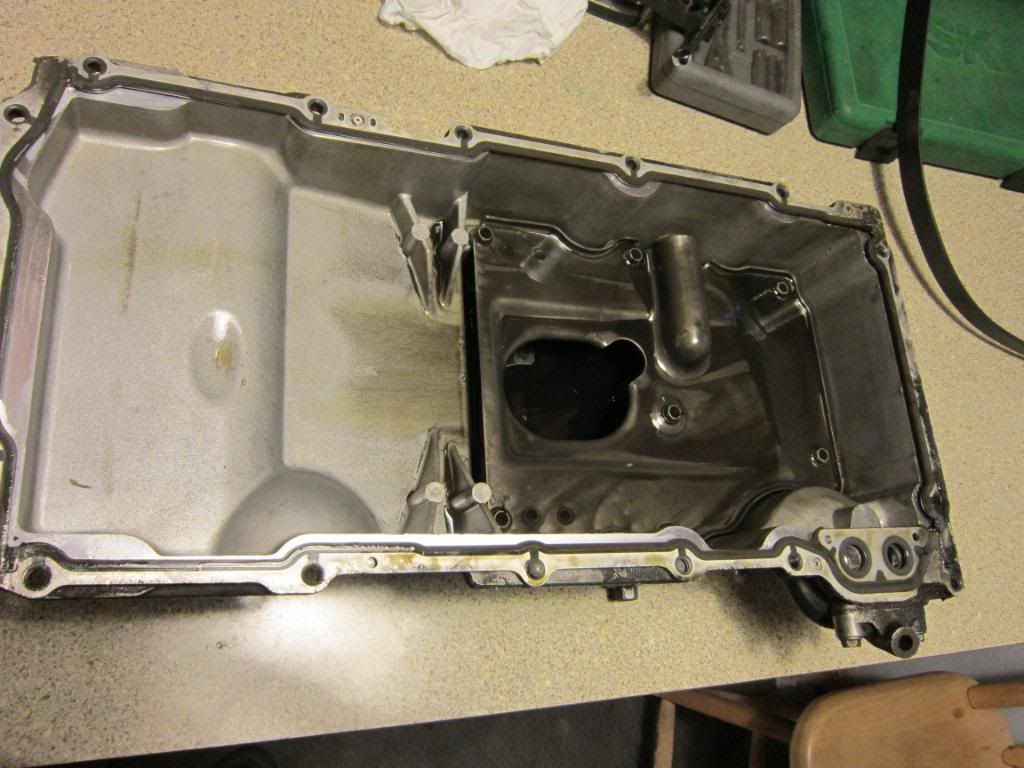
A few red locktight half ring off I think a cam plate bolt in the pickup screen too
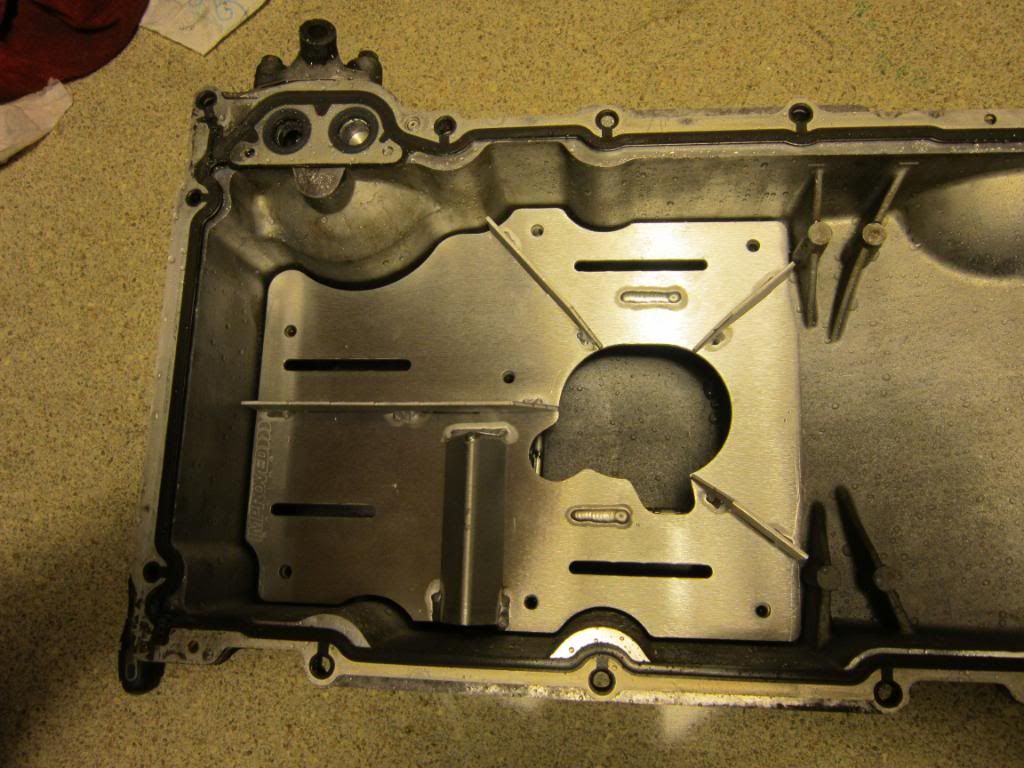
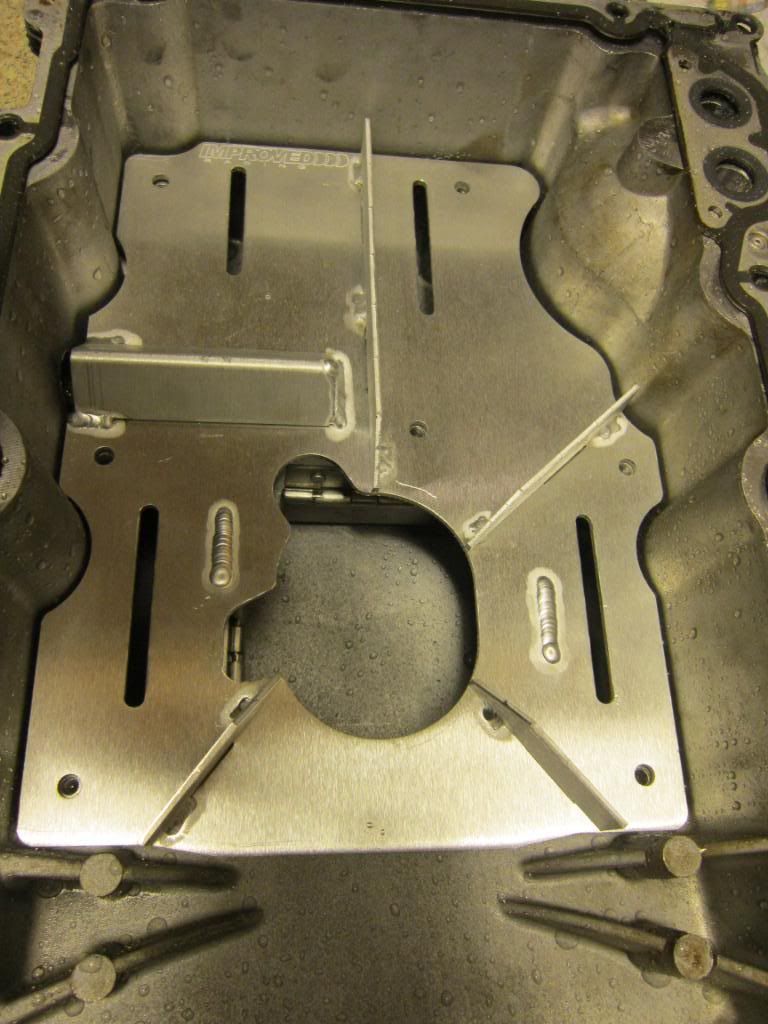
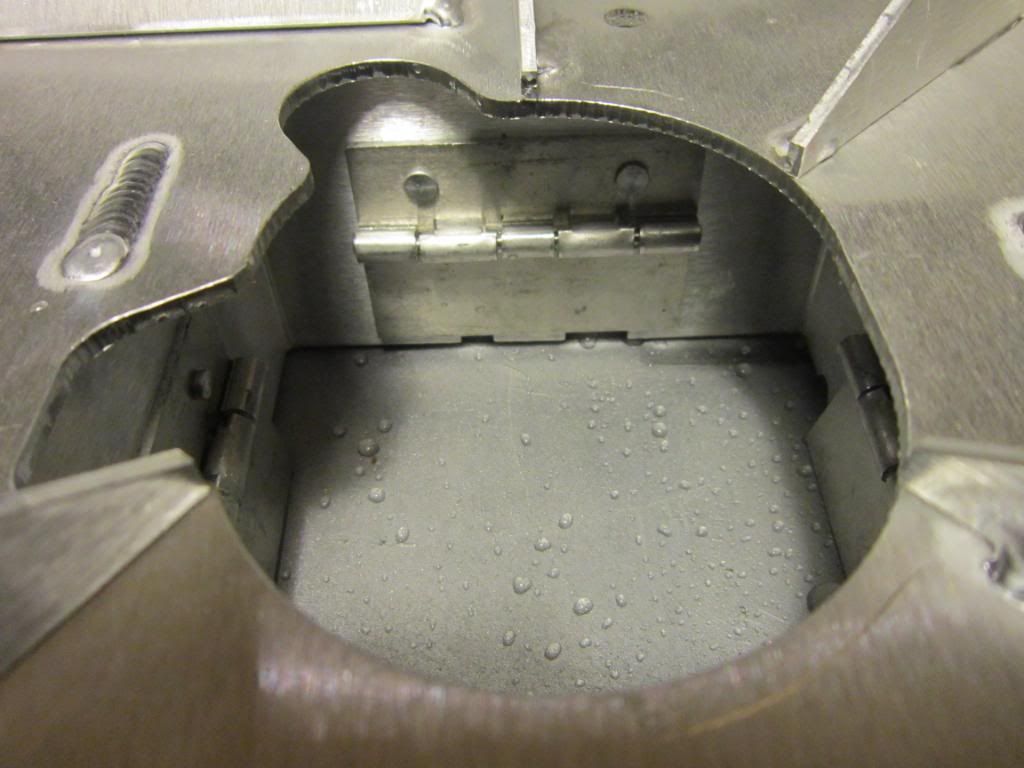
blasted the pan with hot wated dawm quick, but going to grind the back flush for the blocksaver plate while its out, so final clean after that. This imporved racing baffle fits good. I dont really need the side doors, kinds wish it was just strait across the the front, One bigger place to keep oil. Not sure If the smaller middle one with the side closed off can get sucked dry. If you carry a long wheelie?


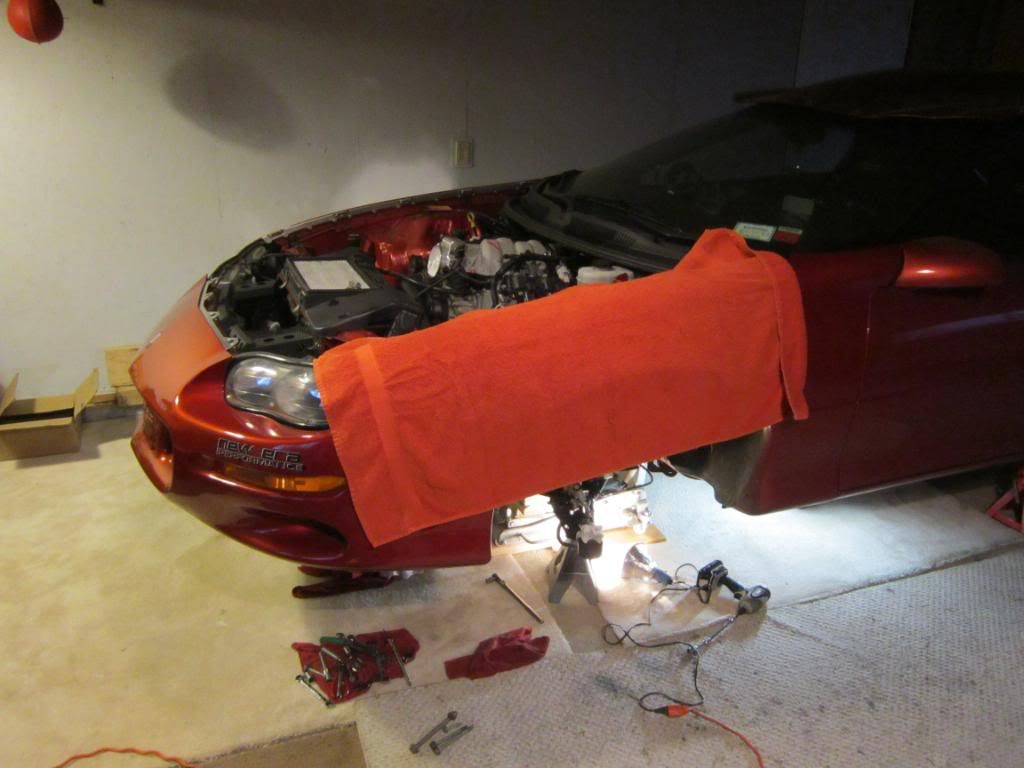
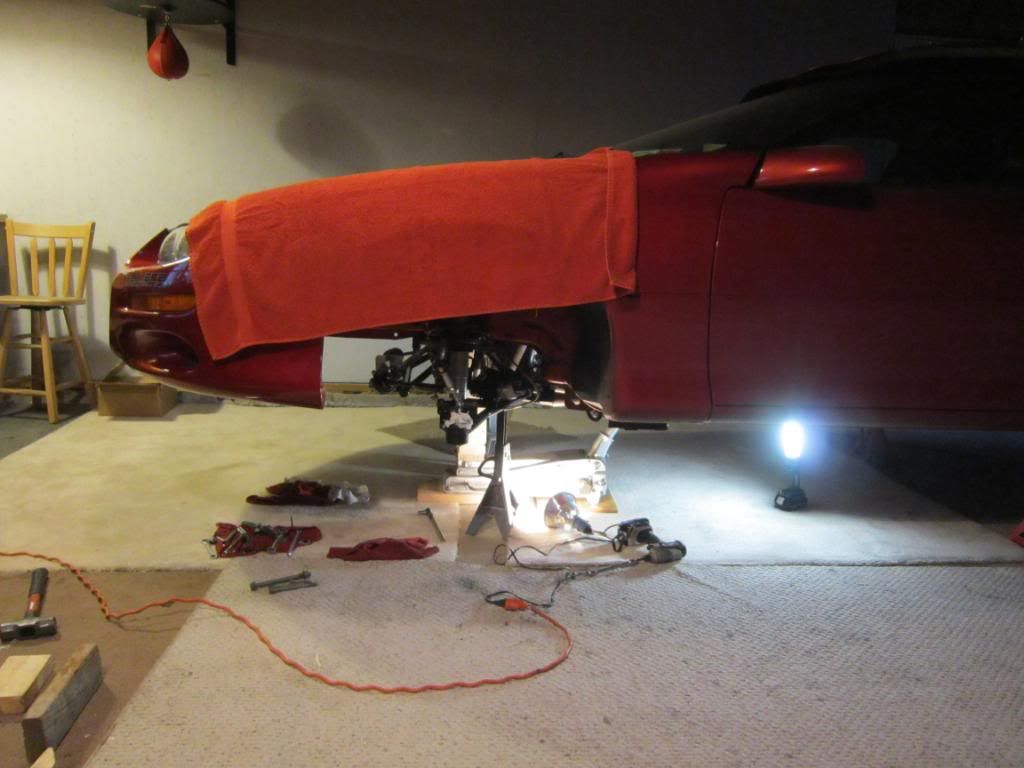
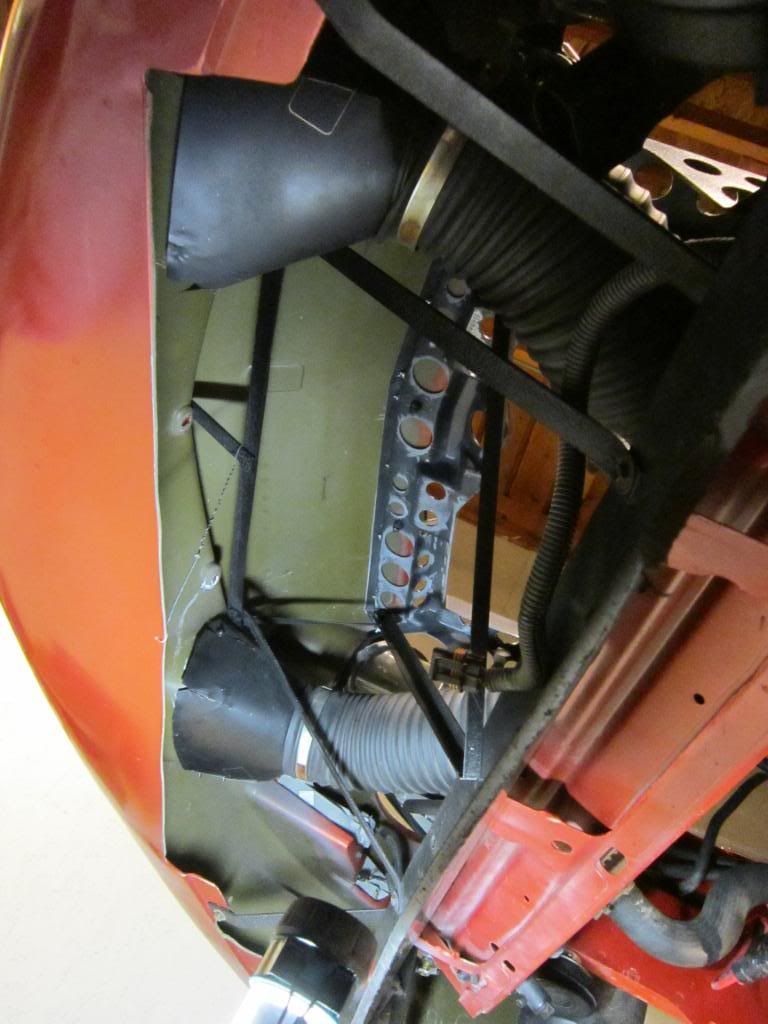
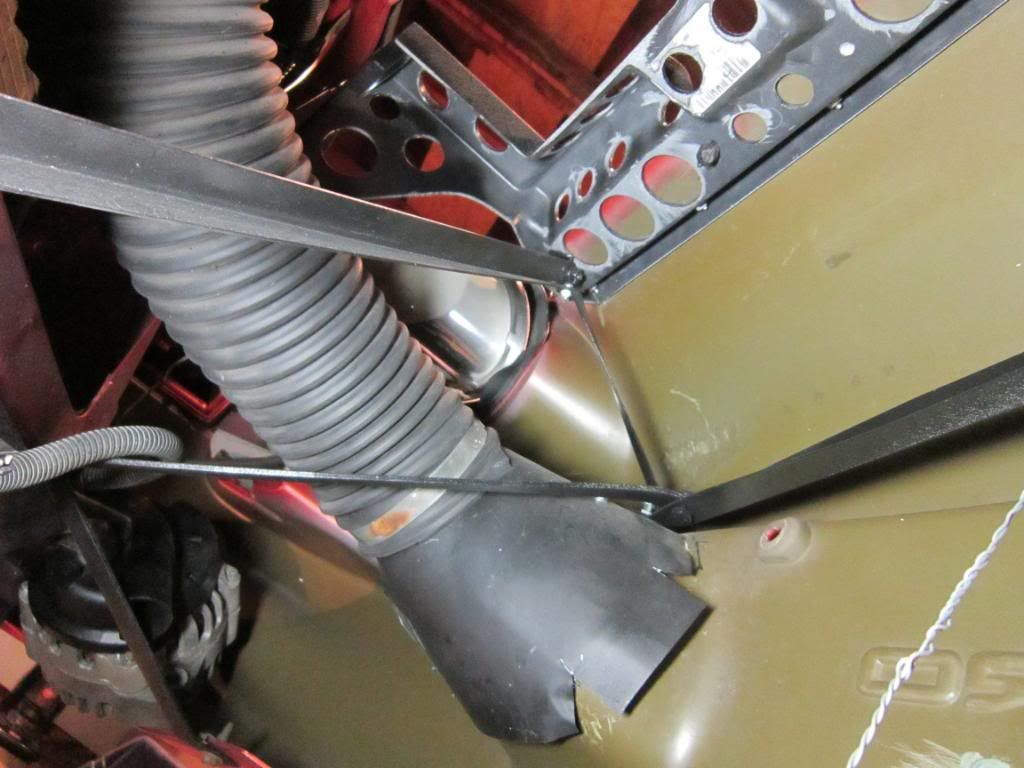
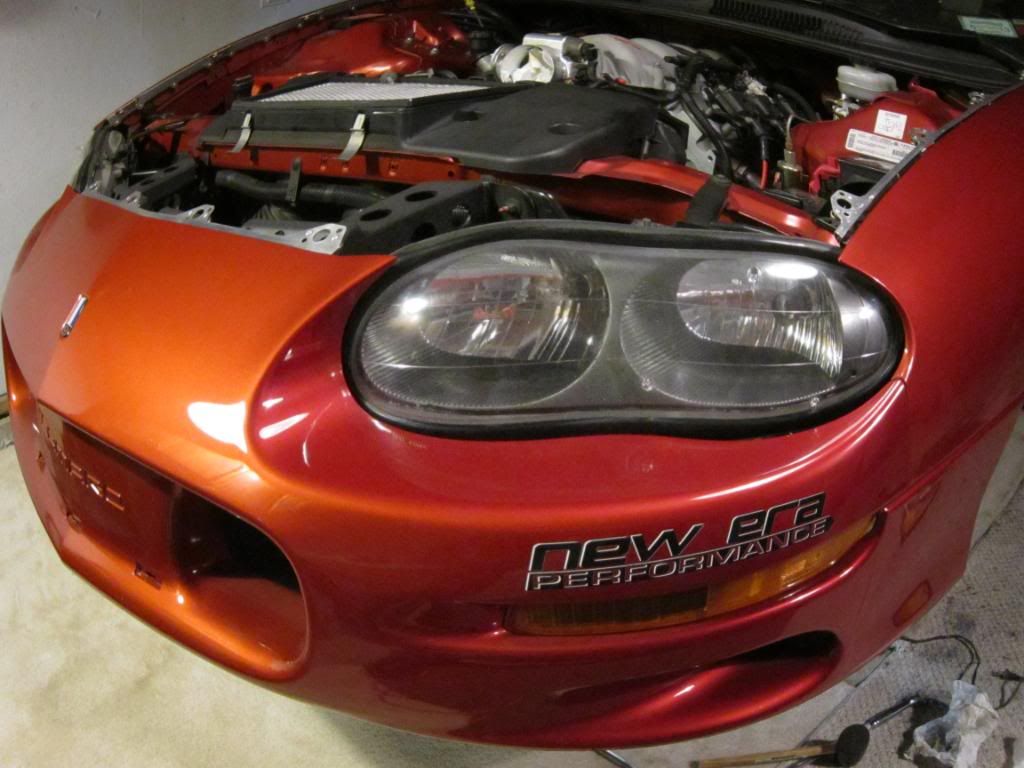
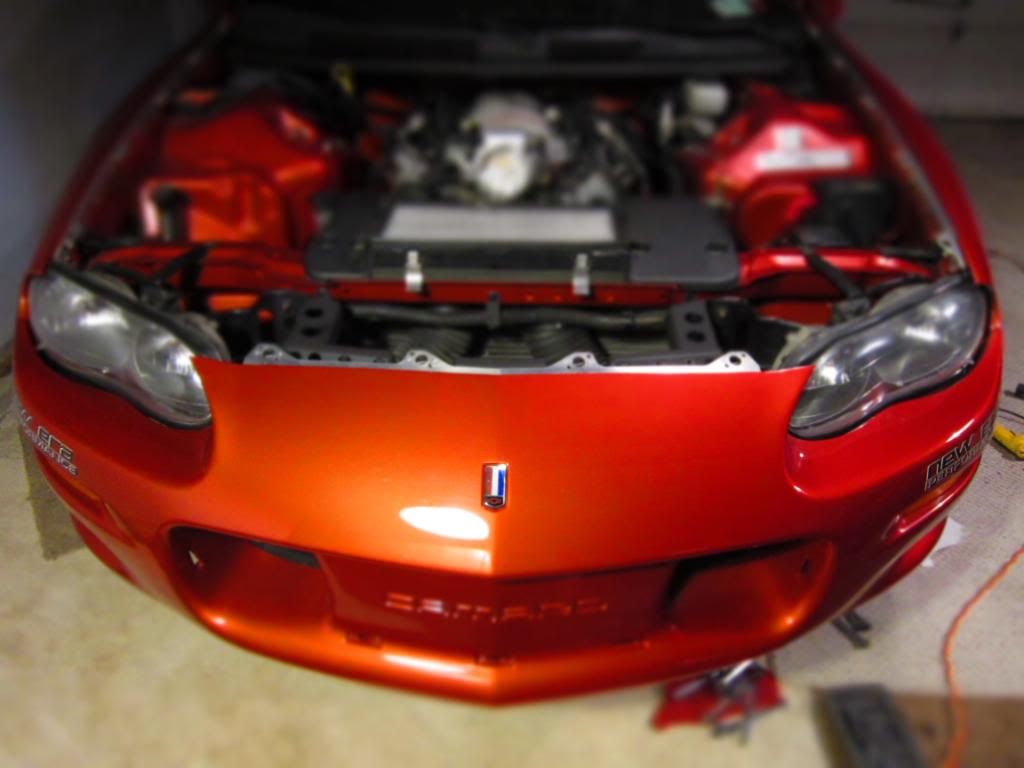
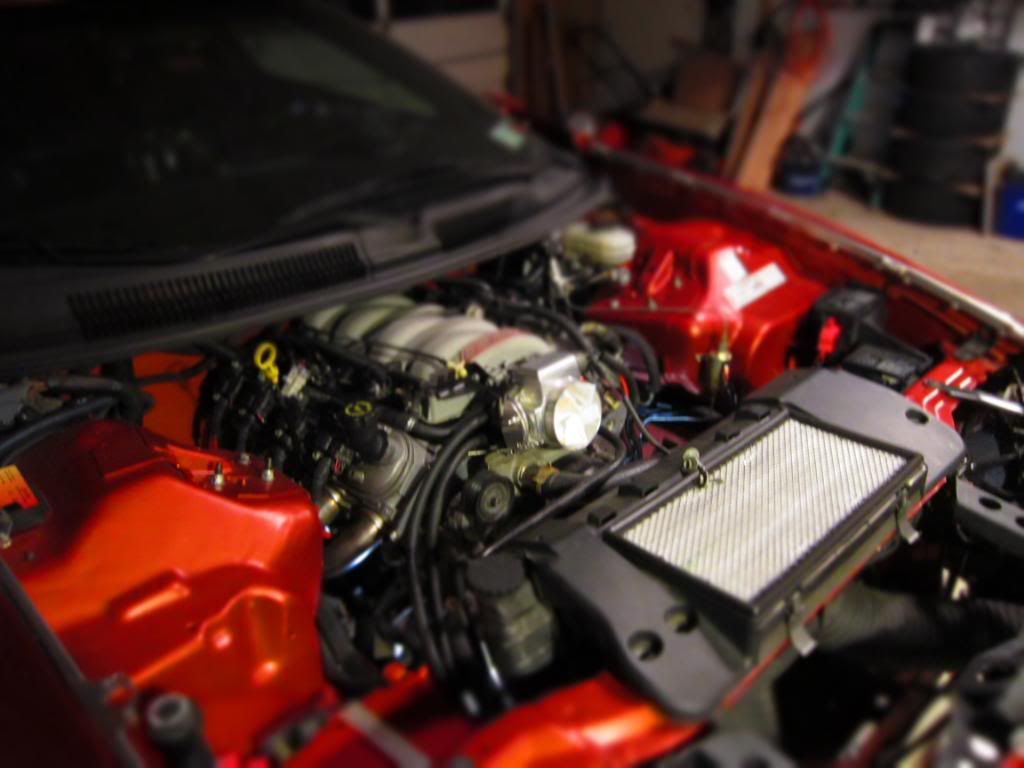
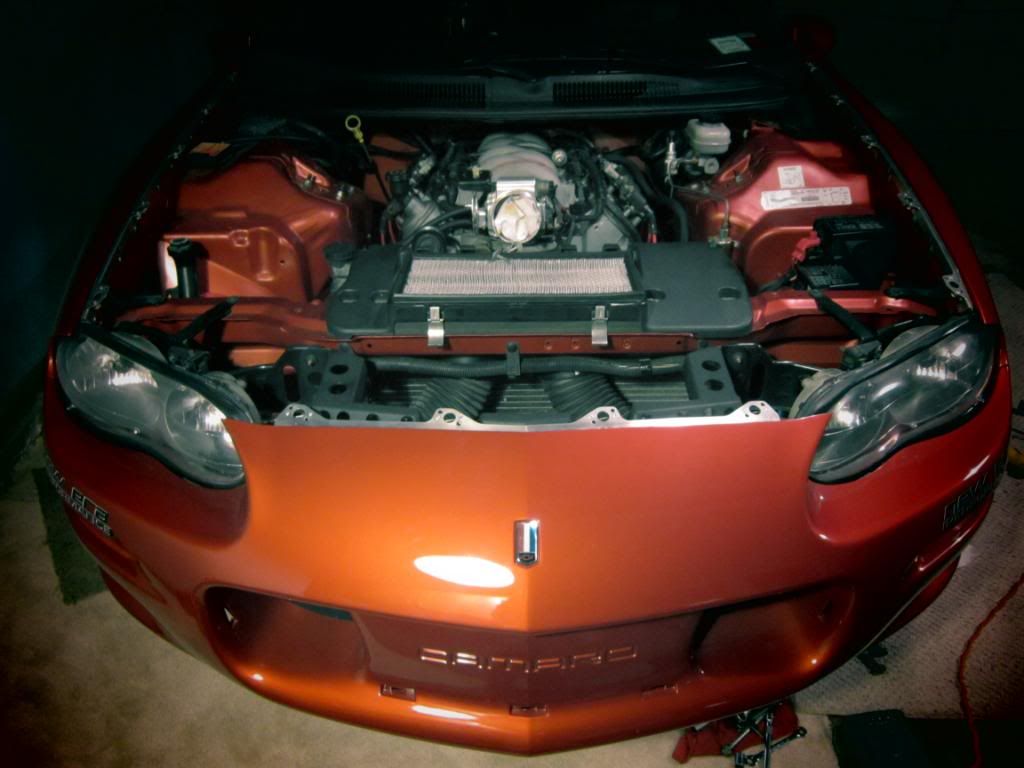
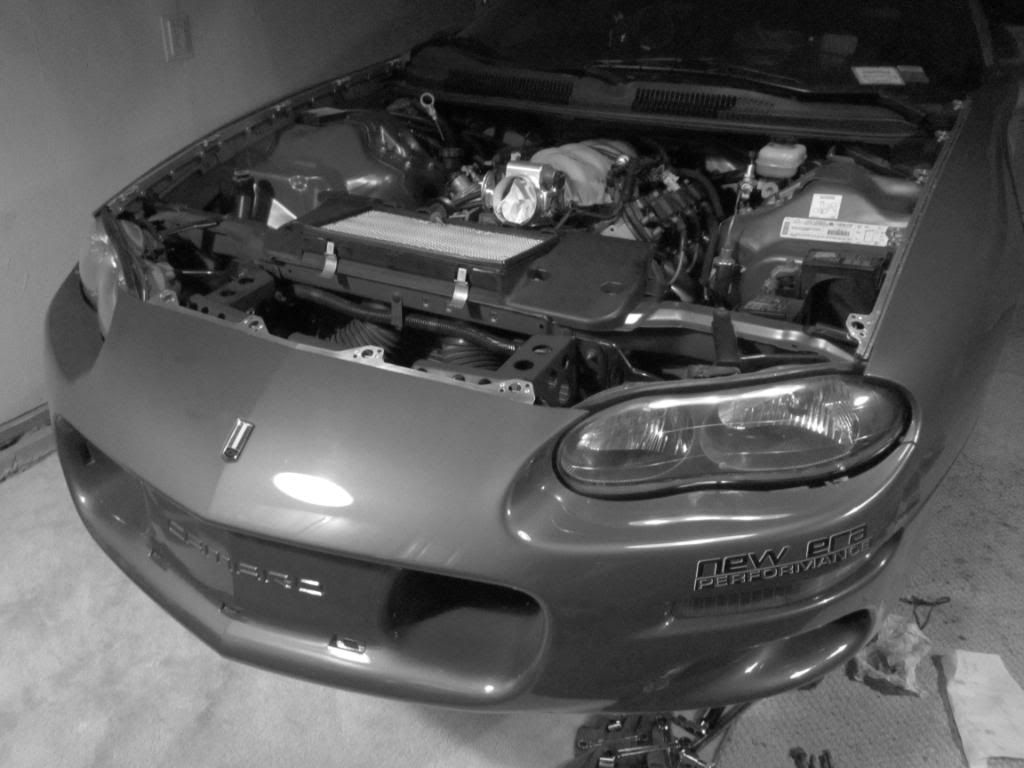
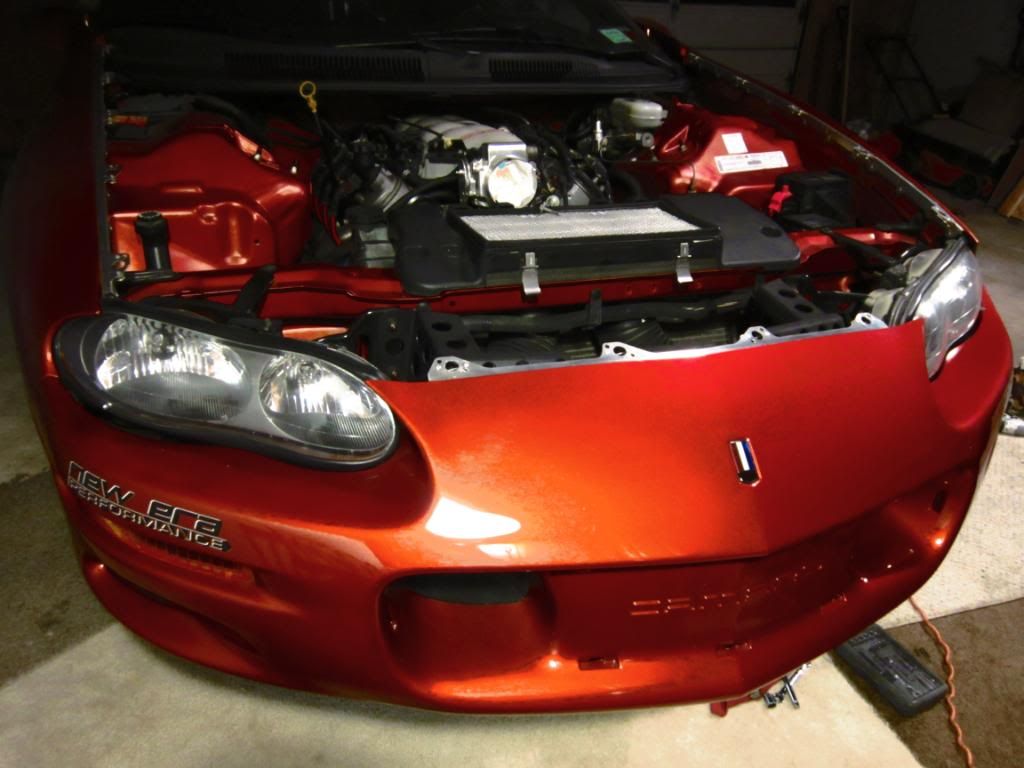
Some pics of the front end, trimmed up light. Still have the stock airdamn, and some other things.
still not leaking
Might get a new oil pan gasket, the back got a little ripped up trying to get the pan off 1st time. And somthing was leaking over the filter area, the oil passages are right there.
Took some affect pics.

Not sludge, I change the oil every 1-2K miles and cleaned it out a few years ago when I did rod bolts. The oil is clean, but the stock baffle had a nice coating of dust clinging to it, no flakes, or chucks. Found some valve seal springs, a few in the pickup screen. 1-2 little black RTV boogers off the timming cover.A few red locktight half ring off I think a cam plate bolt in the pickup screen too
blasted the pan with hot wated dawm quick, but going to grind the back flush for the blocksaver plate while its out, so final clean after that. This imporved racing baffle fits good. I dont really need the side doors, kinds wish it was just strait across the the front, One bigger place to keep oil. Not sure If the smaller middle one with the side closed off can get sucked dry. If you carry a long wheelie?
Some pics of the front end, trimmed up light. Still have the stock airdamn, and some other things.
still not leaking
Might get a new oil pan gasket, the back got a little ripped up trying to get the pan off 1st time. And somthing was leaking over the filter area, the oil passages are right there.
Took some affect pics.
03-18-2012, 06:09 PM
#704
They all get that dirty/dusty look on them. Had a cam only ls1 that did it after 50 street miles and 25 passes or so. Nothing in the filter when cutting them open ever or on the magnetic drain plug.
What's your opinion on that baffle ? Think it'll stop all the oil starvation at the launch that people are having?
What's your opinion on that baffle ? Think it'll stop all the oil starvation at the launch that people are having?
03-19-2012, 02:49 PM
#705
I think that baffle is really good, I'm not a oil system expert or anything but dont think you can do anything better with the stock pan and pickup. The stock baffle looks like a piece of junk,It might stop oil for sloshing for .04 secs, and it will just go around it.
I think it would be better for drag racing if there was a baffle with a new pickup moved to the rear. And the baffle just strait across in the back, with the flap doors. Or even just a L shape on the passenger corner, the oil filter dosn't allow much room for the driver side corner in the pan anyway. But this is more for all around, and handling I think and it just happens to stop rear flow too. So we can use it for drag racing too.
Got the high spots on the back of the pan all flush. I did a little porting on the oil passages going to the filer. So just final wash everything good, and I can get it all back on today. Just gona use the stock oil pan gasket, little RTV in the back corners were it peeling.
 03-20-2012, 11:51 AM
#707
Ya, I looked into one. Has some things I like and some I didn't. Can't think of a better spot for the oil filter to move to, and like using the lower trans bolts. Most guys that run them have a th350/400 I would guess. I could use it again if I build a bigger motor or something, but for now dont have any really problem with the stock one. It would be about $900 -$950 to run the moroso pan with the oil filter setup and everything. Did you guys run one the the Smurf cam only stock motor?
The stock baffle dose really nothing for acceleration, and wheelies. It has a open V behind the pickup. But it doesn't hold enough oil back or slow it down, even for a 1.5 60' it was really dropping oil pressure for me.
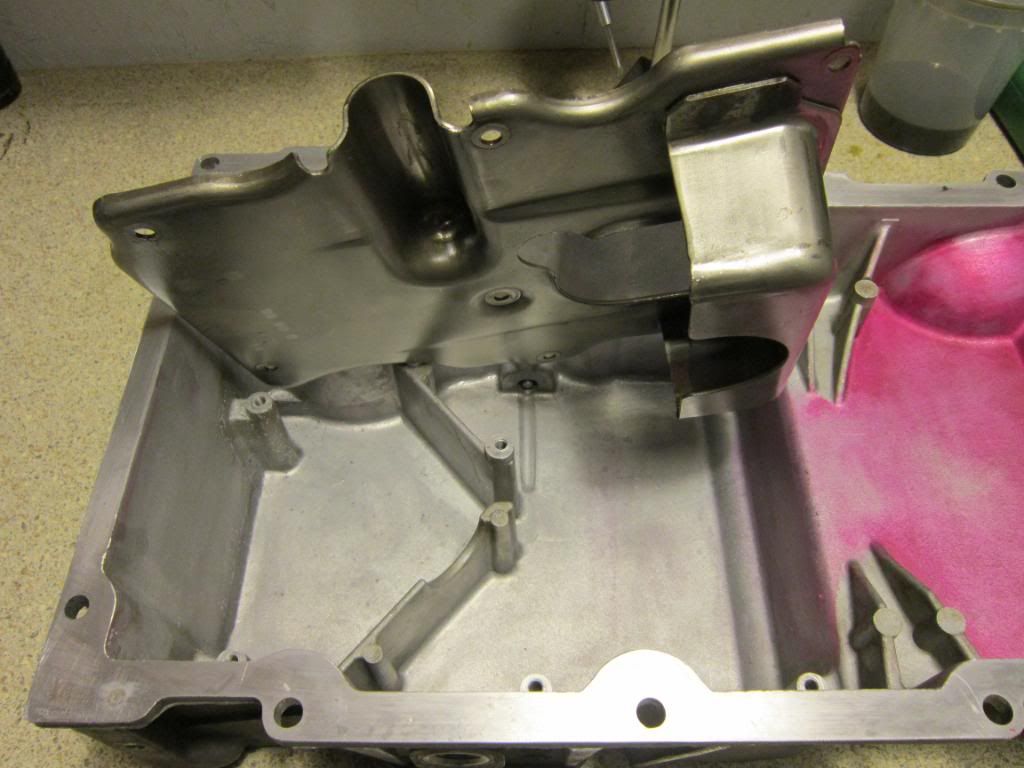
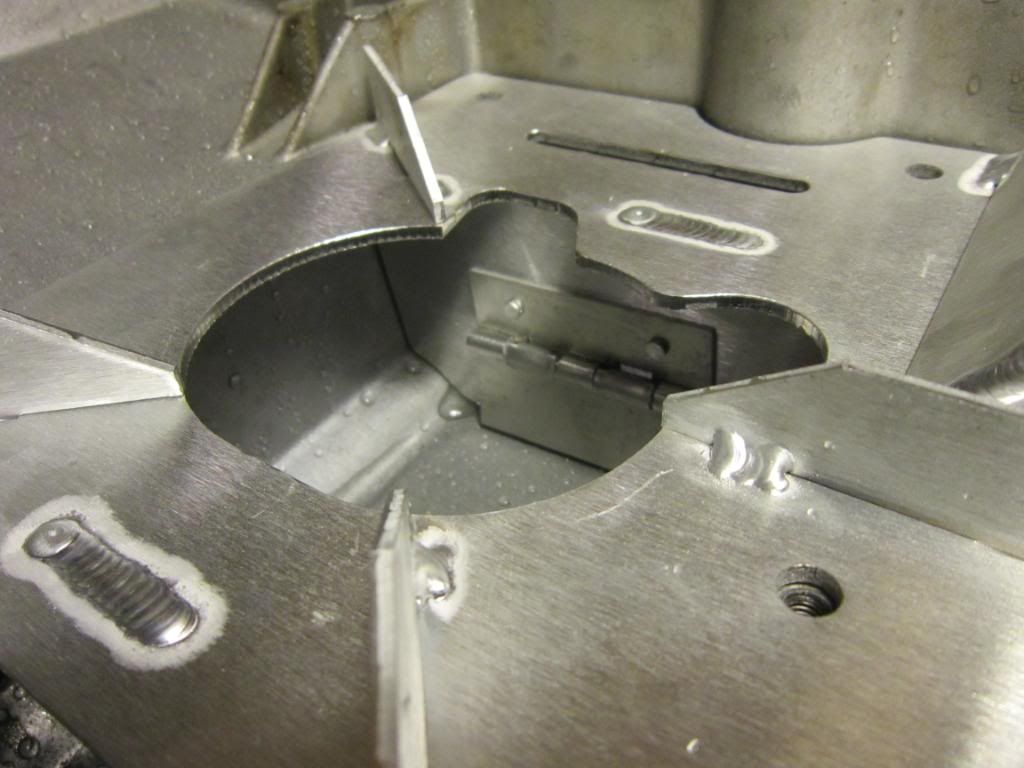
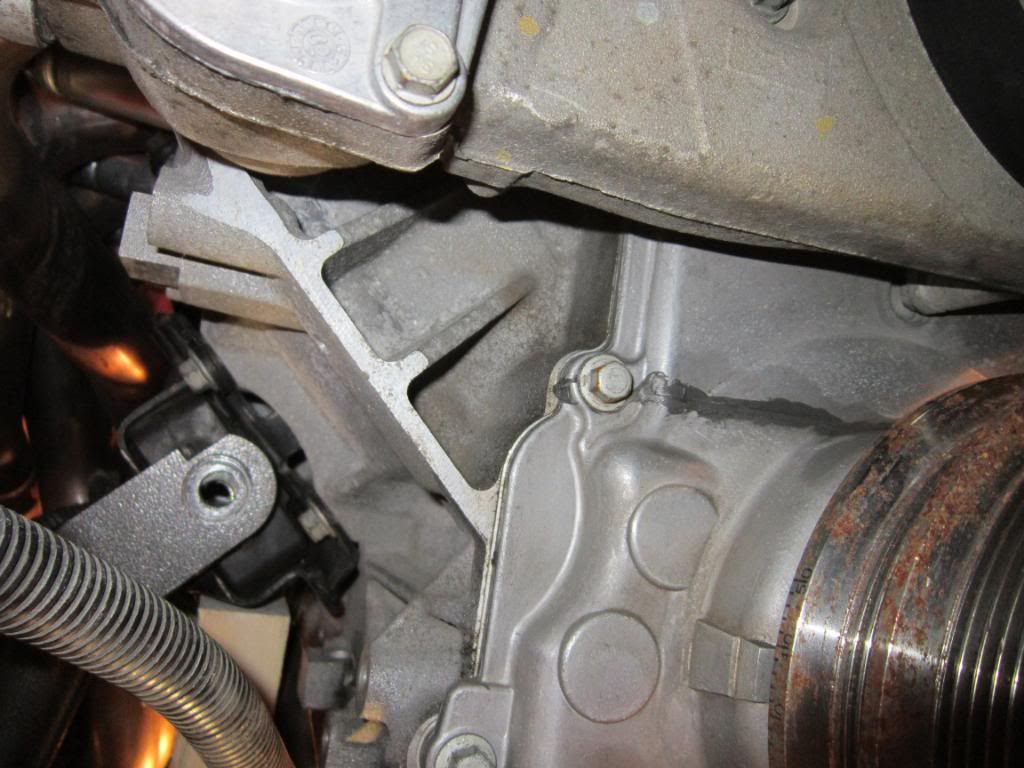
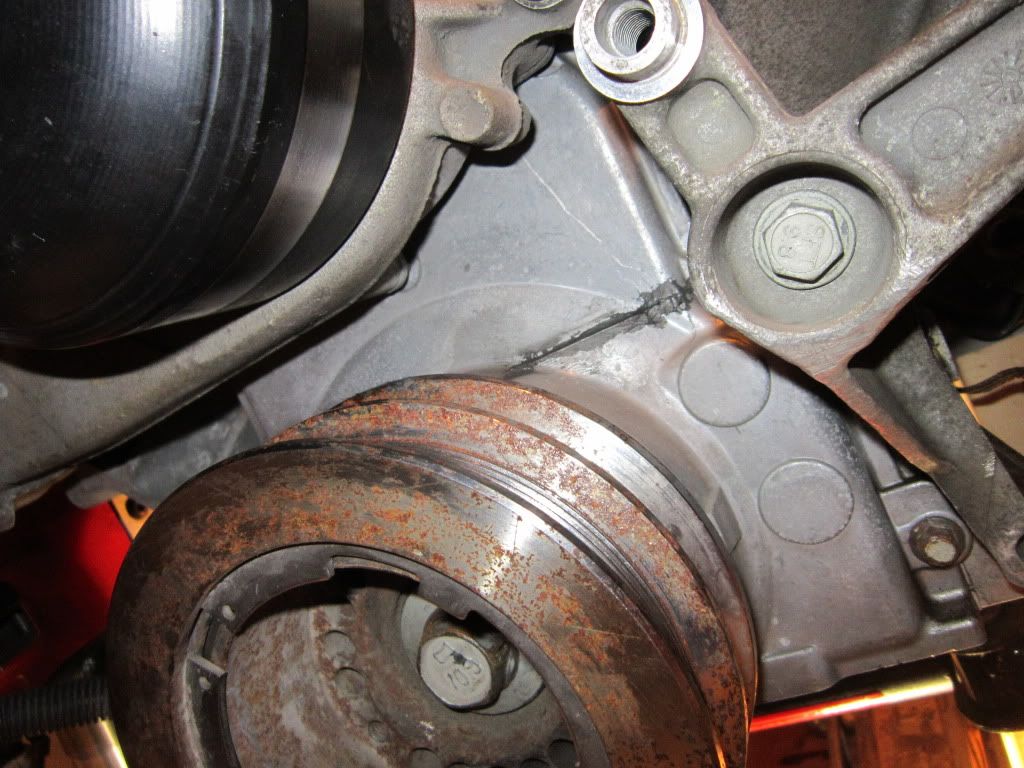
Remember the rear of the pan would be on the right, not the way it is in the background
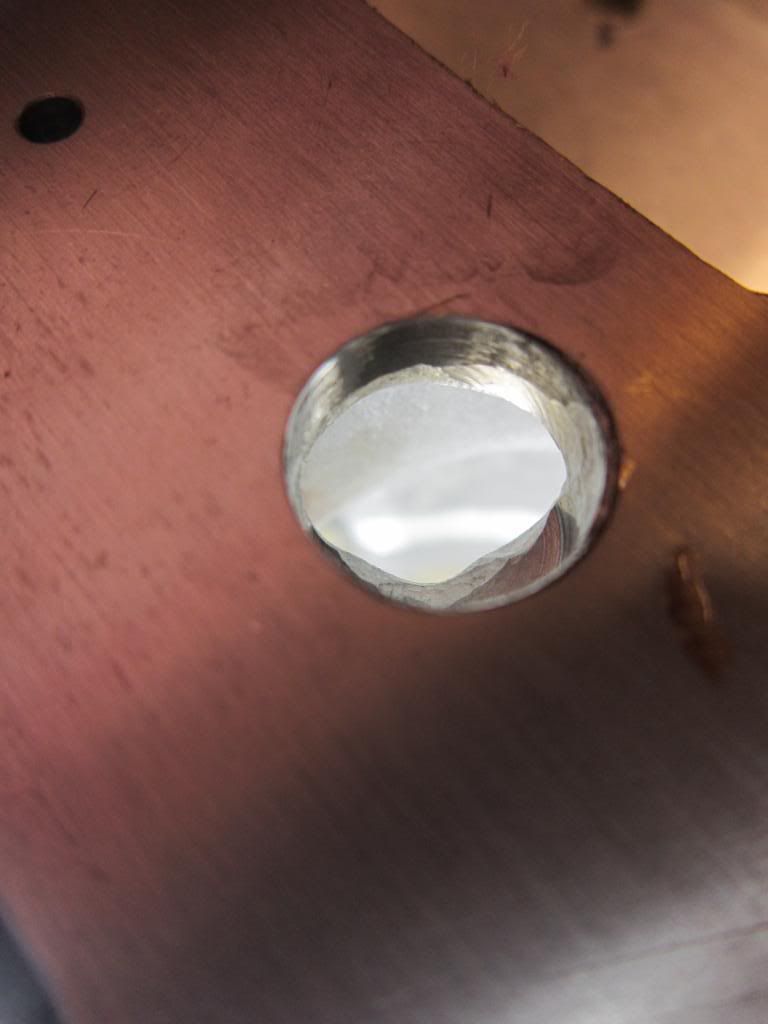
Cleaned up these passages going to the filter, they were square edge drilled intersecting holes.

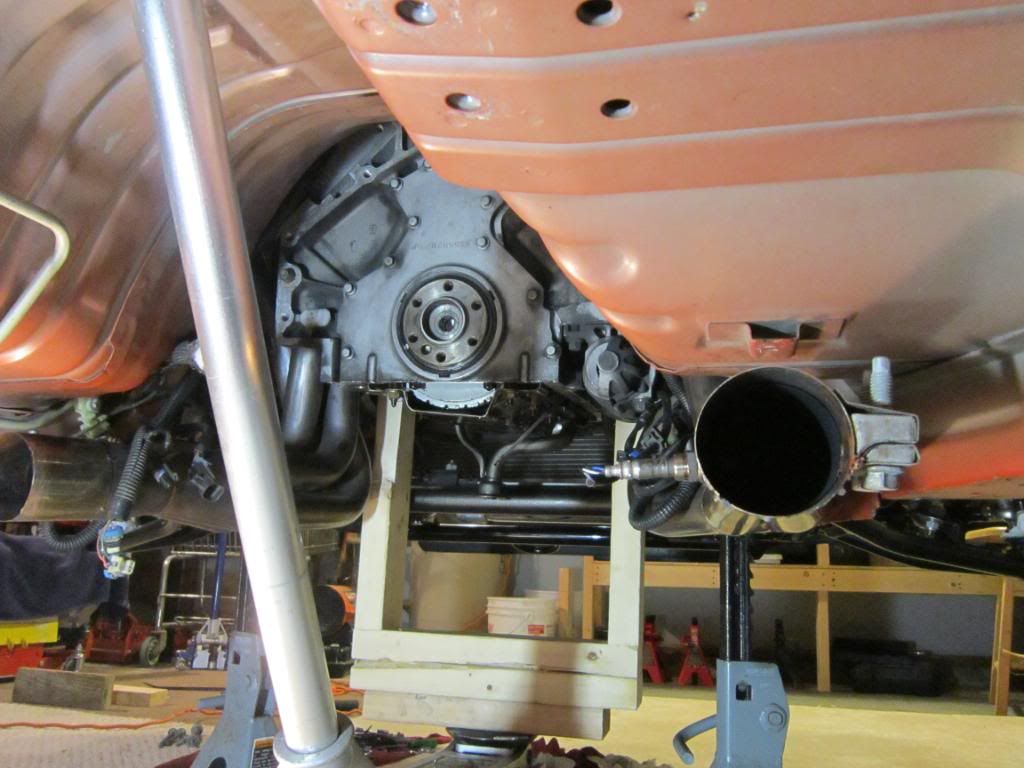
Its all back on, waiting for the bell housing then the trans can get installed.
The stock baffle dose really nothing for acceleration, and wheelies. It has a open V behind the pickup. But it doesn't hold enough oil back or slow it down, even for a 1.5 60' it was really dropping oil pressure for me.
Remember the rear of the pan would be on the right, not the way it is in the background
Cleaned up these passages going to the filter, they were square edge drilled intersecting holes.
Its all back on, waiting for the bell housing then the trans can get installed.
Last edited by studderin; 03-21-2012 at 08:38 PM.


 04-07-2012, 02:03 PM
#713
Its a really nice piece, got it from RPM they have a sale on them right now, contact Jeremy about getting ine or call them. RPM also rebuilt my trans, and it looks like new.
The bellhosing adds weight over the stock but thats a givin. I hear its a lot lighter then the mcloud bellhousing setup, and fit a lot better too so thats good.
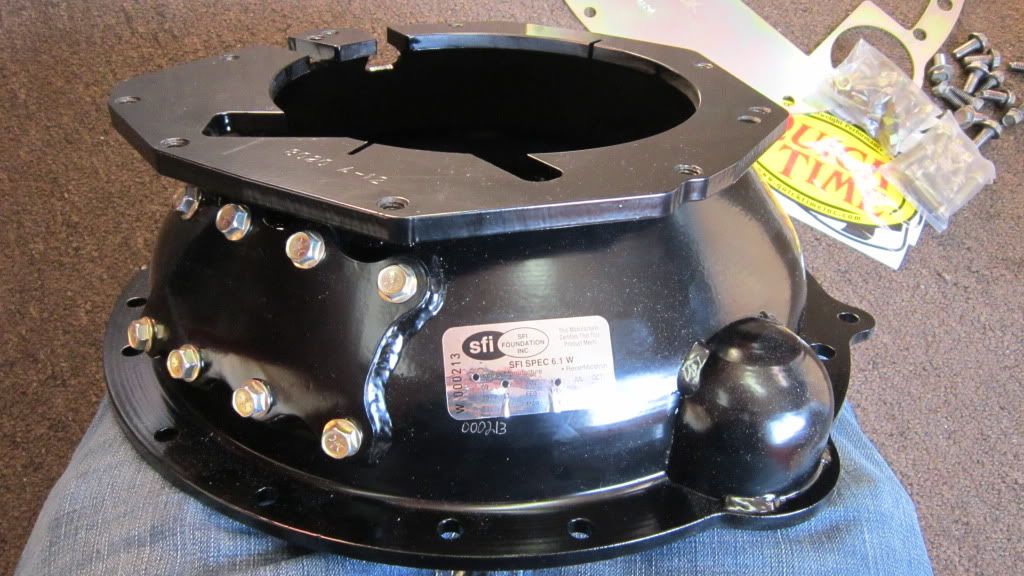
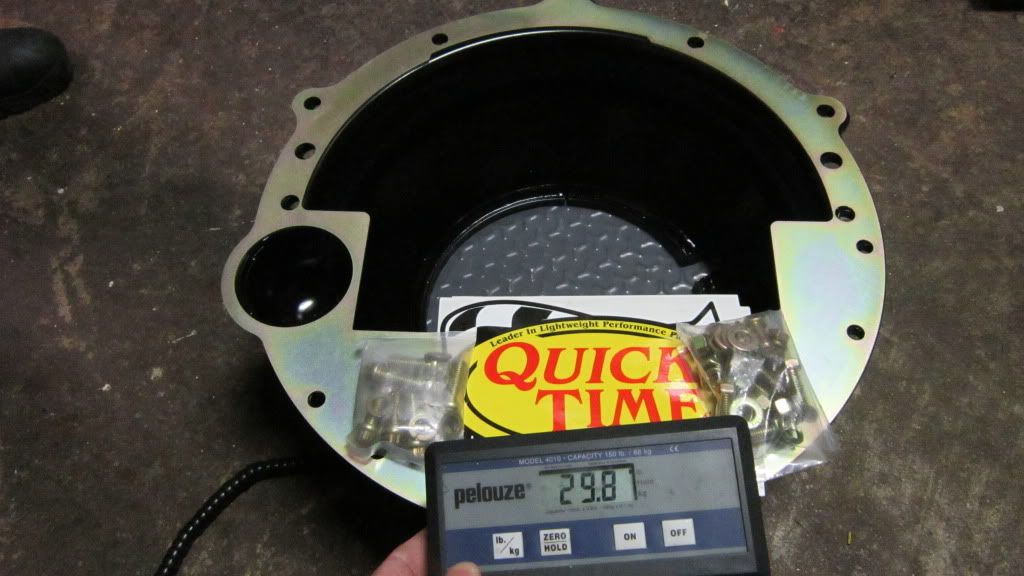
Quick time LS1 bell housing with SFI window, block plate, and bolts is 29.8 pounds.
Just the bell housing with the window bolted on is 25.4 pounds
The "block saved plate" is .115 thick and mate of steel. I see it as really doing nothing, the shape it is. Its not going to save the starter ear (so hopefully just the starter nose breaks off and not the block, that never happens, the starter breaks off bolted to the outer bolt with the ear. cracking thu the inner bolts hole Or any area in the back of the block, I would think they could make the plate solid, and just have a large hole for the crank bolts, and drill some smaller holes in the pattern for the rear cover bolt heads to fit into. That would still protect the block form getting hit, or "parts"
  that are going get wedged in and cracking the block in easy. It dose protest the rear face of the oil pan, but thats the cheapest and easiest thing to fix will the the damage thats going to happen your block. The bell housing will still contain the parts and protect you and the car.
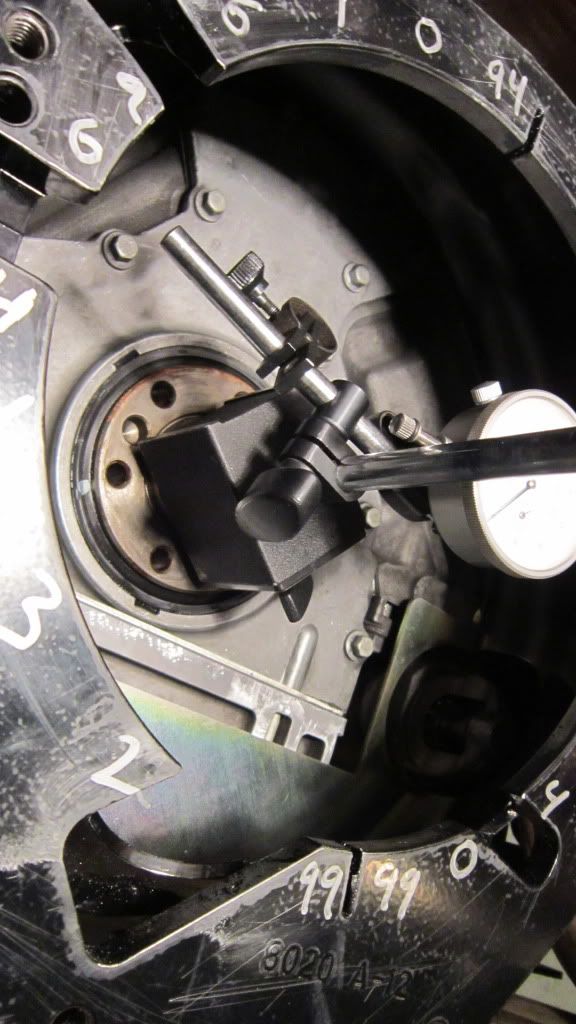
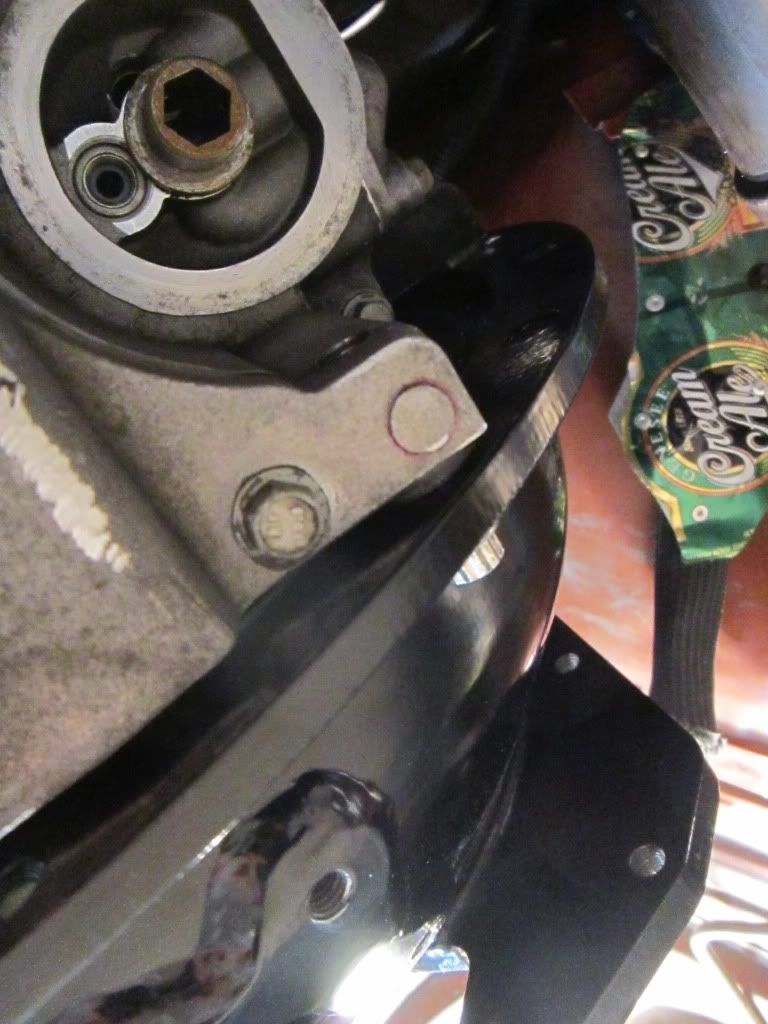
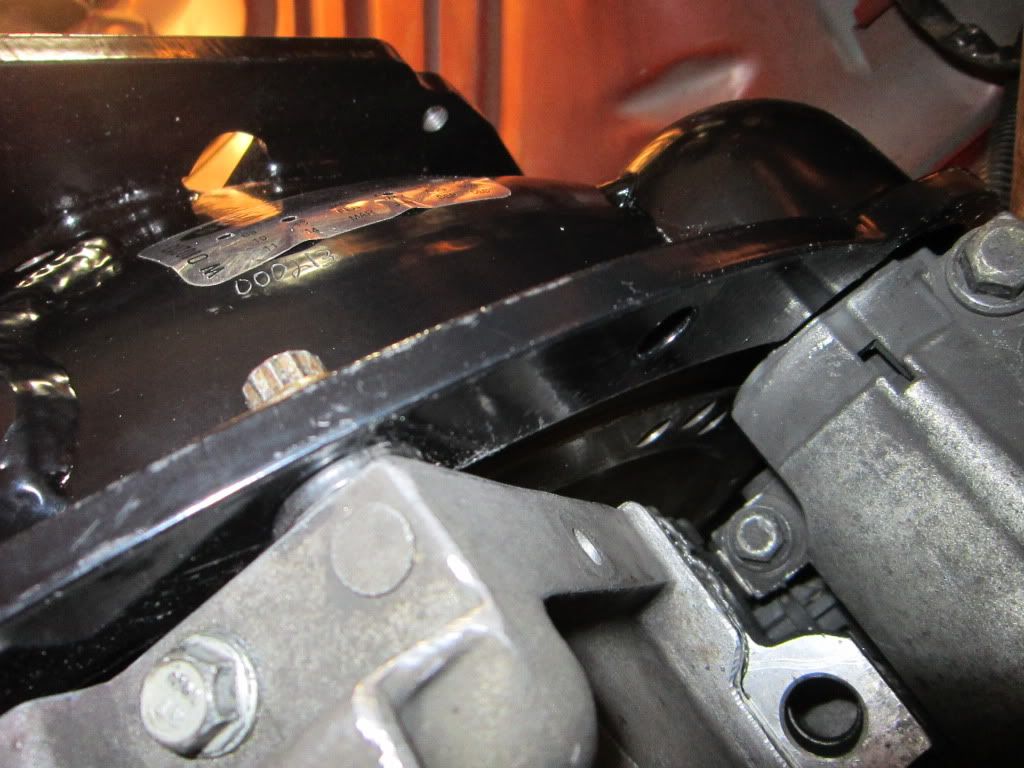
I forgot if I measured this on the surface plate, at newera then I picked it up. But I wrote it was .105 taller (with the block plate) then my stock bell housing. Side my side this pic I took that looks about right. (+.105)
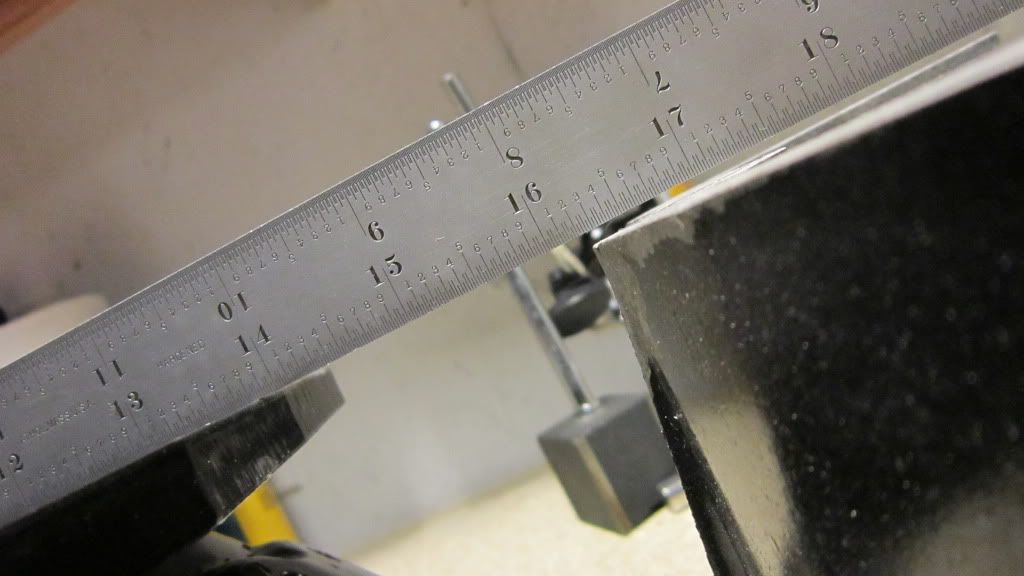
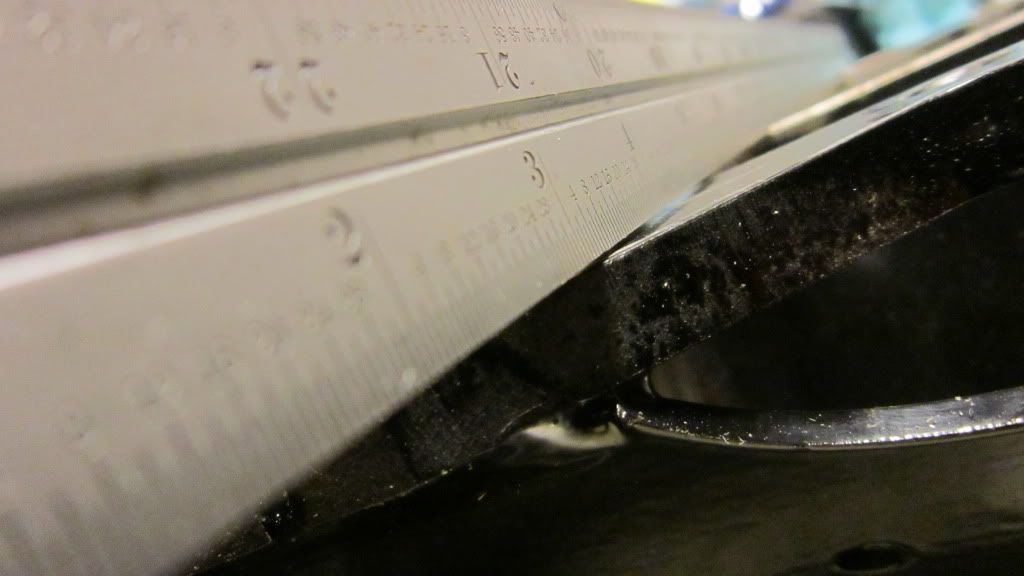
And this pic without the plate (.115) it looks to be what would be (.010) very little to see, but should up with a 24" strait edge, just the quick time bell is slightly thinner, then my stock in the back ground.
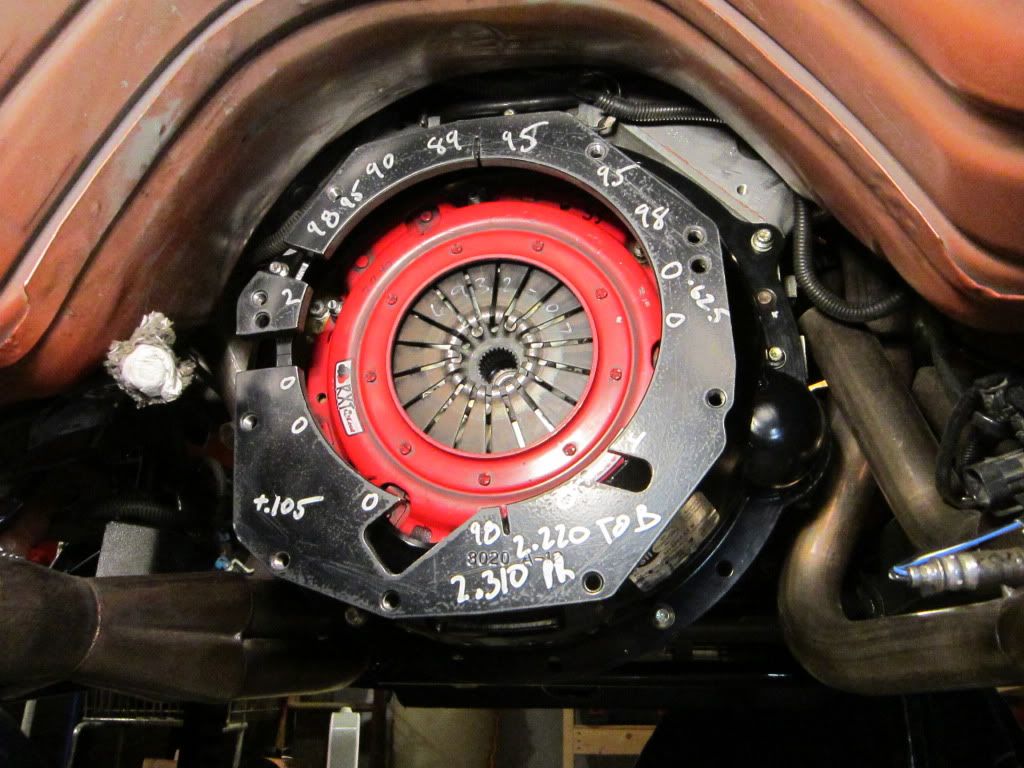
A few of the backside of the threaded holes had the last sharp thread hanging off. But everything else was nice a deburred, No big paint runs, but hit the mating surfaces with a file to knock down any high spot (mostly thicker paint thats going to happen) I did noticed on the trans plate, the lower part was tipped in a little with a start edge. (welding distortion?) But the trans bolts to the outside of the plate anyway, I checked how square that face is off the crank center line (mag base on the crank) as farther outside the plate were the trans bolts are as you can. Its not overall centered, and has a few cutouts, but over all was very good. I was happy about that, I think it was within .010 overall. Hard to see the indicator face full 360* in the tunnel. Same goes for how centered the bell housing was, I could see some witness marks on the main cutouts ID were it looks like quicktime uses some sander on the paint to remove some high spots. But the trans locates with those 2 smaller dowels, so I dont know if that pattern is centered on the dowels anyway? But this is what people use to check it.
With the block plate bolted on, I marked the open spots around the starter and oil filter to add some holes for cooling, and let the clutch dust blow out, for the clutch life and slave. But ended up just cutting the bottom part off (a little weight) and trimming it to fit nice with the shape of the block, and not cover the starter at all. So its all open past the block, and just running 2 hardened washer (think there extra arps, hand sanded a little to get them to .115, money) for the lower oil pan bolts. So it has alot of cooling the the brake fluid will drain out the slot when you bleed the clutch. And you can fit it around the clutch and flywheel bolted on. This also removes the big area that might hit the oil pan, I see some guys saying they didn't have to grind anything. Maybe some oil pans are different? I had the pan off a few weeks ago when I had the trans put getting reuilt to change the oil pan baffle, so at that time I ground the unmachine higher spots of the pan down with it off the car.
Test fit it the spacing is a little off for the master, so the bleeder screw access was off a little bit. I think you could get the 7/16th/11mm socket but it just needed a little 45* flat (bottom side of the opening) took a min with the grinder.
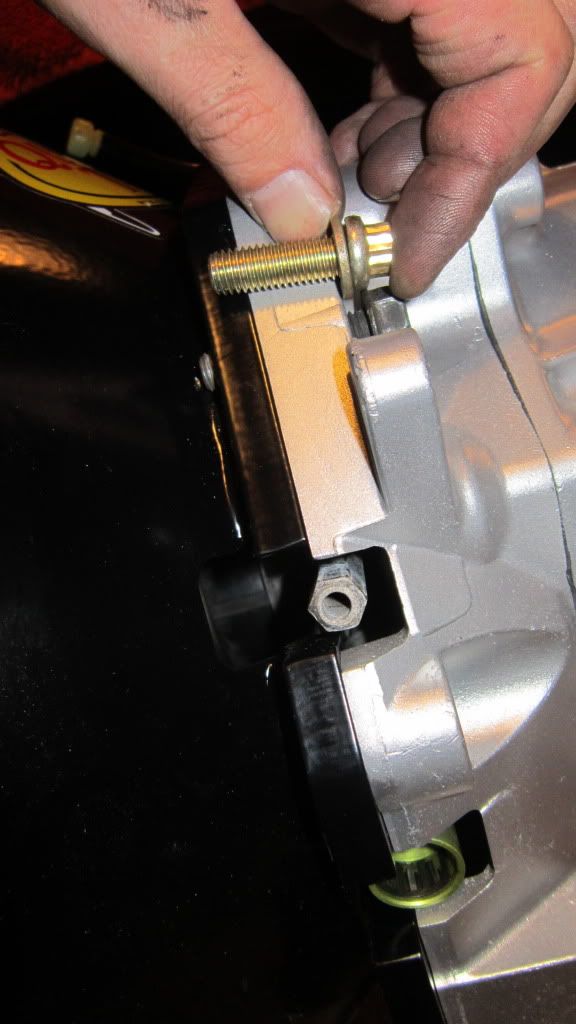
Came with nice 12 point 10mm head bolts (these go into the block) the smaller head means a smaller socket for easier to get to all of them. And because the bellhousing is thicker some of the bolts are closer to the budge so stock bolts will not work, thats you use need these for the block. The trans bolts going into it will be to long (as in the pic) they don't pass thu the flange and will hit. I think you need them about 35mm if you want to buy some new ones, I didn't find any nice ones with the built in washer I liked, or the right lengths (30 or 40mm) At a few stores I checked quick before I put all this in. Best would be a 10mm 12pint so you just need that one socket to pull the trans fast at the track, keep it simple to work on.
So just cut down the stock bolts (about 4-5 threads), and ground a lead edge on them so they start nice.
The stock dowels are 5/8th .625 The bellhousing was tight, the holes were a little small, so took little of the paint off of dowel holes with a flap sand paper porting tool. If you do this don't take any metal off 1st and see how it fits, paint came right off the bell slights right on snug. I test fit it without the block saved plate at 1st, (you could maybe use it that way to get your airgap right) if you do this and have a gen 3 block or the non recessed rear cover bolts (LSX and a think all gen4 setup I noticed have them) The upper 2 rear cover bolts, and maybe the one of the right will hit the curve of the bell flange. Even a low head or normal m6 bolt with no washer will stock out, a button head like used for the fast valley cover will clear.
here it is installed before the trans went back in
With the slight disc wear the block saved plate worked out too better for the air gap. TOB to face was 2.220 (no shim), face the fingers was 2.310

The bellhosing adds weight over the stock but thats a givin. I hear its a lot lighter then the mcloud bellhousing setup, and fit a lot better too so thats good.
Quick time LS1 bell housing with SFI window, block plate, and bolts is 29.8 pounds.
Just the bell housing with the window bolted on is 25.4 pounds
The "block saved plate" is .115 thick and mate of steel. I see it as really doing nothing, the shape it is. Its not going to save the starter ear (so hopefully just the starter nose breaks off and not the block, that never happens, the starter breaks off bolted to the outer bolt with the ear. cracking thu the inner bolts hole
Or any area in the back of the block, I would think they could make the plate solid, and just have a large hole for the crank bolts, and drill some smaller holes in the pattern for the rear cover bolt heads to fit into. That would still protect the block form getting hit, or "parts" that are going get wedged in and cracking the block in easy. It dose protest the rear face of the oil pan, but thats the cheapest and easiest thing to fix will the the damage thats going to happen your block. The bell housing will still contain the parts and protect you and the car.I forgot if I measured this on the surface plate, at newera then I picked it up. But I wrote it was .105 taller (with the block plate) then my stock bell housing. Side my side this pic I took that looks about right. (+.105)
And this pic without the plate (.115) it looks to be what would be (.010) very little to see, but should up with a 24" strait edge, just the quick time bell is slightly thinner, then my stock in the back ground.
A few of the backside of the threaded holes had the last sharp thread hanging off. But everything else was nice a deburred, No big paint runs, but hit the mating surfaces with a file to knock down any high spot (mostly thicker paint thats going to happen) I did noticed on the trans plate, the lower part was tipped in a little with a start edge. (welding distortion?) But the trans bolts to the outside of the plate anyway, I checked how square that face is off the crank center line (mag base on the crank) as farther outside the plate were the trans bolts are as you can. Its not overall centered, and has a few cutouts, but over all was very good. I was happy about that, I think it was within .010 overall. Hard to see the indicator face full 360* in the tunnel. Same goes for how centered the bell housing was, I could see some witness marks on the main cutouts ID were it looks like quicktime uses some sander on the paint to remove some high spots. But the trans locates with those 2 smaller dowels, so I dont know if that pattern is centered on the dowels anyway? But this is what people use to check it.
With the block plate bolted on, I marked the open spots around the starter and oil filter to add some holes for cooling, and let the clutch dust blow out, for the clutch life and slave. But ended up just cutting the bottom part off (a little weight
) and trimming it to fit nice with the shape of the block, and not cover the starter at all. So its all open past the block, and just running 2 hardened washer (think there extra arps, hand sanded a little to get them to .115, money) for the lower oil pan bolts. So it has alot of cooling the the brake fluid will drain out the slot when you bleed the clutch. And you can fit it around the clutch and flywheel bolted on. This also removes the big area that might hit the oil pan, I see some guys saying they didn't have to grind anything. Maybe some oil pans are different? I had the pan off a few weeks ago when I had the trans put getting reuilt to change the oil pan baffle, so at that time I ground the unmachine higher spots of the pan down with it off the car.Test fit it the spacing is a little off for the master, so the bleeder screw access was off a little bit. I think you could get the 7/16th/11mm socket but it just needed a little 45* flat (bottom side of the opening) took a min with the grinder.
Came with nice 12 point 10mm head bolts (these go into the block) the smaller head means a smaller socket for easier to get to all of them. And because the bellhousing is thicker some of the bolts are closer to the budge so stock bolts will not work, thats you use need these for the block. The trans bolts going into it will be to long (as in the pic) they don't pass thu the flange and will hit. I think you need them about 35mm if you want to buy some new ones, I didn't find any nice ones with the built in washer I liked, or the right lengths (30 or 40mm) At a few stores I checked quick before I put all this in. Best would be a 10mm 12pint so you just need that one socket to pull the trans fast at the track, keep it simple to work on.
So just cut down the stock bolts (about 4-5 threads), and ground a lead edge on them so they start nice.
The stock dowels are 5/8th .625 The bellhousing was tight, the holes were a little small, so took little of the paint off of dowel holes with a flap sand paper porting tool. If you do this don't take any metal off 1st and see how it fits, paint came right off the bell slights right on snug. I test fit it without the block saved plate at 1st, (you could maybe use it that way to get your airgap right) if you do this and have a gen 3 block or the non recessed rear cover bolts (LSX and a think all gen4 setup I noticed have them) The upper 2 rear cover bolts, and maybe the one of the right will hit the curve of the bell flange. Even a low head or normal m6 bolt with no washer will stock out, a button head like used for the fast valley cover will clear.
here it is installed before the trans went back in
With the slight disc wear the block saved plate worked out too better for the air gap. TOB to face was 2.220 (no shim), face the fingers was 2.310
Last edited by studderin; 04-07-2012 at 03:36 PM.
04-18-2012, 06:55 PM
#714
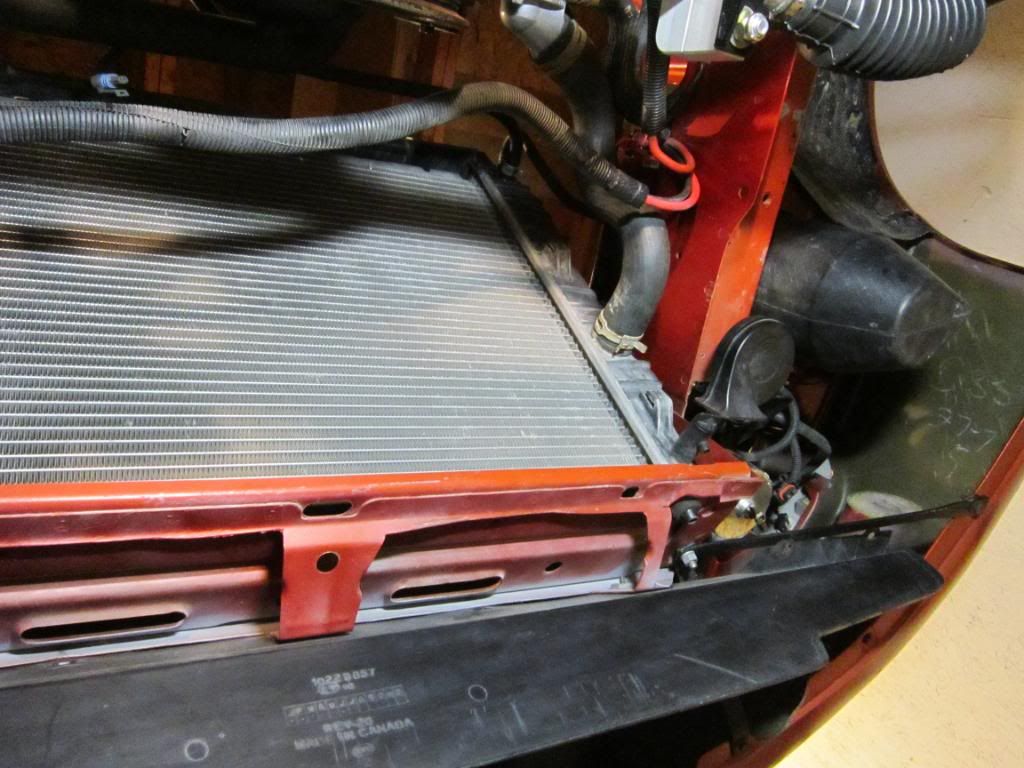
The stock fans and radiator weight 21.2 #s (with the hoses)
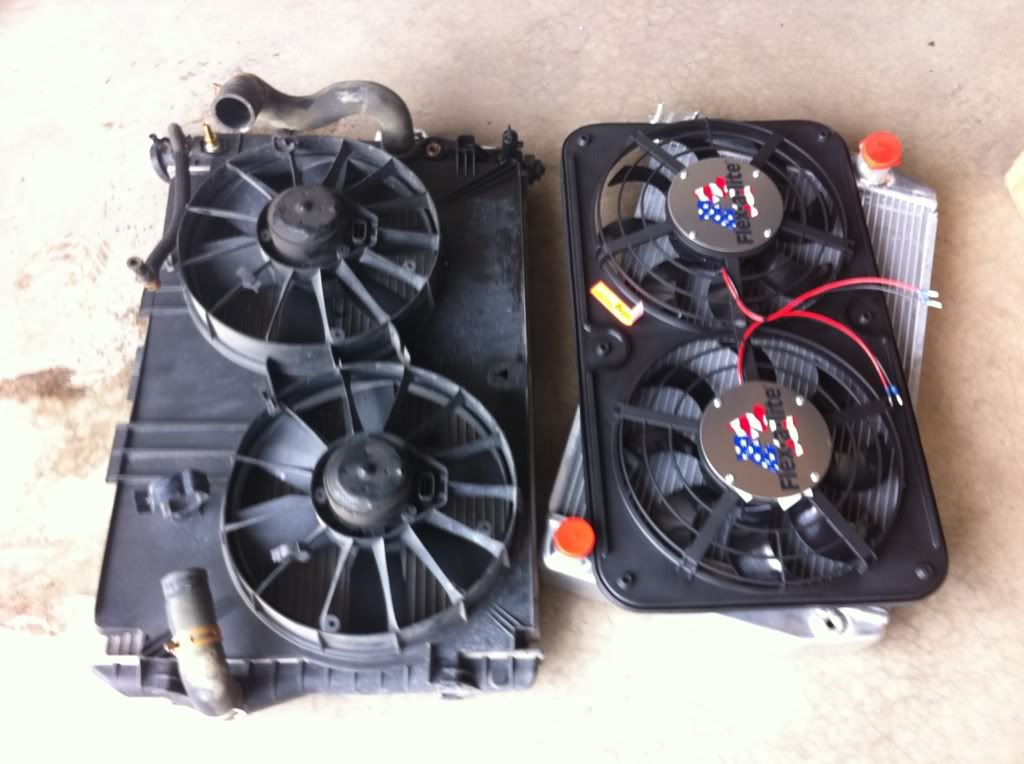
New setup is 14.5 #'s (with hoses)
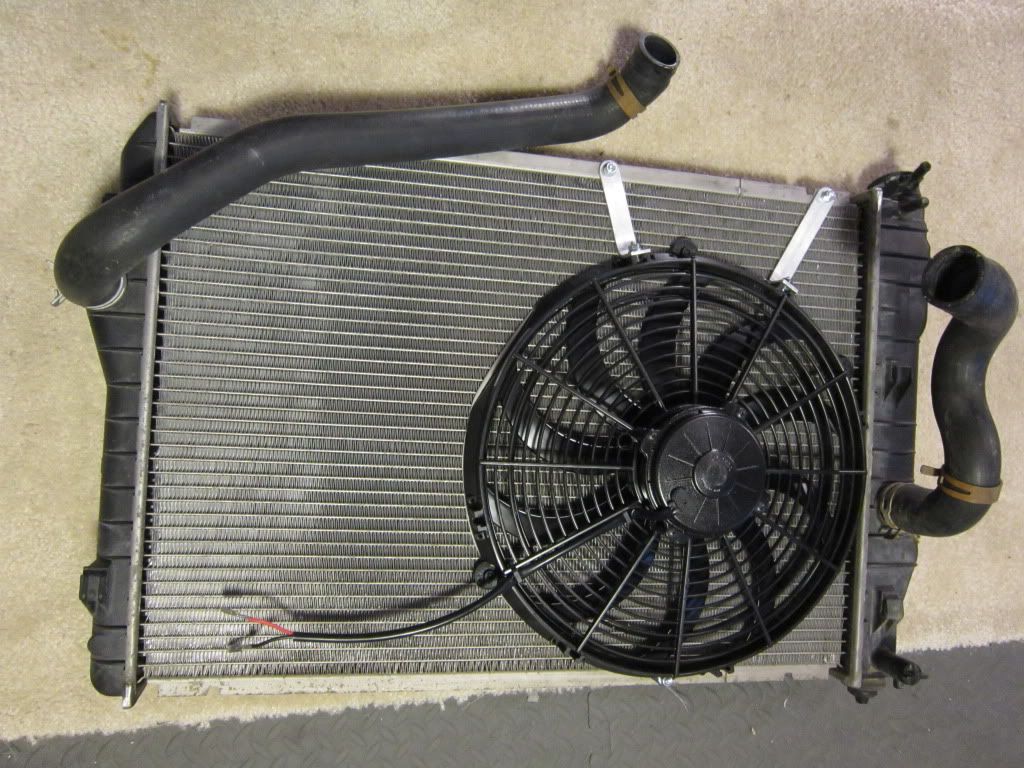
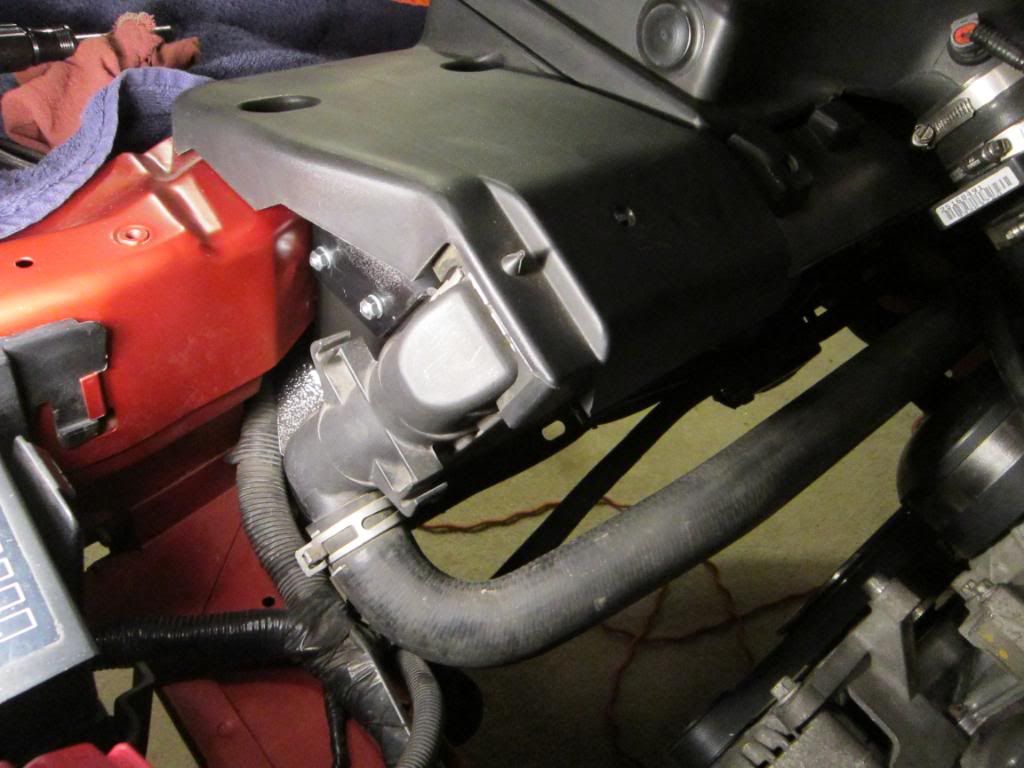
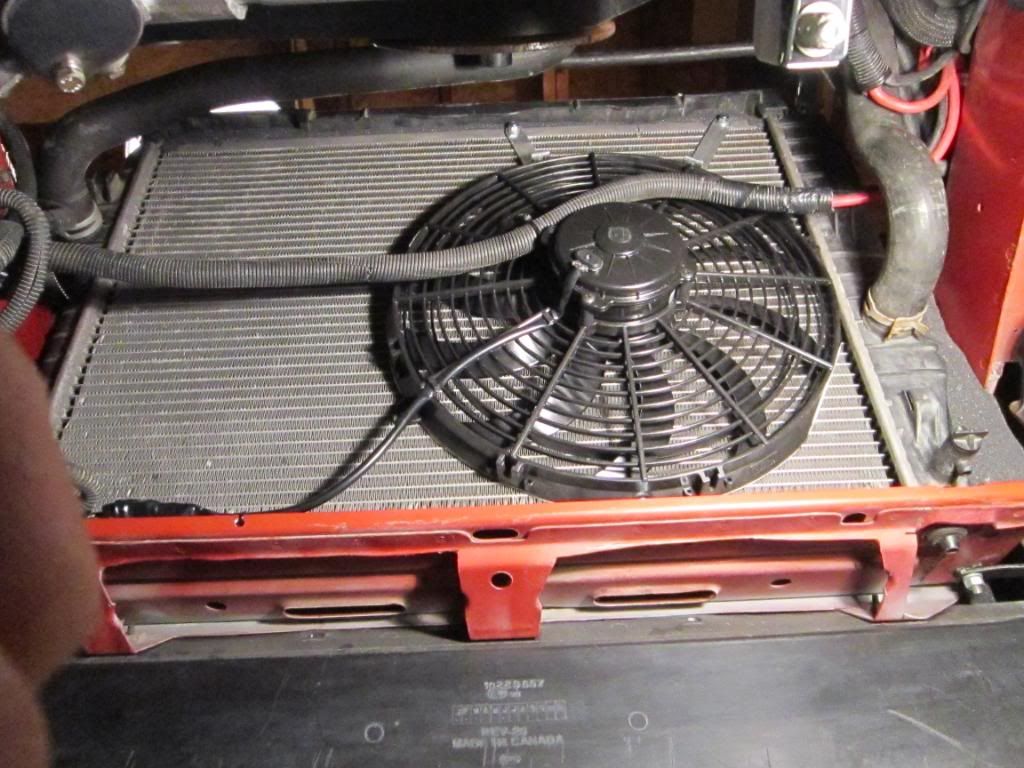
6.7 pounds saved in the fan And thats in the front of the car, not much more to save up there. lol. And moved 5 pounds (the fan) to were I needed it, passanger side. Gained more room for the crank bolt then the stock too. Mounted it nice with those 2 simple alum anti twist brackets, and put a little frost king foam weather striping around to seal and to keep it tight but grip on softly to the rad.
Not sure if I posted the other weights here, form the
light weight" fan thread.
Stock 2001 dual fans in the shroud 11.7-11.8ish
Removing one of the fans blades and motor (4.2 4.1ish) brings them to 7.4.
Stock radiator is about 9.5
New setup is 14.5 #'s
(with hoses)6.7 pounds saved in the fan
And thats in the front of the car, not much more to save up there. lol. And moved 5 pounds (the fan) to were I needed it, passanger side. Gained more room for the crank bolt then the stock too. Mounted it nice with those 2 simple alum anti twist brackets, and put a little frost king foam weather striping around to seal and to keep it tight but grip on softly to the rad.Not sure if I posted the other weights here, form the
light weight" fan thread.
Stock 2001 dual fans in the shroud 11.7-11.8ish
Removing one of the fans blades and motor (4.2 4.1ish) brings them to 7.4.
Stock radiator is about 9.5
Last edited by studderin; 04-20-2012 at 12:34 PM.
04-25-2012, 11:54 PM
#716
thanks,
I got no AC. I'll find out about the fan, I might have to make a shroud if its not enough for cooling with vehicle no speed. That will help a lot, this was the most simple setup. I spaced the fan what SPAL said for best setup. And sealed it, so it pulling really well ONLY over were it it. A shroud sealed with a 1inch space pulling the full area will be a HUGE.
I really don't think my 2nd stock fan was even kicking on for the last few years. I don't really start the car and let it sit running for a long time. No parking brake so I just go, and drive low rpms till the motor gets to heat in it. That rip some gears
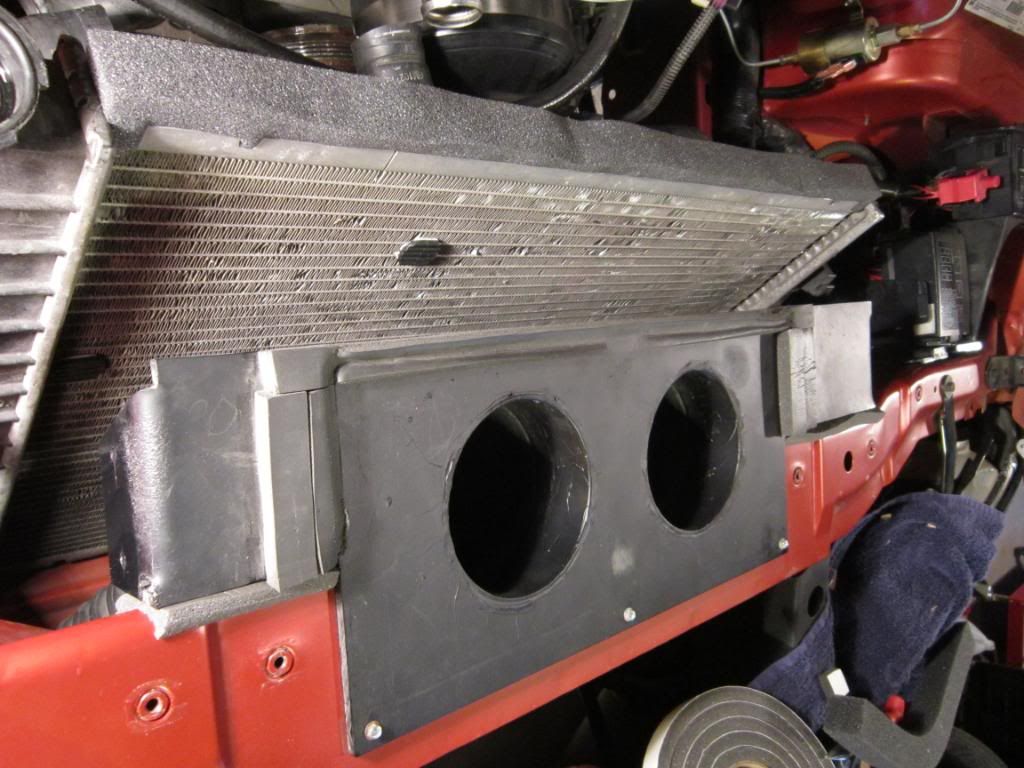
I made the at speed airflow to the radiator alot better, sealed it up, so now all the air coming off the air dam has to pass the radiator. Without the AC, you have the big opening on the side over were the condenser was. So air can easily go around the rad,
thats a big problem on alot of swap cars Ive worked on, you don't always need some $500 custom thick radiator for a 400-500whp LS1. Cars with little to no front grill, RX7, mazdas, just a little airdam to make some air pressure, and direct it to pass thu the radiator can remove some heat.
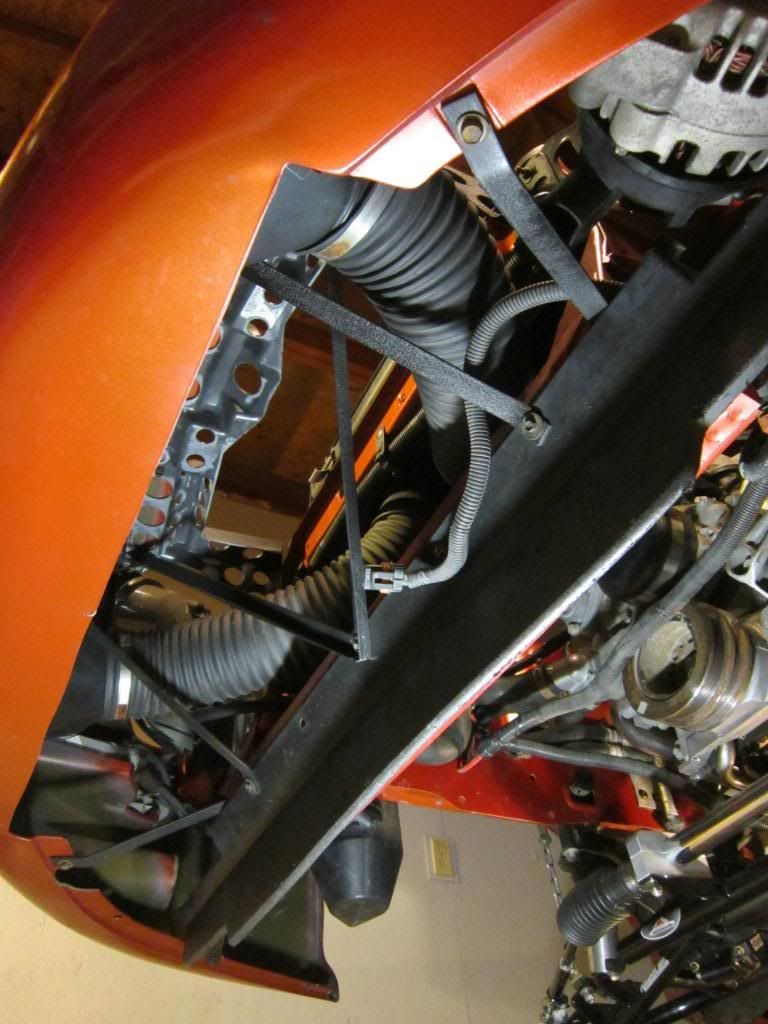
I dont really need more airflow for cooling, but this to the get better aero. I want to lower the car, but haven't been able to keep the traction with the car low. Auto guys I think can do it. I would like to make a belly ban off the bottem of nose, and stop air form getting into the engine bay, so this will help with that too. Not letting it in that easy with open spaces.
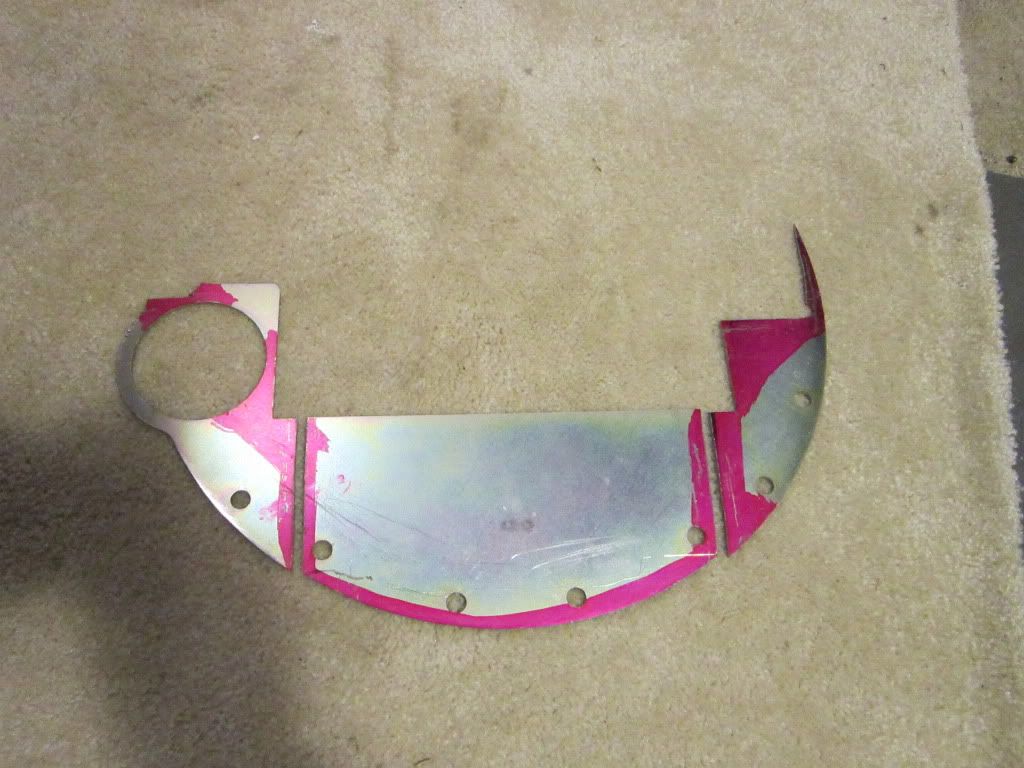
No pics fitting these, quick one before paint
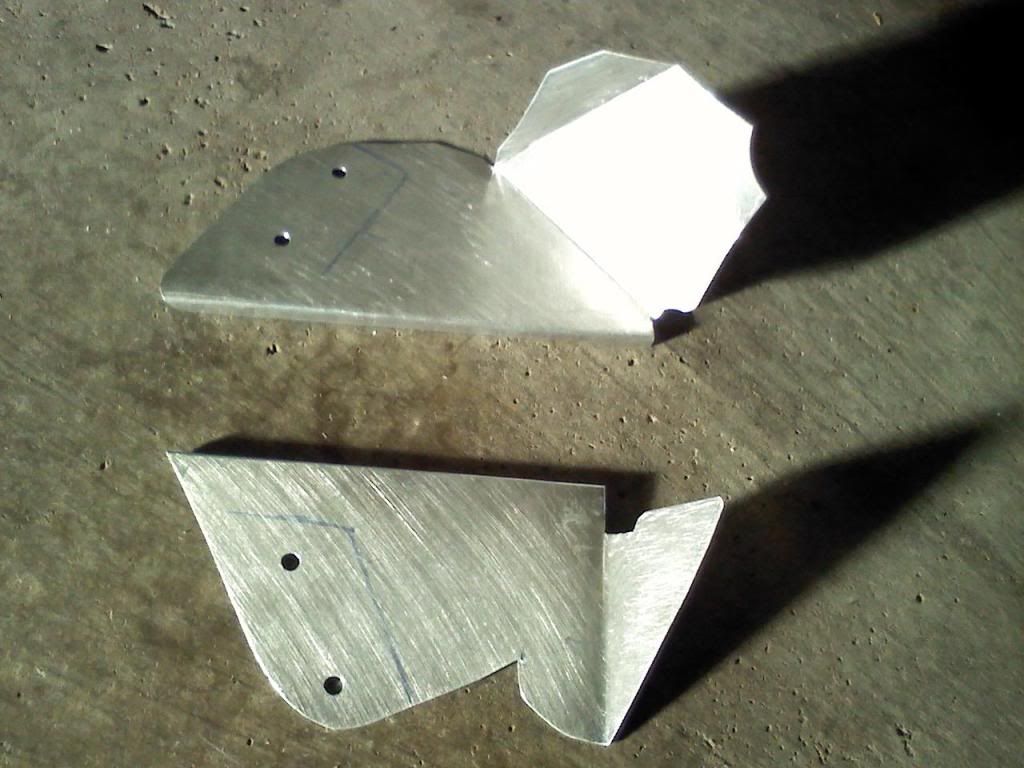
There super thin .019 alum. One coat of hammer black wasn't full, but Im fine with it. Put a 1/4 x 1/4 lip (needed for strength) and touches the rad, put some frost king D gaskets on it to seal, keep it for moving and damaging anything.
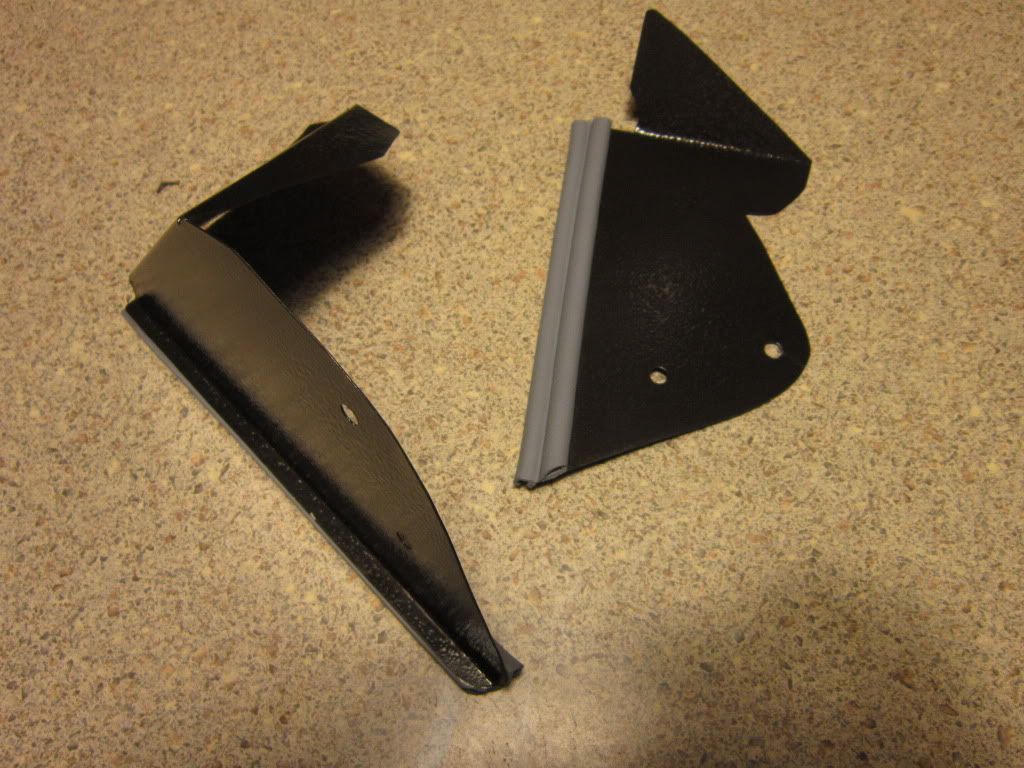
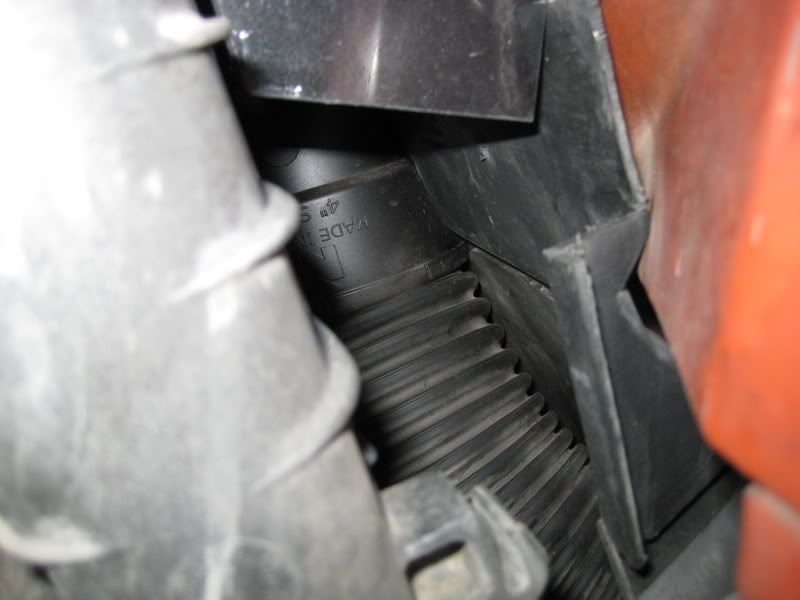
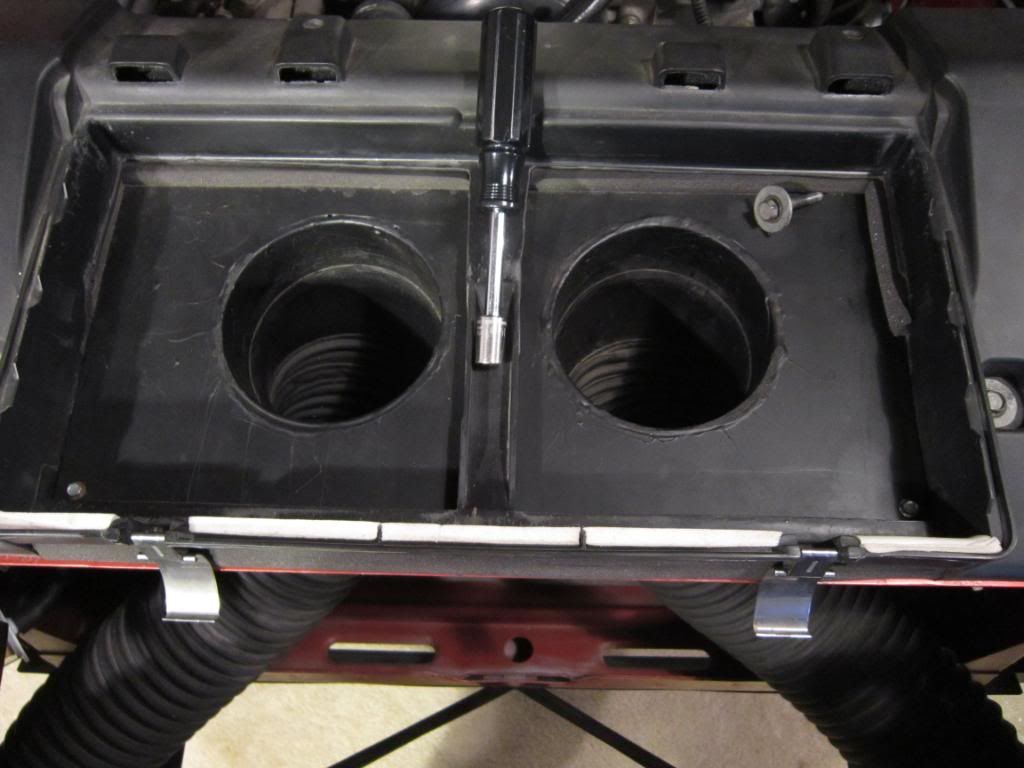
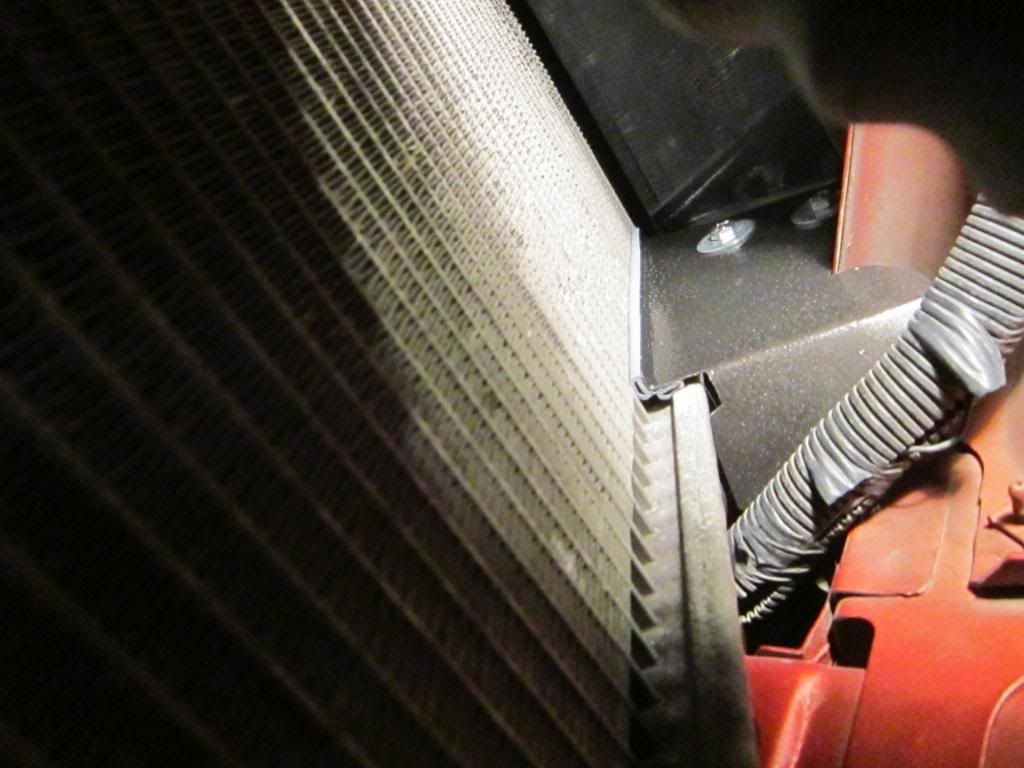
sealed the gap above the rad, if you havn't looked you can almost get your finger in there. Thats the old seal I've been running, the ait box/lid is 100% sealed to the SUX2BU ducts. You need to make somthing like this if you wnat to go fast. Better gain then a fast setup. When I made the lower pan a few years ago, I new I might need to build off it. So glad I put the side ears on it, spaced them perfect with the rad. core too.
battery cables, catch can, and wire harness fit tight.
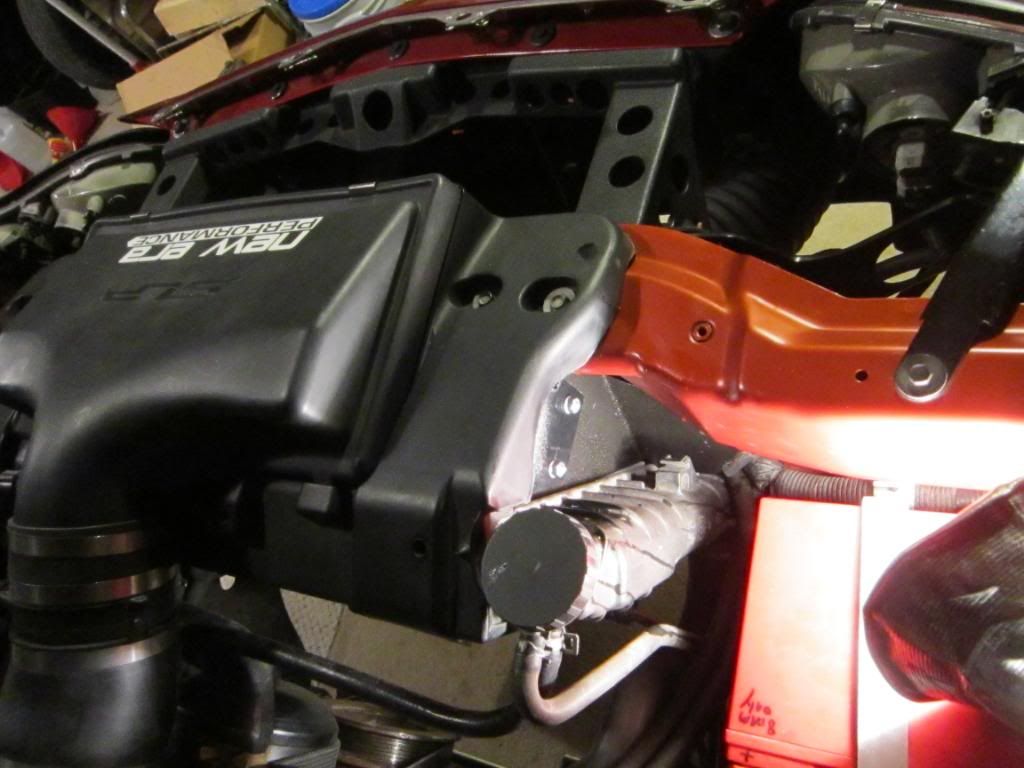
Don't have a good weatherpac end for this fan yet. Not sure if I have the polarity right. And not gona cut the end off the stock engine harness fan plug. I'm gona sell it to offest the coats for the one I bought a took extra wires out of (19pounds so far) Looking at all the spare wires, Lot of them you can't see, my hands over them. Ther there a LOT of them, on that side (ABS, cruise, air pump) I want to get my lightweight wiring harness in the car, I want to get it running to test things. Will get that done soon.
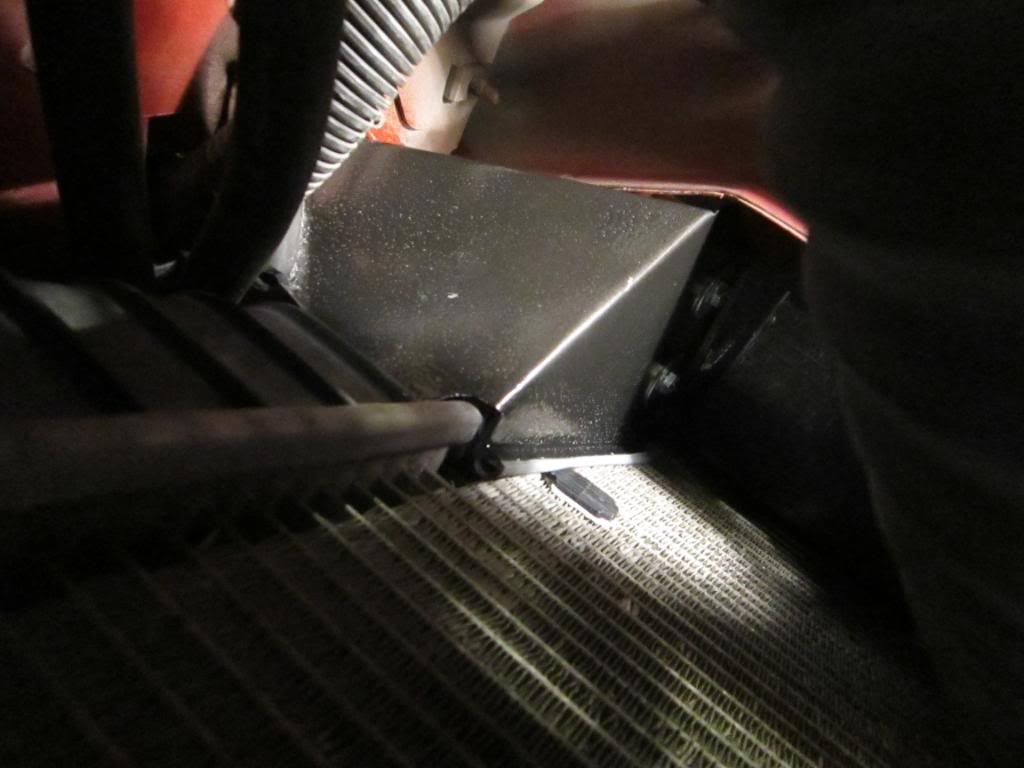
Also sealed up the gaps on the side of the core.
I got no AC
. I'll find out about the fan, I might have to make a shroud if its not enough for cooling with vehicle no speed. That will help a lot, this was the most simple setup. I spaced the fan what SPAL said for best setup. And sealed it, so it pulling really well ONLY over were it it. A shroud sealed with a 1inch space pulling the full area will be a HUGE.I really don't think my 2nd stock fan was even kicking on for the last few years. I don't really start the car and let it sit running for a long time. No parking brake so I just go, and drive low rpms till the motor gets to heat in it. That rip some gears
I made the at speed airflow to the radiator alot better, sealed it up, so now all the air coming off the air dam has to pass the radiator. Without the AC, you have the big opening on the side over were the condenser was. So air can easily go around the rad,
thats a big problem on alot of swap cars Ive worked on, you don't always need some $500 custom thick radiator for a 400-500whp LS1. Cars with little to no front grill, RX7, mazdas, just a little airdam to make some air pressure, and direct it to pass thu the radiator can remove some heat.
I dont really need more airflow for cooling, but this to the get better aero. I want to lower the car, but haven't been able to keep the traction with the car low. Auto guys I think can do it. I would like to make a belly ban off the bottem of nose, and stop air form getting into the engine bay, so this will help with that too. Not letting it in that easy with open spaces.
No pics fitting these, quick one before paint
There super thin .019 alum. One coat of hammer black wasn't full, but Im fine with it. Put a 1/4 x 1/4 lip (needed for strength) and touches the rad, put some frost king D gaskets on it to seal, keep it for moving and damaging anything.
sealed the gap above the rad, if you havn't looked you can almost get your finger in there. Thats the old seal I've been running, the ait box/lid is 100% sealed to the SUX2BU ducts. You need to make somthing like this if you wnat to go fast. Better gain then a fast setup. When I made the lower pan a few years ago, I new I might need to build off it. So glad I put the side ears on it, spaced them perfect with the rad. core too.
battery cables, catch can, and wire harness fit tight.
Don't have a good weatherpac end for this fan yet. Not sure if I have the polarity right. And not gona cut the end off the stock engine harness fan plug. I'm gona sell it to offest the coats for the one I bought a took extra wires out of (19pounds so far) Looking at all the spare wires, Lot of them you can't see, my hands over them. Ther there a LOT of them, on that side (ABS, cruise, air pump) I want to get my lightweight wiring harness in the car, I want to get it running to test things. Will get that done soon.
Also sealed up the gaps on the side of the core.
Last edited by studderin; 04-26-2012 at 12:02 AM.
05-03-2012, 08:15 PM
#717
10 Second Club
iTrader: (8)
Join Date: Jan 2009
Location: Central, PA
Posts: 487
Likes: 0
Received 0 Likes
on
0 Posts

May I ask why the tabs for the shoulder straps are welded towards the back of the car on the cross brace and not forward? I need to do this and have been trying to figure which is right/better....thanks
05-04-2012, 06:09 PM
#720
Drove around it traffic for a few hours, it was really hot yesterday too. Dont' scan ECT but didn't over heat. I might get a scaner setup so I can check it better, Im gona need somthing when I start getting the de pined wiring harness in the car. Got about 18pounds out now should have more on stuff Im not sure about once I see more in the car. And I want to move some circlets around.
When the fans on, it pulls a ton of air, putting your hand under the nose you can fell it sucking up way in front of the air damn. Jacked the car up and with it running that corner is moving alot of air, but even outside the fan it fells like air is pulling thu the rad. You can fell hot air all on top outside the fan, and about 75% of it. I want to get one of thouse termo guns, but with it idleing for 5mins I can put my hand on the cool side of the rad (passanger). The other side I burned my arm touching the rad. Testing the wiring when I was getting it figured out. (relay was bad)
https://ls1tech.com/forums/pcm-diagn...m-harness.html
https://ls1tech.com/forums/drag-raci...m-harness.html
I shroud would be a big improvement for the size of the fan pulling air over all fins, then just over its size. I'll make one if I need it, but so far looks like sealing up the rad is fine. And I had a mad relay so only was using one stock fan for the past unknown years too. And its been fine colling
The trans kicks ***
Last edited by studderin; 05-19-2012 at 03:15 PM.