
Cam only, winter upgrades. Bitch in on a diet
 09-27-2010, 11:38 PM
#301
3560 
me and steveo got a lot done, after spending a while looking at stuff and not sure were to start cutting. got some pics while cutting so you can see whats going on, not just the trimmed, and painted all nice everyone has in the build threads
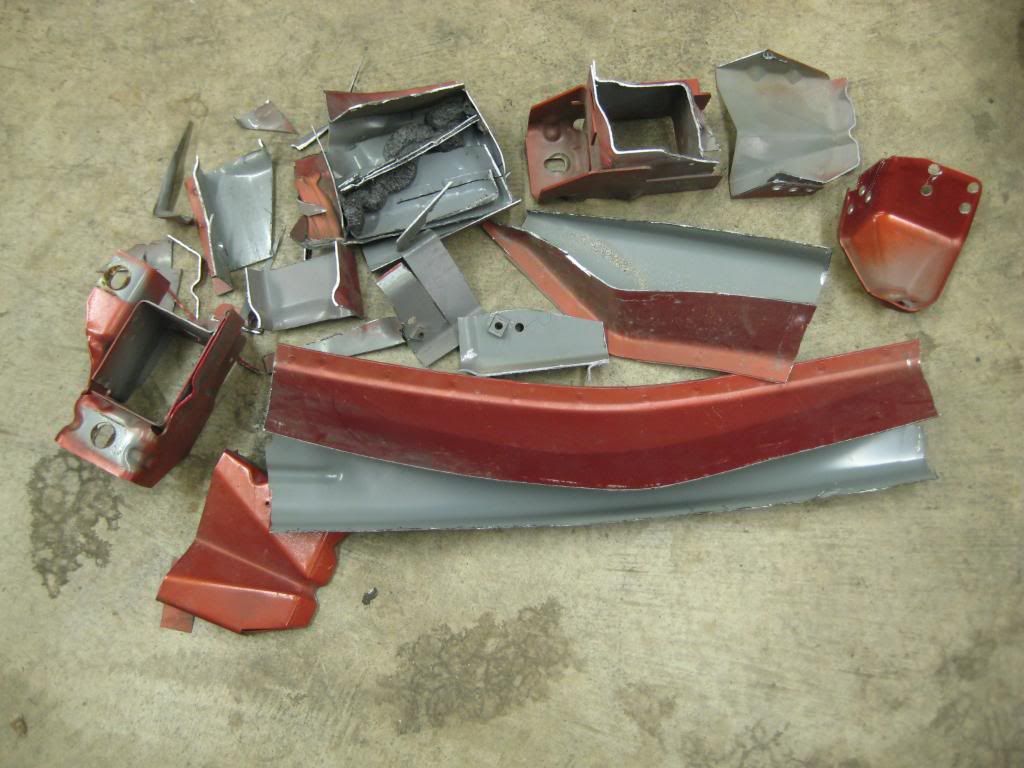
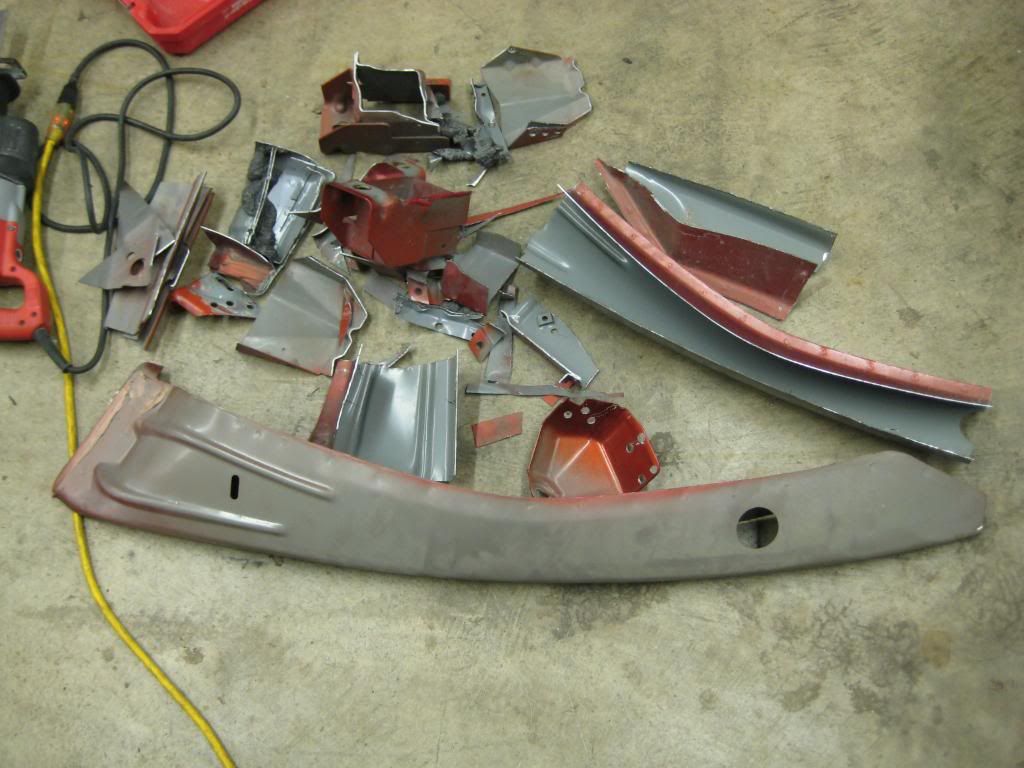
i need to get a scale over there tomarrow, the pile is still gona be bigger
me and steveo got a lot done, after spending a while looking at stuff and not sure were to start cutting.
got some pics while cutting so you can see whats going on, not just the trimmed, and painted all nice everyone has in the build threadsi need to get a scale over there tomarrow, the pile is still gona be bigger
 09-28-2010, 01:21 AM
#302
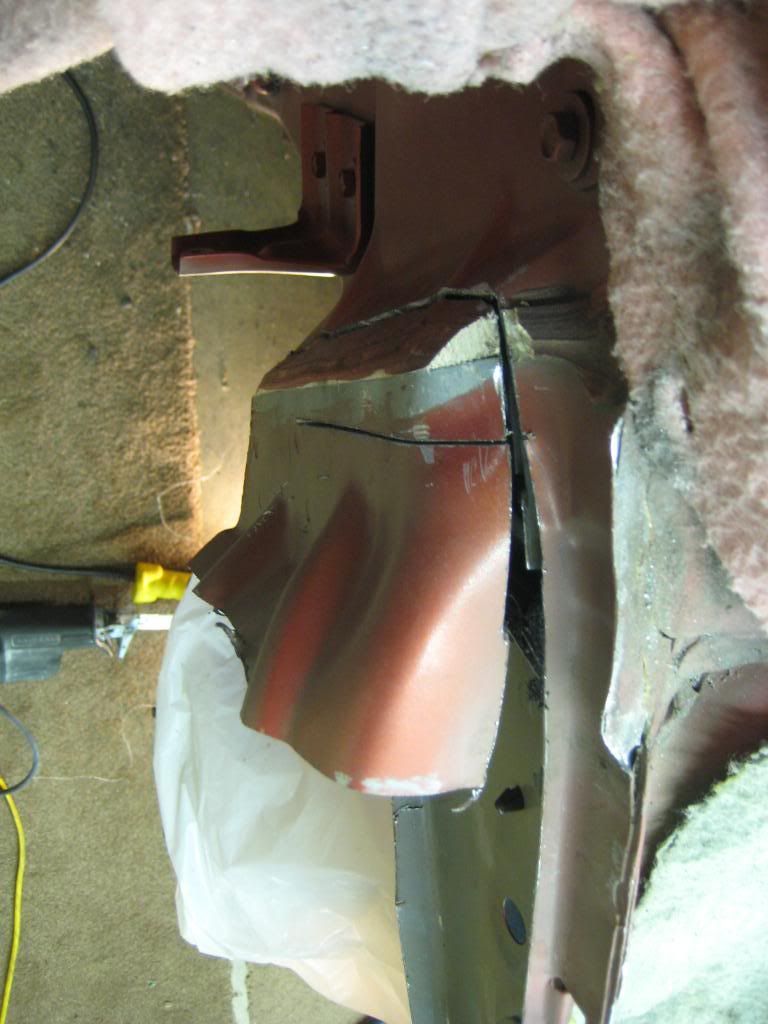
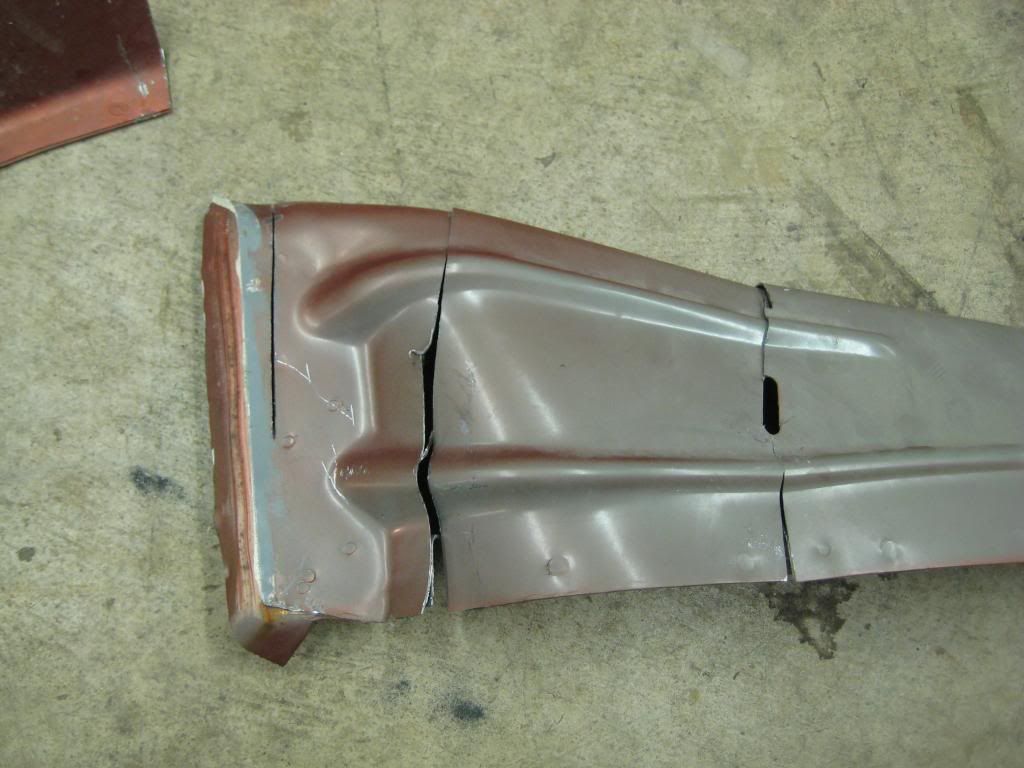
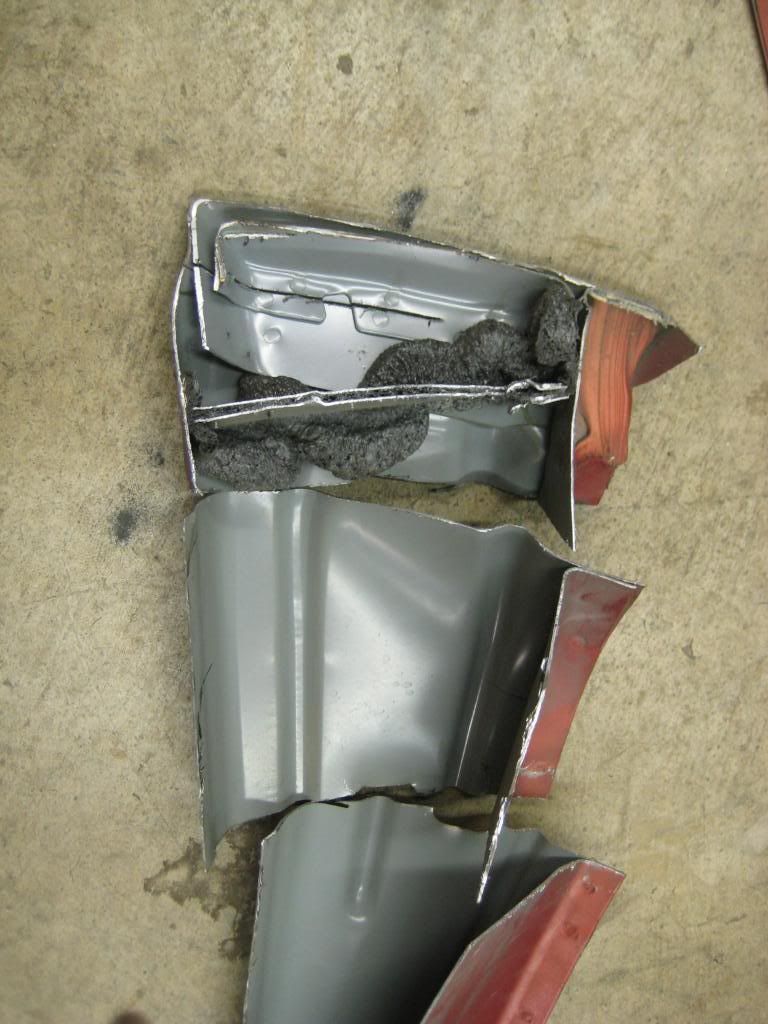
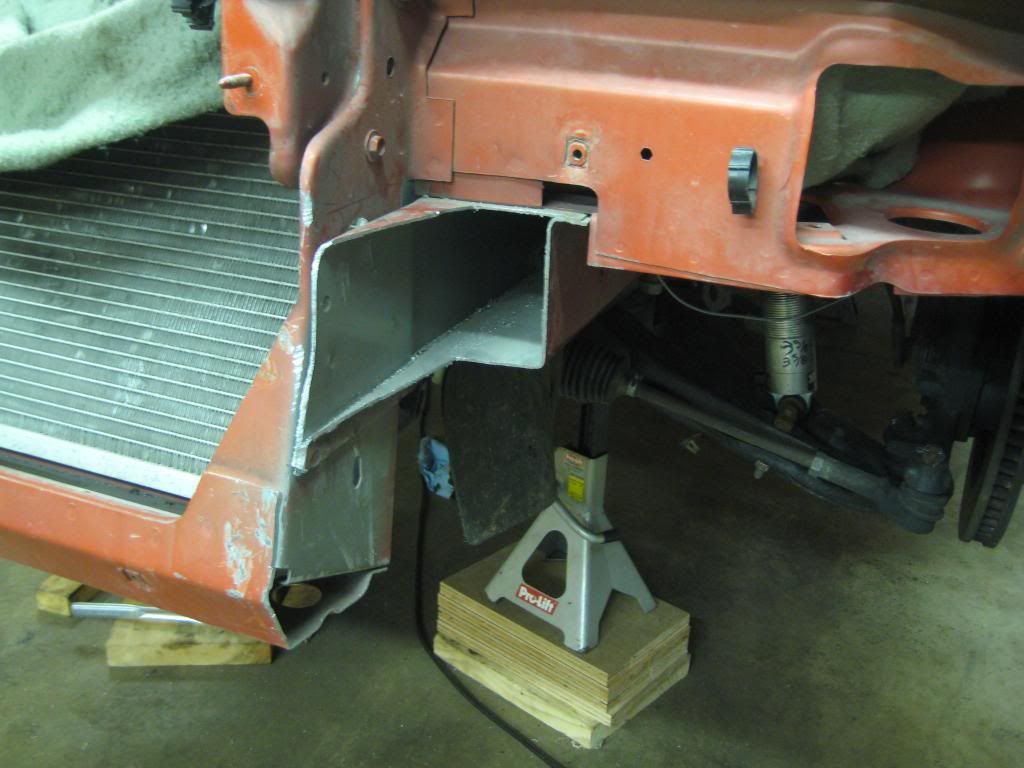
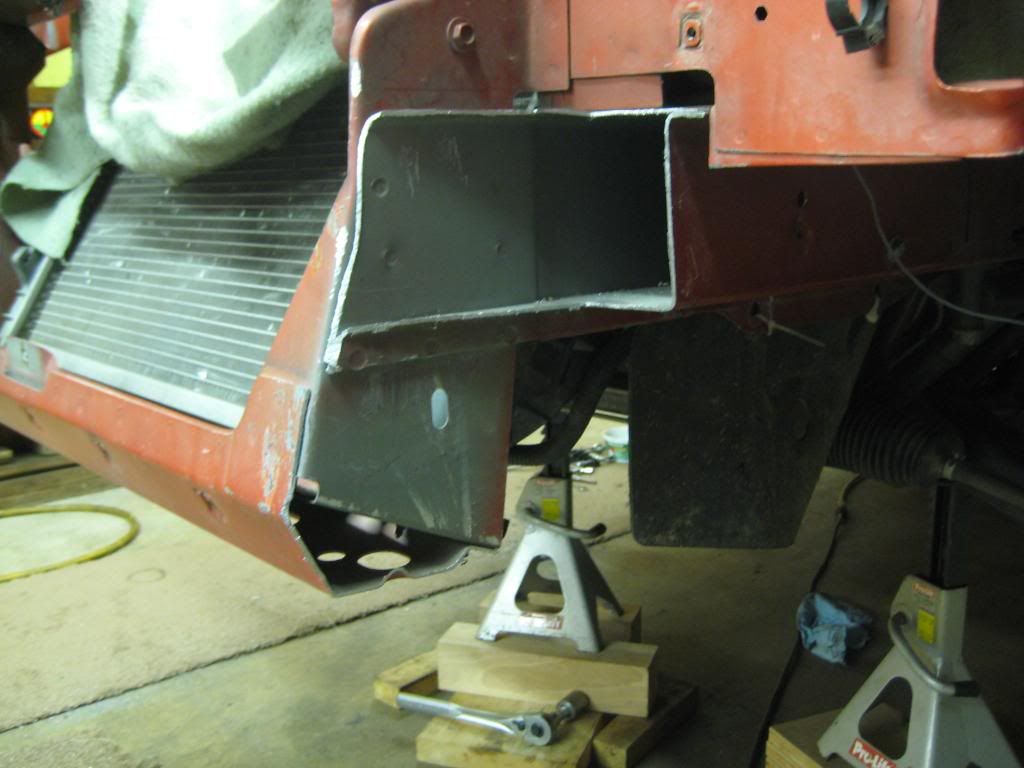
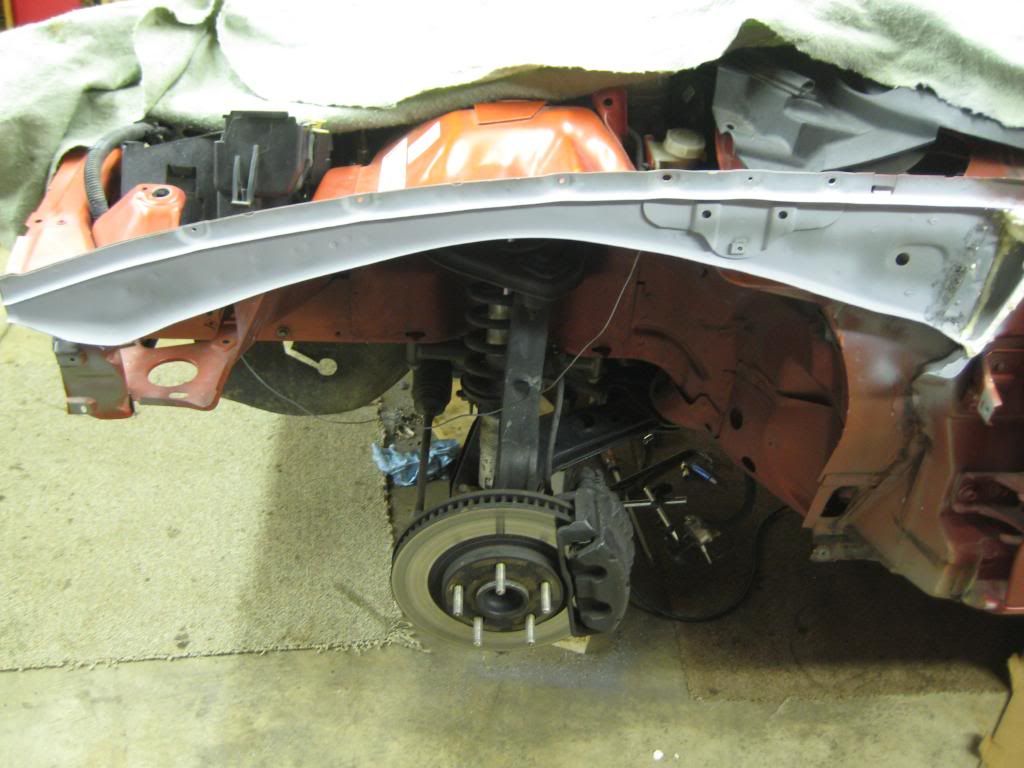
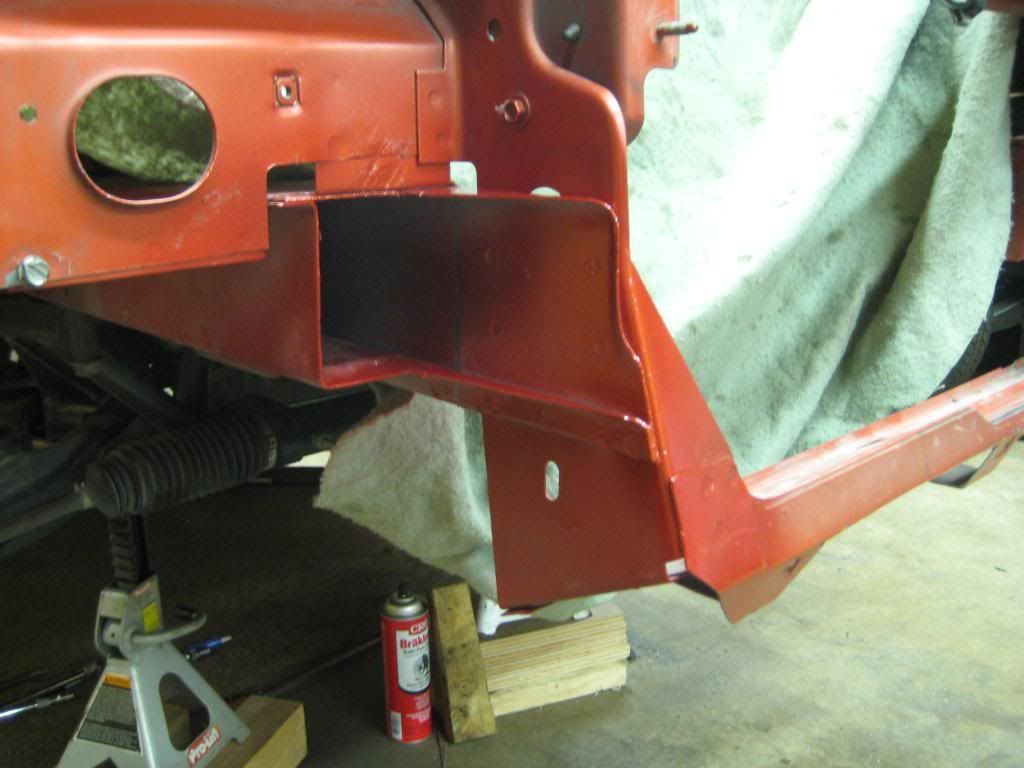
still have to clean the cuts up, this is all raw cuts. only used the cutoff wheel the top of the fender metal, and some of the corners. bottom was sawzall, same on the frame horns.
found a bunch of walnuts in there, haha
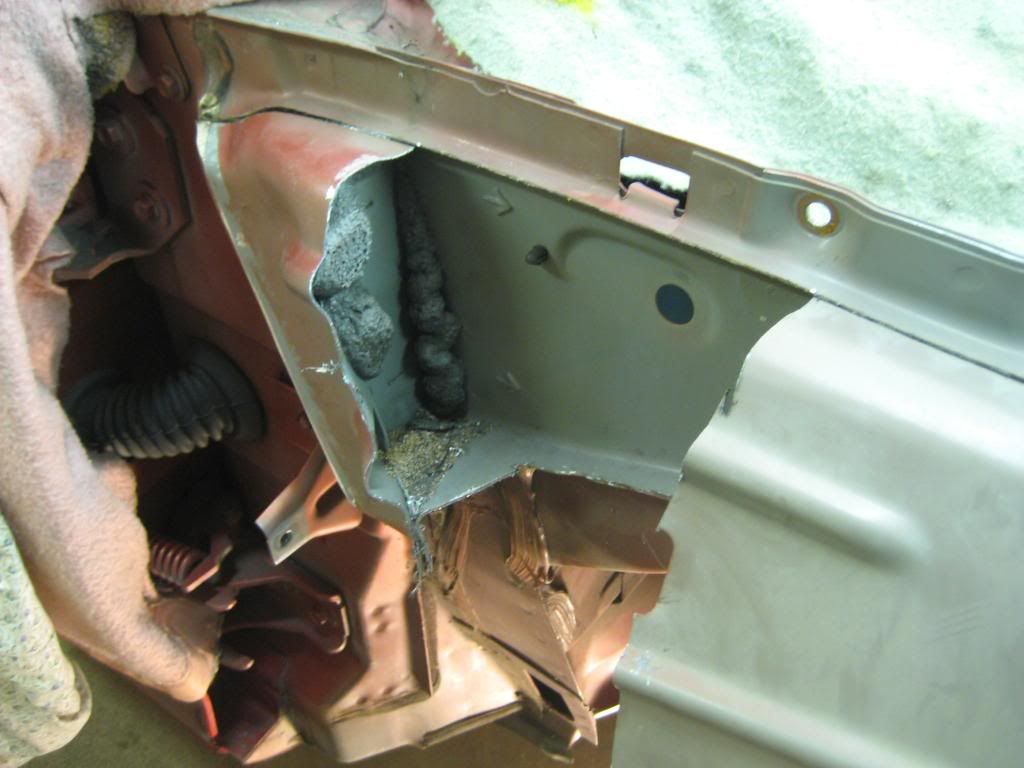
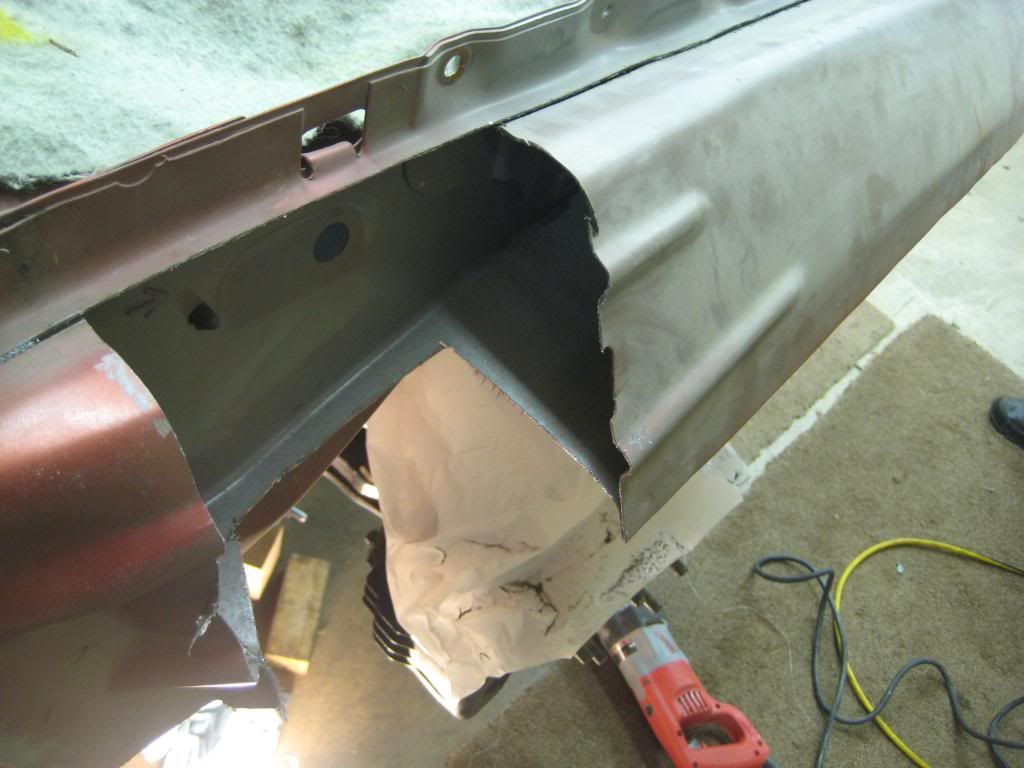
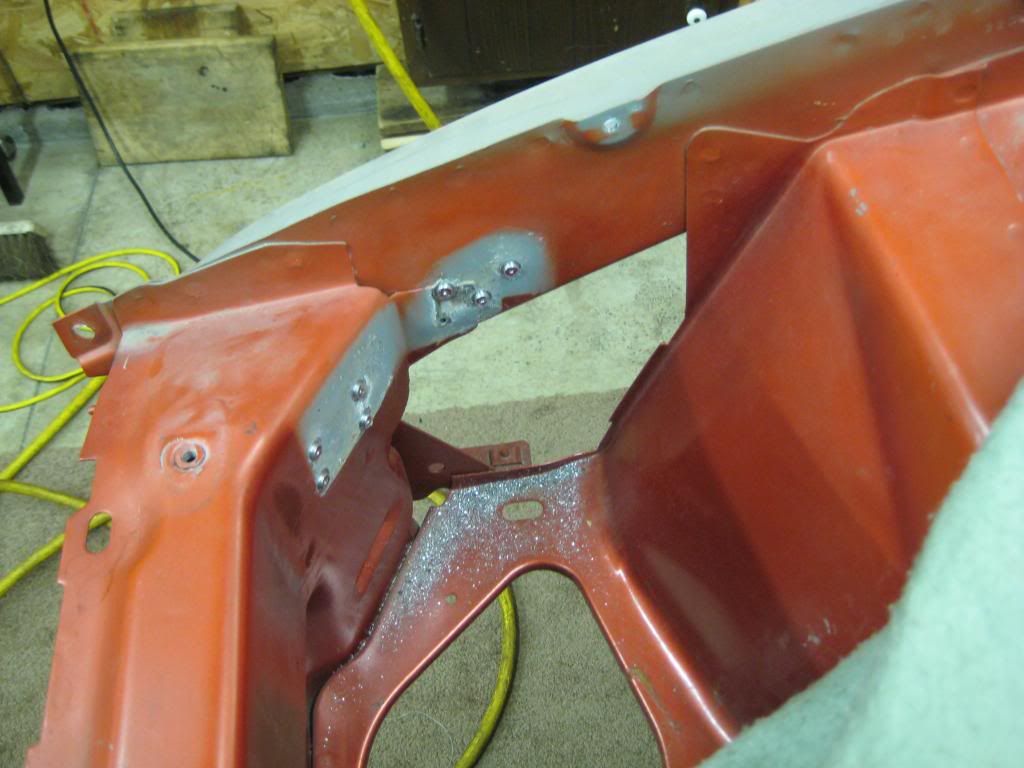
that back part has a lot of metal 3-4 layers, have to plunge a full 3inch cutoff wheel in there to get some deeper layers cut

would really want to cut the whole bottom of the rad, support out, and weld some lighter 4130 tube. but don't have a bender or a tig, to do it. and want to get some passes in this weekend, so this is faster.
hopfully tomarrow after work, i can get some more hours in. get that other fender cut out. i would like to get some more out of the rad. brace, but what to keep the airdam still. so it might be be drilling some holes. and this is the time to put in the wiring harness, i have the pcm one done, but not the front end, or body one. that got old quick, de pinning wires. i don't think i linked that project here yet.
found a bunch of walnuts in there, haha
that back part has a lot of metal 3-4 layers, have to plunge a full 3inch cutoff wheel in there to get some deeper layers cut
would really want to cut the whole bottom of the rad, support out, and weld some lighter 4130 tube. but don't have a bender or a tig, to do it. and want to get some passes in this weekend, so this is faster.
hopfully tomarrow after work, i can get some more hours in. get that other fender cut out. i would like to get some more out of the rad. brace, but what to keep the airdam still. so it might be be drilling some holes. and this is the time to put in the wiring harness, i have the pcm one done, but not the front end, or body one. that got old quick, de pinning wires. i don't think i linked that project here yet.
Last edited by studderin; 09-28-2010 at 01:27 AM.
09-28-2010, 02:09 AM
#303
11 Second Club
iTrader: (10)
Join Date: Feb 2006
Location: Sterling Heights, MI
Posts: 2,215
Likes: 0
Received 2 Likes
on
2 Posts

lemme know if you take that air dam plastic out. Im like you with the sux2bu intake blocking the holes but everything out behind the bumper and ive often wondered about taking it off. My new suspension/stance put the bumper between 5-6" off of the ground and ive dragged the plastic over every bump through my neighborhood I too pondered taking it off, but i have no idea the effects, and i no longer have any of the HVAC stuff so i cant afford to be the one to test it.
also what are you planning on doing for your collant res. Mine has a hole in it and idk what to do to replace it. Currently its got some duct tapce covering the small hole lol
also what are you planning on doing for your collant res. Mine has a hole in it and idk what to do to replace it. Currently its got some duct tapce covering the small hole lol
 09-28-2010, 08:33 PM
#307
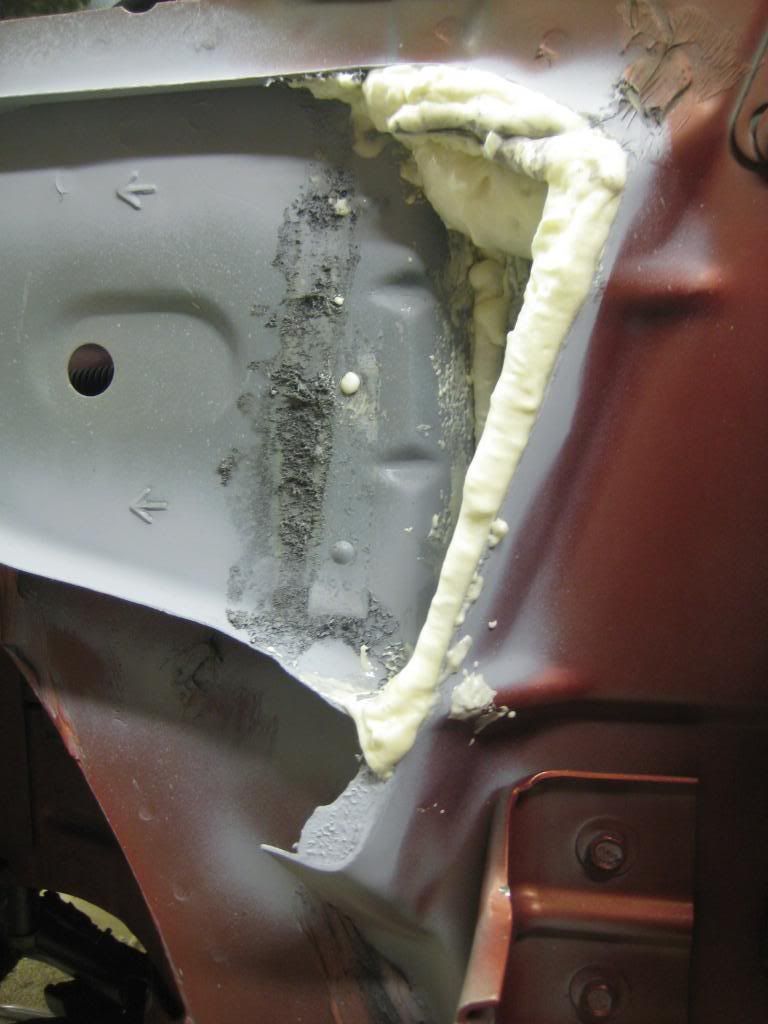
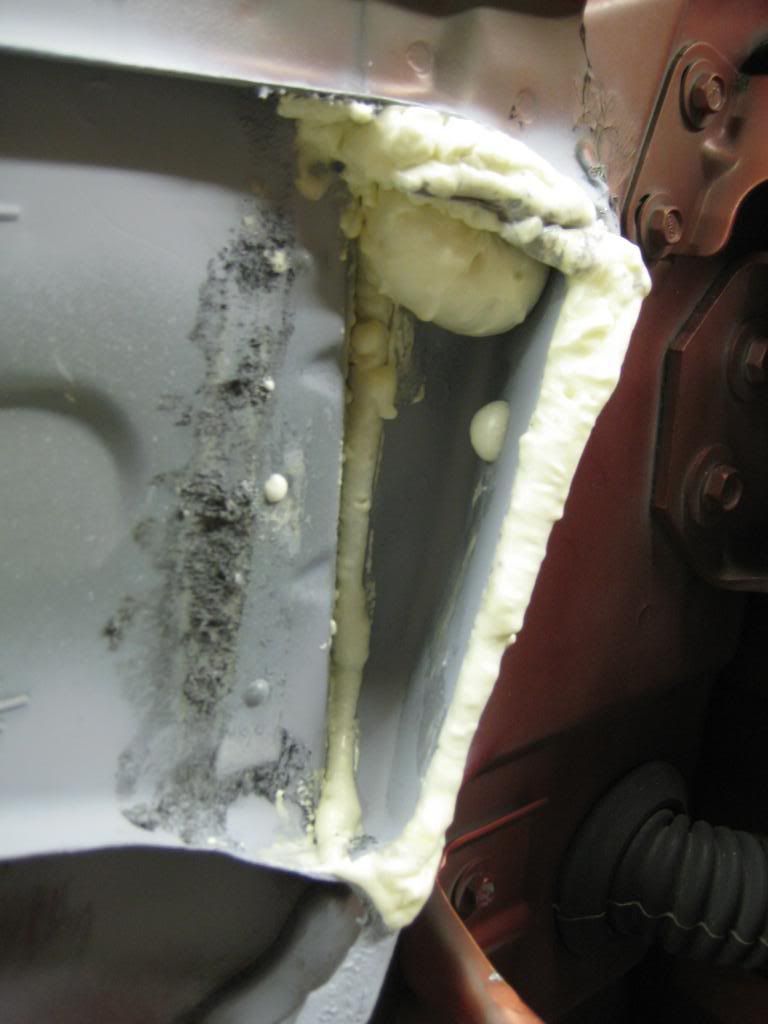
i'll weight the stuff and add it to the 1st page. looks like i cut more off the fenders then most guys. bought some great stuff foam to seal off the back near the firewall, i have to look into it more but i think that might be inside the dash, hahah i'll get a pic of that too, i thought i did.
coolent bottle, i have to make a leag battery holder. so was gona ditch the stock, but its really very very light. i dont think there any weight saving going to the smaller round summit/jegs one. if anything i wnat to use a orange moster can with the alum top, just for somthing diffrent. i think nick can weld a 3/8 nipple in the cap. it would be really hard to weld. and so it gose in both sides. then just run the tube down 1/4 off the bottem of the can. not sure hot to mount it, its really thin.
tonight got a spare set of wheel wells to cut, and see how that works. and a airdam to cut down, and cowl trim. thanks agian to jasonshort for hooking me up with this stuff. oh and a semi cut under hood harness, so i have the fan wires i can pin into my other spare harness that had them cut out. we talked to about running one thin aftermarket fan, and wiring it with the stock wires. ls1 fans are pretty damn heavy.
09-28-2010, 08:56 PM
#308
09-29-2010, 10:16 AM
#311


Mike
09-30-2010, 12:07 AM
#313
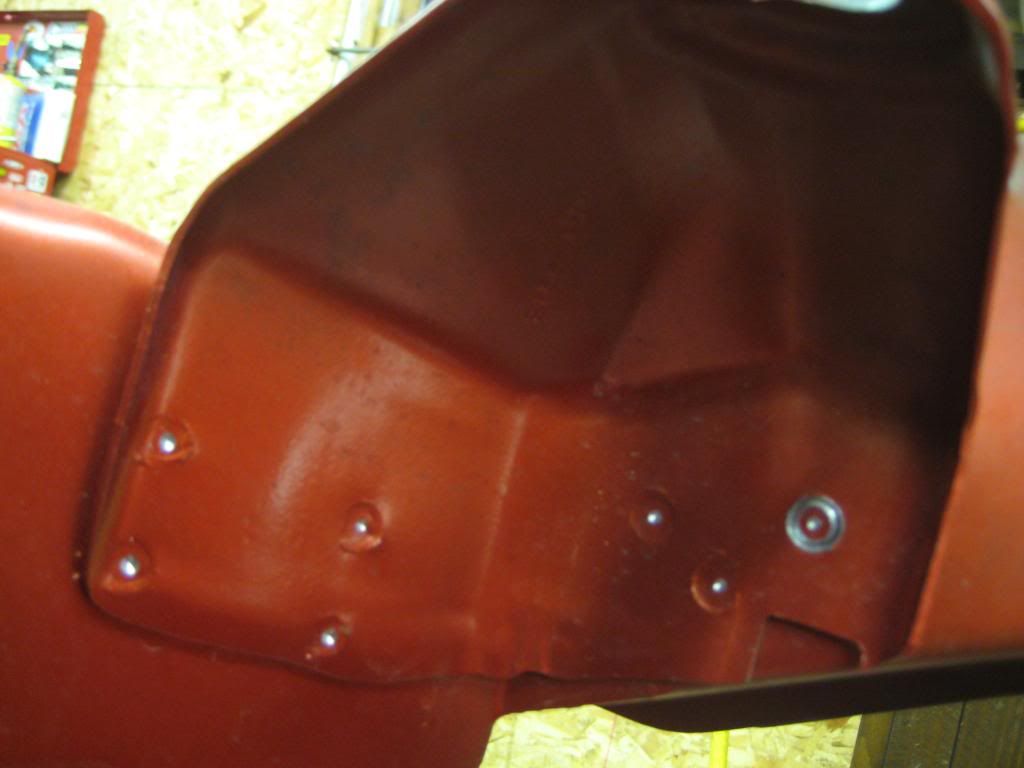
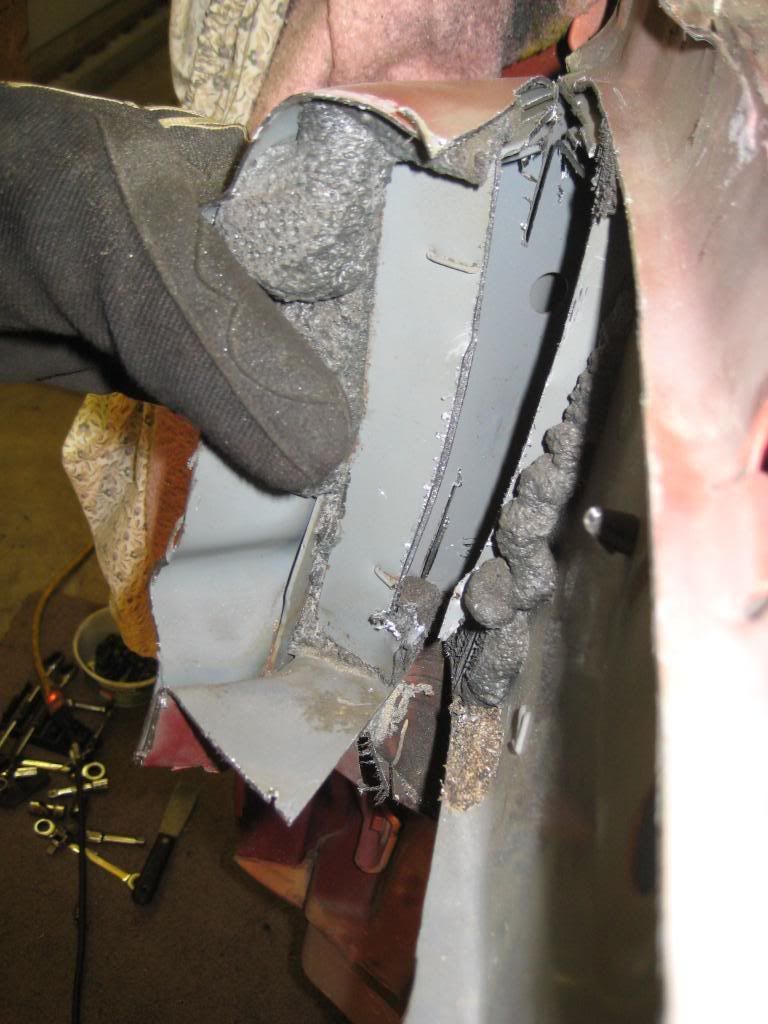
i forgot the camra but the fender metal cutting is all done. that vertical mid metal is really 2 little pieces about 1x1 angle sheet metal that has a pop rivit to shell, and them just foam holds them in when they put the other shell on and spot weld the outside out it. so you dont really have to cut out the deep vertial metal. ther driver side i cut the whole piece off as one to get a better pic of whats going on. so just cut the outside of it, maybe that one spot the innder layer is only 1/2 deep on top over the back corner. and just pulled the whole skin off, tearing the foam and that vertial inner metal stays on the body. then you just drill the head off the middle rivit and pull it off, and scape the foam off under them. there is what looke like 2 more rivits above and below, so it looks like 3 inline. but just the middle holds them in.
went over the edges with a diegringer to make them all smooth, better then the stock edges, and painted them with some light grey primer that matchs the stock look. you dont see any of it not not worried with geting color on them, even thu the door jam it dosnt look like you can see. the front frame horns i'm gona paint som/ no clear, to match stock.
and used a can of this to seal up the back of the fender metal, worked great.

-got the ds new yoke on, gona have it checked for ballance tomarrow
-clutch is in
-waiting to hear back on a local that has rebuilt some t56s, if he has time to check out mine while its out. somome told me they can get out of spec and loosen up, and you can just re shim the bearing specs and helps out a ton.
- need to get a angle drill to get the spot welds for the driver hood bumper bracket, the fuse box braket is in the way.
you can't roll the front fender, or cut the lip off. i think you mean the back, i already did that. i've been working on the fronts.
keeping the door bars, maybe if i didnt drive it in traiffic alot.
i'll get pics of the batter tray for sure.
that vertical mid metal is really 2 little pieces about 1x1 angle sheet metal that has a pop rivit to shell, and them just foam holds them in when they put the other shell on and spot weld the outside out it. so you dont really have to cut out the deep vertial metal. ther driver side i cut the whole piece off as one to get a better pic of whats going on. so just cut the outside of it, maybe that one spot the innder layer is only 1/2 deep on top over the back corner. and just pulled the whole skin off, tearing the foam and that vertial inner metal stays on the body. then you just drill the head off the middle rivit and pull it off, and scape the foam off under them. there is what looke like 2 more rivits above and below, so it looks like 3 inline. but just the middle holds them in.went over the edges with a diegringer to make them all smooth, better then the stock edges, and painted them with some light grey primer that matchs the stock look. you dont see any of it not not worried with geting color on them, even thu the door jam it dosnt look like you can see. the front frame horns i'm gona paint som/ no clear, to match stock.
and used a can of this to seal up the back of the fender metal, worked great.
-got the ds new yoke on, gona have it checked for ballance tomarrow
-clutch is in
-waiting to hear back on a local that has rebuilt some t56s, if he has time to check out mine while its out. somome told me they can get out of spec and loosen up, and you can just re shim the bearing specs and helps out a ton.
- need to get a angle drill to get the spot welds for the driver hood bumper bracket, the fuse box braket is in the way.
Are you cutting the area of the inner fender lip, the area where most people roll it? I cut mine with an air saw, so if you cut it just make sure to mark where the spot welds are. I tried to leave some of the spot welds intact (cut through the middle of them) to help hold the inner/outer fenders together. This has been done that way on mine for 10 years and it's still holding great. Plus, I think I have more tire clearance than a fender that's been rolled.
Mike
Mike
keeping the door bars, maybe if i didnt drive it in traiffic alot.
i'll get pics of the batter tray for sure.

 10-01-2010, 08:14 AM
#315
TECH Senior Member
iTrader: (10)
Join Date: May 2005
Location: Bossier city,LA barksdale AFB
Posts: 5,355
Likes: 0
Received 2 Likes
on
2 Posts
What u use to cut it.? I wanna do that so bad but im afraid i might lean on it to finder to hard while working on it and spider cracking the paint. Im thinking about just getting a hole saw so i still have some support. Wont be as much weight but will be some put.
10-01-2010, 07:33 PM
#318
TECH Regular
iTrader: (1)

Join Date: Sep 2004
Location: Natick mass 508
Posts: 406
Likes: 0
Received 0 Likes
on
0 Posts
Looks good man i was halfway through the last page and was gunna suggest the spray foam then saw u already did it glad im not the only one that used that stuff i sanded the foam smooth after it dryed and hit it with sum paint
10-03-2010, 01:40 AM
#319
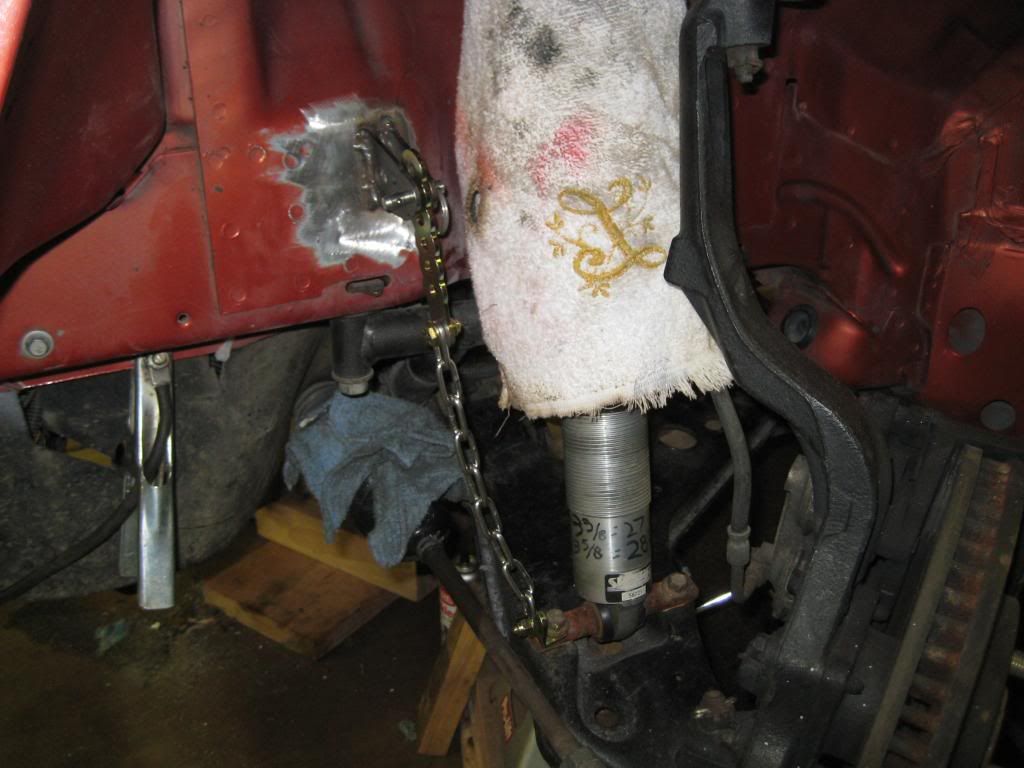
put a few more hours in on it tonight. got the travel limiters on, the car dosn't really need them right now, but will when i want to make some relly power. glad there on while i was cutting, grinding,welding, painting anyway. and with the fenders off had some more room, but still a bitch to weld in the wheel wells with all the suspention there. i'm deff gona have to take the rear end out, or at least drop it down under the car to weld in the arb tabs, i'm only good with bench top welding. for some reason i think the slave needs a shim now the face of the t.o.b is always been 2.90-2.910 to my trans face. but the bellhousing to fingers is 2.40-2.375 more then normal. i have no idea why all the other ram powergrip, and pg hd's in many cars, and mine have always been a .670-.0750 diffrence as they say you need. this flywheel was resurfaced but only had about .008 taken off, .835ish new, at .827 current, checked it on the surface plate in the inspection room at the shop. the new disk is .320 if i recall, like normal. i can't find were the .200 diffrence is 
i had a shim to borrow too during the week, but returned it fri for some reason. so have to wait to get it back from the shop, to get the trans in, to get the ta in, to get the new lca in. get the trz stuff on sqare that up with the new lca. then i can weld the end link tabs in.
this spot looked good, stock wheels clear just had to open the hole up in the lower braket and fits on one of the shock bolts. oh and welding it there watch out for the harness inside running right behind this spot. should be ok, just some of the plastic tray i htink.. noticed some smoking when done. but didnt find anything melting.
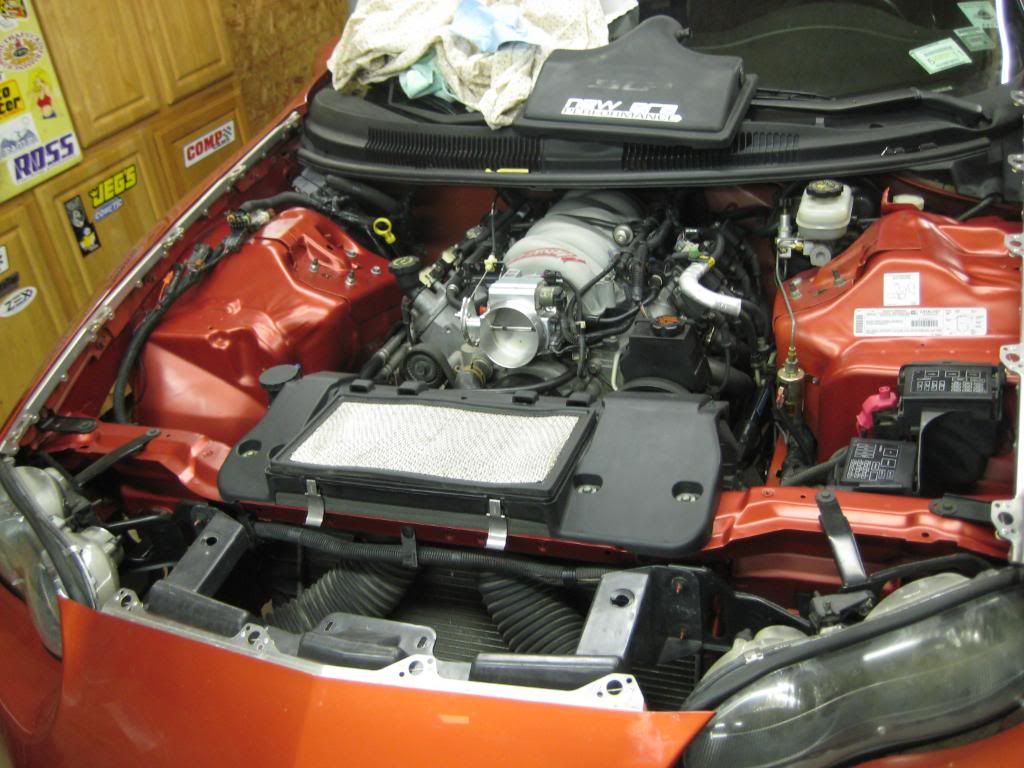
painted, /chevy orange ran out of the better paint, vvv
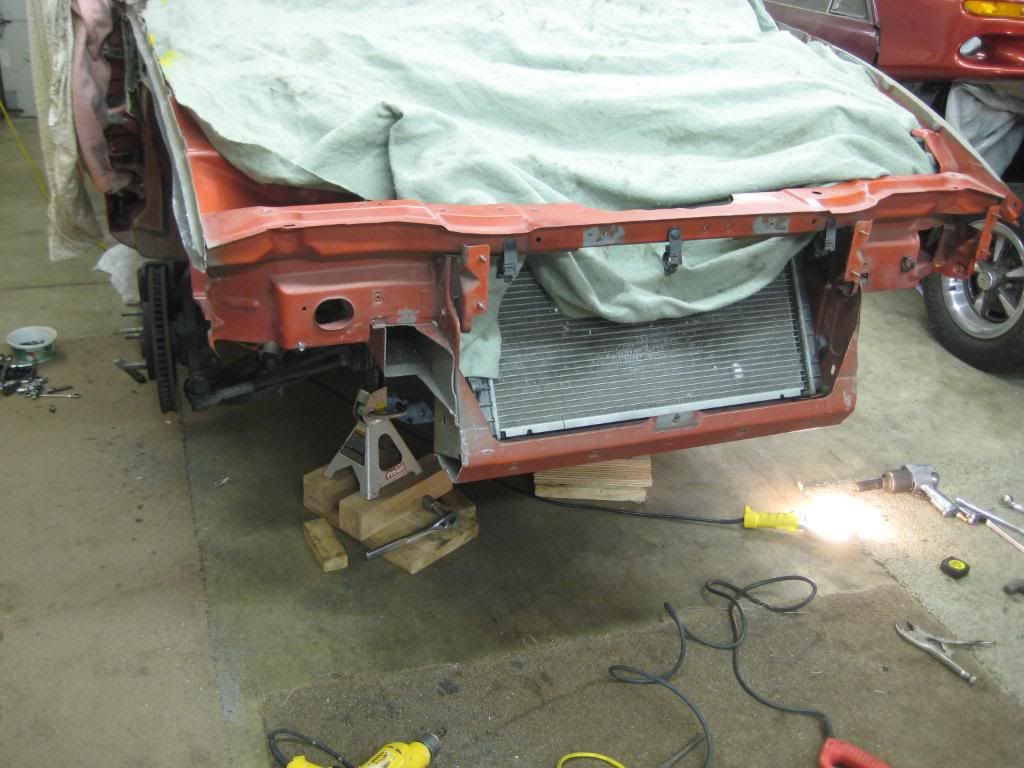
went to paint a few spots, mostly were i drilled off the hood brakets. but it looks so nice and new, and i have a full spray paint can, som matched. ended up painting most of the engine bay
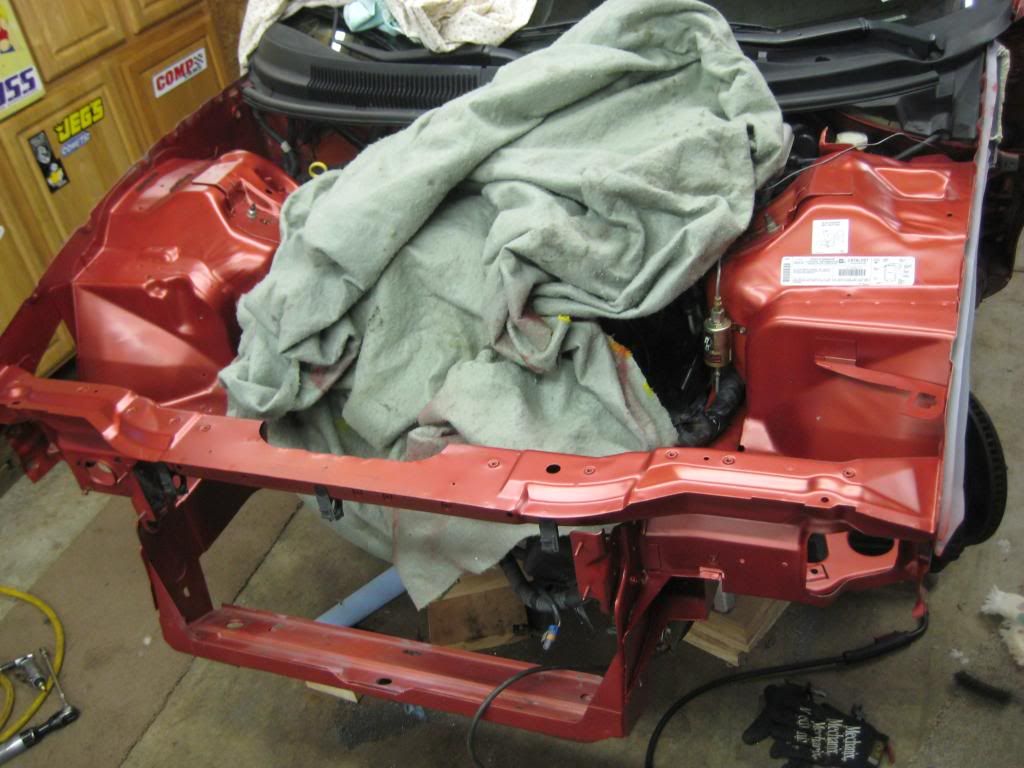
did that yesterday after work quick, let it dry till today then put the fenders back on. never really done this stuff before, heard it could be a huge pain to realine body parts, but not that bad. its a gm not a bmw or somthing. but still worried how close the door gap gets right to the mid body line /crese when you open the door. it's not rubbing, but bearly not is that normal
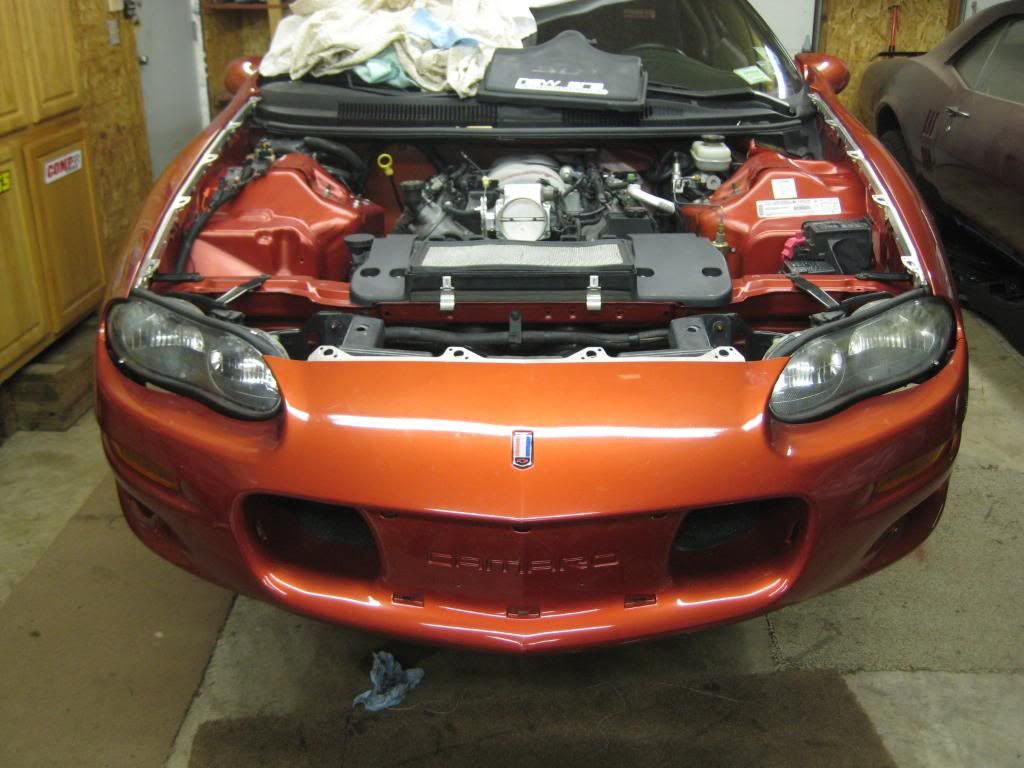
i didnt paint the top of the driver shock tower, the master cly, line lock line were right there. kind looks wierd now, the engine baw is more pumkin orange stock them som i can paint that later i guess. its not a show car thats for sure.
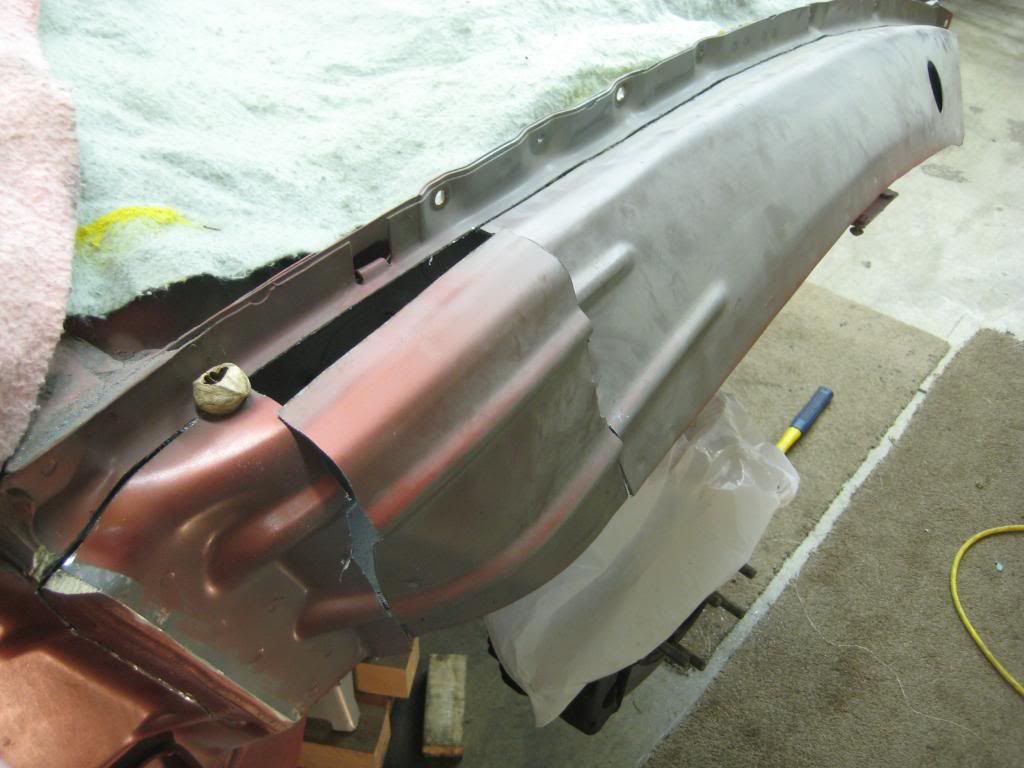
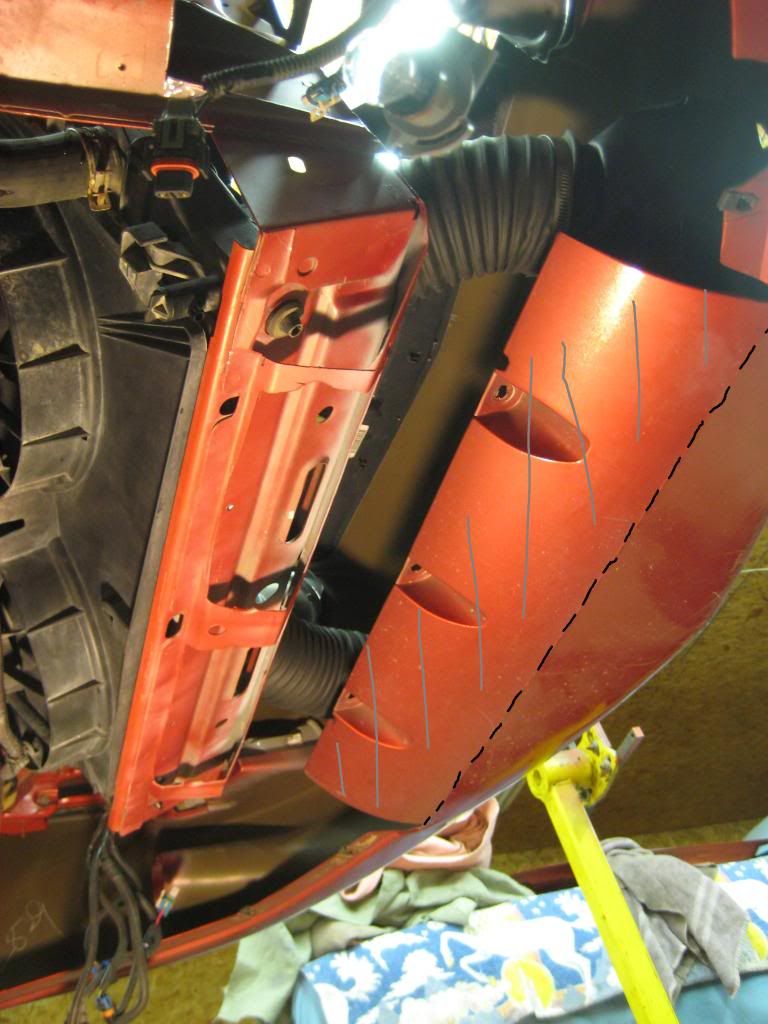
looking at what plastic i can remove, i know guys remove everything, but i dont what **** flapping around doing the burnout like i see on some super gutted cars i might runa little bar of alum to each side of the lower bumper holes, and 1-2 to the front. but any of you camaro guys cutting the bottem of the bumper cover off, there thouse 3 holes went into the bumper support. i think it would help get more air to the rad. with the plasitcs gone. and maybe make it more stiff, without that heavy part sagging down there.

cut this out
i had a shim to borrow too during the week, but returned it fri for some reason. so have to wait to get it back from the shop, to get the trans in, to get the ta in, to get the new lca in. get the trz stuff on sqare that up with the new lca. then i can weld the end link tabs in.
this spot looked good, stock wheels clear
should be ok, just some of the plastic tray i htink.. noticed some smoking when done. but didnt find anything melting.painted, /chevy orange ran out of the better paint, vvv
went to paint a few spots, mostly were i drilled off the hood brakets. but it looks so nice and new, and i have a full spray paint can, som matched. ended up painting most of the engine bay
did that yesterday after work quick, let it dry till today then put the fenders back on. never really done this stuff before, heard it could be a huge pain to realine body parts, but not that bad. its a gm not a bmw or somthing. but still worried how close the door gap gets right to the mid body line /crese when you open the door. it's not rubbing, but bearly not
is that normali didnt paint the top of the driver shock tower, the master cly, line lock line were right there. kind looks wierd now, the engine baw is more pumkin orange stock them som i can paint that later i guess. its not a show car thats for sure.
looking at what plastic i can remove, i know guys remove everything, but i dont what **** flapping around doing the burnout like i see on some super gutted cars
i might runa little bar of alum to each side of the lower bumper holes, and 1-2 to the front. but any of you camaro guys cutting the bottem of the bumper cover off, there thouse 3 holes went into the bumper support. i think it would help get more air to the rad. with the plasitcs gone. and maybe make it more stiff, without that heavy part sagging down there.cut this out
10-03-2010, 07:43 AM
#320

You can cut that flap off, if you're taking all the other platic's out. I put a burkhart bumper support in a couple years ago and cut that entire flap off the bottom of my car then, and it has been fine. One less thing to worry about dealing with, and I think it helps with airflow into the enine bay, making the need for the airdam less too.
Cut it off. I don't know about the camaro nose, but the transam piece had a little line that was curved around the front nicely, I cut right on that line, and it came out perfect.
Engine bay looks great too, I'd have it it with some clear just to make it a little tougher, to scratch and whatnot... but it looks great.
Can't wait until I get mine done, just for the clean factor, and ease of working on things (my cutting, is quite extensive though, build thread coming probably about spring time)