How to: LS1 Pilot bearing removal with free loaner tools
 01-18-2010, 07:37 PM
#1
On The Tree
Thread Starter
iTrader: (10)
Join Date: Jun 2007
Location: NE Philadelphia PA
Posts: 188
Likes: 0
Received 0 Likes
on
0 Posts
Well I figured I would make this how to. I spent a few hours trying and trying to remove the pilot bearing. I used the harbor fright pilot bearing removed which was too big, I tried to use just two jaws and they bent. Then I rented the Autozone blind hole removed. This did not work either, the slide was too light.
From Autozone I rented the biggest slide hammer they had. I brought the new pilot bearing with me and asked to see their pilot bear attachment for the slide hammer. It was too big of coarse, so I sat there for a minute examining the tool. I was thinking I can grind it down and make it work then I noted the 2 jaws were held in my pressed in studs. If I can press a studs out and put the jaws into the bearing one at a time it may just work. Well it did and this is how.
I did not take pics as I did the job, but these were taken as an example of how to
Do not pack grease, bread, or paper towels behind the bearing and driving a socket into the material. There is a freeze plug behind the bearing and it will fall into the oil pan
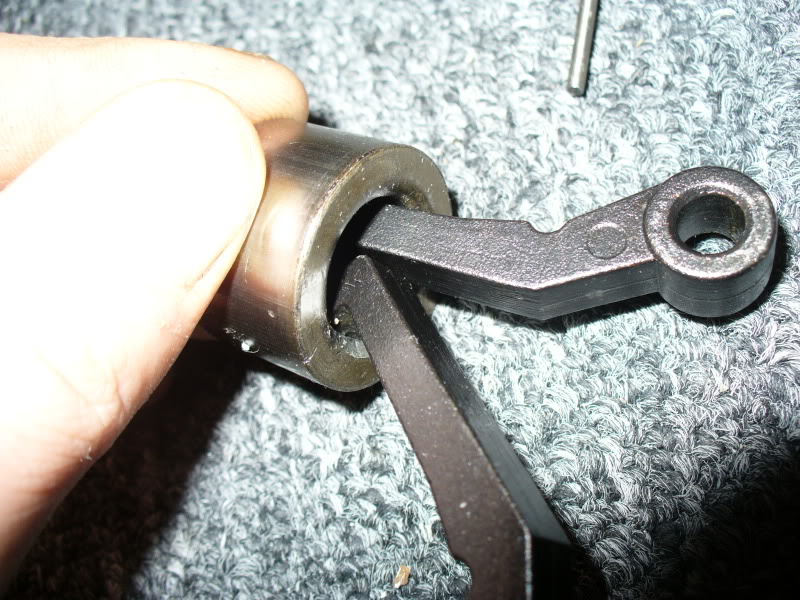
The Jaws are just too big to go through the bearing
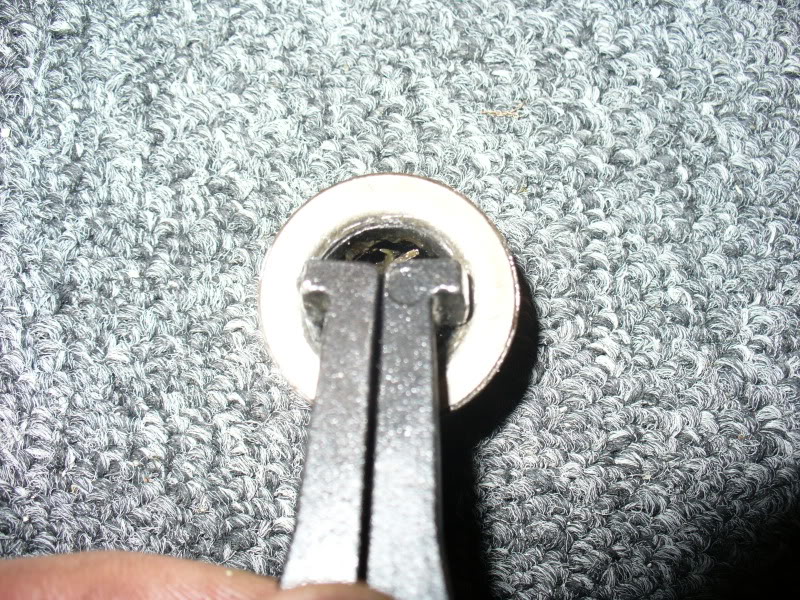
With a small punch and hammer, I hit the stud once hard and it started to slide right out

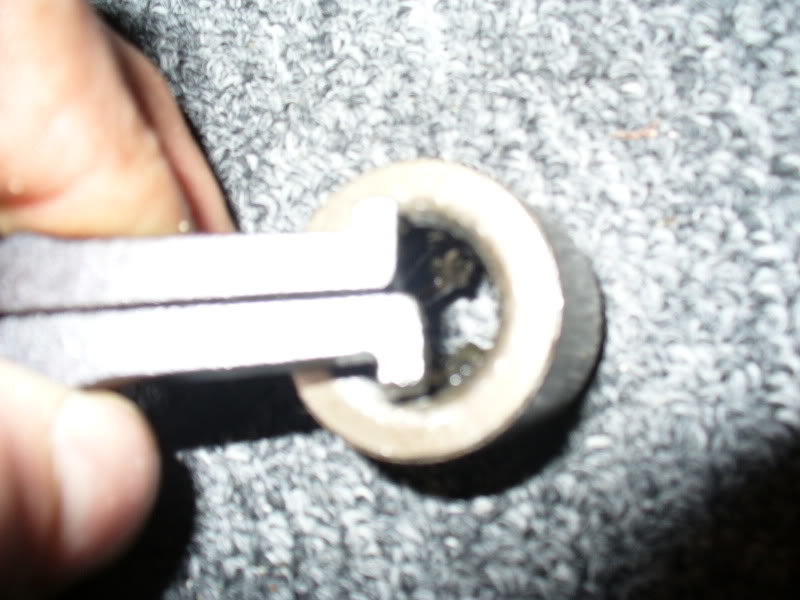
Put the loose puller arm through the bearing, then with some finessing push the other through. With both arms in the bearing line up the holes and push the stud through using pliers
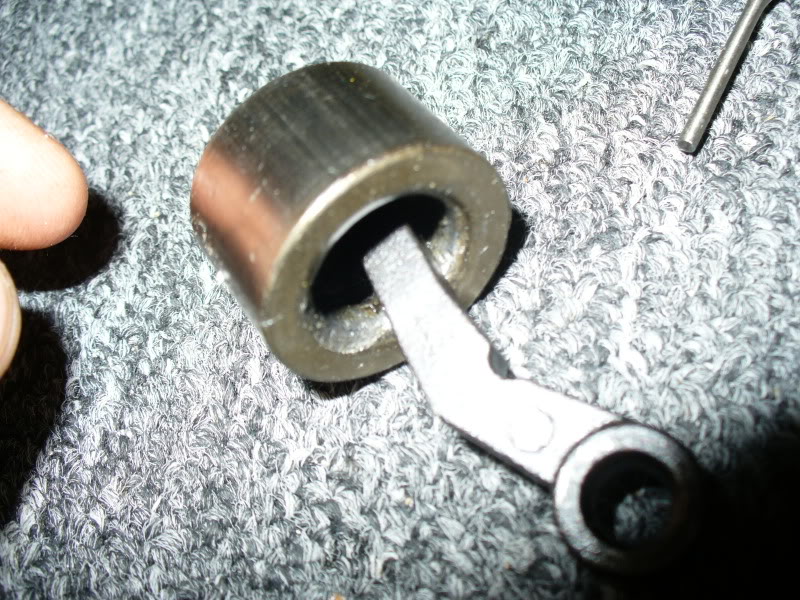
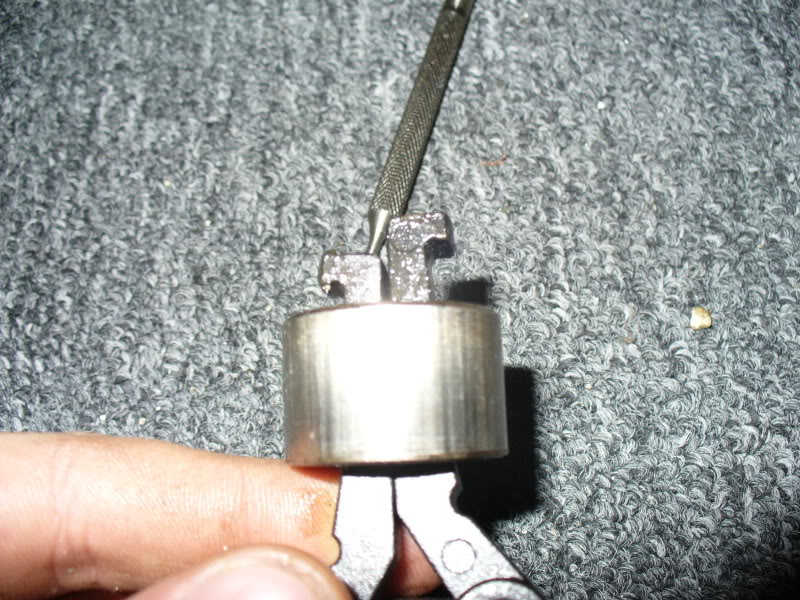
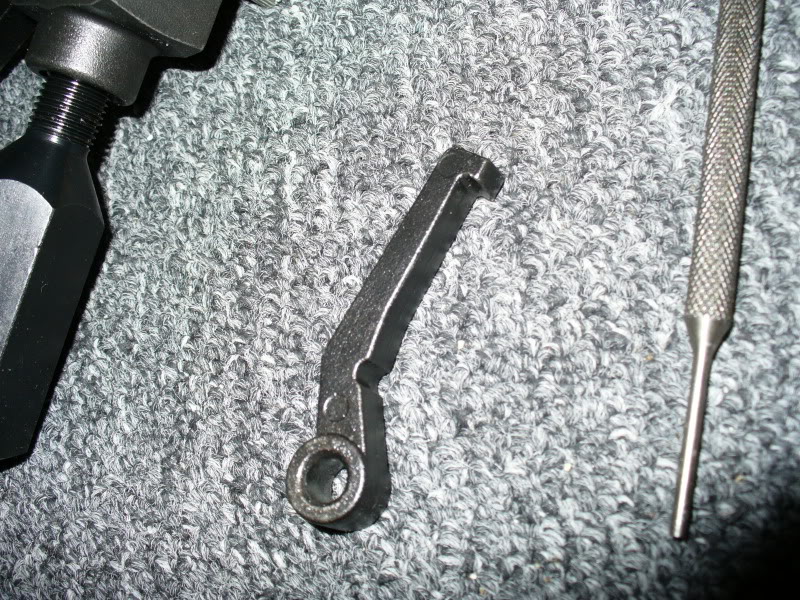
Now thread the BF_Slide_H into the back of the puller and give it hell. I had to give it 10 hard blast then it popped right out. Then clean and inspect the hole and freeze plug behind the bearing.
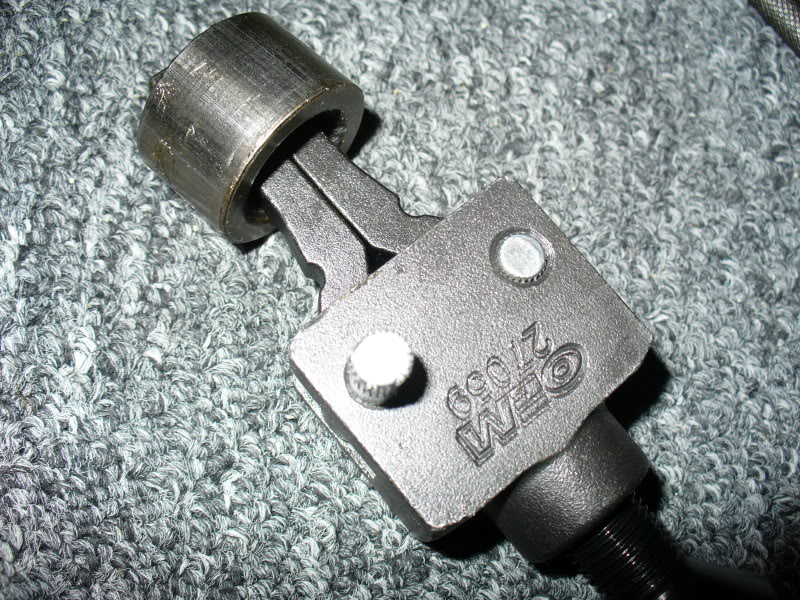
End result
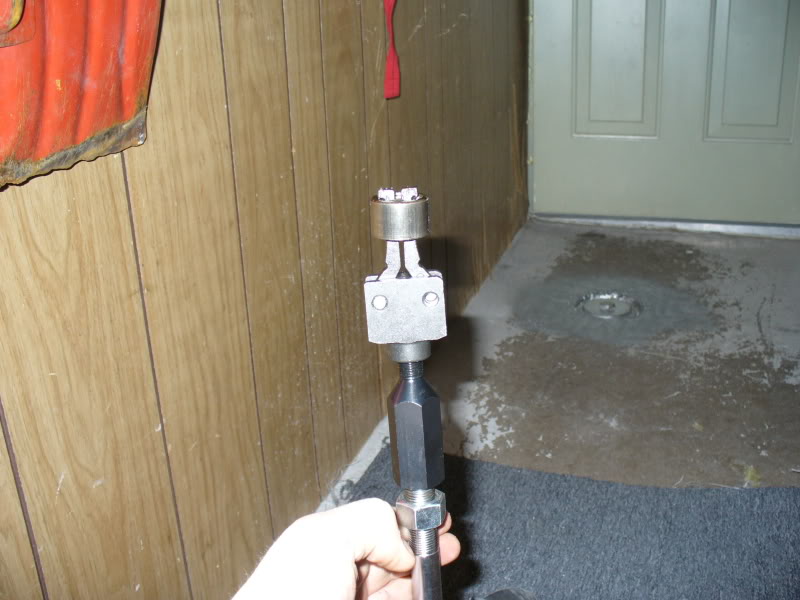
Now put the tool back together, and return to Autozone and get you deposit back
From Autozone I rented the biggest slide hammer they had. I brought the new pilot bearing with me and asked to see their pilot bear attachment for the slide hammer. It was too big of coarse, so I sat there for a minute examining the tool. I was thinking I can grind it down and make it work then I noted the 2 jaws were held in my pressed in studs. If I can press a studs out and put the jaws into the bearing one at a time it may just work. Well it did and this is how.
I did not take pics as I did the job, but these were taken as an example of how to
Do not pack grease, bread, or paper towels behind the bearing and driving a socket into the material. There is a freeze plug behind the bearing and it will fall into the oil pan
The Jaws are just too big to go through the bearing
With a small punch and hammer, I hit the stud once hard and it started to slide right out
Put the loose puller arm through the bearing, then with some finessing push the other through. With both arms in the bearing line up the holes and push the stud through using pliers
Now thread the BF_Slide_H into the back of the puller and give it hell. I had to give it 10 hard blast then it popped right out. Then clean and inspect the hole and freeze plug behind the bearing.
End result
Now put the tool back together, and return to Autozone and get you deposit back
Last edited by OutToWinPAHC; 01-18-2010 at 08:06 PM.
 01-19-2010, 02:07 PM
#2
On The Tree
Join Date: Sep 2008
Posts: 167
Likes: 0
Received 0 Likes
on
0 Posts
i did kinda the same thing. i used both those same tools, only when i saw that the tool wasn't going to fit it was already late and i was tired. so after i stared at the puller in disgust, i got pissed and took it straight to the bench grinder so it fit.  i think i actually put some paint on it so it looked legit, but i know i got my deposit back. however hindsight is 20/20 i suppose, and your way looks alot better
  thumbs up.
i think i actually put some paint on it so it looked legit, but i know i got my deposit back. however hindsight is 20/20 i suppose, and your way looks alot better thumbs up.
01-19-2010, 02:13 PM
#3
TECH Fanatic
iTrader: (10)
Join Date: Oct 2007
Location: plainfield,IL
Posts: 1,389
Likes: 0
Received 0 Likes
on
0 Posts

wow....you guys put way too much thought into it...lol
i just drill a hole into the old bearing, stick a damn screw driver into it and pop the sucker out....end.
takes 45seconds max...lol. btw im not bein rude guys...
i just drill a hole into the old bearing, stick a damn screw driver into it and pop the sucker out....end.
takes 45seconds max...lol. btw im not bein rude guys...
01-19-2010, 05:33 PM
#6
TECH Fanatic
iTrader: (10)
Join Date: Oct 2007
Location: plainfield,IL
Posts: 1,389
Likes: 0
Received 0 Likes
on
0 Posts
ive removed bushings also...i drill the hole and take the screwdriver and hit it inward and it folds in n i just slide it out...? dunno ive done a few so it just seems easyer to me?
Trending Topics

 09-11-2015, 11:50 PM
#12
Also used part number 27011 pulley puller and a 3/8 3" extension to extend the stud to pull the crank shaft timing gear.
Wish I would have known about the loan tools before buying an OTC crank pulley puller and piston ring compressor.
Last edited by tommypenguin; 09-11-2015 at 11:59 PM.
01-28-2016, 10:53 PM
#13
Registered User

Join Date: Jan 2016
Posts: 1
Likes: 0
Received 0 Likes
on
0 Posts
I just used Harbor Freight puller #95987
http://www.harborfreight.com/blind-h...ler-95987.html
http://www.harborfreight.com/blind-h...ler-95987.html
01-31-2016, 06:18 PM
#14
Teching In

Join Date: Nov 2015
Posts: 10
Likes: 0
Received 0 Likes
on
0 Posts
02-10-2016, 12:45 PM
#15
I just used Harbor Freight puller #95987
http://www.harborfreight.com/blind-h...ler-95987.html
http://www.harborfreight.com/blind-h...ler-95987.html
works great
09-01-2019, 07:32 PM
#16
This should be a sticky, so we've corrected that. I found this late, after I'd already wasted an hour...
I ended up giving the cheap bearing puller another go before making another trip to get the OEM 27059 and was able to get it out easily. I just took a chisel, tore up the needle bearings, and then pulled the bearing out by the small lip at the front, which the needle bearing race sits up against. Similar to this video, except I purposefully destroyed the needle bearings first:
^ When one chisels out the needle bearings first, no screwdriver wedge is needed on the cheap tool.
09-01-2019, 08:20 PM
#17
Teching In
Join Date: Nov 2015
Posts: 10
Likes: 0
Received 0 Likes
on
0 Posts
Fun times! For the installation of the new pilot bearing I used Autozone�s OEM Bearing and race installer tool set. Part #27119 I also cutout a small cardboard square to cover the face of the bearing to prevent damage.
link for tool...
https://m.autozone.com/test-scan-and...91360_0_0?aqs=
Also, the pilot bearing has to face the correct way when installing...
https://ls1tech.com/forums/manual-tr...earing-go.html
link for tool...
https://m.autozone.com/test-scan-and...91360_0_0?aqs=
Also, the pilot bearing has to face the correct way when installing...
https://ls1tech.com/forums/manual-tr...earing-go.html
09-26-2019, 08:55 AM
#18
When I replaced the one on my 99 LS1 it was too far gone for a puller above, I used a die grinder with carbide burr lots of metal flake but it got it done
NOTE: on older chevy SB and BB if you have an old input shaft you can pack grease in hole and drive input shaft with hammer and the grease will push out old bushing (may need to add more grease as it moves bearing out) but DO NOT try this on LS motors as there's a metal expansion plug in crank that it will lets say put it in a bad place!
NOTE: on older chevy SB and BB if you have an old input shaft you can pack grease in hole and drive input shaft with hammer and the grease will push out old bushing (may need to add more grease as it moves bearing out) but DO NOT try this on LS motors as there's a metal expansion plug in crank that it will lets say put it in a bad place!