How to prolong the life of your clutch
 02-07-2012, 11:17 PM
#1
LS1TECH Sponsor
Thread Starter
iTrader: (23)

Join Date: May 2003
Location: Tampa, FL
Posts: 1,168
Likes: 0
Received 0 Likes
on
0 Posts

Let me be the first to say that this isn’t for everyone and that we don’t completely understand everything about clutches.
However, what is stated here will help extend the life of the clutch by keeping the clutch cooler and the fluid cleaner for much longer than any other method. This is primarily meant for those of us with stock clutches but will apply to all the aftermarket clutches as well. We have heard of many people that have put clutches in their vehicle when it may not have been necessary or many feel it is a mandatory upgrade with more power.
On our shop car we have a heads and cam C6 z06 with 585RWHP and 535RWTQ and 82K miles STOCK clutch from new and the car is driven like it is stolen, daily. The car has some drag racing time on it at the track but it is mostly thrashed on the street and road coursed as much as time and the budget allow. We have NEVER had the pedal stick to the floor and it takes about 5K miles for the fluid to change color let alone turn dark.
Drag racing does play havoc on a clutch but hopefully this will get those that are apprehensive out there to beat the tar out of their cars like they should be, it’s good for them!! It has been our experience that the 2 worst GM V8 vehicles out there for having issues with clutches are the GTO and the F-bodies. I would like to point out one thing that they have in common: They do not have an "exhaust" for clutch debris and heat. The back of the bell housing does not have vents like the Corvette and especially the C6. The 2 C6 vents are about 2" by 3/4" just beneath the clutch and in the back of the bell housing whereas the C5 was about 1/3 the size. The late model Camaro has a large vent roughly equivalent to the C6 size.
I mention all of this as an important backdrop that we will come back to shortly and I will try to tie it all together.
Even though this is a LONG write up IN SHORT it will only help even if you aren't have any issues.
I tried to illustrate with my kindergarten drawing ability Check out the clutch airflow pic at the bottom.
-Bleed the clutch line
Many of us are familiar with Ranger's articles about using a turkey baster to draw out dirty fluid and then replenish with clean the fluid.
This helps, however it is not the solution for the larger issue, you will still continue to get filth in the clutch and reservoir.
Please understand I am extremely grateful for his contributions to the corvette community. Ranger sent the fluid to a lab to analyze what the dark substance was in the fluid and established that it was clutch material. Without this important piece of info we would have much less knowledge about this system. THANK YOU RANGER!!
As you USE the clutch you consume it and where does the debris go? As the clutch material is flung around within the bell housing the material gets past a seal into the slave cylinder and then the hydraulic system the fluid is contaminated and begins to darken. If allowed to worsen you eventually will have a sticking pedal and lose hydraulics. In most cases not permanent but often at the most inopportune times. It is best to address this as early as possible so you do not have permanent issues with the stock slave.
We are not sure but it seems likely that damage may be caused to the slave cylinder by the clutch particles embedding between the bore and piston of the slave. Catch it before its too late. Naturally a clutch should give off the most debris upon break-in.
The factory system moves a very small amount of fluid in a line from the reservoir to the slave, fore and aft. Naturally the most contaminants would be at the point of entry into the system, not just the reservoir two feet away. Bleeding the system like a brake or any other hydraulic system until the fluid is clear would rejuvenate and minimalize the contaminants.
A remote bleeder is nice and convenient but not all of us are willing or able to put a remote bleeder in or quite honestly I don’t know if you can even get one installed without tearing the torque tube and clutch out. So what can we do that is not too labor intensive and wont cost much? or How can we optimize this system and make it last? Whether its the basic STOCK clutch setup or a rather expensive aftermarket clutch this should only help. We are going to tell you how we do it in the car without too much labor.
The easiest way that we have found is to pull the intake manifold for the C5 and C6 Corvettes. We have ported hundreds of manifolds so we have become proficient at pulling intake manifolds. (Total time to clean head ports and put it back on about 45min.) This will allow one to lay in and across the engine bay. With your head right at the firewall with a 9mm combination wrench and a light just barely have enough room to see the port, pop off the rubber cap (leave it off) and open it while someone else is depressing the clutch pedal. Bleed it just like a brake system, one person (A) holds pedal, the other (B) opens the port till fluid pours out and then closes, (A) pumps pedal till firm again and then repeat till fluid is clear, 3-12 cycles. Remember to check the reservoir! Refill it so you do not get any air in the line. Earlier F bodies and GTOs may be accessible from under the car and may not require pulling the intake manifold.
-Open front of the bell housing by removing the plastic panels
There are 2 black plastic panels that cover the front side of the bell housing. The driver side has a small 3” panel held in place by 1-10mm bolt. The passenger side panel surrounds where the starter engages the flywheel. Disconnect battery, remove the 2- 15mm bolts and push the starter forward enough to pull out plastic panel. Before you reinstall the starter you can benefit from this wide open space. Check out the next step, Compressed air.
Total time will be between 10min and 1hr depending on stock exhaust manifold or headers and adjoining piping and space restraints and if on a lift or on the ground.
I would imagine that the panels were put in there to keep things from getting into the bell housing but the irony could be what was meant to protect the clutch hurt the longevity of it. The Driver side is shielded by the oil filter and the starter on the passenger side. It is quite amazing the amount of air moved by the clutch at idle from the “exhaust” ports of the bell housing, imagine what it would be in CFM@155mph 7k rpm. Ever heard of Smokey Yunicks flywheel supercharger?
However, what is stated here will help extend the life of the clutch by keeping the clutch cooler and the fluid cleaner for much longer than any other method. This is primarily meant for those of us with stock clutches but will apply to all the aftermarket clutches as well. We have heard of many people that have put clutches in their vehicle when it may not have been necessary or many feel it is a mandatory upgrade with more power.
On our shop car we have a heads and cam C6 z06 with 585RWHP and 535RWTQ and 82K miles STOCK clutch from new and the car is driven like it is stolen, daily. The car has some drag racing time on it at the track but it is mostly thrashed on the street and road coursed as much as time and the budget allow. We have NEVER had the pedal stick to the floor and it takes about 5K miles for the fluid to change color let alone turn dark.
Drag racing does play havoc on a clutch but hopefully this will get those that are apprehensive out there to beat the tar out of their cars like they should be, it’s good for them!! It has been our experience that the 2 worst GM V8 vehicles out there for having issues with clutches are the GTO and the F-bodies. I would like to point out one thing that they have in common: They do not have an "exhaust" for clutch debris and heat. The back of the bell housing does not have vents like the Corvette and especially the C6. The 2 C6 vents are about 2" by 3/4" just beneath the clutch and in the back of the bell housing whereas the C5 was about 1/3 the size. The late model Camaro has a large vent roughly equivalent to the C6 size.
I mention all of this as an important backdrop that we will come back to shortly and I will try to tie it all together.
Even though this is a LONG write up IN SHORT it will only help even if you aren't have any issues.
I tried to illustrate with my kindergarten drawing ability
Check out the clutch airflow pic at the bottom.-Bleed the clutch line
Many of us are familiar with Ranger's articles about using a turkey baster to draw out dirty fluid and then replenish with clean the fluid.
This helps, however it is not the solution for the larger issue, you will still continue to get filth in the clutch and reservoir.
Please understand I am extremely grateful for his contributions to the corvette community. Ranger sent the fluid to a lab to analyze what the dark substance was in the fluid and established that it was clutch material. Without this important piece of info we would have much less knowledge about this system. THANK YOU RANGER!!
As you USE the clutch you consume it and where does the debris go? As the clutch material is flung around within the bell housing the material gets past a seal into the slave cylinder and then the hydraulic system the fluid is contaminated and begins to darken. If allowed to worsen you eventually will have a sticking pedal and lose hydraulics. In most cases not permanent but often at the most inopportune times. It is best to address this as early as possible so you do not have permanent issues with the stock slave.
We are not sure but it seems likely that damage may be caused to the slave cylinder by the clutch particles embedding between the bore and piston of the slave. Catch it before its too late. Naturally a clutch should give off the most debris upon break-in.
The factory system moves a very small amount of fluid in a line from the reservoir to the slave, fore and aft. Naturally the most contaminants would be at the point of entry into the system, not just the reservoir two feet away. Bleeding the system like a brake or any other hydraulic system until the fluid is clear would rejuvenate and minimalize the contaminants.
A remote bleeder is nice and convenient but not all of us are willing or able to put a remote bleeder in or quite honestly I don’t know if you can even get one installed without tearing the torque tube and clutch out. So what can we do that is not too labor intensive and wont cost much? or How can we optimize this system and make it last? Whether its the basic STOCK clutch setup or a rather expensive aftermarket clutch this should only help. We are going to tell you how we do it in the car without too much labor.
The easiest way that we have found is to pull the intake manifold for the C5 and C6 Corvettes. We have ported hundreds of manifolds so we have become proficient at pulling intake manifolds. (Total time to clean head ports and put it back on about 45min.) This will allow one to lay in and across the engine bay. With your head right at the firewall with a 9mm combination wrench and a light just barely have enough room to see the port, pop off the rubber cap (leave it off) and open it while someone else is depressing the clutch pedal. Bleed it just like a brake system, one person (A) holds pedal, the other (B) opens the port till fluid pours out and then closes, (A) pumps pedal till firm again and then repeat till fluid is clear, 3-12 cycles. Remember to check the reservoir! Refill it so you do not get any air in the line. Earlier F bodies and GTOs may be accessible from under the car and may not require pulling the intake manifold.
-Open front of the bell housing by removing the plastic panels
There are 2 black plastic panels that cover the front side of the bell housing. The driver side has a small 3” panel held in place by 1-10mm bolt. The passenger side panel surrounds where the starter engages the flywheel. Disconnect battery, remove the 2- 15mm bolts and push the starter forward enough to pull out plastic panel. Before you reinstall the starter you can benefit from this wide open space. Check out the next step, Compressed air.
Total time will be between 10min and 1hr depending on stock exhaust manifold or headers and adjoining piping and space restraints and if on a lift or on the ground.
I would imagine that the panels were put in there to keep things from getting into the bell housing but the irony could be what was meant to protect the clutch hurt the longevity of it. The Driver side is shielded by the oil filter and the starter on the passenger side. It is quite amazing the amount of air moved by the clutch at idle from the “exhaust” ports of the bell housing, imagine what it would be in CFM@155mph 7k rpm. Ever heard of Smokey Yunicks flywheel supercharger?
 02-07-2012, 11:18 PM
#2
LS1TECH Sponsor
Thread Starter
iTrader: (23)
Join Date: May 2003
Location: Tampa, FL
Posts: 1,168
Likes: 0
Received 0 Likes
on
0 Posts
Opening the front side of the bell housing is a crucial part of keeping things cleaner and cooler within the clutch. By allowing the front side of the bell housing to ingest airflow we now have a cross flow of air coming in and out of the bell housing and the faster we go the more volume of air through, like a radiator. With greater volume of high velocity air the clutch debris is expelled much more quickly rather than staying in the bell housing longer like the stock stagnant closed-front-entry (or it doesn’t exit but through a tiny hole like earlier Fbodies and GTOs). On our C6Z we even “ported” the “exhaust” side of the bell housing to even more aid in getting the airflow out. Futhermore, after about 7K miles we again cleaned it there was very little debris in the clutch and bell housing area and the fluid was in great shape too.
We feel that this is conclusive that it does keep the clutch much cleaner and cooler. What happens to a radiator when you block its airflow?
One more thing to mention about the GTOs and Fbodies: It has been our experience that the Heat and the clutch debris can very quickly ruin your fun. A few years back we had an ‘05 80K mile GTO with about 390RWHP and boltons, stock clutch. The vehicle was at a road course event and as the vehicle heated up it would lose hydraulics and not even be able to execute a gear shift by the end of a lap. We would have to draw out the DIRTY fluid and replace it every lap. (It is unknown how large a role the heat played it is difficult to test independently. When both sides of the bell housing are open it seems that it is no longer an issue.) Now looking back upon those experiences I know we could have resolved or at least greatly extended the proper functioning of the clutch. Since GTOs and earlier Fbodies do not have “exhausts” on their bell housings I would like to machine a few passages in there and see what happens......Now we have done the aforementioned methods to said vehicles and it has helped rather significantly but they NEED is the “exhaust” side opened up. When you take a look at the bigger picture you can see that it needs both clean high speed air in and high speed air out, just like an engine. Having only one side of it is merely half the battle.
-Use Compressed air and brake clean to blow out bell housing
Now that the panels are off you can get in there with a compressed air probe and blow out all the crevices of the clutch. We have been in there for over 10 minutes still finding more areas that blow out clouds or clutch debris. When you think you’ve blown it out enough keeping going. Then rotate the motor over with a breaker bar and do it again till there is no more clutch debris coming out. Next take 2-3 cans of brake clean and spray it all through anywhere you can. Wear a respirator and have some fans going in a well ventilated area, this is not good stuff to breathe in. Reassemble it and go beat the **** out of it.
We have a customer with a 30K mi 600RWHP C6Z that began to have some clutch slippage. We opened up the front side blew out and cleaned out the bell housing and has yet to have the problem again. One thing to consider is the contact surface of the disc and flywheel. If there is a boatload of dust in there, the surface has been compromised. The grip integrity of a clean surface has changed. Now it doesn't lay all the dust out evenly either so there is a even better chance that you will develop hot spots on the flywheel if one area slips on its own dust and another area grabs. Slowly we began to see how one thing leans on another, heat and dust ,dust and heat.
-Clutch stop and removal of the clutch spring
At the PRI show 2010 we spoke with a few clutch engineers about clutch stops for limiting travel and extending the life of any clutch by not over extending the springs in the pressure plate. From what we gleaned the more you extend a spring past a given point time and time again you will diminish its strength. The Ideal is to only depress the pedal to what is necessary for engagement and disengagement, anything more is wasted energy. What we want to do is reduce its travel by about 20-33%. If we limit the pedal travel by say 25% on the engagement and disengagement we can also reduce the shift times by a small amount.
We made our own clutch stop from: a freeze plug with a bolt with its head welded to the center of the concave side, 2 nuts and 2 lock washers. With the convex side contacting the clutch switch and the threaded side toward your foot (The C5 and C6 have a pad that contacts the clutch switch (until ’09) on the pedal that you can drill a place to set the spacing by adjusting the threaded portion of the bolt and jam nuts. There is a thread here somewhere on CF about that.
-Change the Fluid to a higher heat rating
We feel this is the least important but it is a factor. We went to MOTUL RBF 600 instead of the typical DOT3 as another measure to address what we felt could be part of the problem. We didn’t measure the temps within the bell housing but by running a very high boiling point fluid we felt that it was a good insurance to keep from having the clutch version of “brake fade”. With the temps encountered on a road course: coolant, trans, air temp, oil, brakes, etc. Wide open throttle and braking then upshifting and downshifting for half an hour non stop. There is no other way to simulate these on the street. This was our test bed as well as the street. It has held up much better than we have anticipated.
Well this research has been going on for a few years now and still learning everyday. Hopefully it didn't take you a year to read all of this
Often we are very busy so please be patient as I may only get back to this thread about once a week. Thank you all for reading and I hope that it is helpful to the LS community.
Jeremy Formato of FASTERPROMS

 Great post
  02-24-2012, 03:12 PM
#5
Teching In
iTrader: (4)

Join Date: Jun 2011
Location: Fairborn, OH
Posts: 48
Likes: 0
Received 0 Likes
on
0 Posts
So on the "older" Fbody lets say a 98 for instance, you are saying there is no exhaust for the clutch. Are you suggesting that we need to cut exhaust ports into the bell housing? If so what would you use to make the cut? The the "intake" would just be the openings left from removing the plastic shrouds?
Thanks
Matt
Thanks
Matt
02-26-2012, 07:24 AM
#7
TECH Regular

Join Date: Mar 2011
Posts: 496
Likes: 0
Received 0 Likes
on
0 Posts
beautiful!!! just in time . got mine up and running just yesterday with a bout of power steering woes. i see the plastic guards removal. like dr. whigham says where to cut exaust holes without compromising the structure of the bell housing?? just had all this stuff apart a month ago. jeremyf thanks for info on vents. the exaust ports it seems could be drilled out witheverything bolted together ? correct? damn i wish i'd have known this amonth ago!!
Trending Topics
02-26-2012, 05:50 PM
#11
11 Second Club
iTrader: (3)
Join Date: Mar 2008
Location: Utah
Posts: 257
Likes: 0
Received 0 Likes
on
0 Posts
Excellent info, I did this today and was suprised at the amount of clutch dust coming out of the bell housing. I left the plastic shields off, hopefully my fluid stays cleaner. 
02-27-2012, 07:20 AM
#12
TECH Regular
Join Date: Mar 2011
Posts: 496
Likes: 0
Received 0 Likes
on
0 Posts
the intake port would be the removal of the plastic sheilds correct?? kinda forced induction? we still have the slot where the hydro lines and bleeder exit the bell so it's not totally sealed. just throwing this out there an exit port at the bottom of the bell housing just behind the presure plate so air blows thru where the plastic sheilds were and out the bottom of bell taking dust with it ?? a hole or slot installed where the structure of the bell is not compromised. man, i just had mine apart and could possibly found a location . anyone got theirs apart with pics? jeremyl you started this you got a good idea on whats gotta happen this could quite possibly help thousands of us 6spd guys with dirty clutch issues. keep up the good work !! oh and by the way thanks for all your info.this is just another reason that this site is the best!
02-27-2012, 08:54 AM
#13
Interesting, I never thought of cooling vents for a clutch... makes sense I guess.
I swapped my T56 for a T56 Magnum, and it has a "window", but the window is not in the bell housing (which was reused from the stock T56).
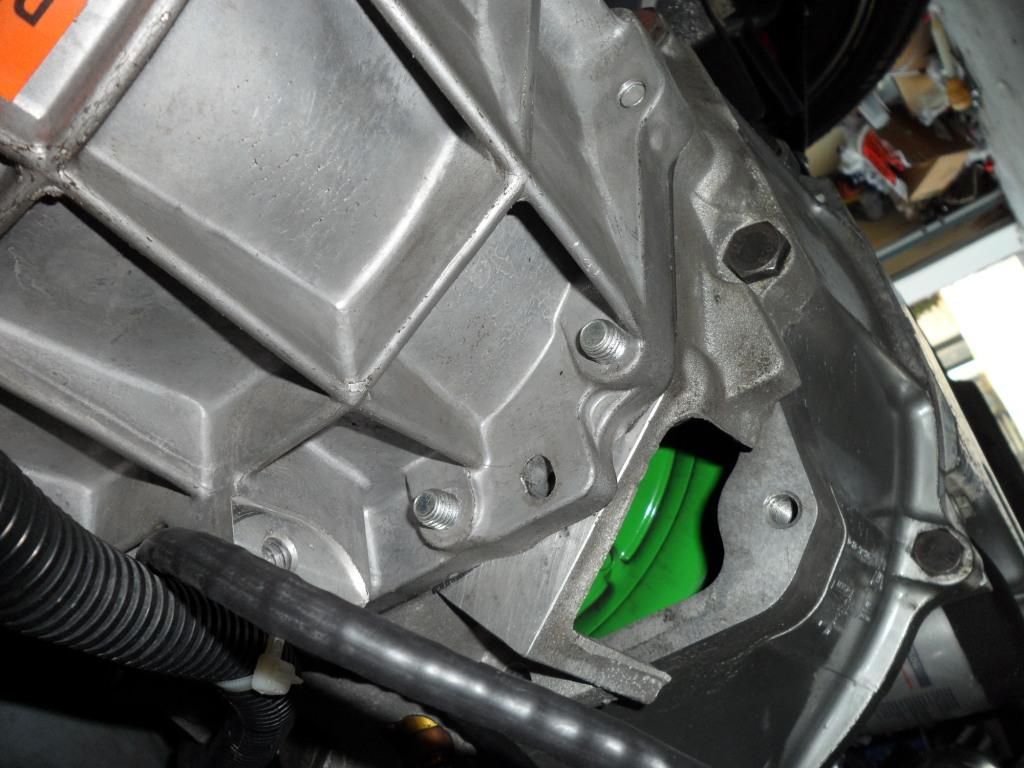
Look at that beautiful clutch...
I swapped my T56 for a T56 Magnum, and it has a "window", but the window is not in the bell housing (which was reused from the stock T56).
Look at that beautiful clutch...
02-27-2012, 08:41 PM
#14
LS1TECH Sponsor
Thread Starter
iTrader: (23)
Join Date: May 2003
Location: Tampa, FL
Posts: 1,168
Likes: 0
Received 0 Likes
on
0 Posts
we didnt port the openings but we did the exh side on the Z06 because they were already there, they just needed to flow better.
The main idea is CROSSFLOW will keep it clean and cooler. Just rejuvenate it first and clean it real good.
Yeah that window should suffice.......Just open up the front and you are set.
Ok Like I said we have not done a GTO or Fbody yet but if we did this is what I would open in the red circles. Use your own judgement, I mean you dont want to weaken anything. I believe that you could put a bunch of holes in there without weakening anything though.
 02-29-2012, 07:35 AM
#17
TECH Regular
Join Date: Mar 2011
Posts: 496
Likes: 0
Received 0 Likes
on
0 Posts
i think velosity would extract most water. you have on one side the starter obscuring one side and the oil filter on the other. with all due respect jeremyl should i just try a small slot at the bottom before adding too many holes to bell?? also in the areas in mention would exaust heat have a better chance of entering clutch and overheating issues could be present?? i know i read into **** to much, sorry. seriously onto something though wonder what plastic sheilds are for heat or debris . need someone to chime in who worked on the line or someone who knows more than me. is the bellhousung a gm part or tremec part?? i will try tremec today and get back, the idea is if its tremec bell then they could tell you where to vent without compromising structure.. later, the oldman......

