


PCM Relocation complete with pics
Thread Starter
11 Second Club
iTrader: (11)
Joined: Nov 2002
Posts: 501
Likes: 0
From: Orange Park, FL
I actually did this a few months ago. I just didn't tell anybody in hopes that I would be the only one at G13 with a relocated PCM. With G13 out of the way, here's a little write-up and pics:
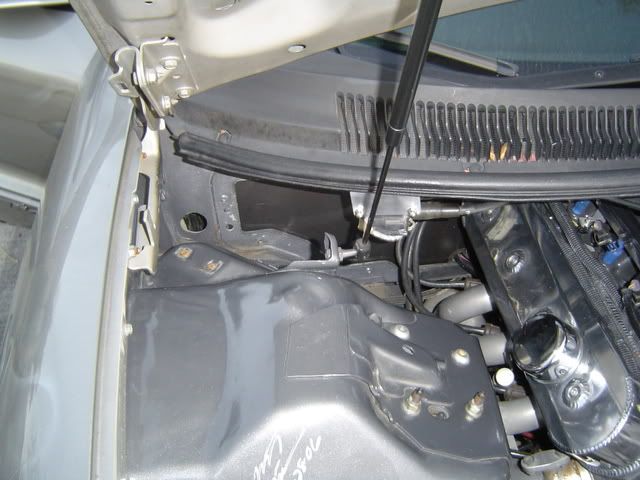
My AC is removed, so the giant empty space on the other side of the firewall is perfect for a PCM. The plan is to pass the main harness through the firewall here:
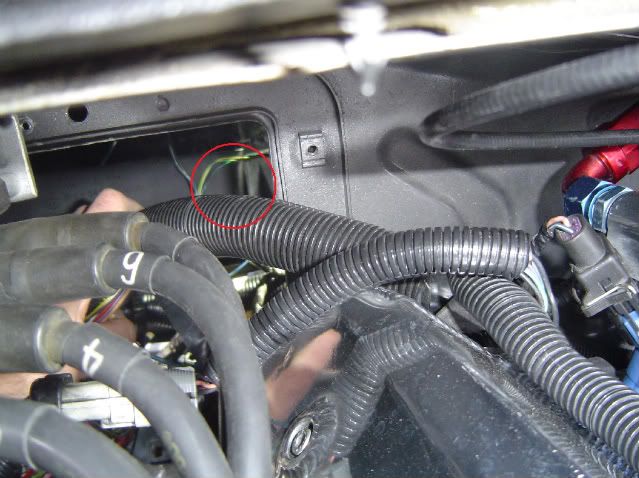
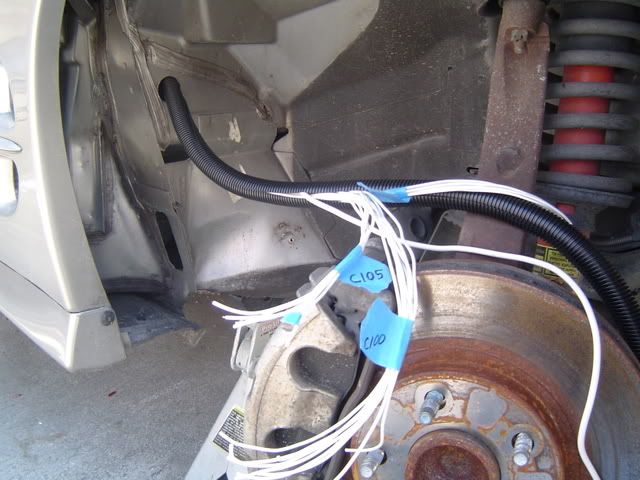
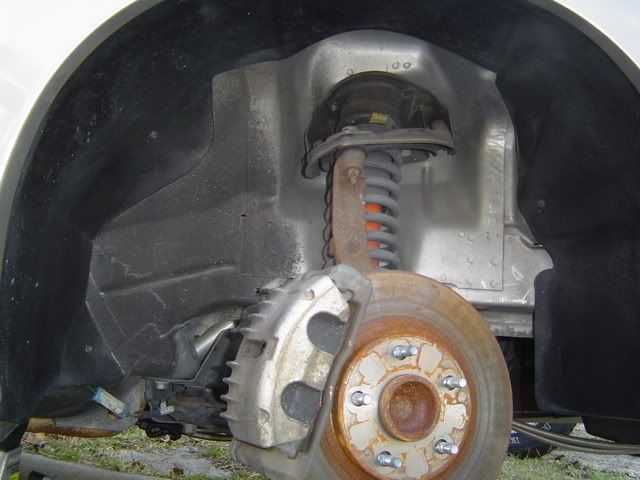
In doing that, the harness that runs over the passenger side fender gets pulled inside as well, and will need to come out. These are the wires that are commonly hidden under the fender. You have a couple of options for what to do with these. The hole in the firewall that was used for the pass-through to the PCM is no longer needed with the PCM located inside. You can run the harness through there, or like I did, you can drill another hole BELOW the fender so the harness remains hidden:
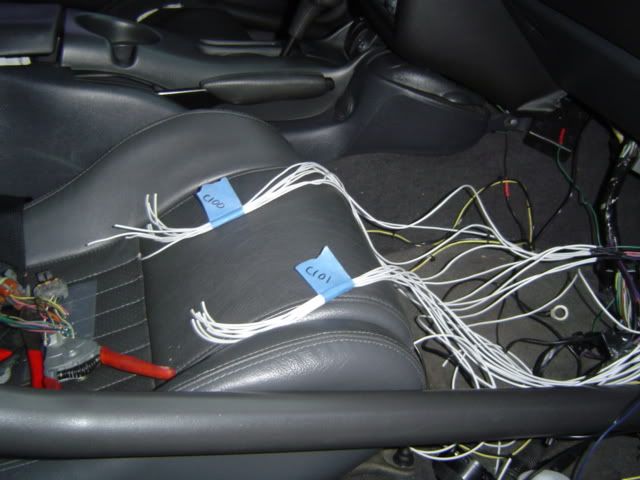
In any case, this harness will need to be extended to reach it's other connectors. All of the wires are 20-22 guage. For simplicity, I used 20 guage white wire to make all of my extensions. The only exception is the purple wire in the single pin connector. That wire is a 10 guage and I used a 10 guage white wire to extend it. All wires were soldered and covered with heat-shrink tubing. This is the only way I would recommend doing this. Don't dare use butt connectors for this job!

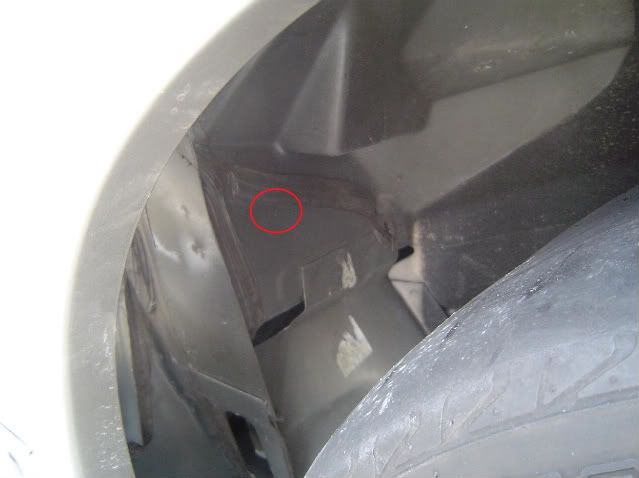
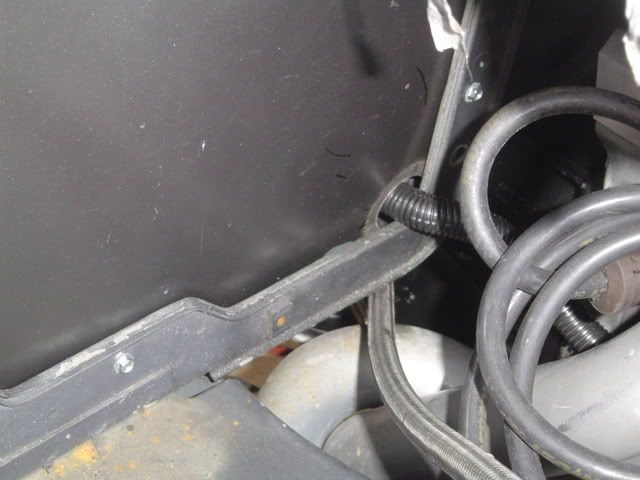
After all wires were extended, I drilled a 1-3/4" hole in the firewall underneath the fender and ran the harness through:

Note: Although I did not have the connectors attached yet, with a 1-3/4" hole, the connectors WILL fit through.
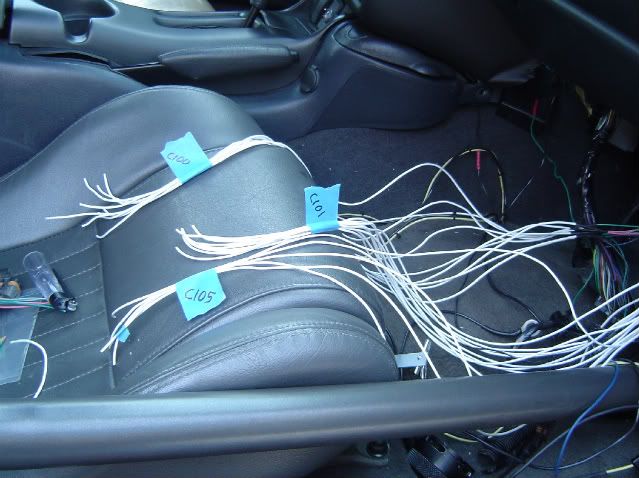
I cut my HVAC delete panel near the top driver side corner in order to fit the main harness through.
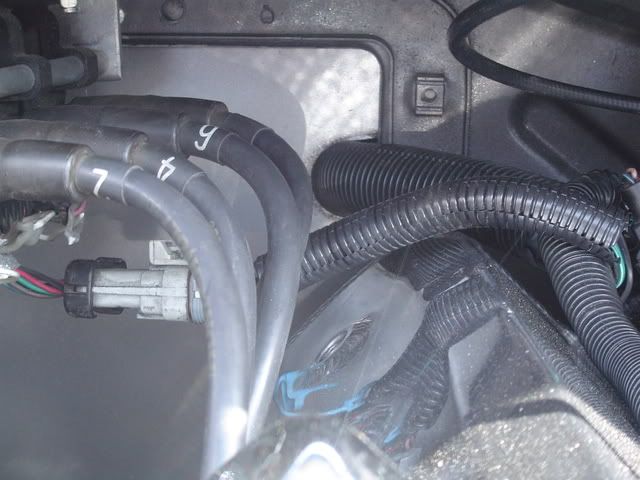
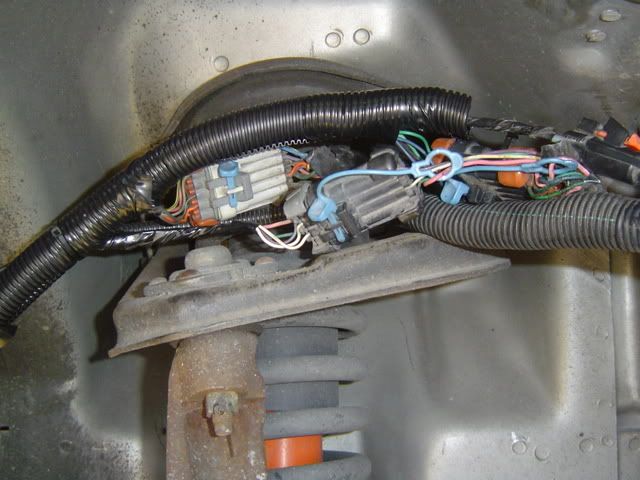
Another harness that got pulled inside and needed a way out was the one that ran down to the starter solenoid, oil level sensor, O2 sensor, and crank position sensor. The AC cycle switch is also on this harness, but without AC, it's not needed. I ran this harness out in the lower corner of the HVAC delete panel. From here I could reach all of the sensors and the starter solenoid without needing to extend any wires.
After attaching the connector ends to all of the extened wires, I connected them, tied them up, and reinstalled the cover:

Inside, I connected the PCM and installed interior panels:
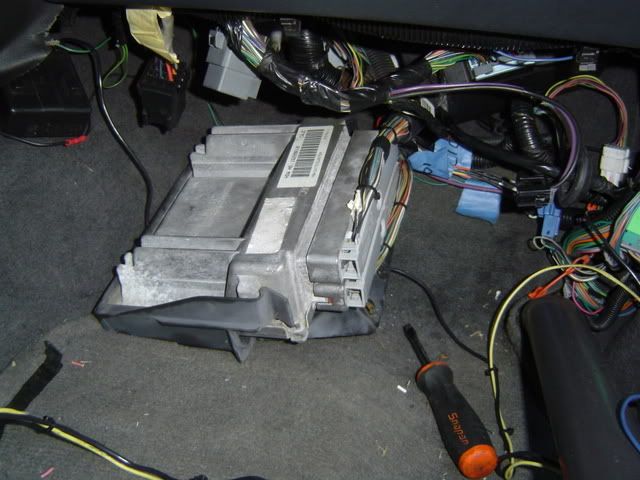
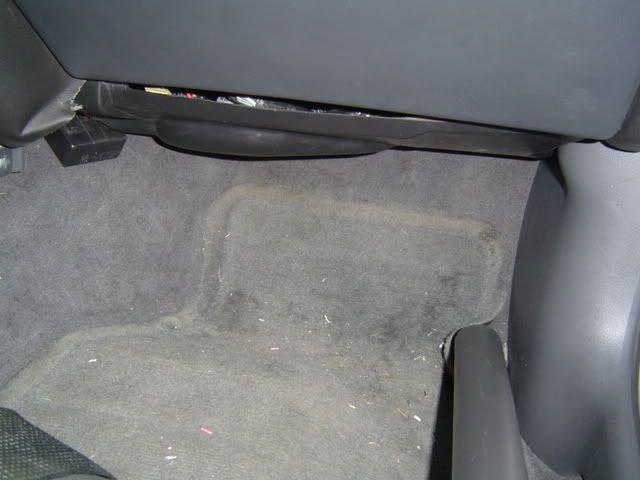
The finished product:
I still need to find a plug for the hole in the firewall. Also on the lookout for some big grommets to go around that wire loom. Although, the split loom does provide pretty decent protection for a car that's not driven much.
My AC is removed, so the giant empty space on the other side of the firewall is perfect for a PCM. The plan is to pass the main harness through the firewall here:
In doing that, the harness that runs over the passenger side fender gets pulled inside as well, and will need to come out. These are the wires that are commonly hidden under the fender. You have a couple of options for what to do with these. The hole in the firewall that was used for the pass-through to the PCM is no longer needed with the PCM located inside. You can run the harness through there, or like I did, you can drill another hole BELOW the fender so the harness remains hidden:
In any case, this harness will need to be extended to reach it's other connectors. All of the wires are 20-22 guage. For simplicity, I used 20 guage white wire to make all of my extensions. The only exception is the purple wire in the single pin connector. That wire is a 10 guage and I used a 10 guage white wire to extend it. All wires were soldered and covered with heat-shrink tubing. This is the only way I would recommend doing this. Don't dare use butt connectors for this job!
After all wires were extended, I drilled a 1-3/4" hole in the firewall underneath the fender and ran the harness through:
Note: Although I did not have the connectors attached yet, with a 1-3/4" hole, the connectors WILL fit through.
I cut my HVAC delete panel near the top driver side corner in order to fit the main harness through.
Another harness that got pulled inside and needed a way out was the one that ran down to the starter solenoid, oil level sensor, O2 sensor, and crank position sensor. The AC cycle switch is also on this harness, but without AC, it's not needed. I ran this harness out in the lower corner of the HVAC delete panel. From here I could reach all of the sensors and the starter solenoid without needing to extend any wires.
After attaching the connector ends to all of the extened wires, I connected them, tied them up, and reinstalled the cover:
Inside, I connected the PCM and installed interior panels:
The finished product:
I still need to find a plug for the hole in the firewall. Also on the lookout for some big grommets to go around that wire loom. Although, the split loom does provide pretty decent protection for a car that's not driven much.
thanks for the write up. How much of the wire did you have to extend, was it evey single wire that is connected to the PCM or was it just the ones that can be run under the fender in the wire mod. Once again it looks excellent
Thread Starter
11 Second Club
iTrader: (11)
Joined: Nov 2002
Posts: 501
Likes: 0
From: Orange Park, FL
Thanks for the compliments.
I only extended the wires that run over (under) the fender. I don't remember exactly how long I extended them. I started with about a 3ft extension on each wire then trimmed it down to fit when I reattached the connectors.
I only extended the wires that run over (under) the fender. I don't remember exactly how long I extended them. I started with about a 3ft extension on each wire then trimmed it down to fit when I reattached the connectors.
Trending Topics
Thread Starter
11 Second Club
iTrader: (11)
Joined: Nov 2002
Posts: 501
Likes: 0
From: Orange Park, FL
It would have been far more difficult to match all the colors of the wires I think. I extended a total of around 25 wires. While it would have been great to have a supply of wire in every color combination needed, I think finding and purchasing wire in dark green, dark blue, pink/white, yellow/black, purple/white, gray/black, etc would have been way too time consuming, not to mention expensive. The wires are colored for a few inches at the connectors and on the inside near the PCM. That should be sufficient for tracing them if I need to.
I took my time with it and spread the job out over a few days, however if was to do it again all at one time, I think I could probably make it a short day's work.
I took my time with it and spread the job out over a few days, however if was to do it again all at one time, I think I could probably make it a short day's work.
LS1 Tech Stories
The Best V8 Stories One Small Block at Time

Gas Monkey Built a 6-Wheel Ferrari Testarossa With a Corvette LT4 Engine
Verdad Gallardo
7 Most Reliable High-Performance Engines GM Has Ever Built
Verdad Gallardo
Amazing '71 Camaro Restomod Is Modern Muscle Car Under the Skin
Verdad Gallardo
6 Common C5 Corvette Failures and What's Involved In Repairing Them
Pouria Savadkouei
Retro Modern Bandit Pontiac Trans AM Comes With Burt Reynolds' Autograph
Verdad Gallardo
Top 10 Greatest Cadillac V Series Performance Models Ever, Ranked
Pouria Savadkouei
Top 10 Most Powerful Chevy Trucks Ever Made!

Hennessey's New Supercharged Silverado ZR2 Has 700 HP
Verdad Gallardo
Coachbuilt N2A Anteros Is an LS2-Powered C6 Corvette In Italian Clothes
Verdad Gallardo So you cut the wire and made two splices? I can't tell from the pics. But look at EFIconnection .(om next time for wire and pins, very reasonable priced and they sell wire by the foot.
But it looks great i plan on doing this in my 96 ls swap. And i need to extend the wires on my 02 for some more room.
But it looks great i plan on doing this in my 96 ls swap. And i need to extend the wires on my 02 for some more room.
 That looks great!
Thread Starter
11 Second Club
iTrader: (11)
Joined: Nov 2002
Posts: 501
Likes: 0
From: Orange Park, FL
Yes, I cut the wire a few inches back from the connector and spliced the white wire in between. Good stuff at EFI Connection; I'll have to remember that next time I do something like this. Thanks
I moved my pcm inside without cutting any wires. you have to route the pass side wires around to the drive side and behind the motor. Then just take apart the loom and re route where the wiring "turns and bends" and it will be able to fit inside.
I did mine. I did however cut and solder a few wires, but none to the pcm. I wound up cutting a few of the wires to the passenger side lights to untangle the loom. I just rerouted the wires to the pcm around the back of the motor and inside the corner of my hvac delete plate. Lot of work, but looks awesome without all that clutter under there
Last edited by taws6m6; Jun 12, 2009 at 10:11 PM.

