Turn signal question for WS6?
 01-28-2011, 10:37 PM
#1
On The Tree
Thread Starter

Join Date: Apr 2009
Location: California
Posts: 108
Likes: 0
Received 0 Likes
on
0 Posts

Hey guys, my front right turn signal keeps going out, I've replaced the bulb on it about 3 or 4 times now in the past year and a half. Have any of you guys had the same issue with your TA's? I remember when I first bought the car my left one went out and I took it to the dealer and they fixed it for a little over $200..yeah, I didn't know any better lol. I believe they replaced the whole housing for it? Any of you know how to fix this issue instead of replacing the bulb everytime it goes out?
 01-29-2011, 08:35 AM
#3
TECH Apprentice
iTrader: (10)
Join Date: Jan 2008
Location: Florida
Posts: 309
Likes: 0
Received 0 Likes
on
0 Posts
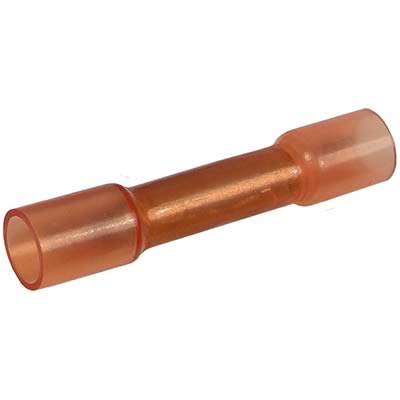
Remove the bulb from the recepticle and check for severe corrosion. Thats what kills'em. $8 at your local autozone in the oem section. Cut the old one out and splice the new one in and should be good.
Heres where I found the info awhile back: https://ls1tech.com/forums/appearanc...r-problem.html
Heres where I found the info awhile back: https://ls1tech.com/forums/appearanc...r-problem.html
01-29-2011, 05:00 PM
#5


You do not need to cut and splice...you can take apart the socket. The inner part pops out and then pull the pins out and slide the wires out, then scrub off any corrosion and reinstall with new socket.
Also to prevent this from happening again, drill a 1/4" hole in the bottom of the light housing to allow water to drain. The housings will have minor leaks, allowing water to collect, which causes the corrosion.
Also to prevent this from happening again, drill a 1/4" hole in the bottom of the light housing to allow water to drain. The housings will have minor leaks, allowing water to collect, which causes the corrosion.
01-29-2011, 06:57 PM
#6
On The Tree
Thread Starter
Join Date: Apr 2009
Location: California
Posts: 108
Likes: 0
Received 0 Likes
on
0 Posts
Thanks guys for the help..this has been bothering me for the longest time now. Thanks throttlejunkie1 for the link on that write-up, I think I need to do that since the socket seems to be really corroded (I tried putting a ton of dielectric grease in there the last time I replaced it and it still went out after a few months). Have any of you guys had problems with one turn signal light being dimmer than the other? I have been buying the bulb from autozone but it seems to be dimmer than the drivers side that the dealer fixed for me. Is it a different light bulb? Do I need to replace the housing too because it seems like water is getting in there.
01-29-2011, 07:05 PM
#7
Launching!

Join Date: Sep 2009
Location: SOUTH CAROLINA
Posts: 260
Likes: 0
Received 0 Likes
on
0 Posts
 Hi,
Hi,you may want to use posi-lock connectors =simple to use. Just insert wire and twist to lock. Connection complete and water resistant.have a blessed day'''
jim
Trending Topics
01-29-2011, 07:12 PM
#8
On The Tree
Thread Starter
Join Date: Apr 2009
Location: California
Posts: 108
Likes: 0
Received 0 Likes
on
0 Posts
01-30-2011, 06:22 AM
#11
TECH Regular
iTrader: (8)
Join Date: Dec 2009
Location: Fayetteville, NC
Posts: 426
Likes: 0
Received 0 Likes
on
0 Posts
Remove the bulb from the recepticle and check for severe corrosion. Thats what kills'em. $8 at your local autozone in the oem section. Cut the old one out and splice the new one in and should be good.
Heres where I found the info awhile back: https://ls1tech.com/forums/appearanc...r-problem.html
Heres where I found the info awhile back: https://ls1tech.com/forums/appearanc...r-problem.html
01-30-2011, 05:41 PM
#13
Teching In

Join Date: Sep 2010
Posts: 25
Likes: 0
Received 0 Likes
on
0 Posts
01-30-2011, 06:34 PM
#14
Yeah, search for DRL LED and you'll find tons of info. I found everything I needed on here, including the model number of the needed flasher, etc.
I also disassembled and replaced the sockets without cutting and splicing the wires. There's a link to that write up on here as well.
I didn't change the operation of my LEDs. You can't tell I've changed anything from stock, although the LEDs aren't quite as bright as incandescent bulbs, you probably wouldn't notice looking at my car unless you had something to compare it to.
https://ls1tech.com/forums/appearanc...chbacks-3.html
(I used normal amber LEDs, not switchbacks, but the basic info is the same)
Here's a writeup on how to change the socket without cutting and splicing any wires:
https://ls1tech.com/forums/11115320-post8.html
New DRL housings from sponsor WS6 Store: http://www.ws6project.com/user_stor/...ath=235_83_366
The flasher you want is an "EL12". I got mine at AutoZone.
I also left the regular lights everywhere else. I'm only using LED DRL/turn signal bulbs since those were the only ones burning out frequently.
Last edited by Saturn5; 01-30-2011 at 06:46 PM.
01-30-2011, 08:05 PM
#15
TECH Regular
iTrader: (8)
Join Date: Dec 2009
Location: Fayetteville, NC
Posts: 426
Likes: 0
Received 0 Likes
on
0 Posts
and you say LED DRL's ( as in daylight running lamps? )...I was referring to the turn signal??
01-31-2011, 12:15 AM
#16
Offroad, did you take apart the socket to look at the wires? Like I mentioned before, you do not have to cut and splice...my original socket was pretty corroded, but when I removed the socket, the wires were not bad, just used some steel wool to clean them up. The part that actually makes contact with the bulb gets replaced with the new ones, which was what was actually corroded on mine.
01-31-2011, 12:41 AM
#17
TECH Regular
iTrader: (8)
Join Date: Dec 2009
Location: Fayetteville, NC
Posts: 426
Likes: 0
Received 0 Likes
on
0 Posts
Offroad, did you take apart the socket to look at the wires? Like I mentioned before, you do not have to cut and splice...my original socket was pretty corroded, but when I removed the socket, the wires were not bad, just used some steel wool to clean them up. The part that actually makes contact with the bulb gets replaced with the new ones, which was what was actually corroded on mine.
01-31-2011, 09:50 PM
#18
no, the inside of my socket looked like it caught fire...I clicked that link and seems that socket comes with the whole wiring. the one I got from advanced auto had only a few inches of wiring...but my turn signal works fine now, since I bought it ( which was when I discovered the turn signal out ).
If the wiring in your original socket is not damaged, you can disassemble the socket and remove it from the wiring. You then do the same with the new socket and assemble the new socket onto the original wires.
The only time you need to cut and splice is if you have wire damage.
01-31-2011, 10:33 PM
#19
TECH Regular
iTrader: (8)
Join Date: Dec 2009
Location: Fayetteville, NC
Posts: 426
Likes: 0
Received 0 Likes
on
0 Posts
After clicking the link, it would have been helpful to carefully read the page.
If the wiring in your original socket is not damaged, you can disassemble the socket and remove it from the wiring. You then do the same with the new socket and assemble the new socket onto the original wires.
The only time you need to cut and splice is if you have wire damage.
If the wiring in your original socket is not damaged, you can disassemble the socket and remove it from the wiring. You then do the same with the new socket and assemble the new socket onto the original wires.
The only time you need to cut and splice is if you have wire damage.