When you click on links to various merchants on this site and make a purchase, this can result in this site earning a commission. Affiliate programs and affiliations include, but are not limited to, the eBay Partner Network.
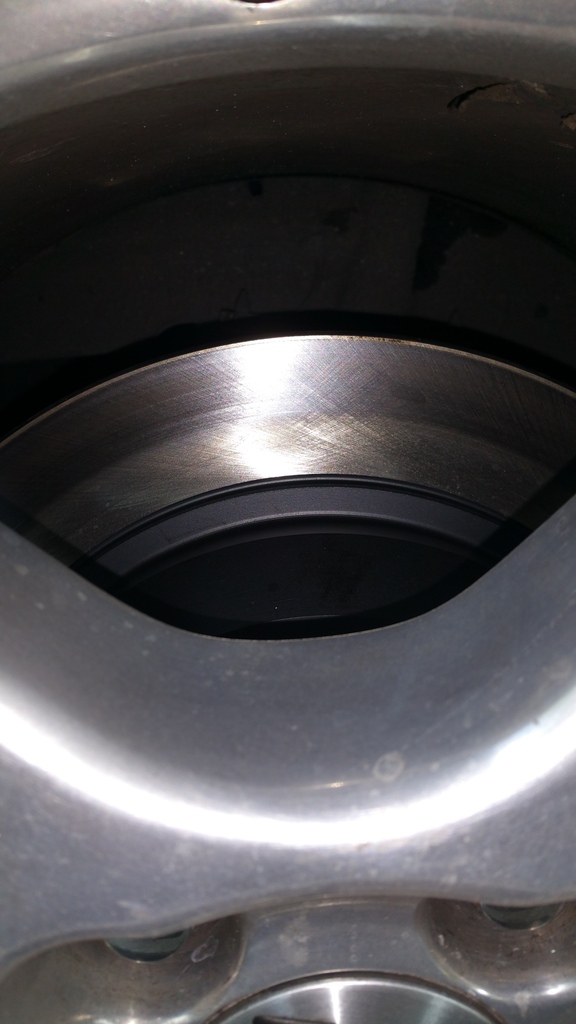
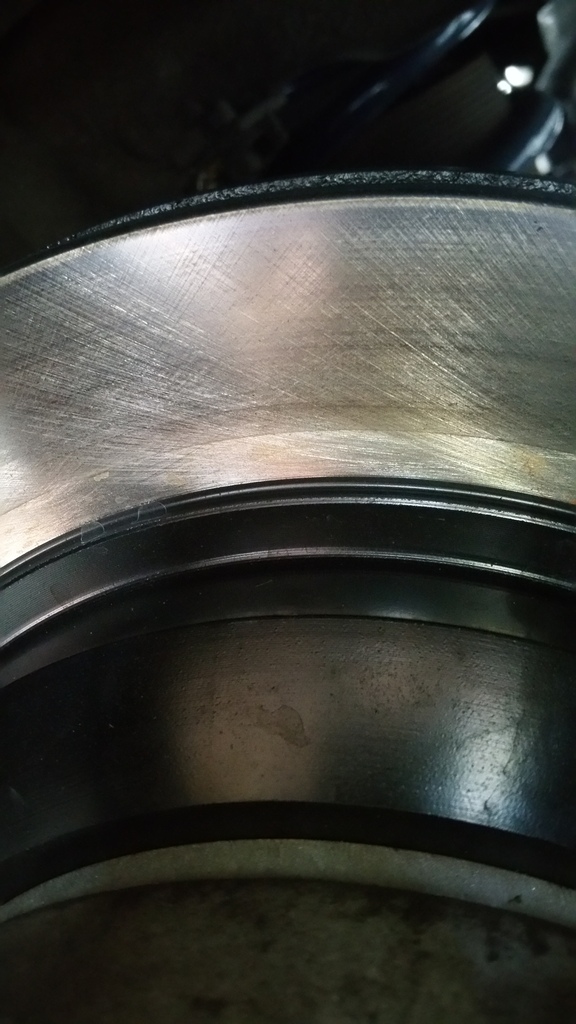
I had brake maintenance done yesterday at my regular maintenance shop (although I have the tools & knowledge I'm too out of shape) and everything seems normal except for the rear pad/rotor contact pattern. I left the old rotors at the shop, but I know they didn't exhibit wear on only half of the rotor surface. What I had done on the rears is replace the brake lines, and replace everything besides the bare caliper and banjo bolts (including caliper rebuild).
Is this a parts selection issue, an installation issue, my failing memory, or...?
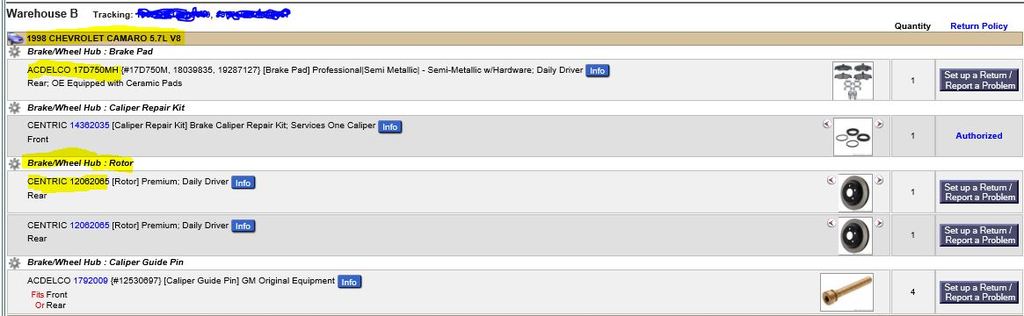
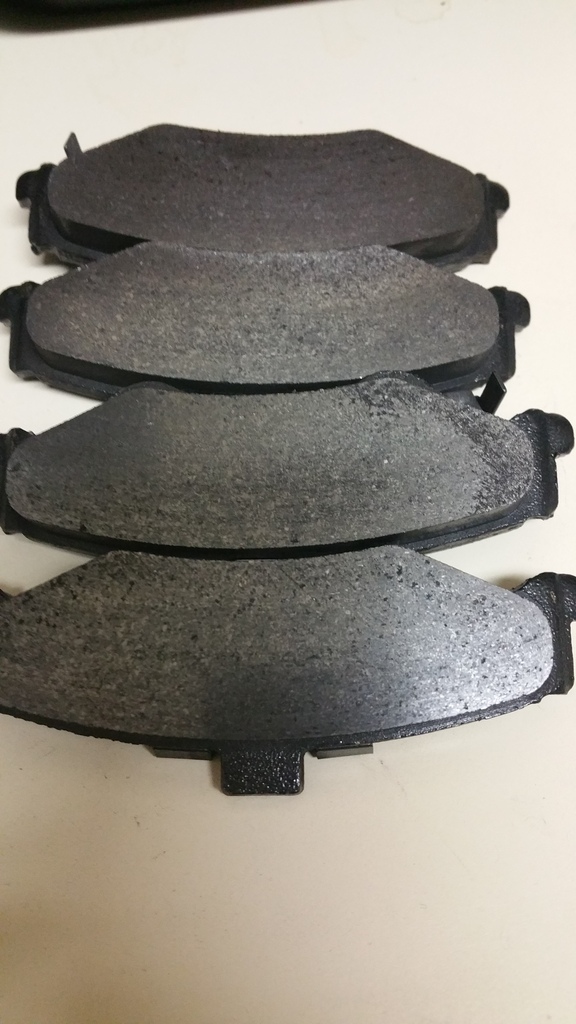
These are the pads/rotors I ordered from RockAuto:
Last edited by JimMueller; 06-20-2016 at 12:42 PM.
Reason: typos
Got the same problem on my passenger side. Thought I had spread calipers so I replaced them with some remanned ones and problem is still there. I know eventually as the pad wears it will get better but its weird.
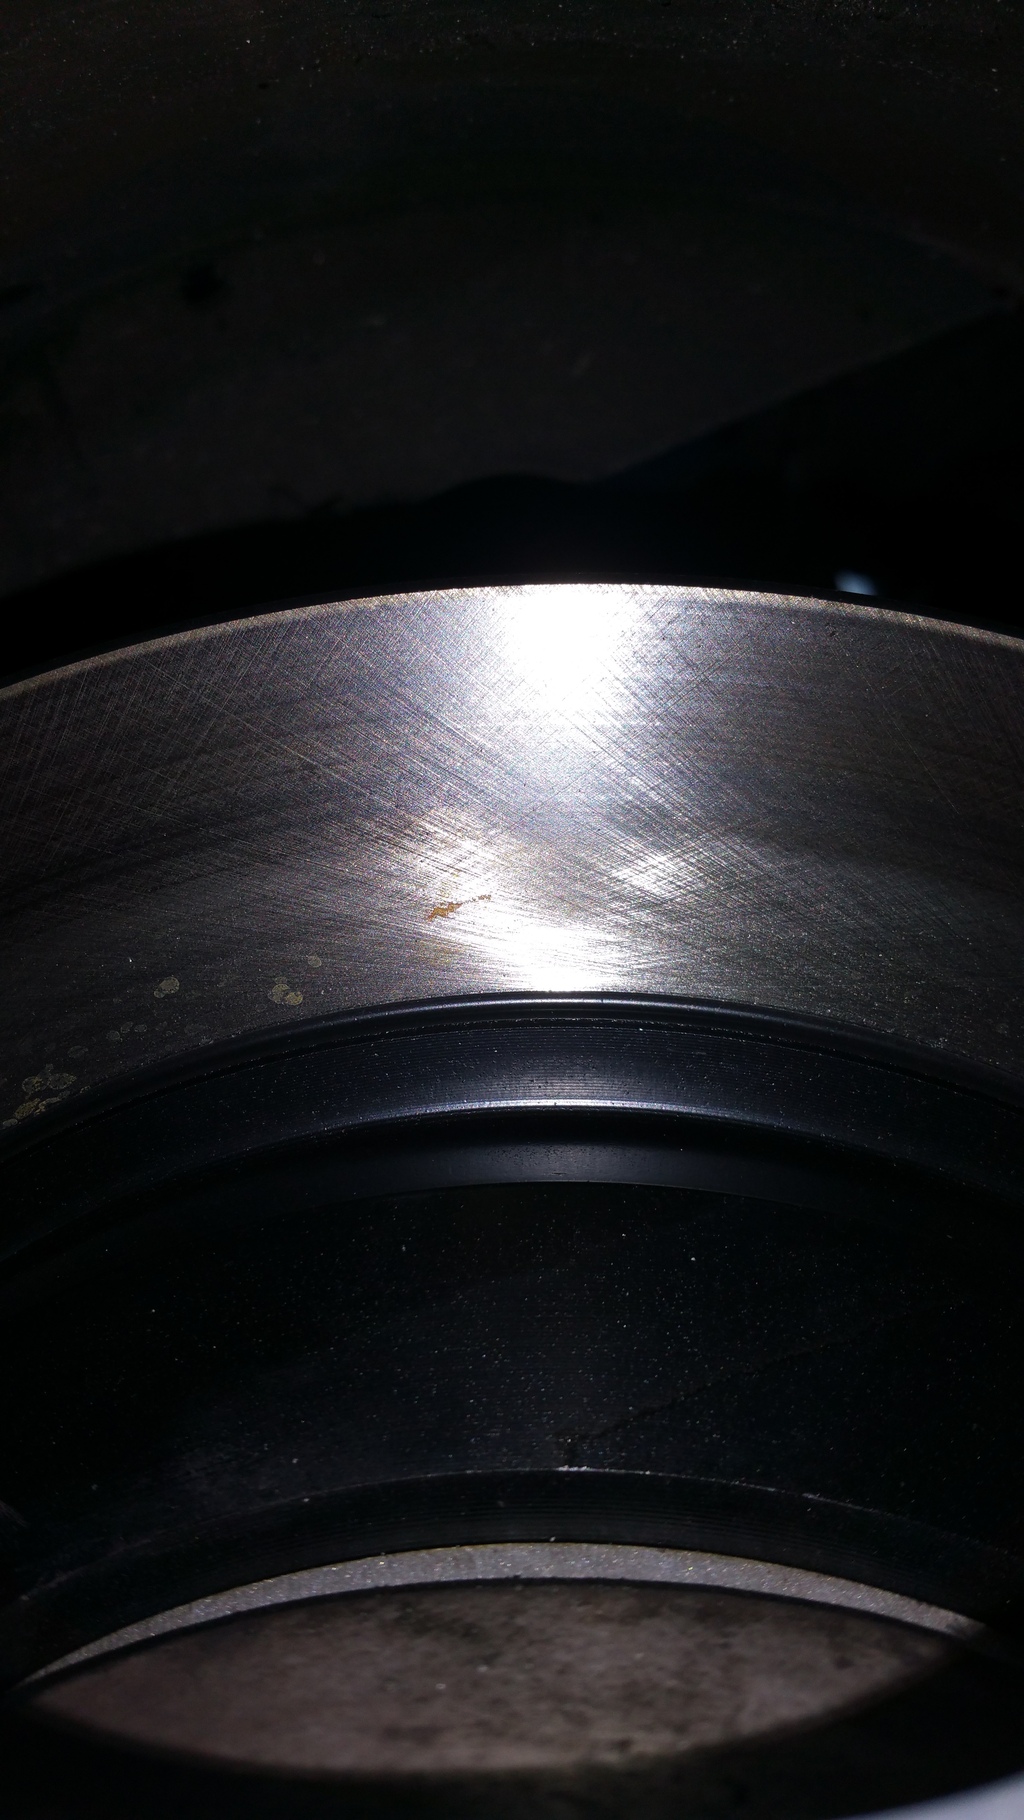
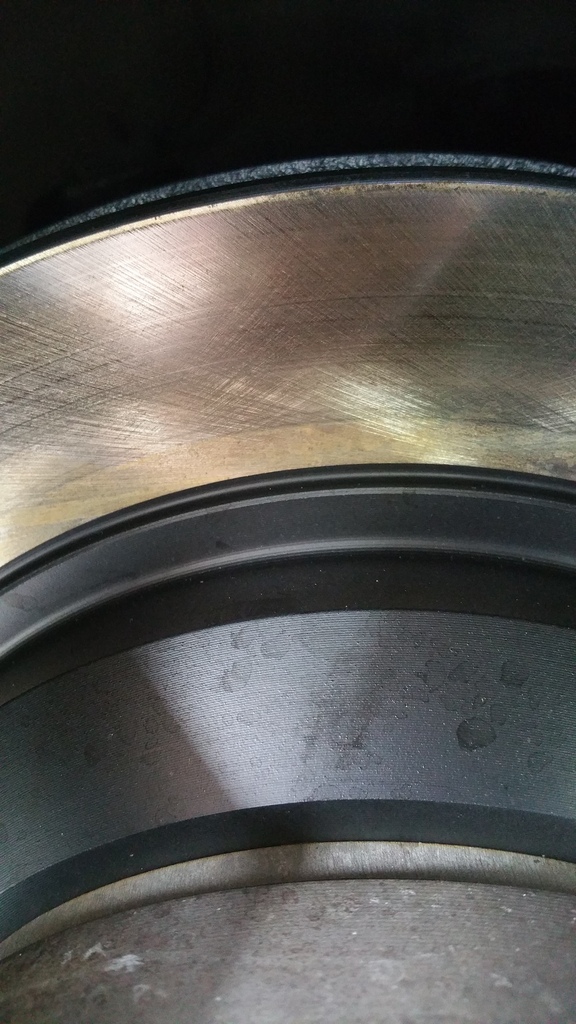
Here's a better photo. The inner edge of the pad is closer to the center of the swept area than to the inner edge of the swept area. I've asked to try to recover the old rotors to see if the old Powerslot rotors effectively had a narrower swept area which was closer to the size of the pad as a result of a larger diameter inner 'hub' section. If that's the case, I don't see how the wear pattern would go away over time.
As you stated try and find your old parts to compare the two, the other thing you should do is compare the old pad to the new. You are correct that does not look correct, the pad actually looks smaller that it is supposed to be. I'm sure someone that has a Camaro/TA can snap a pic too and compare how the two look.
Do you have this same problem on both sides of the car? What does the inside of the rotor look like? Is the wear opposite with heavy wear on the inside of the rotor and light on the outside?
I would expect that you'll see something similar on the inside of the rotor. This can happen when you have the inboard and outboard pads reversed. These Delco pads have a squeal bar on the inboard pad only.
Is that it? Can you see a squeal bar on the pads visible through your wheel? (The brake may obstruct them, so you may have to check by putting an inspection mirror in through the wheel spokes.)
I do remember two of the pads having squeal bars, but I cannot see them with the tire mounted and the car on the ground as I don't have an inspection mirror. From what I recall all four pad shapes were all the same (although I didn't compare the old with the new before disposing the old), so why does it matter if the squeal bar is mounted on the inside vs the outside? Looking online there doesn't seem to be a consensus on where the squeal bar should be located (top/bottom/inside/outside).
I'm going down to pickup the old rotors (old pads weren't found), I'll see if we can inspect the pads & inside rotor pattern then.
I'll look at it further the next time the wheels are off. These Delco EE pads aren't aggressive enough for what I need so I'll try a set of FF's and if necessary GG's.
Looks like a bedding issue or surface contaminants (did the tech clean the rotors before installing calipers and pads?). Had that a few times even after following instructions, usually when rotor and pad bedding processes were very different and I couldn't use old parts for bedding.
Quick scrub of the pads and rotors with an abrasive, clean it all off with brake cleaner, then follow pad instructions for bedding. Personally I like to use the plastic abasive pads to keep silica out of the rotor, red pad works wonders on brakes. Green pads work too with a little more elbow grease.
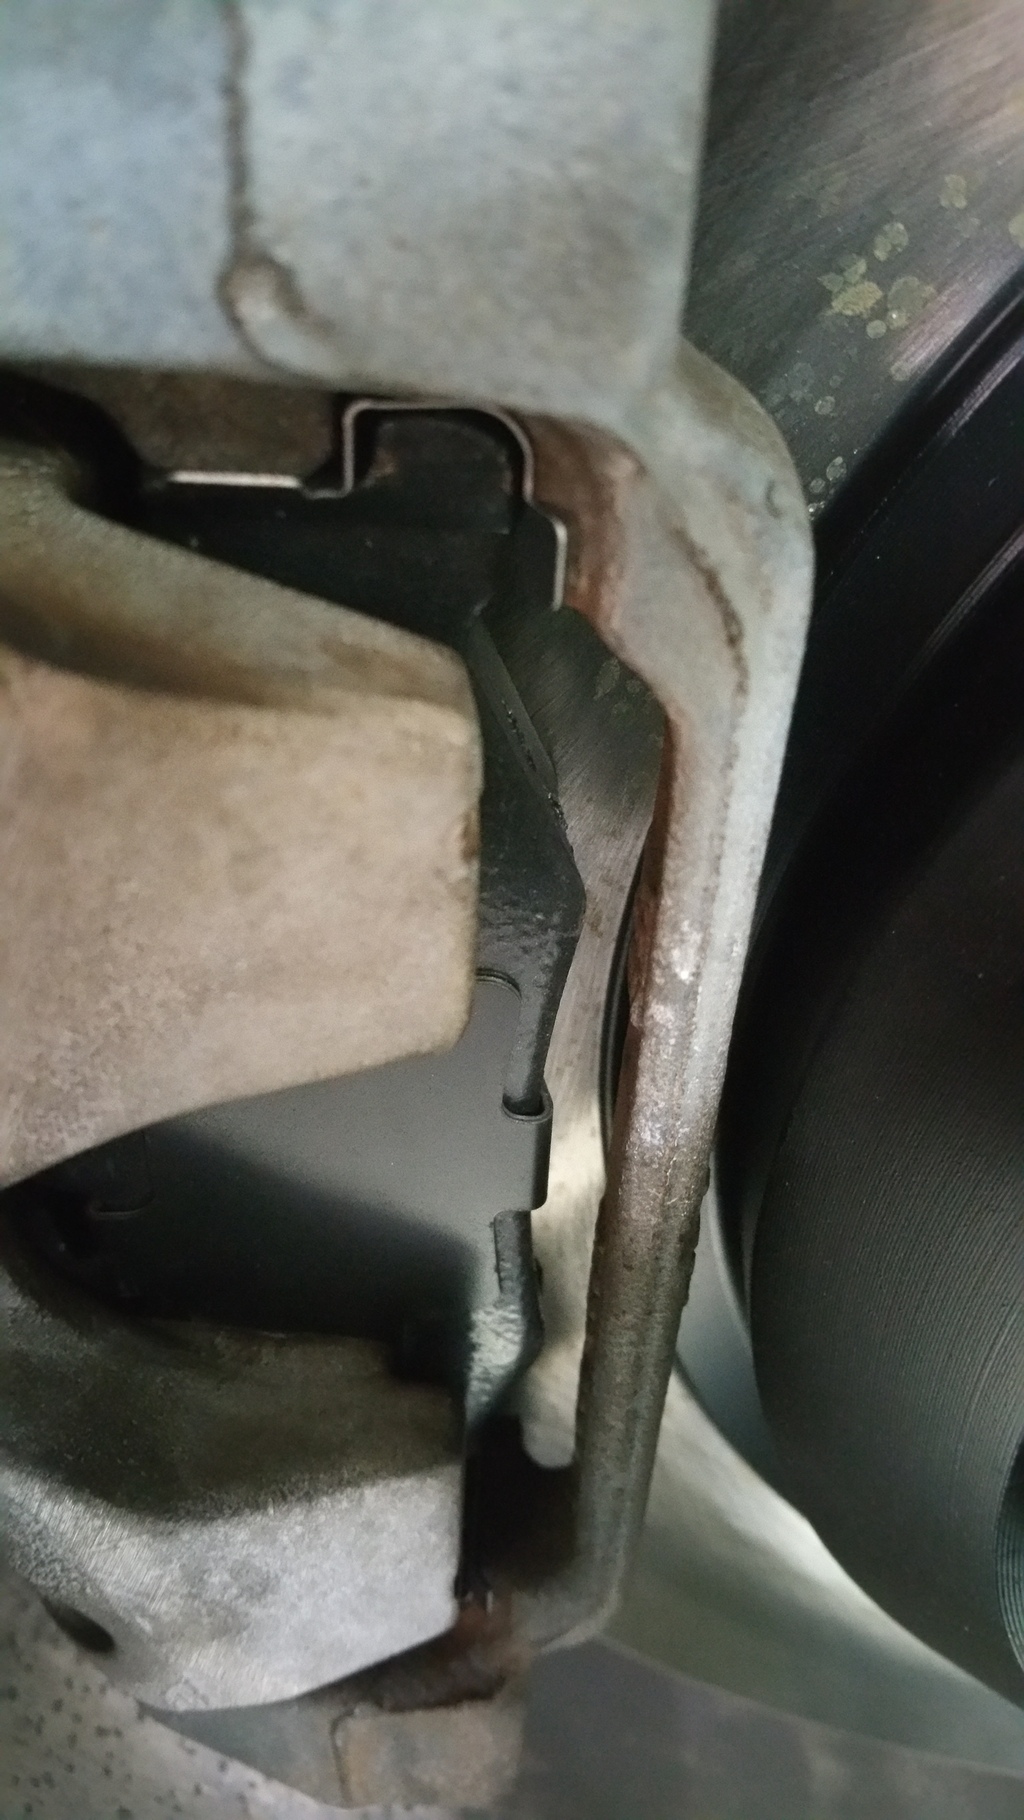
Yeah he doused all the rotors with brake cleaner during installation. The area which isn't worn (the inside circumference on the rotor contact surface) isn't being touched by the pad... the pad shape is not physically large enough to reach that part of the rotor. To me the untouched area is just much wider than I had remembered it being on the old rotor.
I brought back one of the old rotors. OD is ~12", the worn pad swept area is roughly 30mm wide, the inside rotor surface width is 39.5mm, the inside lip is about 6mm and the outside lip around 2mm, the center 'hub' diameter is 8" with a small lip between the 'hub' and the inner edge of the pad contact surface. So the old pad was using 75% of the old rotor contact width and the new pad is using about 60% of the new rotor contact width. Who knows... I'm no longer worried about it at this point.
Something else which is bothering me is that we bled all four calipers in the correct order twice, never let the master run low, but the pedal has a new 'whoooosh' sound between rest and when the pads start to grip. They said give it a few days and bring it in next weekend if it hasn't gone away. I know there is a Tech2 ABS procedure to bleed the ABS but I've never used that before. Should I inspect/repair/replace the booster also?
From what I recall all four pad shapes were all the same (although I didn't compare the old with the new before disposing the old), so why does it matter if the squeal bar is mounted on the inside vs the outside? Looking online there doesn't seem to be a consensus on where the squeal bar should be located (top/bottom/inside/outside).
I recall the front pads are the same. Searching for pictures of the rears, this is what I find:
The rear pad has a larger contact area for the piston. If you have the pads reversed, the piston won't have full contact with the pad in the rear and they will "pinch" the top of the rotor. This will give you extra wear/heat at the top of the rotor, like you are seeing here. (I'd expect the wear to look similar on the backside, if this is what is happening.)
On the fronts, we have two smaller pistons, so we don't need a larger shoe on the backside.
The squeal bar should definitely be mounted on the in the back. It is there to warn against lack of pad material. One can visually check for that on the front pad, so a squeal bar is not needed there. Since the back pad is not visible, that is why the bar is needed back there - so we get a sound signal/warning instead.
That makes sense and I can honestly say I never realized that when I did my brakes before. My photo in post #4 shows that the inner arc of the pad backing plate is basically flat, and it looks the same through both wheels; that arc is closer in shape to the pad in your photo which doesn't include the squeal bar. I realize Delco could use two different backing plates but I'm wondering about the likelihood.
When I switch rear pads to another vendor/compound, can I just swap pads or will I need to prep the rotors at all?
Looks like you're not alone. I had EBC greens on there for a while and then recently switched to AutoZone pads. Neither pad 'swept' the surface of the rotor more than what's pictured. Mind the rust, it's been sitting for a while. Also my EBC's started breaking apart and didn't contact with the full pad so that's why there's a clean area, a half clean area and then the area that hasn't been touched. The half clean area is where the AutoZone pads started contacting the rotor after I replaced the EBC's
When I switch rear pads to another vendor/compound, can I just swap pads or will I need to prep the rotors at all?
Sounds like a good excuse to buy a new tool! If the two areas are close in measurement, (with a micrometer) I'd just slap on the new pads and go. Everything will wear even eventually.
^ The brake pros will probably say that the rotors should be properly burnished before hand, but I'm not sure if the payback is worth the effort if you aren't racing the car.
Well after all that I guess I just had to be patient. I checked the rotors Thursday or Friday and found that the pattern was mostly normal, and when I swapped rear pads again on Saturday I found that some areas of the old pads had not yet been bedded.
Well after all that I guess I just had to be patient. I checked the rotors Thursday or Friday and found that the pattern was mostly normal, and when I swapped rear pads again on Saturday I found that some areas of the old pads had not yet been bedded.
Did the tech clean and regrease the slide pins? It seems like it just might have taken them a bit start sliding correctly.
I didn't technically watch him do the rear guide pins, but I watched him lube all of the caliper pistons and lube the front guide pins without me having to tell him. I used all new guide pins and I saw the old guide pins in his cart after the job was done. I stopped hanging out in the shop once he got the rear calipers rebuilt as there wasn't anything custom in the rear...and it was hot lol. I used Permatex 80653 lubricant.

 06-19-2016, 09:26 AM