What’s Up in the Forum: DIY LS1 Turbo Kit with Truck Manifolds
Monster turbo kit for the LS1 Camaro is as simple as truck manifolds and plenty of welding skill.
The LS1 engine loves boost and a single turbocharged setup can allow your 4th gen Camaro to make monster power, but turbo kits are expensive. Fortunately, there is a great do-it-yourself write-up in the forums that walks us through all of the key steps of making your own turbo setup with truck manifolds, piping and an array of premade flanges.
Oh, and you are going to need to be able to weld, or have a welder available to finish up the piping once everything is mocked up. In the long run, being able to weld plays a major role in performing this DIY on a budget, but so long as you can tack things together, a trained welder can finish the job while adding cost to the job.
The Introduction
This LS1 turbo manifold how-to thread was written up by “KILLER-LS1” and as the title suggests, it walks us through the surprisingly simple project of making a turbo kit for your 4th generation Camaro SS. The OP begins with some key notes before getting into the actual project.
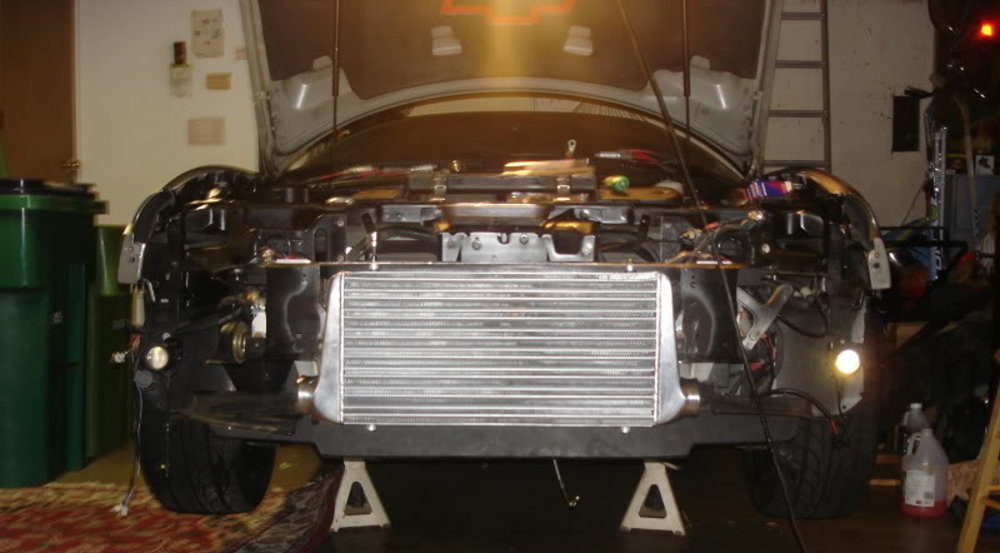
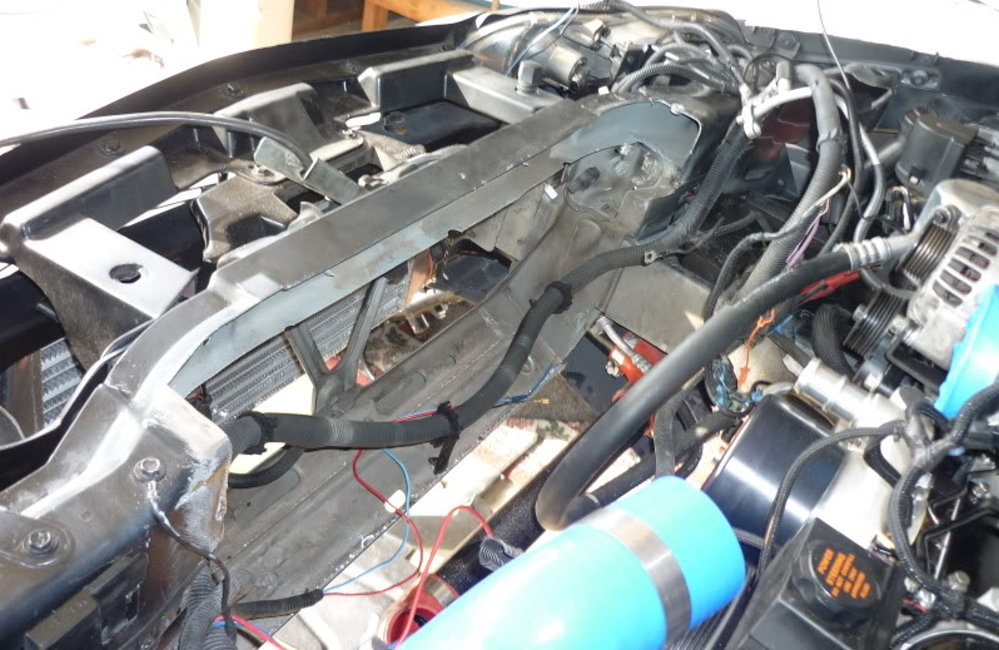
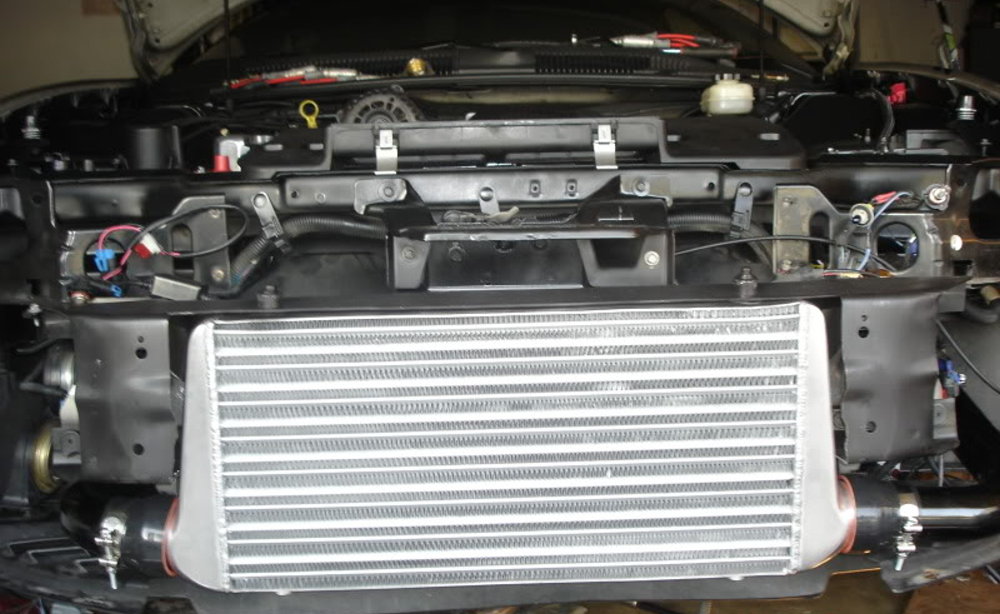
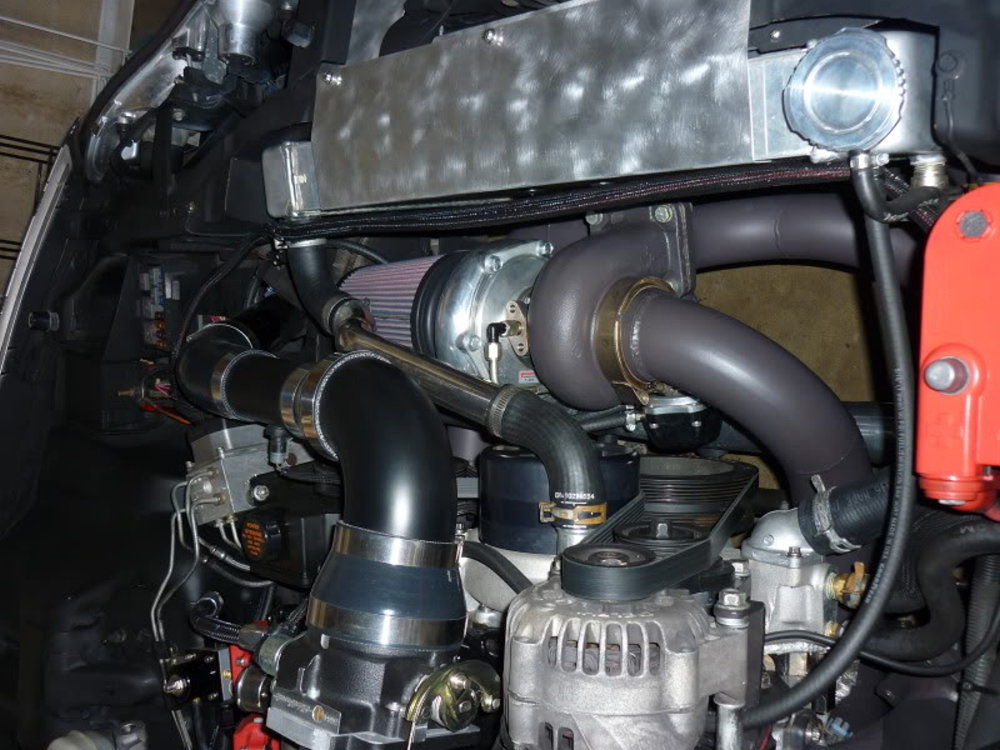
In order to fab this kit, you need to mount the radiator vertically. I called Griffin Radiators and told them what I was doing and what engine it was for and they built me a custom one. The “universal” griffin that everyone seems to use really isn’t the correct unit to use. The engineers at Griffin said that would be too small, and it does not come with a steam port for the heads, or a bung to mount the fluid level sensor. I’d just call them and get their recommendation. Here are some photos on mounting it.
He then included a few pictures of the work needed to make the radiator fit, followed by a quick look at the mounting process for the big front mount intercooler.
He also touched on the items needed for the rest of the project:
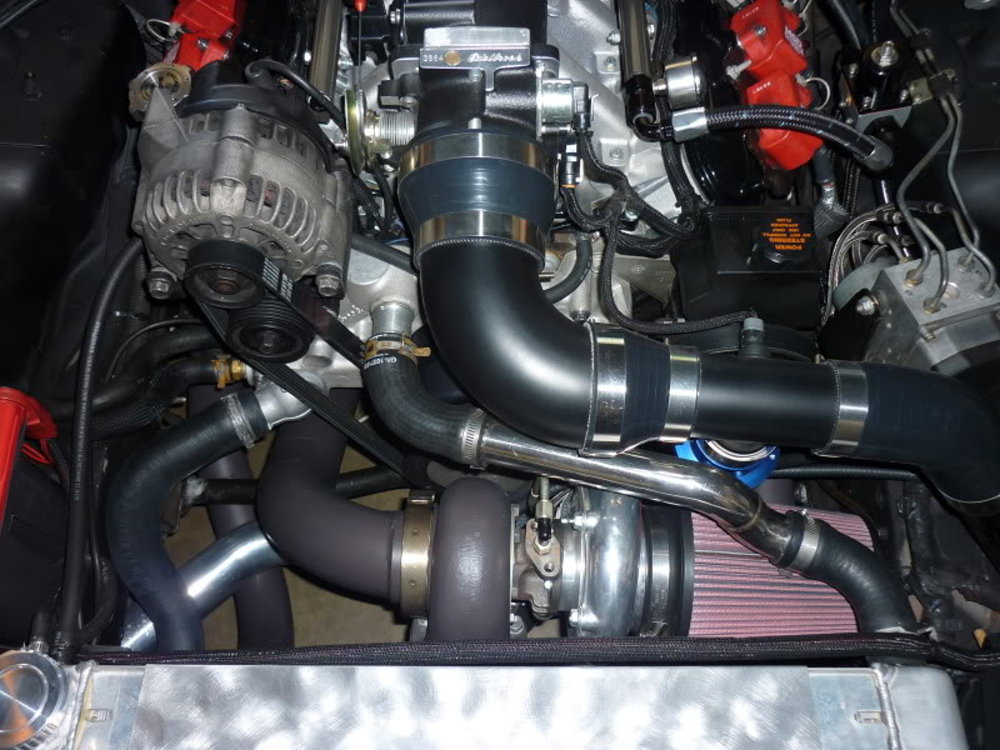
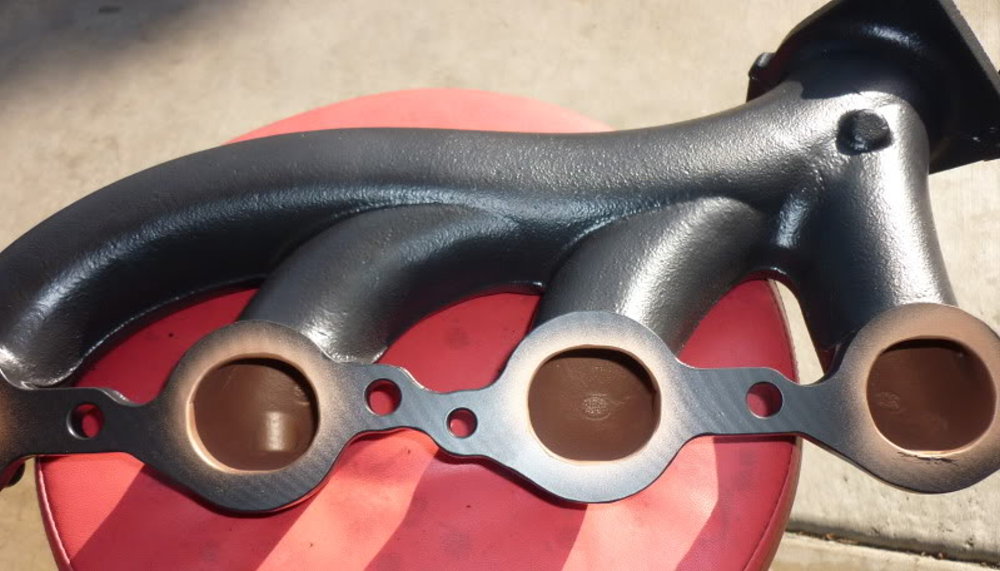
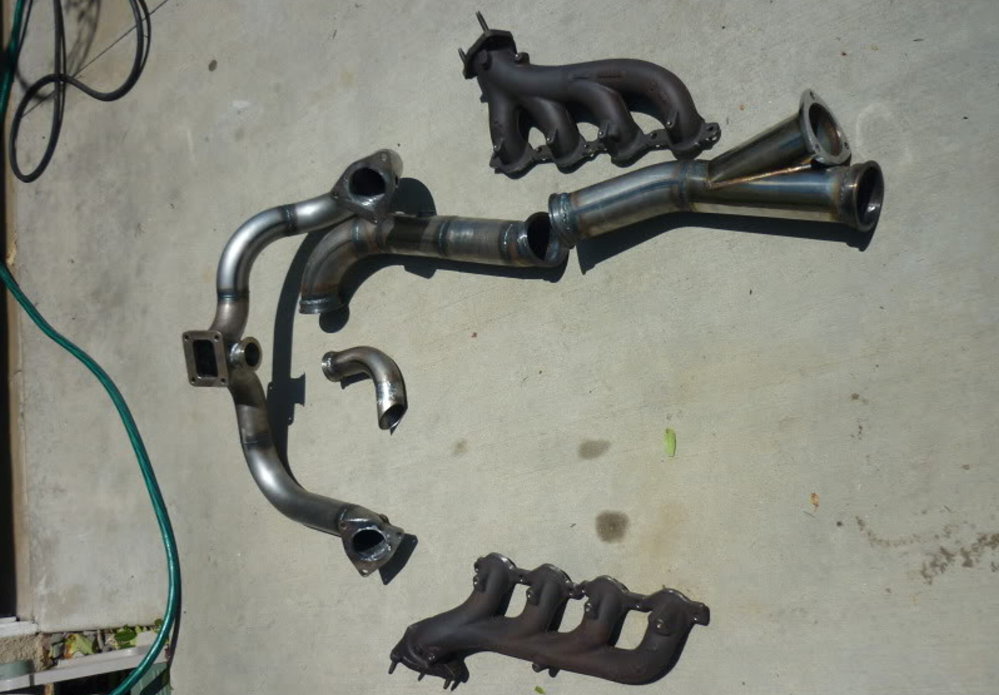
Truck Manifolds- no need to modify them. Just put the drivers side manifold on the passenger side the other manifold on the drivers side.
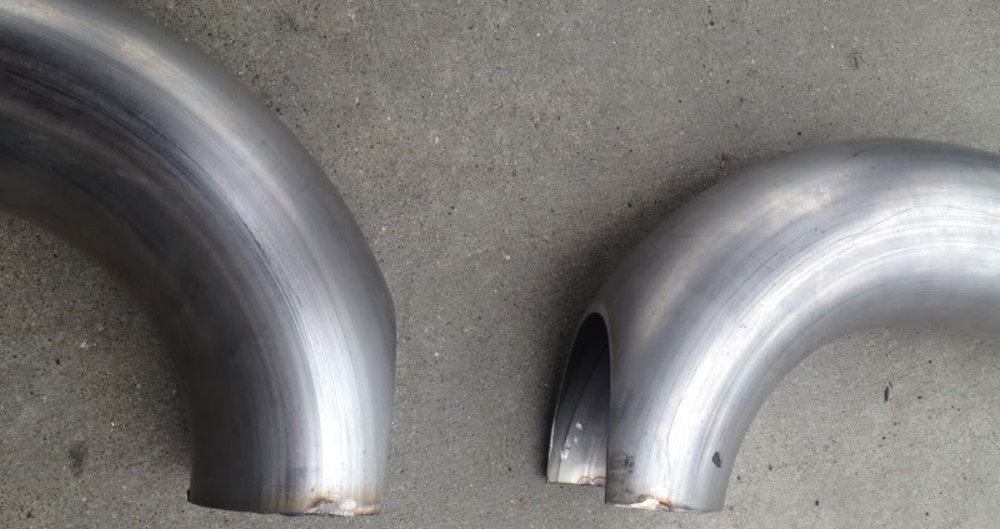
Mandrel bent tubing. I bought (1) 2″ U bend for my wastegate, (3) 2.5″ Mandrel U-bends for the merge pipes, and (3) 3″ U bends for the downpipe. This gave me plenty of extra room for error
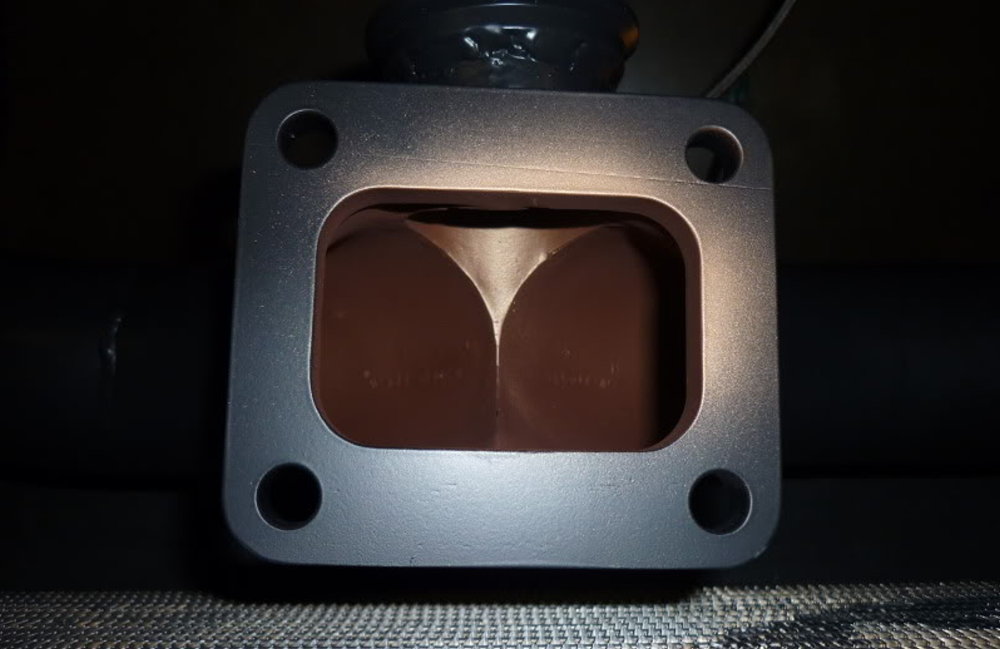
Manifold flange – I bought two laser cut flanges off ebay, but im sure some of our sponsors would have them. These are welded to the merge pipe and bolt on to the truck manifolds.
Turbo Flange – Bought my T4 flange from Turbonetics
Wastegate Flange – Should come with your wastegate
V-Band flanges w/ clamps – these come in handy while making the downpipe!
02 Sensor Bung(s)- for wideband/oem sensors
Turbo K-member- will make your life MUCH EASIER!!
Planning the Piping
The next step involves preparing the piping that will connect your turbocharger to the manifolds.
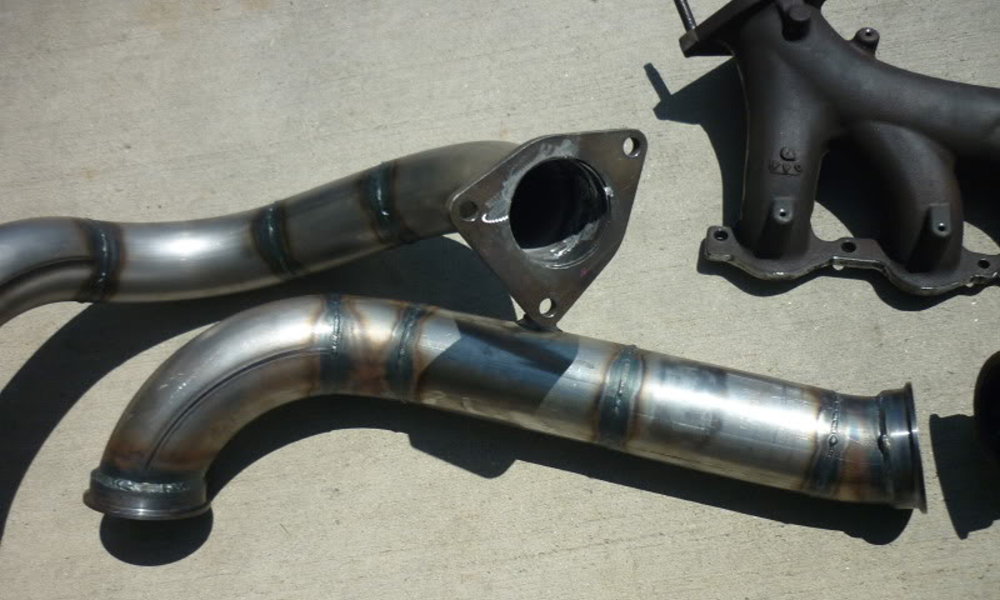
This begins by taking the T4 turbo flange and some of the piping, cutting the piping to merge smoothly and attaching that piping to the flange. The OP uses a dremel tool after welding everything in place and the result looks like something that he bought from a custom shop, especially after power-coating.
Next, he bolted up the truck manifolds to the engine, placed the flange on the end of the manifold and began cutting piping, working his way to where the turbo would sit once installed.
After the merge was done, I fully bolted up both manifolds with gaskets and started to put it all together… I started on the passenger side and worked my way over. You can go whatever way you want. Just start with the laser cut flange and figure out where you need to go next. THE LESS PIECES YOU HAVE THE BETTER This takes some creativity and a lot of trial and error, but cut an angle out of your U bend and hold it up to the manifold flange and look at the placement. if its where you want it, tack it on in a few spots.
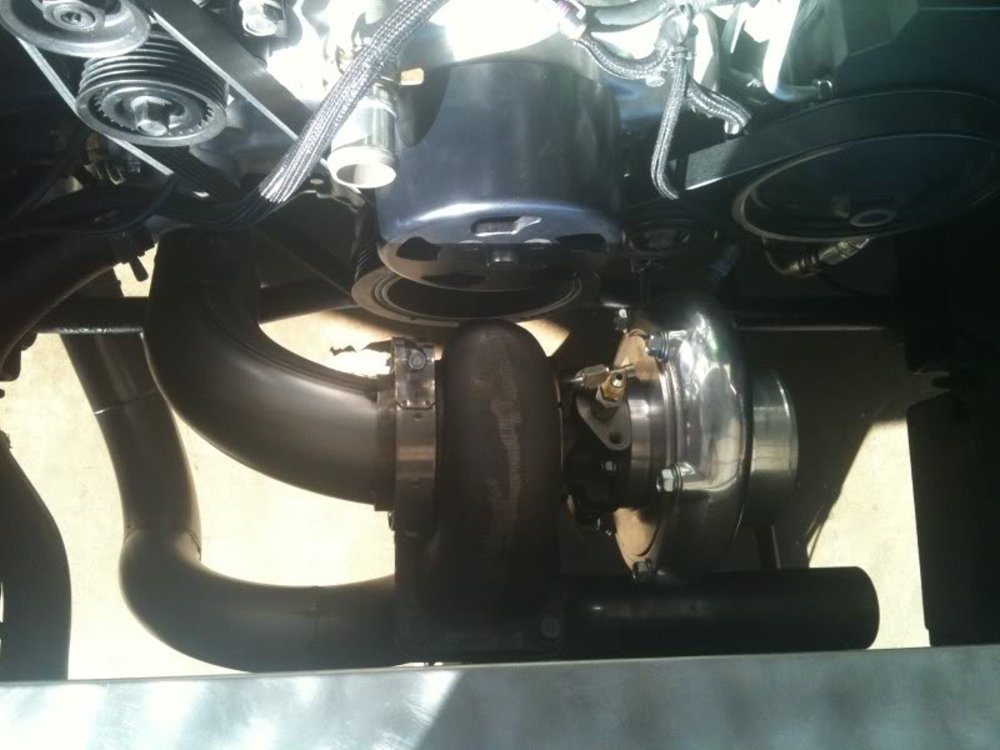
Once he finished one side, he worked on the driver’s side, getting everything pieced into place before removing and properly welding the entire system of piping.
The Downpipe
After hammering out the piping that connects the exhaust manifolds to the turbocharger, the OP explains that the downpipe is crafted using the same basic method. By cutting and piecing together piping, he built the path that the exhaust would travel after passing through the turbocharger, connecting the downpipe to the exhaust system.
Other Key Points
This DIY focuses specifically on how to route the piping from truck manifolds on an LS1 to a front-mounted turbocharger, along with routing the downpipe to the exhaust, but it doesn’t address how he ran the charge piping from the engine to the intercooler to the throttle body, nor does it talk about how to run the oil lines.
Those are things that each owner will have to plan out on their own, but for a Camaro SS owner who knows how to weld, this thread shows how easily a set of truck manifolds and some heavy duty piping can be transformed into a big single turbo kit for a 4th gen Chevy muscle car.