


 May 20, 2016, 02:10 PM
Last edit by: IB Advertising
See related guides and technical advice from our community experts:
- Camaro and Firebird How to Sequence Tail Lights<br>Step by step instructions for do-it-yourself repairs.

HOW TO: Sequential Tail Lights
Thread Starter
TECH Fanatic
Joined: Oct 2008
Posts: 1,183
Likes: 0
From: VA
Hey everyone. I just installed my sequential tail light kit although the directions from the kit were useful, they were generic for multiple cars and werent specific on things. Since there is no how to on here, I thought I'd write one.
First off, heres mine installed in case you don't know what they are.
With flasher from kit (part installed under steering wheel)
http://video.google.com/videoplay?docid=-1120273509123936896&hl=en
With stock flasher
http://video.google.com/videoplay?do...99711715&hl=en
Notice when the headlights are one all 3 bulbs stay lit. With stock, you only have the inside 2 so it looks more like a square; our full tail lights dont light up. This is an added bonus.
I bought the kit off ebay for $80 shipped from thundercat_electronixx. I'd put a link in but thats against forum rules so I'll leave it at that.
What's Needed:
2 Sequential Modules*
2 Ring Terminals*
10 Butt Connectors*
2 Universal Sockets*
2 1157 Bulbs*
1 electronic turn signal flasher*
Wire Cutters
Wire Strippers
Wire Crimper
Dremel or Drill with Wheel Grinder and bits
Phillips Screw Driver
Socket Wrench
Needle Nose Pliers
Silicone or duck tape
Nail
* Comes in kit I mentioned
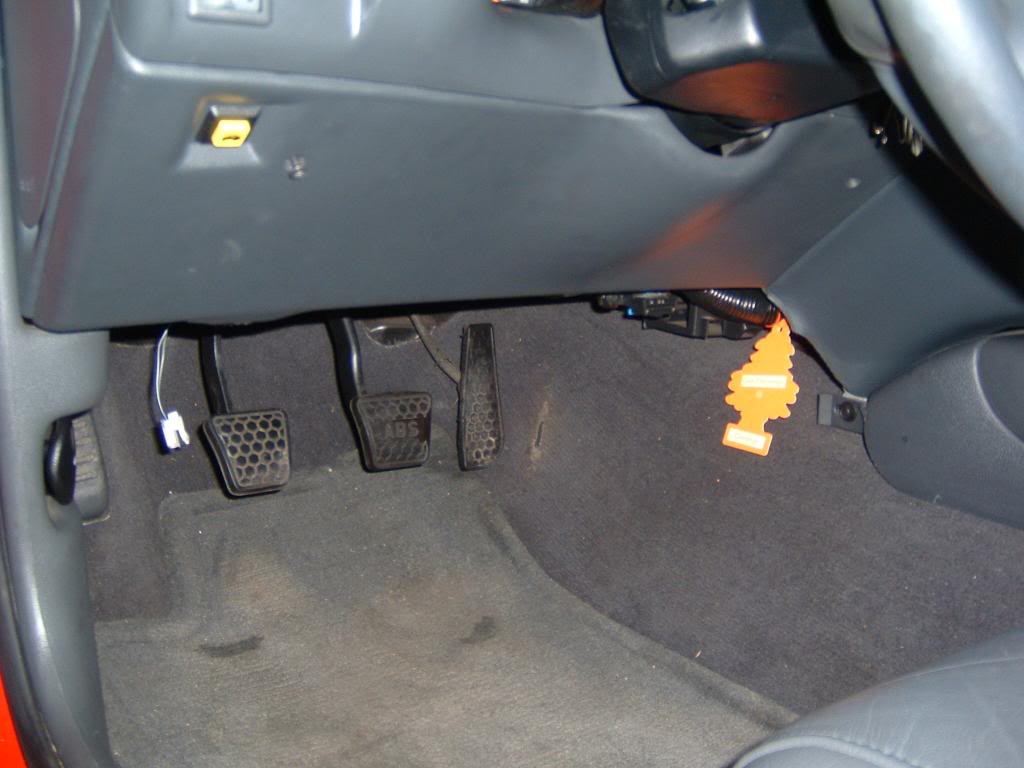
1. This part is optional. If you like the first vid speed more or dont like the stock sound, do this. If you like the second vid, go to step 3. Remove the panel under the steering wheel. You might have to do the one right above the pedals too. Mine was already off so I'm not sure if you need to remove that. Anyways, its attached by 2 phillips screws at the top and on the bottom of it 2 7mm nuts.
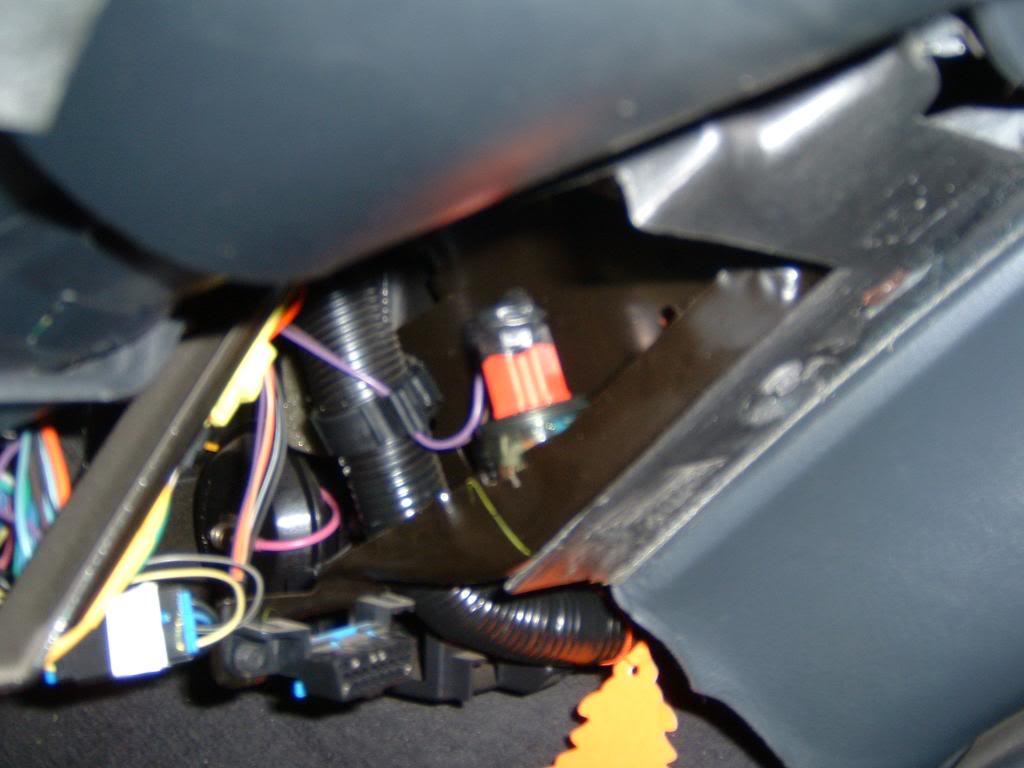
2. Replace stock turn signal relay with electronic one in kit. It will be steel looking and hidden on the right side near center console. It is clipped to a metal support, just pull it up and off. I did not get a pic before I took it off, but the new one in this pic should be in the same place. The turn signal sound comes from it, so turning on the signal will help locate it if you have trouble.
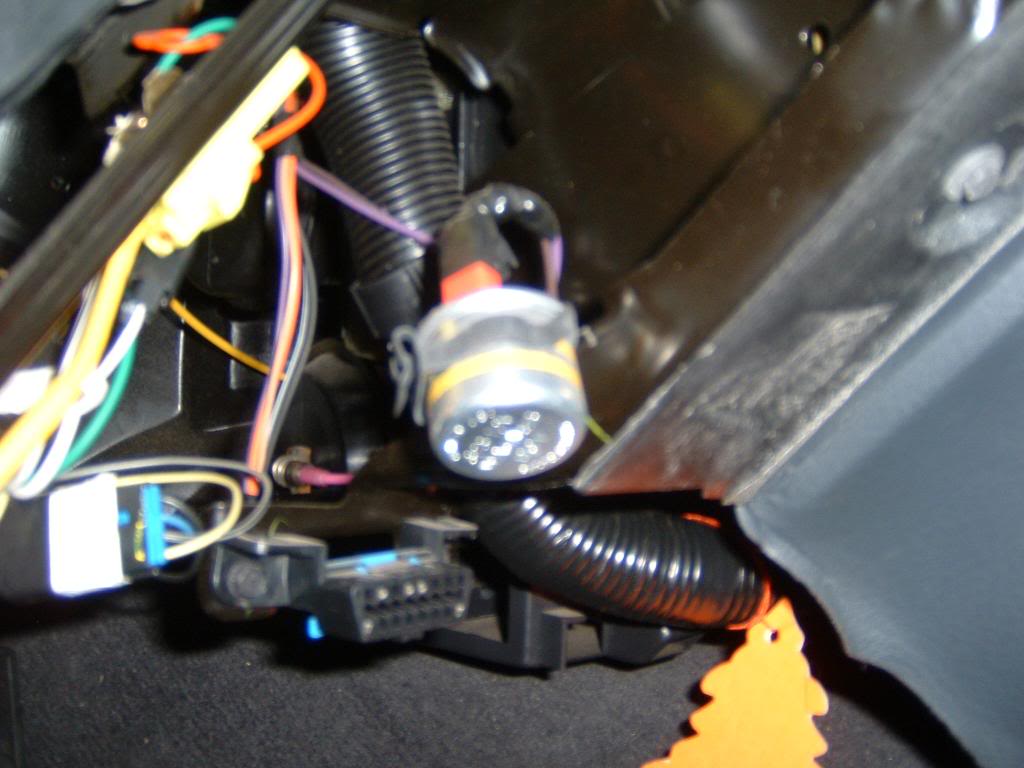
Once you replace it you will have a new turn signal sound! Enjoy.
3. To be safe, go into your fuse box interior fuse box. Open your driver door and look on the side panel of your dash. There will be a small panel label fused. Taking it off is easy, as its held by velcro, and look up the tail light fuse. This is labeled on the back of the panel you removed.
4. Now, you must get to your tail lights. To do so, you will need to remove the carpet behind them in your trunk. It is not pinned like some cars.
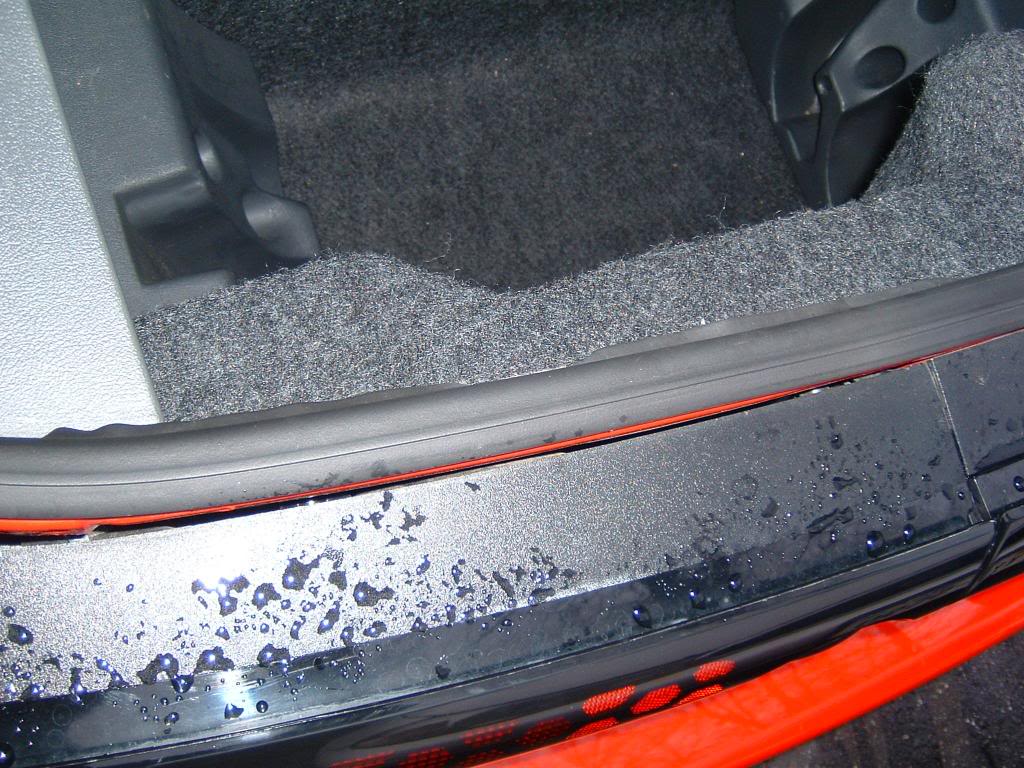
First remove the floppy panel by pulling on it. Simple.
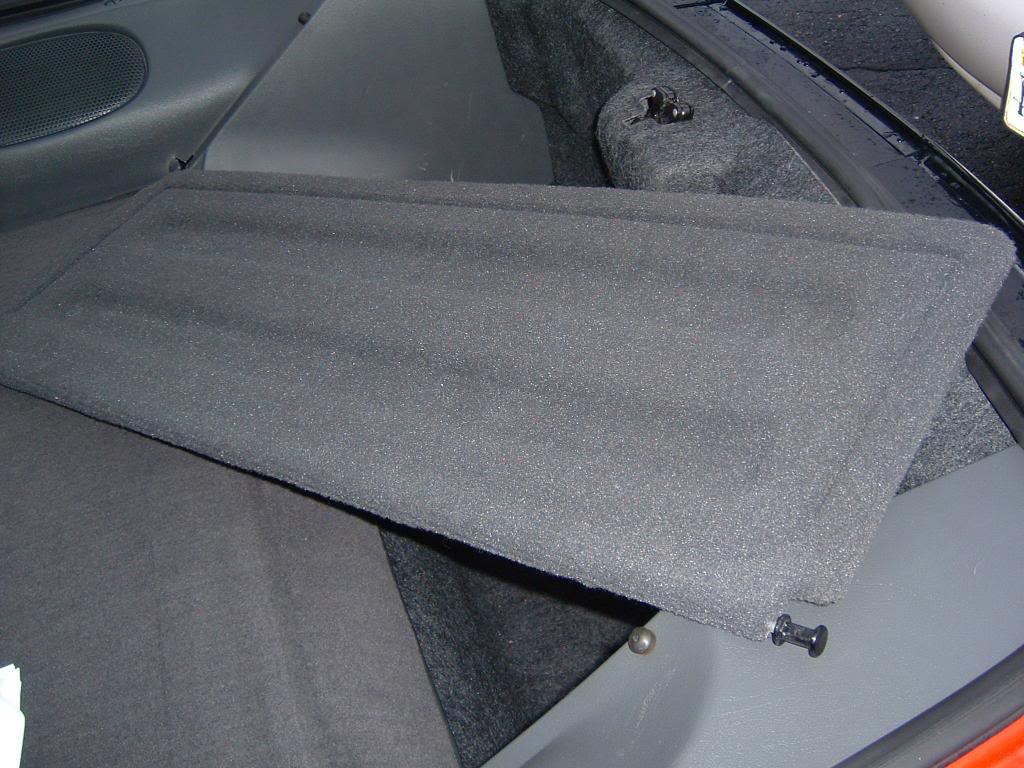
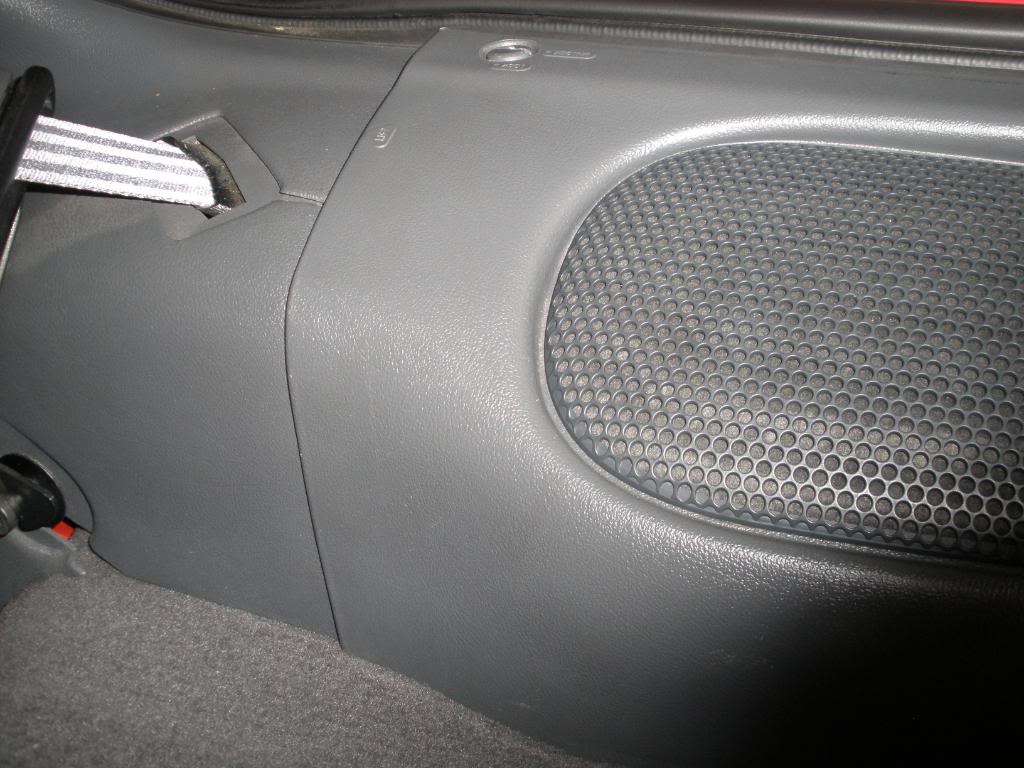
Now grab the left panel that holds your rear hatch speaker and pull up. Shouldn't take much force to get it loose.
Then, twist the 3 screws on the right panel and pull it up. On the side with the speakers there is a slot that holds the panel so you will have to grab that near there and lift vertically.
It takes a bit of force but will come off. Unlike the left side, this panel needs to completely come off. Put panel across the raised trunk area right behind seats. Watch the speaker wires, try not to put pressure on them.
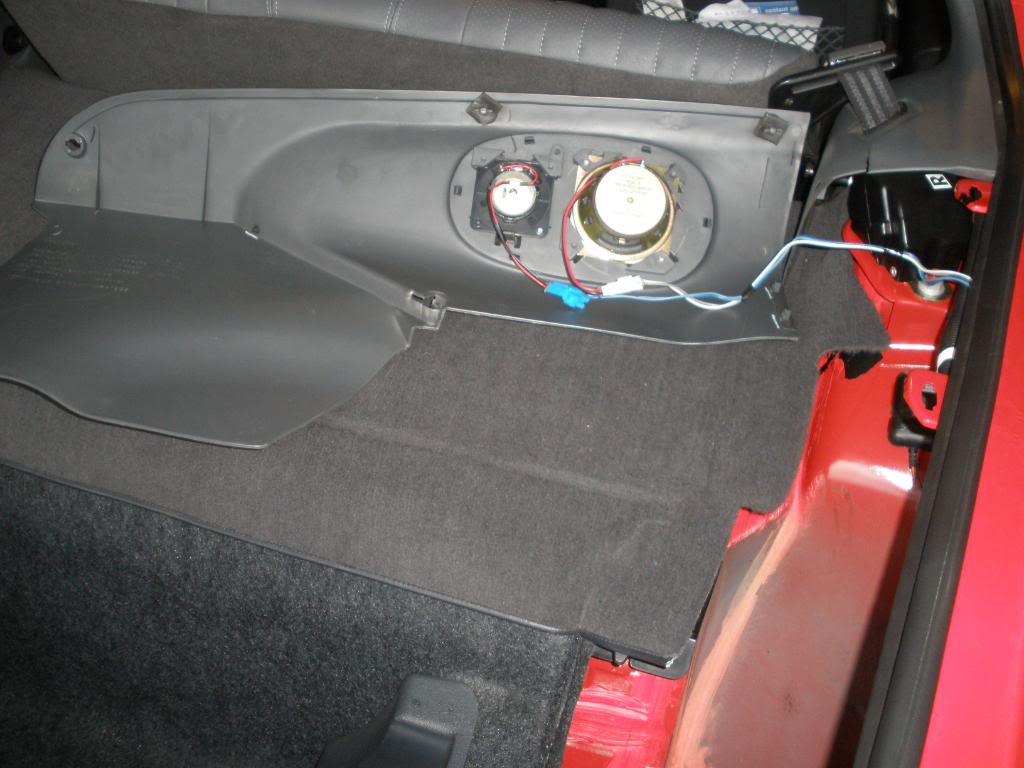
Now grab carpet where the hatch latch is in middle and pull it over the latch and away from the panel.
5. Now that you can get to your tail lights, you need to remove them. There are 5 black plastic twist things that hold the tail lights in place. 1 is way to side near corner of car. To get to this on the passenger side you will need to take out your spare tire.
After twisting them off, you can pull the tail lights off. Surprisingly, I found that pulling at an angle away from center of car is easier than straight. Once loose you can see the wires and where the 3 bulbs sit.
First remove the smaller outer one. To do so you will probably need the pliers. There is a black cover over the bulbs. On the sides, you can see the white piece the black is attached to. Put pressure on the white part in the middle with the tip of the pliers, then grab the black part and pull out and up. Then you can pull the black cover off. Now you can twist them counter clockwise then pull them off.
To remove inners and backup, press down on the gray clip and twist counter clockwise then pull up.
http://i357.photobucket.com/albums/o...m/PC280051.jpg
6. Now you need to make the holes bigger for the new outer bulbs. You do this because otherwise the sides wont be as bright and they will light up too fast, since smaller. So, sit your tail lights on a good layer of old rags or blankets so they don't get scratched. If you look at the hole, there is an indented ring around the hole. This is the size you need to make it (maybe slightly smaller).
What I did was take a dremel with a wheel grinder and grinded the edge. This worked well and was extremely fast (10 secs per hole).
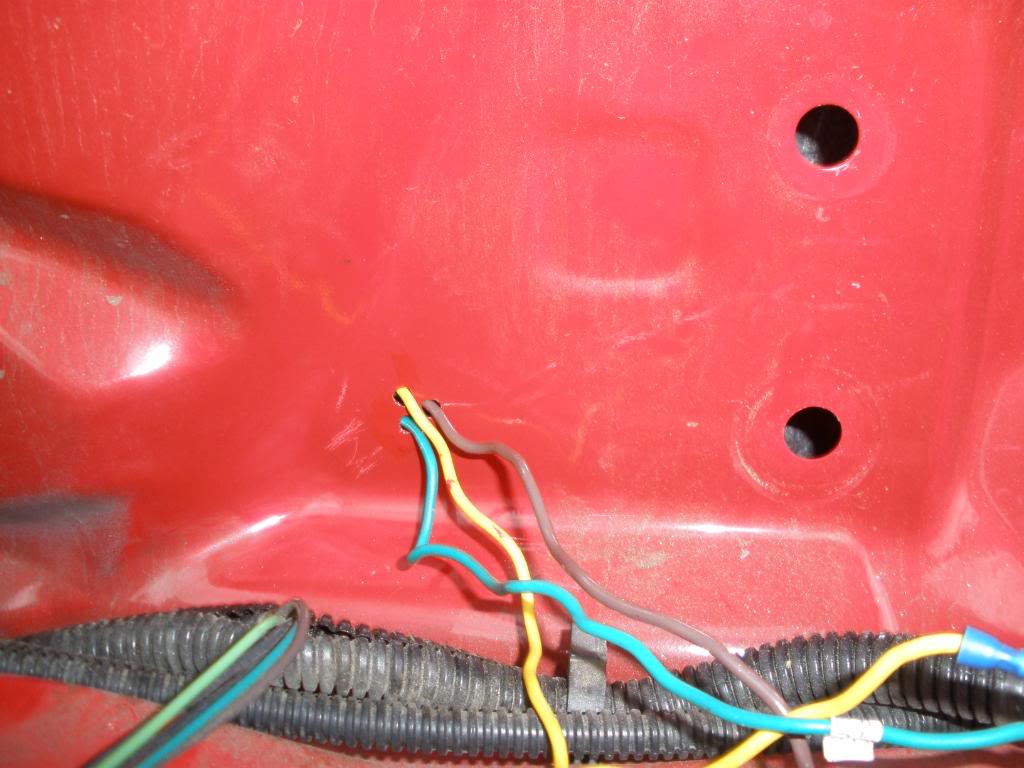
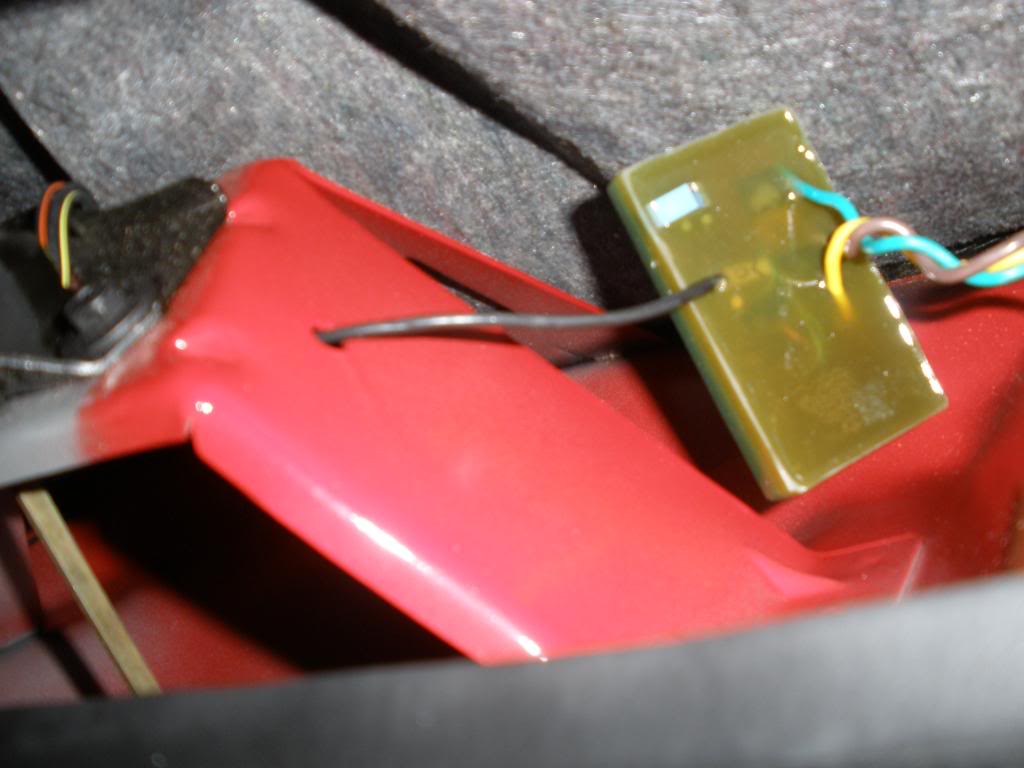
7. You need to wire in your sequential modules in. Heres what the wires look like stock. The brown and the black look very close so be careful. Also, Im not sure why GM made the backup and passenger signal wires both green (different shades) but they did.

Yellow = signal for driver side
Dark Green = signal for passenger side
Light green = backup lights power
Brown = Positive, brake power
Black = Ground
I might of gotten the greens switched but thats not important. Everything else is correct.
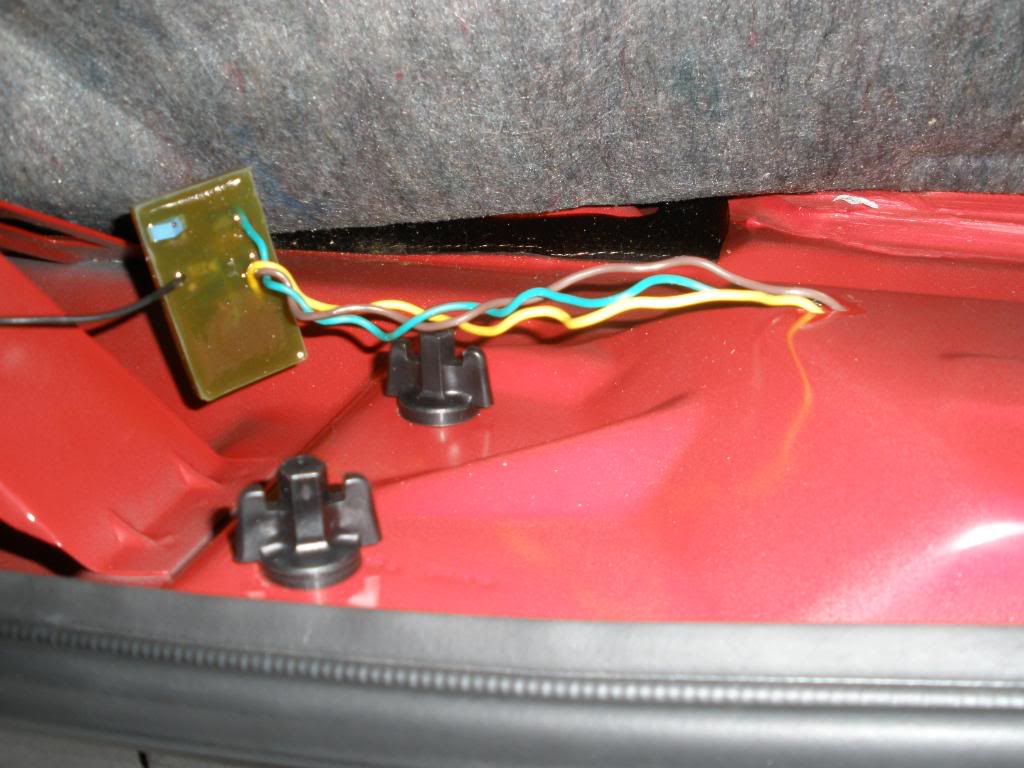
Anyways you need to wire it like shown.
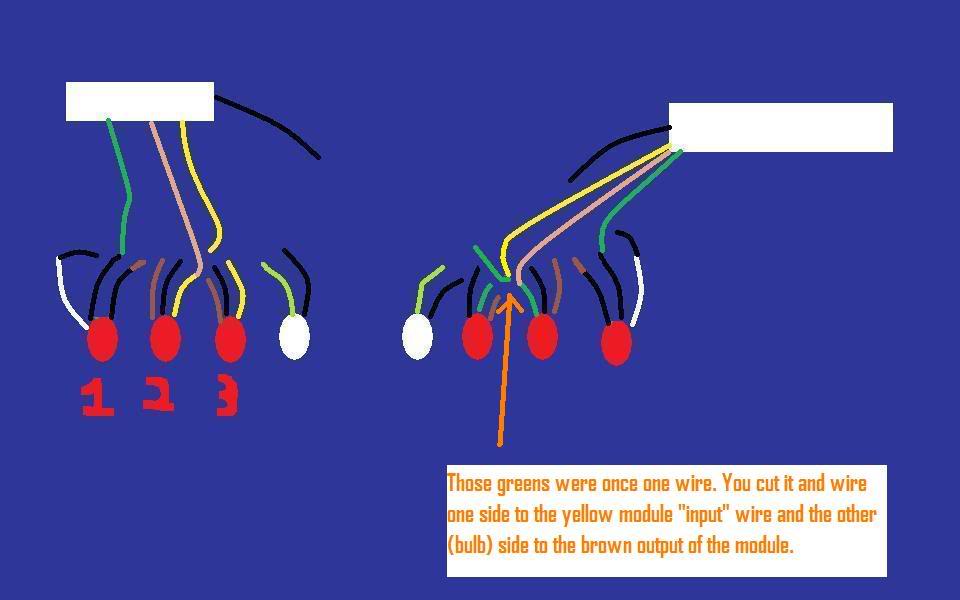
On the modules the yellow is the input, the light brown is the "center output" which goes back to bulb 2, the green is outer to bulb 1, and the black is the ground.

The backup and red bulbs closest to center are untouched (labeled 3). You do nothing with its wiring.
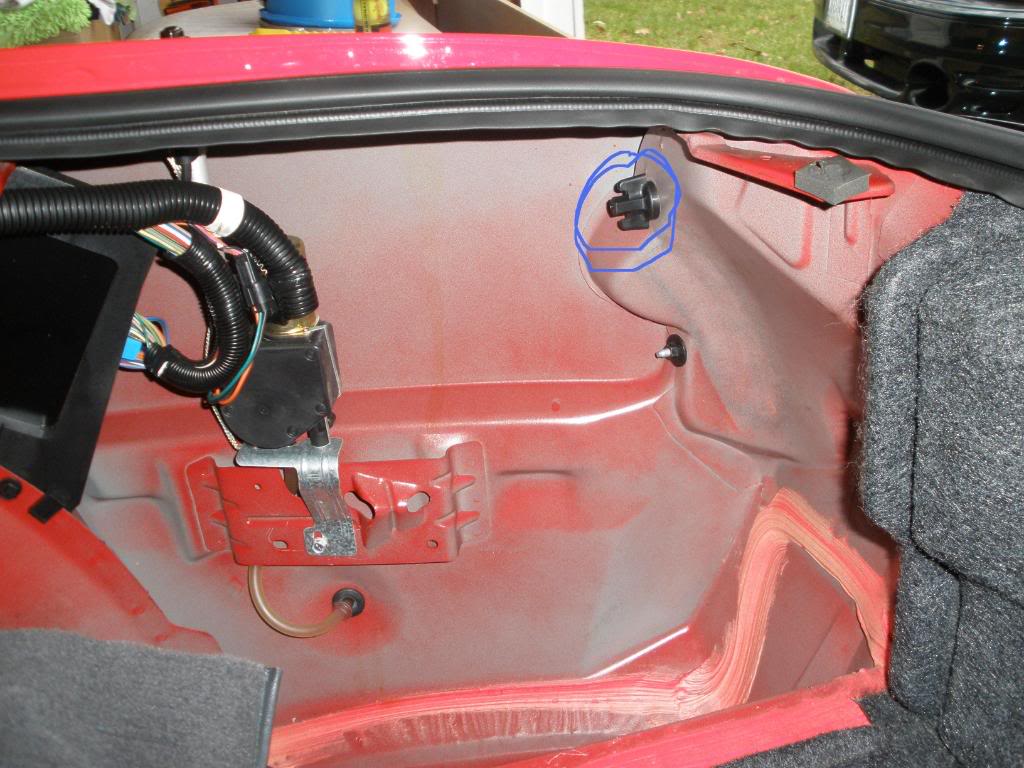
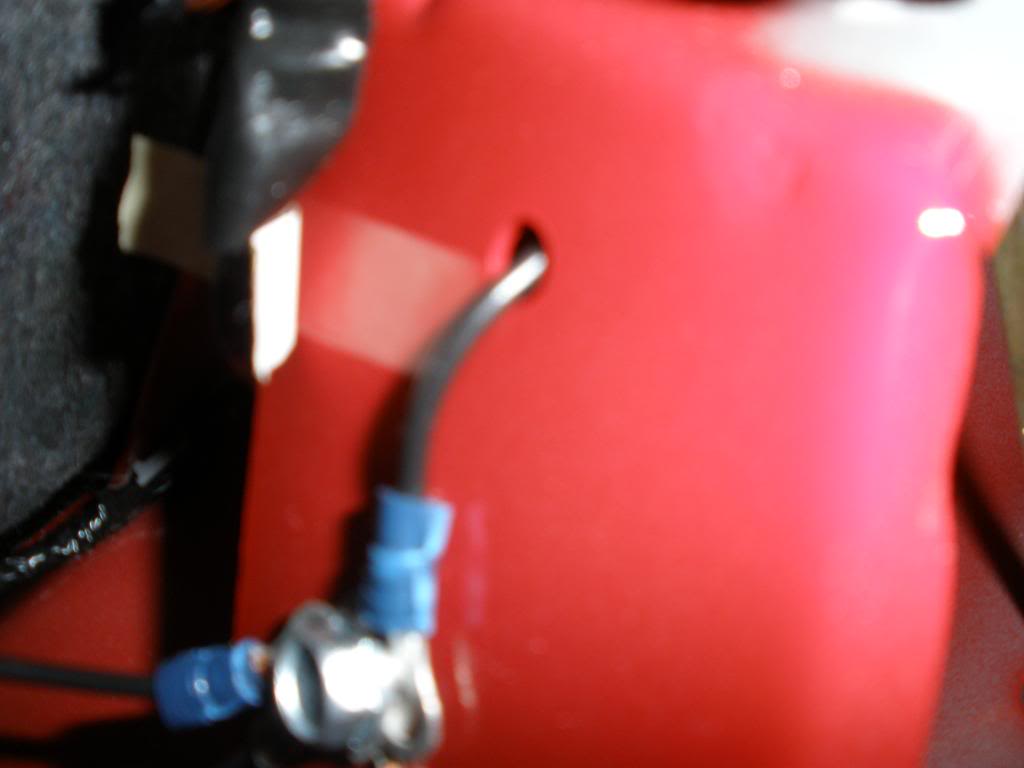
Then on the center red bulb (labeled 2) cut the yellow signal cable. You then will wire it back into the car, as thats where you will keep the modules under the carpet. On the driver side, i then routed it (and the green and brown wires i will talk about later) through where the other wires go into the interior by putting a nail through the black gummy stuff and have the yellow wire follow through.
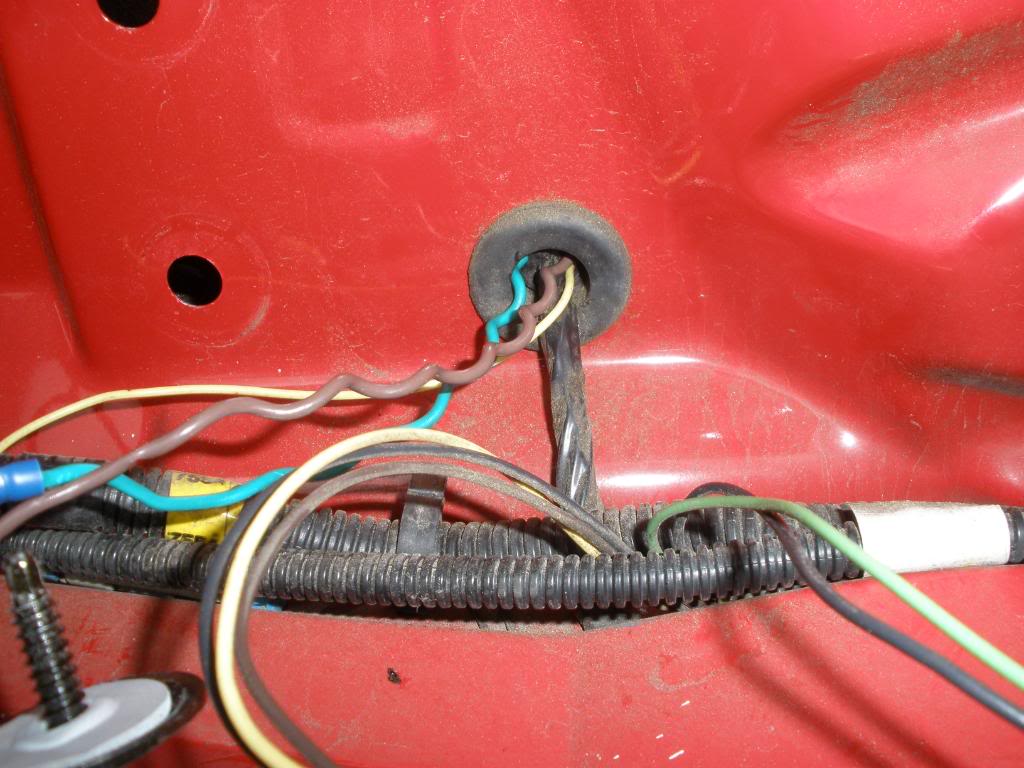
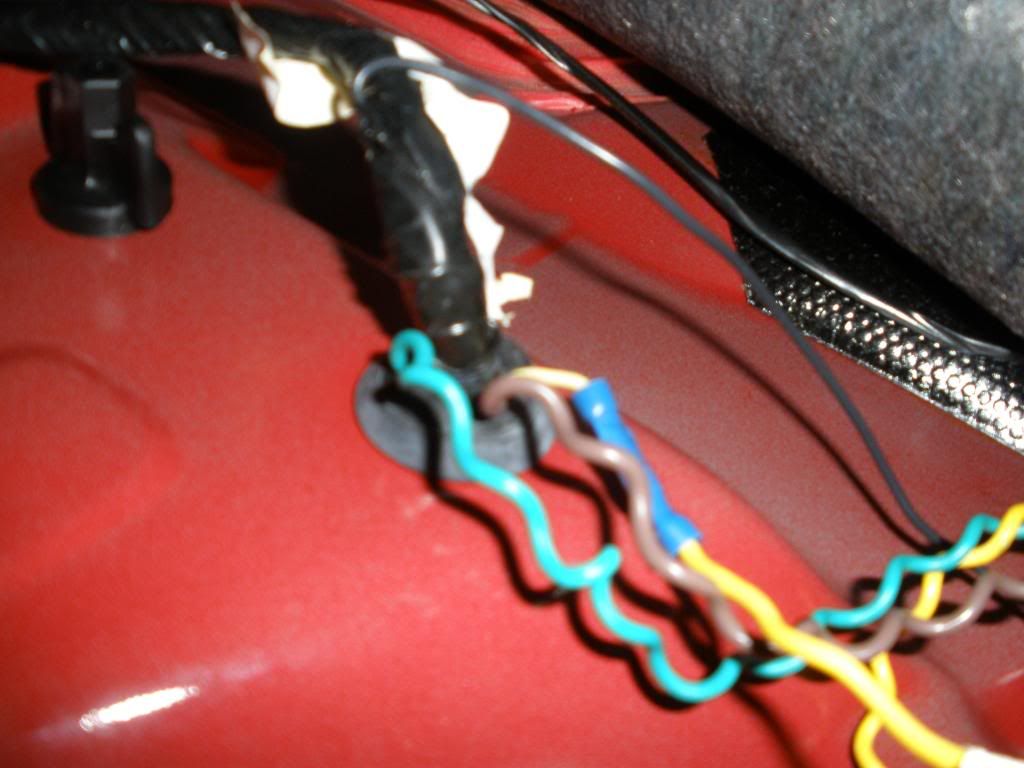
On the the passenger side, i had to drill 3 wire size holes in the same location where the big wire hole was on the driver side. I painted the holes with left over caliper paint to be safe, but probably not necessary. Crimp the yellow wire to the input yellow wire on the modules.
Then the light brown "center output" wires from the modules are crimped to the yellow wire you cut, on the bulb side of bulb #2.
Then cut the old outer bulbs (labeled 1) off. The new ones have a white ground which should be crimped to the factory black wire. Then, they have 2 labeled black wires. Crimp the wire labeled park to the brown factory wire that was attached to bulb 1, then the black wire from the new bulb that will be labeled stop/turn to the green "outer output" wire from the module.
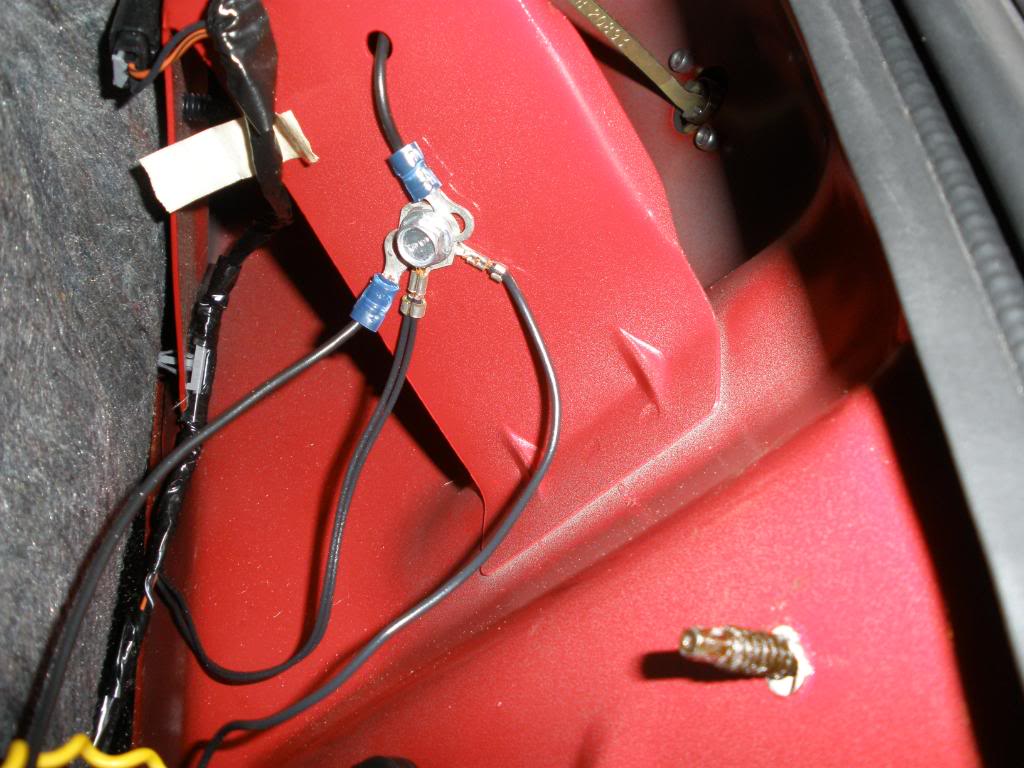
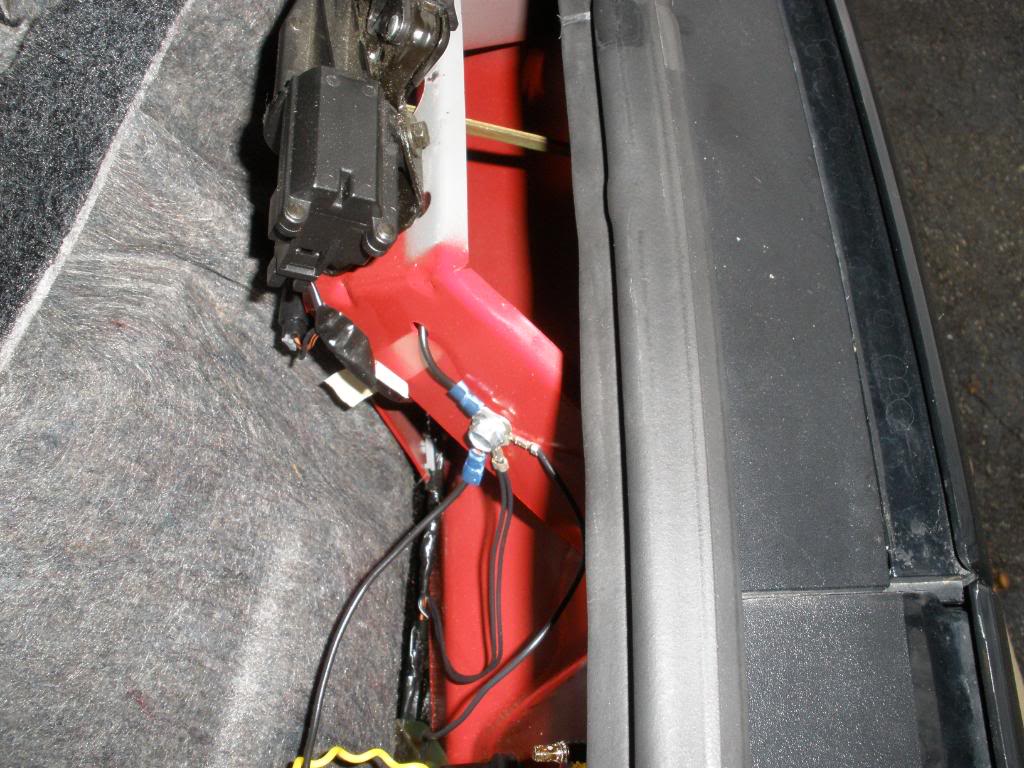
To ground the modules, I connected them the the bolt near the hatch latch on the driver side. This bolt already has a few wires grounded on it, so this should be a good safe connection.
Replace fuse now and test the bulbs now to see if they work.
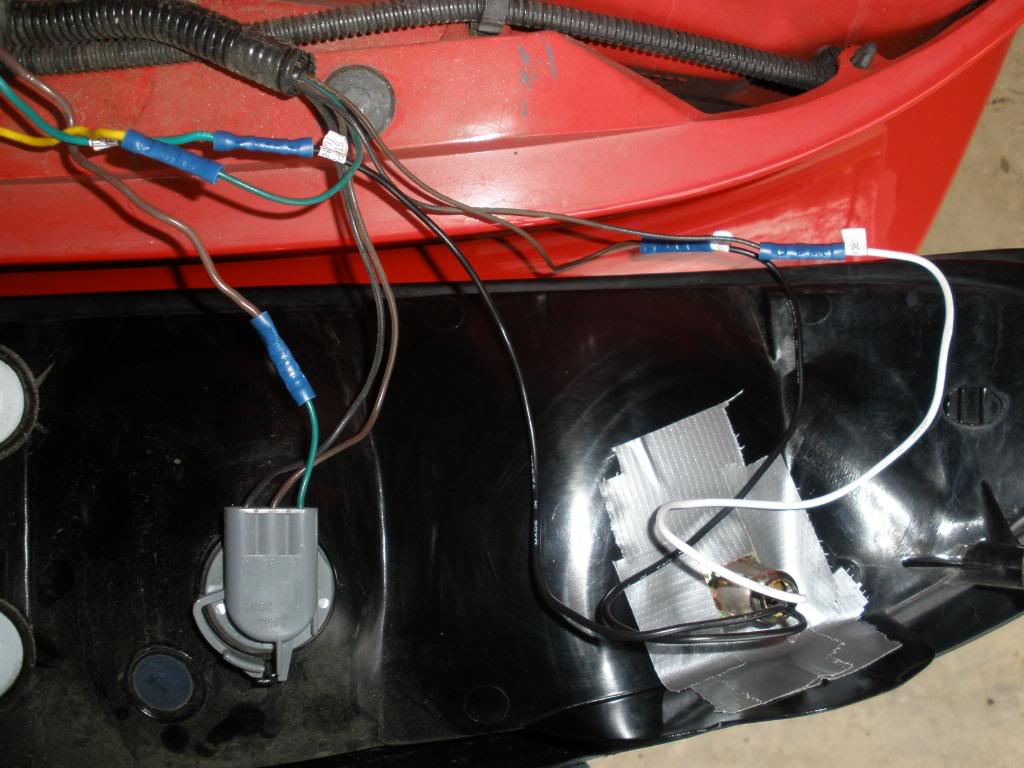
8. Replace tail lights. Now, to get the new bulbs to stay, i used silicone under the metal bracket, then covered in duck tape.
http://i357.photobucket.com/albums/o...m/PC280059.jpg
http://i357.photobucket.com/albums/o...m/PC280052.jpg
The modules will be kept under the carpet on the inside. I didnt do anything to keep them in place. The carpet fits tight over them so they shouldn't move, but you cant tell with the carpet there that they exist. There is no lump or anything.
Sorry I dont have more pics during the later process, but the part without them was the part I did on christmas and didnt have enough time. I added some pics of the results. If anyone has any questions/comments leave it here or feel free to pm me.
First off, heres mine installed in case you don't know what they are.
With flasher from kit (part installed under steering wheel)
http://video.google.com/videoplay?docid=-1120273509123936896&hl=en
With stock flasher
http://video.google.com/videoplay?do...99711715&hl=en
Notice when the headlights are one all 3 bulbs stay lit. With stock, you only have the inside 2 so it looks more like a square; our full tail lights dont light up. This is an added bonus.
I bought the kit off ebay for $80 shipped from thundercat_electronixx. I'd put a link in but thats against forum rules so I'll leave it at that.
What's Needed:
2 Sequential Modules*
2 Ring Terminals*
10 Butt Connectors*
2 Universal Sockets*
2 1157 Bulbs*
1 electronic turn signal flasher*
Wire Cutters
Wire Strippers
Wire Crimper
Dremel or Drill with Wheel Grinder and bits
Phillips Screw Driver
Socket Wrench
Needle Nose Pliers
Silicone or duck tape
Nail
* Comes in kit I mentioned
1. This part is optional. If you like the first vid speed more or dont like the stock sound, do this. If you like the second vid, go to step 3. Remove the panel under the steering wheel. You might have to do the one right above the pedals too. Mine was already off so I'm not sure if you need to remove that. Anyways, its attached by 2 phillips screws at the top and on the bottom of it 2 7mm nuts.
2. Replace stock turn signal relay with electronic one in kit. It will be steel looking and hidden on the right side near center console. It is clipped to a metal support, just pull it up and off. I did not get a pic before I took it off, but the new one in this pic should be in the same place. The turn signal sound comes from it, so turning on the signal will help locate it if you have trouble.
Once you replace it you will have a new turn signal sound! Enjoy.
3. To be safe, go into your fuse box interior fuse box. Open your driver door and look on the side panel of your dash. There will be a small panel label fused. Taking it off is easy, as its held by velcro, and look up the tail light fuse. This is labeled on the back of the panel you removed.
4. Now, you must get to your tail lights. To do so, you will need to remove the carpet behind them in your trunk. It is not pinned like some cars.
First remove the floppy panel by pulling on it. Simple.
Now grab the left panel that holds your rear hatch speaker and pull up. Shouldn't take much force to get it loose.
Then, twist the 3 screws on the right panel and pull it up. On the side with the speakers there is a slot that holds the panel so you will have to grab that near there and lift vertically.
It takes a bit of force but will come off. Unlike the left side, this panel needs to completely come off. Put panel across the raised trunk area right behind seats. Watch the speaker wires, try not to put pressure on them.
Now grab carpet where the hatch latch is in middle and pull it over the latch and away from the panel.
5. Now that you can get to your tail lights, you need to remove them. There are 5 black plastic twist things that hold the tail lights in place. 1 is way to side near corner of car. To get to this on the passenger side you will need to take out your spare tire.
After twisting them off, you can pull the tail lights off. Surprisingly, I found that pulling at an angle away from center of car is easier than straight. Once loose you can see the wires and where the 3 bulbs sit.
First remove the smaller outer one. To do so you will probably need the pliers. There is a black cover over the bulbs. On the sides, you can see the white piece the black is attached to. Put pressure on the white part in the middle with the tip of the pliers, then grab the black part and pull out and up. Then you can pull the black cover off. Now you can twist them counter clockwise then pull them off.
To remove inners and backup, press down on the gray clip and twist counter clockwise then pull up.
http://i357.photobucket.com/albums/o...m/PC280051.jpg
6. Now you need to make the holes bigger for the new outer bulbs. You do this because otherwise the sides wont be as bright and they will light up too fast, since smaller. So, sit your tail lights on a good layer of old rags or blankets so they don't get scratched. If you look at the hole, there is an indented ring around the hole. This is the size you need to make it (maybe slightly smaller).
What I did was take a dremel with a wheel grinder and grinded the edge. This worked well and was extremely fast (10 secs per hole).
7. You need to wire in your sequential modules in. Heres what the wires look like stock. The brown and the black look very close so be careful. Also, Im not sure why GM made the backup and passenger signal wires both green (different shades) but they did.
Yellow = signal for driver side
Dark Green = signal for passenger side
Light green = backup lights power
Brown = Positive, brake power
Black = Ground
I might of gotten the greens switched but thats not important. Everything else is correct.
Anyways you need to wire it like shown.
On the modules the yellow is the input, the light brown is the "center output" which goes back to bulb 2, the green is outer to bulb 1, and the black is the ground.
The backup and red bulbs closest to center are untouched (labeled 3). You do nothing with its wiring.
Then on the center red bulb (labeled 2) cut the yellow signal cable. You then will wire it back into the car, as thats where you will keep the modules under the carpet. On the driver side, i then routed it (and the green and brown wires i will talk about later) through where the other wires go into the interior by putting a nail through the black gummy stuff and have the yellow wire follow through.
On the the passenger side, i had to drill 3 wire size holes in the same location where the big wire hole was on the driver side. I painted the holes with left over caliper paint to be safe, but probably not necessary. Crimp the yellow wire to the input yellow wire on the modules.
Then the light brown "center output" wires from the modules are crimped to the yellow wire you cut, on the bulb side of bulb #2.
Then cut the old outer bulbs (labeled 1) off. The new ones have a white ground which should be crimped to the factory black wire. Then, they have 2 labeled black wires. Crimp the wire labeled park to the brown factory wire that was attached to bulb 1, then the black wire from the new bulb that will be labeled stop/turn to the green "outer output" wire from the module.
To ground the modules, I connected them the the bolt near the hatch latch on the driver side. This bolt already has a few wires grounded on it, so this should be a good safe connection.
Replace fuse now and test the bulbs now to see if they work.
8. Replace tail lights. Now, to get the new bulbs to stay, i used silicone under the metal bracket, then covered in duck tape.
http://i357.photobucket.com/albums/o...m/PC280059.jpg
http://i357.photobucket.com/albums/o...m/PC280052.jpg
The modules will be kept under the carpet on the inside. I didnt do anything to keep them in place. The carpet fits tight over them so they shouldn't move, but you cant tell with the carpet there that they exist. There is no lump or anything.
Sorry I dont have more pics during the later process, but the part without them was the part I did on christmas and didnt have enough time. I added some pics of the results. If anyone has any questions/comments leave it here or feel free to pm me.
Last edited by Flaring Afro; Jan 7, 2009 at 10:25 PM.
Thread Starter
TECH Fanatic
Joined: Oct 2008
Posts: 1,183
Likes: 0
From: VA
http://www.youtube.com/watch?v=SAswvFGmQNQ
i don't know how install is different. but im pretty sure that the ebay seller i mentioned sells it for the camaros as well.
you can do it.
http://www.youtube.com/watch?v=SAswvFGmQNQ
i don't know how install is different. but im pretty sure that the ebay seller i mentioned sells it for the camaros as well.
http://www.youtube.com/watch?v=SAswvFGmQNQ
i don't know how install is different. but im pretty sure that the ebay seller i mentioned sells it for the camaros as well.
but thats awesome on your TA
 great writeup!
 Thread Starter
TECH Fanatic
Joined: Oct 2008
Posts: 1,183
Likes: 0
From: VA
thanks guys. thats really cool that its in there now. hopefully it will get more people to go for it. everyone likes them but very few have them. its a cheap mod thats a pretty easy install.
Trending Topics
LS1 Tech Stories
The Best V8 Stories One Small Block at Time

Gas Monkey Built a 6-Wheel Ferrari Testarossa With a Corvette LT4 Engine
Verdad Gallardo
7 Most Reliable High-Performance Engines GM Has Ever Built
Verdad Gallardo
Amazing '71 Camaro Restomod Is Modern Muscle Car Under the Skin
Verdad Gallardo
6 Common C5 Corvette Failures and What's Involved In Repairing Them
Pouria Savadkouei
Retro Modern Bandit Pontiac Trans AM Comes With Burt Reynolds' Autograph
Verdad Gallardo
Top 10 Greatest Cadillac V Series Performance Models Ever, Ranked
Pouria Savadkouei
Top 10 Most Powerful Chevy Trucks Ever Made!

Hennessey's New Supercharged Silverado ZR2 Has 700 HP
Verdad Gallardo
Coachbuilt N2A Anteros Is an LS2-Powered C6 Corvette In Italian Clothes
Verdad Gallardo
Thread Starter
TECH Fanatic
Joined: Oct 2008
Posts: 1,183
Likes: 0
From: VA
i know the lt1 bird tails have a separate red piece that can be removed. however, ls1 tails can not do the same, its all one piece. you might be able to just paint over it red. people use to use a certain paint to make the whole tail red on my old car, let me find it.
EDIT: http://www.mx6.com/forums/2g-mx6-pro...aillights.html
That might work. I didnt do it to mine so I dont know if the signals would be the same red. btw I didnt have a horrid exhaust on mine like that guy does lol
Actually i just reread and that guy says they flash red, not orange.
EDIT: http://www.mx6.com/forums/2g-mx6-pro...aillights.html
That might work. I didnt do it to mine so I dont know if the signals would be the same red. btw I didnt have a horrid exhaust on mine like that guy does lol
Actually i just reread and that guy says they flash red, not orange.
Last edited by Flaring Afro; Dec 28, 2008 at 12:37 AM.
 .
. 
Thread Starter
TECH Fanatic
Joined: Oct 2008
Posts: 1,183
Likes: 0
From: VA
EDIT: new pics. hope that helps clarify. i went over limit so had to link some. also, ill explain the yellow wire more in a little while. i dont have time right now and im at the text limit too so ill have to figure out how to make it more clear with no more words since i want everything clear in main post.
Thread Starter
TECH Fanatic
Joined: Oct 2008
Posts: 1,183
Likes: 0
From: VA
Heres the sound.
http://video.google.com/videoplay?do...29164565&hl=en
i also edited the paint picture to be more clear on the module's yellow wire.
http://video.google.com/videoplay?do...29164565&hl=en
i also edited the paint picture to be more clear on the module's yellow wire.
Last edited by Flaring Afro; Dec 28, 2008 at 06:03 PM.