
Finally got my engine bay decent looking


 11-11-2010, 07:20 PM
#162

man i dont know about painting the shock tower bolts black, maybe just put some new chrome ones on there?
i have no idea when you plan on swapping shocks or springs but i imagine when you try and break those bolts loose, the paint will come off.
this is all just my 2 cents
i have no idea when you plan on swapping shocks or springs but i imagine when you try and break those bolts loose, the paint will come off.
this is all just my 2 cents
11-11-2010, 09:27 PM
#163
TheCobraHunter.. what was the process you used for sanding/painting the air lid support base? If you had to paint it over again, would you change anything to make it better?
Also, I think I found another thing to add to the list I assume the lighting is just a skinny LED strip up under the cowl? I will probably go with red myself. I saw you do that awhile ago but forgot about it.
Also, I think I found another thing to add to the list
I assume the lighting is just a skinny LED strip up under the cowl? I will probably go with red myself. I saw you do that awhile ago but forgot about it.
11-11-2010, 09:29 PM
#164
man i dont know about painting the shock tower bolts black, maybe just put some new chrome ones on there?
i have no idea when you plan on swapping shocks or springs but i imagine when you try and break those bolts loose, the paint will come off.
this is all just my 2 cents
i have no idea when you plan on swapping shocks or springs but i imagine when you try and break those bolts loose, the paint will come off.
this is all just my 2 cents

The main goal of my engine bay is to only have the center of the engine bay come and pop out at you. That is why I wouldn't put chrome bolts there. The ones on there now are actually pretty shiny themselves.
 11-12-2010, 03:44 AM
#168
TheCobraHunter.. what was the process you used for sanding/painting the air lid support base? If you had to paint it over again, would you change anything to make it better?
Also, I think I found another thing to add to the list I assume the lighting is just a skinny LED strip up under the cowl? I will probably go with red myself. I saw you do that awhile ago but forgot about it.
Also, I think I found another thing to add to the list
I assume the lighting is just a skinny LED strip up under the cowl? I will probably go with red myself. I saw you do that awhile ago but forgot about it.I just sanded it until it was super smooth. Then used that canned clear primer stuff (not the grey primer). Put a coat of gloss black. Wet sanded it till it as best as I could. Then put on a clear coat. Couldn't get it mirror-like, but it'll work.
I did use several LED flex strips I got off of eBay. Put them on like, 3 years ago or so. And so far, only 3 or 4 of the individual LEDs are starting to go out, you know, with all the heat that get's trapped under there.
11-12-2010, 10:50 AM
#172
2 less things on the list.. painted shock tower bolts and AC port inlet thing..
BEFORE PAINTING
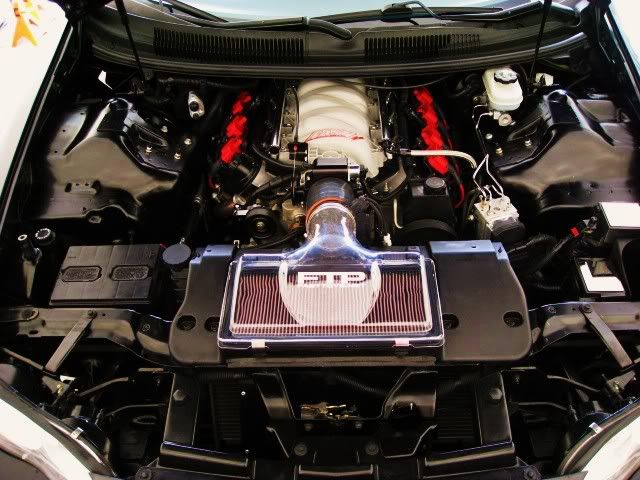
AFTER PAINTING
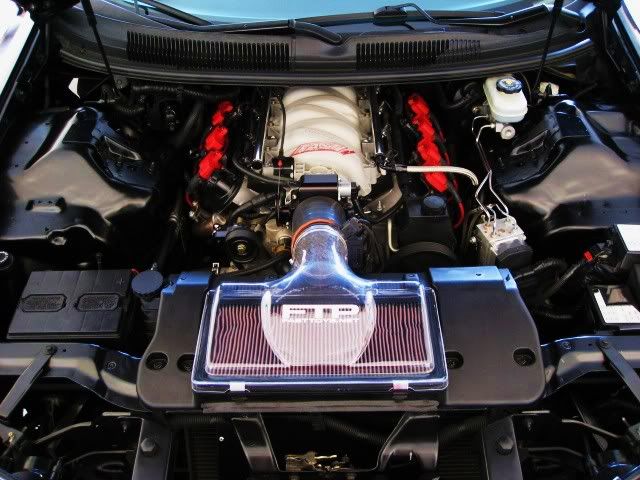
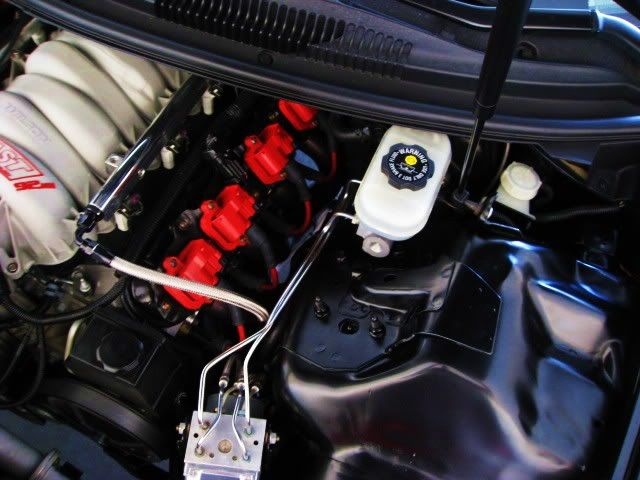
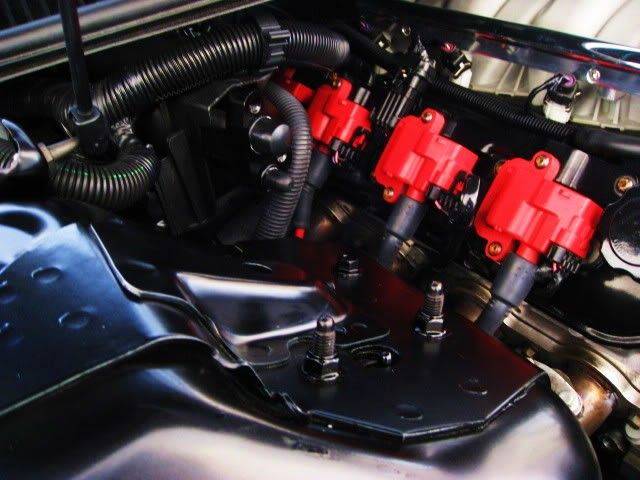
Notice in the last pic the black oxide allen head bolts on the coils and coil brackets.. I got these thinking they would be nice and glossy black.. little did I know they instantly rust when exposed to water.. damn things...
BEFORE PAINTING
AFTER PAINTING
Notice in the last pic the black oxide allen head bolts on the coils and coil brackets.. I got these thinking they would be nice and glossy black.. little did I know they instantly rust when exposed to water.. damn things...
11-12-2010, 03:10 PM
#174
Would you be interested in doing mine for me? If so, PM me and we'll discuss it
I was thinking something like the resident evil monster or something.. hard to find pics online of good actually cool scary ****.Not sure which one.. leaning toward Nemesis


Last edited by djfury05; 11-12-2010 at 03:23 PM.
11-15-2010, 06:31 PM
#178
damn, I tried painting my lower lid box and its orange pealing 
I had used a shine liquid on it on the past so I degrease it,sanded 800,1000.then used about 4 coats of adhesion promoter.gloss blk pant and got some orange peal.I'm going to have to re-sand this crap and attempt it again.
I had used a shine liquid on it on the past so I degrease it,sanded 800,1000.then used about 4 coats of adhesion promoter.gloss blk pant and got some orange peal.I'm going to have to re-sand this crap and attempt it again.
11-15-2010, 07:23 PM
#179
Launching!
Join Date: Jan 2010
Location: N. Va
Posts: 283
Likes: 0
Received 0 Likes
on
0 Posts
djfury...man you're a bunch further than I am...and can't wait to get there myself.
2 ideas for ya i'm gonna do...relocate the fuse box and ecm to the passenger air bag area...so somewhere inside....relocate the abs block down to where the the air pump used to be
2 ideas for ya i'm gonna do...relocate the fuse box and ecm to the passenger air bag area...so somewhere inside....relocate the abs block down to where the the air pump used to be
11-15-2010, 08:51 PM
#180
damn, I tried painting my lower lid box and its orange pealing
I had used a shine liquid on it on the past so I degrease it,sanded 800,1000.then used about 4 coats of adhesion promoter.gloss blk pant and got some orange peal.I'm going to have to re-sand this crap and attempt it again.
I had used a shine liquid on it on the past so I degrease it,sanded 800,1000.then used about 4 coats of adhesion promoter.gloss blk pant and got some orange peal.I'm going to have to re-sand this crap and attempt it again.
