Driver side wire tuck WITHOUT extending the harness!

Thread Starter
10 Second Club
iTrader: (14)
Joined: Oct 2005
Posts: 1,384
Likes: 4
From: Concord, NC
Wire tuck is pretty much done, just need to make a one more bracket, and drill one more hole and it's complete. Here's my moch up to make sure the harnesses will fit once i rerouted them.
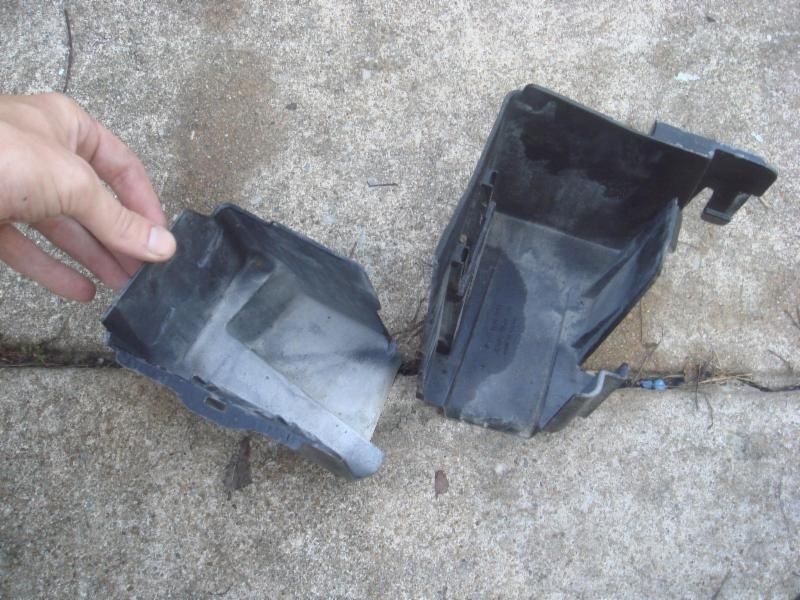
Stock plastic mounting buckets for fuse boxes...cut in half and trimmed up

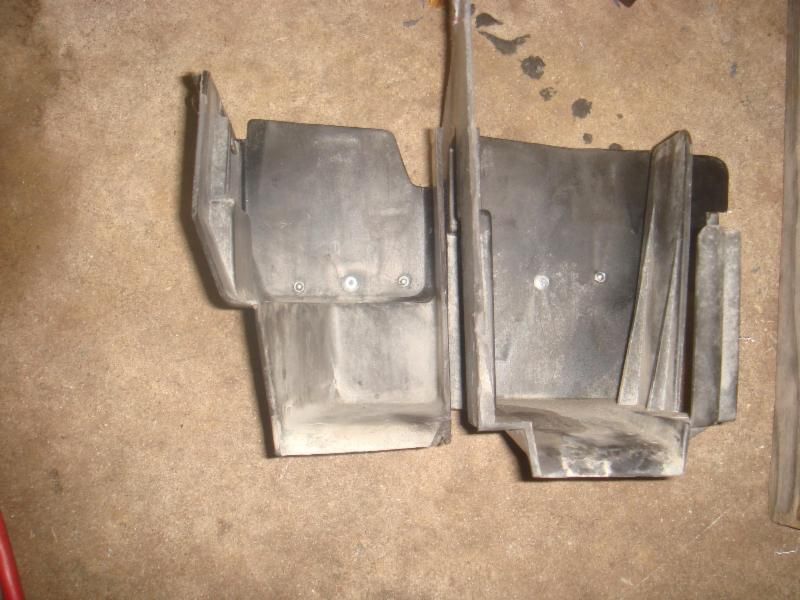
side by side

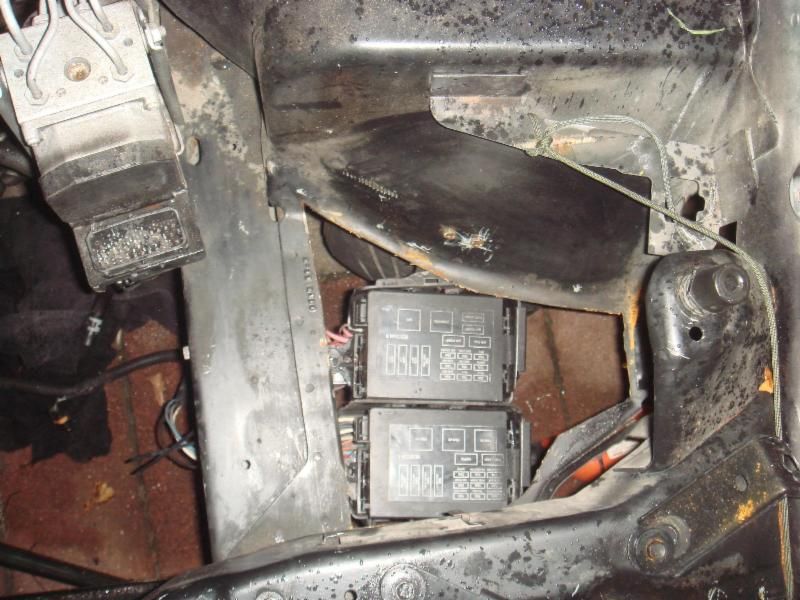
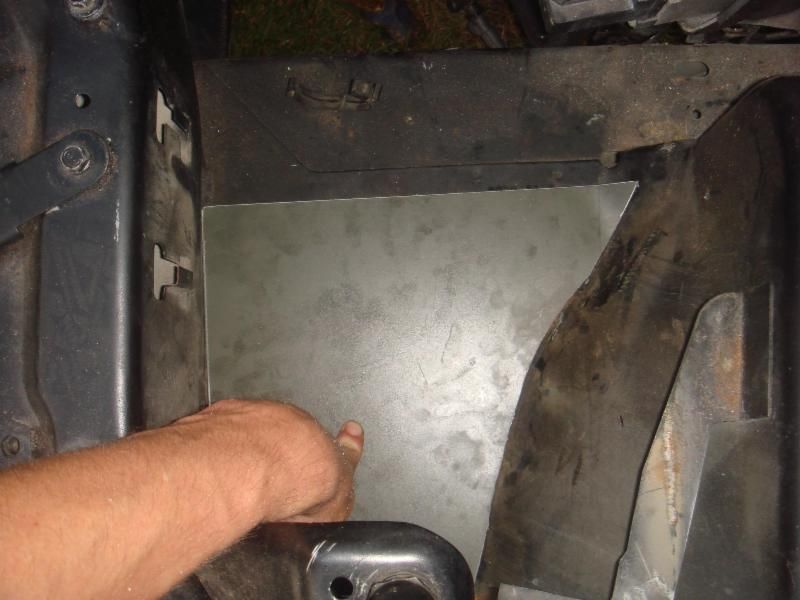
Area under the old fuse box location, cut away

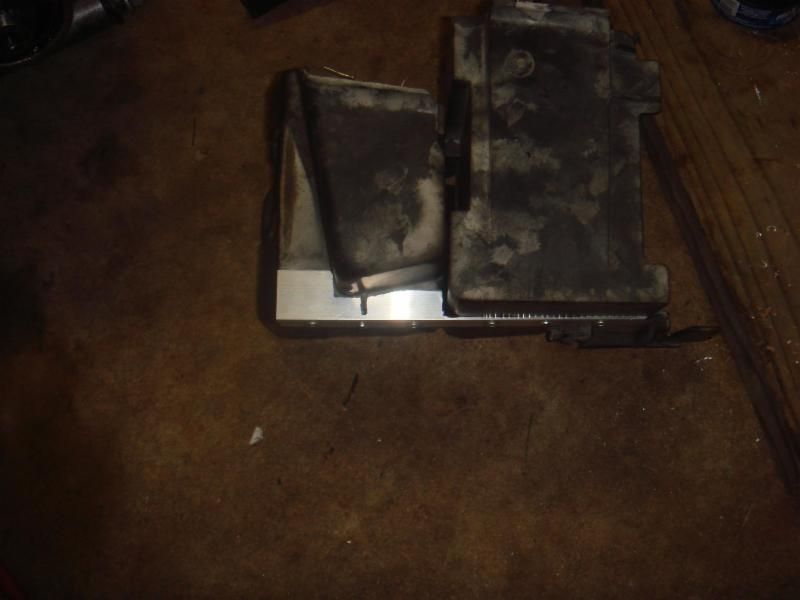
New cover plate cut out, will have small DZUS fastners for quick access to fuses

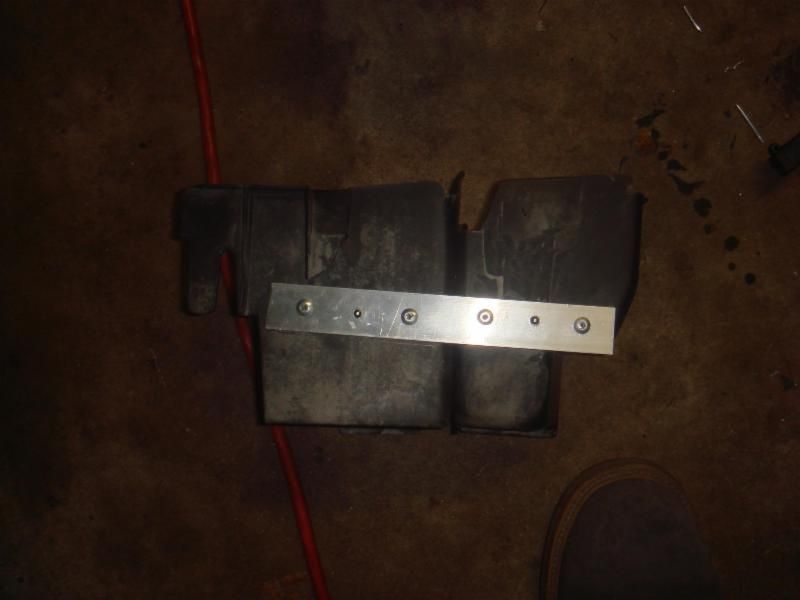
Stock "buckets" mated up, this isnt stuctural so the rivets should do just fine.

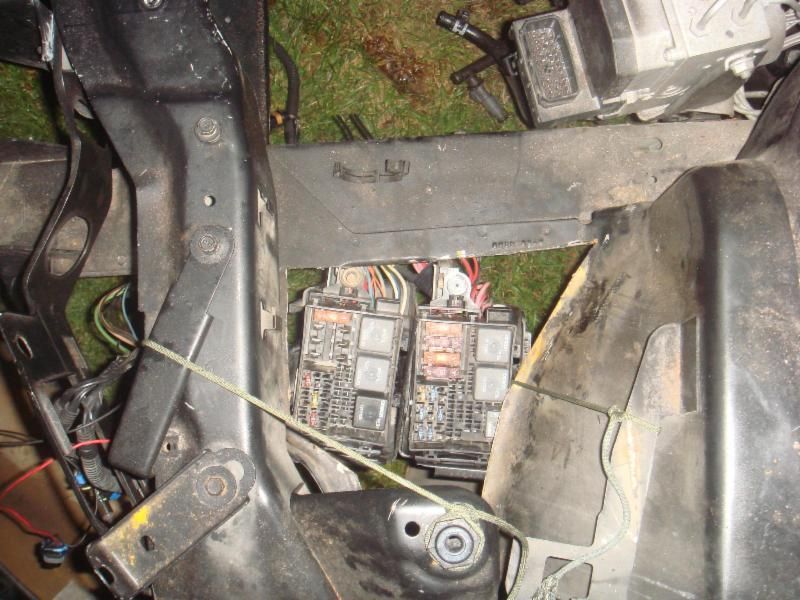
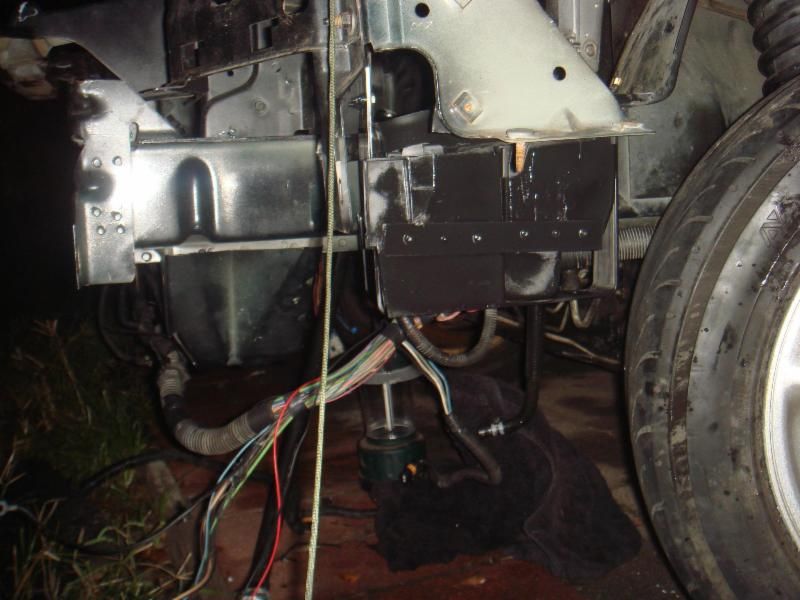
Fuse boxes in their new location, just strung up till I can make the mounting bracket.

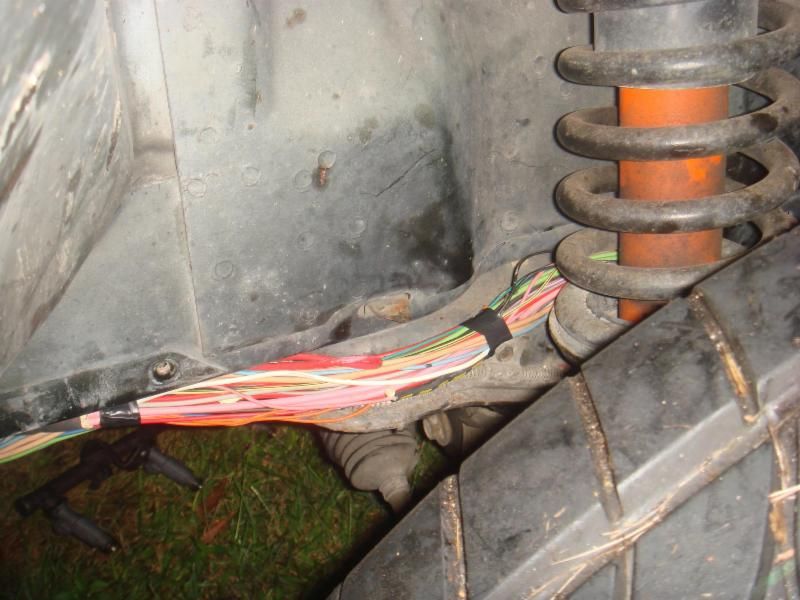
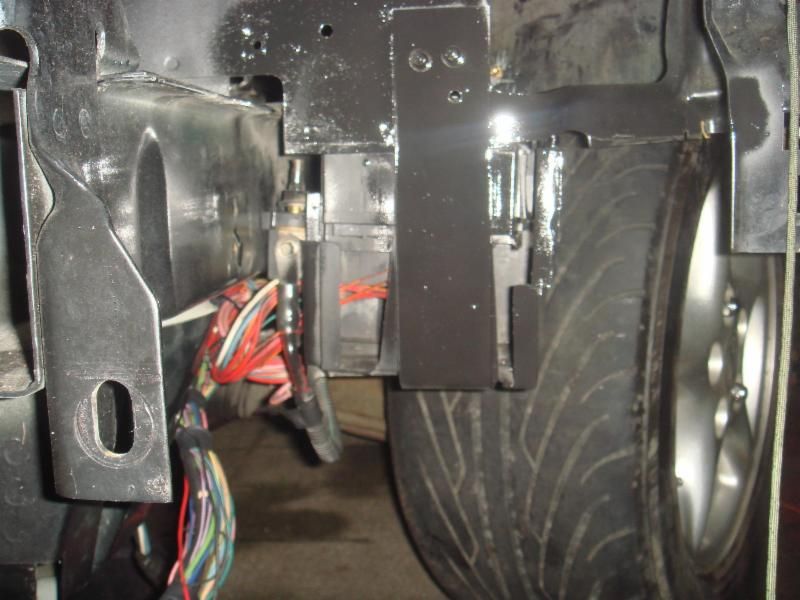
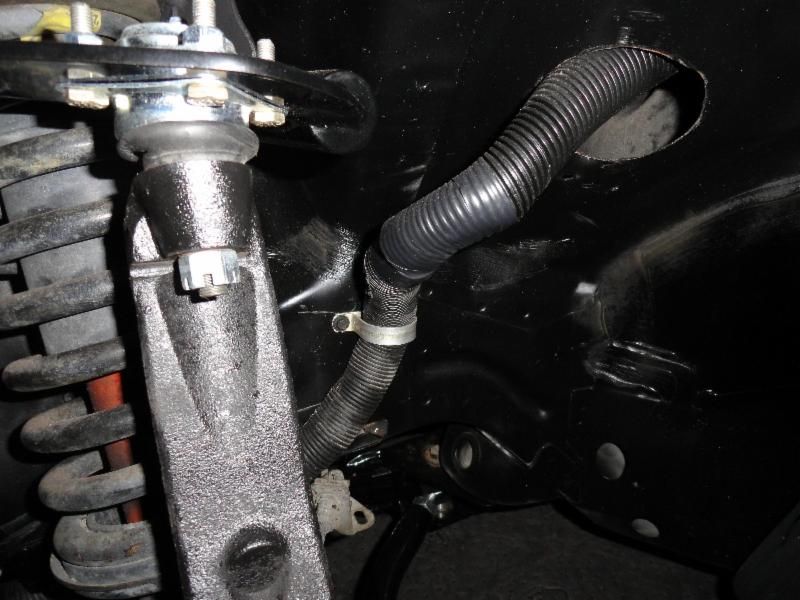
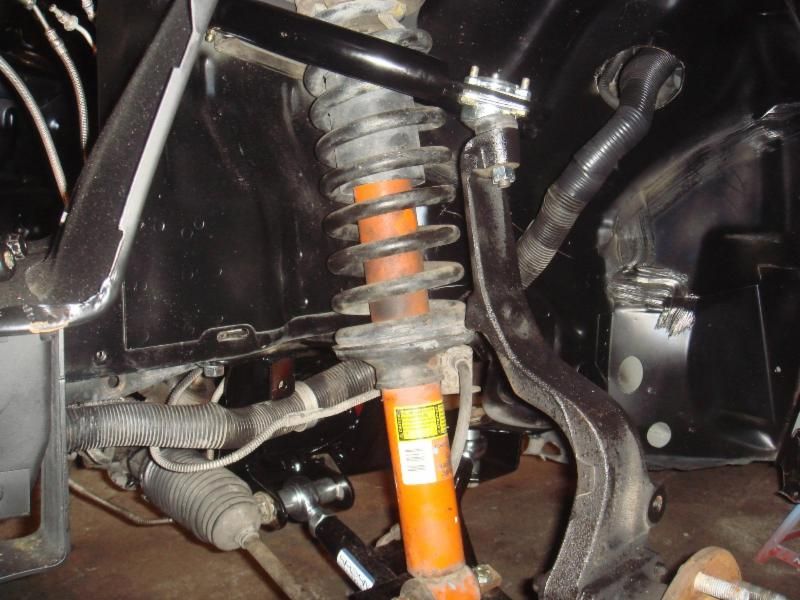
Wires being routed behind the shock, there is about 1" of clearance there so it has plenty of room

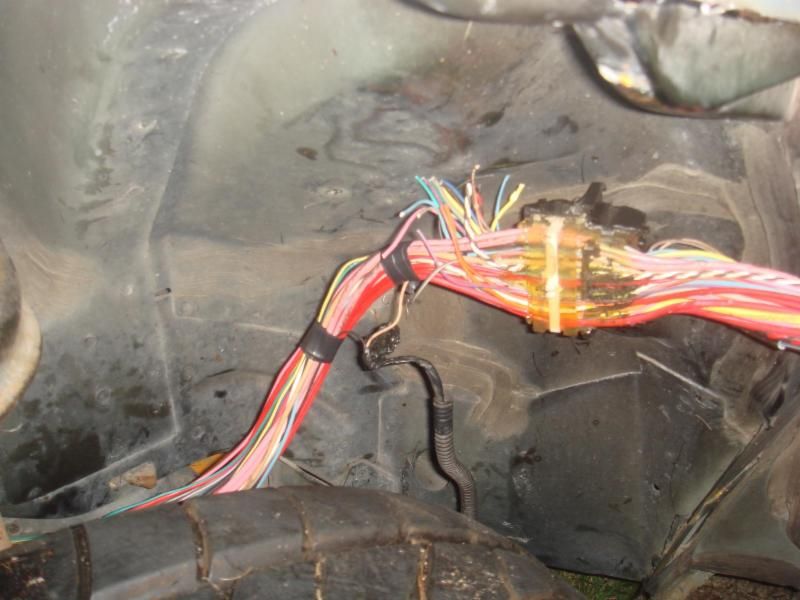
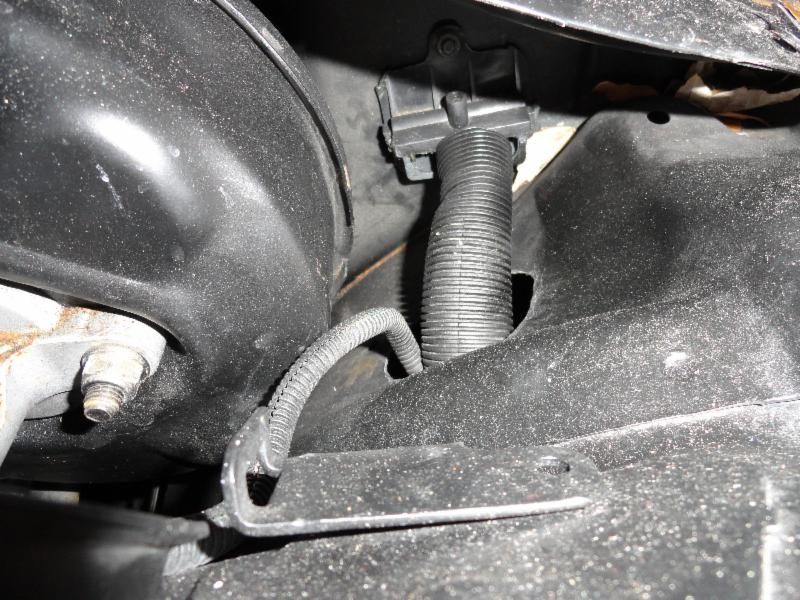
Need to drill a hole in the strut tower to feed the wires back into the cockpit. Dont mind the clipped wires, i still need to remove them, but was holding off until i fitted the harness to the car..not looking forward to melting the sealant and getting into that mess

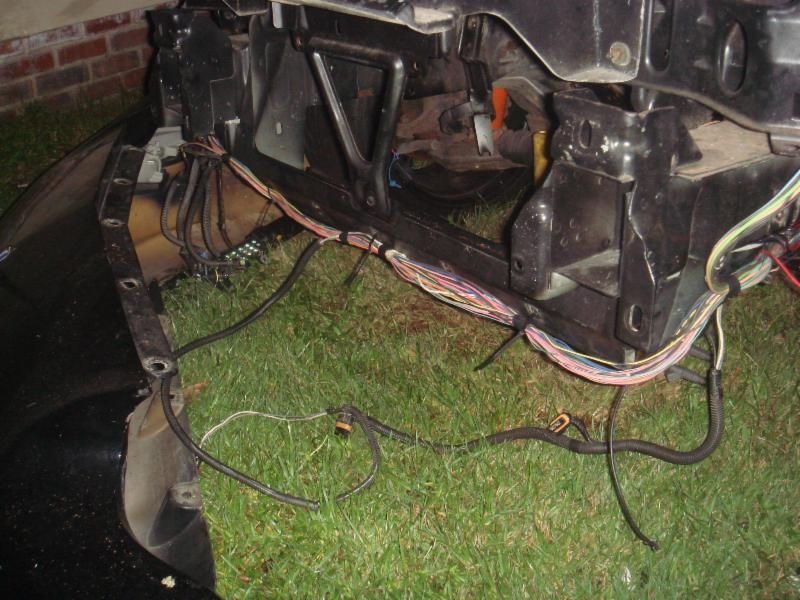
Harness routed under the lower radiator support

And back out to the other side

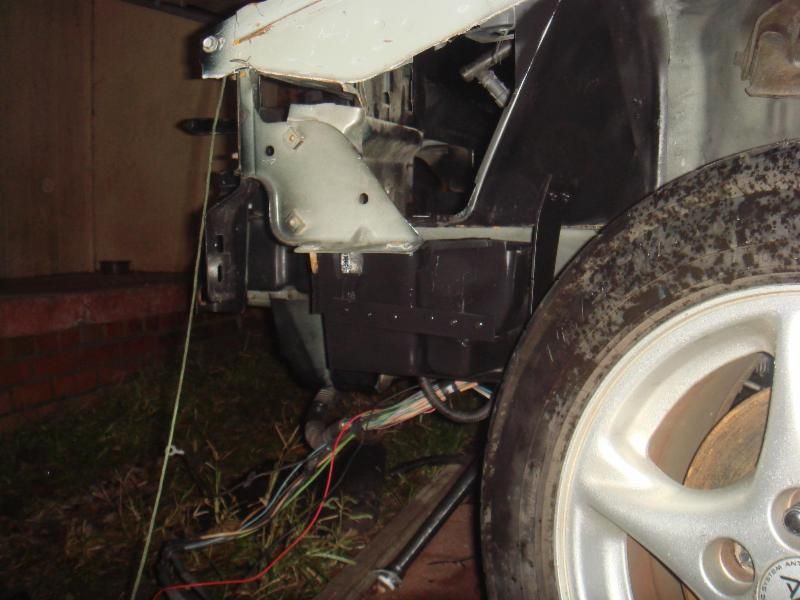
another angle of the fuse box location

And there you have it, a driver side wire tuck WITHOUT extending the harness. Please keep in mind that this is just roughed in, i will go back and use insulated line clamps to secure it to the body/frame and will cover the wires back up with loom. I am also building a removable enclosure for the fuse boxes so moisture cant get to them. All said and done the ONLY wires that will be remotely visible are the one that have to come out to the headlights , everything else is completely hidden. I will update this as i get the rest of the things done i mentioned earlier.
Stock plastic mounting buckets for fuse boxes...cut in half and trimmed up
side by side
Area under the old fuse box location, cut away
New cover plate cut out, will have small DZUS fastners for quick access to fuses
Stock "buckets" mated up, this isnt stuctural so the rivets should do just fine.
Fuse boxes in their new location, just strung up till I can make the mounting bracket.
Wires being routed behind the shock, there is about 1" of clearance there so it has plenty of room
Need to drill a hole in the strut tower to feed the wires back into the cockpit. Dont mind the clipped wires, i still need to remove them, but was holding off until i fitted the harness to the car..not looking forward to melting the sealant and getting into that mess
Harness routed under the lower radiator support
And back out to the other side
another angle of the fuse box location
And there you have it, a driver side wire tuck WITHOUT extending the harness. Please keep in mind that this is just roughed in, i will go back and use insulated line clamps to secure it to the body/frame and will cover the wires back up with loom. I am also building a removable enclosure for the fuse boxes so moisture cant get to them. All said and done the ONLY wires that will be remotely visible are the one that have to come out to the headlights , everything else is completely hidden. I will update this as i get the rest of the things done i mentioned earlier.
I used a heatgun to melt that crap, had a shop rag close by and used my widest flat screwdriver to scoop off the goop as it loosened. That cleared the majority. The screwdriver helped to pull the wires out of the block as they began to free up. Good luck. Everything looks good so far!
Trending Topics
LS1 Tech Stories
The Best V8 Stories One Small Block at Time

Topdon ONE vs. Artidiag 800 BT2: Which is the Diagnostic Tablet For You?
Pouria Savadkouei
Gas Monkey Built a 6-Wheel Ferrari Testarossa With a Corvette LT4 Engine
Verdad Gallardo
7 Most Reliable High-Performance Engines GM Has Ever Built
Verdad Gallardo
Amazing '71 Camaro Restomod Is Modern Muscle Car Under the Skin
Verdad Gallardo
6 Common C5 Corvette Failures and What's Involved In Repairing Them
Pouria Savadkouei
Retro Modern Bandit Pontiac Trans AM Comes With Burt Reynolds' Autograph
Verdad Gallardo
Top 10 Greatest Cadillac V Series Performance Models Ever, Ranked
Pouria Savadkouei
Top 10 Most Powerful Chevy Trucks Ever Made!

Hennessey's New Supercharged Silverado ZR2 Has 700 HP
Verdad Gallardo
11 Second Club
iTrader: (29)
Joined: Jan 2007
Posts: 305
Likes: 0
From: where ever i can store my car. (palos hills,il for now)
Looks good I had a bad exp with the interior harness but I think I may do this looks not to bad. Sure it will still suck but thanks for the info and pics

It is pretty simple to do. You unplug all the connectors from your headlights, fog lights, horn, windshield washer reservoir, abs block, brake master cylinder, undo the strap from the fuse blocks etc and basically get the harness completely undone on the engine bay side.
After it is completely undone on the engine bay side, take a 7mm socket and unscrew the bolt on the firewall at the top of that black connector to the right of the brake master cylinder. Don't try pulling this connector away from the firewall as it has to be pushed into the engine bay from inside the cabin.
Open the driver door and remove the access panels with a 7mm socket and a tool to help remove the push pins. Use a flash light and find the connector on the firewall at the top left. There are two small plastic pins on each side to hold in and push the connector into the engine bay. Follow that same harness/connector that you just pushed into the engine bay from the firewall into the cabin and undo all the connectors it is connected too. Find the largest black/grey connector like the one you just pushed into the engine bay. It is attached to a metal bracket. You don't need to remove it from the bracket but look on the front of it in between the wires. You will see a bolt that needs undoing. Use a thin wall 7mm socket to undo the bolt and get the connector to separate into two pieces. There are plastic retainer clips that you have to remove from this as well to get it undone I think I can't remember. Now after separating this connector there are 2 connectors on the top of the steering column that will be a bitch to get to if you don't drop the column. There are a few connectors attached to the pedals, and some to the left side near the kick panel. I want to say there are 8-9 total including the large one you separated. Once all these connectors are undone, go ahead and maneuver the connectors through the hole in the firewall where that connector was that you held the plastic pins in and pushed through to the engine bay side.
I'm not sure how big of a hole saw bit he used but I'd say you need at least 2-2 1/4" for the largest connector to fit through. The rest is pretty self explanatory as far as routing the harness back into the engine bay and to the passenger side etc. I'm not sure if the ABS connector will be long enough to reach the module itself as I removed my ABS. Once I get my car back from paint I can do a step by step process of this but the harness will already have been removed. Hope this helps clarify a few things.
Thread Starter
10 Second Club
iTrader: (14)
Joined: Oct 2005
Posts: 1,384
Likes: 4
From: Concord, NC
Sorry to bring up and old thread, but thought I would answer some questions. As far as the harness, it all unhooks from inside the car, and then comes out through the firewall. Since my car is mostly a track car, I just traced all the wires for things I didnt need and removed them from the harness completely. I think it lost about 15-20 lbs just from that harness alone. Plus whatever the ABS unit, evap, and cruise control stuff weighed. I didnt use a hole saw to cut that, i actually cut it out with an angle grinder and cleaned it up with a dremel and carbide grinding bit, just traced the inside of a roll of 3M blue painter's tape, somewhere between 2.5-3 inches would be my guess.
If you just wanted to do the routing etc, figure a good 6 to 8 hours to do it the way that I have, because you'll need to re route the entire harness, plus fabricate some brackets and a cover. I have about twice that, as I spent a lot of time tracing and removing wires, one at a time, and let me tell you this, GM puts a crap ton of tape around the harnesses, and the sealant that goes around the firewall connector, gets messy when you hit it with the heatgun LOL.
If you just wanted to do the routing etc, figure a good 6 to 8 hours to do it the way that I have, because you'll need to re route the entire harness, plus fabricate some brackets and a cover. I have about twice that, as I spent a lot of time tracing and removing wires, one at a time, and let me tell you this, GM puts a crap ton of tape around the harnesses, and the sealant that goes around the firewall connector, gets messy when you hit it with the heatgun LOL.