
93-97 Firebird Bi-Xenon FX Projector Retro-fit ***UPDATED W/ WRITE-UP***


93-97 Pontiac Firebird Bi-Xenon Projector Write-Up
UPDATED on Page 2: Better aimed pics and high beam with video
Background: The factory headlights are nothing to talk about and put out a very poor amount of lighting. I first moved on to new H4 conversion housings with Hella housings and quality H4 lamps. The output was much better but I knew HID would be the next logical step to further improve the lighting. I purchased a drop-in HID kit with a movable Hi/Low shield controlled by a solenoid. Everything was plug and play and it gave off a beautiful color and decent output but nothing compared to a true HID projector. I finally decided to start looking into projector retrofits but many of the Bi-Xenon projectors were too large and many of the firebird retro’s (typically 98-02 birds)I had seen left the projector lens exposed. I wanted to retain full functionality so a Bi-Xenon was the only logical solution. It is said the Infiniti FX35/45 bi-xenon projector is the smallest to get and looking at the measurements, it looked plausible. After viewing one of the LS1 bird retros that used plexi-glass with a center hole cut to mount the projector, I had my idea.
Parts/Materials:
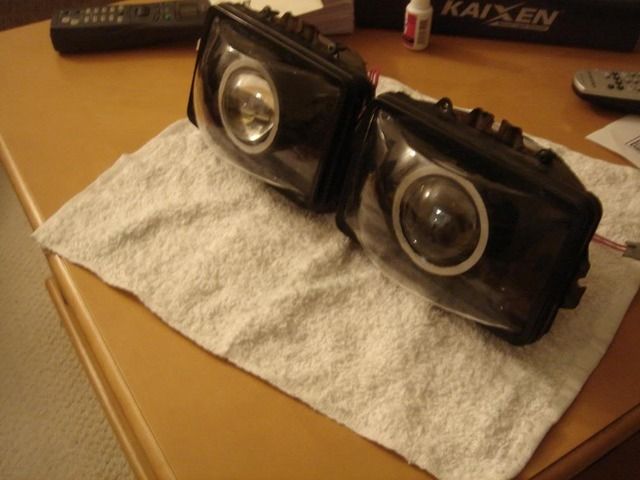
Infiniti FX35/45 Bi-Xenon projectors w/ Clear Lens (pair)
Hella Gen 3 OEM ballasts (pair)
Philips 85122+ HID D2S lamps (pair)
H4 Wiring Harness with solenoid wires (positively switched)
Plexi-Glass Sheets 1/10th inch thick
Lexan Sheet
Garden lamps used for projector shrouds
Plaster of Paris
Stock Headlamp
Black High Temp Paint
Misc. wire connectors and Elec. Tape
How-To:
Begin by cutting the factory mounting brackets from the FX projector.
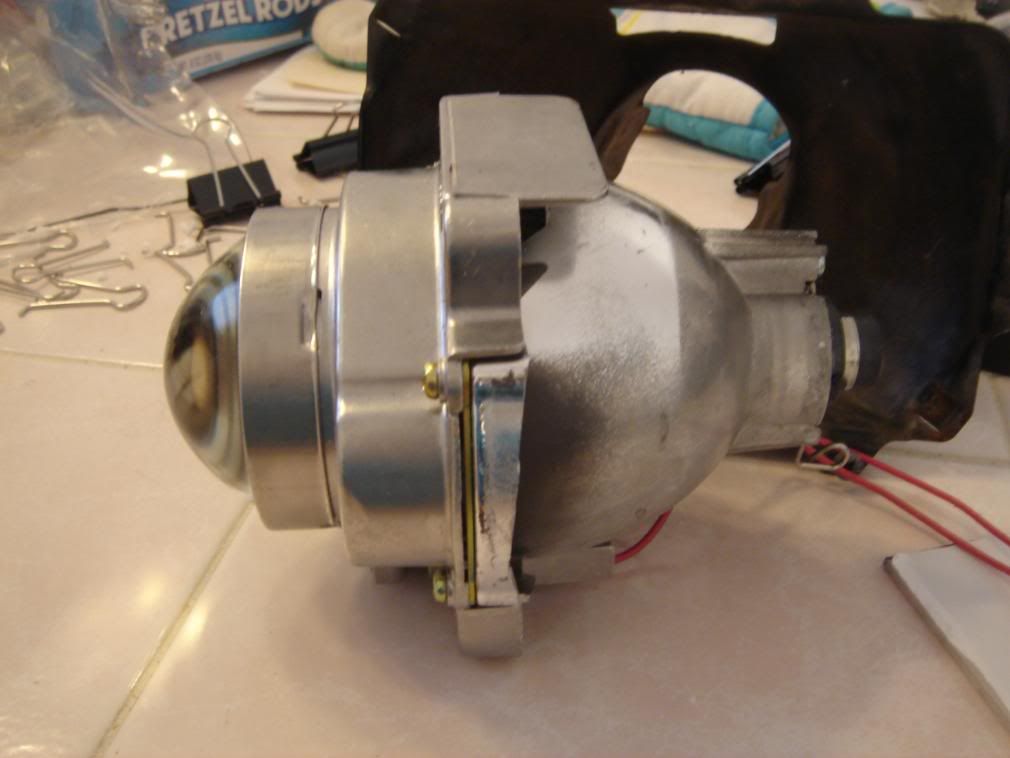
You can see where I cut right in the center of the projector.
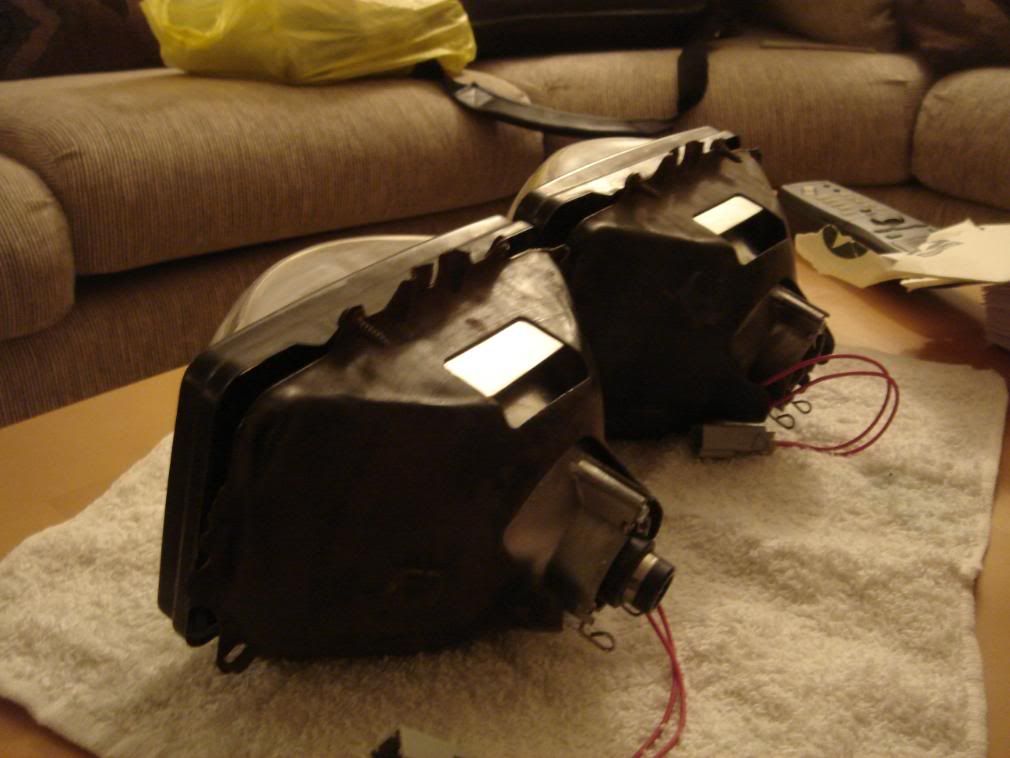
Next, I attempted to do a trial fit of the projector in a spare bucket I had laying around. As you will notice, the projector slides all the way in with a very snug fit to boot.
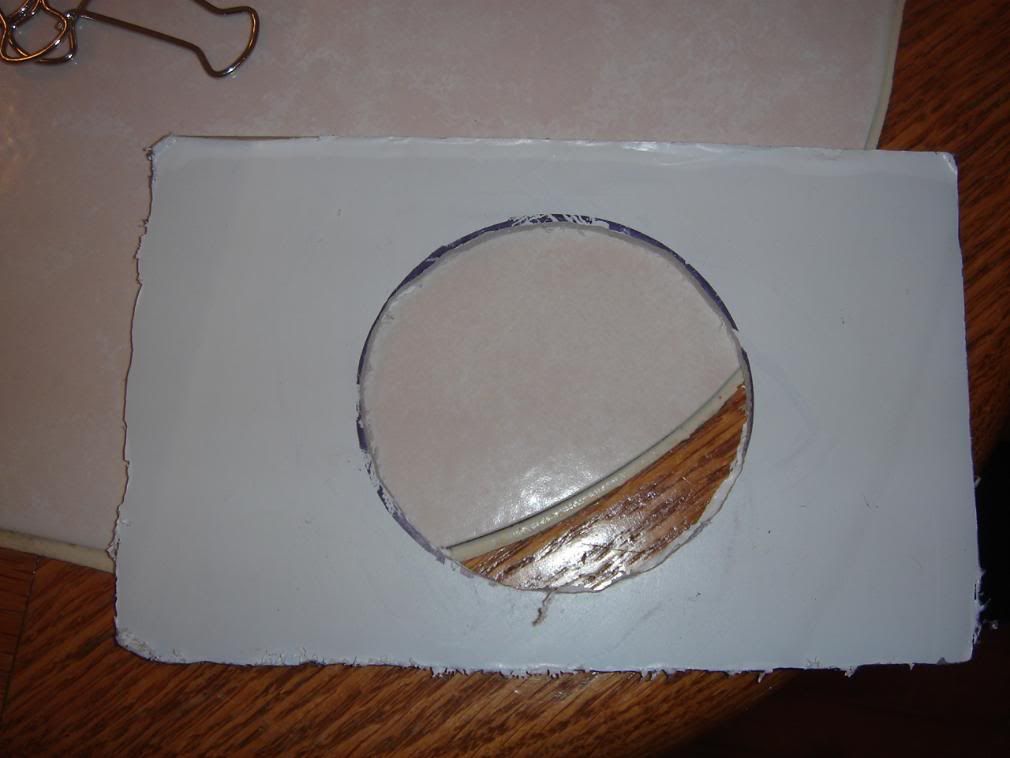
Now take a piece of lexan and cut two pieces that measure just a bit larger than the opening of the factory trim piece that holds the lamp to the bucket. I also measured and cut a hole for the projector lens to poke through.
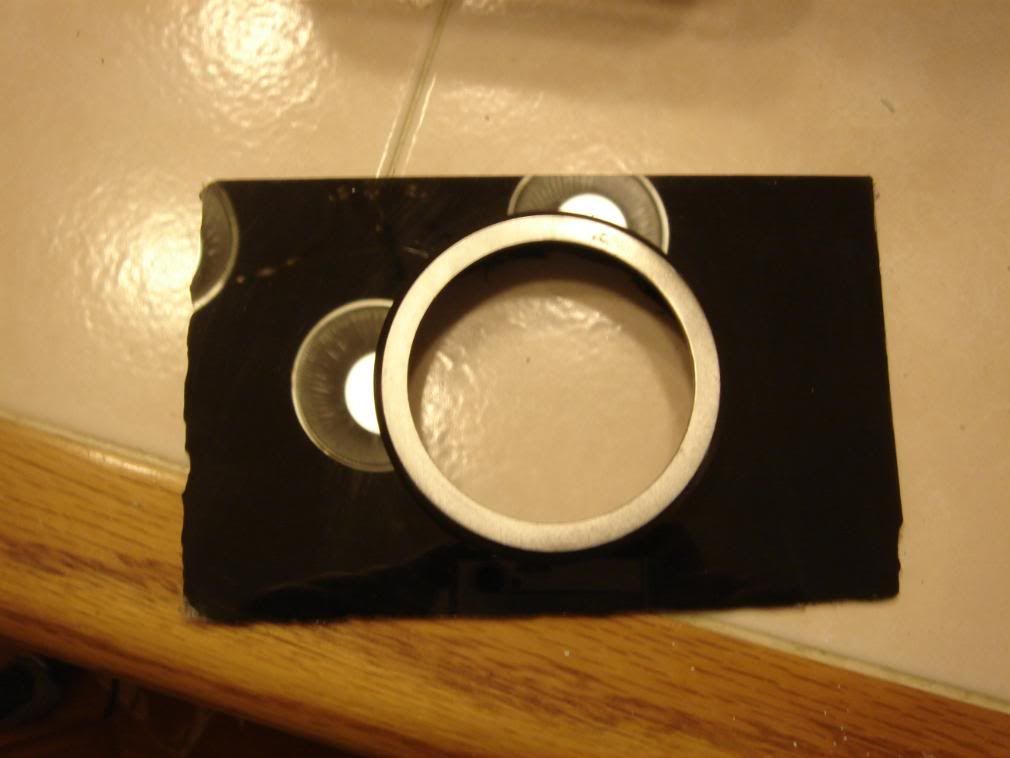
Next, I took my Garden lamp screw cover and used clear RTV to secure it to the Lexan piece. This will be the projector shroud. I sanded off the open-close lettering and left it with a brushed aluminum look on the face just as a cosmetic accent.
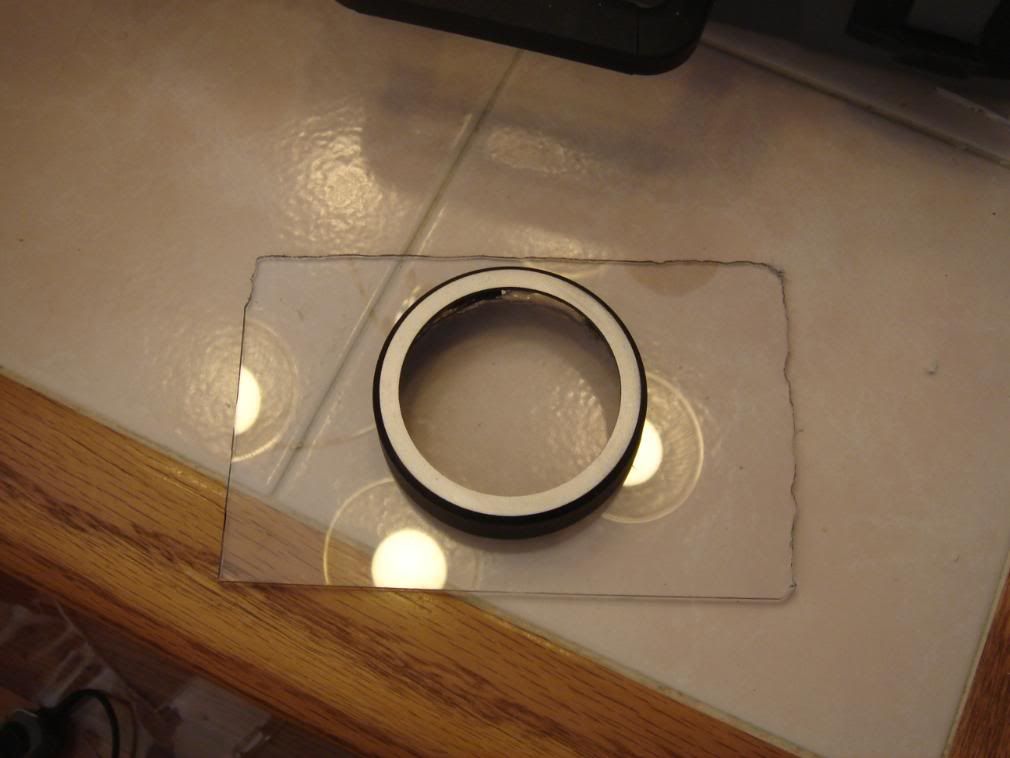
I then painted the back of the Lexan with the black high temp paint. Painting the rear of the Lexan makes the front come through as very shiny.
Moving on to the hardest part of the retro – The Plexi-glass bubble covers
I read online quite a bit and finally found someone that was force forming plexi-glass.
I first need a mold so I cut open the stock sealed beam housing and removed the lamp inside.
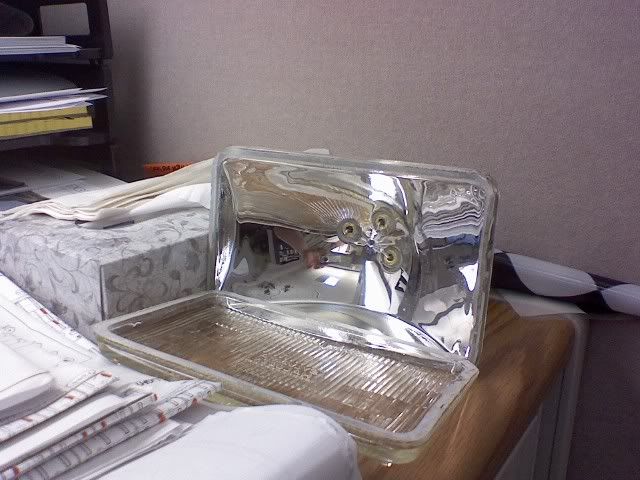
I then mixed and poured the Plaster of Paris into the open housing and waited for it to dry. My first attempt I used too much water and it never fully dried even though it was solid. The second attempt was perfect and left me with a very smooth and solid mold. However, I guess the mold expanded ever so slightly and cracked the stock headlamp…oh well don’t need it anymore anyway.
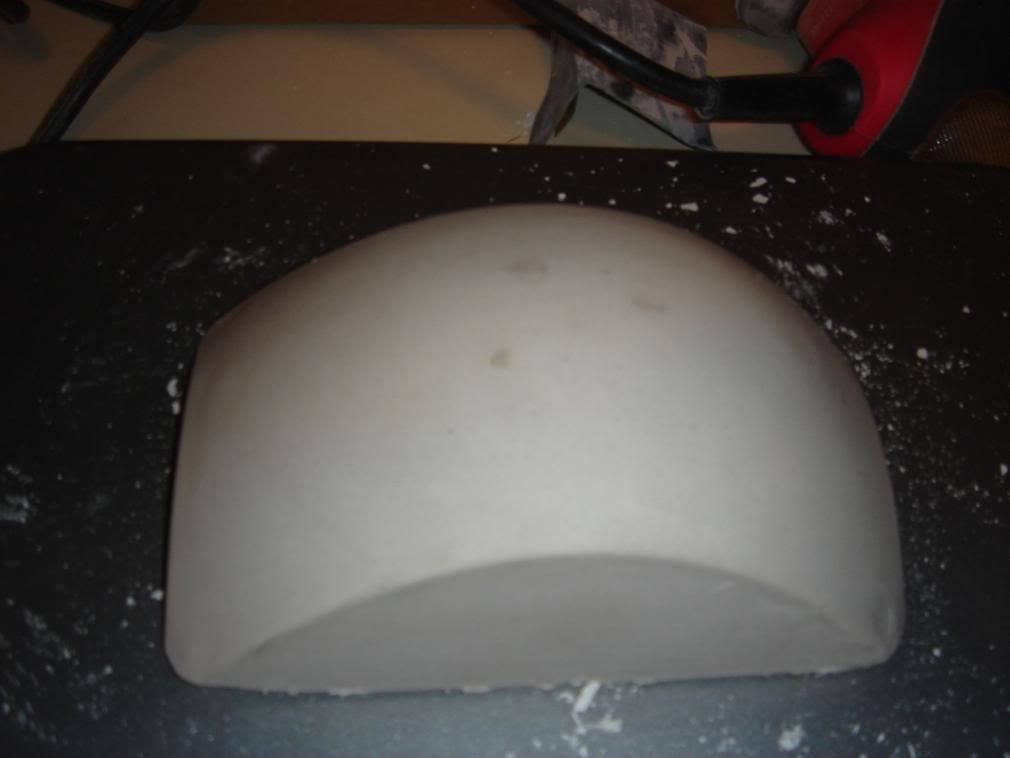
I used a power sander and made the surface as smooth as possible. I then did a little hand sanding with 2000 grit for an even finer finish. Make sure the surface is smooth and free of debris before attempting the next steps.
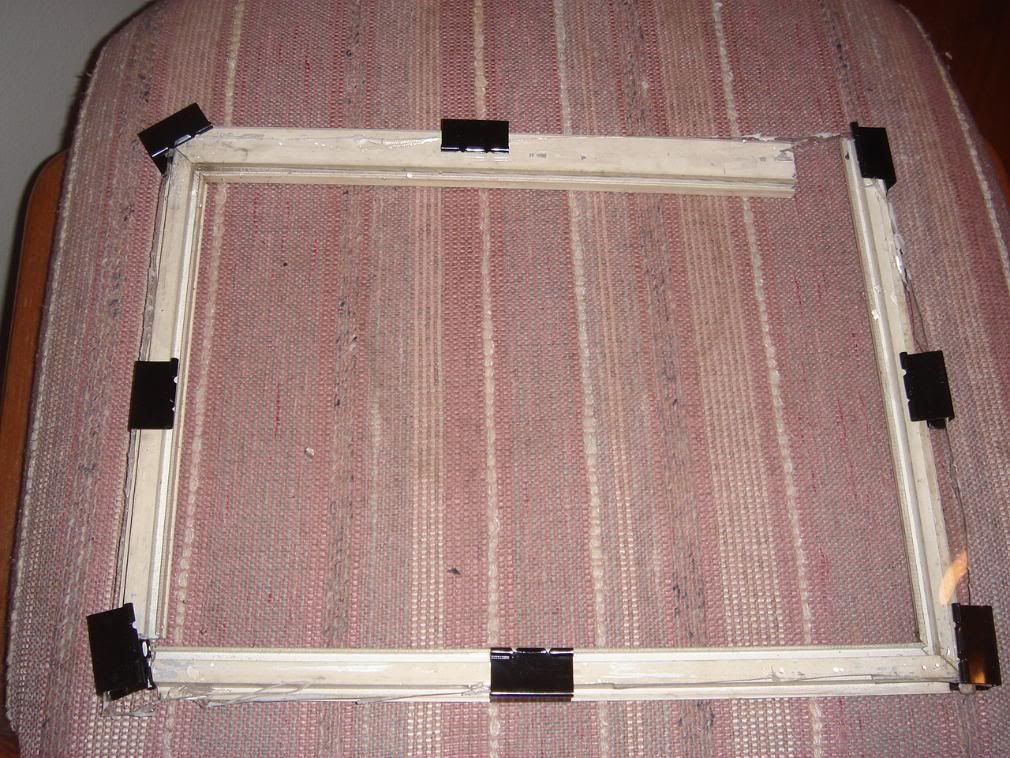
Now, cut a piece of Plexi-glass considerably greater in size than your mold. I took an old windows screen frame and cut it up at a frame for the plexi-glass sheet. I used large paper clips to secure the plexi-glass to the metal frame. Remove the silver clips before placing it in the oven.
I placed this in the oven on 4 coffee cups at ~310 – 325 degrees F for around 7 min. This required quite a bit of trial and error with the amount of heat and heating time. Different sheets took different times and not every oven temperature is the same. You will see the center of the sheet sag but don’t overheat or keep it too long or it will create small bubbles in the plastic. When it’s ready, remove it from the oven quickly and place it over your mold. I then used the metal trim that holds the factory headlamp and forced it down the mold quickly. I then held it there while it cooled. I obviously used oven mitts for this but take care to not touch the plastic with your mitts or it will imprint their texture onto your formed plexi. Cut out the excess plastic to fit snuggly but flush with the metal housing trim.
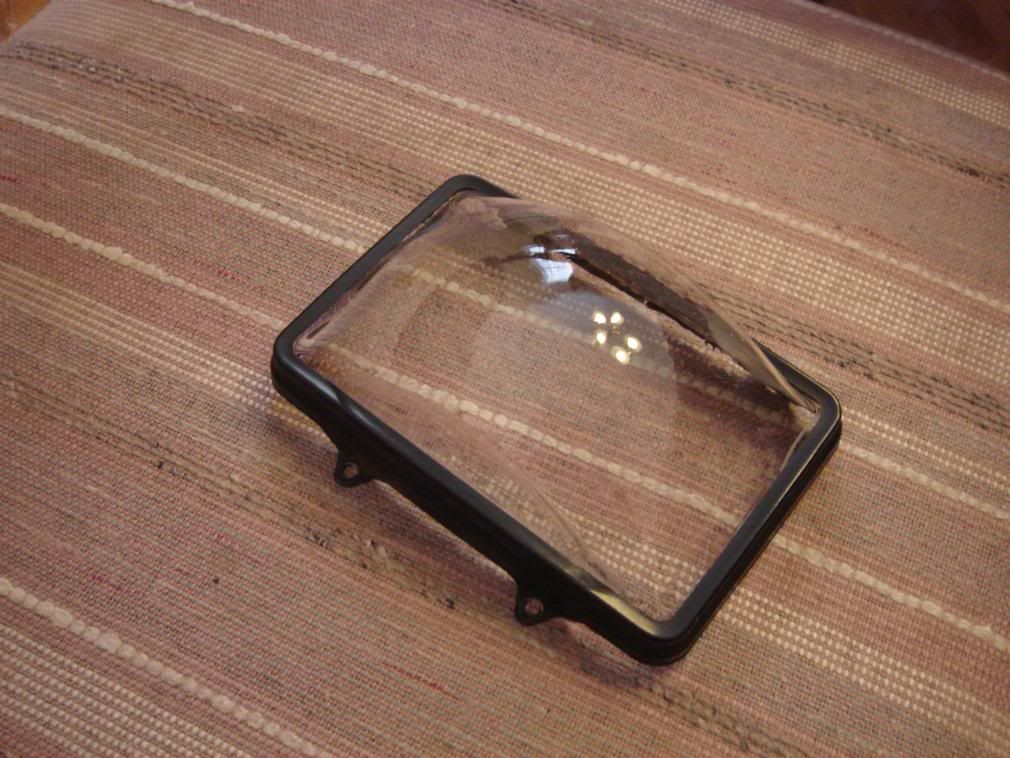
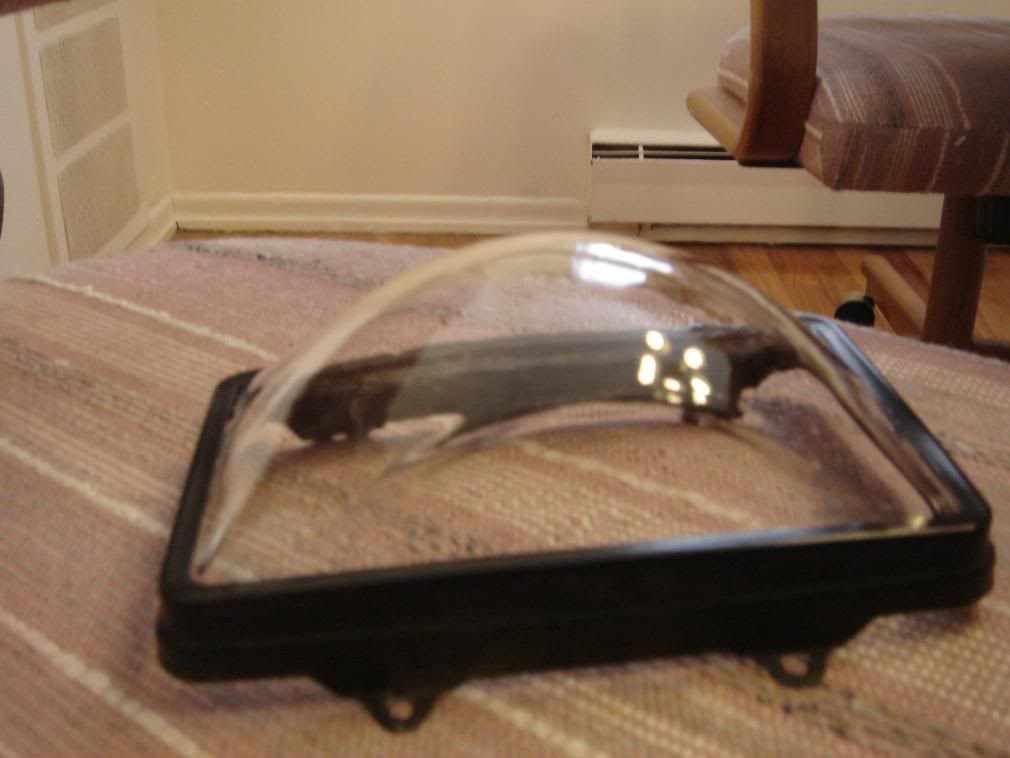
I used clear RTV again to seal and secure the plexi-glass lens to the metal trim frame. This will ensure a water tight seal so you can wash the car like normal with the headlights up.
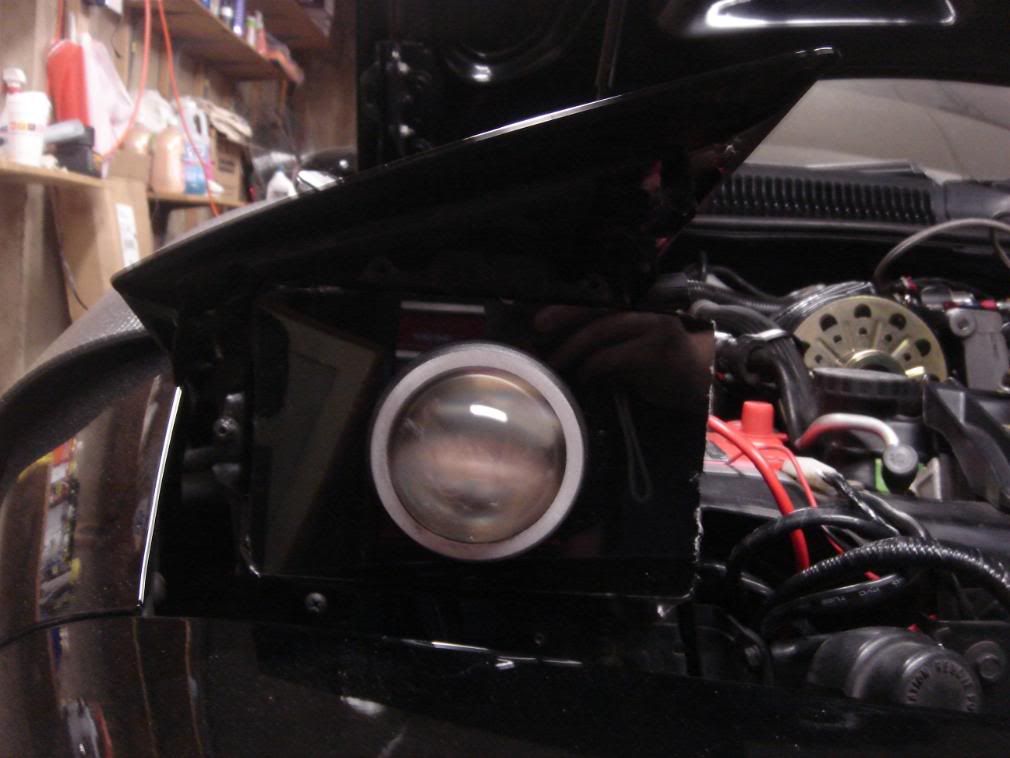
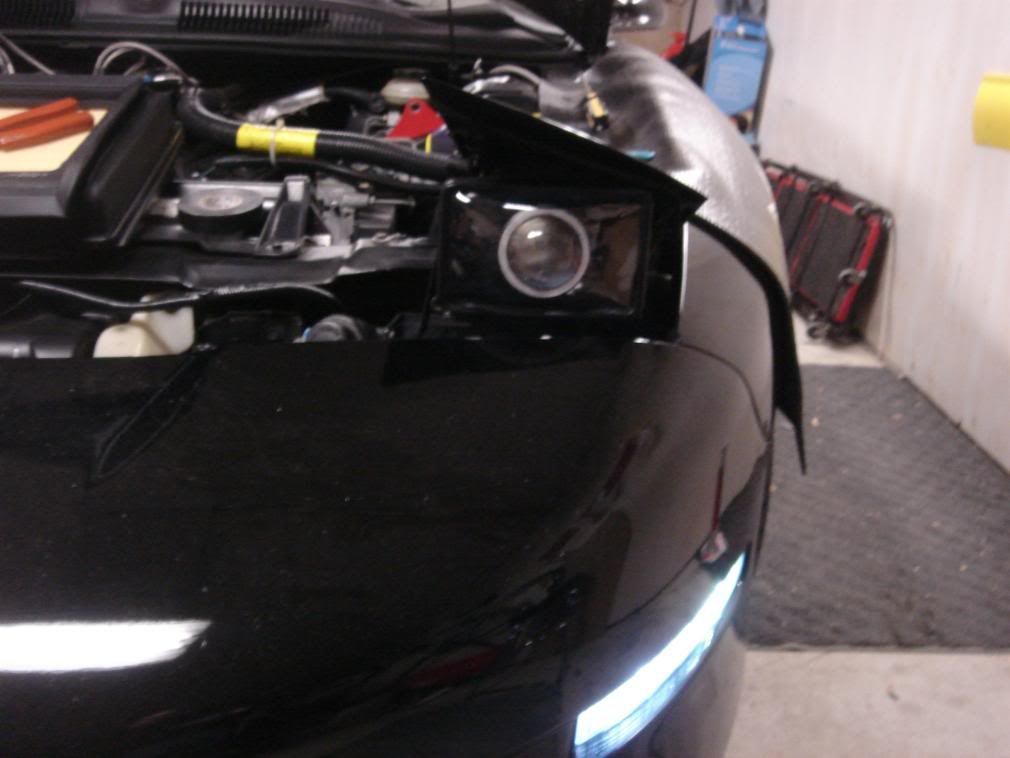
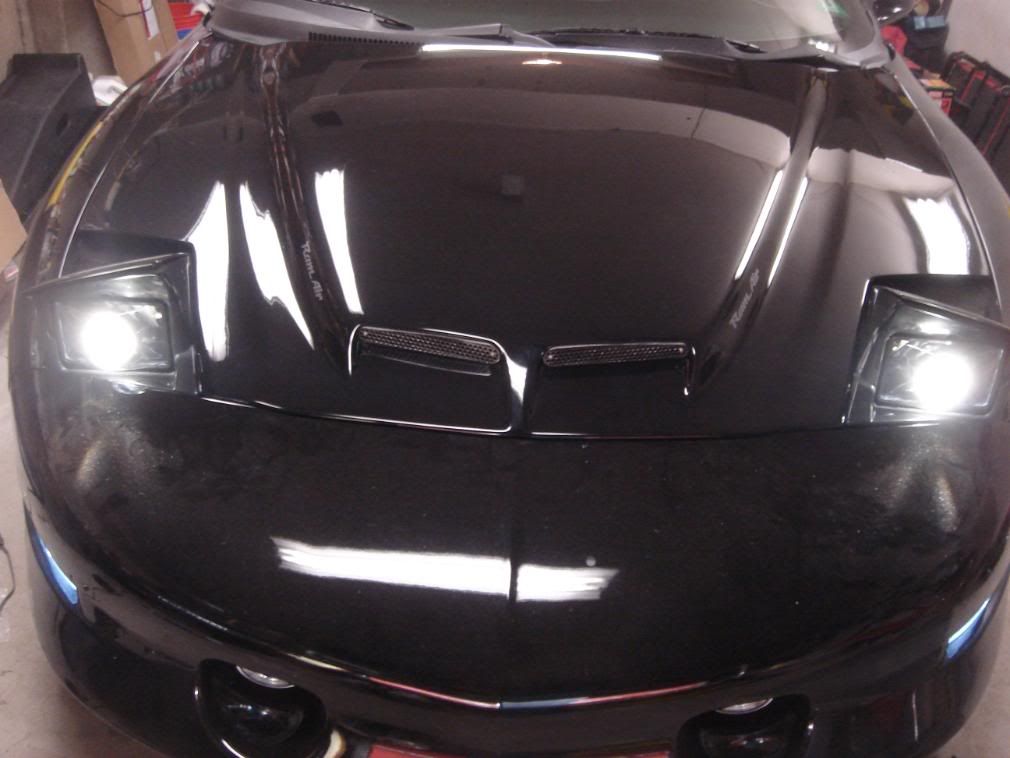
Here is a mock-up with how everything should fit and look in the car. Notice that there was no need for fasteners because the 4x6 Lexan actually fits within the metal trim piece. This allows not movement side to side or front to back because everything is a very tight fit but in a good way.
Finally, the install!
For the wiring, I had a harness pre-made to my specs since I am very lackluster with wiring. Finding a suitable place for the ballasts was the most difficult spot but there is a good area around below the headlights towards the center of the car.
Output:
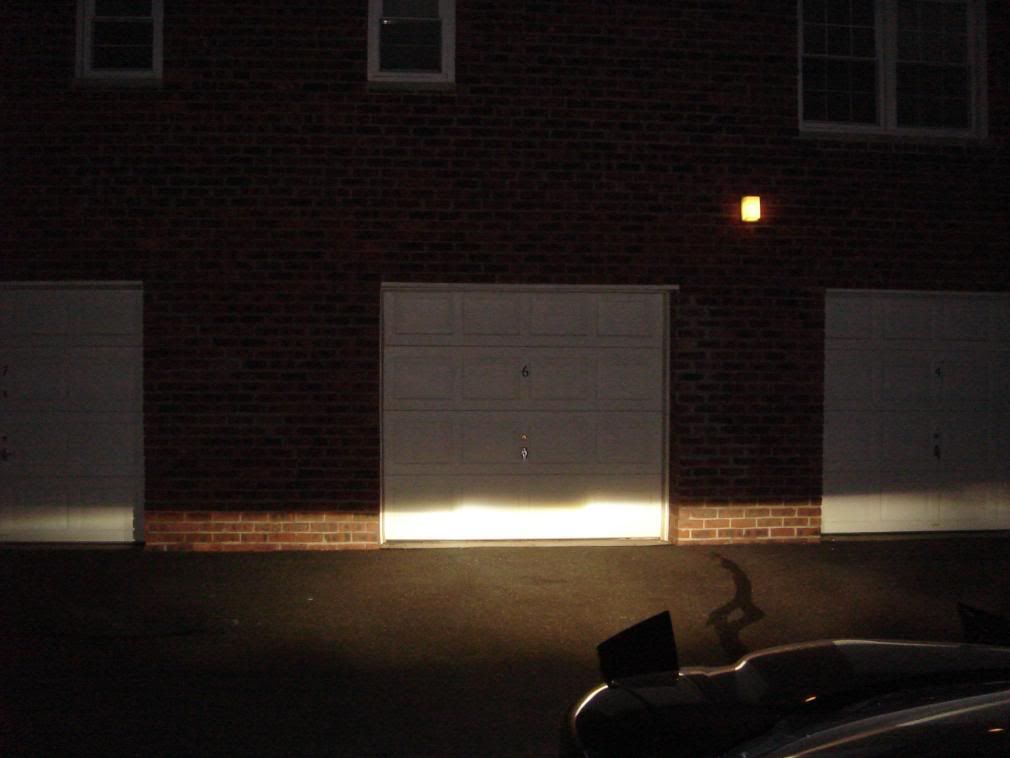
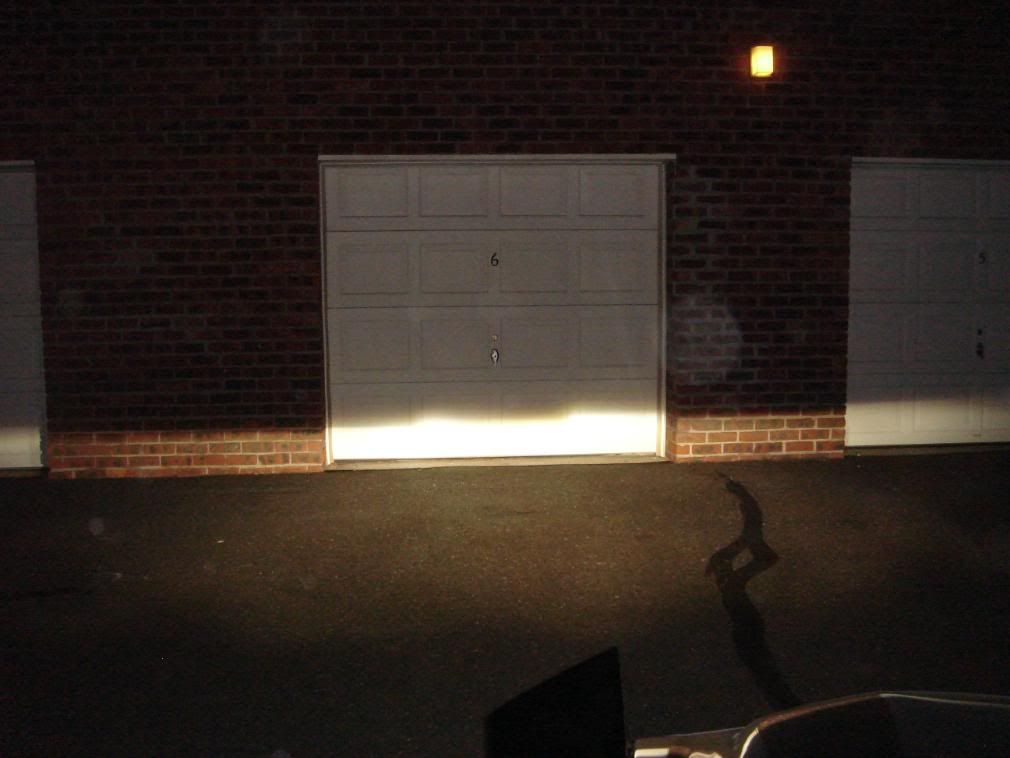
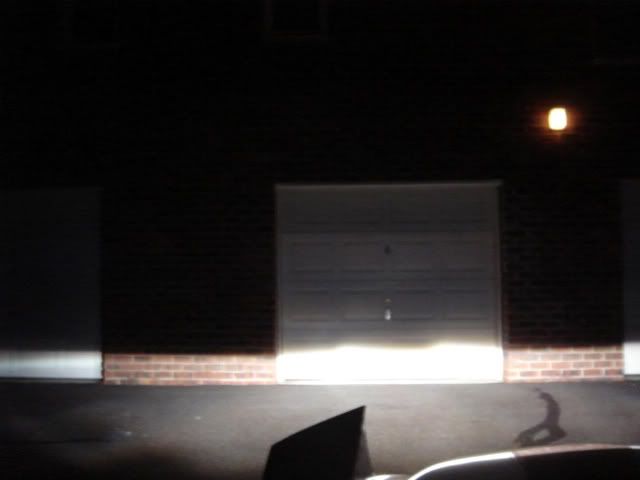
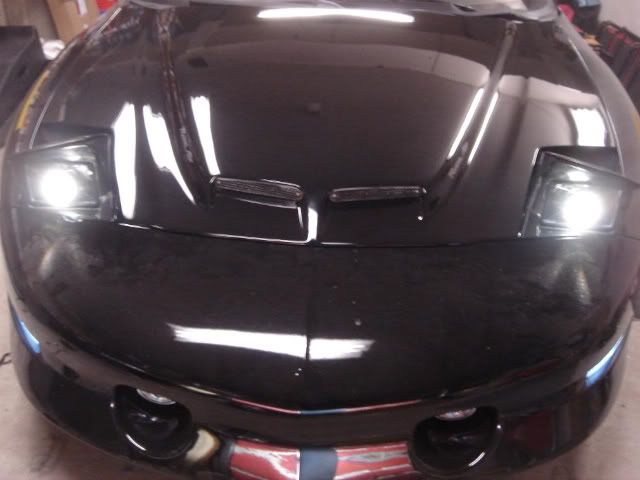
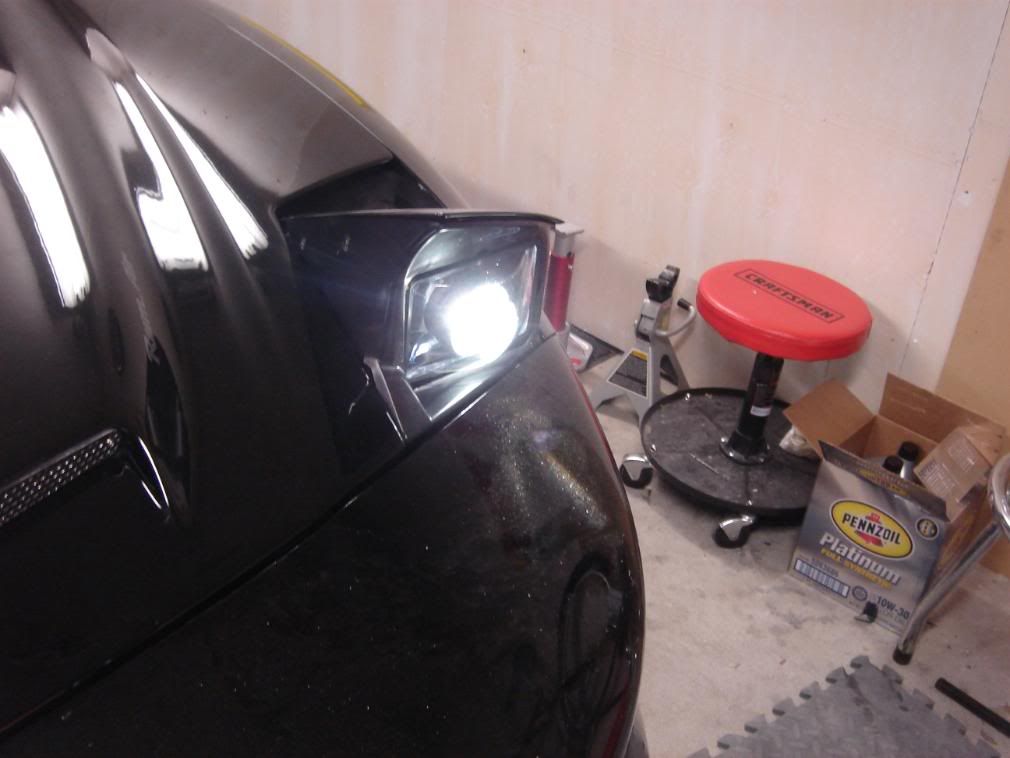
I still need to aim them a bit better but the output is amazing. What a difference these make. I was parked on a very slight slope so these may look a bit off but they are perfectly level. The nice thing is that these are easily adjusted with the stock adjusters. I need to bring them up a bit and my night shots really aren’t good at all because of the lackluster camera. I will also remember to get high beam shots as well. Using the flash in some of the pics allowed the cutoff to be better seen.
Cost:
Clear Lens Projectors FX Bi-Xenon Projectors - $100 HIDPLANET.com forum member (non-clear lens versions are cheaper but output isn’t as good)
New Gen 3 Hella D2S ballasts - $180 for the pair
New Philips 85122+ lamps - $90 for the pair
Pre-Made Wiring Harness - $87
Garden Lights - $20 – could be done for cheaper but this worked just fine.
Cost of Lexan - $15.00 for the sheet
Cost of Plexiglass- $15.00 large sheet
Plaster of Paris - $5.00
OEM Headlamp - $8.00
H4 conversion connectors - $15 but already had from previous setup
Feel free to ask me any questions.
UPDATED on Page 2: Better aimed pics and high beam with video
Background: The factory headlights are nothing to talk about and put out a very poor amount of lighting. I first moved on to new H4 conversion housings with Hella housings and quality H4 lamps. The output was much better but I knew HID would be the next logical step to further improve the lighting. I purchased a drop-in HID kit with a movable Hi/Low shield controlled by a solenoid. Everything was plug and play and it gave off a beautiful color and decent output but nothing compared to a true HID projector. I finally decided to start looking into projector retrofits but many of the Bi-Xenon projectors were too large and many of the firebird retro’s (typically 98-02 birds)I had seen left the projector lens exposed. I wanted to retain full functionality so a Bi-Xenon was the only logical solution. It is said the Infiniti FX35/45 bi-xenon projector is the smallest to get and looking at the measurements, it looked plausible. After viewing one of the LS1 bird retros that used plexi-glass with a center hole cut to mount the projector, I had my idea.
Parts/Materials:
Infiniti FX35/45 Bi-Xenon projectors w/ Clear Lens (pair)
Hella Gen 3 OEM ballasts (pair)
Philips 85122+ HID D2S lamps (pair)
H4 Wiring Harness with solenoid wires (positively switched)
Plexi-Glass Sheets 1/10th inch thick
Lexan Sheet
Garden lamps used for projector shrouds
Plaster of Paris
Stock Headlamp
Black High Temp Paint
Misc. wire connectors and Elec. Tape
How-To:
Begin by cutting the factory mounting brackets from the FX projector.
You can see where I cut right in the center of the projector.
Next, I attempted to do a trial fit of the projector in a spare bucket I had laying around. As you will notice, the projector slides all the way in with a very snug fit to boot.
Now take a piece of lexan and cut two pieces that measure just a bit larger than the opening of the factory trim piece that holds the lamp to the bucket. I also measured and cut a hole for the projector lens to poke through.
Next, I took my Garden lamp screw cover and used clear RTV to secure it to the Lexan piece. This will be the projector shroud. I sanded off the open-close lettering and left it with a brushed aluminum look on the face just as a cosmetic accent.
I then painted the back of the Lexan with the black high temp paint. Painting the rear of the Lexan makes the front come through as very shiny.
Moving on to the hardest part of the retro – The Plexi-glass bubble covers
I read online quite a bit and finally found someone that was force forming plexi-glass.
I first need a mold so I cut open the stock sealed beam housing and removed the lamp inside.
I then mixed and poured the Plaster of Paris into the open housing and waited for it to dry. My first attempt I used too much water and it never fully dried even though it was solid. The second attempt was perfect and left me with a very smooth and solid mold. However, I guess the mold expanded ever so slightly and cracked the stock headlamp…oh well don’t need it anymore anyway.
I used a power sander and made the surface as smooth as possible. I then did a little hand sanding with 2000 grit for an even finer finish. Make sure the surface is smooth and free of debris before attempting the next steps.
Now, cut a piece of Plexi-glass considerably greater in size than your mold. I took an old windows screen frame and cut it up at a frame for the plexi-glass sheet. I used large paper clips to secure the plexi-glass to the metal frame. Remove the silver clips before placing it in the oven.
I placed this in the oven on 4 coffee cups at ~310 – 325 degrees F for around 7 min. This required quite a bit of trial and error with the amount of heat and heating time. Different sheets took different times and not every oven temperature is the same. You will see the center of the sheet sag but don’t overheat or keep it too long or it will create small bubbles in the plastic. When it’s ready, remove it from the oven quickly and place it over your mold. I then used the metal trim that holds the factory headlamp and forced it down the mold quickly. I then held it there while it cooled. I obviously used oven mitts for this but take care to not touch the plastic with your mitts or it will imprint their texture onto your formed plexi. Cut out the excess plastic to fit snuggly but flush with the metal housing trim.
I used clear RTV again to seal and secure the plexi-glass lens to the metal trim frame. This will ensure a water tight seal so you can wash the car like normal with the headlights up.
Here is a mock-up with how everything should fit and look in the car. Notice that there was no need for fasteners because the 4x6 Lexan actually fits within the metal trim piece. This allows not movement side to side or front to back because everything is a very tight fit but in a good way.
Finally, the install!
For the wiring, I had a harness pre-made to my specs since I am very lackluster with wiring. Finding a suitable place for the ballasts was the most difficult spot but there is a good area around below the headlights towards the center of the car.
Output:
I still need to aim them a bit better but the output is amazing. What a difference these make. I was parked on a very slight slope so these may look a bit off but they are perfectly level. The nice thing is that these are easily adjusted with the stock adjusters. I need to bring them up a bit and my night shots really aren’t good at all because of the lackluster camera. I will also remember to get high beam shots as well. Using the flash in some of the pics allowed the cutoff to be better seen.
Cost:
Clear Lens Projectors FX Bi-Xenon Projectors - $100 HIDPLANET.com forum member (non-clear lens versions are cheaper but output isn’t as good)
New Gen 3 Hella D2S ballasts - $180 for the pair
New Philips 85122+ lamps - $90 for the pair
Pre-Made Wiring Harness - $87
Garden Lights - $20 – could be done for cheaper but this worked just fine.
Cost of Lexan - $15.00 for the sheet
Cost of Plexiglass- $15.00 large sheet
Plaster of Paris - $5.00
OEM Headlamp - $8.00
H4 conversion connectors - $15 but already had from previous setup
Feel free to ask me any questions.
Last edited by Blackbirdws6; Feb 25, 2008 at 06:44 PM. Reason: added write-up


Copy & Paste Moderator


Joined: Apr 2002
Posts: 9,761
Likes: 206
From: Eastern MA
Great! 
I just added this to the Lighting FAQ:
https://ls1tech.com/forums/appearance-detailing/710357-lighting-faq.html
Please keep the write-up in this thread so we can keep it all together.
How did you make those lenses?
Vacu-form or cast?
I just added this to the Lighting FAQ:
https://ls1tech.com/forums/appearance-detailing/710357-lighting-faq.html
Please keep the write-up in this thread so we can keep it all together.
How did you make those lenses?
Vacu-form or cast?

Great!
I just added this to the Lighting FAQ:
https://ls1tech.com/forums/showthread.php?t=710357
Please keep the write-up in this thread so we can keep it all together.
How did you make those lenses?
Vacu-form or cast?
I just added this to the Lighting FAQ:
https://ls1tech.com/forums/showthread.php?t=710357
Please keep the write-up in this thread so we can keep it all together.
How did you make those lenses?
Vacu-form or cast?
I will also include total cost. It wasn't very cheap but well worth the money over drop-in HID kits into halogen housings.
-Brian
Trending Topics


2 Questions. 1, when are you going to mass produce these? 2, when are you going to mass produce these? heh, I really want these for my lt1 Camaro and my 2000 Firebird. Seriously, I'll pay you to make them.

Parts/Materials:
Infiniti FX35/45 Bi-Xenon projectors w/ Clear Lens (pair)
Hella Gen 3 OEM ballasts (pair)
Philips 85122+ HID D2S lamps (pair)
H4 Wiring Harness with solenoid wires (positively switched)
Plexi-Glass Sheets 1/10th inch thick
Lexan Sheet
Garden lamps used for projector shrouds
Plaster of Paris
Stock Headlamp
Black High Temp Paint
Misc. wire connectors and Elec. Tape
Blue, where did you buy these, and what thickness would you recommend the lexan be?
Green, what kind of garden lamps are you talking about exactly, and are the rings sold separately or do you have to buy a whole kit of lamps? Any pictures of what the actual lamps look like? I might have some in my garage.
Bold, where can Plaster or Paris be purchased.
How exactly did you manage to do this? I've messed around with the stock housing, and have been afraid of attempting this with fear of shattering both the glass lens and glass housing.
Red, do you have just a basic wiring diagram of this, not entirely sure how you wired the projectors high beam movable shield to the current wiring setup.
Blue, where did you buy these, and what thickness would you recommend the lexan be?
Green, what kind of garden lamps are you talking about exactly, and are the rings sold separately or do you have to buy a whole kit of lamps? Any pictures of what the actual lamps look like? I might have some in my garage.
Bold, where can Plaster or Paris be purchased.
How exactly did you manage to do this? I've messed around with the stock housing, and have been afraid of attempting this with fear of shattering both the glass lens and glass housing.

Lexan and Plexi-glass can be found at Home Depot and Lowes. 1/10th Inch and .080 is fine when you go there. Nothing too thin and nothing overly thick.
Garden Light - I only needed the screw on ring for these. These look like the ones I bought. I said this could be done cheaper because I've seen tons of other ideas for this from the bottom of steal coffee travel mugs, and others.
http://www.lowes.com/lowes/lkn?actio...507&lpage=none
Plaster of Paris can also be found at Home Depot and Lowes. Says it right on the box. Look in the spackle and paint section.
Separating the factory headlamp wasn't as easy as I thought. I tried using regular dremel cutting wheels but they got burned up with barely doing anything. A high temp glue holds the front glass lense to the rear portion. I purchased a "diamond" cutting wheel and it separated it with easy.
-Brian
Red, do you have just a basic wiring diagram of this, not entirely sure how you wired the projectors high beam movable shield to the current wiring setup.
Blue, where did you buy these, and what thickness would you recommend the lexan be?
Green, what kind of garden lamps are you talking about exactly, and are the rings sold separately or do you have to buy a whole kit of lamps? Any pictures of what the actual lamps look like? I might have some in my garage.
Bold, where can Plaster or Paris be purchased.
How exactly did you manage to do this? I've messed around with the stock housing, and have been afraid of attempting this with fear of shattering both the glass lens and glass housing.
Blue, where did you buy these, and what thickness would you recommend the lexan be?
Green, what kind of garden lamps are you talking about exactly, and are the rings sold separately or do you have to buy a whole kit of lamps? Any pictures of what the actual lamps look like? I might have some in my garage.
Bold, where can Plaster or Paris be purchased.
How exactly did you manage to do this? I've messed around with the stock housing, and have been afraid of attempting this with fear of shattering both the glass lens and glass housing.
Lexan and Plexi-glass can be found at Home Depot and Lowes. 1/10th Inch and .080 is fine when you go there. Nothing too thin and nothing overly thick.
Garden Light - I only needed the screw on ring for these. These look like the ones I bought. I said this could be done cheaper because I've seen tons of other ideas for this from the bottom of steal coffee travel mugs, and others.
http://www.lowes.com/lowes/lkn?actio...507&lpage=none
Plaster of Paris can also be found at Home Depot and Lowes. Says it right on the box. Look in the spackle and paint section.
Separating the factory headlamp wasn't as easy as I thought. I tried using regular dremel cutting wheels but they got burned up with barely doing anything. A high temp glue holds the front glass lense to the rear portion. I purchased a "diamond" cutting wheel and it separated it with ease.
-Brian
Awesome diagram, thanks! Now I just want to clarify this:
So place it in the oven.. once it starts to sag in the middle, that's about when you should take it out? Once its out, you placed it over the plaster mold, and used the outer light trim to compress it down over the mold. Correct? How large was the sheet of plexi-glass you used to do this? Not much larger than the metal trim I assume?
Originally Posted by Blackbirdws6
I placed this in the oven on 4 coffee cups at ~310 � 325 degrees F for around 7 min. This required quite a bit of trial and error with the amount of heat and heating time. Different sheets took different times and not every oven temperature is the same. You will see the center of the sheet sag but don�t overheat or keep it too long or it will create small bubbles in the plastic. When it�s ready, remove it from the oven quickly and place it over your mold. I then used the metal trim that holds the factory headlamp and forced it down the mold quickly. I then held it there while it cooled. I obviously used oven mitts for this but take care to not touch the plastic with your mitts or it will imprint their texture onto your formed plexi. Cut out the excess plastic to fit snuggly but flush with the metal housing trim.
Awesome diagram, thanks! Now I just want to clarify this:
So place it in the oven.. once it starts to sag in the middle, that's about when you should take it out? Once its out, you placed it over the plaster mold, and used the outer light trim to compress it down over the mold. Correct? How large was the sheet of plexi-glass you used to do this? Not much larger than the metal trim I assume?
So place it in the oven.. once it starts to sag in the middle, that's about when you should take it out? Once its out, you placed it over the plaster mold, and used the outer light trim to compress it down over the mold. Correct? How large was the sheet of plexi-glass you used to do this? Not much larger than the metal trim I assume?
The size of plexi was actually quite a bit larger than the trim ring used to push it down. Some of the plexi will stretch but it will reach a point where it needs more material to work all the way down. Be generous very generous with the sizing.
Good luck.
Thanks for the compliments everyone.
-brian
As for the projector fitment, the fit was very very snug but in a good way since it more or less locks into place. I have driven the car over bumps and other areas to attempt to loosen everything but it's all right where it should be and hasn't moved at all. It seems odd not having any fasteners but it honestly worked very very well.
It's almost as if the projectors were the perfect size for the buckets. It saved me a lot of hassle.
I hope this answered things for you.
-Brian