When you click on links to various merchants on this site and make a purchase, this can result in this site earning a commission. Affiliate programs and affiliations include, but are not limited to, the eBay Partner Network.
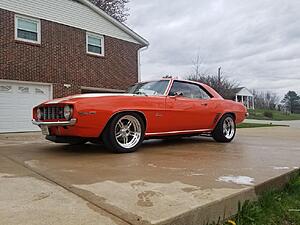
I figured I would document the build of the 4L60E going in my 69 Camaro resto mod.
List of mods:
2006 LQ9 overhauled by me
Melling high PSI oil pump
LS2 timing chain
BTR Stage II LS1 cam
LS7 lifters
BTR dual valve springs
BTR pushrods
BTR rocker trunnion upgrade
Stock 243 heads, cleaned and lapped valves, new seals
ARP head bolts
FIC 44# flow matched injectors
Factory truck intake and accessories
Circle D 3200 billet converter
GM car 12 bolt, Richmond 3:73 gear set, Auburn posi
BUILD LIST:
CASE: Removed factory 3rd accumulator, install Superior K0136 directional switch valve Block 4th accumulator with 5/16 set screw, remove piston and spring Remove #6 checkball (overrun) Remove low/reverse encapsulated check ball 24219937 2nd accumulator housing, aluminum 2nd accumulator piston with hardened pin, blue TransGo spring, piston, then orange TransGo spring
2-4 SERVO: Sonnax 77911-03K 2nd servo Sonnax 77767K 4th servo Sonnax 77787-02K servo pin kit TransGo blue 2nd cushion spring inside large white factory cushion spring Modify factory steel 2nd apply cover for quicker exhaust Alto extra wide carbon 2-4 band ( .060" band clearance on install)
VALVE BODY: 4209354 Valve body 3-2 control valve blocked inboard 3-2 downshift valve blocked inboard Central valve bodies .001" oversized AFL valve TransGo white AFL spring inside factory AFL spring TransGo yellow low overrun spring TransGo white 1-2 accumulator spring TransGo 1-2 shift valve and spacer Sonnax 77754-41 HD 2-3 shift valve Sonnax 77754-35K forward & reverse abuse valve kits Sonnax 77964-08K o-ringed end plugs Sonnax 77754-03K TCC regulator & isolator kit
(Vacuum tested VB, results in build thread)
#2 check ball removed, hole plugged TransGo seperator plate w/ steel reinforcement corner plate Orifices drilled to: Band release - .104" Rev input - .104" 3-4 clutch and 3-4 clutch signal - .110" 1-2 shift - .096" 2-3 shift - .140" 3-4 shift - .110" Low/reverse - .093 Forward clutch - .086" AFL factory size Borg Warner EPC solenoid (early style) Rostra wiring harness (early style) Sonnax 77980-01K wiring harness connector retainer Rostra pressure switch manifold TransGo torlon check *****, serpator plate peened to except check ***** AC Delco A & B shift solenoids Rostra TCC PWM solenoid Rostra 3-2 Shift solenoid Aluminum forward accumulator piston with hardened pin
PUMP: 2420661 pump Re-seat pressure relief ball Wide bronze inner and outer stator bushings 10 vane rotor 13 vane slide w/ new pin TransGo hardened retaining rings TransGo high RPM priming spring TransGo .500 boost valve TransGo orange bumper and orange main regulator springs Sonnax 77805E-K TCC o-ringed apply valve kit
(Vacuum test results in build thread)
LOWER UNIT OF CASE: Factory lower 5 pinion carrier Borg warner HD low/reverse roller clutch (late design) Borg Warner low/reverse clutches Raybestos "turbulator" steels Sonnax 74678L-HD billet output shaft 2WD
UPPER UNIT OF CASE: GM factory 5 pinion upper carrier Sonnax 77010-01 wide sun gear bushing Sonnax 77749-02K smart shell Sonnax 74602-01K HD reaction shaft kit
INPUT DRUM: 4L79 custom factory input drum Sonnax 77733-11S billet input shaft (non reluctor 300MM) Sonnax 77733-51K reinforcement sleeve kit with billet overrun piston Seal aftermarket product Hi-per blue molded 3-4 and forward pistons TransGo 7CS hi-rev forward and 3-4 springs Borg Warner overrun clutches AC Delco overrun steels Borg Warner forward clutches Raybestos forward steels 4L79 custom 3-4 apply plate .180" 8 Raybestos custom wide 3-4 clutches .062" 8 4L79 custom wide 3-4 steels .072" 5 4L79 custom load release springs Sonnax 74574-HD sprag clutch hub Borg Warner 29 element dual cage forward sprag
REVERSE INPUT DRUM: AC Delco reverse input drum Borg Warner clutches Raybestos "turbulator " steels Alto lower wave plate (replaces belleville plate) Replace outer bushing to except roller bearing to replace plastic thrust washer
The unit I purchased is believed to be a 2003 unit out of a 2WD Silverado I am told
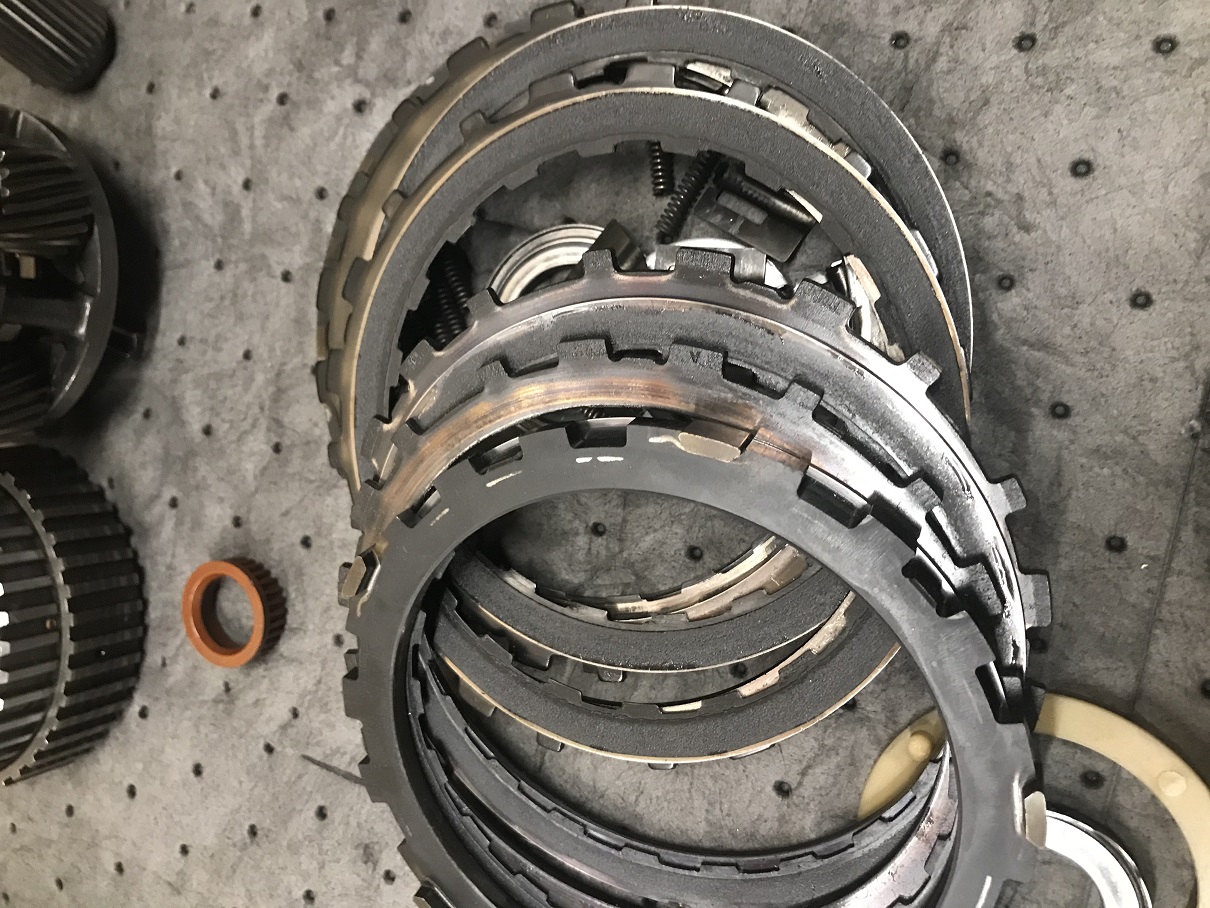
After removing the pan on the core, it had HEAVY material in the pan and the fluid was dark and burned. Disassembled
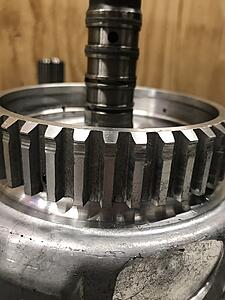
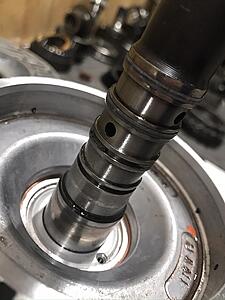
After disassembly I found the inner babbot stator bushing failed and took out the sealing rings for the input drum.
The 3/4 clutch was smoked as well as the forward and overrun stack naturally. After further inspecting the input drum (which I dont plan to use a stock one anyway) where the bushing failed it damaged the shaft and also where the reverse
clutches spline the teeth have worn the splines on the drum down quite a bit.
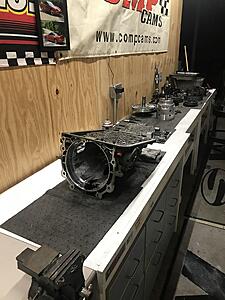
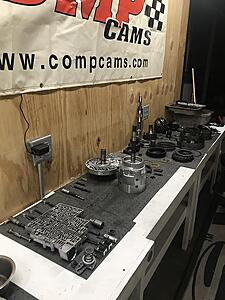
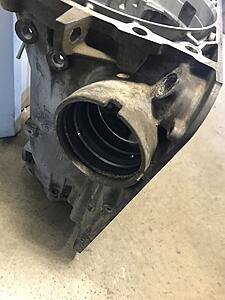
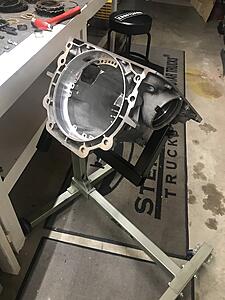
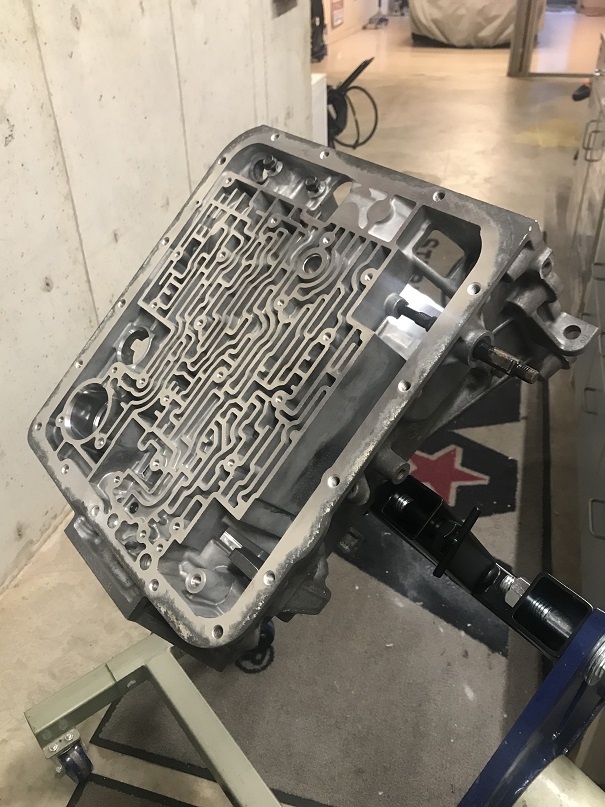
I will get to the pump sub assembly as the thread goes on. But the next post I will start with the case as the first component of the build as I have it blasted, cleaned, and ready to go on the transmission stand. Here it is before getting blasted.
So, here we go. Starting with the case. I had the external of the case soda media blasted along with the bell and tail housings. Turned out well. I reinstalled the pan on the case to make sure the bottom so the passages didn't get damaged or nicked while it was getting blasted. I didn't accidently want it to lay on the bottom side or fall over.
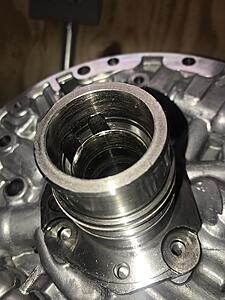
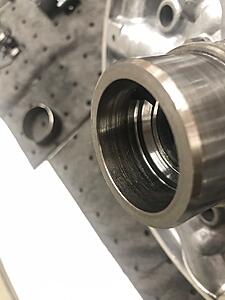
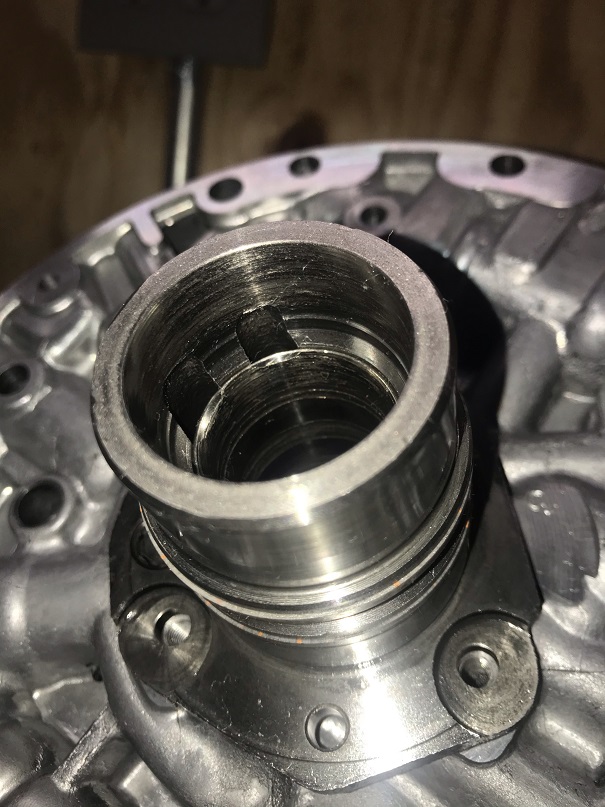
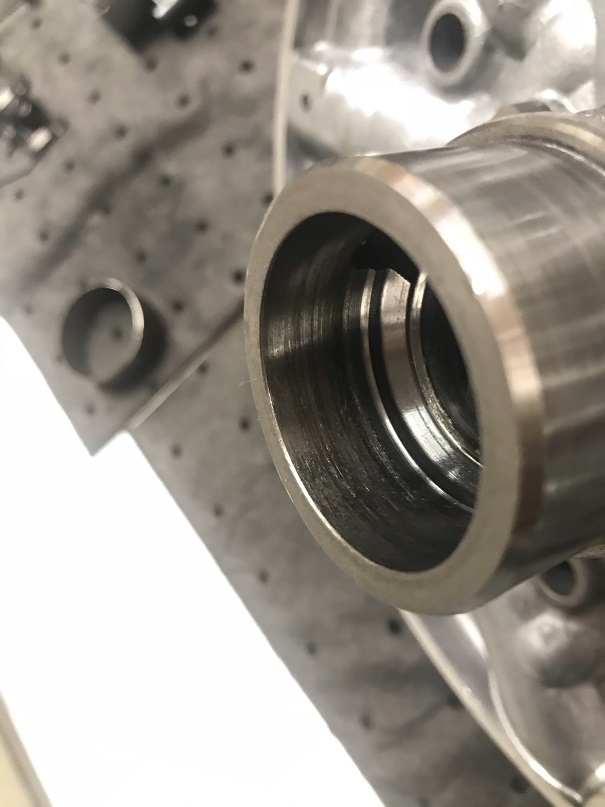
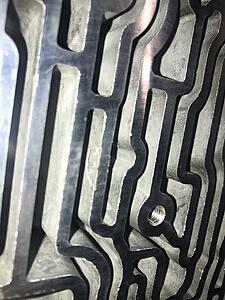
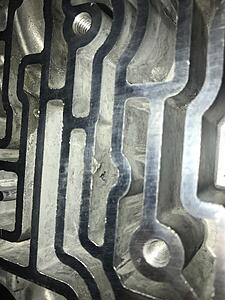
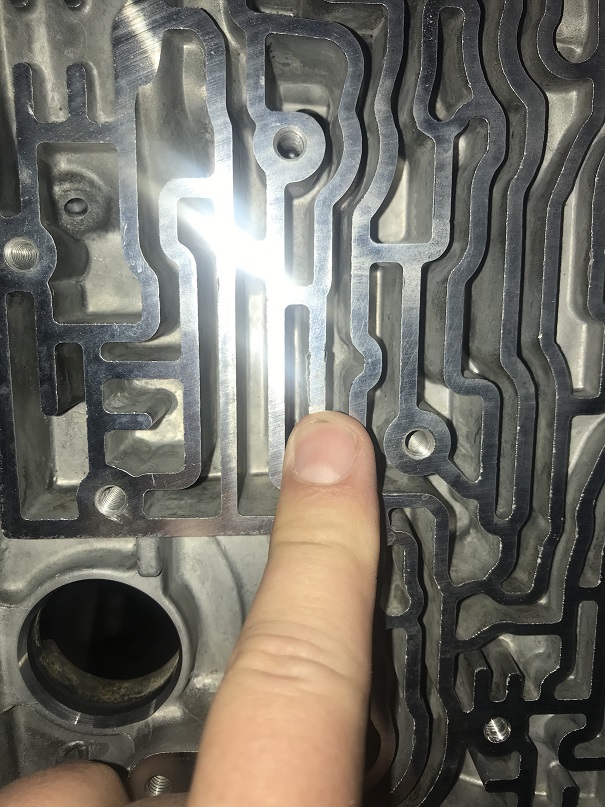
So after getting the case steamed and washed and back on the stand, I inspected the case a little more and found this. You can see the side wall of the passage is fretting a little bit? The actual flat surface where the gasket lays is flat when you lay a straight edge over it, but is this something to be concerned with? You can see one side and what the other side of the passage looks like and also the location of it.
So before I carry on with any case modifications I want to see what you guys think about this first?
Do not worry about the fretting. You will find some on every single case.
Flatness is most important
Great news. Thanks for confirming. Do I need to flake a little more off the sides? it looks like a piece or something could come off? Or leave it? The case is flat as I have checked with a straight edge
Totally respect your experience and guidance you have provided on this forum. If there are any suggestions, criticism, or anything I might overlook regarding this build please don't be shy!
Now that the case is confirmed ok, lets get to my list of mods.
Sonnax 3rd Accumulator Checkball Seat 74480D. I havnt checked the factory one, but I feel more comfortable installing new and rechecking a new capsule.
Sonnax 2nd Servo Release Check Valve Kit 77701-076
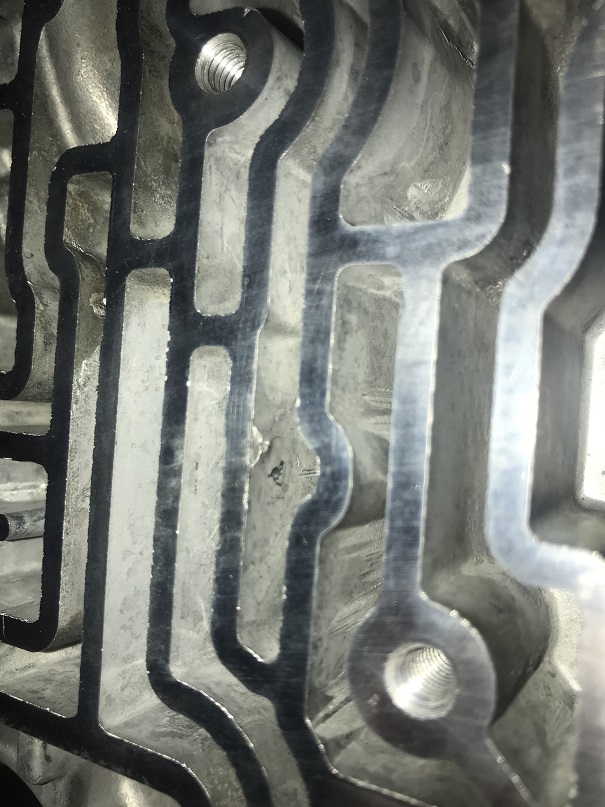
I plan to block the 3/4 accumulator bore with a 5/16 set screw. I know there have been several different ways to achieve this mod (pinless accumulator and driving a checkball in the hole, leaving feed hole open and stacking pistons with a shim in the middle, ect) To me, tapping the hole and installing a set screw with a dab of Loctite and leaving the piston completely out makes the most sense to me lube circuit wise from what I see. I know the reason for a pinless accumulator, I just dont mind just a little more bump into 4th by eliminating it. Unlike driving a check ball in the hole, a set screw can be easily reversed if need be as well
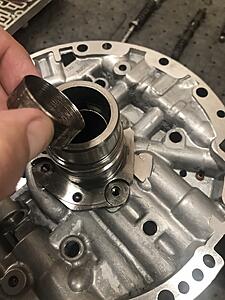
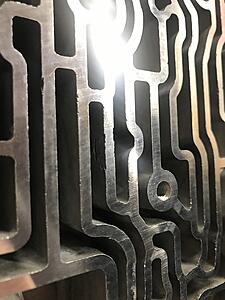
Here is the hole that I will tap and install the 5/16 set screw into
Maroon Monsta just gave some more perfect information!
I personally am OCD when it comes to cleanliness.... So I always feel compelled to cleaning up all that junk in the casting before flat-stoning the case and valve-body.
When I see photos of a transmission case that looks like that... PTSD kicks-in; but instead of hallucinating my time in the service...
I hallucinate back to Med.-School and all of the in-depth and very over-kill cleaning practices before starting a surgery!!!
So when I say compelled to clean, and clean, and clean to perfection!!! I mean it! LMAO!
In regard to that Sonnax 3rd accumulator capsule "Check-Valve" assembly... I also despise it!!! I hate it, complete junk!
I get asked about that Sonnax part all the damn time... I had to get the phrase: "NO Sonnax 77701-076" tattooed!
So now whenever someone comes to ask me about that Sonnax part (every day)...
I just grab my girl-friend by the hand... and show the customer, her forehead!
DO NOT use the 77701-076
Trash
I'd recommend the superior directional switch valve K0136--it will be better than the two parts you have listed
Interesting. This is why im glad I am doing a thread like this. So this eliminates the check ball completely which I think is a great idea. Again, thanks for the direction.
Originally Posted by vorteciroc
So when I say compelled to clean, and clean, and clean to perfection!!! I mean it! LMAO!
In regard to that Sonnax 3rd accumulator capsule "Check-Valve" assembly... I also despise it!!! I hate it, complete junk!
....FWIW I am not completely done cleaning the case yet. But I assume you are saying its atrocious compared
With both of you agreeing the capsule is a less than stellar move, are you saying the Sonnax capsule is compared to the AC Delco one? Or just running a capsule period is? Like I said, I like eliminating it totally but curious as knowledge is power.
Sonnax part #74480D, is the GM third accumulator check-ball capsule (the same as installed from the assembly-line).
This part is required for the transmission to operate properly. There is nothing wrong with this part (unless it is worn-out and leaks)...
The part that we do not like... is a part that Sonnax adds to the third accumulator check-ball capsule.
The part is called the "check valve" for the third accumulator check-ball capsule.
Sonnax part #77701-076.
When using the Sonnax part #77701-076 "check-valve"...
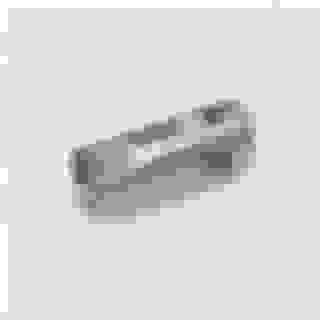
Both the third accumulator check-ball capsule and the Sonnax "check-valve" get used together (in-line with one another). As in the image below:
The transmission needs to use the third accumulator check-ball capsule to function properly.
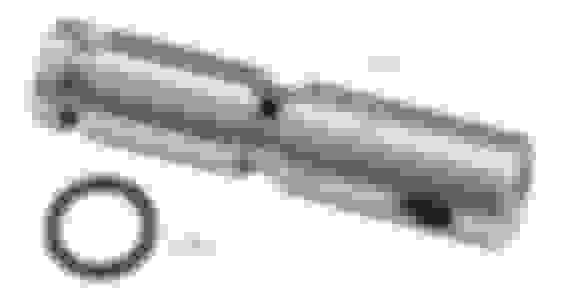
However Superior Transmission produces a differently designed replacement part, that can be used instead of the third accumulator check-ball capsule.
Superior part #K0136.
This is what MaroonMonster recommended... I also like and use this part.
Since 1982 the third accumulator check-ball capsule has caused people grief, when it is worn (and the check-ball no longer seals-off completely).
The Superior Transmission part #K0136 is designed differently than the original GM part... and I favor its design (especially in regard to leakage).
Last edited by vorteciroc; 11-25-2020 at 10:56 PM.
The sonnax 77701-076 is an attempt at adding an orifice to a location where there is not one from factory.
The orifice is small and works fine for stock applications following stock clearances with stock pressures in stock vehicles with stock HP etc etc.
Anything other than that, and the shift timing gets funky and I really really don't like it.
The superior has a tapered seat. It exhausts great for a 3-2 downshift and positively seals for a nice crisp 3rd gear. Some may report a slightly firmer 2-3 shift with this versus a stock capsule if this were the only thing they changed. It's very very minor in my opinion, but the good sealing is what I really like about it. Just another area to cure a 3rd gear circuit leak
Would you recommend using this in conjunction with blocking the 3-2 and 2-3 shift valves, as mentioned here?
First, a general rule here would be to not use/ work with a similar alloy or material as the part/ component being worked-on.
So No aluminum-oxide here.
For a DIY builder; 2 or 3 sizes of "Whet-Stone" made of ceramics... Should be fine.
Something like Silicon-Carbide that is found at Home Depot or other "Hardware" stores is adequate here.
Use ATF while doing this type of work (unless you are using a Cast-Iron surface-plate).
Do not buy a "Course" stone... medium or fine grit would be better; especially for a first-timer!
Small, medium, and a large stone would be ideal to try and keep the larger surfaces as flat as can be.
If any of you guys get into this stuff regularly or have a business...
Something like a "truing table or block" is going to be your best-friend.
I use a very large 50" square Granite surface (and straight edge) block as well as 2 smaller 24" surface plates... each with a checker-board pattern; one steel and one iron.
I have small "Whet-Stones" for the smaller parts.
If it's not too much trouble, could you post some pictures of those?
I'm having some trouble picturing them (rimshot).
First, a general rule here would be to not use/ work with a similar alloy or material as the part/ component being worked-on.
So No aluminum-oxide here.
For a DIY builder; 2 or 3 sizes of "Whet-Stone" made of ceramics... Should be fine.
Something like Silicon-Carbide that is found at Home Depot or other "Hardware" stores is adequate here.
Use ATF while doing this type of work (unless you are using a Cast-Iron surface-plate).
Do not buy a "Course" stone... medium or fine grit would be better; especially for a first-timer!
Small, medium, and a large stone would be ideal to try and keep the larger surfaces as flat as can be.
If any of you guys get into this stuff regularly or have a business...
Something like a "truing table or block" is going to be your best-friend.
I use a very large 50" square Granite surface (and straight edge) block as well as 2 smaller 24" surface plates... each with a checker-board pattern; one steel and one iron.
I have small "Whet-Stones" for the smaller parts.
These are all great suggestions and practices. If someone wants to do this, I won't knock it one bit. I have these stones and use them all the time
But I'll toss out a little caveat to your typical home builder that might be reading this.
The 60e uses gaskets. It's not like some TH400 or powerglide aftermarket stuff that uses just an aluminum separator plate with no gaskets...those NEED everything very flat and smooth to seal.
I've seen some...lets just say egregious..."issues" or low spots or porosity in a 60e case and it will run fine and have no issue...because the .020 (ish) paper gaskets can conform to alot and seal quite well.
So...if you're a home builder...just make sure you don't see any obvious peaks/valleys or chunks missing. But outside of that. Just use the right gaskets, torque them properly, and you should be A-OK

 11-23-2020, 01:36 PM


 but instead of hallucinating my time in the service...