
My build on my 09 v :D
 11-18-2011 | 12:05 AM
#1
Well since everyone else is I'm gonna show mine, not gonna be as cool as pics as others but oh well.
So....
Removed the belts and CAI.
injectors and rails out
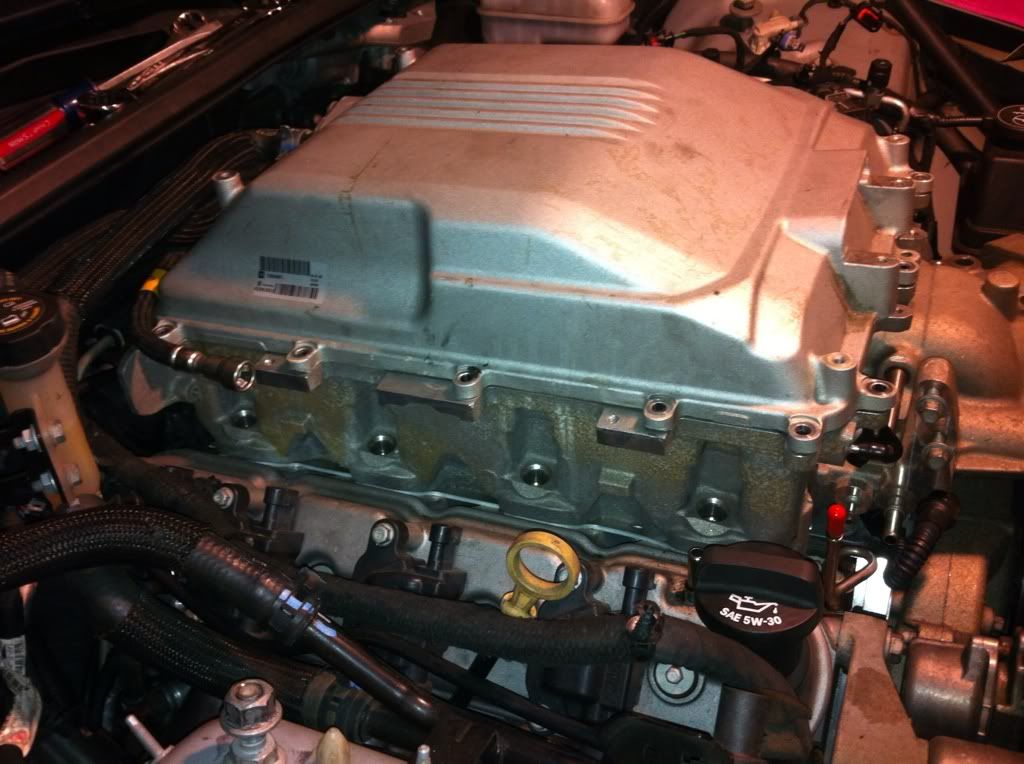
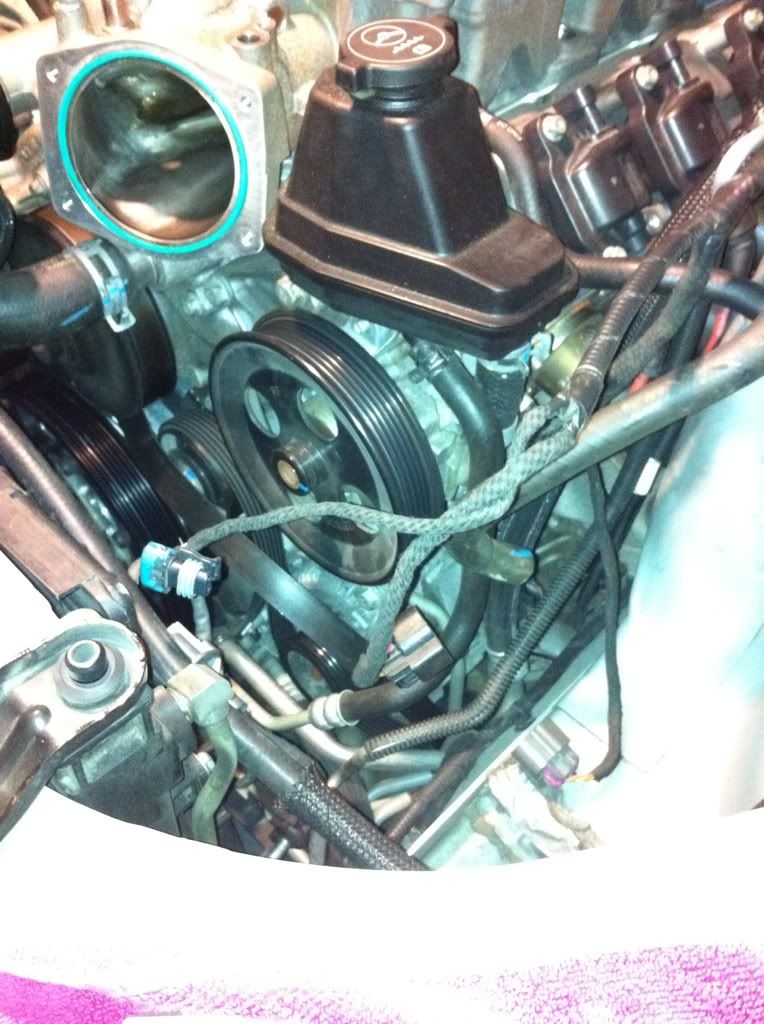
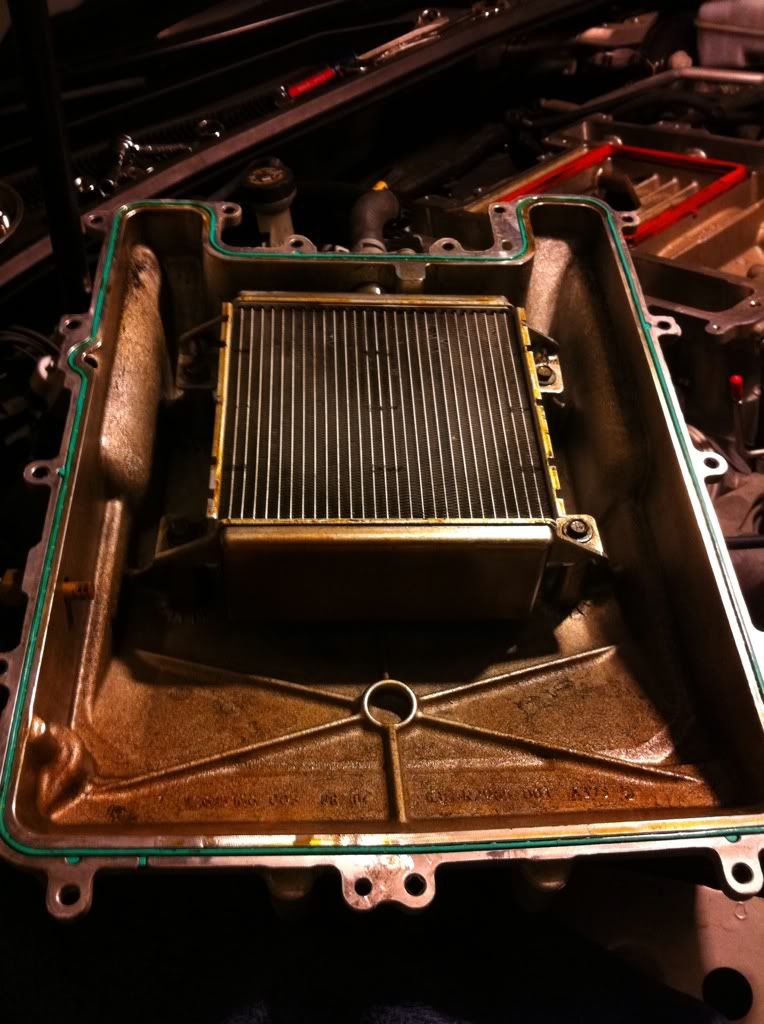
SC hat off, and placed upside down till I pull the HX off tomorrow.

Now the SC is off
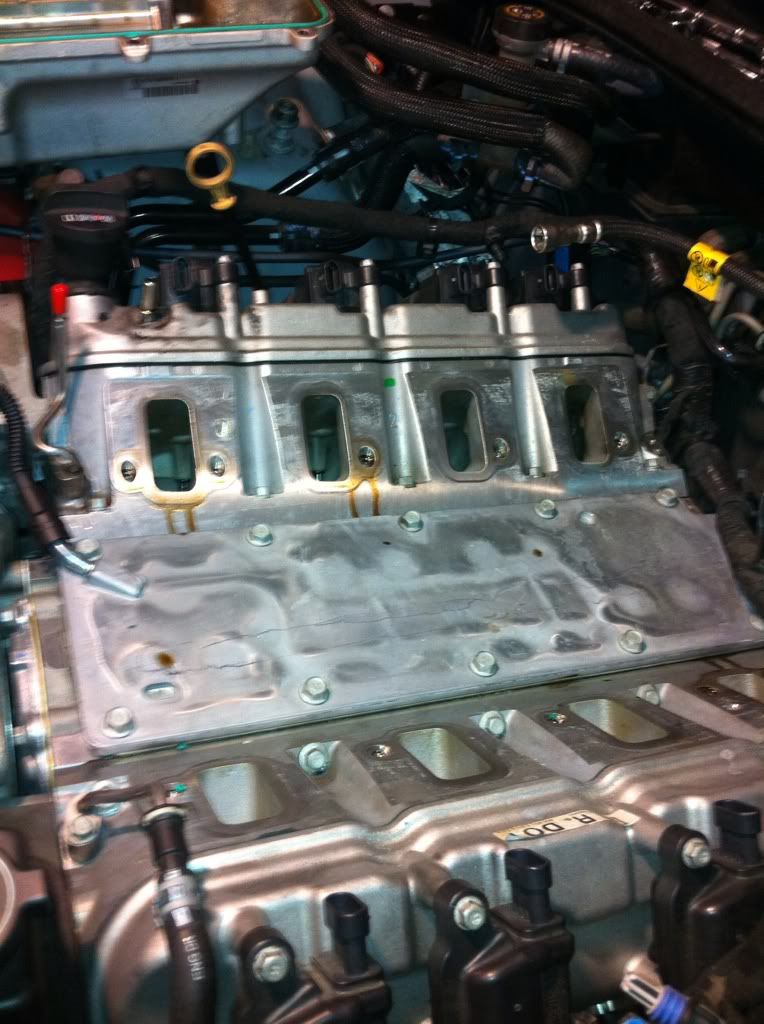
all taped up to keep bad stuff out.
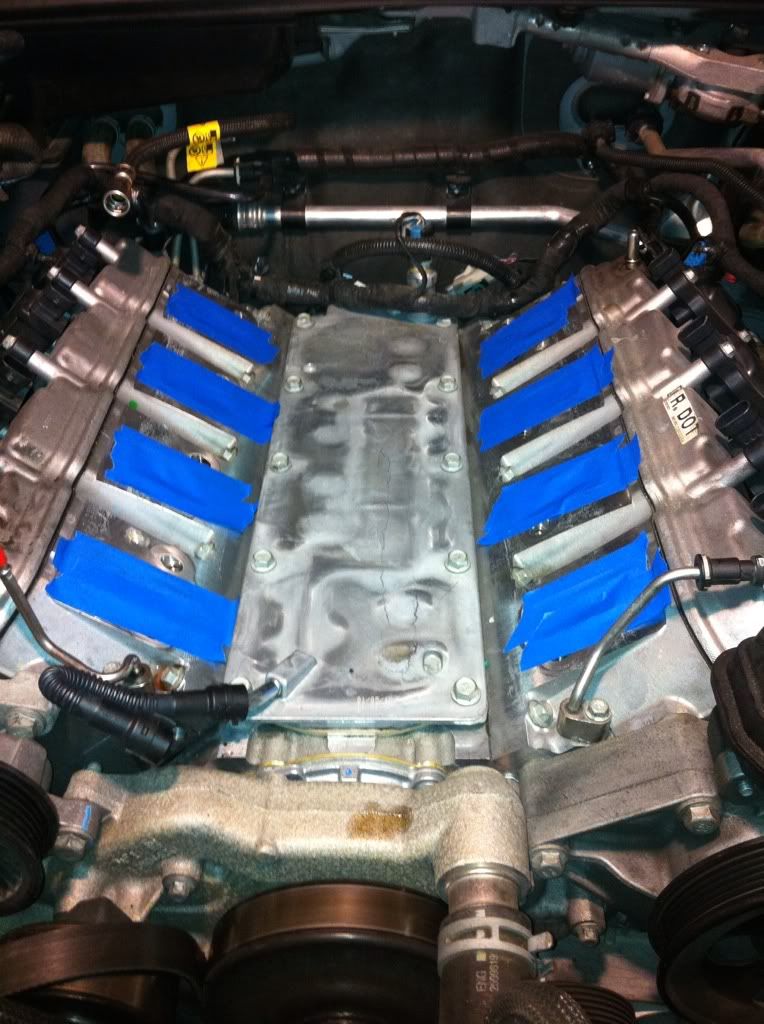
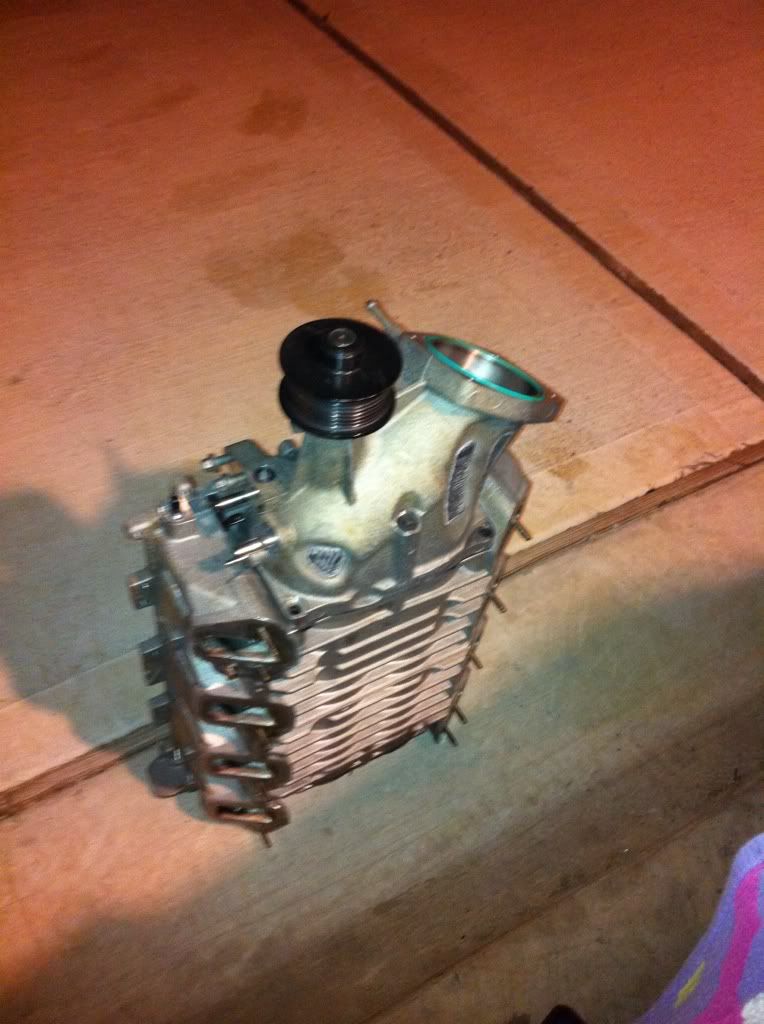
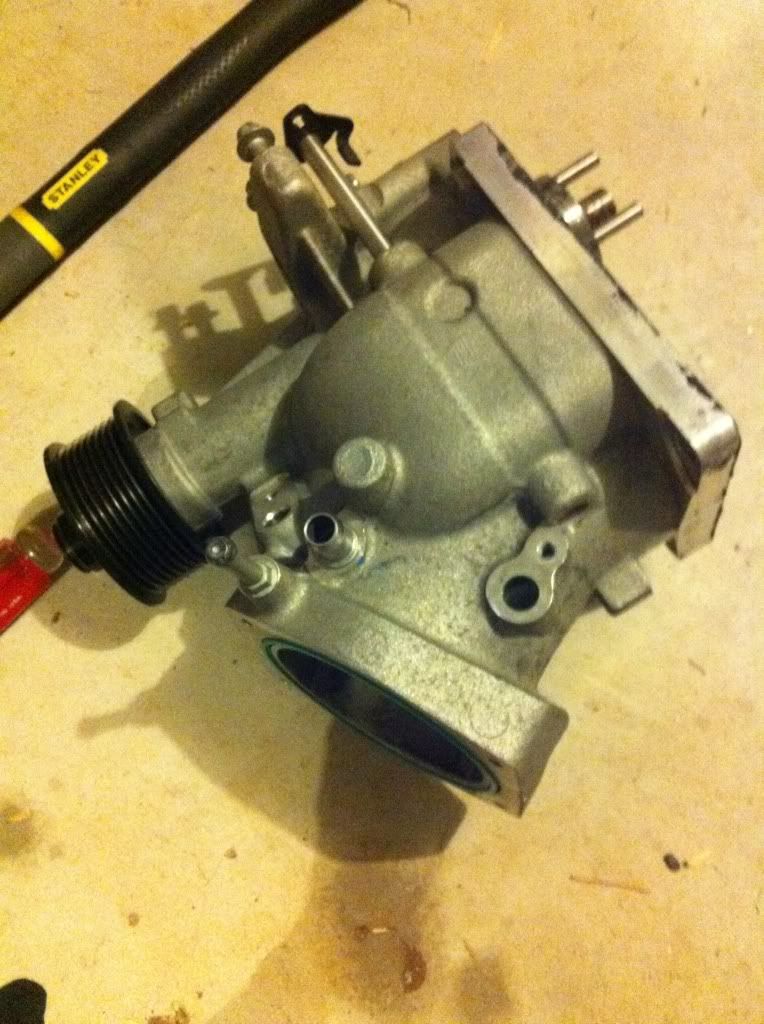
and now the Snout is of so the 2.85 can get pressed in tomorrow
I'm tired, going to bed, gotta work tomorrow
PS saw my port and polish job that KDI had done! Talk about F***ing top notch!! wow very very nice!!
So....
Removed the belts and CAI.
injectors and rails out
SC hat off, and placed upside down till I pull the HX off tomorrow.
Now the SC is off
all taped up to keep bad stuff out.
and now the Snout is of so the 2.85 can get pressed in tomorrow
I'm tired, going to bed, gotta work tomorrow
PS saw my port and polish job that KDI had done! Talk about F***ing top notch!! wow very very nice!!
11-18-2011 | 09:19 AM
#3
11-18-2011 | 03:31 PM
#4
11-19-2011 | 07:02 AM
#5
Trending Topics
11-20-2011 | 10:05 PM
#8
well didn't get to work on the car yesterday thanks to "honey do's" and then family crap today, so finally a little after 6 I got to work on it, Good thing I have all of next week to finish her
Lol
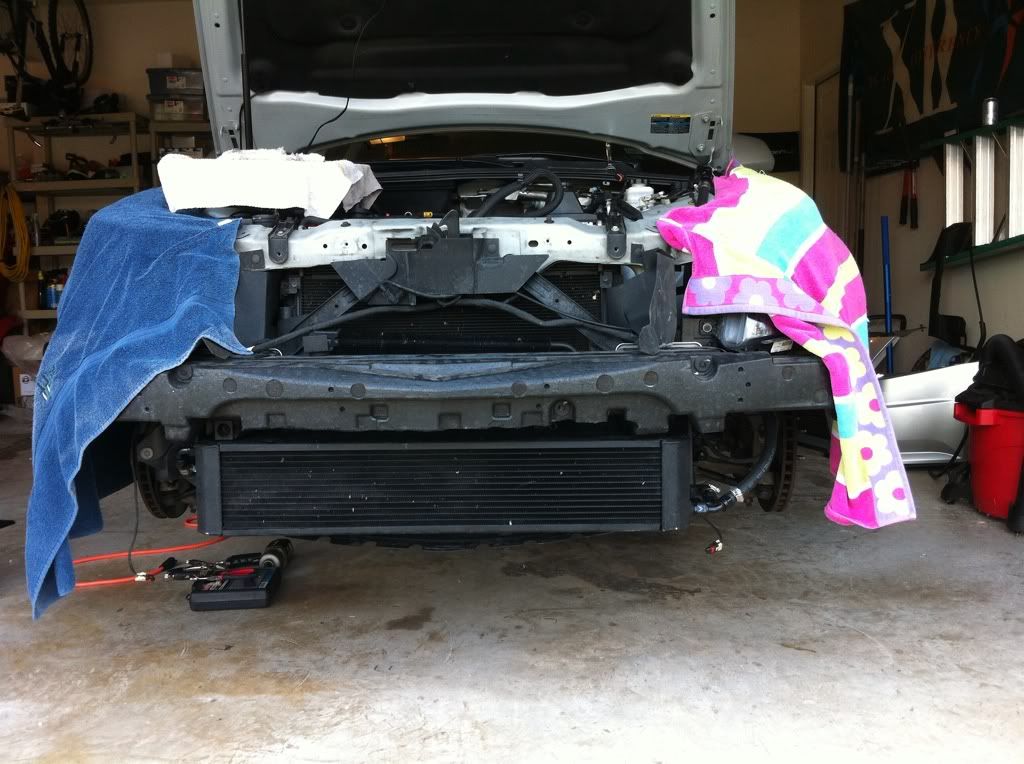
Bumper off
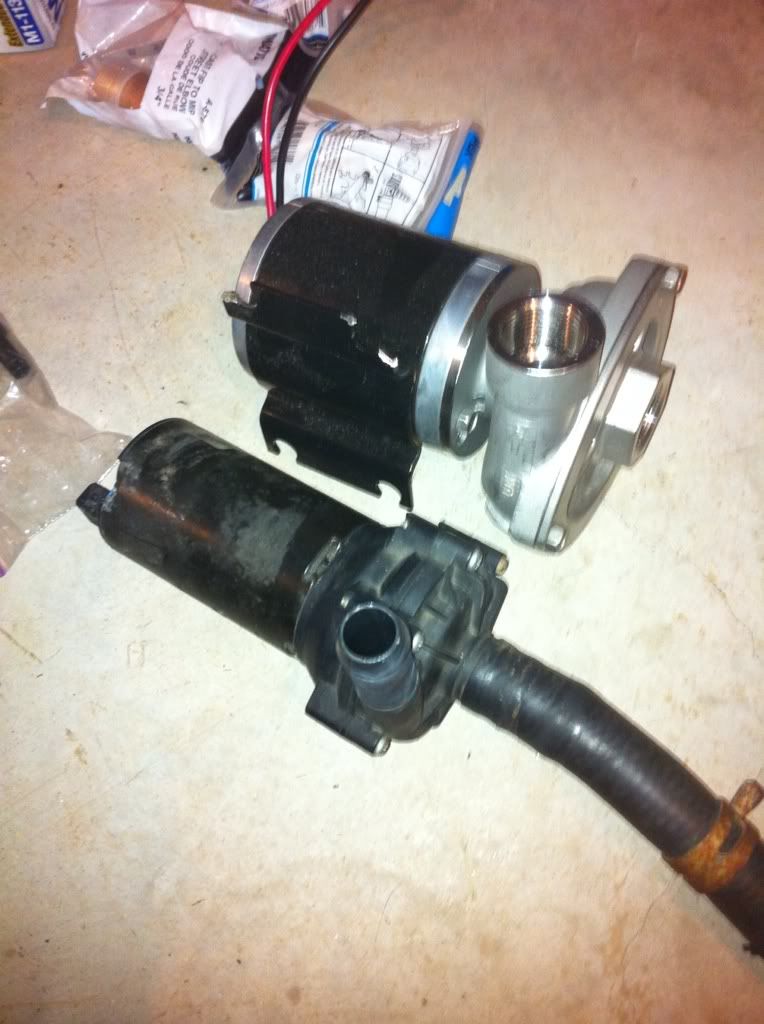
Wimpy Stock heat HX pump next to BIG BURLY KDI HX pump
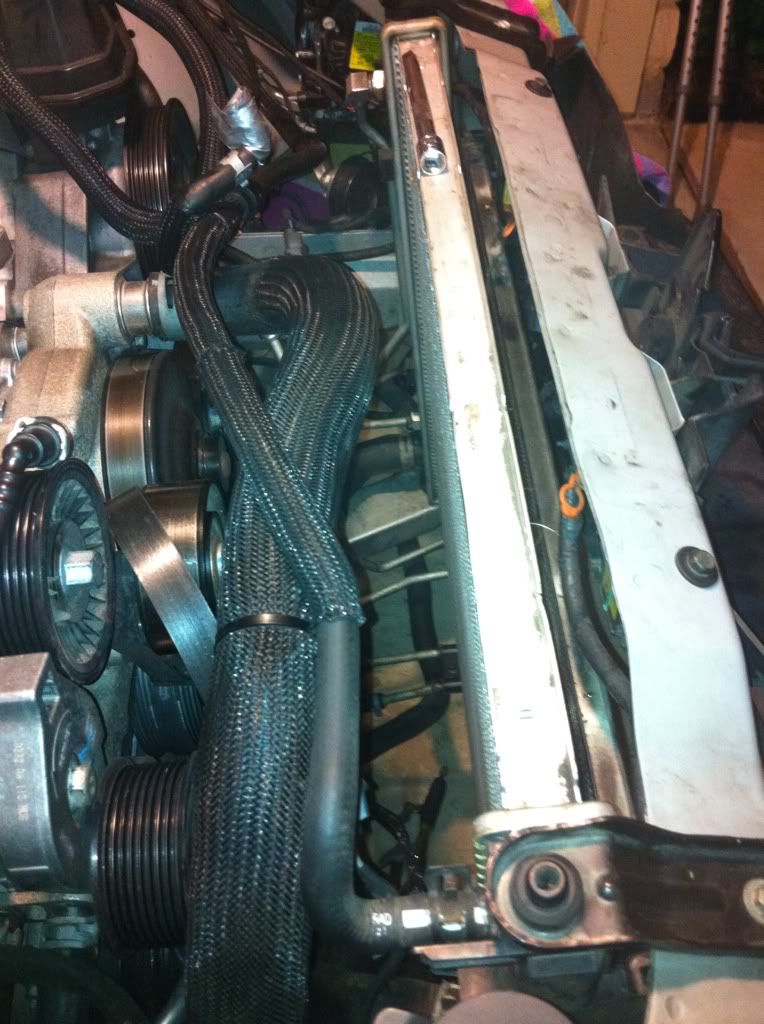
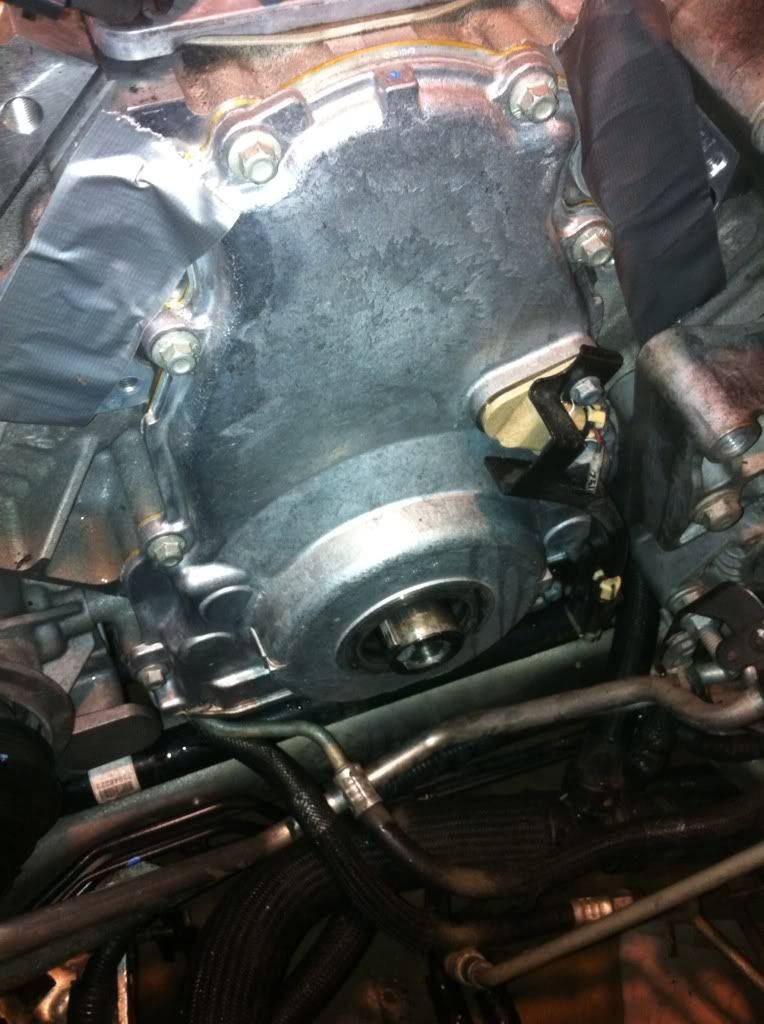
Rad, ac, oil, pwr steering cooling crap all out of the way
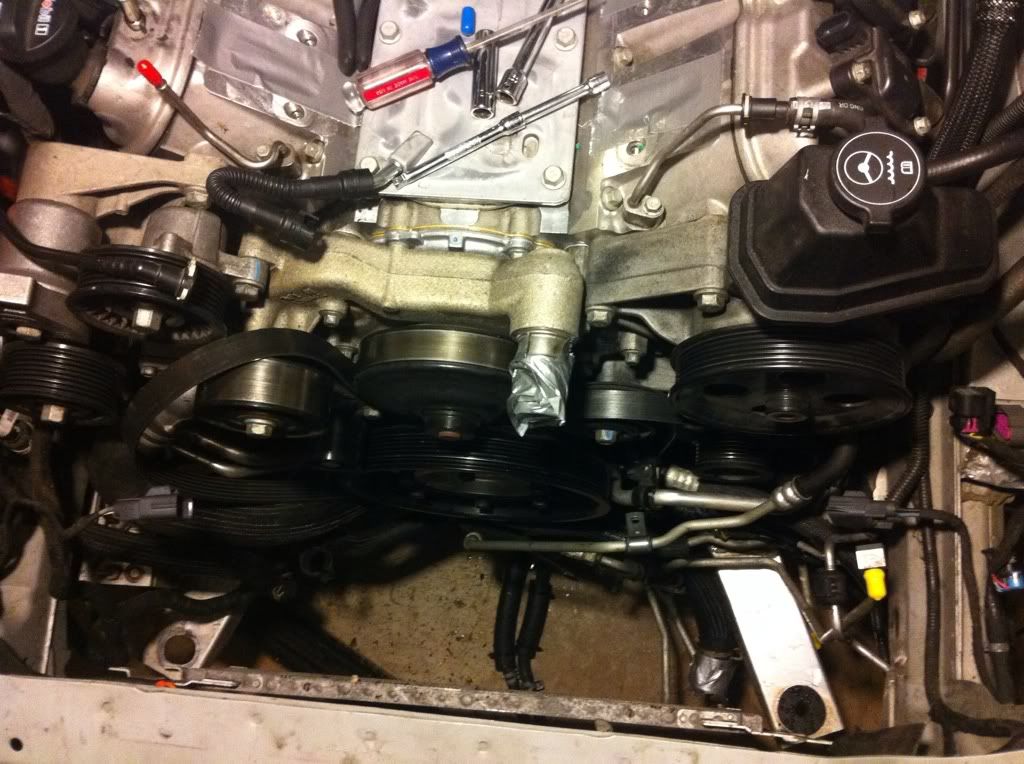
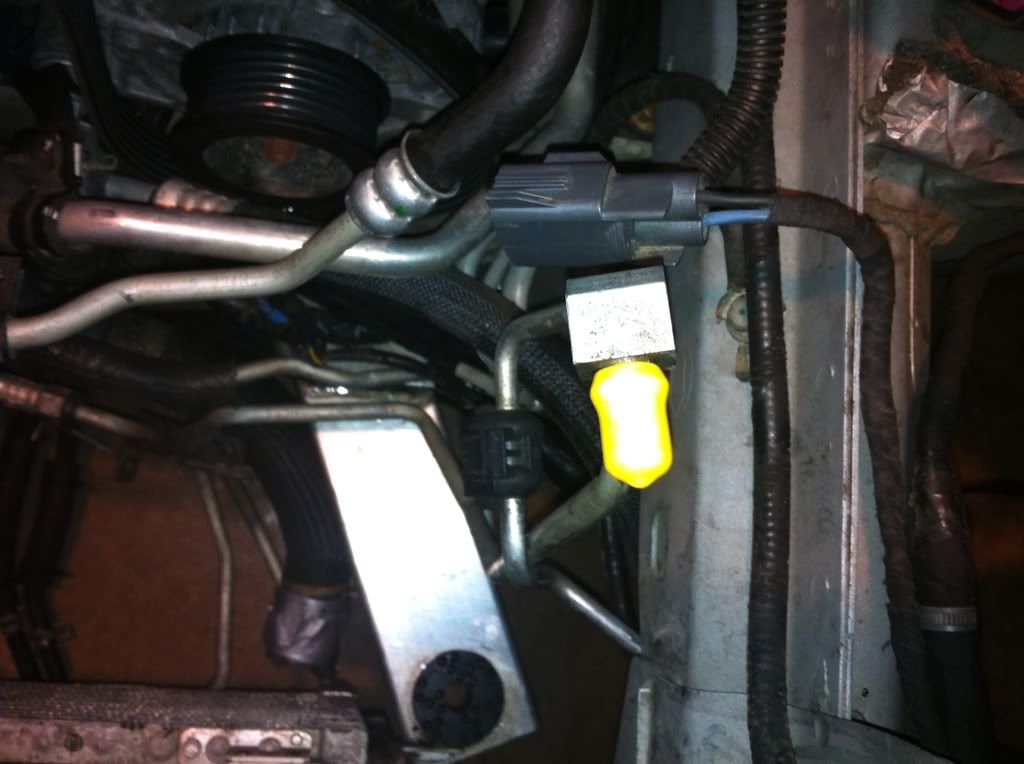
HIGHLY RECOMMEND buying some of these vacuum line blockers/caps/etc. They work great to keep fluids from going EVERYWHERE!!
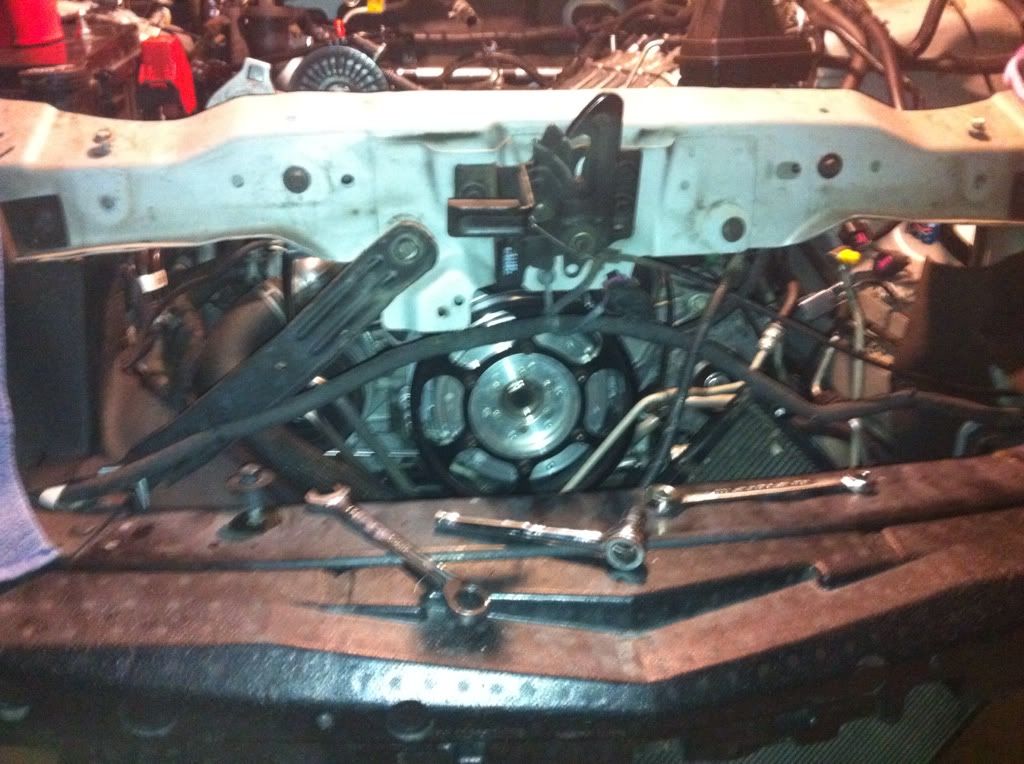
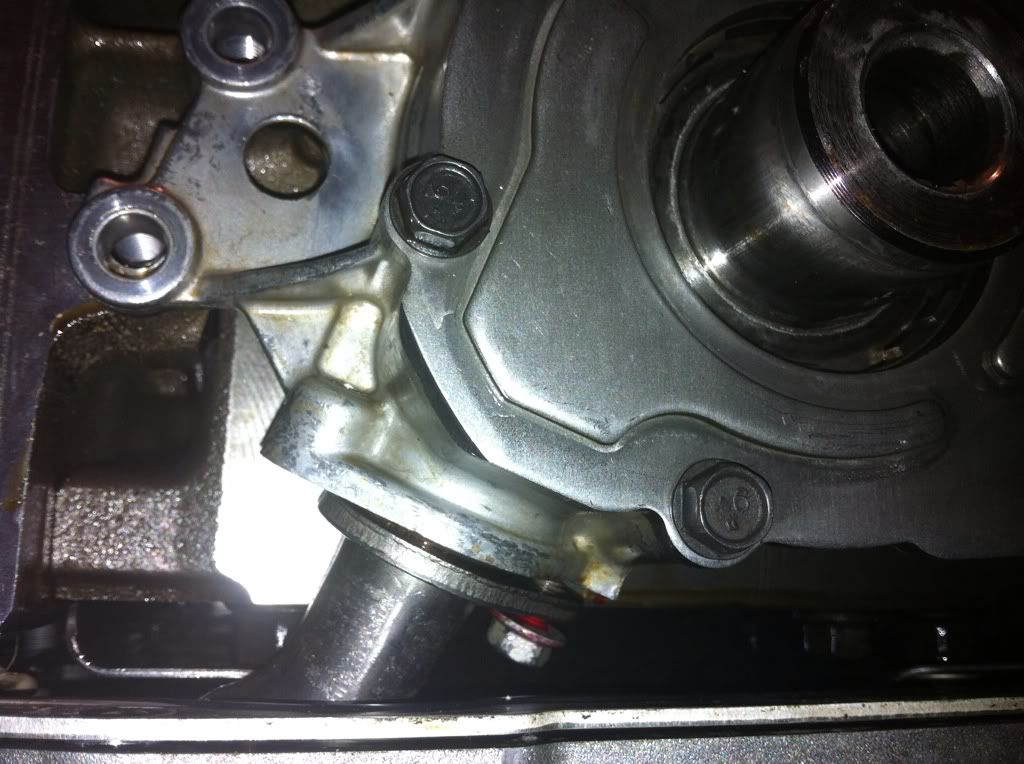
Water pump off, and I'm kinda pissed now!!!
Not sure how the **** this happened but I was loosening the idle pulley bracket and mind you I was using a 1/4 drive ratchet with the 13mm socket and the ******* bolts where not even tight, long behold they were all busted but one of them. SO looks like I get to buy a new water pump and bolts now. Not very happy at this moment!!
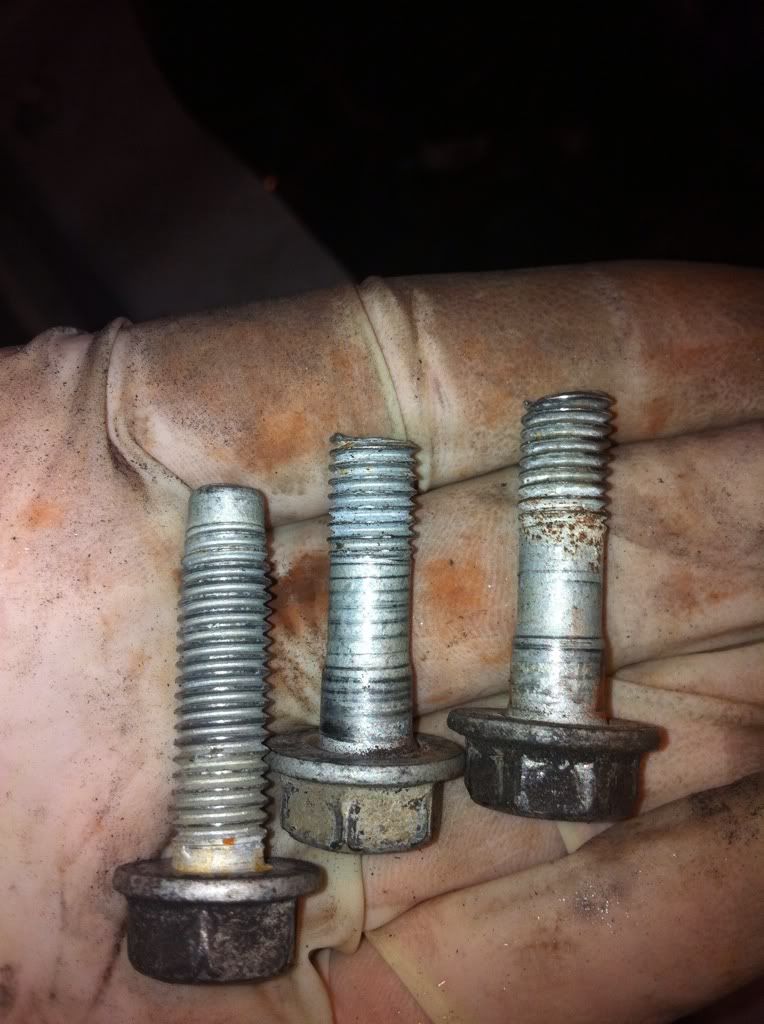
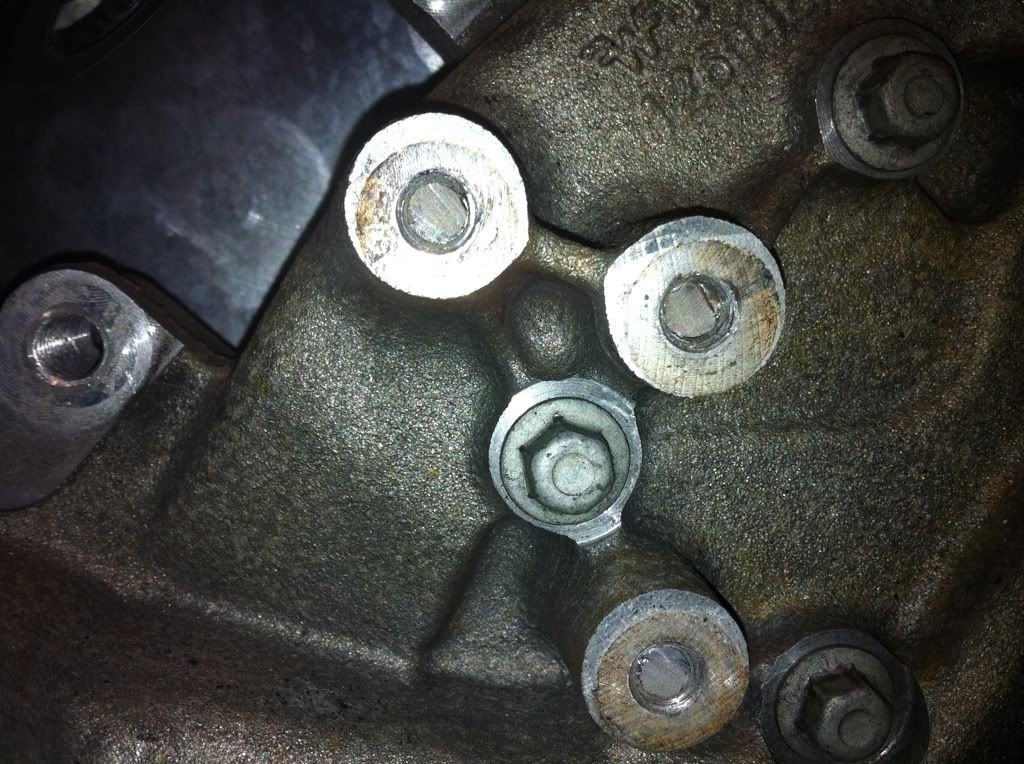
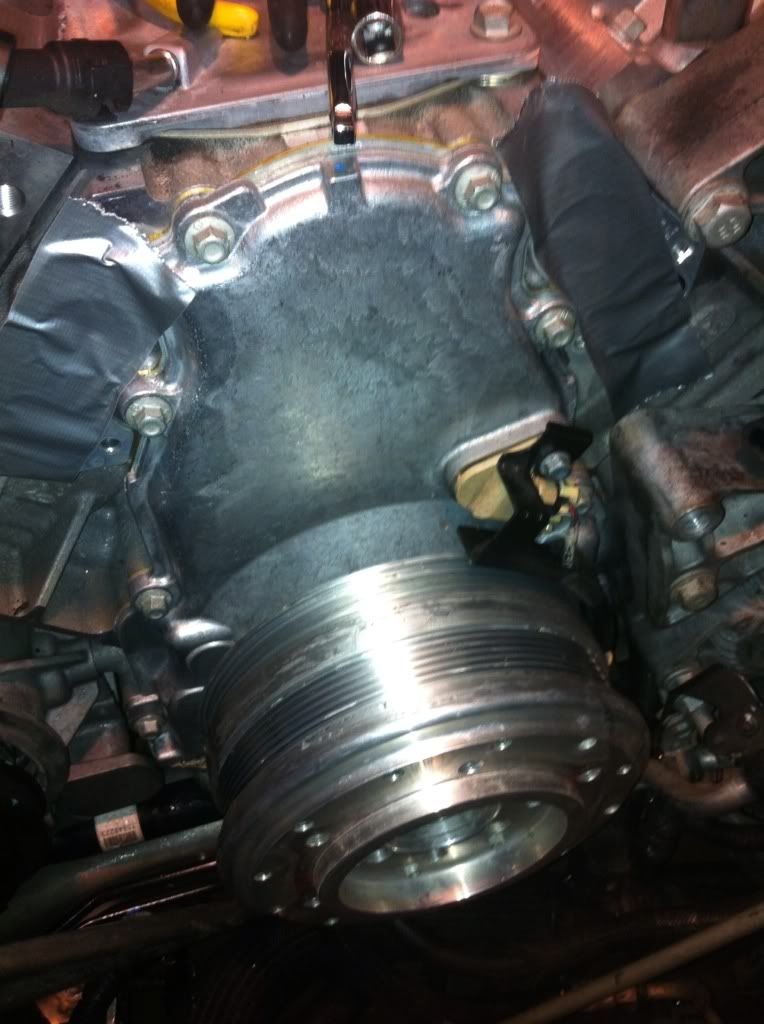
as you can see in the last pic, it looks like someone put another bolt in or something... IDK, but you can see all of them broken off in there.
dampener off and all ready to pull the cam out tomorrow or tuesday. Have to get up way early and drive for work, so may not make it home tomorrow, but tue for sure!! cam is coming out!
side note...
what do I tq these back to???
Lol
Bumper off
Wimpy Stock heat HX pump next to BIG BURLY KDI HX pump
Rad, ac, oil, pwr steering cooling crap all out of the way
HIGHLY RECOMMEND buying some of these vacuum line blockers/caps/etc. They work great to keep fluids from going EVERYWHERE!!
Water pump off, and I'm kinda pissed now!!!
Not sure how the **** this happened but I was loosening the idle pulley bracket and mind you I was using a 1/4 drive ratchet with the 13mm socket and the ******* bolts where not even tight, long behold they were all busted but one of them. SO looks like I get to buy a new water pump and bolts now. Not very happy at this moment!!
as you can see in the last pic, it looks like someone put another bolt in or something... IDK, but you can see all of them broken off in there.
dampener off and all ready to pull the cam out tomorrow or tuesday. Have to get up way early and drive for work, so may not make it home tomorrow, but tue for sure!! cam is coming out!
side note...
what do I tq these back to???

 11-21-2011 | 08:53 PM
#11
11-21-2011 | 11:17 PM
#12
Didn't get as much done tonight as I'd liked.
Pulled out the push rods, and rocker arms
Pulled the timing cover off
Lowering the oil pan took me a bit longer then expected, and I had a little spill, hadn't drained all the oil out yet whoops lol. Also one thing you want to make SURE you get it at least 3/4 clearance, makes it a TON easier to remove the oil pump. I keep getting up and down to do that, oh well live in learn.
make sure that o'ring is on the pick up line, or else will give you fits when you reinstall ilt.
lined up the markings on the cam, and crank to pull the cam out tomorrow. Glad I have plenty of time to do this, darn work keeps getting in they way.
11-22-2011 | 10:44 PM
#13
OK!! So for tonight.....
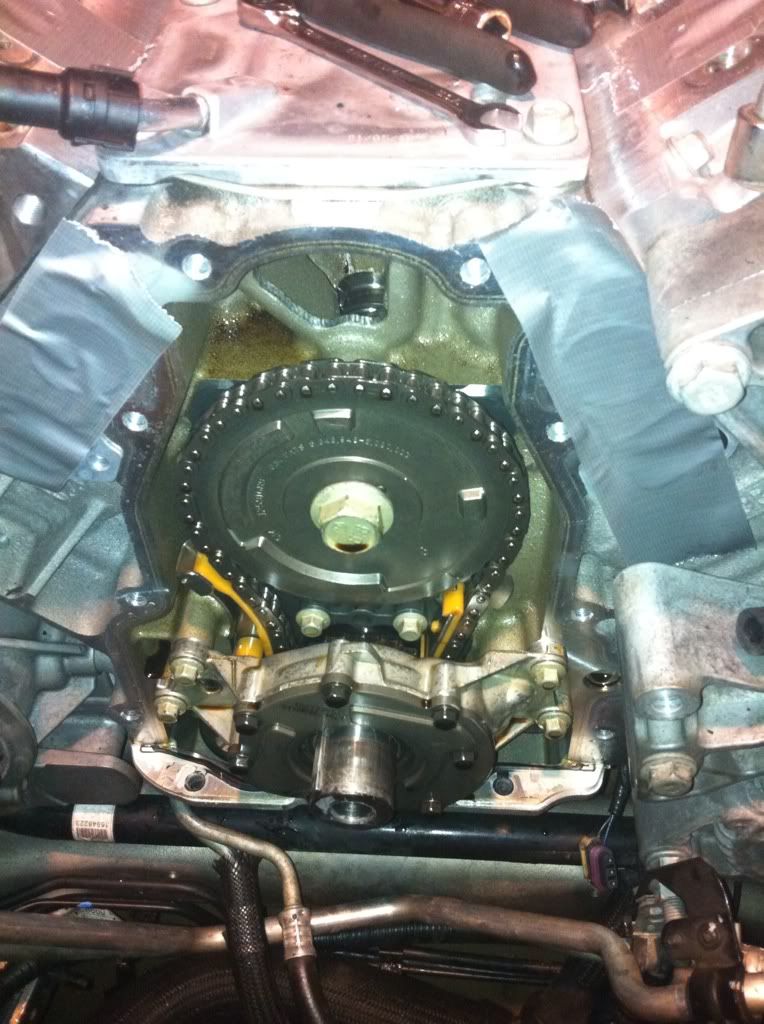
So Oil pump is off, and cam gear and timing chain are off:
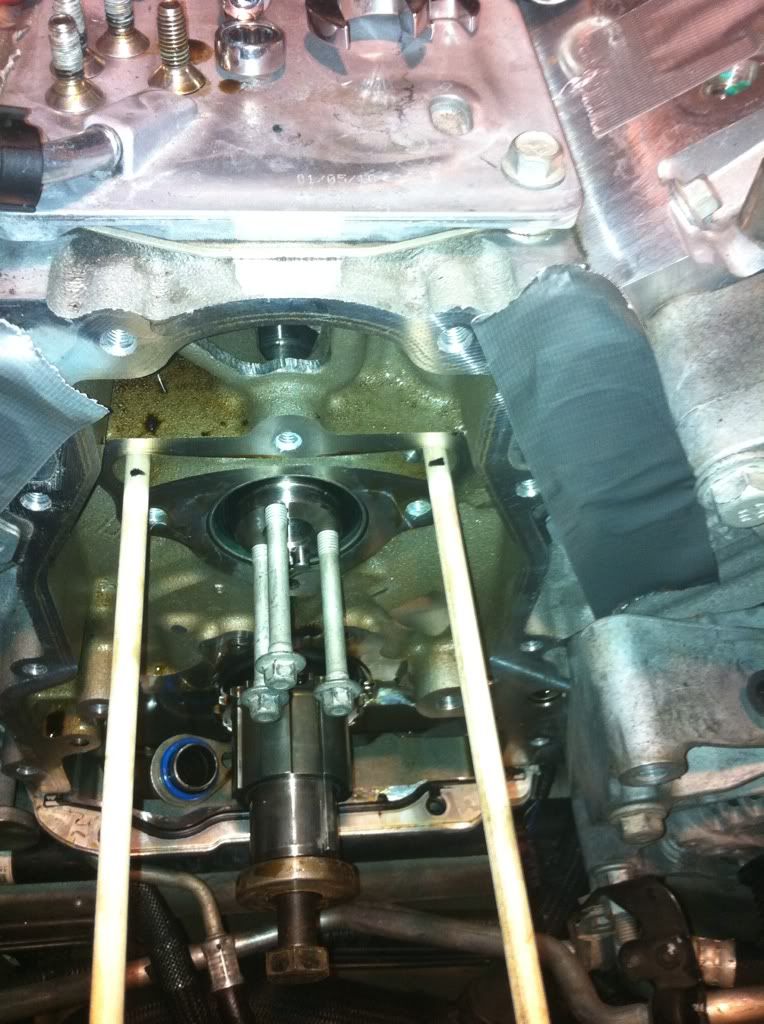
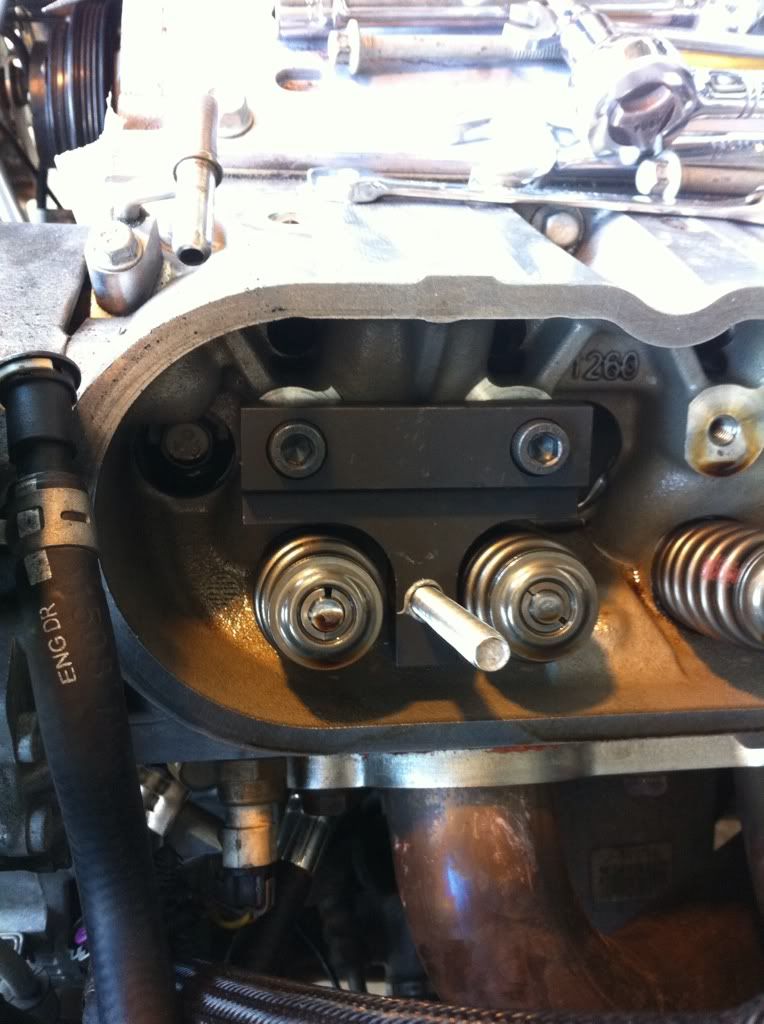
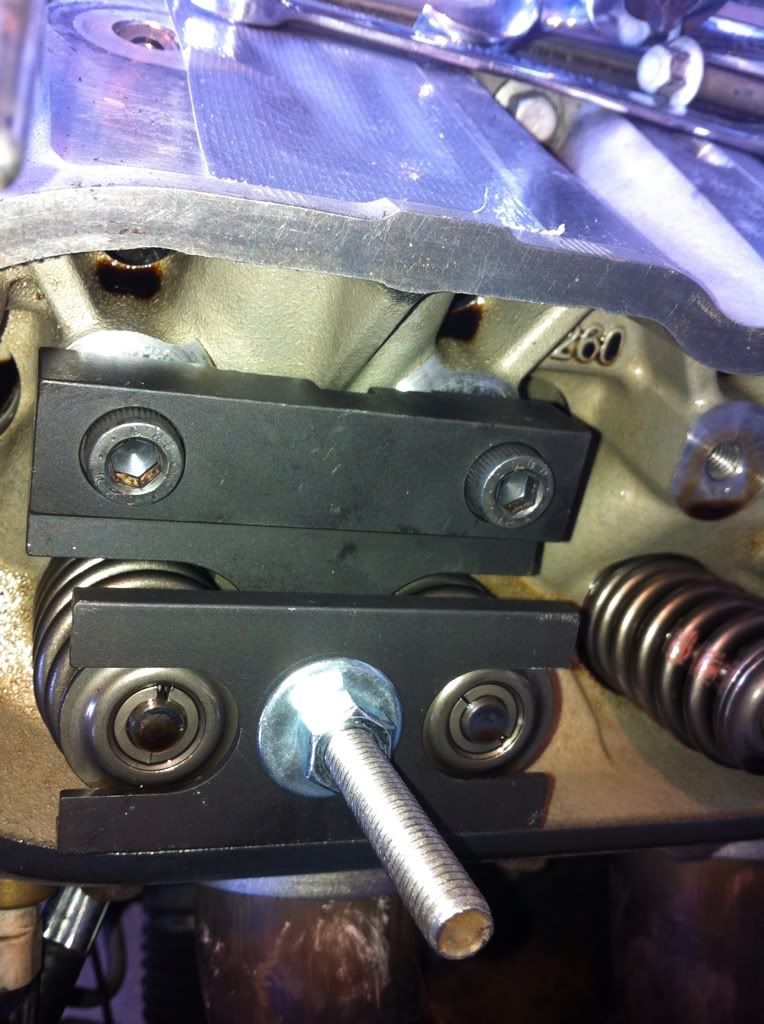
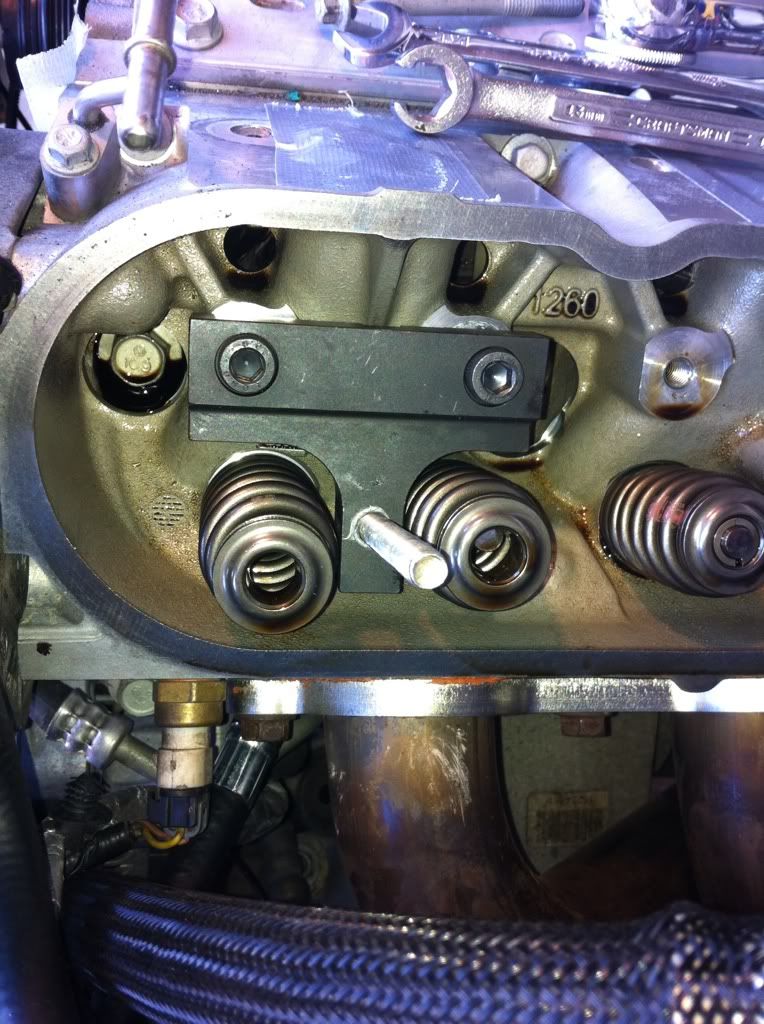
Inserted the dowel rods to keep the lifters from falling, side note you will see in a later pic, go ahead and mark them where the "end" should be so you don't have to worry about getting through all the lifters when spinning the cam. My lifters didn't "stay up" like I had read about and I had to turn the cam the entire time to get both dowels down the path
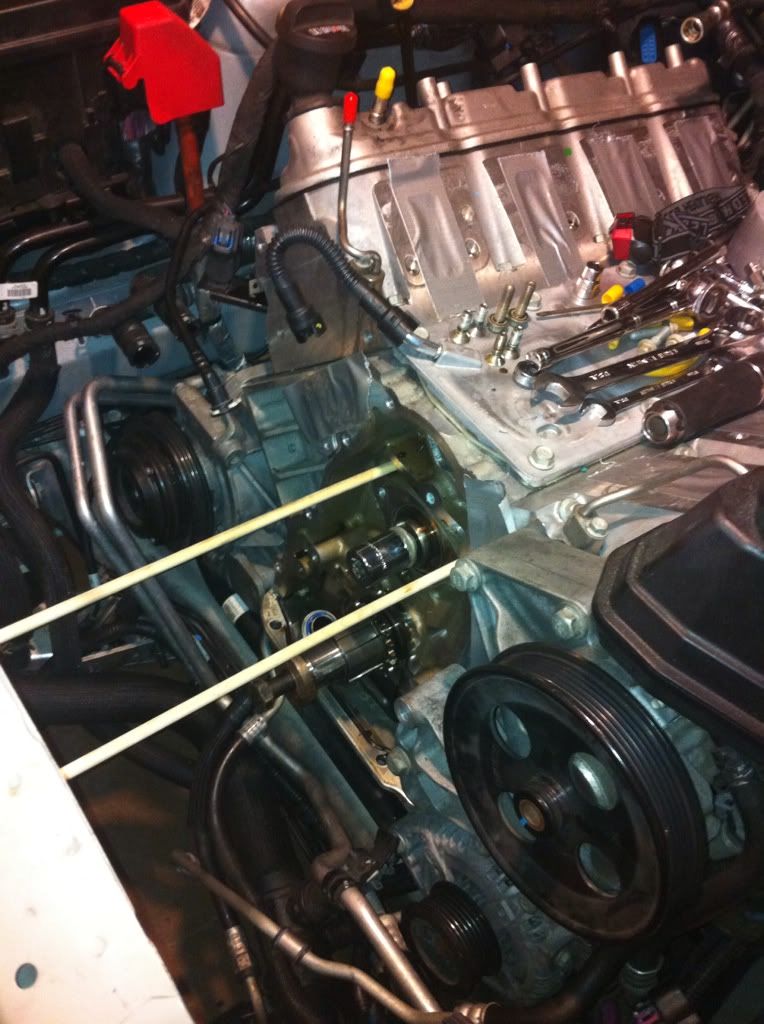
Better view of the marks... (after I had already put them in, then decided to pull them back out to mark and reinsert)
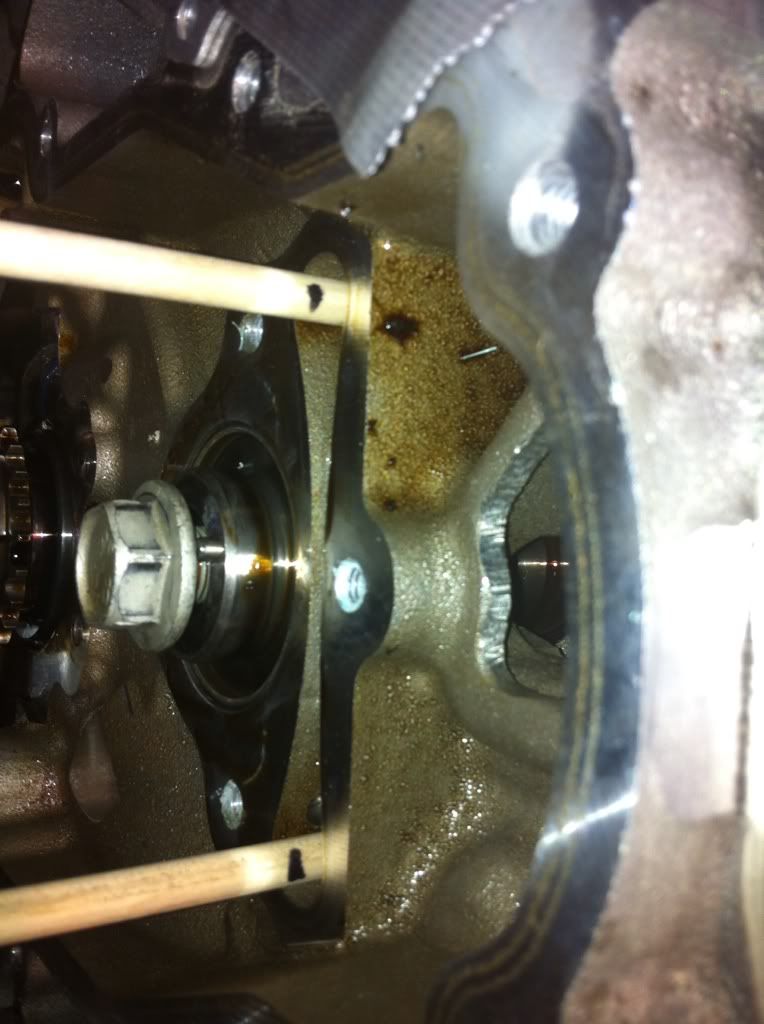
Pulling the cam out (make sure you do this carefully, don't want to ding anything inside the engine.
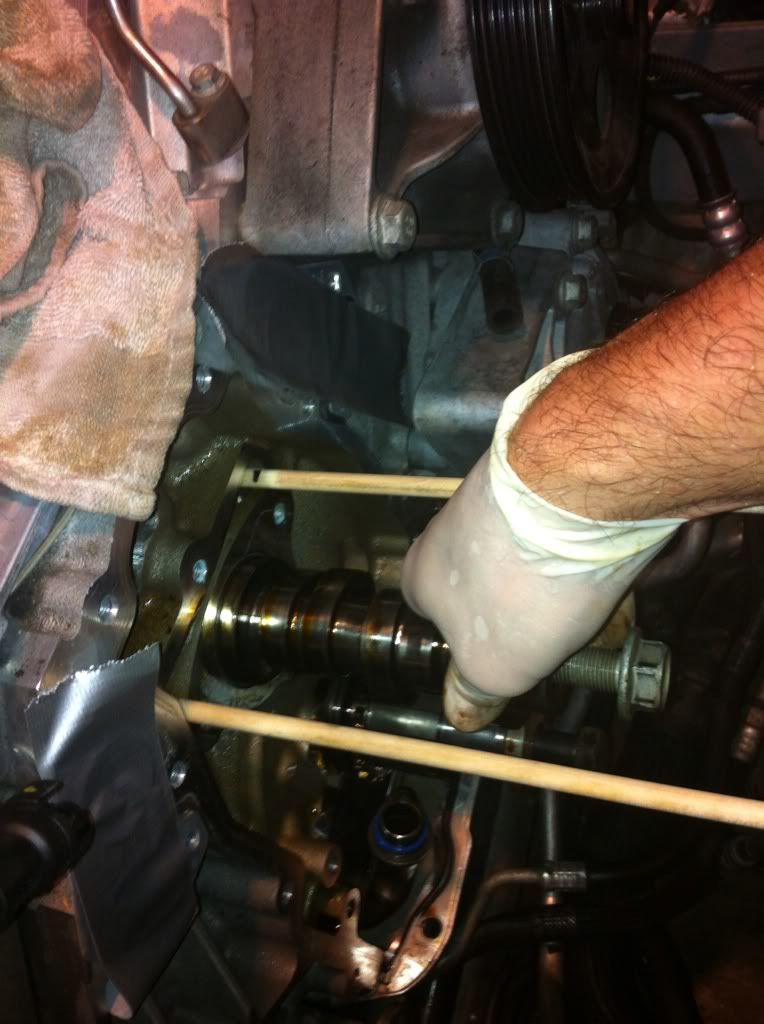
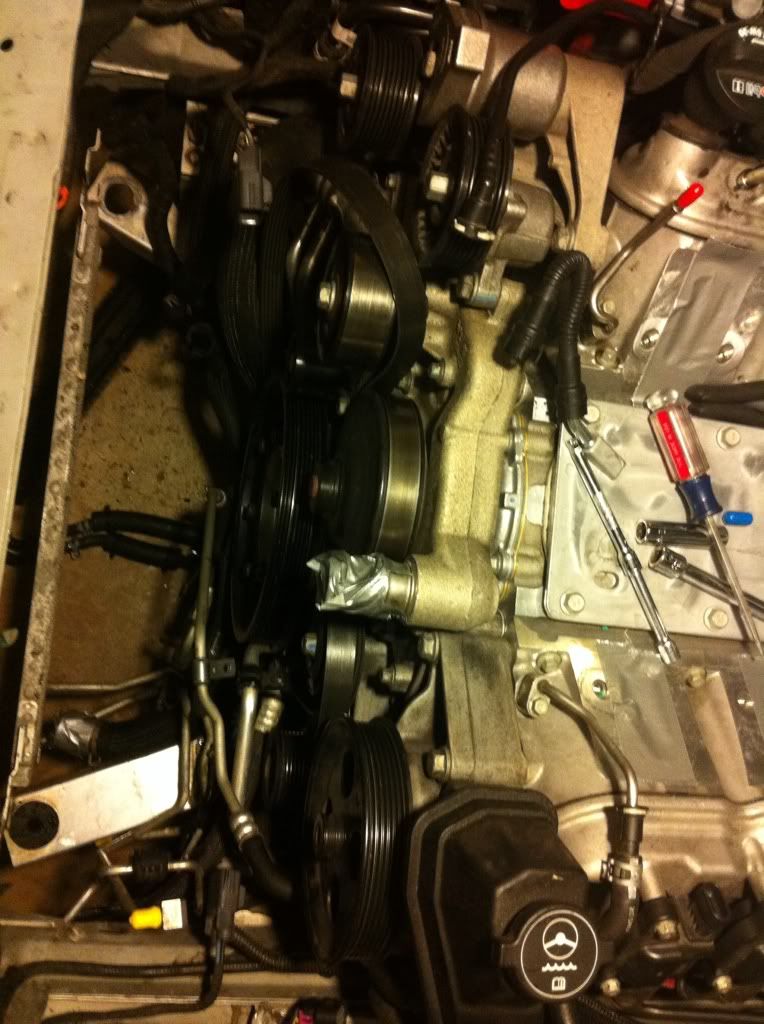
Old wimpy items (if anyone wants any of this for some reason or knows someone who does let me know. I didn't put the ls3 tensioner back in.
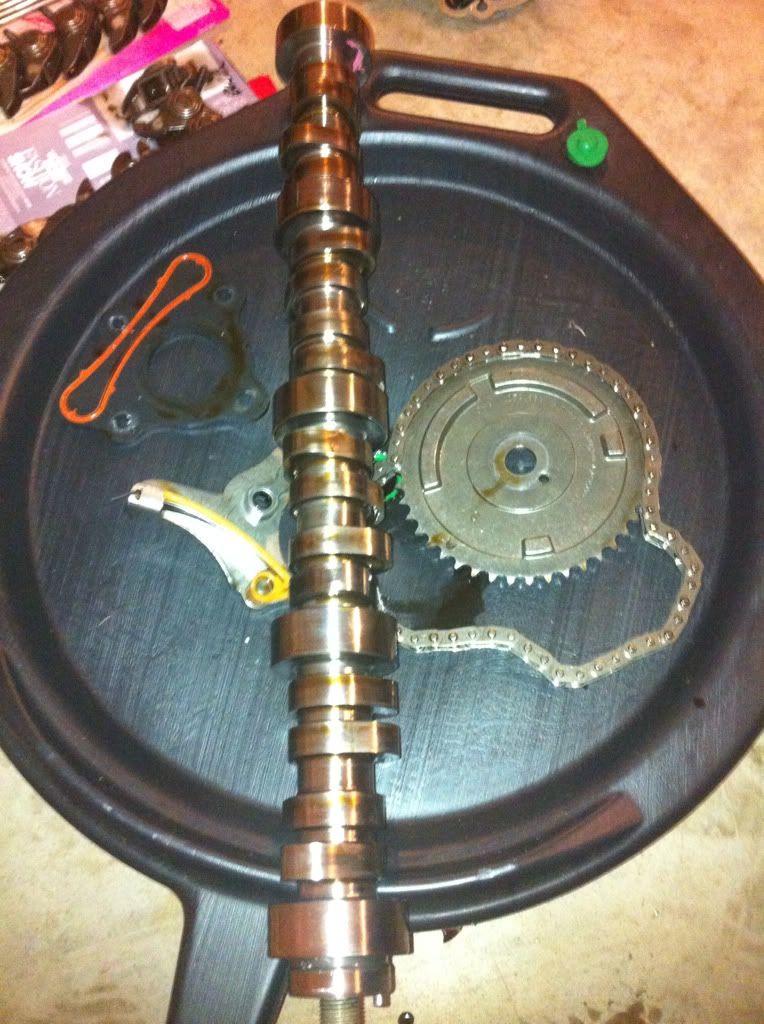
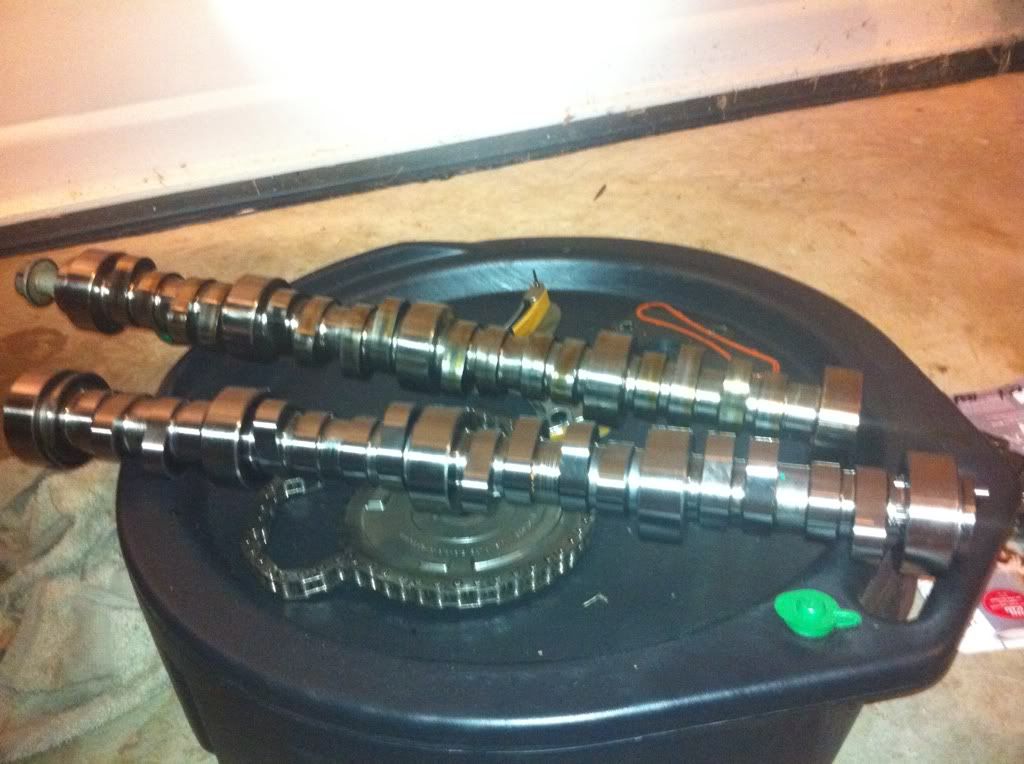
New cam in front, old one in the back
New cam all the way in, (sorry no pics my hands were full of assembly lube, and man that **** is sticky. Those are just 3 water pump bolts I used for extra leverage when installing the new cam, make sure you do it slow not to ding anything.
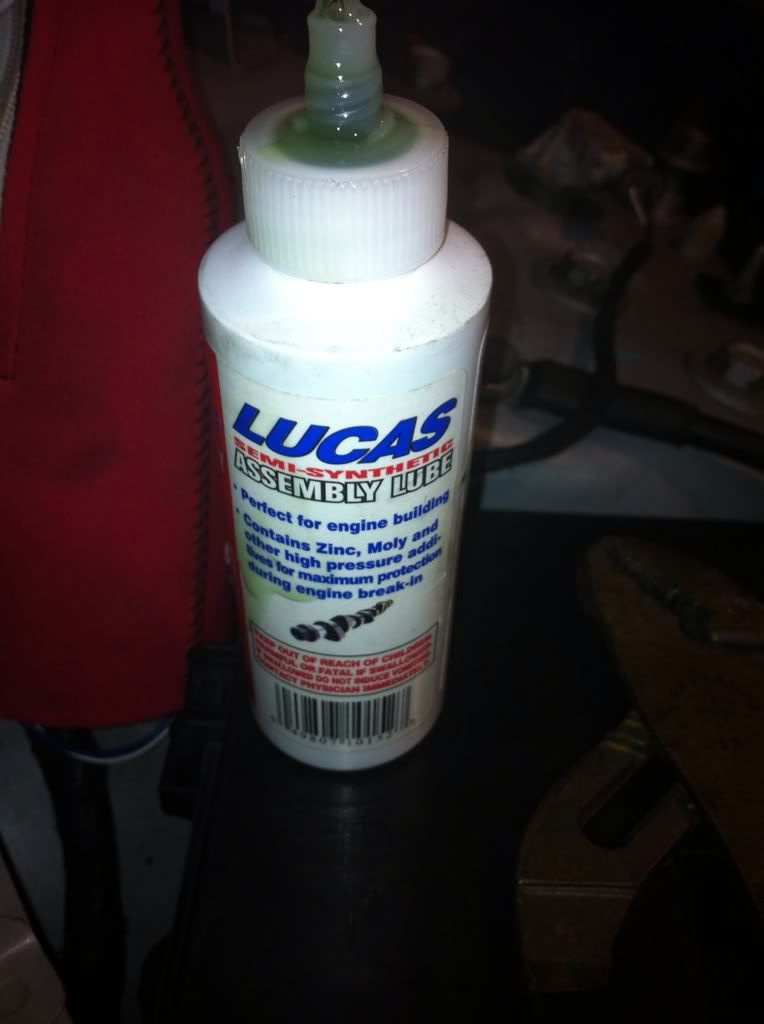
LUBE!!!
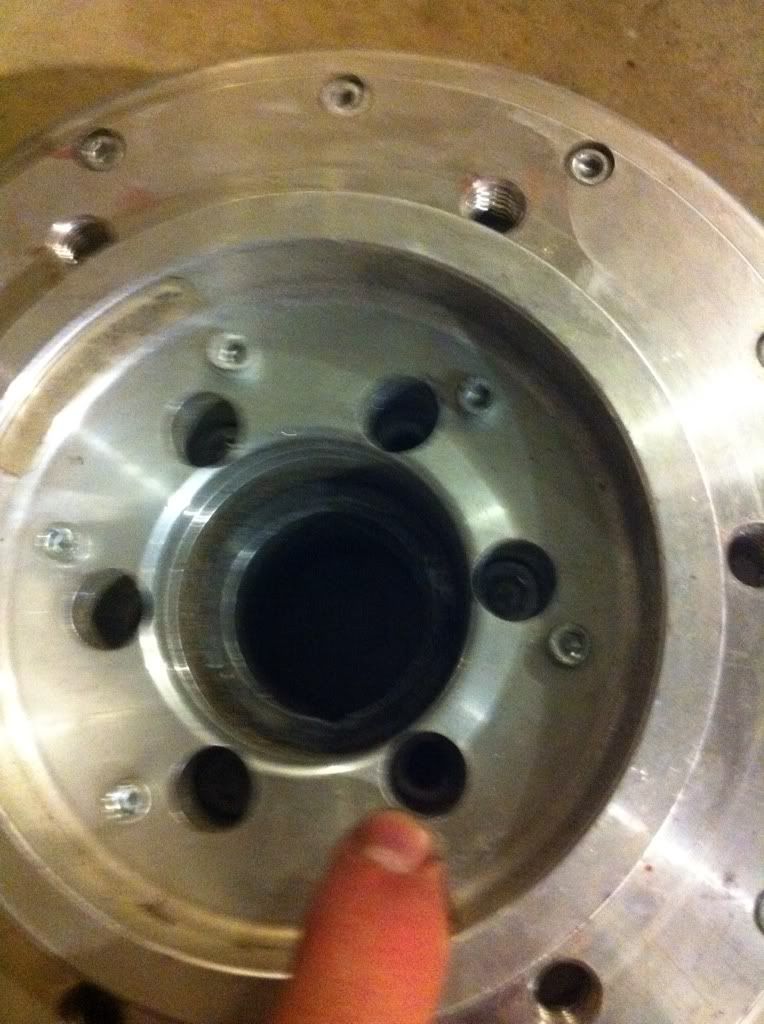
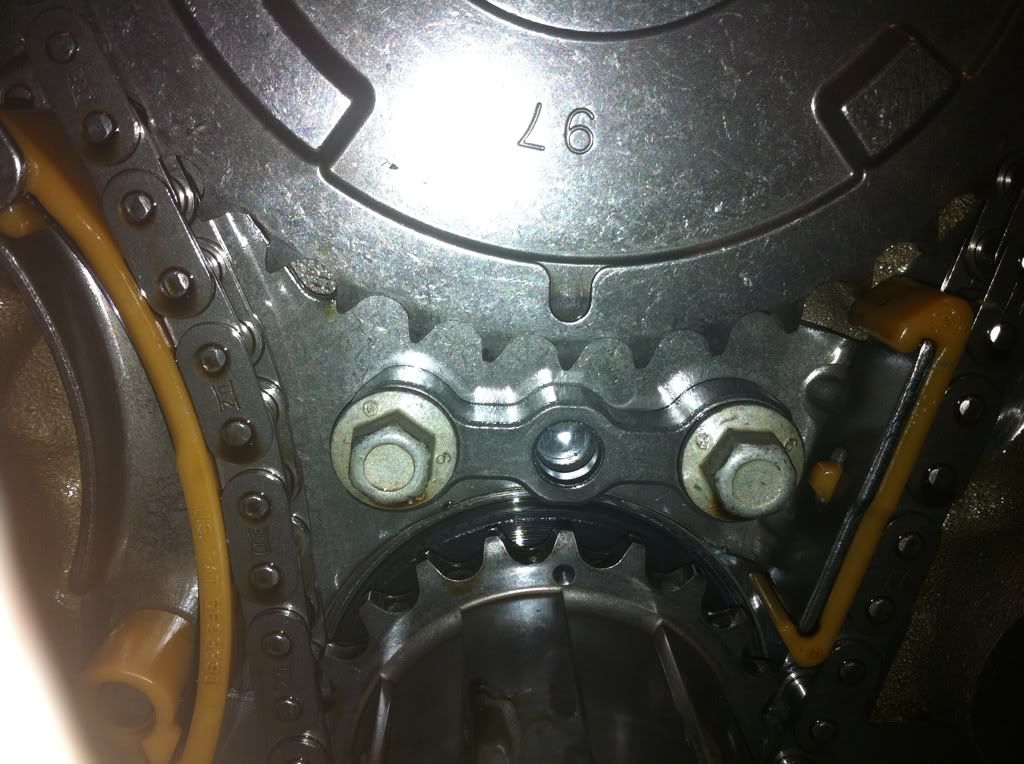
timing chain installed and the cam gear is at 6 and the crank is at noon, just where it needs to be. (yes that's lots of oil, I choose to pour the oil over the gears while I was assembling it as opposed to dip it and pick it up and drip all over the place. I also put lube on the whole cam gear teeth to help everything. Should be ZERO dry area's)
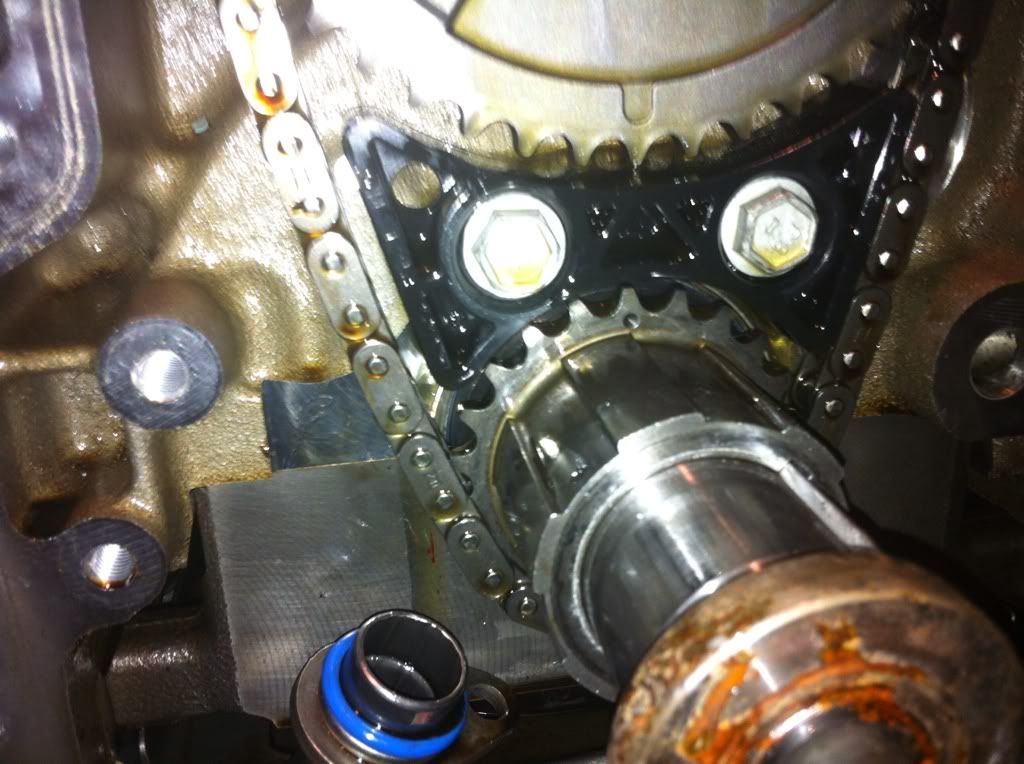
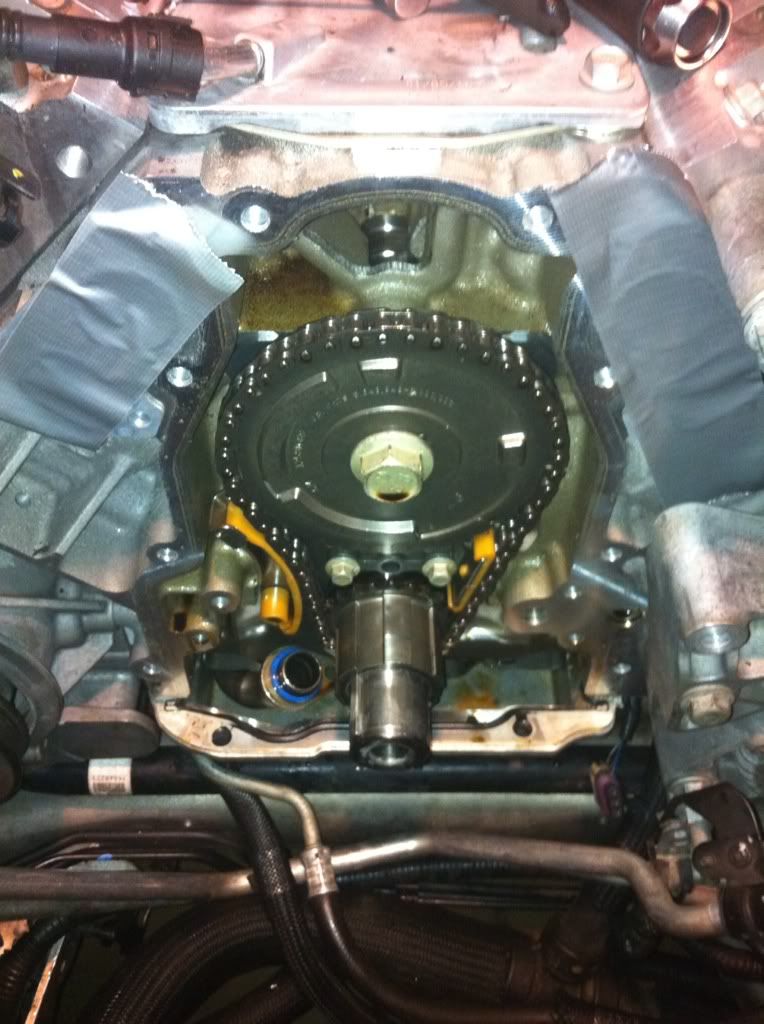
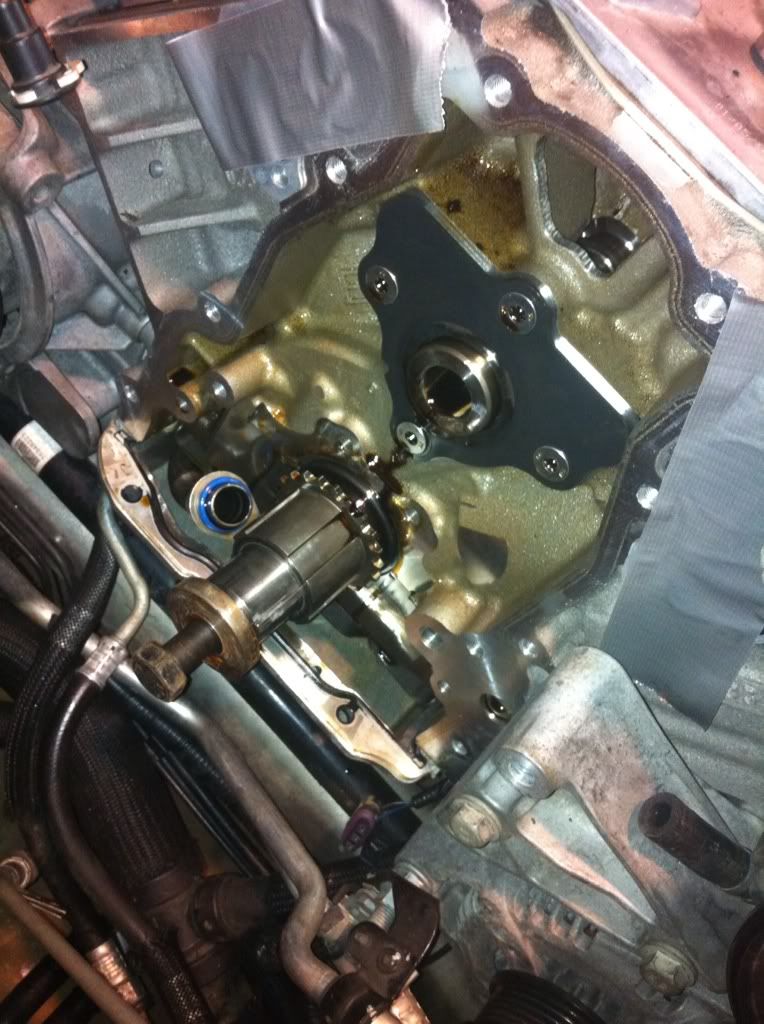
This next pic is when I was installing the oil pump. If you read the ls3 write up on camaro 5 there is a slight item I feel you can do better to make installing that dam little bolt in the pick up line. Instead of bolting the pump slightly, with the 4 main bolt, I feel it's better (and sure was easy for me) to slide the pump on, making sure the o-ring in the pick up line is correct and then starting the bolt. Once you get the bolt started (fyi take your gloves off it's much easier) get a few good turns in, then put some lock tite on it ( you can see it in the pic), then put the 4 main bolts in, snug down, crank the crank a few times to make sure it's all centered then snug it all up with lock tight on all 5 bolts. Took me all of 5 min to do it, and in the write up he said it was a huge PITA!
After that I snugged up the oil pan, and tomorrow I'll do the push rods, and the springs and then start putting her back the rest of the way together so then I can install the meth and ice box
So Oil pump is off, and cam gear and timing chain are off:
Inserted the dowel rods to keep the lifters from falling, side note you will see in a later pic, go ahead and mark them where the "end" should be so you don't have to worry about getting through all the lifters when spinning the cam. My lifters didn't "stay up" like I had read about and I had to turn the cam the entire time to get both dowels down the path
Better view of the marks... (after I had already put them in, then decided to pull them back out to mark and reinsert)
Pulling the cam out (make sure you do this carefully, don't want to ding anything inside the engine.
Old wimpy items (if anyone wants any of this for some reason or knows someone who does let me know. I didn't put the ls3 tensioner back in.
New cam in front, old one in the back
New cam all the way in, (sorry no pics my hands were full of assembly lube, and man that **** is sticky. Those are just 3 water pump bolts I used for extra leverage when installing the new cam, make sure you do it slow not to ding anything.
LUBE!!!
timing chain installed and the cam gear is at 6 and the crank is at noon, just where it needs to be. (yes that's lots of oil, I choose to pour the oil over the gears while I was assembling it as opposed to dip it and pick it up and drip all over the place. I also put lube on the whole cam gear teeth to help everything. Should be ZERO dry area's)
This next pic is when I was installing the oil pump. If you read the ls3 write up on camaro 5 there is a slight item I feel you can do better to make installing that dam little bolt in the pick up line. Instead of bolting the pump slightly, with the 4 main bolt, I feel it's better (and sure was easy for me) to slide the pump on, making sure the o-ring in the pick up line is correct and then starting the bolt. Once you get the bolt started (fyi take your gloves off it's much easier) get a few good turns in, then put some lock tite on it ( you can see it in the pic), then put the 4 main bolts in, snug down, crank the crank a few times to make sure it's all centered then snug it all up with lock tight on all 5 bolts. Took me all of 5 min to do it, and in the write up he said it was a huge PITA!
After that I snugged up the oil pan, and tomorrow I'll do the push rods, and the springs and then start putting her back the rest of the way together so then I can install the meth and ice box
11-22-2011 | 11:16 PM
#15
lol shut it cole!!
and yeah the honey do's are done, but if I don't get this car out of the way of the atic by sat, i'll be deeper in the dog house ( i currently stay there so that way I always know where I am)
and yeah the honey do's are done, but if I don't get this car out of the way of the atic by sat, i'll be deeper in the dog house ( i currently stay there so that way I always know where I am
)
11-25-2011 | 04:31 PM
#16
well got to work on it again today, back is killing me so taking a breather and I'll post up what I'm done with.
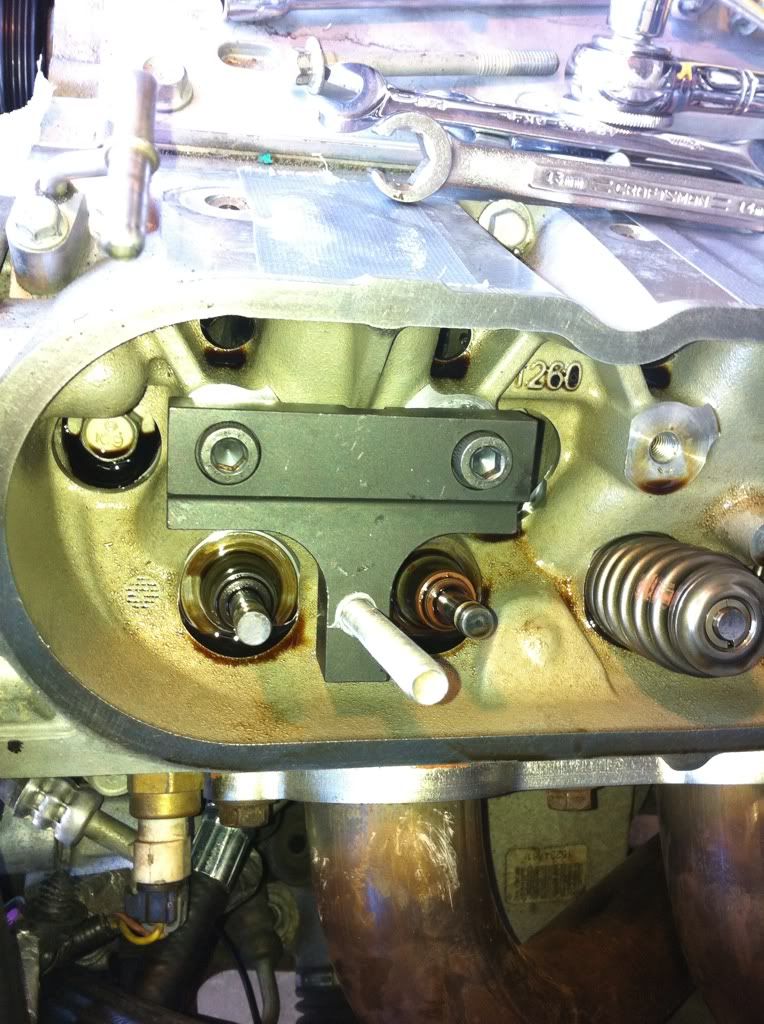
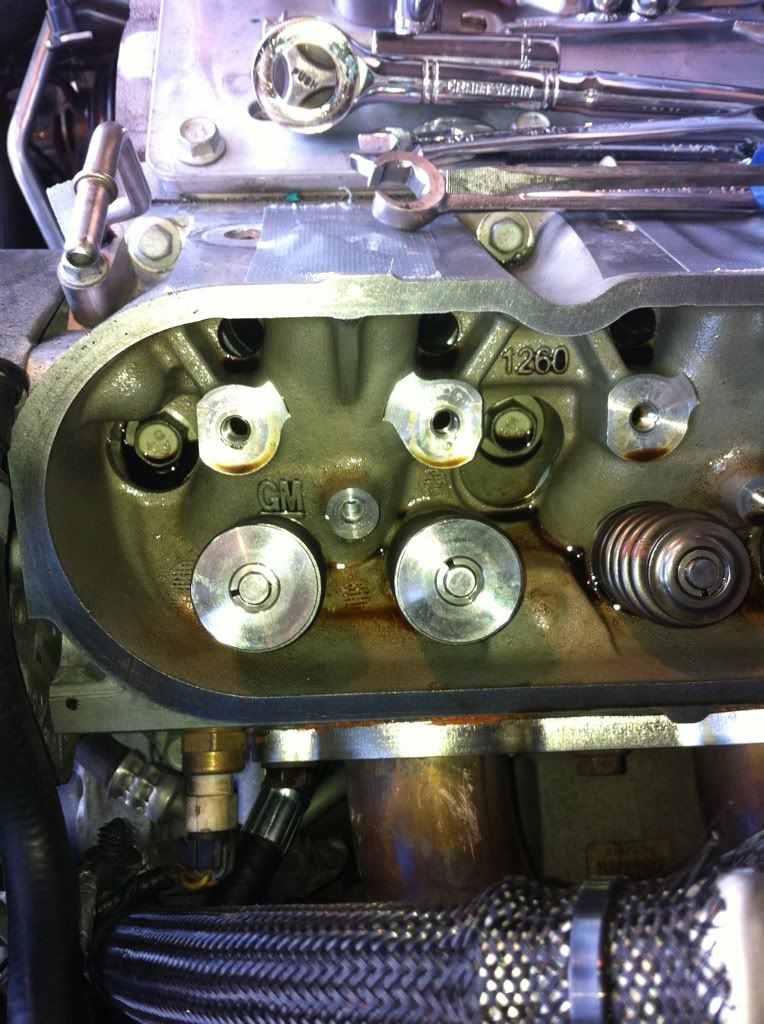
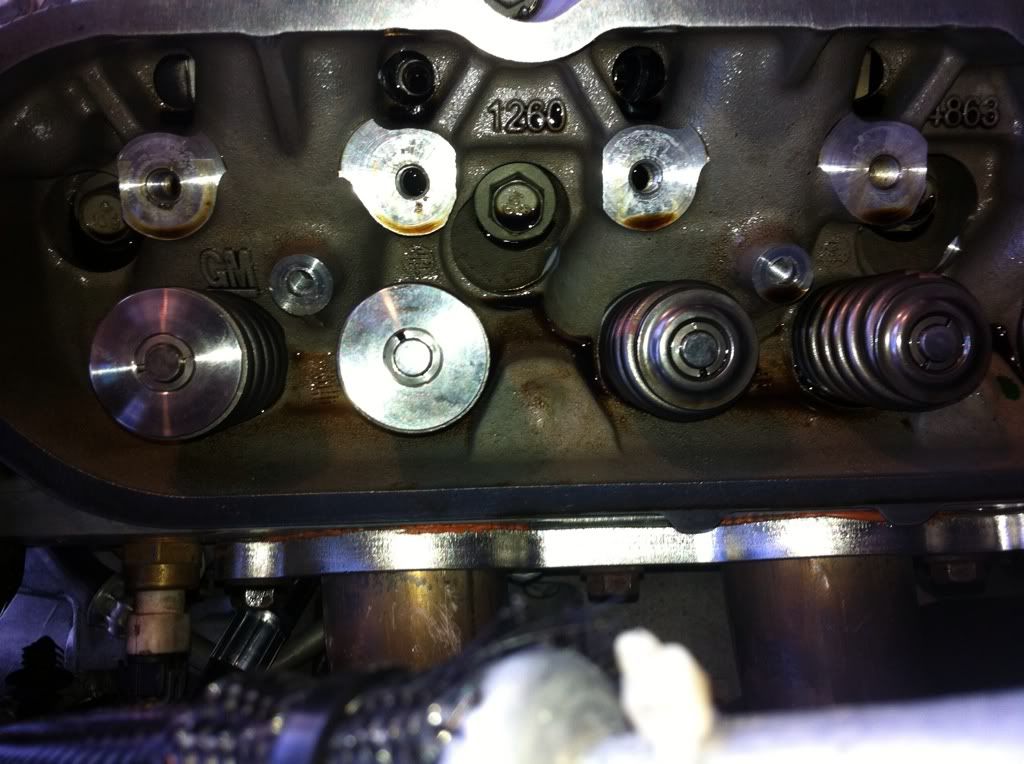
Time to pull the springs out, so went with the moving each cylinder to TDC since I pulled the SC out the air pressure won't work to keep the valves from falling.
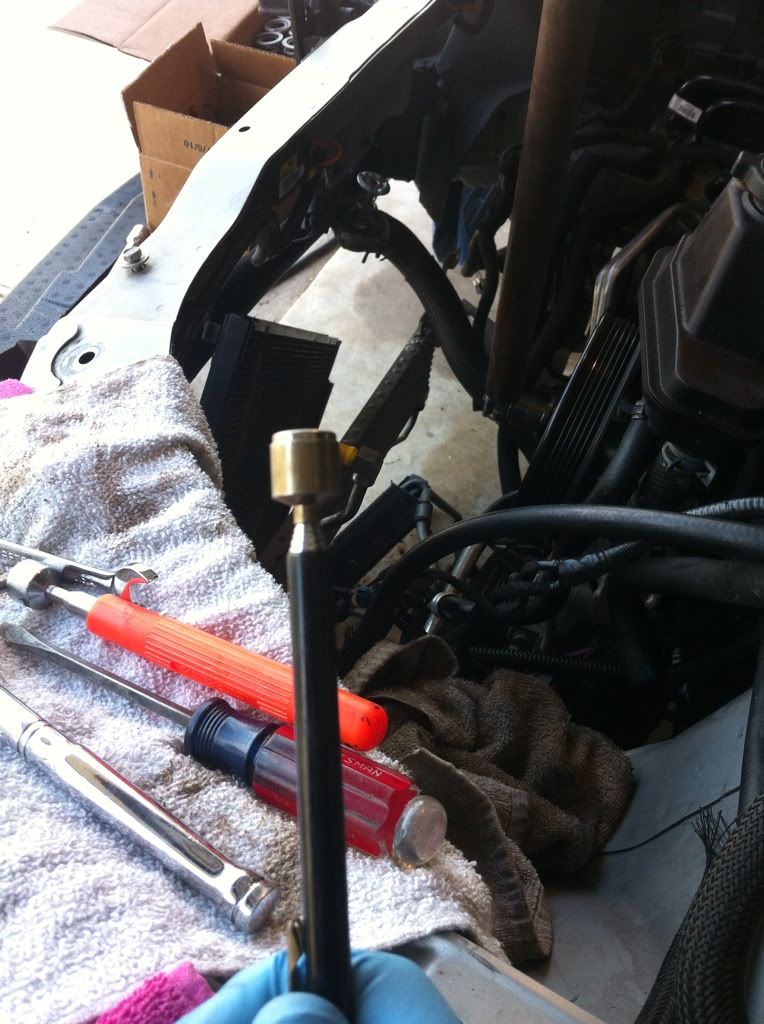
This is the tool I got from vincihighperformance, what a life saver
Ready to compress:
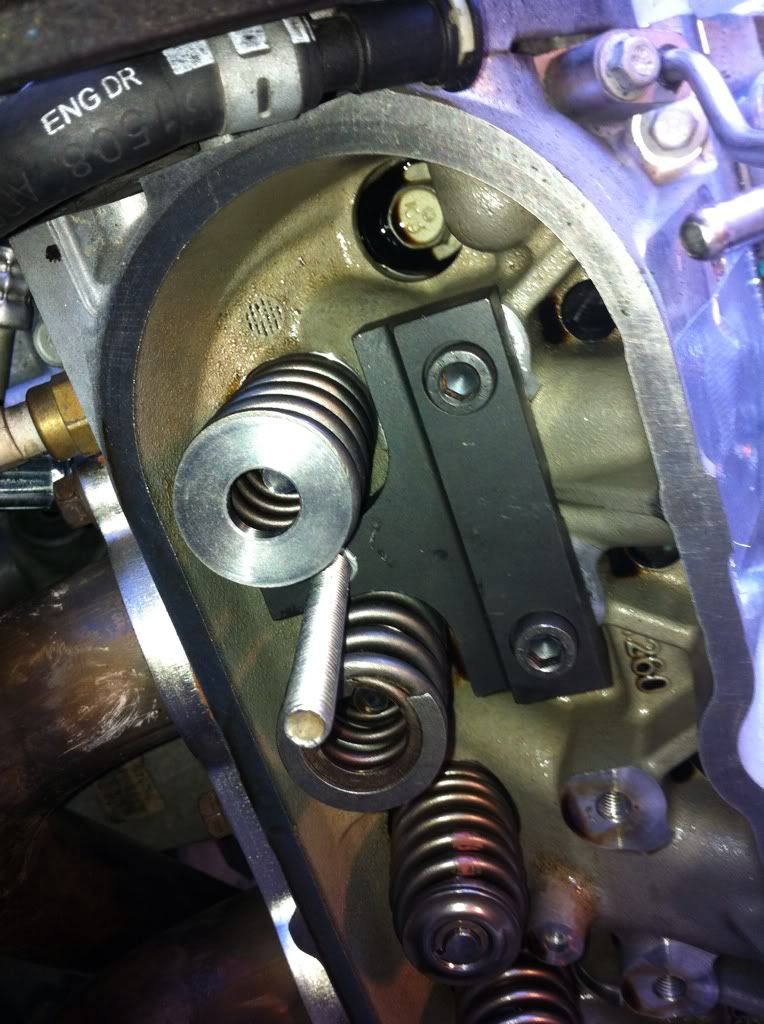
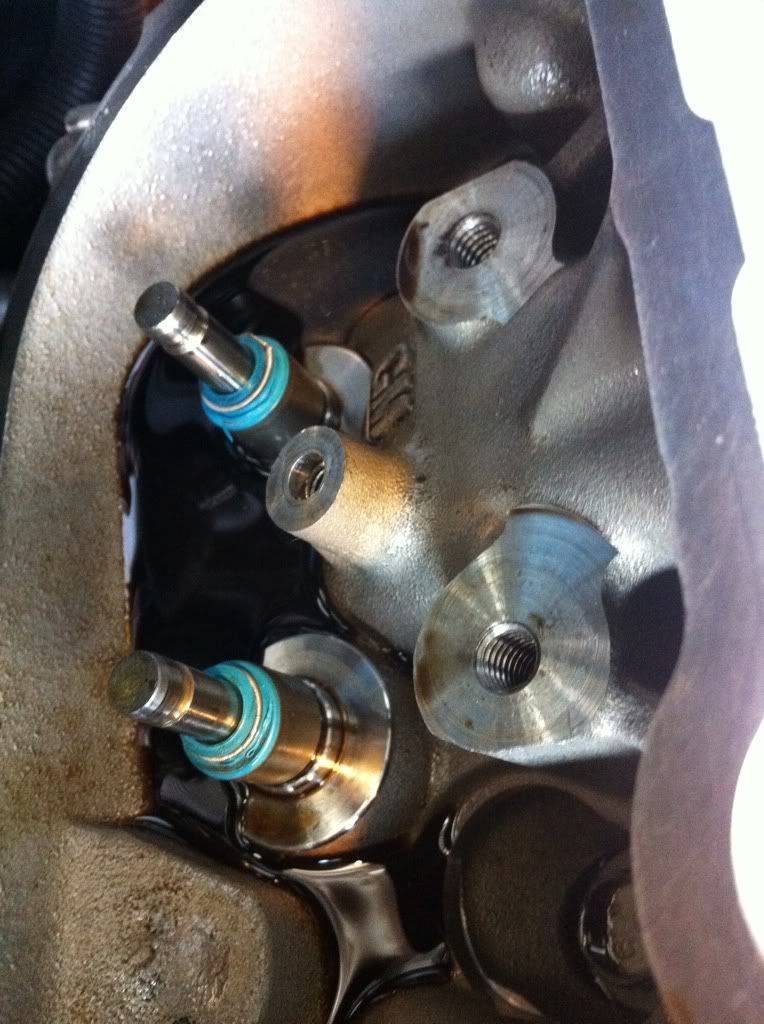
Retainers out:
Naked valves
Spring retainer hats, the one close to you is the top, back is the bottom

Before putting the valve rings.... (Not sure what they are called)
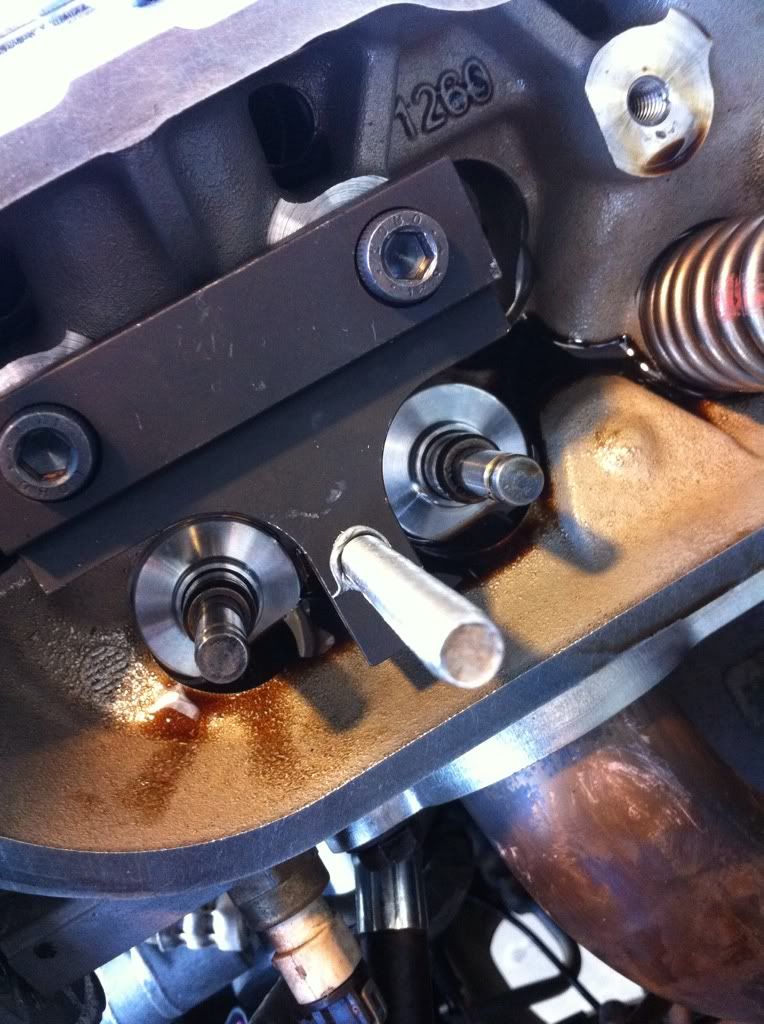
Here is what you have to press on with a 12mm socket and tap it with a hammer to set it, you will hear the difference in the hammer hitting it when you set it. (I hit one a touch too hard, but what touches the valve is fine so I'm not concerned)
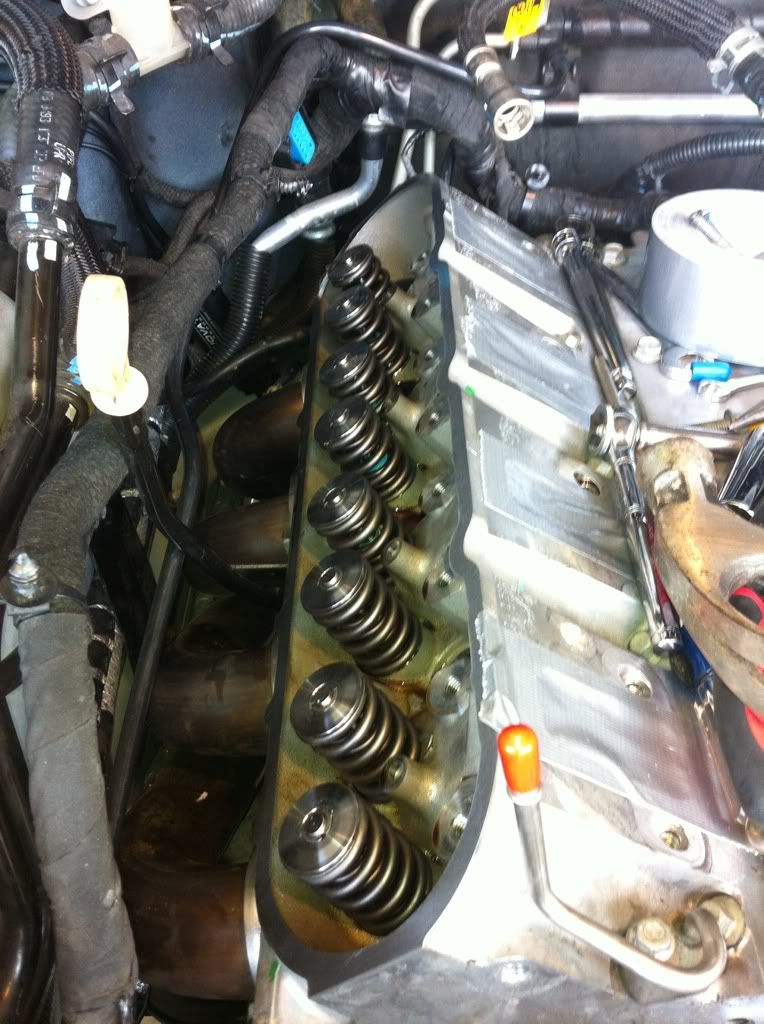
First set of springs set up, 7 more cylinders to go.
Comparison of stock vs new springs
BUY ONE OF THESE!!! This magnet is worth it's 3 bucks, you can use it to pull the valves up, retainers off, when you drop something down (you will drop something trust me!!)
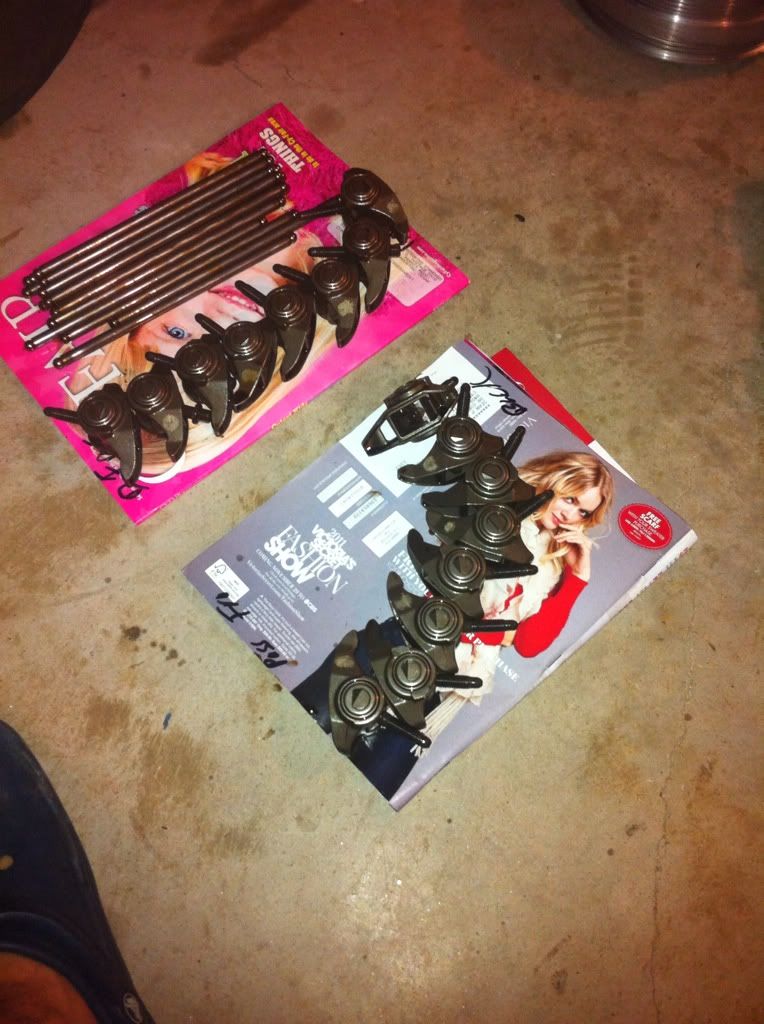
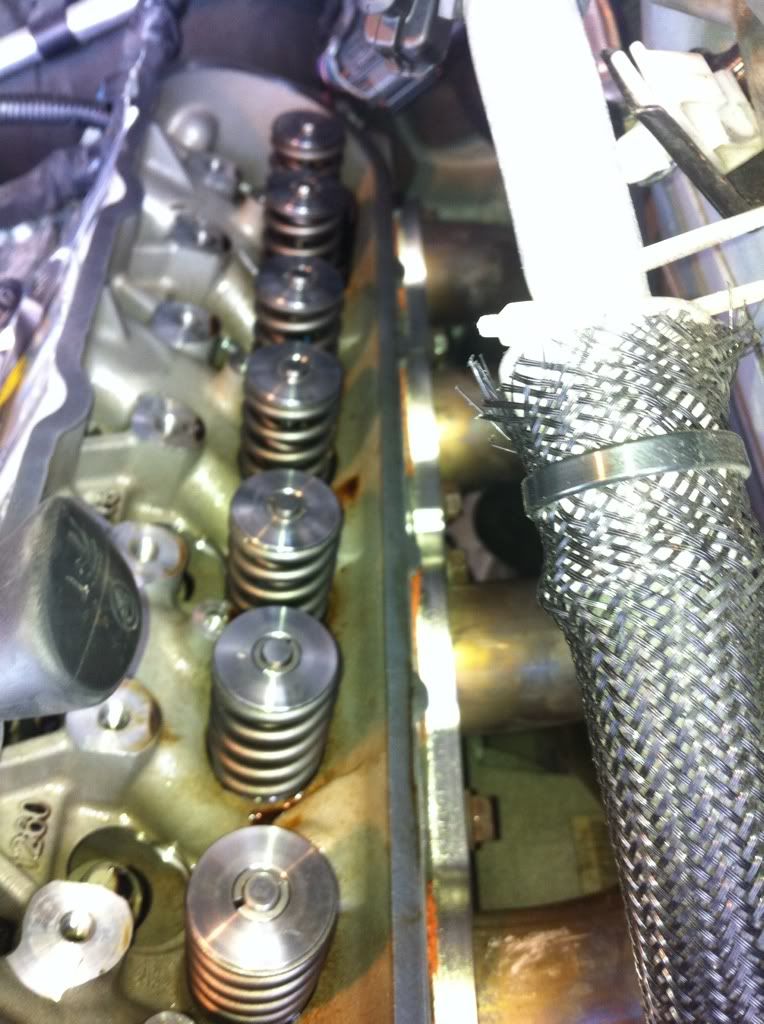
Look at those pretty springs!!
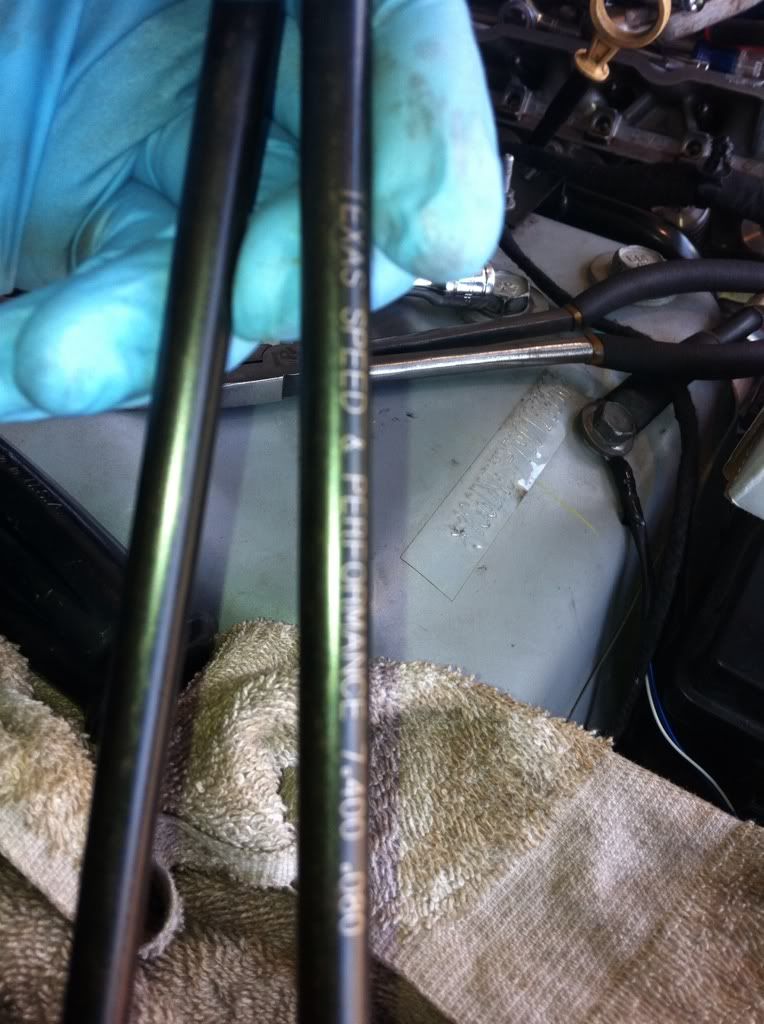
My push rods
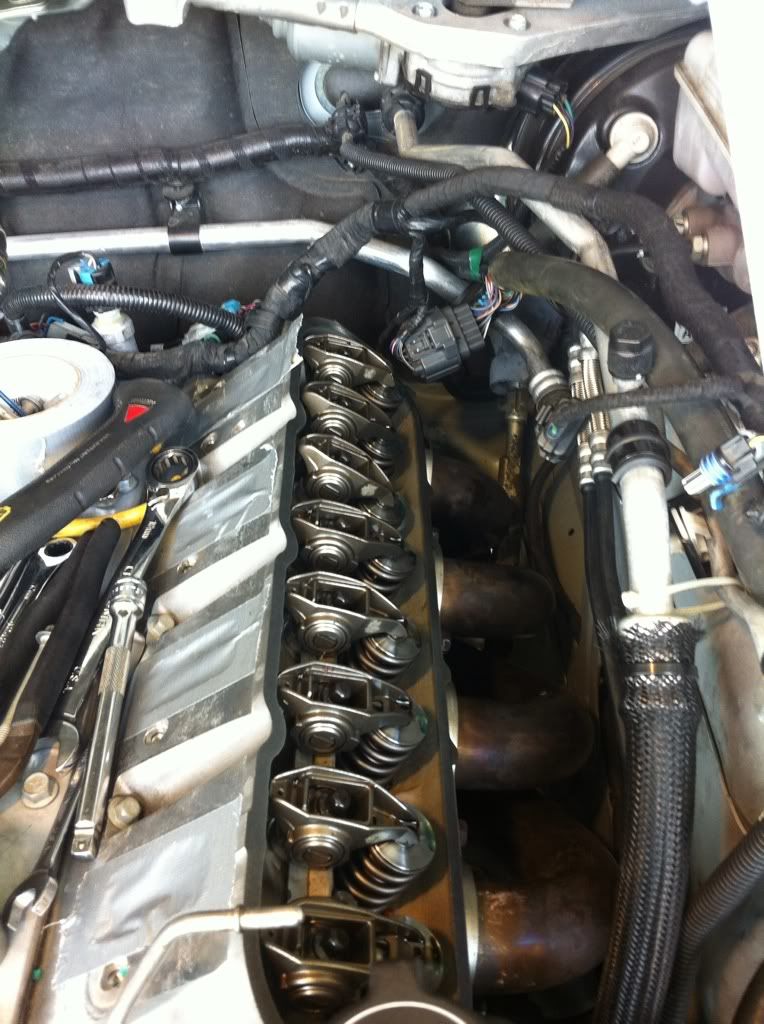
all the rocker arms with lube on the push rods and springs and rockers and torqued down to 22 ft lbs all with each cylinder at TDC
Another point of advice, before you go and tighten the oil pump up, go head and mark where the timing mark is on your crank gear on the snout of your crank, just use a sharpie. You will need this for when you go and tighten everything. Save your self the headache of removing all the oil pump bolts again to look.
Time to pull the springs out, so went with the moving each cylinder to TDC since I pulled the SC out the air pressure won't work to keep the valves from falling.
This is the tool I got from vincihighperformance, what a life saver
Ready to compress:
Retainers out:
Naked valves
Spring retainer hats, the one close to you is the top, back is the bottom
Before putting the valve rings.... (Not sure what they are called)
Here is what you have to press on with a 12mm socket and tap it with a hammer to set it, you will hear the difference in the hammer hitting it when you set it. (I hit one a touch too hard, but what touches the valve is fine so I'm not concerned)
First set of springs set up, 7 more cylinders to go.
Comparison of stock vs new springs
BUY ONE OF THESE!!! This magnet is worth it's 3 bucks, you can use it to pull the valves up, retainers off, when you drop something down (you will drop something trust me!!)
Look at those pretty springs!!
My push rods
all the rocker arms with lube on the push rods and springs and rockers and torqued down to 22 ft lbs all with each cylinder at TDC
Another point of advice, before you go and tighten the oil pump up, go head and mark where the timing mark is on your crank gear on the snout of your crank, just use a sharpie. You will need this for when you go and tighten everything. Save your self the headache of removing all the oil pump bolts again to look.
11-26-2011 | 06:59 AM
#18
I'd guess on my aggressive tune well in to the 650+,
My Goal was to see how close to 700 I Could get without touching the heads. I have a post meth that is going to go on eventually, but I need to figure it out/talk with some guys who have done it. I hope to have 650 daily without really making it an aggresive tune and then have the xtra when I need it.