

LQ4/4L60E into 67 Chevelle
 07-29-2009, 09:11 PM
#161
Just a quick update.
I screwed up when I checked specs on the frame months ago. I didn't get into enough detail and didn't pick up on the fact that the front is tweaked. When I was mocking up the front sheet metal [in preparation to install inner fenders to hang PCM], I found that the front wheels ended up in the fender wells in different spots on each side. After trying to shift body for a week, I bit the bullet and pulled body off frame again. I got into more detail with specs and found the front to be pushed to the passenger side by a half inch and the drivers side of the front to be pushed forward about 7/8 of an inch. I am now looking for a frame shop to fix it. this will no doubt change where the engine mounts on the cross member which will cause all kinds of adjustments.
I can't believe I didn't catch it the first time.
Rob
To bad you weren't down this way. It's hard to find a true frame shop these day since most cars are unitized construction. We have a guy down this way that specialize in chevelles if all else fails.
 07-29-2009, 09:20 PM
#162
On The Tree
Thread Starter
iTrader: (1)

Join Date: Jan 2009
Location: Modesto, CA
Posts: 197
Likes: 0
Received 0 Likes
on
0 Posts

Thanks guys! It is going in tomorrow. I called all over hell and back. This guy showed me the rack and the computer and software that goes with it. He is going to throw it into manual mode and get this pig straightened out I hope.
Joseph. that is exactly where I started. It was good to meet you this weekend. I hope that truck goes go good use!
Rob
Joseph. that is exactly where I started. It was good to meet you this weekend. I hope that truck goes go good use!
Rob
07-30-2009, 09:51 AM
#163
Thanks guys! It is going in tomorrow. I called all over hell and back. This guy showed me the rack and the computer and software that goes with it. He is going to throw it into manual mode and get this pig straightened out I hope.
Joseph. that is exactly where I started. It was good to meet you this weekend. I hope that truck goes go good use!
Rob
Joseph. that is exactly where I started. It was good to meet you this weekend. I hope that truck goes go good use!
Rob
Keep us posted
08-17-2009, 07:47 AM
#164
On The Tree
Thread Starter
iTrader: (1)
Join Date: Jan 2009
Location: Modesto, CA
Posts: 197
Likes: 0
Received 0 Likes
on
0 Posts
Frame is straight. The passenger side was smashed back. The opposite of what I thought was wrong. The crack in the frame that I found months ago is obviously from the passenger side smash. I am still very upset with myself for not finding this months ago, but I guess I need to move on.
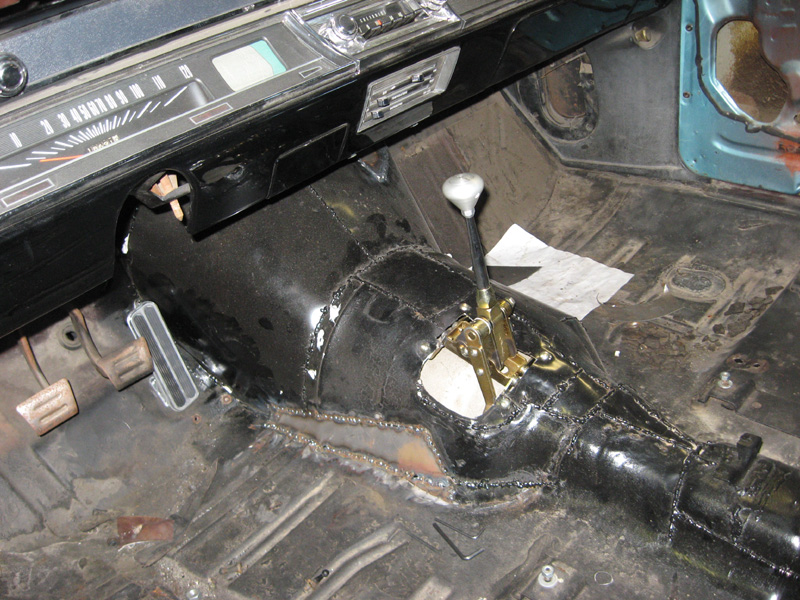
Body back on, engine/trans back in, Lokar floor mount shifter installed, Lokar gas pedal and cable installed and on to the wiring.
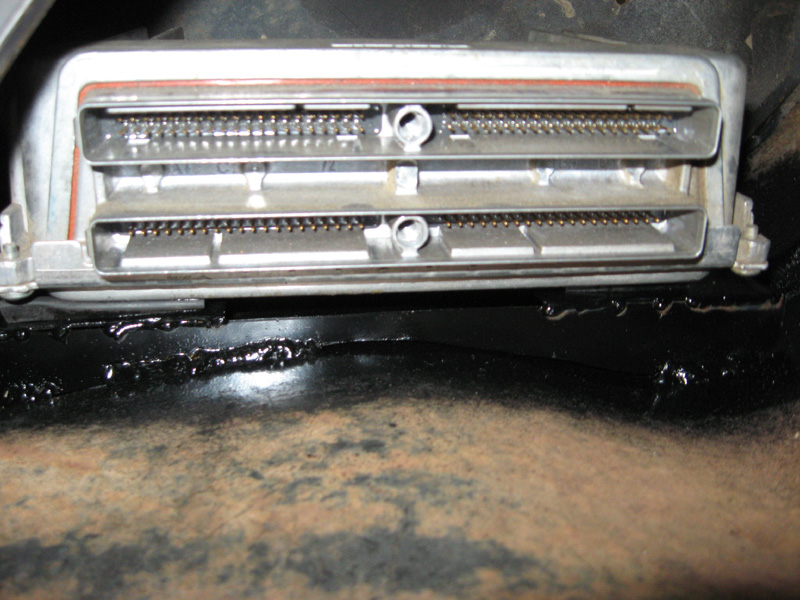
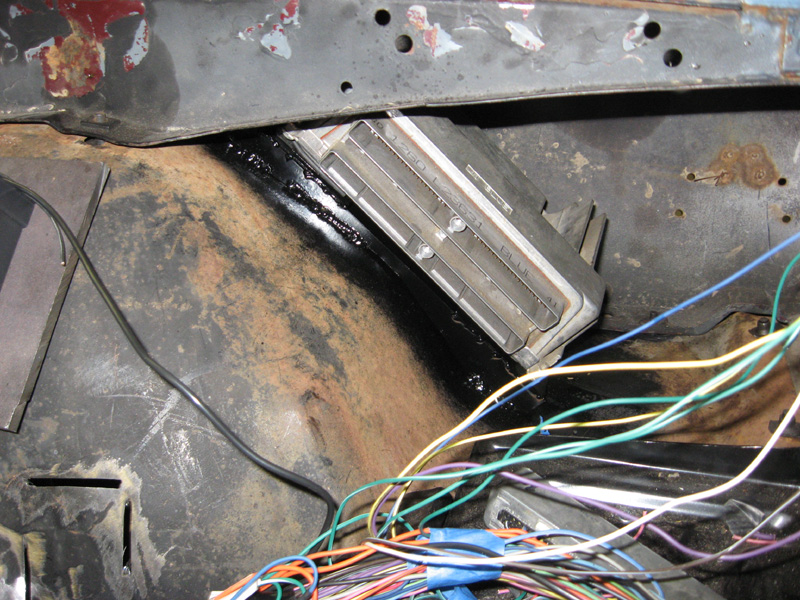
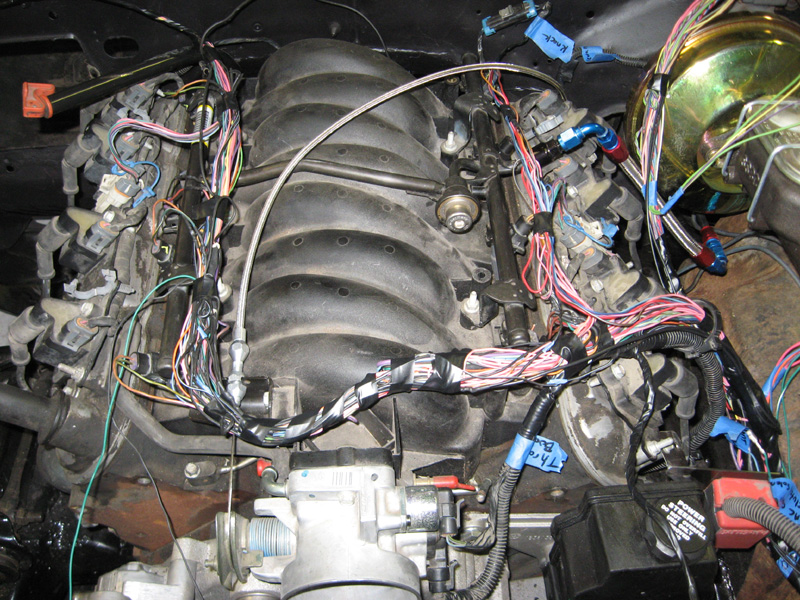
I put the PCM and battery on the Drivers side front like the truck had it. Then I plan to use a stockish intake on the passenger side.
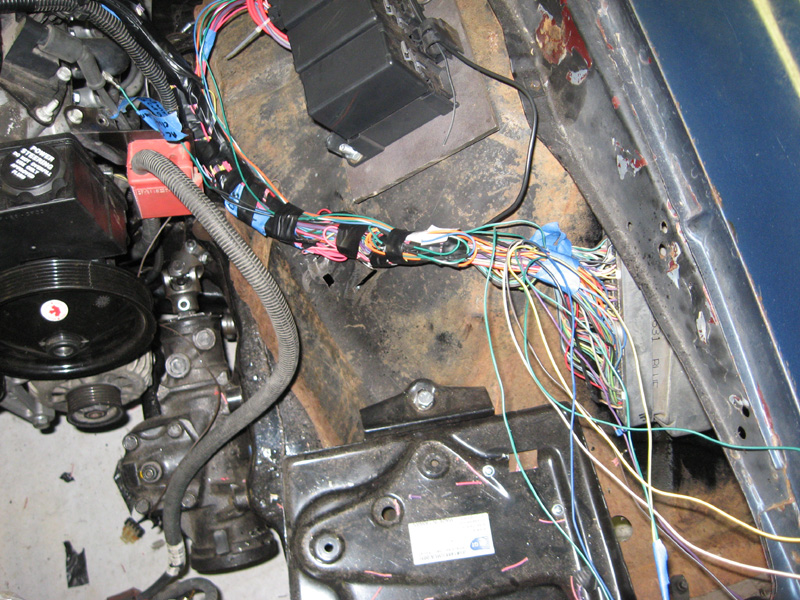
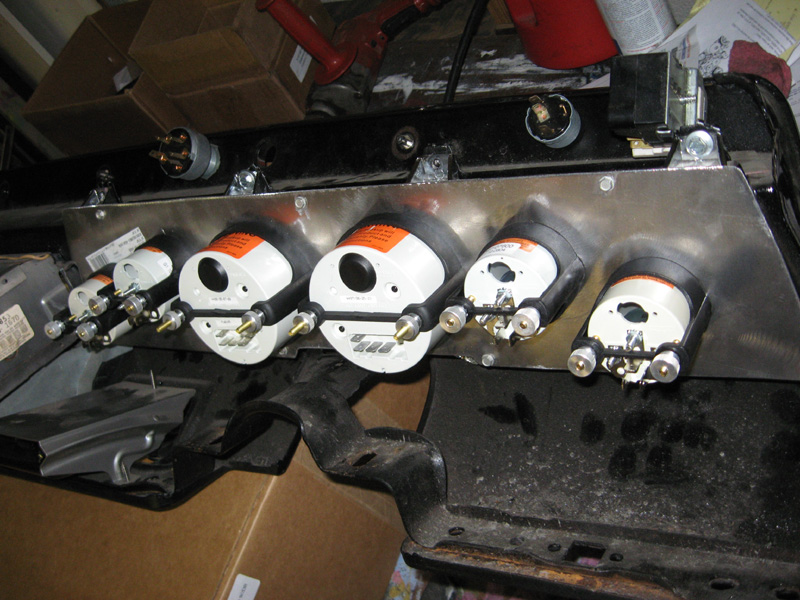
I was just going to leave the harness untouched with pigtails to go from truck injectors to ls1 injectors, then I decided to delete what I don't need, then I decided to re-route some of it. I removed truck injector connectors and soldered in the ls1 injector connectors. I will have two runs on top of the intake, one on top of each fuel rail...
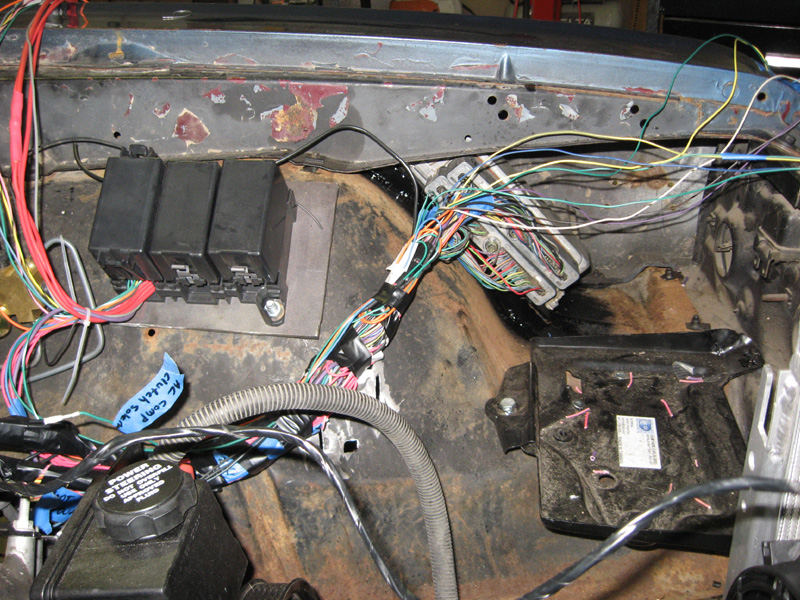
I still have a few wires I am not sure of and I have no clue as to how to wire up the AC to have the PCM involved in it. I have seen schematics and threads talking about it, but it hasn't come clear in my head yet.
Next up is the harness for the rest of the car. This car was bare when I got it. Very frustrating at times that I have to install everything!!!
Rob
Body back on, engine/trans back in, Lokar floor mount shifter installed, Lokar gas pedal and cable installed and on to the wiring.
I put the PCM and battery on the Drivers side front like the truck had it. Then I plan to use a stockish intake on the passenger side.
I was just going to leave the harness untouched with pigtails to go from truck injectors to ls1 injectors, then I decided to delete what I don't need, then I decided to re-route some of it. I removed truck injector connectors and soldered in the ls1 injector connectors. I will have two runs on top of the intake, one on top of each fuel rail...
I still have a few wires I am not sure of and I have no clue as to how to wire up the AC to have the PCM involved in it. I have seen schematics and threads talking about it, but it hasn't come clear in my head yet.
Next up is the harness for the rest of the car. This car was bare when I got it. Very frustrating at times that I have to install everything!!!
Rob
Last edited by robbied31; 11-15-2012 at 07:01 PM. Reason: fixed pic links
08-18-2009, 10:56 PM
#165
On The Tree
Thread Starter
iTrader: (1)
Join Date: Jan 2009
Location: Modesto, CA
Posts: 197
Likes: 0
Received 0 Likes
on
0 Posts
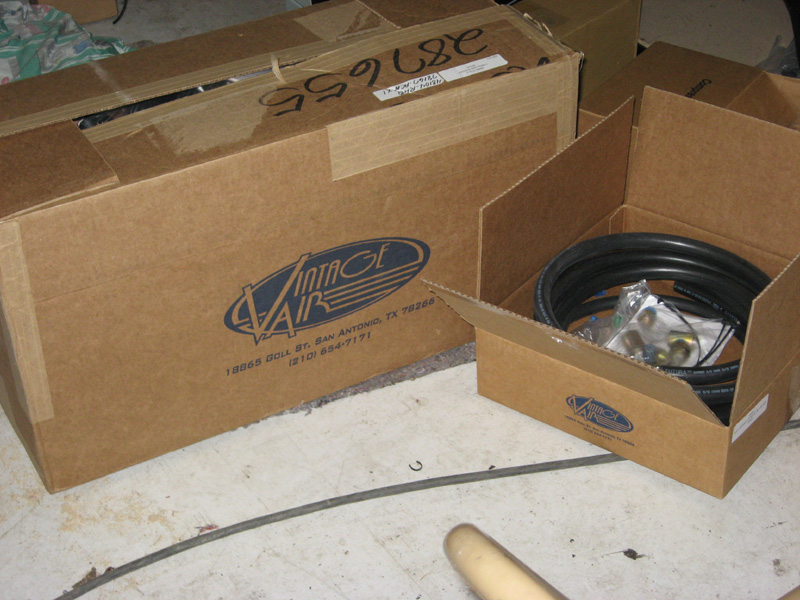
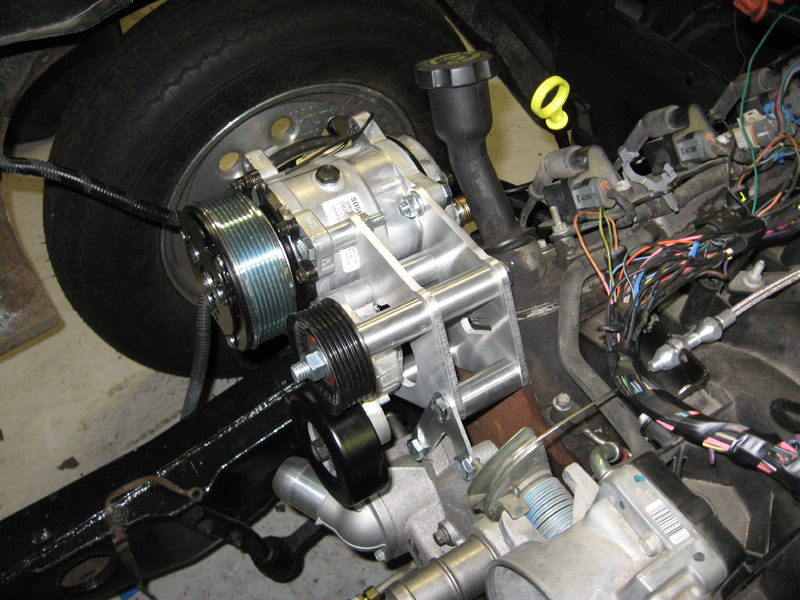
I don't do too much during the week. If I do, I need short & sweet little projects I can complete before I get tired. I got the rest of my vintage air kit yesterday, so I slapped the Kwik Performance brackets and the compressor on last night....
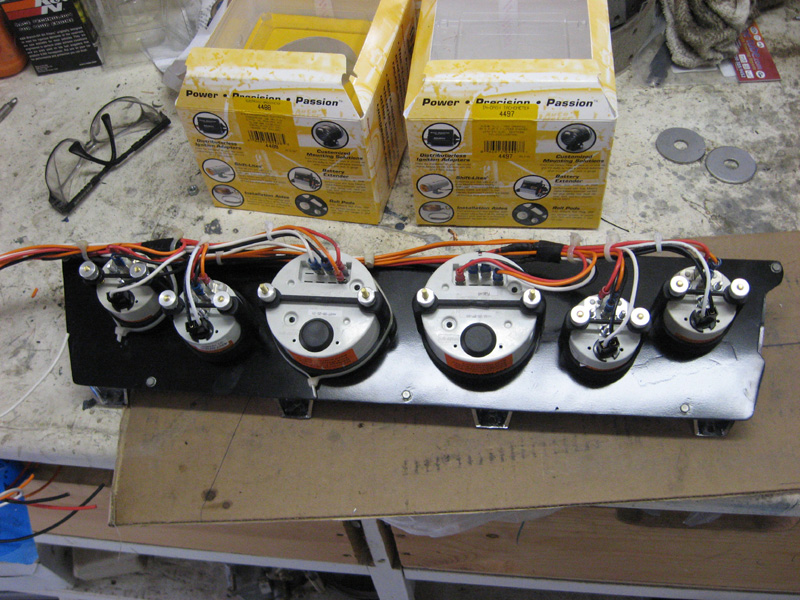
Tonight's project was to pull the stock Speedo out of my dash and figure out how to put new autometer guages into it. this is what I came up with....
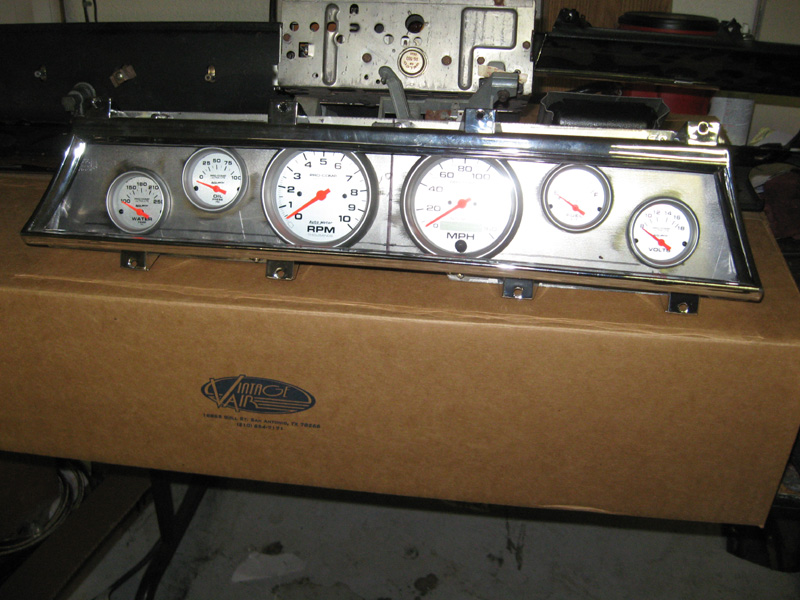
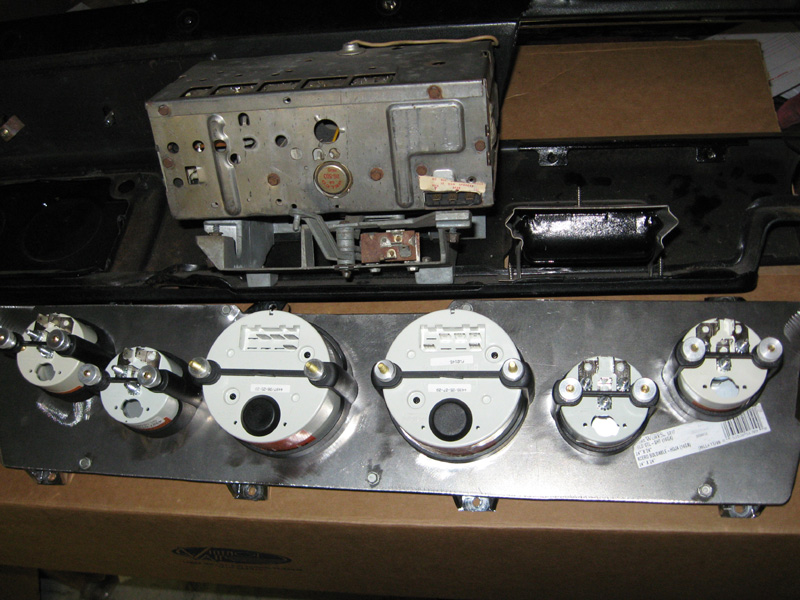
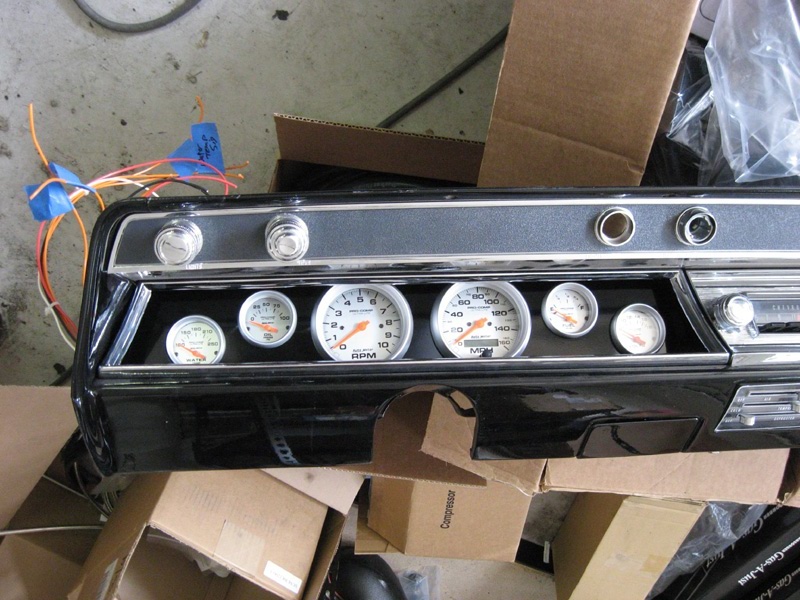
chrome trim and guages installed into the dash...
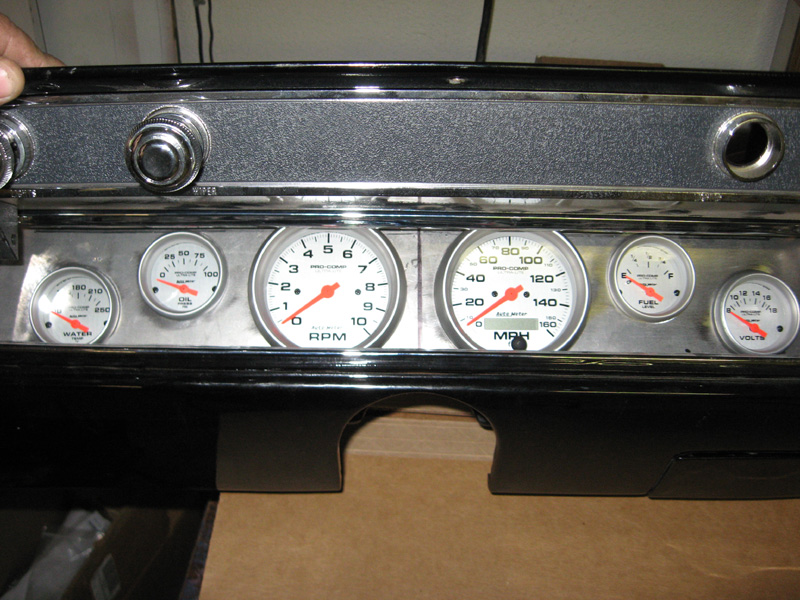
I probably should have used a smaller tach and speedo, but 3 3/8" is already pretty small for my taste. just don't like how the trim of the two ends up behind the chrome trim. Oh well, I think I can live with it. Just need to paint the 16 guage sheet metal black to match rest of dash.
now to make the harness.
finish engine harness, body harness, dash harness, vintage air kit, battery, plumbing [radiator, power steering & trans cooler - was waiting on condensor to mount trans cooler], fluids, drive shaft and I think I am real close to firing this thing up. That would be really cool!!! I don't have all the wiring figured out yet, but with all the info on this site, I am sure I can get it straight in my head.
Late,
Rob
Tonight's project was to pull the stock Speedo out of my dash and figure out how to put new autometer guages into it. this is what I came up with....
chrome trim and guages installed into the dash...
I probably should have used a smaller tach and speedo, but 3 3/8" is already pretty small for my taste. just don't like how the trim of the two ends up behind the chrome trim. Oh well, I think I can live with it. Just need to paint the 16 guage sheet metal black to match rest of dash.
now to make the harness.
finish engine harness, body harness, dash harness, vintage air kit, battery, plumbing [radiator, power steering & trans cooler - was waiting on condensor to mount trans cooler], fluids, drive shaft and I think I am real close to firing this thing up. That would be really cool!!! I don't have all the wiring figured out yet, but with all the info on this site, I am sure I can get it straight in my head.
Late,
Rob
 08-19-2009, 03:42 PM
#168
On The Tree
Thread Starter
iTrader: (1)
Join Date: Jan 2009
Location: Modesto, CA
Posts: 197
Likes: 0
Received 0 Likes
on
0 Posts
Thanks for the input guys. I finally feel like I am making some progress after all these months. Then you start writing down everything you still need to do......hehehehehe 
Rob
Rob
09-07-2009, 11:06 PM
#169
On The Tree
Thread Starter
iTrader: (1)
Join Date: Jan 2009
Location: Modesto, CA
Posts: 197
Likes: 0
Received 0 Likes
on
0 Posts
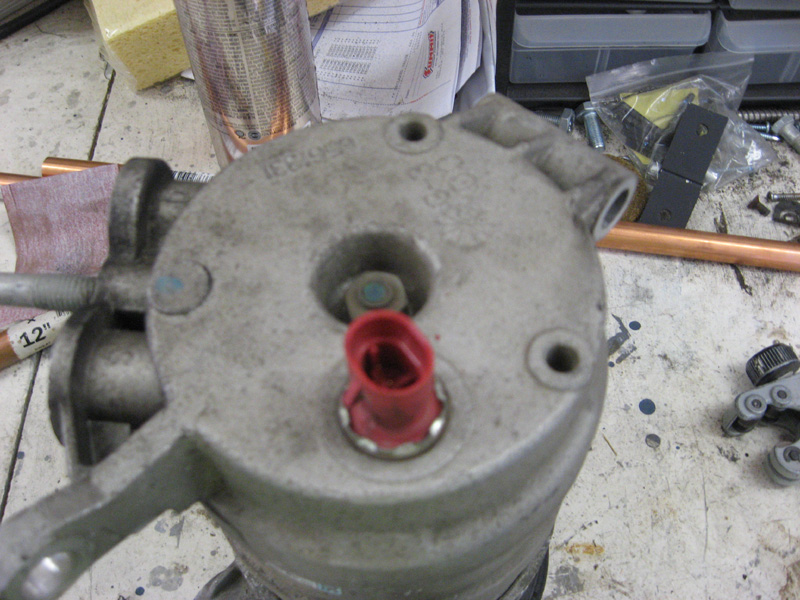
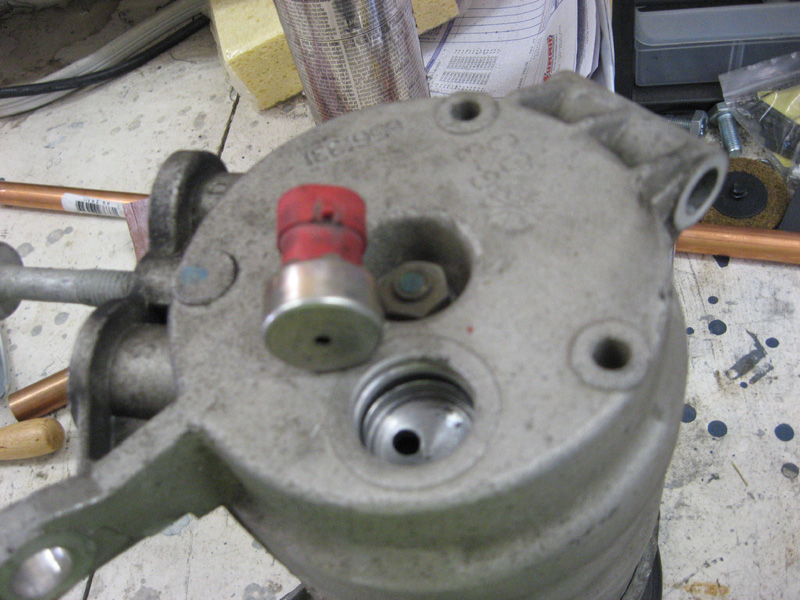
I feel like I have been wiring for a month straight. I dream about wiring :-) . After reading about AC wiring on the LS1's, I assumed it was the same for a '2000 LQ4 and I bought the braze in high pressure port, a crimp on port and the LS1 3-wire trinary switch. Well........My harness doesn't work that way. The LQ4 has a 2-wire high pressure switch in the back of the stock compressor.....
So my lack of proper research cost me some money. Turns out Vintage Air sells a low pressure/high pressure trinary switch that screws right into the drier [with the proper adapter]. It will also control the fans if you want it to.
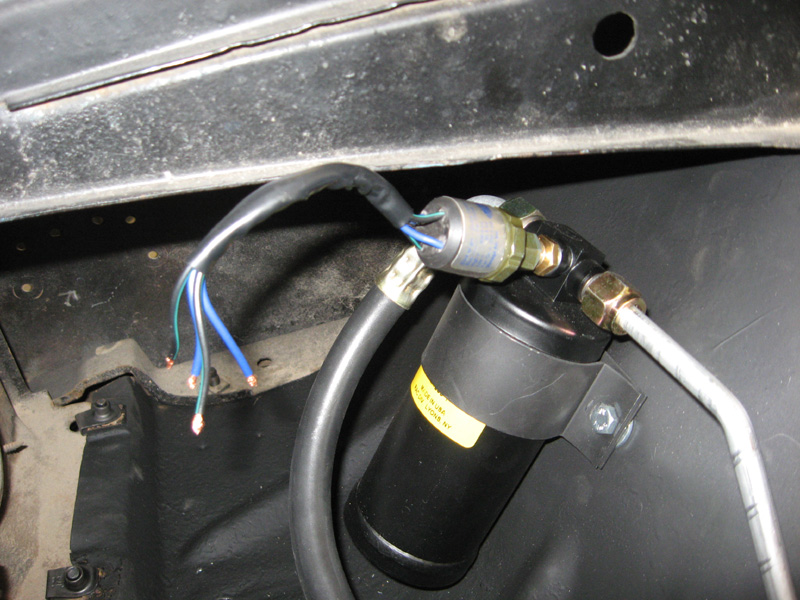
It is a two wire switch, but when pressure is "good", the circuit is closed and I think the stock LQ4 switch circuit is open when pressure is "good". So I am going to use a relay to make the VA switch work like the stock LQ4 switch. See diagram below....
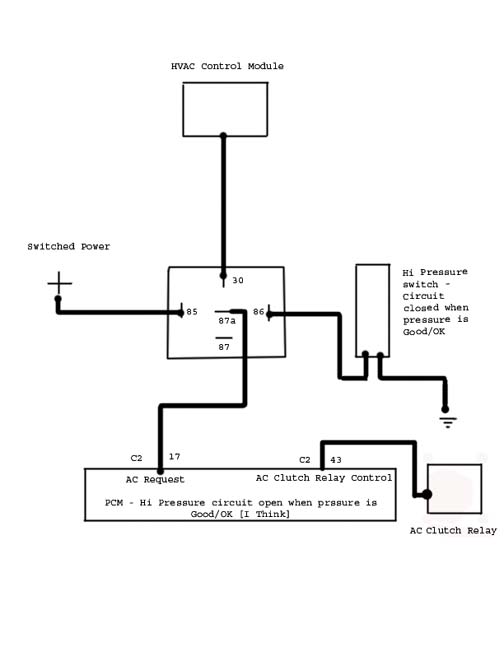
It will be a while before I get to test it. More progress pics....
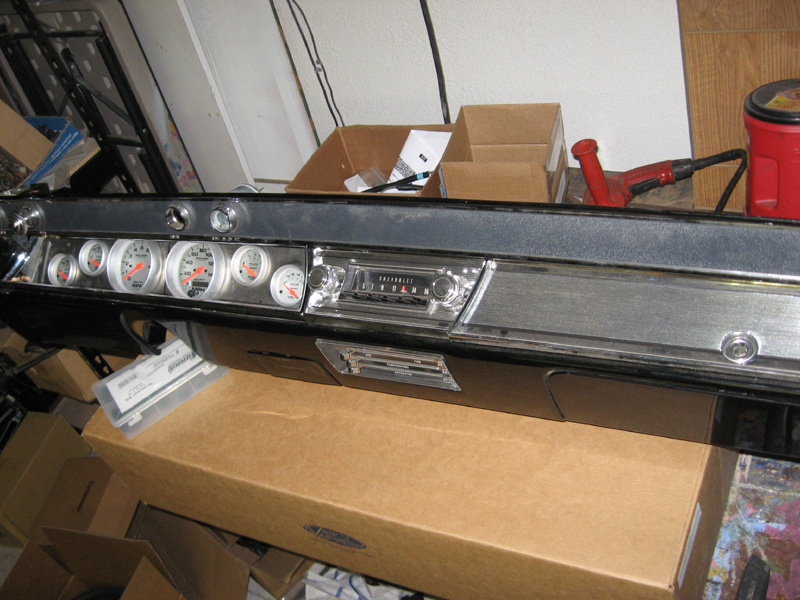
Dash/guages...

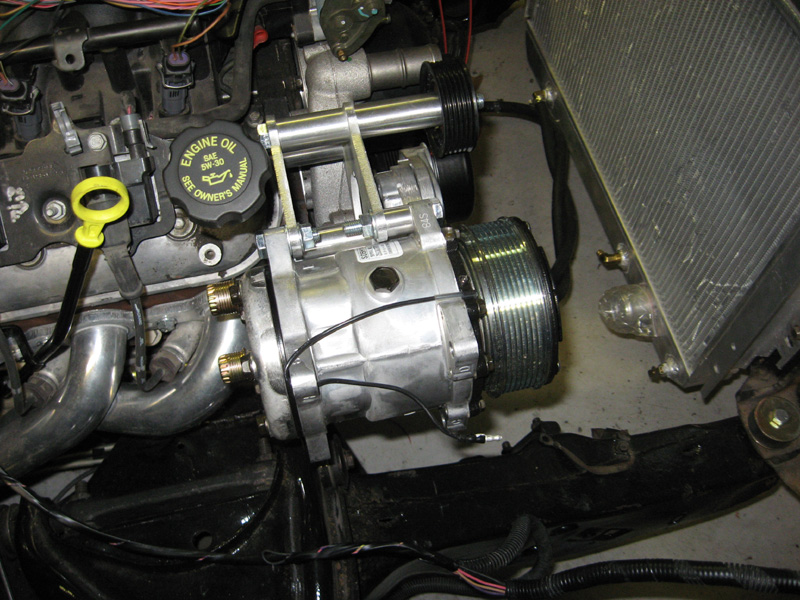
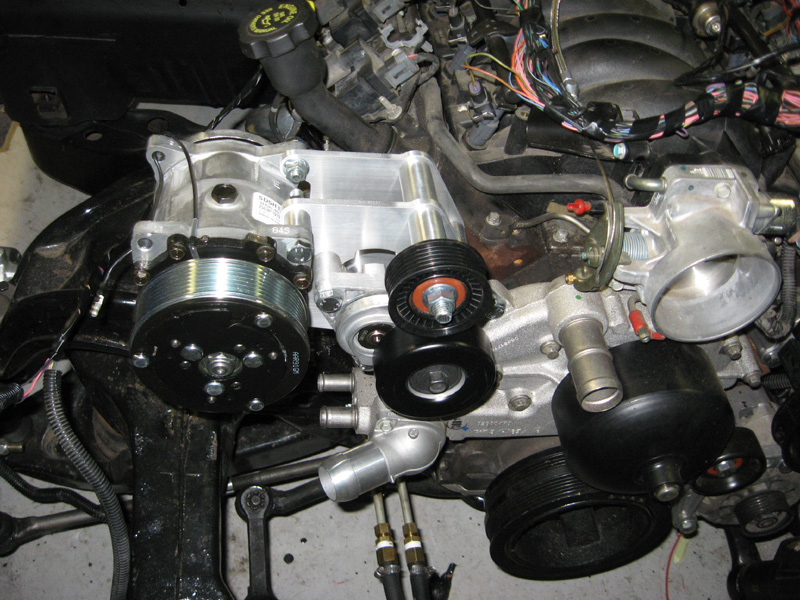
Started the Vintage air install...

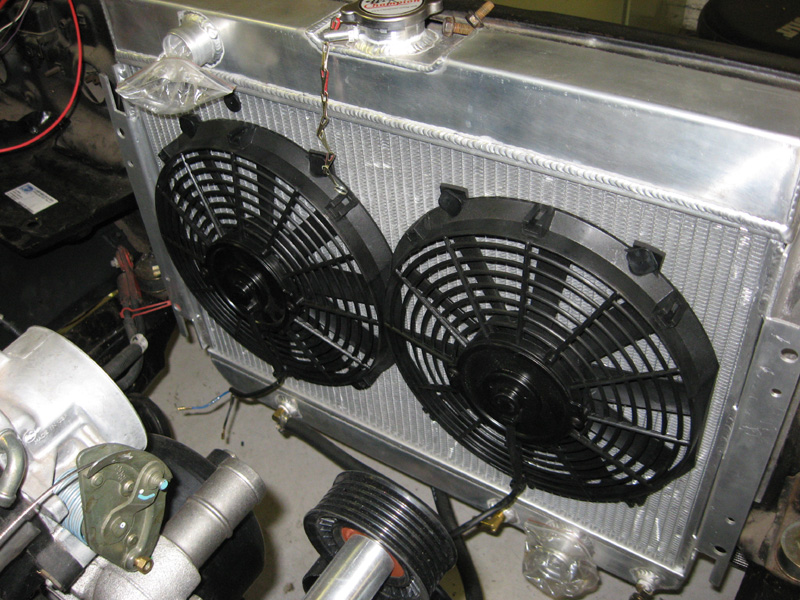
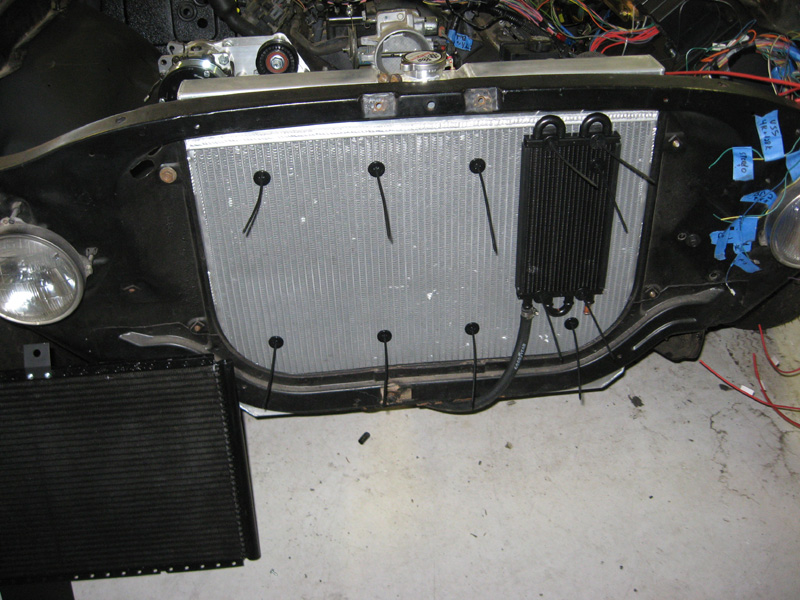
Radiator/fan/trans cooler/condensor....
Rob
So my lack of proper research cost me some money. Turns out Vintage Air sells a low pressure/high pressure trinary switch that screws right into the drier [with the proper adapter]. It will also control the fans if you want it to.
It is a two wire switch, but when pressure is "good", the circuit is closed and I think the stock LQ4 switch circuit is open when pressure is "good". So I am going to use a relay to make the VA switch work like the stock LQ4 switch. See diagram below....
It will be a while before I get to test it. More progress pics....
Dash/guages...
Started the Vintage air install...
Radiator/fan/trans cooler/condensor....
Rob
09-07-2009, 11:21 PM
#170
On The Tree
Thread Starter
iTrader: (1)
Join Date: Jan 2009
Location: Modesto, CA
Posts: 197
Likes: 0
Received 0 Likes
on
0 Posts
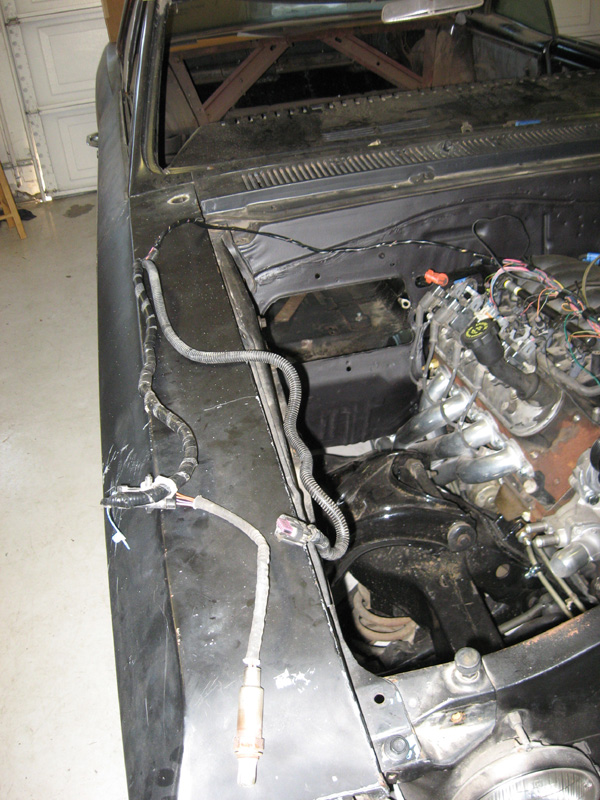
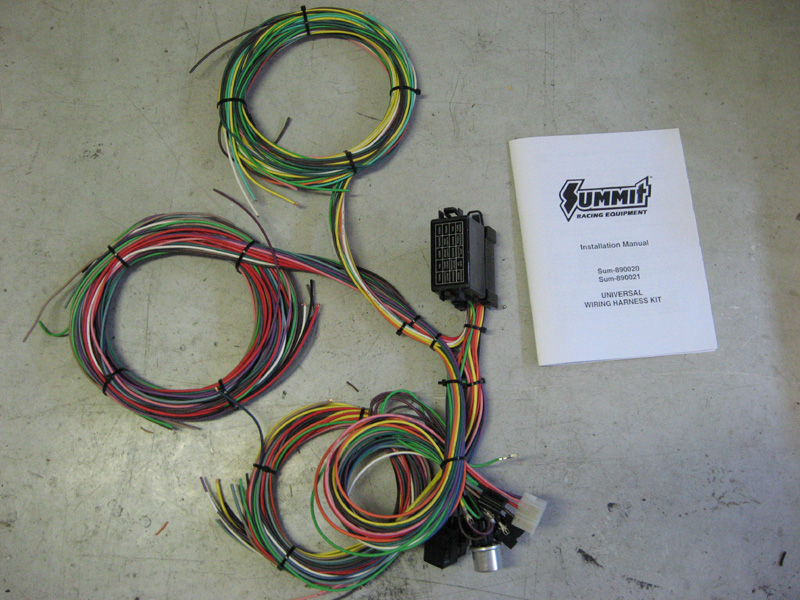
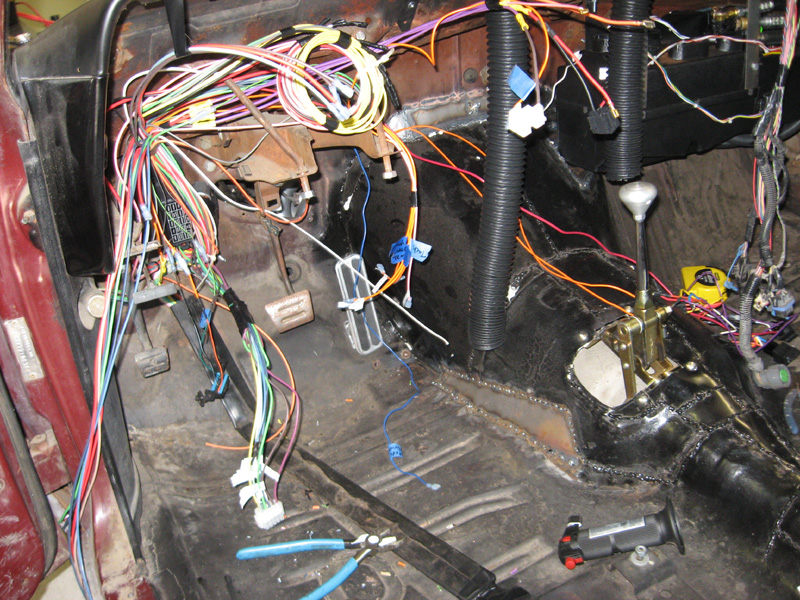
Decided to start installing the summit universal harness in the chevelle. This car didn't have 1 wire in it when I bought it...

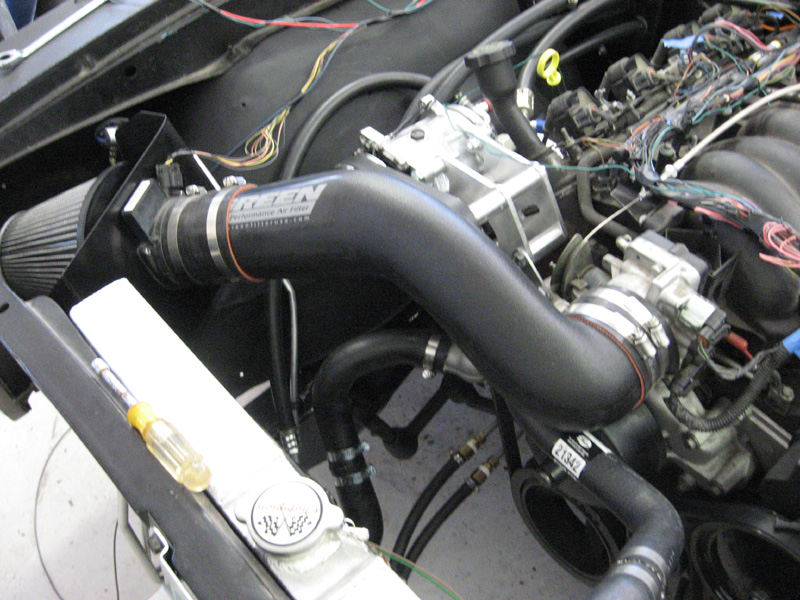
Radiator hoses/intake/MAF...
Finished routing the body harness, but I have issues with it. When I turn the key, nothing is getting power including the PCM. So I hardwired PCM to start switch to see if I could get HP Tuners to see the PCM. Got that figured out and saved the stock LQ4 tune to my server. I then started playing with it [HP Tuners that is] and got motivated to try to start this thing up.....run to Kragen to get oil, trans fluid, coolant. Put gas in the tank and start to get nervous. I turned the key to start and it turned over and started for a second. Pretty excited but runs real rough and dies. figured out I didn't hook the vaccum hose from back of intake to brake booster. Plugged that up and it runs smooth. A lot of work to do yet, but happy to hear it fire!!!! Cheasy video to follow.....
Rob
09-07-2009, 11:42 PM
#171
On The Tree
Thread Starter
iTrader: (1)
Join Date: Jan 2009
Location: Modesto, CA
Posts: 197
Likes: 0
Received 0 Likes
on
0 Posts
Here is a cheesy startup video.... Some idiot forgot that he didn't have the power steering lines in so I can't start it up until I get that figured out. Hope I didn't screw up my PS pump!
Cheesy Video Here
Rob
Cheesy Video Here
Rob
10-27-2009, 01:45 PM
#172
Teching In
Join Date: Jul 2009
Location: Los Angeles
Posts: 10
Likes: 0
Received 0 Likes
on
0 Posts
I got a 67 chevelle suspensioned out and scrapping quarters it so low i put a lq4 in it and moved motor mounts back about 2 1/2 to 3 inches putting most of weight behind front wheels, problem truck oil pan is too big hangs too low 2 inches off ground wondering if f body oil pan would clear a body frame
.. Classic youngsta
.. Classic youngsta
10-27-2009, 02:28 PM
#173
TECH Enthusiast

Rob looks great, just 1 tip , I would notch the holes in the dash where it bolts up to the steering column .at some point you will have to install the column and will have to take dash in and out a few times, notching it will keep you from dropping the column completely and possibly damaging your headers if you have them, I was planning on installing the dash once - I'm up to about 6 times so far.JOHN
10-27-2009, 02:36 PM
#174
TECH Enthusiast
what bezels are you using for the ac?look at my link before you cut any holes, john, I can call you late-r pm me your #look at post # 177 there is a pic. I can take some more pics for you
Last edited by john 67; 10-27-2009 at 02:46 PM.
10-28-2009, 01:13 PM
#176
On The Tree
Thread Starter
iTrader: (1)
Join Date: Jan 2009
Location: Modesto, CA
Posts: 197
Likes: 0
Received 0 Likes
on
0 Posts
Rob looks great, just 1 tip , I would notch the holes in the dash where it bolts up to the steering column .at some point you will have to install the column and will have to take dash in and out a few times, notching it will keep you from dropping the column completely and possibly damaging your headers if you have them, I was planning on installing the dash once - I'm up to about 6 times so far.JOHN
Rob
10-28-2009, 01:17 PM
#177
On The Tree
Thread Starter
iTrader: (1)
Join Date: Jan 2009
Location: Modesto, CA
Posts: 197
Likes: 0
Received 0 Likes
on
0 Posts
I got a 67 chevelle suspensioned out and scrapping quarters it so low i put a lq4 in it and moved motor mounts back about 2 1/2 to 3 inches putting most of weight behind front wheels, problem truck oil pan is too big hangs too low 2 inches off ground wondering if f body oil pan would clear a body frame
.. Classic youngsta
.. Classic youngsta
Youngsta,
the f body pan and the CTS-v pan are the most commonly used stock pans in the A-Body converstion. Some are also using the Hummer pan, but that hangs low too. I used the CTS-v pan. The F-Body pan has been modified quite a bit in this swap too I believe.
Rob
10-28-2009, 01:36 PM
#178
On The Tree
Thread Starter
iTrader: (1)
Join Date: Jan 2009
Location: Modesto, CA
Posts: 197
Likes: 0
Received 0 Likes
on
0 Posts
I bought the Champion radiator and fans from a guy on ebay. His store was named classic radiators or something like that. His seller name was rrrjsc but I can't find him there anymore. Sorry.
Rob
11-27-2009, 10:01 PM
#179
Launching!

Join Date: Jan 2008
Posts: 232
Likes: 0
Received 0 Likes
on
0 Posts
robbie can you tell me how much you have in your guages. tring to deside if i wont decota digital or not. hoping to find a cheaper way out there about $750 i realy like the way yours turned out. thanks just pm me if you dont mind
11-28-2009, 03:41 PM
#180
On The Tree
Thread Starter
iTrader: (1)
Join Date: Jan 2009
Location: Modesto, CA
Posts: 197
Likes: 0
Received 0 Likes
on
0 Posts
I have $510 in guages from Summit.
I have a few bugs to work out still. Love driving it around everywhere. After working out all bugs and closing up the harness, it is onto making her look goood! How she sits today.......Sorry for the night time shots.....
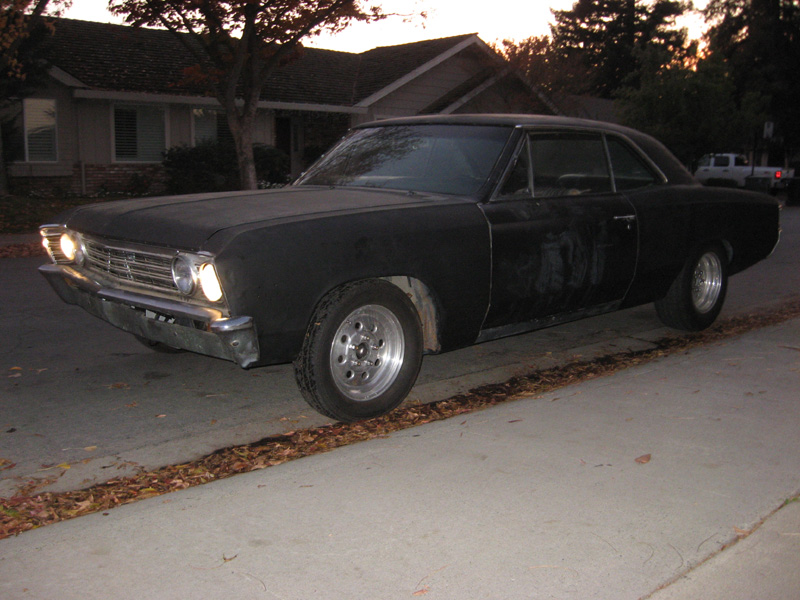

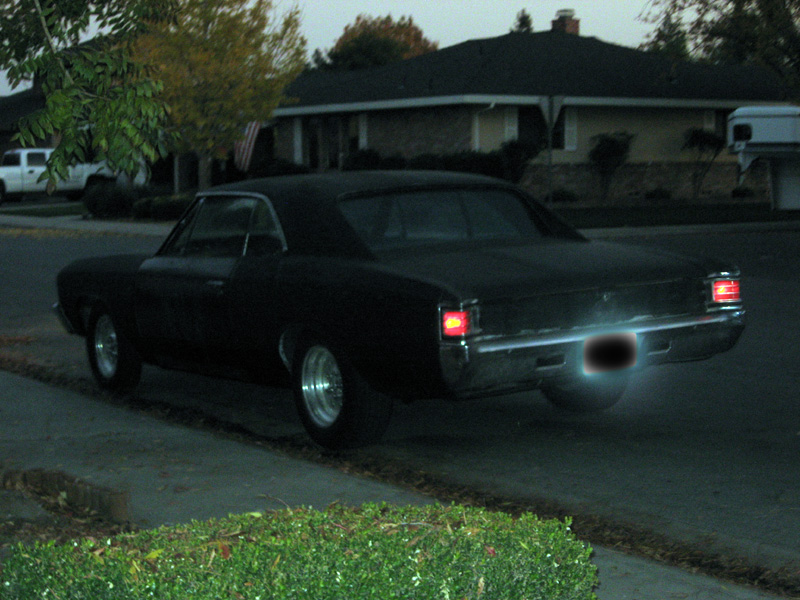
Late
Last edited by robbied31; 11-28-2009 at 05:48 PM.