
LY6/4L80e from rough van into rough 69 camaro


 03-28-2011, 10:24 PM
#242
I'm sure I'm not the first to try this, but the bolt to the right of the steering column can be used to mount the left mount hole in the pedal. This is going to make mounting the gas pedal pretty straight forward. The pedal is just below the brake pedal and leaves about 1 inch for carpet and pad underneath when floored.
03-29-2011, 04:12 AM
#243

You made a wise choice by using the stock radiator as I am having a heck of a time mounting the Speedway radiator. It seemed like a good idea at first but now maybe not so. I had bought the mounting kit for this radiator but I didnt trust the thin metal to hold the radiator to the core support. I have got it figured out but it has taken some time. I think I will end up using the radiator like BMF5150 in the end. I see you are moving right along. Its coming together nicely. I am going to mount the PCM and such in the engine bay also. I really am not into cutting and splicing 4000 wires at the moment. Keep up the good work. Did you get the computer back yet?
03-30-2011, 04:46 PM
#244
Thanks for the tip on the screw thread. There are three mounting holes and I plan to use all three.
I got the computer back and now my injectors aren't pulsing except once, while cranking. I went out and borrowed a noid light to figure this out. I've got 12 volts on one injector wire. I guess the computer grounds the other wire to pulse the injector?
I checked the grounds and fuses, I've got good spark and still throwing the same codes.
On a positive note, I measured the driveshaft close enough, that it fits. I decided to use the truck aluminum shaft, which I hope will hold up to what I'm going to throw at it. I should probably install a loop.
03-31-2011, 11:22 AM
#245

Is that an LS3 pedal from a C6 Corvette or 5th gen Camaro? What does the pedal stop against at full throttle?
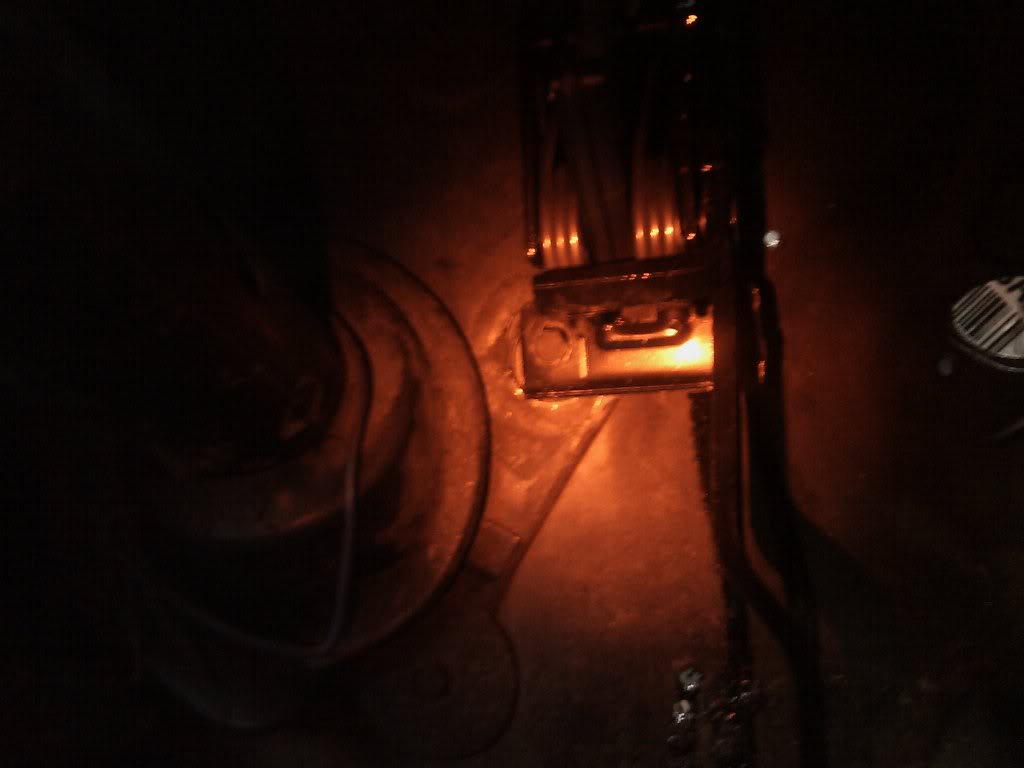
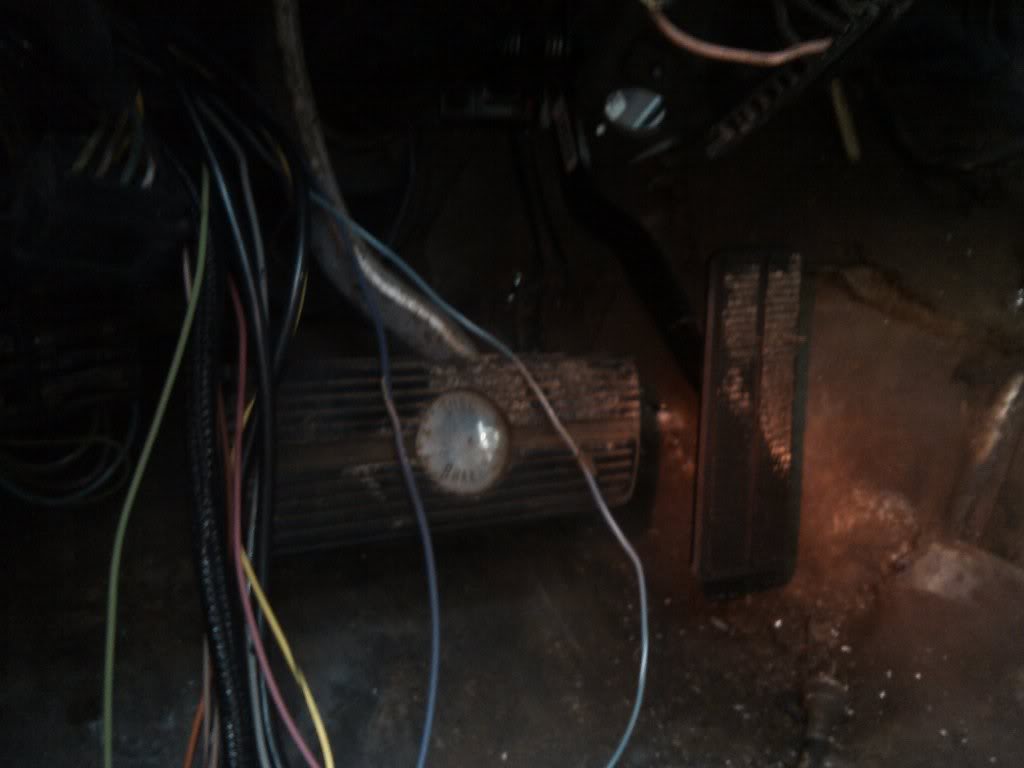
Here is where I plan to put my ECU, mounted on rubber standoffs over the "X" under the fender (see yellow box in this picture). I'll likely put my fuse/relay panel up at the radiator support in the area you're currently showing for the ECU. The engine harness can then extend from the back of the intake and run over the brake booster to the ECU.
Here is where I plan to put my ECU, mounted on rubber standoffs over the "X" under the fender (see yellow box in this picture). I'll likely put my fuse/relay panel up at the radiator support in the area you're currently showing for the ECU. The engine harness can then extend from the back of the intake and run over the brake booster to the ECU.
03-31-2011, 07:45 PM
#246
Is that an LS3 pedal from a C6 Corvette or 5th gen Camaro? What does the pedal stop against at full throttle?
Here is where I plan to put my ECU, mounted on rubber standoffs over the "X" under the fender (see yellow box in this picture). I'll likely put my fuse/relay panel up at the radiator support in the area you're currently showing for the ECU. The engine harness can then extend from the back of the intake and run over the brake booster to the ECU.
Here is where I plan to put my ECU, mounted on rubber standoffs over the "X" under the fender (see yellow box in this picture). I'll likely put my fuse/relay panel up at the radiator support in the area you're currently showing for the ECU. The engine harness can then extend from the back of the intake and run over the brake booster to the ECU.
It's a C6 pedal. It's all metal and the stop is metal on metal, I think.
Last edited by futureuser; 03-31-2011 at 08:52 PM.
03-31-2011, 08:19 PM
#247
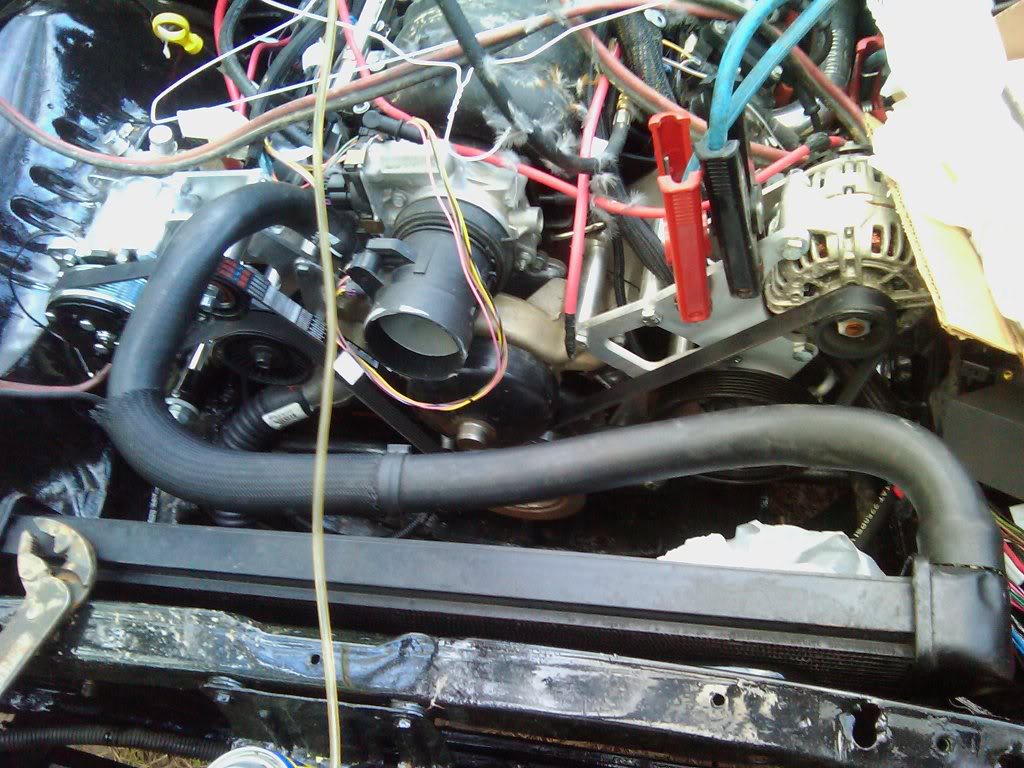
My van upper and lower radiator hoses worked with my factory widened radiator. I had to cut two inches off the top and ended up using a universal on the bottom, because of a little kink and lack of a spring.
The first belt I tried worked too at 97 inches. The only reason this happened is because I brought home 3 and will have to return 2.
Now why isn't it running? Checked my voltage, grounds, got a couple of more injector pulses for short fire ups. The vats is off, the starter ground wire thing doesn't exist in my harness. The fuses are good, the relays are new and the battery tested good.
I am going to be finishing out the transmission lines with my fuel injection hose. I know it sounds like a cheesy shortcut, but after talking to the manufacterer, the hose exceeds the requirements for transmission cooler lines. No limits on how far it can be run and it is superior to alot of stainless braided line where it counts on the inside with it's resistance to breaking down to additives and alchohol. Tranny fluid will be easier on it and I've got lot's left, so what better way to use it? I had hard lines made, with the help of hydraulic supply co, that come out of the transmission tunnel, make a turn towards the frame avoiding header proximity. I used 90 degree fittings coming out of the tranny for clearance issues. The 4L80 doesn't leave much room for lines in a car.
Another benefit to doing a project like this in a garage is that you won't wake up to find that a neighborhood cat ate its dinner on your intake under the tarp. Notice the feathers in the picture?
Last edited by futureuser; 03-31-2011 at 08:37 PM.
04-03-2011, 07:27 PM
#250
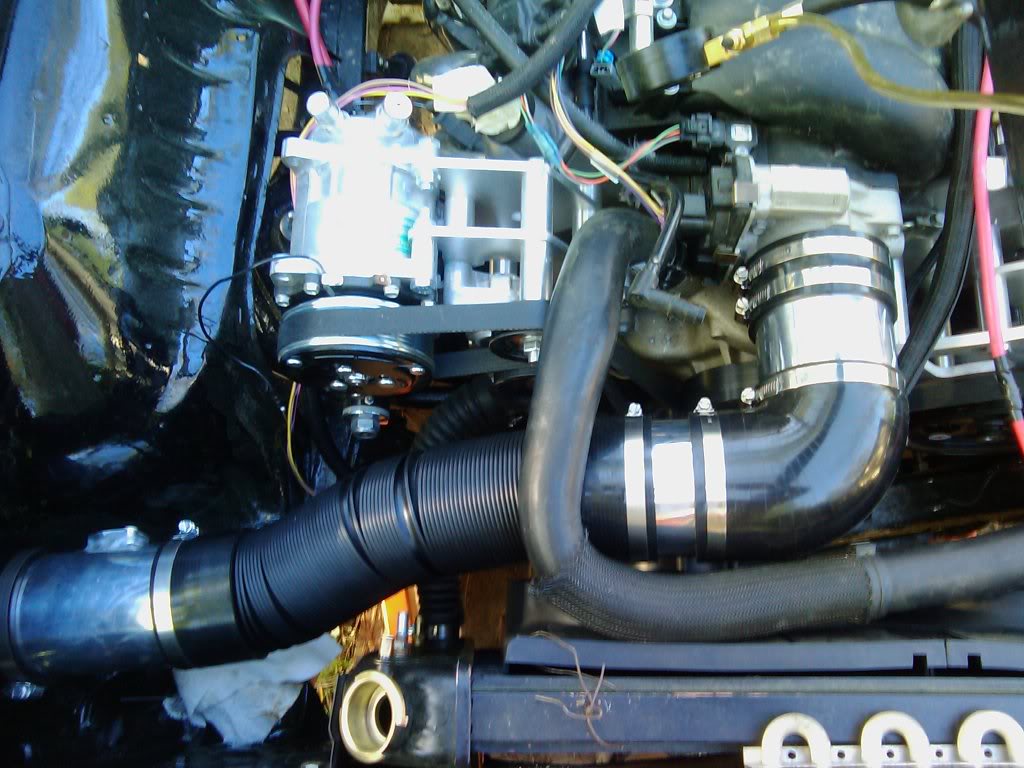
This is 2 four inch length tubes, 1 coupling, 1 ninety degree bend, 1 flex tube, 1 six inch tube with the maf bracket welded in and a k&n filter.
I am going to return the flex tube and a 4 inch length and install a length of plastic tube. The filter will go straight into the fender and I'm going to make a little plate that will mount to the fender to seperate it off so that it draws in mostly cold air from the end of the grill. The total cost of this will be about $140 including paying to get the bracket welded.
The downside is the battery is in the trunk.
I stuck my fans in with some wire to think about mounting brackets. I know what I want to do, but don't know how to do it. Some sheet metal bent in a couple of places seems like would do.
Last edited by futureuser; 04-03-2011 at 08:55 PM.
04-04-2011, 07:59 AM
#252
It's not running. I'm going to have to get some professional help.

 04-06-2011, 07:46 PM
#254
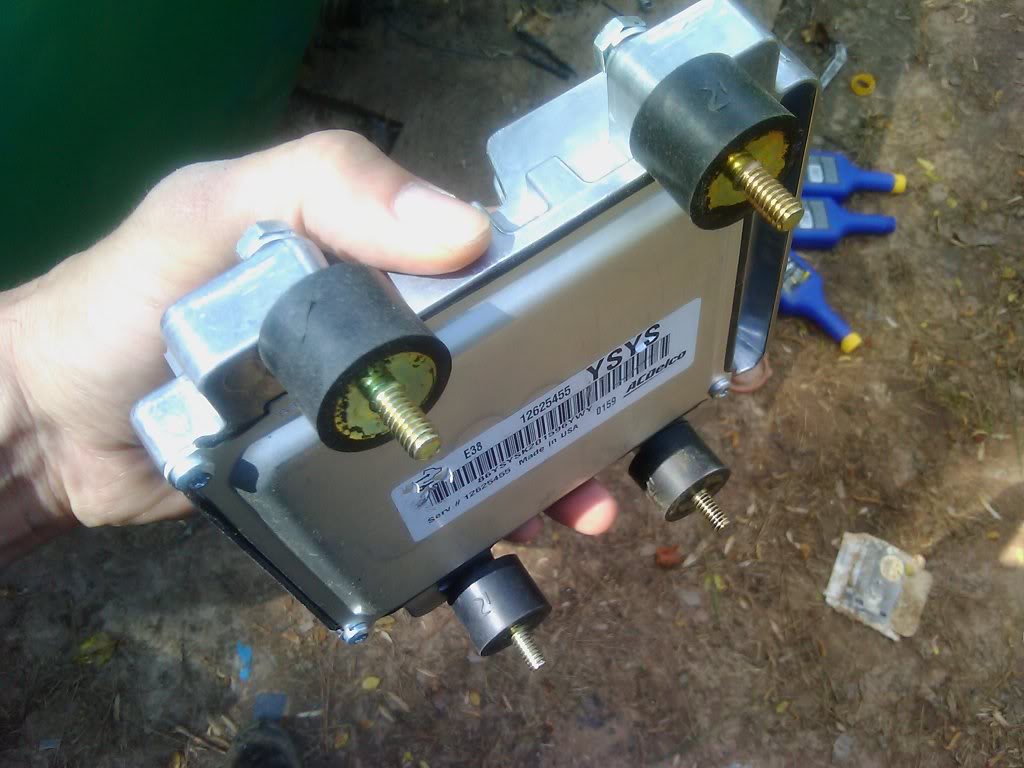
These are what I used to mount the pcm and tcm to the inner fender. They are grainger 2NPE4 and have a little flexibility so the surface doesn't have to be perfectly flat. The thread is 1/4 inch and cost $2.89 each retail.
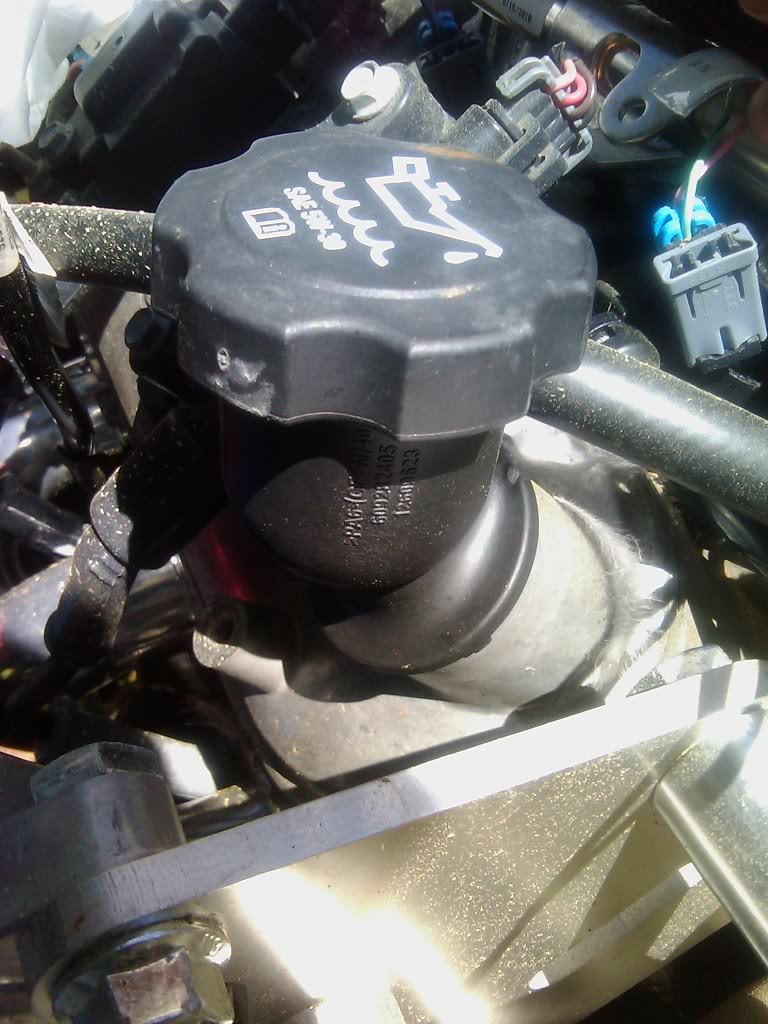
This is the filler tube I needed to work with my 2009 LY6 valve cover. If you have a late valve cover this is what's needed as the cap won't screw into the cover and it's from a 2010 camaro ss. It is gm part #: 12609623 and cost is $6.98 wholesale. Oil caps are all the same and have different part numbers and script. Don't use the LS3 cap unless you want to spend $25 extra for the word mobil on it. I used the van cap in the picture.
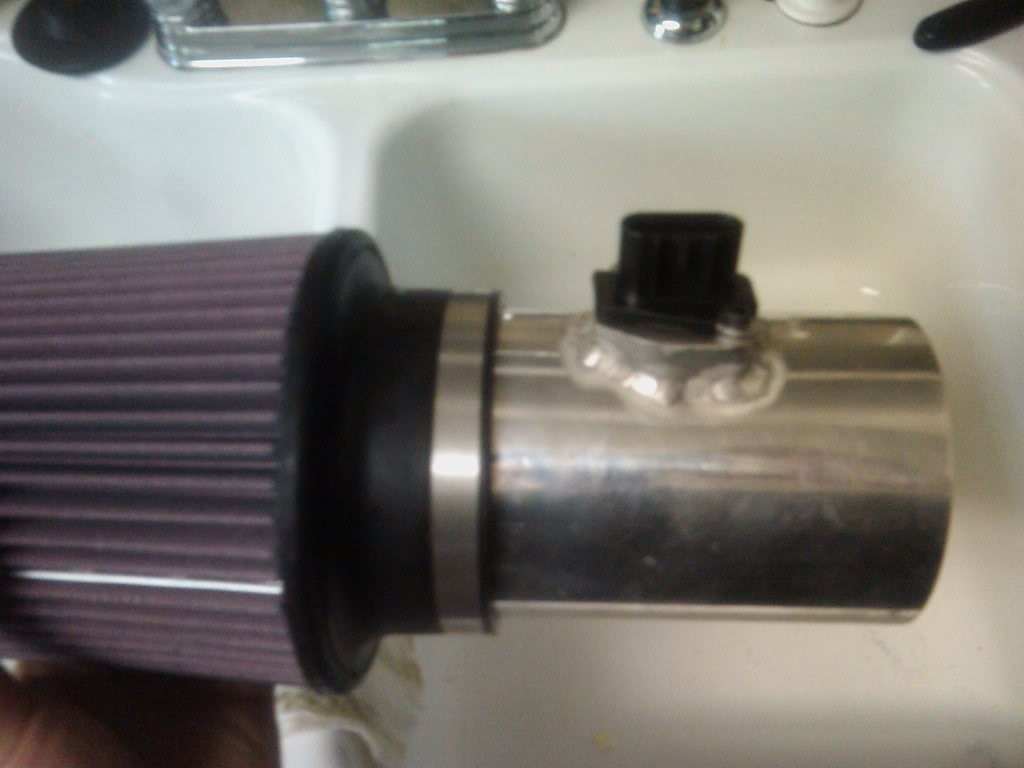
This is the MAF assembly that will go into the fender. This is 19166574 welded into a 4 inch diameter 6 inch long spectra tube with 15865791
installed. The total cost to make this was $120 including paying someone $30 to drill and weld the tube. I'm not sure if this will be worth the power gain gong from about 75mm to about 95 inner diameter. The hardware to install the MAF (not included) is two M4-.70 x 12 which I got at Lowe's Hillman H# 880822 (2 pack).
I hope this helps someone save a few hours.
This is the filler tube I needed to work with my 2009 LY6 valve cover. If you have a late valve cover this is what's needed as the cap won't screw into the cover and it's from a 2010 camaro ss. It is gm part #: 12609623 and cost is $6.98 wholesale. Oil caps are all the same and have different part numbers and script. Don't use the LS3 cap unless you want to spend $25 extra for the word mobil on it. I used the van cap in the picture.
This is the MAF assembly that will go into the fender. This is 19166574 welded into a 4 inch diameter 6 inch long spectra tube with 15865791
installed. The total cost to make this was $120 including paying someone $30 to drill and weld the tube. I'm not sure if this will be worth the power gain gong from about 75mm to about 95 inner diameter. The hardware to install the MAF (not included) is two M4-.70 x 12 which I got at Lowe's Hillman H# 880822 (2 pack).
I hope this helps someone save a few hours.
Last edited by futureuser; 04-06-2011 at 07:54 PM.
04-06-2011, 10:48 PM
#256
I'm pretty sure the card type Maf sensor is an oem LS3 part. The bracket is sold by gm but probably is not oem. Part numbers are in the post above. I'd love to know how much of a bottle neck there really is. Also, this set up requires tuning for it to work.
04-07-2011, 05:42 AM
#258
T
This is the filler tube I needed to work with my 2009 LY6 valve cover. If you have a late valve cover this is what's needed as the cap won't screw into the cover and it's from a 2010 camaro ss. It is gm part #: 12609623 and cost is $6.98 wholesale. Oil caps are all the same and have different part numbers and script. Don't use the LS3 cap unless you want to spend $25 extra for the word mobil on it. I used the van cap in the picture.
I hope this helps someone save a few hours.

EDIT UPDATE: Called GMPARTSGIANT and was able to swap to your part #. thx for posting--saved me $28!
Last edited by Goldhawg; 04-07-2011 at 08:45 PM. Reason: UPDATE
04-09-2011, 11:57 PM
#259
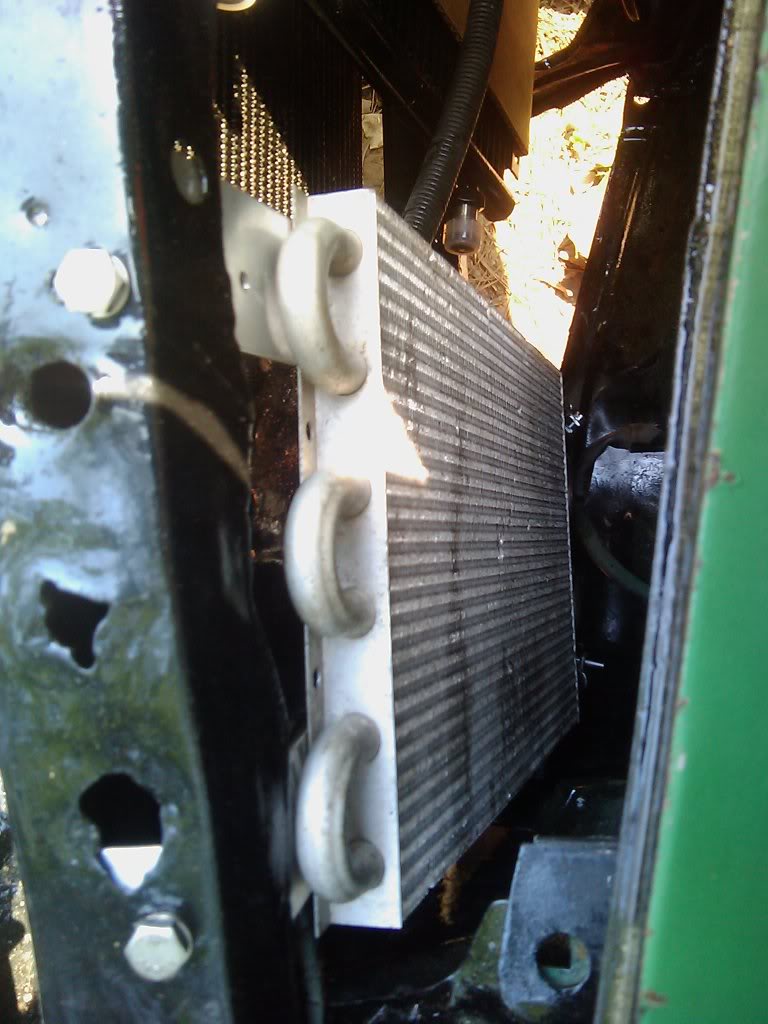
Since I am running vintage a/c, but want to drive the car before it is installed, I moved the trans cooler out of the way. This is how good I am at fabbing brackets. The core support is a little chewed up, but it's 42 years old. This is the left side of the core support.
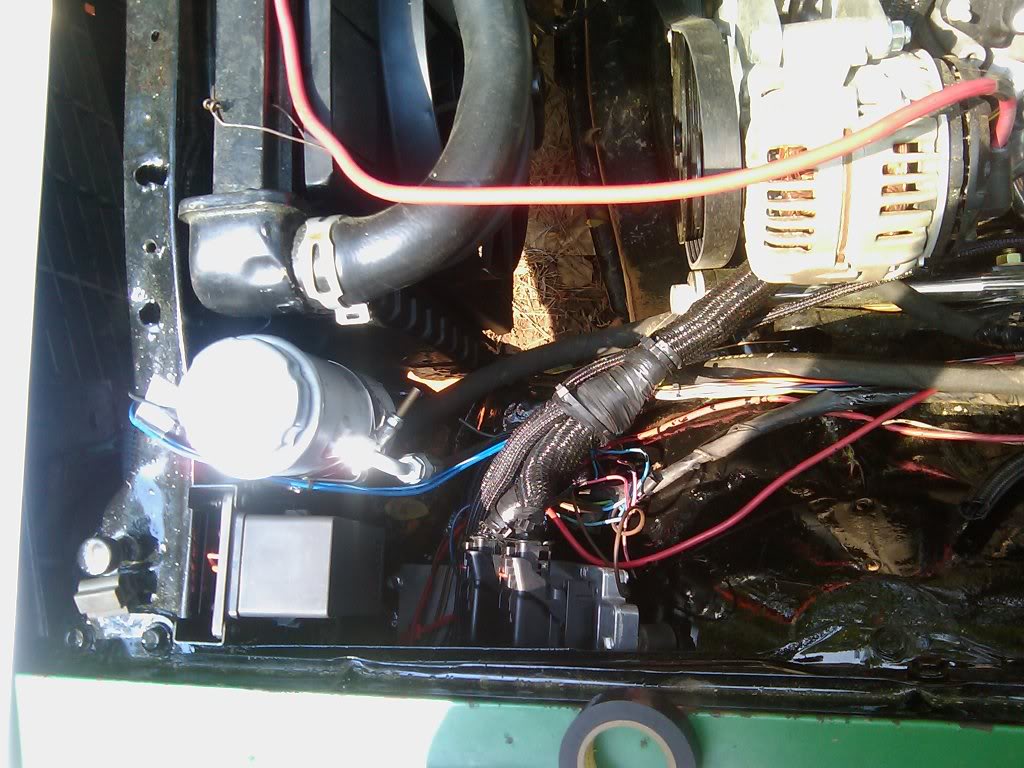
and here are some pics of the pcm and fusebox installed. The tcm is underneath the pcm. Obviously, I still have some wiring clean up. Since I liked my autokraft pan so much, I ordered a baffled champ power steering fluid resevoir. If you run the quik bracket, a type 2 pump and remote resevoir is required for power steering.

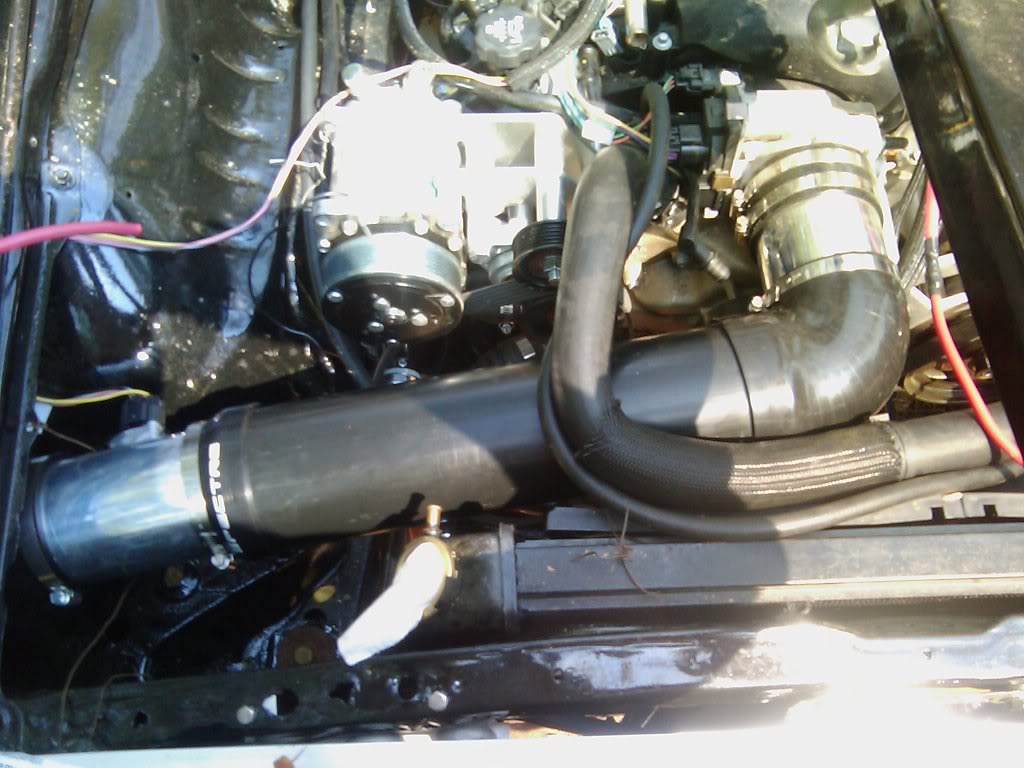
This is how I plan to run the intake. I returned the spectra flex hose and replaced it with 4 inch sewer pipe from lowes. It is 4 inch diameter on the inside, so it doesn't quite match up with the other 4 inch tube. See how the couplings are stretched? The clamps won't fit. I don't know if this will work well as the airflow will slow down after going through the maf then speed up while taking a 90 degree turn into the intake. The filter is deep into the fender. I guess I'll find out.
The booger isn't running yet. No progress, but I am working on it.
and here are some pics of the pcm and fusebox installed. The tcm is underneath the pcm. Obviously, I still have some wiring clean up. Since I liked my autokraft pan so much, I ordered a baffled champ power steering fluid resevoir. If you run the quik bracket, a type 2 pump and remote resevoir is required for power steering.
This is how I plan to run the intake. I returned the spectra flex hose and replaced it with 4 inch sewer pipe from lowes. It is 4 inch diameter on the inside, so it doesn't quite match up with the other 4 inch tube. See how the couplings are stretched? The clamps won't fit. I don't know if this will work well as the airflow will slow down after going through the maf then speed up while taking a 90 degree turn into the intake. The filter is deep into the fender. I guess I'll find out.
The booger isn't running yet. No progress, but I am working on it.
Last edited by futureuser; 04-10-2011 at 12:05 AM.
04-10-2011, 12:35 AM
#260
Here is where I plan to put my ECU, mounted on rubber standoffs over the "X" under the fender (see yellow box in this picture). I'll likely put my fuse/relay panel up at the radiator support in the area you're currently showing for the ECU. The engine harness can then extend from the back of the intake and run over the brake booster to the ECU.