

69 Camaro LS2/4L70E install


 07-22-2012 | 02:56 PM
#202

Looks like you made a good choice with the intake. Did you come up with a way of supporting the end of it yet? Any plans to make a heat shield to block it off from the engine? I am going to get around to doing that one of these days...
That's a nice vent, I've seen it on the PT site and wanted to pick one up as well. Let us know how it works.
That's a nice vent, I've seen it on the PT site and wanted to pick one up as well. Let us know how it works.
The area where the filter is located is pretty congested with the vintage air heater control, heater hoses and trans lines. Once everything is sorted out the plan is to build a mount the tube sits on, versus having a suspended support...we will see.
Like you someday I plan on building a heat shield, but that will be a future project.
07-23-2012 | 05:17 AM
#204
Well it cooled of enough here so I worked on the car most of the day. I am just about finished building/wiring my fuse panel. Currently there is a loose wire by the ecm connectors that is connected to the L terminal of the alternator plug. I also have a blue wire going to the F terminal. This is for a 2005 Corvette alternator.
I am pretty sure this is the exciter wire, which I believe requires a 12 volt "key on" source. I emailed SSP Wiring who built the harness and asked them about this last unlabeled wire......in fact they didn't label any of the wires, about 20 altogether, like they said they would.
I also had to order some additional terminal ends and I will need to mod the fuse panel bracket to provide some additional clearance for installing the fuse panel.
Glad I could help.
07-30-2012 | 01:53 AM
#205

Teching In
Joined: Sep 2006
Posts: 3
Likes: 0
From: San Antonio
OK, I have been stocking this thread for a while. What a great build and awesome documentation! Awesome Job!
I am anxious to see what you find on mounting the A/C compressor down low using the vette accessories/stock sub-frame.
I have been scratching my head, with my build, with this problem... (reason I'm posting this at 2am...) I too am using the same accessories and my options are limited. I am running the A&A corvette supercharger and it sits where the idler pully is...
Thank you for all your updates!
07-31-2012 | 05:10 PM
#206
Thanks. I am outo of town on vacation in Vail, CO, but should be back in town early next week. I have done some quick mockups and I don't know if there will be enough room to run the ac off the rear pulley. The front look possible, but we will see. The other issue is clearance for the compressor lines.
08-11-2012 | 10:45 PM
#207
Well I got to spend some father and son time in the garage today! Teaching my son how to crimp and solder. We just about finished wiring up the fuse panel. Nothing pic worthy, but it was blast watching my son and just a great day overall.
08-17-2012 | 11:49 PM
#208
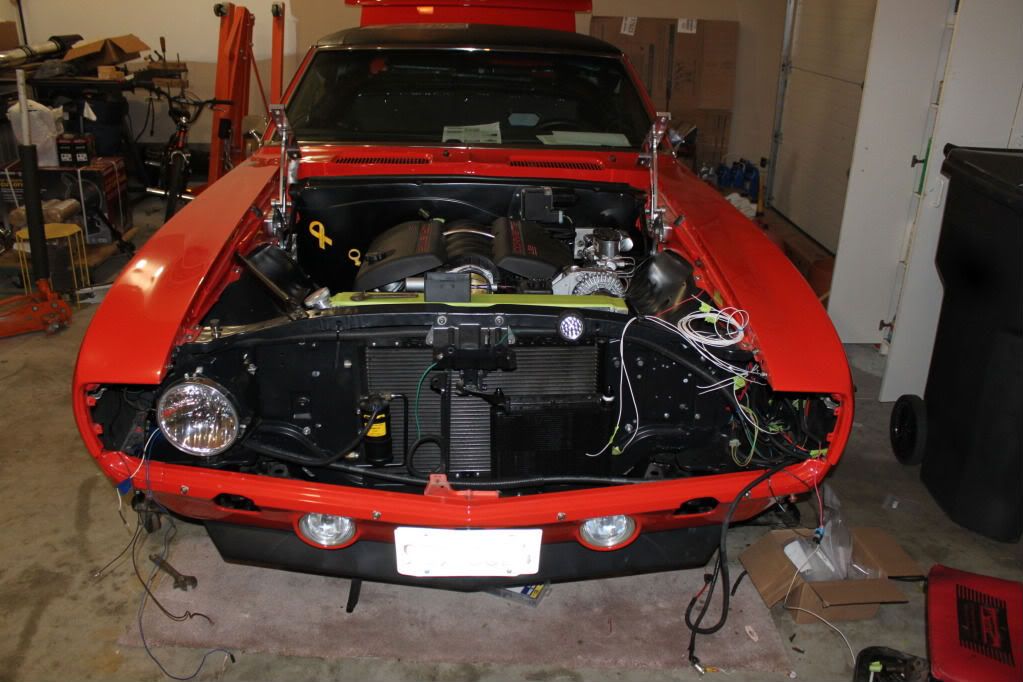
Well work has been busy, the kids started school this week and the wife is gone on a two week business trip, needless to say not much time to work on the car. However I did manage to get a few hours in tonight and just about have the engine harness and fuseblock wiring finished. I should also be able to put the grill, headlights and header panel in soon! The list is getting shorter!
08-18-2012 | 06:47 AM
#209

TECH Fanatic
Joined: Nov 2010
Posts: 1,679
Likes: 0
08-18-2012 | 09:53 PM
#210
I got to spend more time wiring today and writing out a wiring diagram for future reference. Lots of little items on the list, but it is getting shorter. Hopefully I will get a couple more hours in tomorrow.
Last edited by Rocketrod; 08-18-2012 at 10:01 PM.
08-20-2012 | 08:00 AM
#211
I have been researching painting my accesories and came across your single view post on how you painted yours. Terrific job, that is the exact look I want to capture for my swap. Not screaming to grab your attention, but at the same time you can't help but notice how smooth, clean and professional it is.
-I did have a couple question though. Did you sand before you painted to smooth out casting flaws?
-Did you just use spray can SEM Etching Primer?
-It looks like you covered the alternator's windings and electrical components before sanding and painting. How did you do that?
Thanks for the details and advice!
08-21-2012 | 06:25 AM
#212
Yes. Just a couple very light coats
At first I was going to disassemble it, but then came up with the idea of cutting paper the width of the exposed windings and sliding them in between the case and windings. It worked well and was a lot easier than taking the alternator apart.
08-22-2012 | 06:00 AM
#214
08-26-2012 | 09:06 PM
#215
Got to spend some quality time with my son this weekend while working on the Camaro. We picked up 20ft Fragola -6 black nylon race hose and a bunch of an fittings. We created and installed the fuel and transmission cooler lines. He was having fun using the cutoff wheel and installing the fittings.
After that we installed the heater control valve and heater hoses. I used AN fitting on the water pump and Gate Powergrip clamps to secure the heater hoses. The Powergrip clamps really make for a clean install (I'll post pics later).
I also spent some time finishing up the fuseblock installation. I still need to wrap everything in wire loom and secure the harness. After that install the fuel gauge, grounds, fuel pump & remote starter relays and the wiring is done.
I am getting close to firing this thing up! Then it will be time to start on the interior, but that's more of a winter project.
09-03-2012 | 07:59 PM
#218
I got too spend a significant amount of time working on the car this weekend. I got a ton of the wiring done, made a some grounding cables, installed the driveshaft & fuel line. I also mocked up the exhaust. Another good weekend or two and I should be firing the motor.
Most of the remaining work is electrical and I am looking for a fuel pressure gauge I can screw on the end of the fuel rail.
Most of the remaining work is electrical and I am looking for a fuel pressure gauge I can screw on the end of the fuel rail.
09-04-2012 | 06:14 PM
#219
Teching In
Joined: Sep 2010
Posts: 44
Likes: 0
Hey Rob, Stay away from no name fuel pressure gauges, I bought on from ebay and it looked nice but was pure junk. I went with one from FAST that has a 90 brass fitting on the end so it can be read easier pointing upward.
Riggs
Riggs
09-04-2012 | 10:40 PM
#220