

69 Camaro LS2/4L70E install
 05-27-2012 | 05:19 AM
#162

I actually had a new harness built by SSP Wiring to my specifications. They got the length correct, but left out a few other things I requested in my order and their instructions/customer service leaves a lot too be desired. They won't get any repeat business from me or any recommendations. In hindsight I wish I had just done the harness myself.
05-27-2012 | 09:06 AM
#163
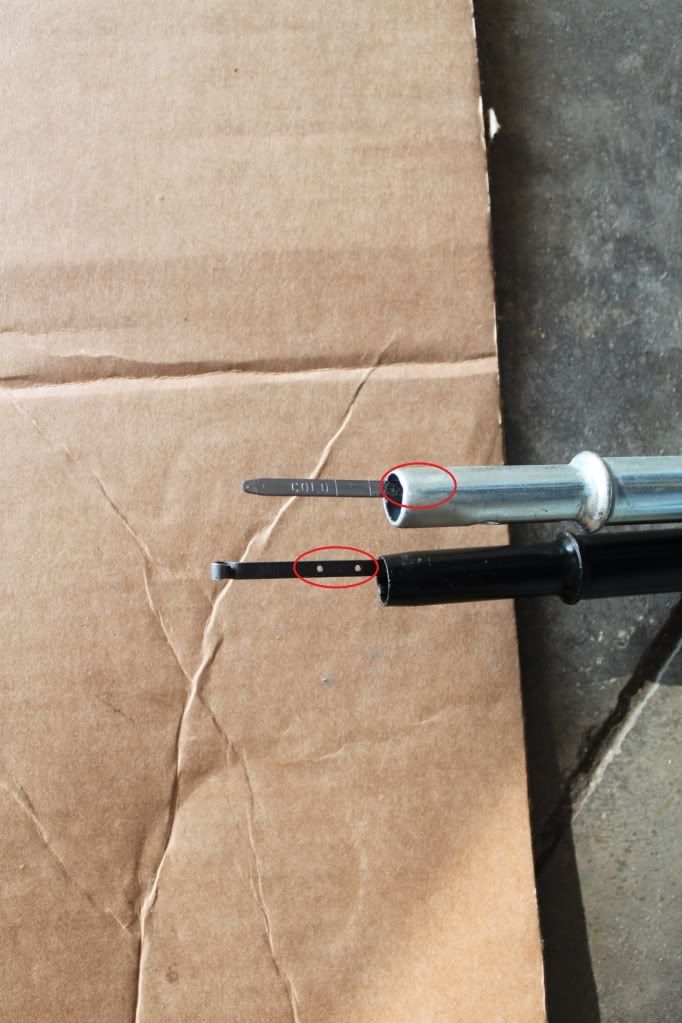
Getting ready to install the trans dipstick and tube. I am comparing the original TBSS tube/indicator to the new LS2 tube/indicator (GM # 92159815 out of 2006 Pontiac GTO) and noticed there is a big difference in how far the indicator protrudes into the pan. The black tube is out of the TBSS and the other is the new tube. The low/full indicator markings protrude a lot deeper into the pan than the new one (see pic below). Anyone have any thoughts on this?
I think I am just going to use the new indicator and cut down the TBSS tube until the low/full marks stick match the TBSS.
Not the best pic, the black tube is the TBSS, the other one is the new GM tube
I think I am just going to use the new indicator and cut down the TBSS tube until the low/full marks stick match the TBSS.
Not the best pic, the black tube is the TBSS, the other one is the new GM tube
05-27-2012 | 09:46 AM
#164
Teching In
Joined: Sep 2010
Posts: 44
Likes: 0
I had the same problem with My 4L70E dipstick. I replace it with a Lokar unit that is listed
for use for the 4L70E . I found it to be different as well, so I ended up having to alter it for
the correct level reads on the stick.
Here's what I had,
Before

After

I'm starting to wonder if the 4L70 is just an odd setup compared to the 4l60 and 65 even
though it's said they are the same cases.
Cutting down the top of the tube should remedy the problem, making the dipstick
correct, to read proper fluid levels.
Riggs
for use for the 4L70E . I found it to be different as well, so I ended up having to alter it for
the correct level reads on the stick.
Here's what I had,
Before
After
I'm starting to wonder if the 4L70 is just an odd setup compared to the 4l60 and 65 even
though it's said they are the same cases.
Cutting down the top of the tube should remedy the problem, making the dipstick
correct, to read proper fluid levels.
Riggs
05-27-2012 | 11:15 AM
#165
I had the same problem with My 4L70E dipstick. I replace it with a Lokar unit that is listed
for use for the 4L70E...I'm starting to wonder if the 4L70 is just an odd setup compared to the 4l60 and 65 even though it's said they are the same cases.
Cutting down the top of the tube should remedy the problem, making the dipstick
correct, to read proper fluid levels.
Riggs
for use for the 4L70E...I'm starting to wonder if the 4L70 is just an odd setup compared to the 4l60 and 65 even though it's said they are the same cases.
Cutting down the top of the tube should remedy the problem, making the dipstick
correct, to read proper fluid levels.
Riggs
Do you, or anyone else, have any suggestions for header gaskets?
I am coming down the home stretch! I got some details to take care of and wiring up the fuse panel then I will be ready to fire this thing up!
05-27-2012 | 12:05 PM
#166
Teching In
Joined: Sep 2010
Posts: 44
Likes: 0
I used these,
https://texas-speed.com/p-219-gm-ls1...er-gasket.aspx
I have found that Texas Speed has better price on most, not all, LS parts over Summit.
Riggs
https://texas-speed.com/p-219-gm-ls1...er-gasket.aspx
I have found that Texas Speed has better price on most, not all, LS parts over Summit.
Riggs
05-27-2012 | 01:25 PM
#167
I used these,
https://texas-speed.com/p-219-gm-ls1...er-gasket.aspx
I have found that Texas Speed has better price on most, not all, LS parts over Summit.
Riggs
https://texas-speed.com/p-219-gm-ls1...er-gasket.aspx
I have found that Texas Speed has better price on most, not all, LS parts over Summit.
Riggs
I am going to start tackling some of the wiring later today and tomorrow....
05-27-2012 | 01:51 PM
#168
Those gm ones 12617944 are the best to use and what the corvette people generally use with longtubes. They are reusable. In fact, my 99 still has the original ones and the headers have been out at least 10 times. NO leaks.
05-27-2012 | 07:23 PM
#169
Thanks for confirming Riggs recommendation......I will add these to the parts order on this week.
05-28-2012 | 07:02 PM
#170
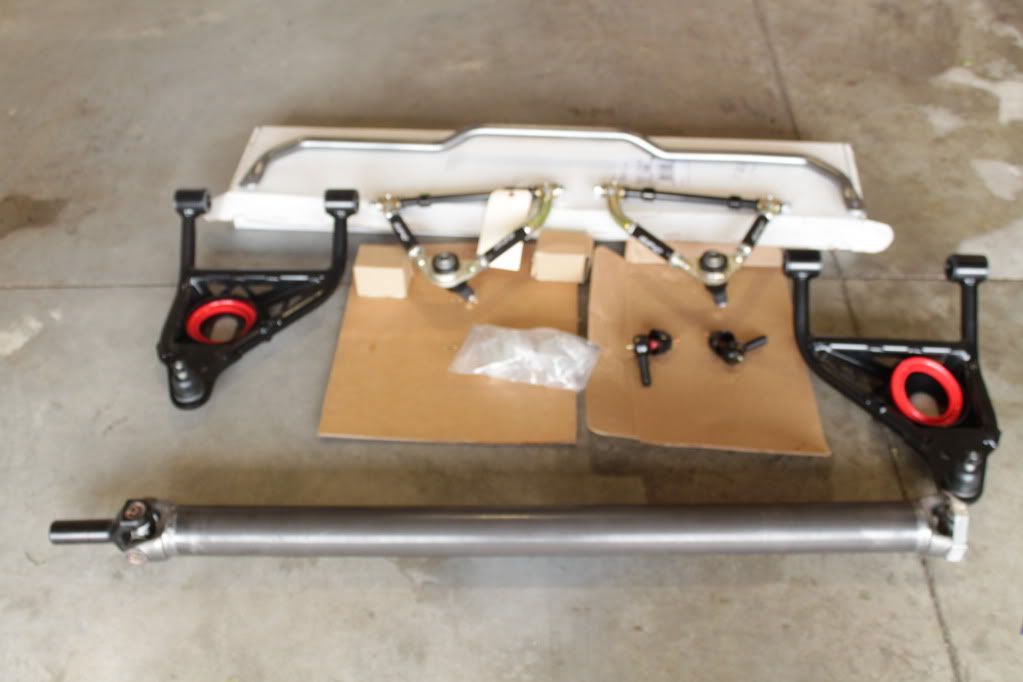
I finally got my SC&C Stage 2 UCAs, SPC LCAs, Helwig swaybar and SPC ride height shim pack installed. This setup allows you to adjust the ride height using a shim pack kit. I put in one shim so I will have to see how see sets once I get everything aligned and the car fully assembled.
 [/QUOTE]
Not many pics, but replacing the upper/lower control arms are pretty straightforward. I did have one heck of a time getting the driver side coil spring to seat properly in the frame, but other than that not much to it other than time. I still need to align the front end, which I will be doing myself using the SPC Performance Pro Series FasTrax Adjustable Caster/Camber Kit SPC Align, http://www.summitracing.com/parts/SPS-91000/
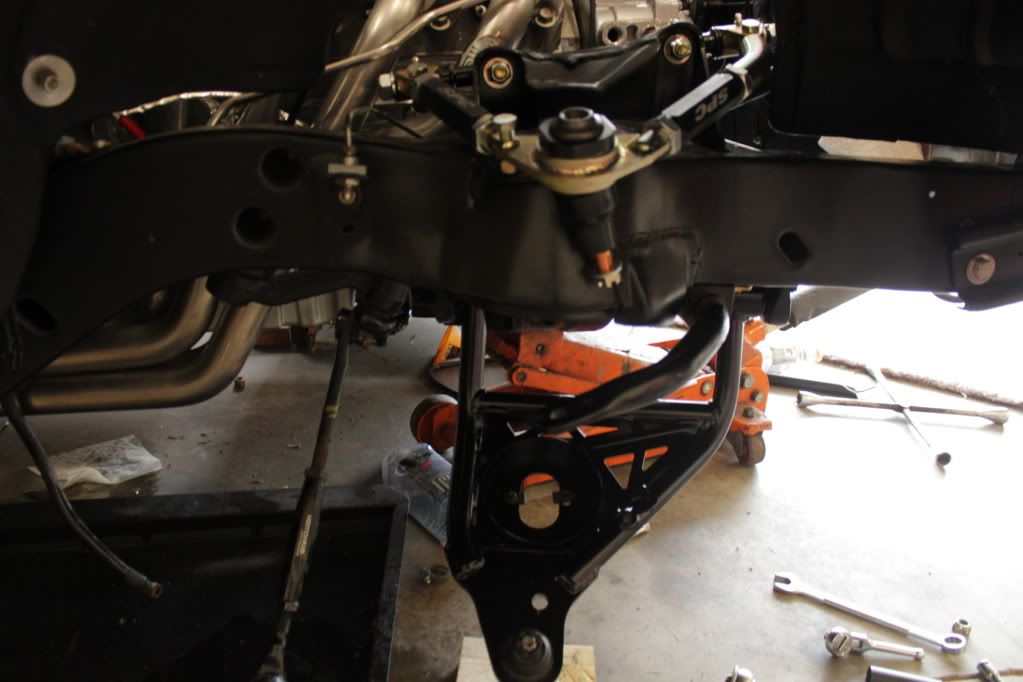
[/QUOTE]Not many pics, but replacing the upper/lower control arms are pretty straightforward. I did have one heck of a time getting the driver side coil spring to seat properly in the frame, but other than that not much to it other than time. I still need to align the front end, which I will be doing myself using the SPC Performance Pro Series FasTrax Adjustable Caster/Camber Kit SPC Align, http://www.summitracing.com/parts/SPS-91000/
05-30-2012 | 10:36 PM
#171
...
If you did by a new pan you could get one like this, http://www.summitracing.com/parts/DER-14204/?rtype=10
I like this because it aids in cooling the fluid...
If you did by a new pan you could get one like this, http://www.summitracing.com/parts/DER-14204/?rtype=10
I like this because it aids in cooling the fluid...
Derale's website says, "Fits most GM Turbo 700 R4 &4L60E 1982-1999".....mine is a 2008. I will give them a call tomorrow and see if I need to use a specific trans filter.
05-31-2012 | 05:06 AM
#172
Teching In
Joined: Sep 2010
Posts: 44
Likes: 0
Ouch, that sucks. I found when I was installing the drain plug and temp sensor in my stock pan
that it was limited on space and had to be careful of the placement of these Items.
Hope the Manufacture has a fix for this.
Riggs
that it was limited on space and had to be careful of the placement of these Items.
Hope the Manufacture has a fix for this.
Riggs
05-31-2012 | 06:15 AM
#173
06-03-2012 | 01:47 PM
#174
I have a feeling my only options will be buy a different pan, or install a drain plug in the stock pan. I did find another pan by PML, http://www.yourcovers.com/transpan_9427.php that will work for the 4l70e, however I am leaning toward installing the drain plug and sensor in my pan.
I spent the rest of the morning securing the radiator, installing the lower radiator hose, installing the an fittings in the water pump, bolting in the trans cross member and taking care of a zillion other things that need to be done. The list is getting shorter.
06-05-2012 | 05:00 PM
#175
No progress to report, but I made the short trek up to Champaign, IL for the third stop on this years HRPT and man was I glad I did! The day started off with rain, but by mid afternoon the the rain stopped and the place was just packed with cars. I took a ton of pics and thought I would share. There was just too many cars to pic a favorite. Here is a link to all 1,100 plus pics 2012 HRPT - Champaign, IL
Here is one of the many 1st gens at the show.
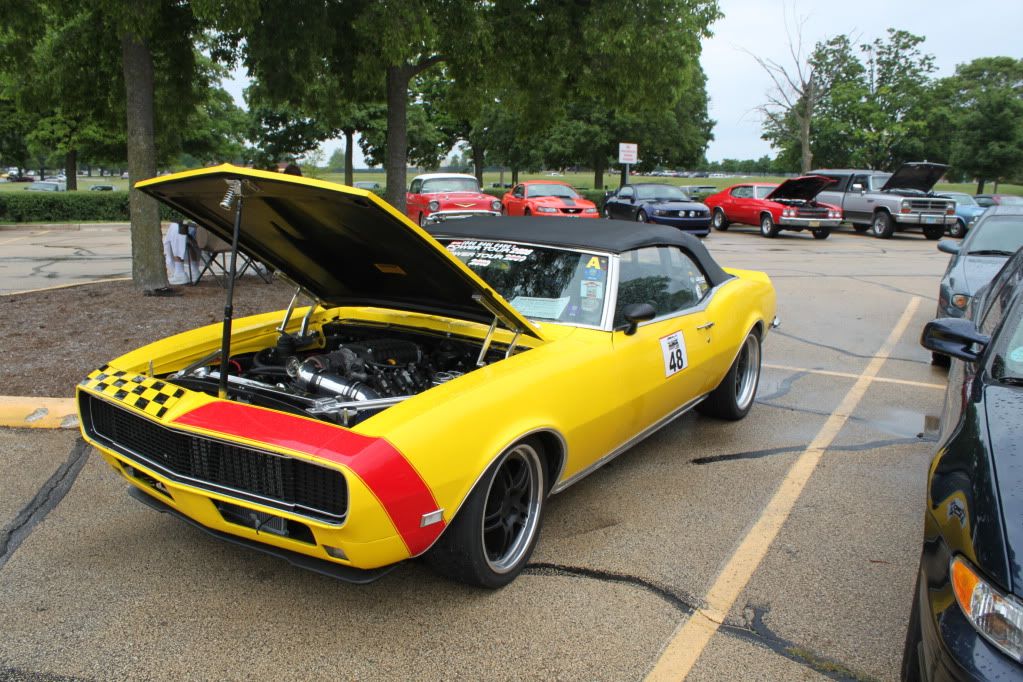
Here is one of the many 1st gens at the show.

Last edited by Rocketrod; 07-03-2013 at 02:29 PM.
06-07-2012 | 02:50 PM
#176
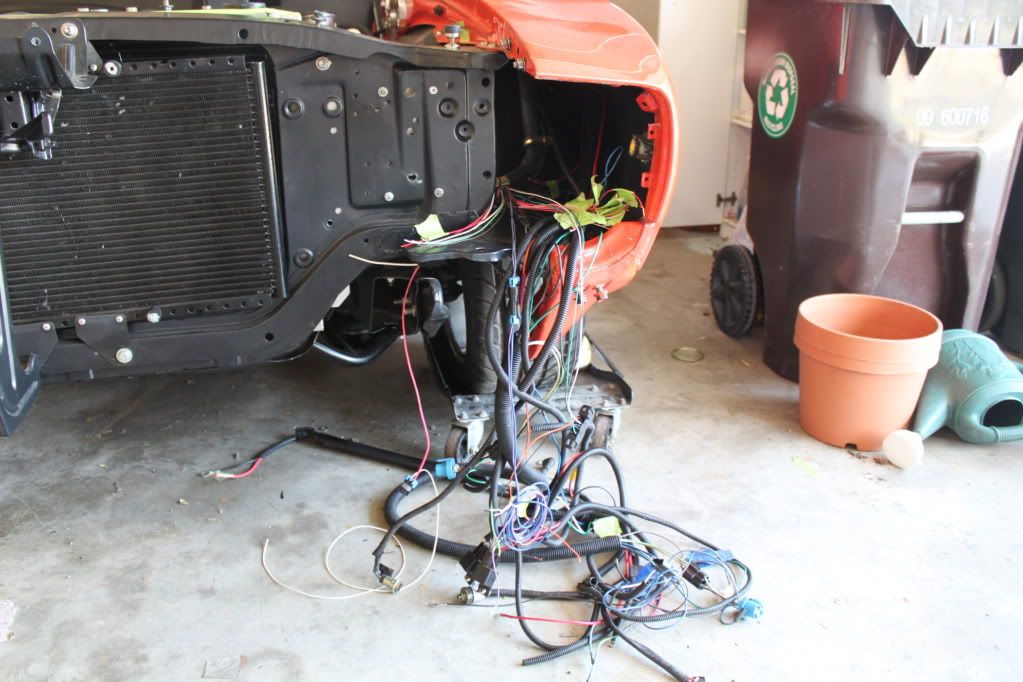
Well I have been putting this off for a while, but it is now time to finish the harness install. This will be split into two stages. Tthe first will be building a harness to run the required wires into the interior. This will include wires for speedo, tach, ODB II port, check engine light, fuel pump relay trigger, etc. The second stage will be building a custom fuse fuse panel for the all the relays (headlights and fans) and other engine circuits (maf, coilpacks, ecm, tcm, etc).
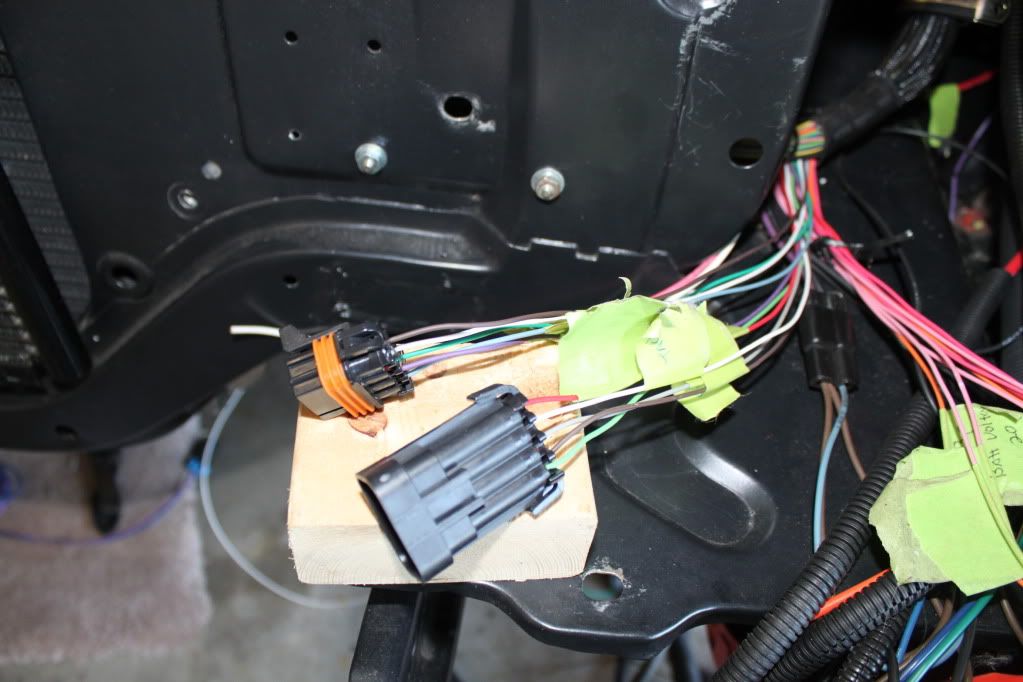
So here is what the rats nest I created previously....it should look much nicer and be easier to work on when I am done.
To connect the engine harness to the interior harness I will be using two 8 pin metri-pack 280 series connectors. In hindsight, I should have ordered 10 pin connectors, because I can't fit everything in one 8 pin connector.
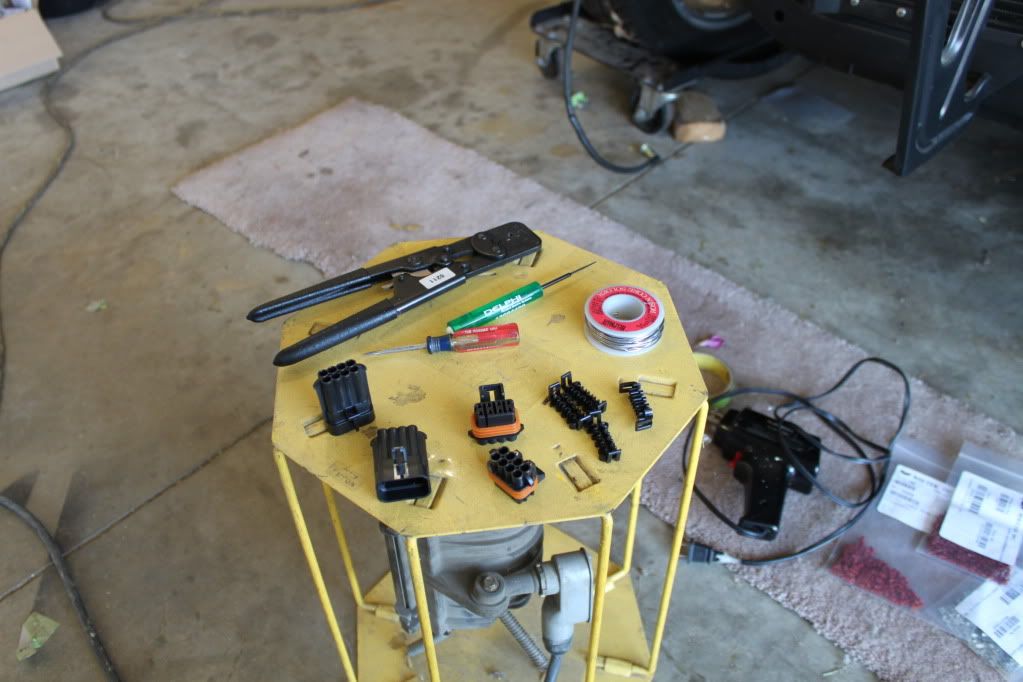
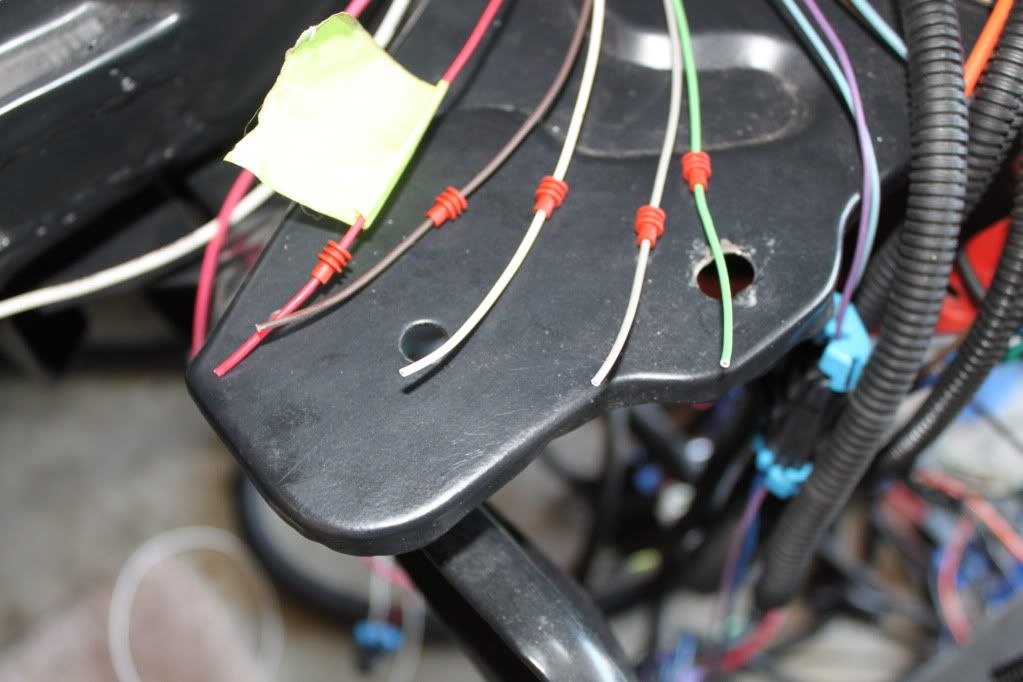
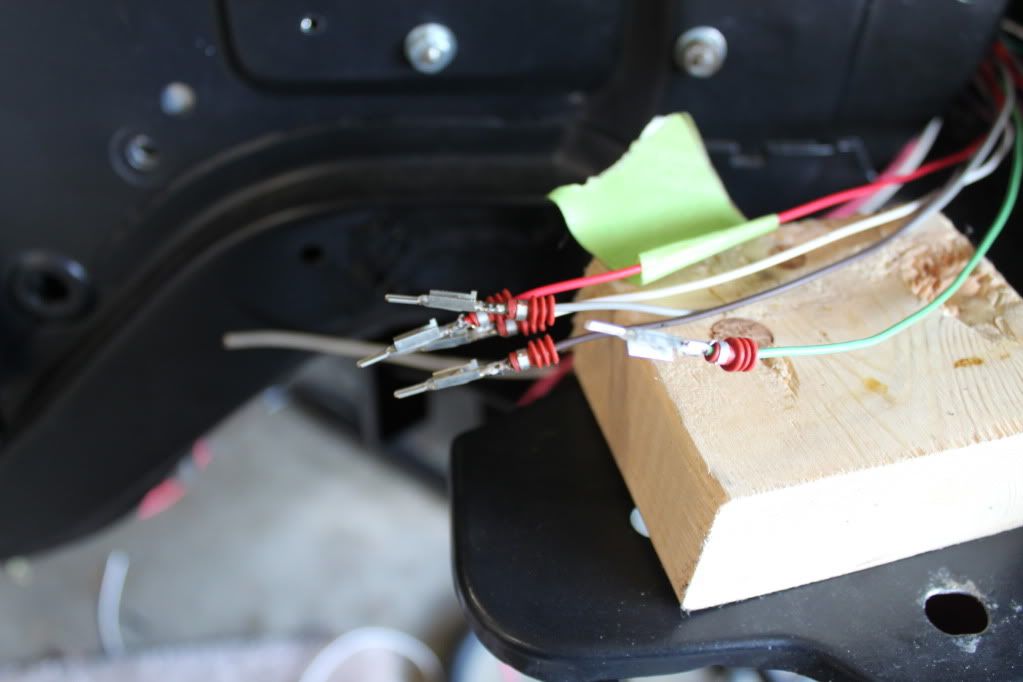
First step is to label wires, determine wire routing, cut wire to length and install the cable seals
Crimping terminals ends and cable seals. The proper crimpers make this job a breeze.
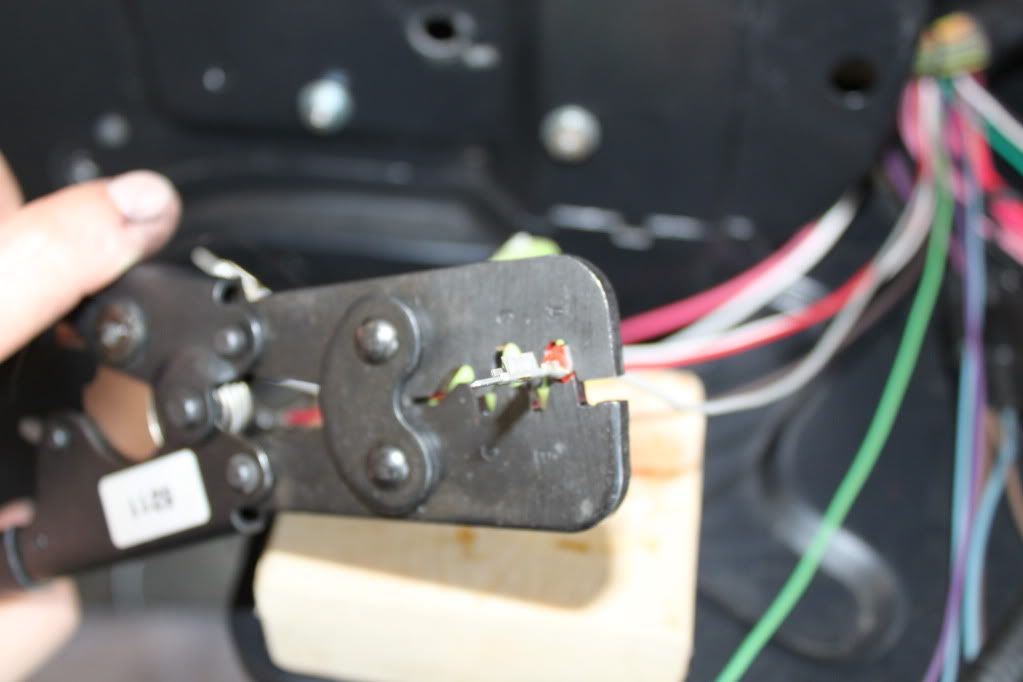
Everything is crimped and soldered. Now I just need to insert the pins into the connector bodies.
Job completed! I installed a male and female connector to eliminate the chance of hooking up the wrong connectors. Of course this may not stop me from connecting them to each other, but nothing will work, which should reduce the troubleshooting time. The next step is to build a harness to run the wires into the interior....
So here is what the rats nest I created previously....it should look much nicer and be easier to work on when I am done.
To connect the engine harness to the interior harness I will be using two 8 pin metri-pack 280 series connectors. In hindsight, I should have ordered 10 pin connectors, because I can't fit everything in one 8 pin connector.
First step is to label wires, determine wire routing, cut wire to length and install the cable seals
Crimping terminals ends and cable seals. The proper crimpers make this job a breeze.
Everything is crimped and soldered. Now I just need to insert the pins into the connector bodies.
Job completed! I installed a male and female connector to eliminate the chance of hooking up the wrong connectors. Of course this may not stop me from connecting them to each other, but nothing will work, which should reduce the troubleshooting time. The next step is to build a harness to run the wires into the interior....
 06-11-2012 | 06:08 AM
#178
Thanks BJ. The Power Tour was a blast I just wish I had taken and extra day off and went to the Madison,IL stop where they had the drag strip open for people to run on all day.
As for the car, not a long going on as we are just finishing up a major landscaping project and work has been quite hectic. Hopefully I can get back at it this week and finish the wiring & the few other things.
As for the car, not a long going on as we are just finishing up a major landscaping project and work has been quite hectic. Hopefully I can get back at it this week and finish the wiring & the few other things.
06-12-2012 | 08:58 PM
#179

Staging Lane
Joined: Aug 2011
Posts: 57
Likes: 0
