

My 1965 Buick Skylark L92/6L80 Swap
 02-28-2013 | 09:16 PM
#121

Thread Starter
TECH Junkie

Joined: Dec 2005
Posts: 3,092
Likes: 8
Thanks guys for the kind words. Being this is what I call a "resto-mod" I am trying to follow the factory style as much as posible on the body and interior. So in the end the car is not going to look to much different than the picture in post #1.
It will still be white but a 3 stage pearl white. The wheels are quite similiar to the factory rally wheels as shown above. However the handling and the power will be the major differences as the car in that respect will be brought up to date along with safety items such as mirrors and 4 wheel disc brakes.
It will still be white but a 3 stage pearl white. The wheels are quite similiar to the factory rally wheels as shown above. However the handling and the power will be the major differences as the car in that respect will be brought up to date along with safety items such as mirrors and 4 wheel disc brakes.
 03-12-2013 | 10:06 PM
#123
Thread Starter
TECH Junkie
Joined: Dec 2005
Posts: 3,092
Likes: 8
Yes, as of right now I am only going to have a front and back speaker like the factory did at the time. It is set up for four speakers if I choose to go that route in the future.
03-17-2013 | 01:00 PM
#124
Thread Starter
TECH Junkie
Joined: Dec 2005
Posts: 3,092
Likes: 8
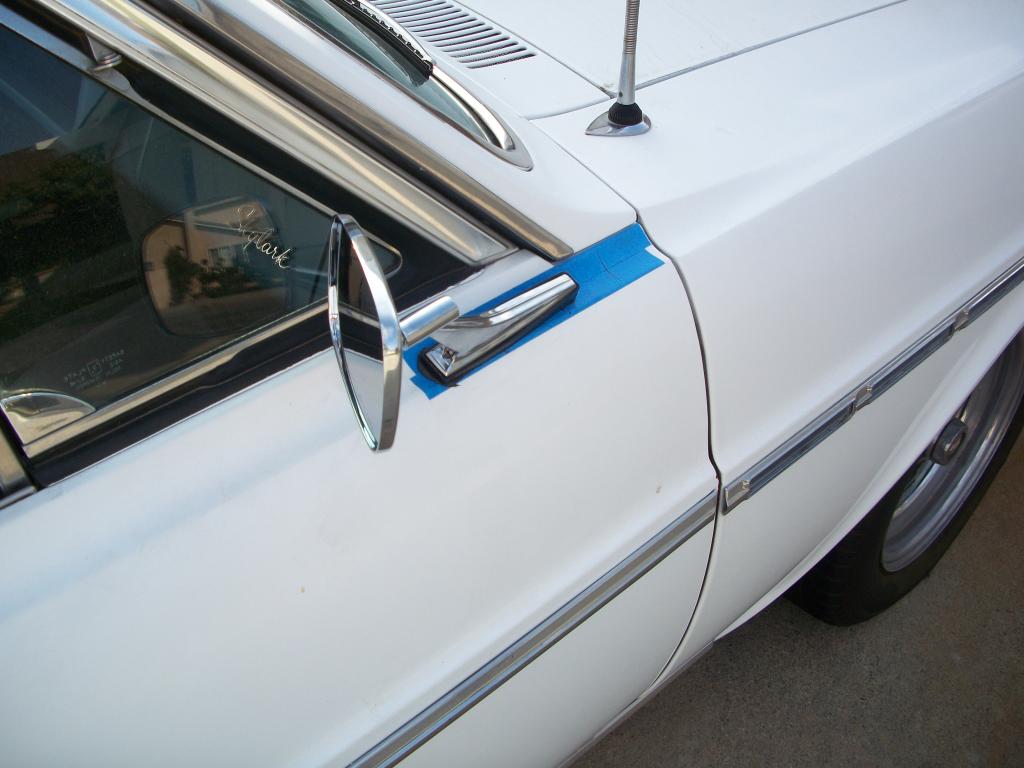
While I am waiting for the shop to make room for my car I am inching forward on some things. One of them is more up to date outside rear view mirrors. I feel this is a necessity for me from a safety issue. The mirror on the passenger side has the "objects are closer than they appear" type mirror for a wider field of view.
The one on the drivers side is an improvement over the factory mirror. The plastic base for these mirrors is flat and my door is concave where they mount. So I used some black silicone sealant to fill in the difference and trim off the excess. You can see how I did it in the passenger side mirror photo. I put oil on top of the masking tape so the silicone would not adhere as easily to the tape and lift right off when it dried. Also I drilled a couple of holes in the plastic mount so the sealant would ooze up in there to hold better. Here are a couple of pictures.
Drivers Side.
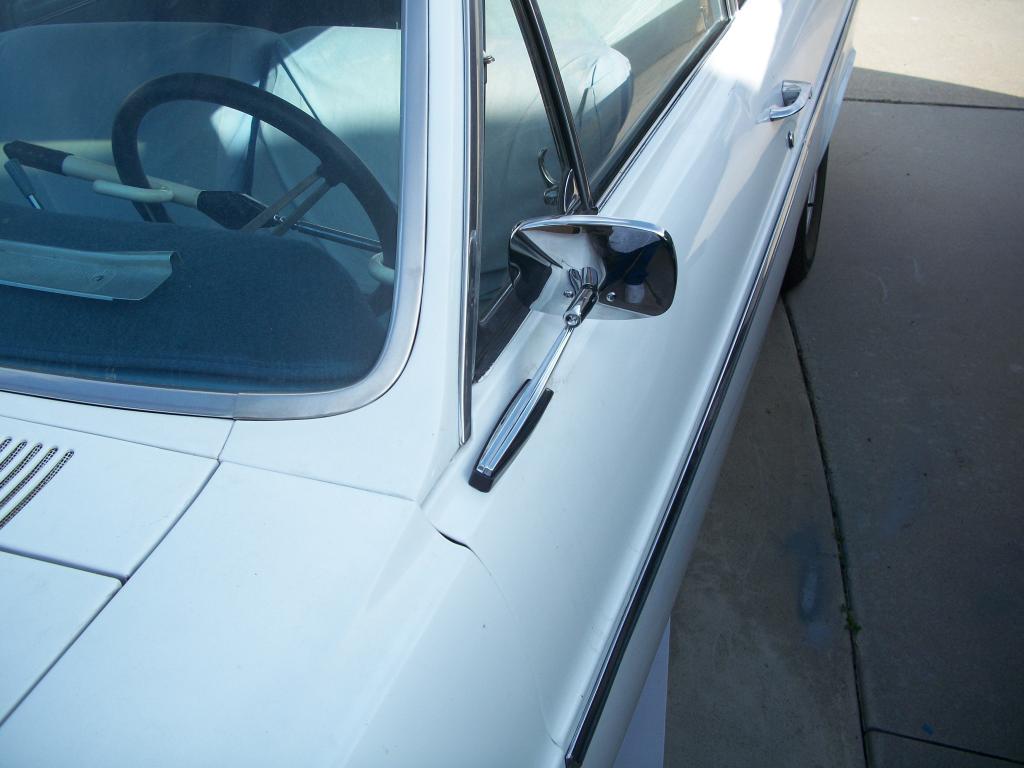
Passenger Side
The one on the drivers side is an improvement over the factory mirror. The plastic base for these mirrors is flat and my door is concave where they mount. So I used some black silicone sealant to fill in the difference and trim off the excess. You can see how I did it in the passenger side mirror photo. I put oil on top of the masking tape so the silicone would not adhere as easily to the tape and lift right off when it dried. Also I drilled a couple of holes in the plastic mount so the sealant would ooze up in there to hold better. Here are a couple of pictures.
Drivers Side.
Passenger Side
04-09-2013 | 03:48 PM
#125
Thread Starter
TECH Junkie
Joined: Dec 2005
Posts: 3,092
Likes: 8
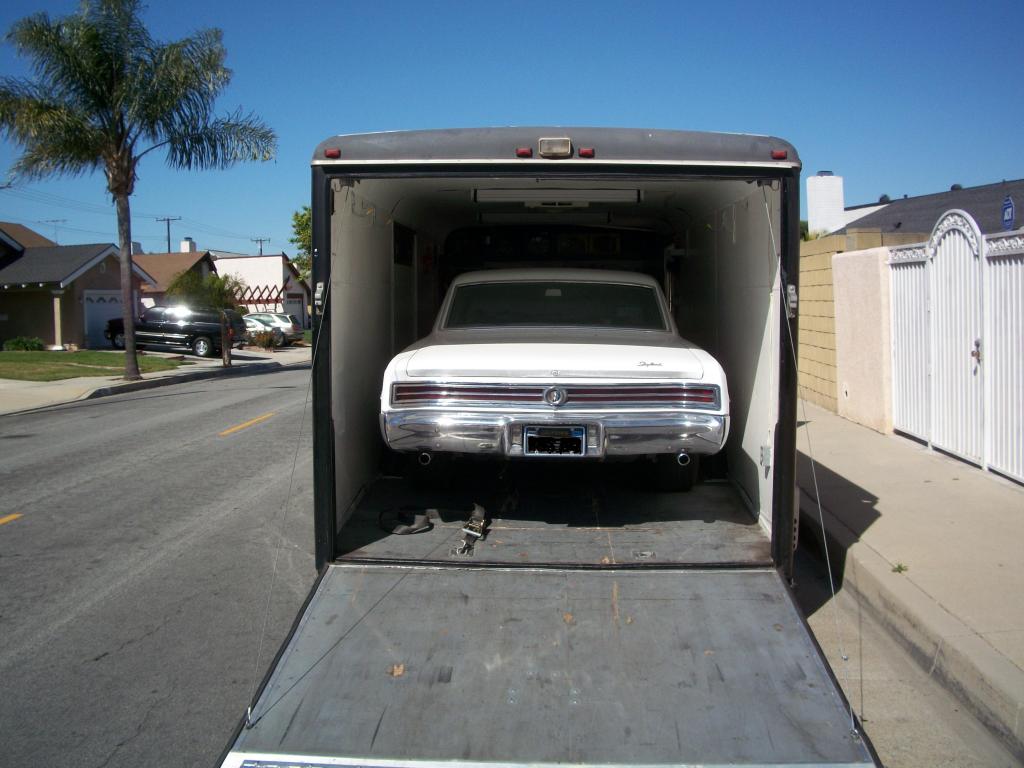
Ok, the day has arrived that my Skylark is off to the shop. Shown is a picture of her in the trailer getting ready to leave. She will be getting a whole new drive train and some suspension upgrades.
04-13-2013 | 12:30 PM
#126
Thread Starter
TECH Junkie
Joined: Dec 2005
Posts: 3,092
Likes: 8
A little update on the progress. I forgot to take my camera for some photos but will do so next week. We removed the engine, transmission, drive shaft, rear end and gas tank. We also removed the front bumper assy, grille, headlights and radiator core along with the radiator. This makes it so much easier to work in the engine compartment. I painted the engine compartment a satin black.
Sent the radiator core and some other items out to get powder coated. The front bumper, grille and a couple of other items are off to the chrome shop. I recently have also received the following parts with others do in by Wednesday. By the way I have decided to move the battery to the trunk. Wasn't going to but it makes some other things much easier in the engine compartment by freeing up some room. Plus I could use more weight in the rear and less up front.
1. Right Stuff rear disc brake conversion. Only going with 11" rotors as I feel that is all I need to do the job for the intended use of the car.
2. Upper and lower front tubular A-arms.
3. For the rear upper and lower control arm braces. Already have adjustable upper control arms and boxed lower control arms.
4. 1998 Jeep Grand Cherokee power steering box.
5. New Pittman arm and rag link.
6. Power steering drag arm and accessories.
One thing I found out is you cannot just convert from manual steering to power steering by just replacing the steering box. You need the other items I listed to do the conversion. So by next week all the suspension items should be done. The following week no work will be done on the car as the shop will be getting some cars ready to go racing. Priorities.
Last edited by 1989GTA; 04-13-2013 at 01:23 PM.
04-15-2013 | 02:55 PM
#127
Thread Starter
TECH Junkie
Joined: Dec 2005
Posts: 3,092
Likes: 8
A little update. The shop was able to get 13" of clearance for the real wheels/tires. So now I will be able to use the Nitto 285/40ZR17 tires on the rear. Those tires are 11.4" wide. Next is if I can get 255/45ZR17 tires for the front with 5.25" of backspacing on an 8" wheel. I will be running upper and lower tubular A-arms so that might do the trick plus they could move the front wheel forward 1/2". They have 4 degrees of camber. Fingers are crossed. If not I will just drop down to the 245 size.
Update: It looks like the backspacing in the rear will be 6.375" with the 9.5" x 17" rims. This includes the rear disc brake conversion which adds a little to the backspacing.
Update: It looks like the backspacing in the rear will be 6.375" with the 9.5" x 17" rims. This includes the rear disc brake conversion which adds a little to the backspacing.
Last edited by 1989GTA; 04-16-2013 at 06:27 PM.
04-17-2013 | 06:20 PM
#129
Thread Starter
TECH Junkie
Joined: Dec 2005
Posts: 3,092
Likes: 8
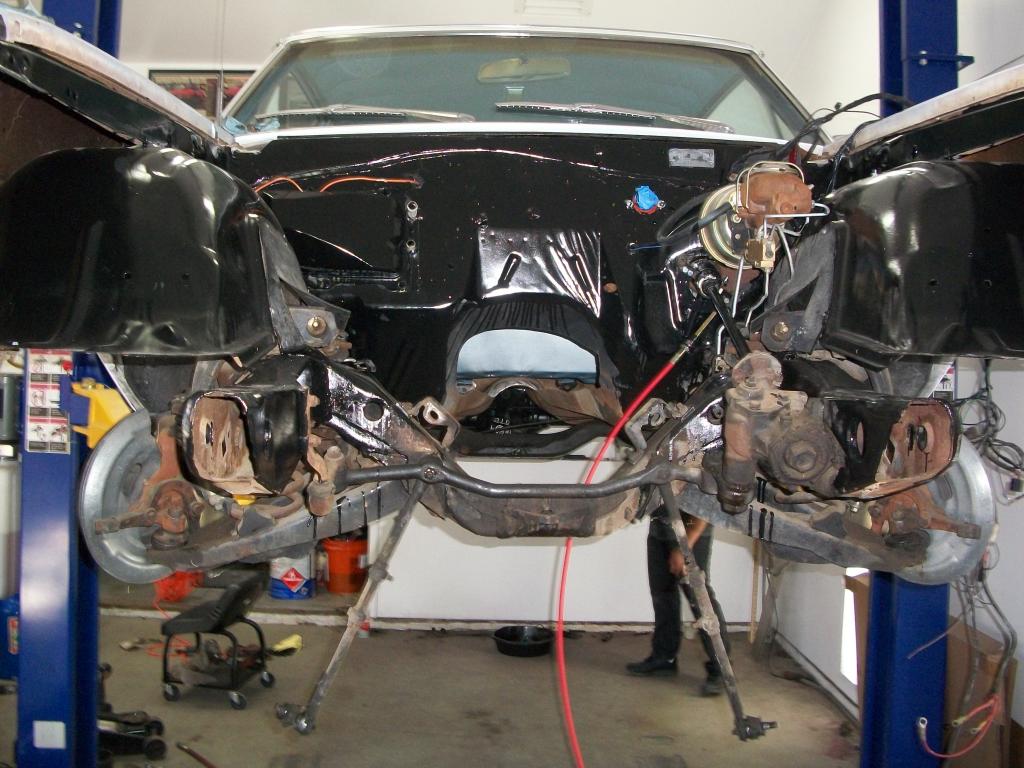
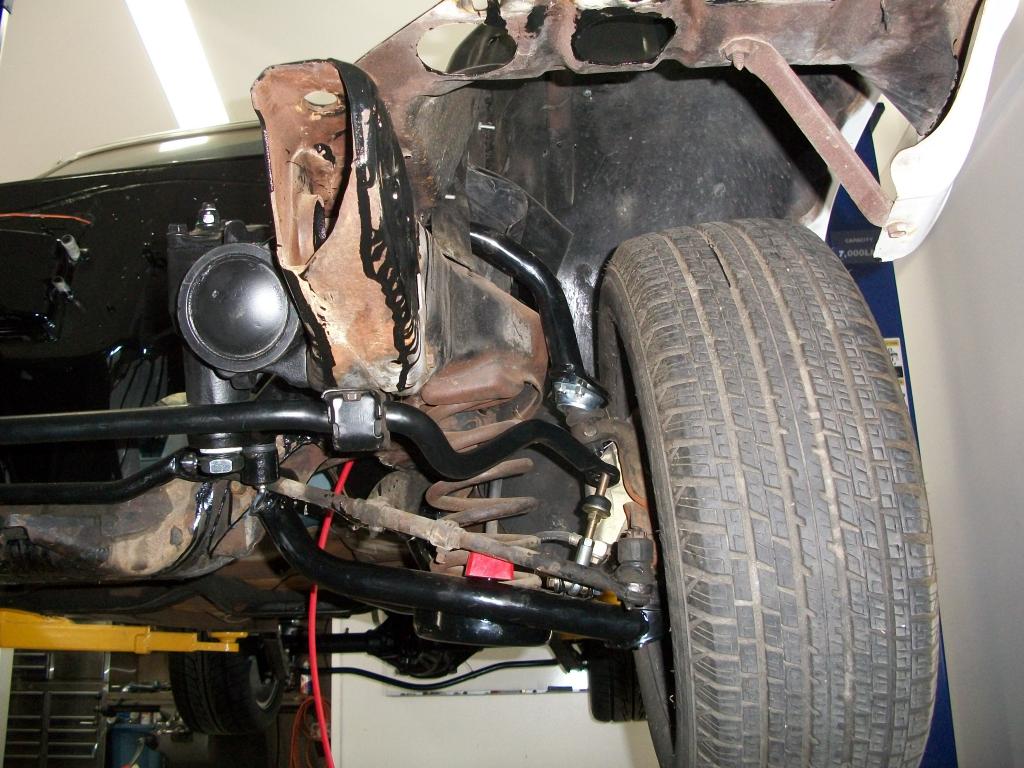
I went with the KMJ tubular A-arms. They are made in China but seem to be well built. I got the whole set for $270 shipped. Should have pictures of them installed tomorrow. Regarding the springs I will reuse the factory units. The car came with a V6 so the stance should be close. With the 6L80 transmission I can't be to low. Here are some pictures from today.
In this one the steering components are not all removed yet. You can see the transmission tunnel cutout for the 6L80 transmission.
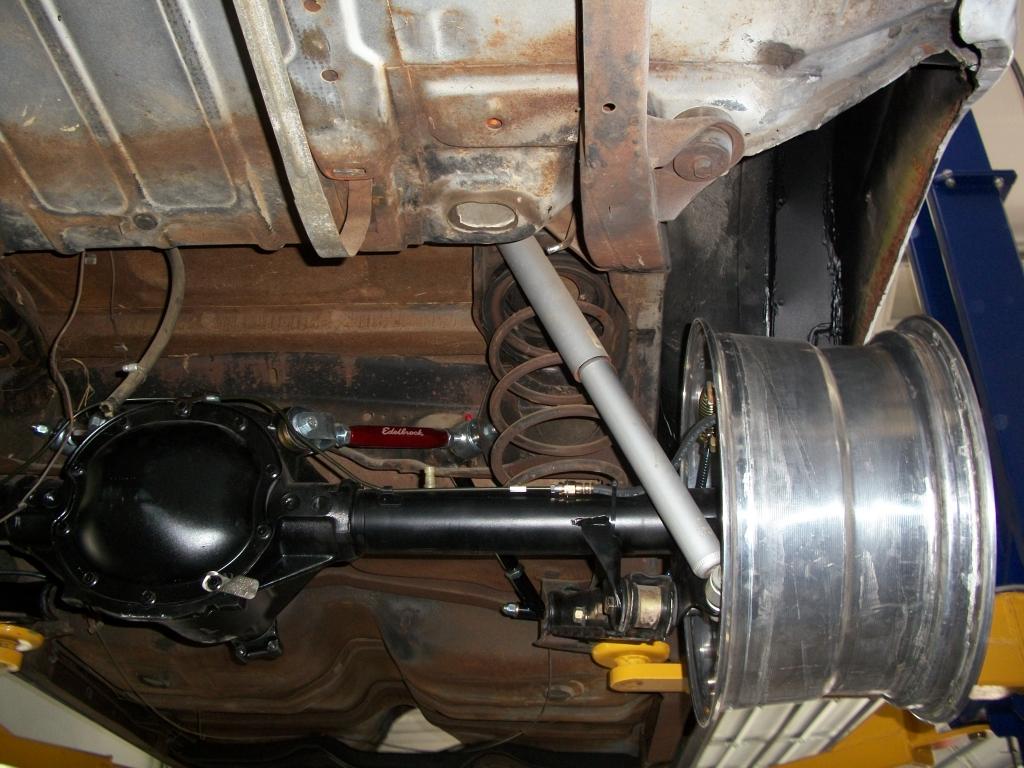
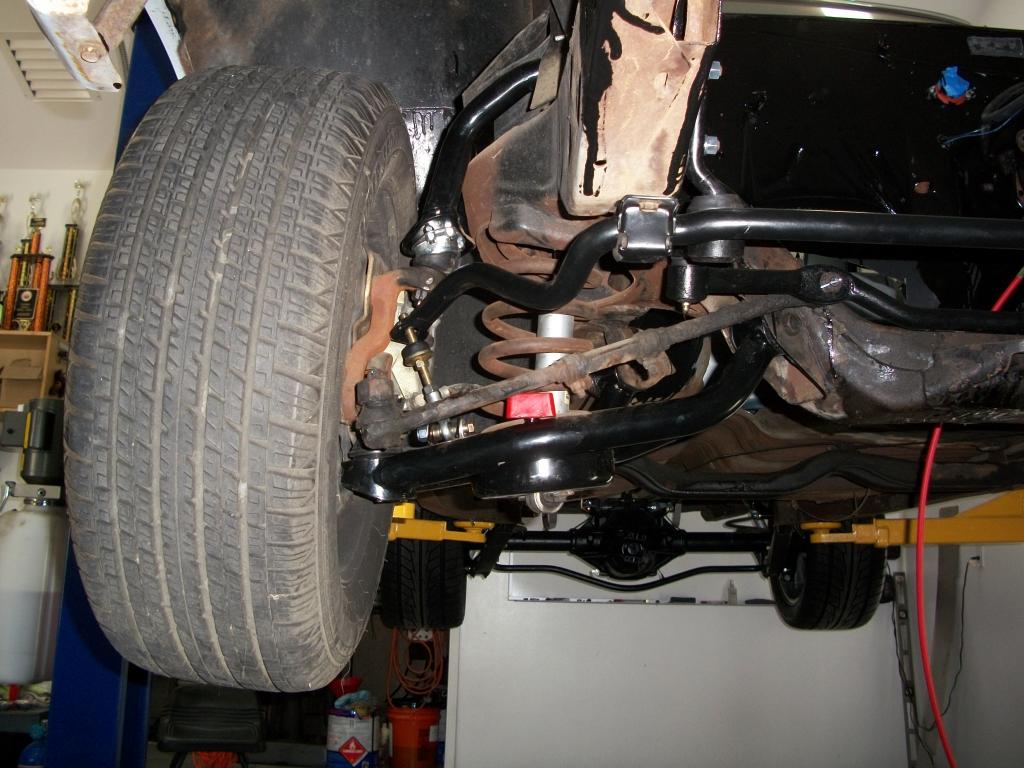
In this picture you can see the rearend installation. Those are 17" x 9.5" wheels but with 6.5" back spacing. These are on loan until my wheels come in.
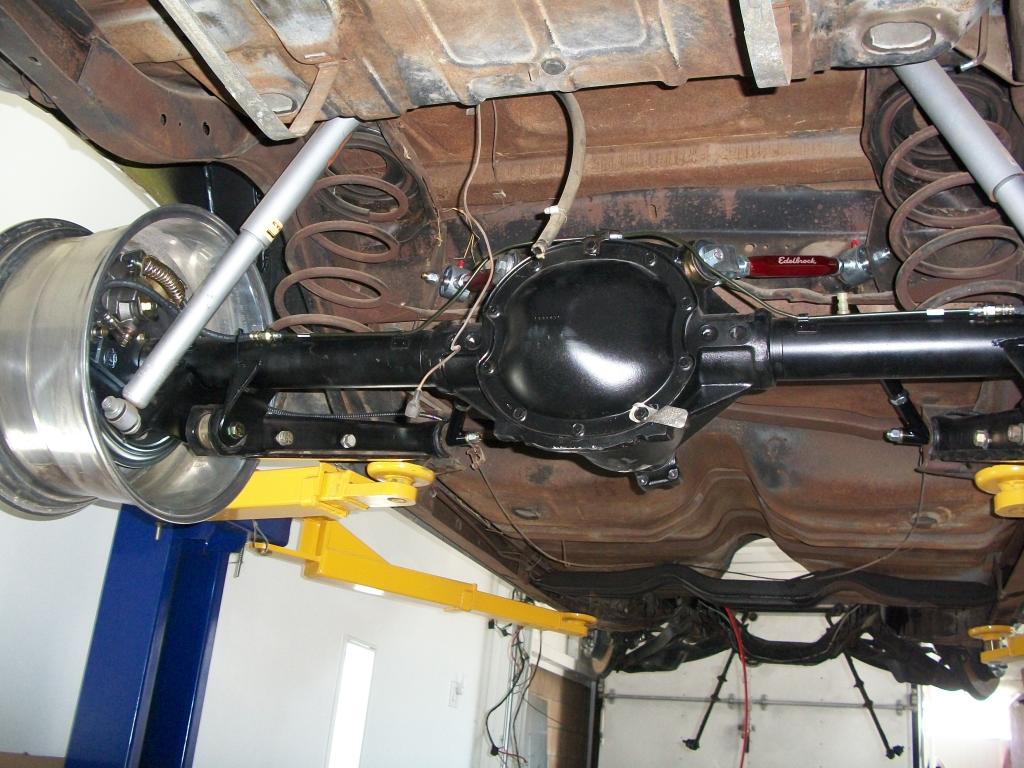
In this photos I tried to get a picture of the wheel well modifications that are 13" wide so I can use the 285/40ZR17 tire.
In this one the steering components are not all removed yet. You can see the transmission tunnel cutout for the 6L80 transmission.

In this picture you can see the rearend installation. Those are 17" x 9.5" wheels but with 6.5" back spacing. These are on loan until my wheels come in.

In this photos I tried to get a picture of the wheel well modifications that are 13" wide so I can use the 285/40ZR17 tire.

Last edited by 1989GTA; 04-17-2013 at 07:01 PM.
04-18-2013 | 04:00 PM
#130
Thread Starter
TECH Junkie
Joined: Dec 2005
Posts: 3,092
Likes: 8
A few more pictures from today's session at the shop.
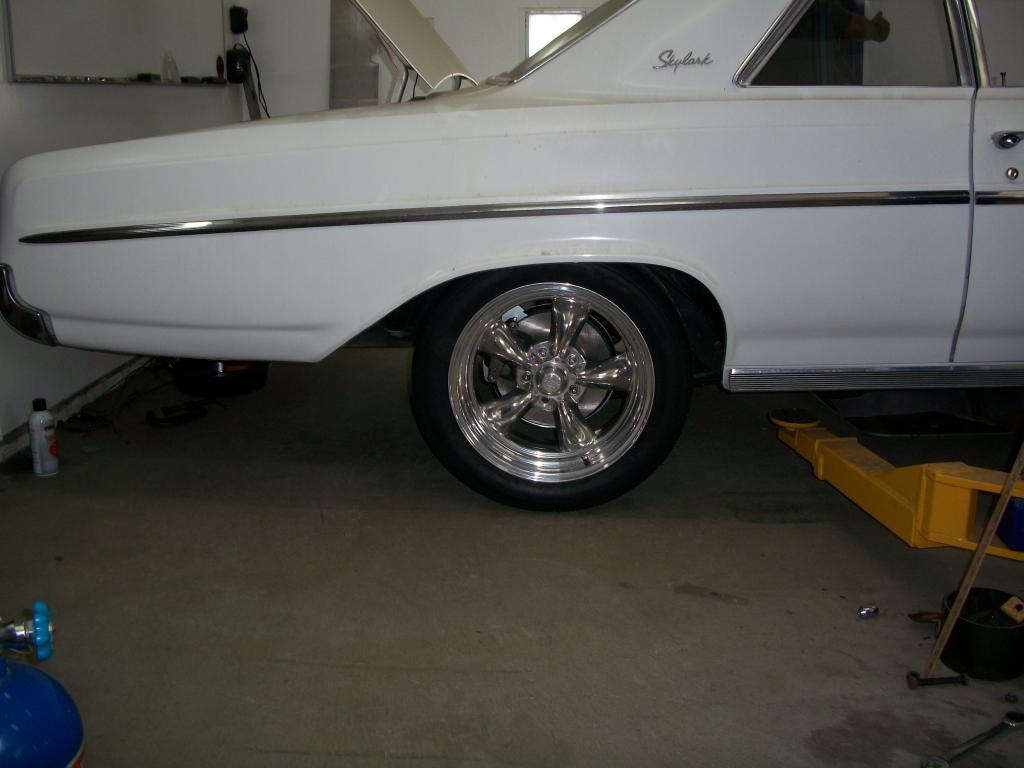
Here are some photos with the Nitto 285/40ZR17 tires installed on the wheel and a side shot of the car. These temporary wheels have a 6.5" offset versus the 6.375" offset of the VN500 wheels when they come in. Once we let the car all the way down and moved it up an down the tires settled into the wheel well some more and there is plenty of room. Could have gone one size larger on the tires.
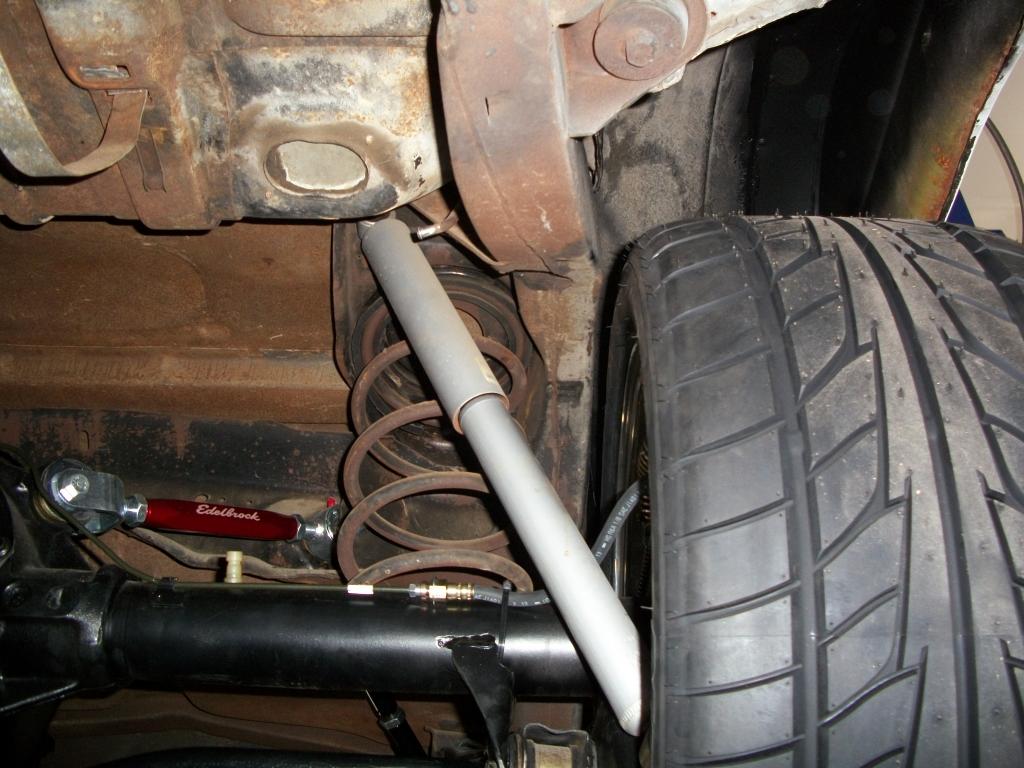
Here are some photos with the Nitto 285/40ZR17 tires installed on the wheel and a side shot of the car. These temporary wheels have a 6.5" offset versus the 6.375" offset of the VN500 wheels when they come in. Once we let the car all the way down and moved it up an down the tires settled into the wheel well some more and there is plenty of room. Could have gone one size larger on the tires.


 04-18-2013 | 04:11 PM
#131
Thread Starter
TECH Junkie
Joined: Dec 2005
Posts: 3,092
Likes: 8
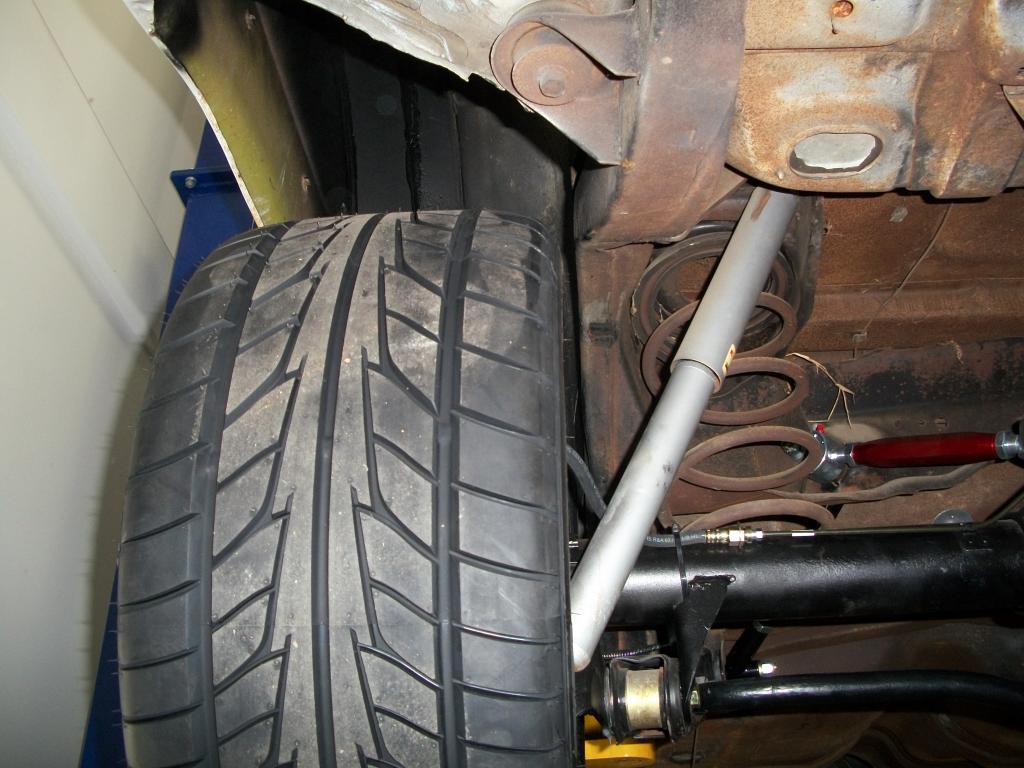
Here is a picture of the KMJ A-arms installed. Also all the parts fit from the power steering upgrade as listed in the above post. The orginal rear tires were 255/60/R15 and the fronts as shown in the picture are 225/R15. After this picture was taken we put the 255's on the front. I want to get an idea of how the Nitto 255/45ZR17 wheels are going to fit. Here are some more pictures and on the last one I was trying to get a picture of the width of the rear tire and the car. It did not come out to well.


Last edited by 1989GTA; 05-03-2013 at 10:59 PM.
04-30-2013 | 05:07 PM
#132
Thread Starter
TECH Junkie
Joined: Dec 2005
Posts: 3,092
Likes: 8
Made some progress today. Got the engine in place and the motor mount standoffs fastened in the correct location. Got to love the Dirty Dingo sliders. Makes things so easy. We test fitted the Heddman Hustler headers and everything looks good. Passenger side goes in from the top no problem. The drivers side we installed from the bottom with no problem except give yourself plenty of room under the car. They go in almost straight up and then turn into place. You can do it from the top but you have to jack up the motor on the drivers side. So two more hurdles down.
Tomorrow we are going to install the 6L80 transmission. The plan is to have the trans on a cart and then lower the car down around the transmission. That sucker is heavy. Then wrestle it into place. I will also bring my camera and take some pictures. The engine bay looks so much better with the L92 motor sitting in there. Back to the transmission I went over to CPP and bought their LS conversion transmission support brace. It appeared like it would be a bear to try and use the factory one after we took some measurements.
Tomorrow we are going to install the 6L80 transmission. The plan is to have the trans on a cart and then lower the car down around the transmission. That sucker is heavy. Then wrestle it into place. I will also bring my camera and take some pictures. The engine bay looks so much better with the L92 motor sitting in there. Back to the transmission I went over to CPP and bought their LS conversion transmission support brace. It appeared like it would be a bear to try and use the factory one after we took some measurements.
Last edited by 1989GTA; 04-30-2013 at 06:53 PM.
04-30-2013 | 06:58 PM
#134
Thread Starter
TECH Junkie
Joined: Dec 2005
Posts: 3,092
Likes: 8
The clearance appears to be good at this point. I was kind of more interested in how much clearance there was from the floor pans which appears to be OK since others reported problems in that area with some of the other headers.
Once the transmission is in I can give some numbers as that will determine the final angle the motor sits at. I believe we are pretty close right now. Should have some pictures tomorrow and thanks for reminding me to get under the car and take some pictures of the header clearance in that area. The pan of the 6l80 might be lower. We shall see.
Once the transmission is in I can give some numbers as that will determine the final angle the motor sits at. I believe we are pretty close right now. Should have some pictures tomorrow and thanks for reminding me to get under the car and take some pictures of the header clearance in that area. The pan of the 6l80 might be lower. We shall see.
05-01-2013 | 05:02 PM
#135
Thread Starter
TECH Junkie
Joined: Dec 2005
Posts: 3,092
Likes: 8
We got the 6L80 transmission installed today. Everything is going quite well at this point in time. No problems yet thanks to those who posted threads on their installs and pointed out the problem areas. So I am just following along. Here are some pictures from today.
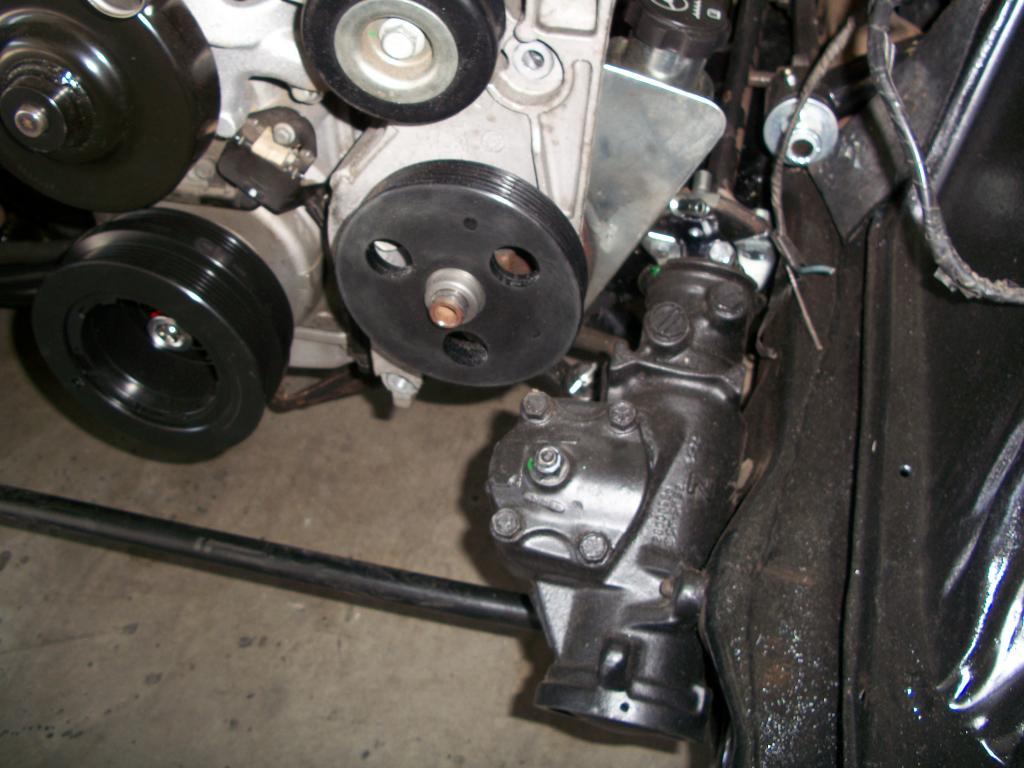
This picture shows the power steering pulley clearance. No problems here.
This picture shows the transmission from inside the car. Just need to raise the tunnel one inch.

This picture shows the drivers side header from the bottom. You can see the 6L80 transmission will be lower than the exhaust.

This picture shows the power steering pulley clearance. No problems here.

This picture shows the transmission from inside the car. Just need to raise the tunnel one inch.

This picture shows the drivers side header from the bottom. You can see the 6L80 transmission will be lower than the exhaust.

Last edited by 1989GTA; 05-01-2013 at 05:13 PM.


 05-01-2013 | 05:09 PM
#137
Thread Starter
TECH Junkie
Joined: Dec 2005
Posts: 3,092
Likes: 8
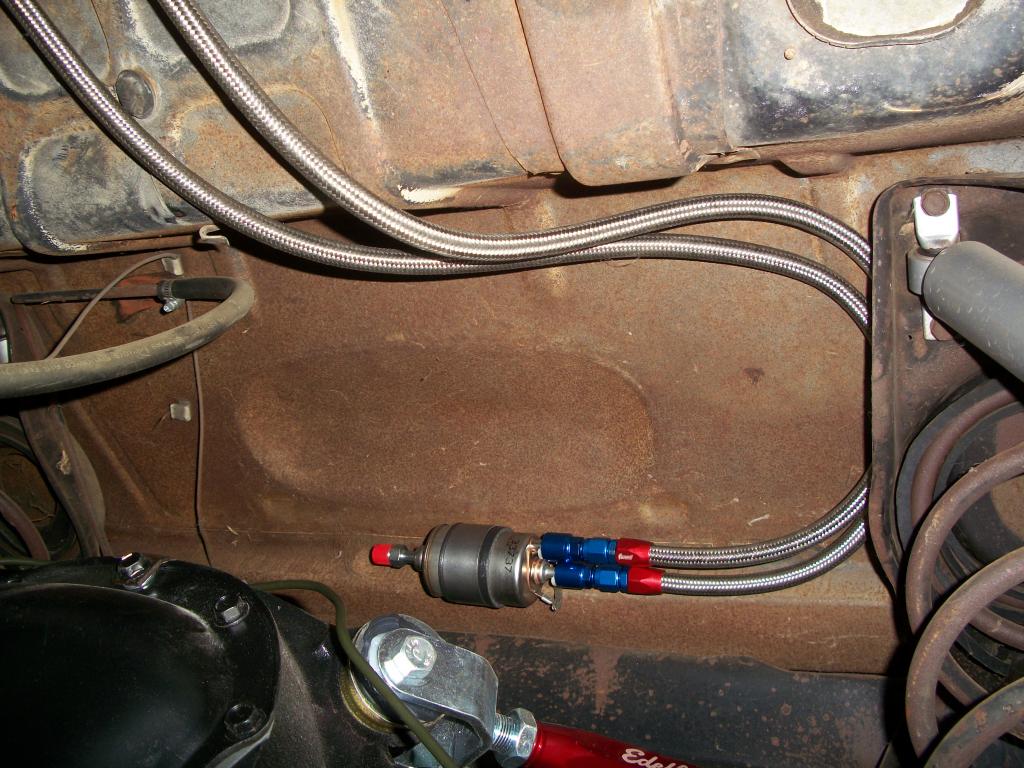
And the last three pictures from today.
This shows the firewall clearance. Around 1" at the closest point
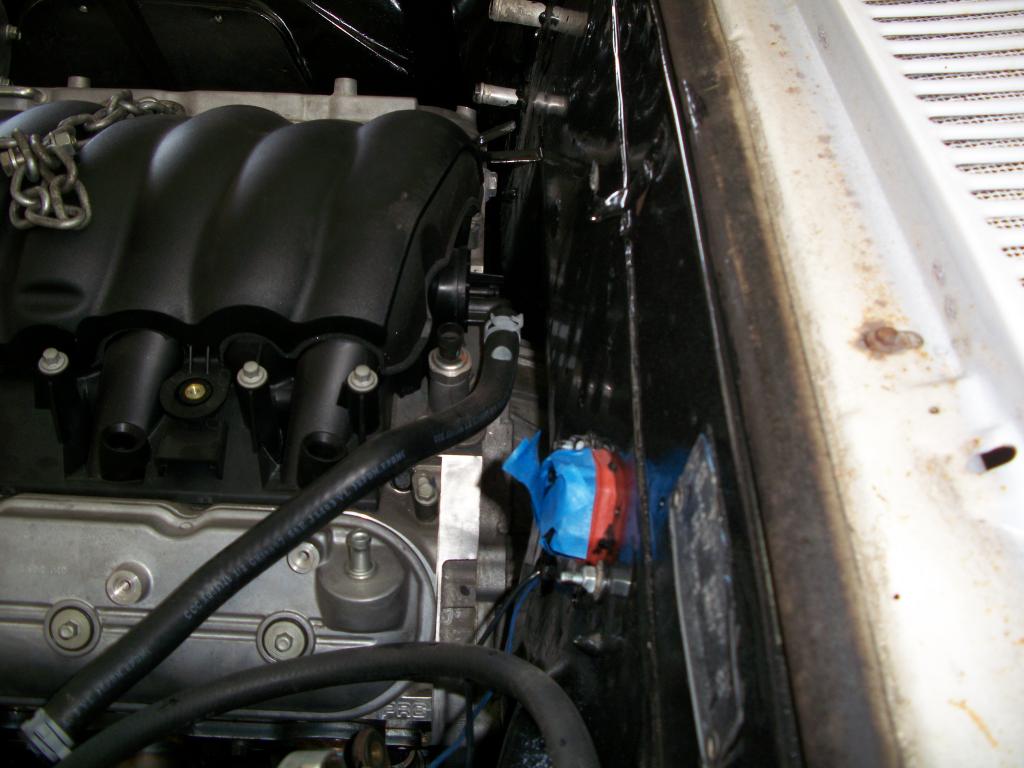
Front view of car with the motor installed.

A picture from last week showing the fuel filter/regulator install.
This shows the firewall clearance. Around 1" at the closest point

Front view of car with the motor installed.

A picture from last week showing the fuel filter/regulator install.

 05-01-2013 | 07:39 PM
#140
Thread Starter
TECH Junkie
Joined: Dec 2005
Posts: 3,092
Likes: 8
The wheels were $658 plus $45 shipping for the pair. Bought them on Ebay. I will buy the 8"x17" fronts down the road. Using the 15" stockers for now. Money is going to more needy places in order to get his car back on the road with the L92 motor.
Last edited by 1989GTA; 05-01-2013 at 07:48 PM.