

Custom Long Tube Header / Exhaust Build ***DYNO Results are In***
 02-14-2013, 08:32 AM
#1
11 Second Club
Thread Starter
After about a year with the tiny (1.5" primary's) Sanderson shorty's, catalytic converters, resonators and less than optimal muffler, it's time to let the engine breathe a little.
I took a short audio clip of what the car currently sounds like. My camera doesn't have the best audio but you get the idea.
The plan is to build a free flowing set of long tube headers using 1.825" primary's to 3" collectors. After the collectors things are still a bit sketchy but the plan is 3" pipes to an X pipe, then 2 small bullet mufflers followed by an electronic cut-out, then 3" pipe back to two small mufflers in the rear. The electronic cut-outs will let me flip the loud switch inside the car when I really wanna open it up.
So far I just have the mandrel bends and flanges but I plan on starting on the car in the next couple weeks.
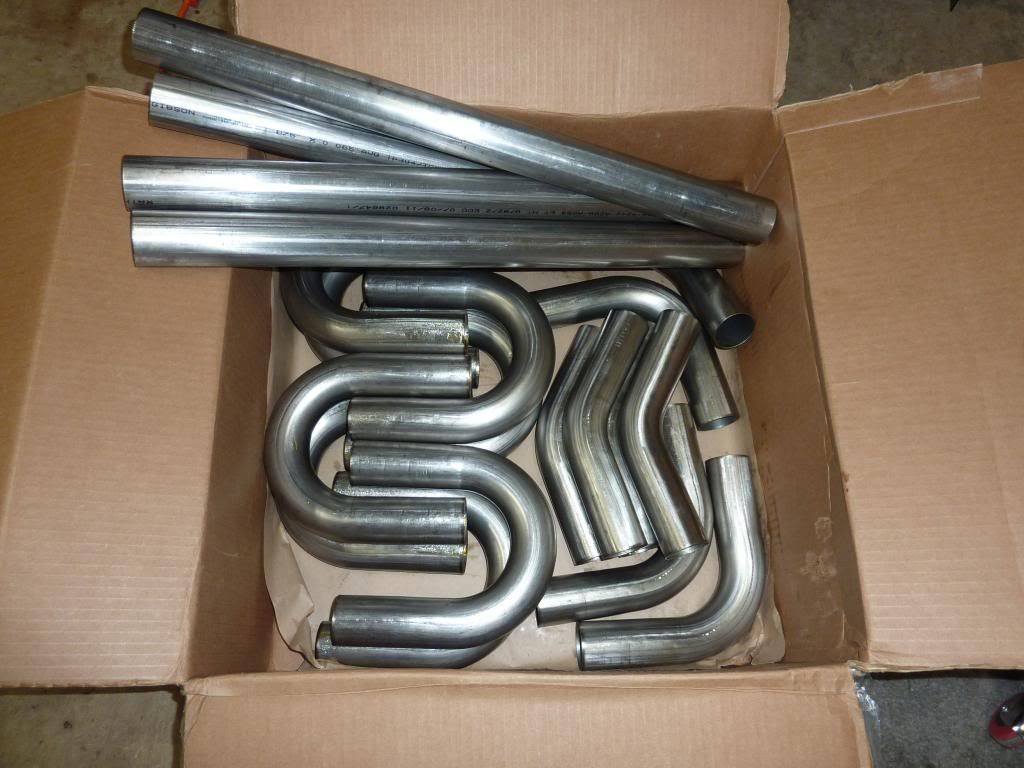
Here's the stainless bends from Mandrel-Bends.com
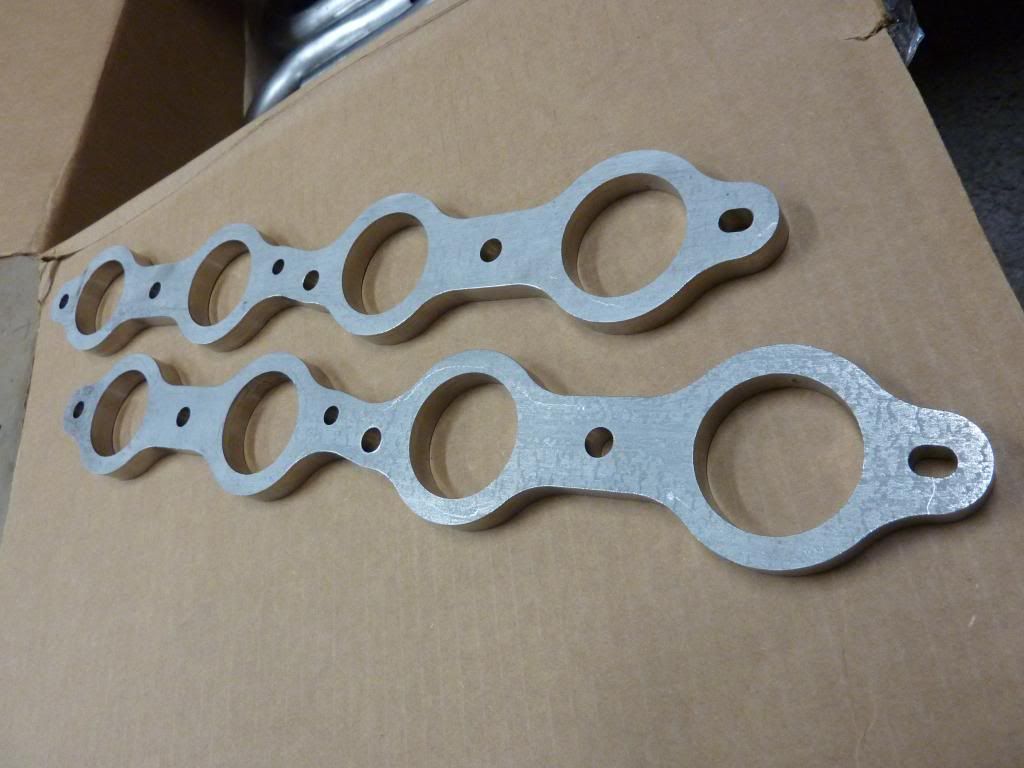
And the 1/2" thick stainless flanges from Modular-Turbo
I took a short audio clip of what the car currently sounds like. My camera doesn't have the best audio but you get the idea.
The plan is to build a free flowing set of long tube headers using 1.825" primary's to 3" collectors. After the collectors things are still a bit sketchy but the plan is 3" pipes to an X pipe, then 2 small bullet mufflers followed by an electronic cut-out, then 3" pipe back to two small mufflers in the rear. The electronic cut-outs will let me flip the loud switch inside the car when I really wanna open it up.
So far I just have the mandrel bends and flanges but I plan on starting on the car in the next couple weeks.
Here's the stainless bends from Mandrel-Bends.com
And the 1/2" thick stainless flanges from Modular-Turbo
Last edited by MX6.0; 12-20-2013 at 04:33 PM.

 02-19-2013, 09:30 AM
#3
11 Second Club
Thread Starter
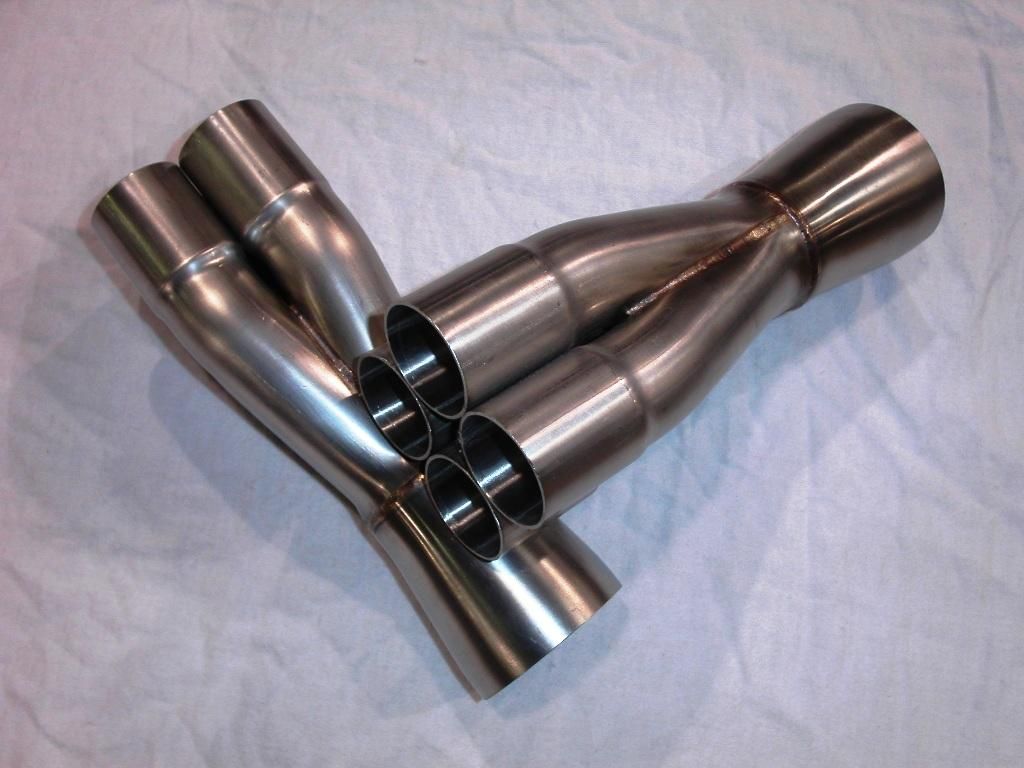
Got the car all torn down with the exception of the old headers and radiator. I've been looking around for some nice collectors and X-pipes. For collectors I found these slip-on pieces from Stainless Works. They are everything I was looking for in a collector and the price wasn't too ridiculous.
I'm still trying to track down an X-pipe. Everything I find is either mild steel or $350. Maybe that's the going rate but it doesn't seem like an X-pipe should cost twice as much as a collector....
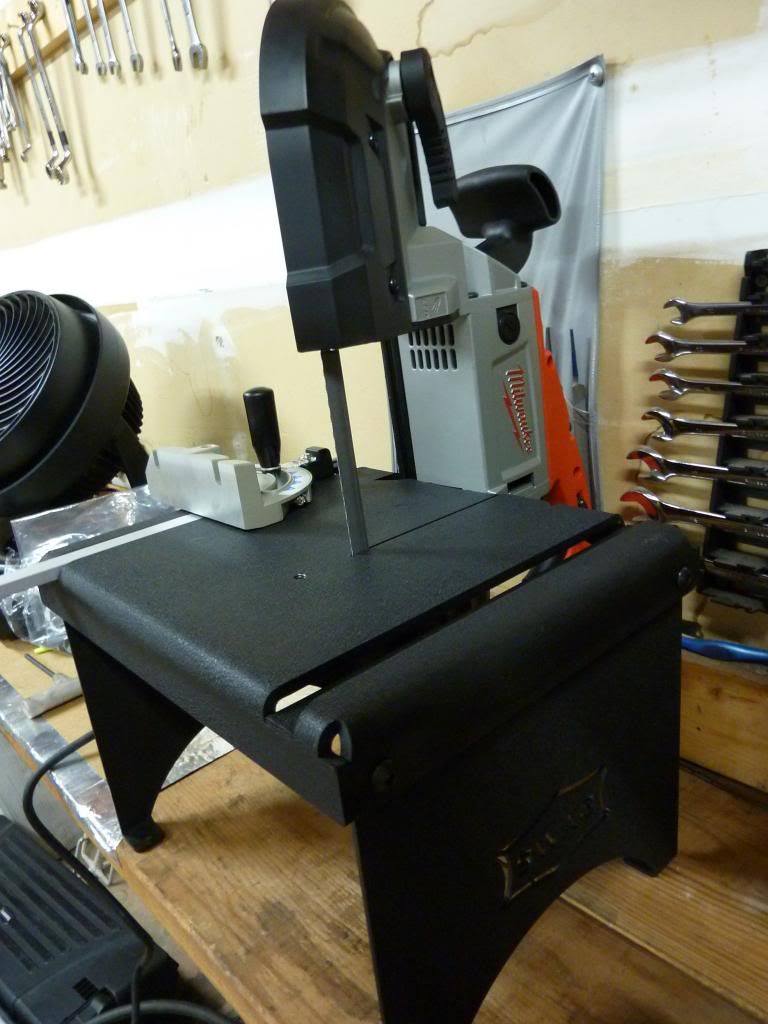
Picked up a nice metal saw for all the pipe cuts. It's a portable band saw bolted to a small work table.
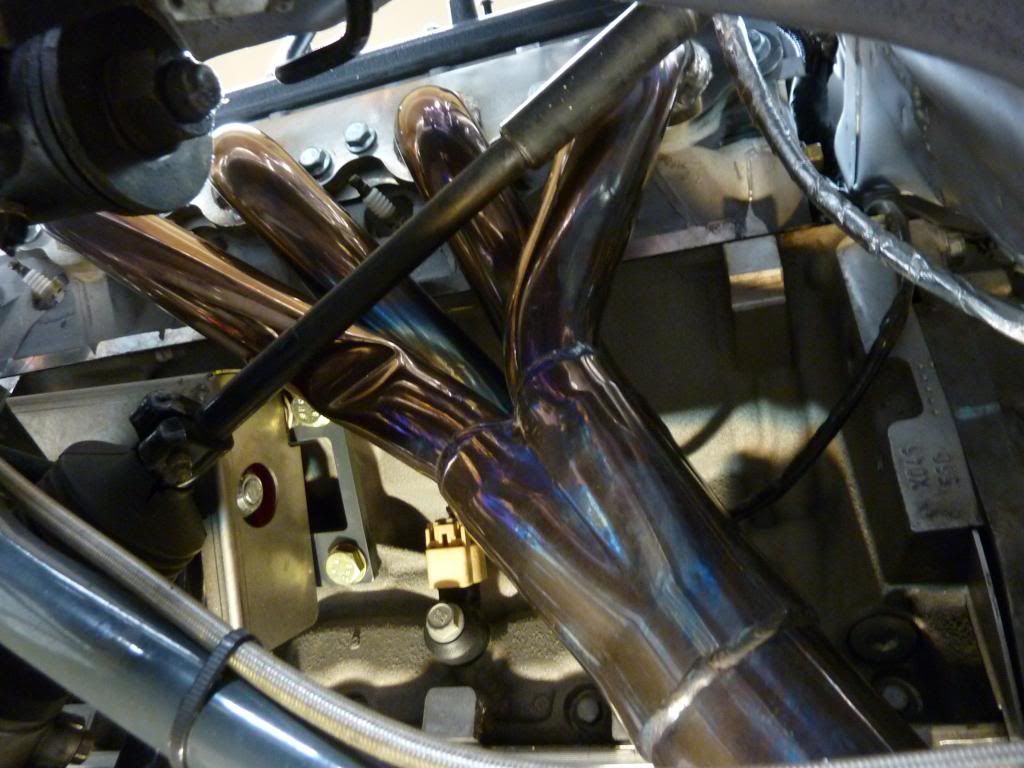
Here's a shot of the shorty headers in place. For clearance I plan to route cylinders 1 and 3 over the steering shaft and split the drivers side flange in half. Hopefully this would allow me to remove/install the headers without dropping the engine every time.
I'm still trying to track down an X-pipe. Everything I find is either mild steel or $350. Maybe that's the going rate but it doesn't seem like an X-pipe should cost twice as much as a collector....
Picked up a nice metal saw for all the pipe cuts. It's a portable band saw bolted to a small work table.
Here's a shot of the shorty headers in place. For clearance I plan to route cylinders 1 and 3 over the steering shaft and split the drivers side flange in half. Hopefully this would allow me to remove/install the headers without dropping the engine every time.
 02-19-2013, 12:33 PM
#6

Just built these. 1 7/8" mild steel. First time. Need to clean up the welds a bit. Going in a 67 Nova with Heidt superide front clip.
It was time consuming. Hooker makes little sheet metal sleeves that help align the the tubes.
Next time I will go 1 7/8" to 2". The 2" just slide ove the 1 7/8" tube making aligment and welding easier.
Tried to go with a gentle of radius out of the port as I could. Suspension wouldn't let me pull the rear tubes any farther forward for more equal length.
Trending Topics
02-21-2013, 09:35 PM
#8
TECH Fanatic
02-21-2013, 10:31 PM
#9
Best tip was from a Car Craft article by Doug Glad.
Postion the collector or four round tubes where they need to be near the trans. That gives you an aiming spot for the primary tubes. I started from the front passenger side because it was the easiest. No steering shaft to contend with. I wanted to clear the starter with the first and second tube so I wouldn't need to unbolt the header to remove the starter. Could of gone under the starter but it gives up allot of ground clearance.
Drivers side was a little bit more work. I came inside the steering shaft and then past the oil filter by about 3/8" to 1/2".
Wasn't a huge fabrication issue but did require a fair amount of eye balling, grinding of tubes for squareness before welding. I don't have tig so the wire feed had to do.
Nothing else to do in MN when it's -10.
02-22-2013, 10:08 PM
#10
11 Second Club
Thread Starter
here's some good info, plus they're a sponsor here. stainlessheaders.com
Best tip was from a Car Craft article by Doug Glad.
Postion the collector or four round tubes where they need to be near the trans. That gives you an aiming spot for the primary tubes. I started from the front passenger side because it was the easiest. No steering shaft to contend with. I wanted to clear the starter with the first and second tube so I wouldn't need to unbolt the header to remove the starter. Could of gone under the starter but it gives up allot of ground clearance.
Drivers side was a little bit more work. I came inside the steering shaft and then past the oil filter by about 3/8" to 1/2".
Wasn't a huge fabrication issue but did require a fair amount of eye balling, grinding of tubes for squareness before welding. I don't have tig so the wire feed had to do.
Nothing else to do in MN when it's -10.
Postion the collector or four round tubes where they need to be near the trans. That gives you an aiming spot for the primary tubes. I started from the front passenger side because it was the easiest. No steering shaft to contend with. I wanted to clear the starter with the first and second tube so I wouldn't need to unbolt the header to remove the starter. Could of gone under the starter but it gives up allot of ground clearance.
Drivers side was a little bit more work. I came inside the steering shaft and then past the oil filter by about 3/8" to 1/2".
Wasn't a huge fabrication issue but did require a fair amount of eye balling, grinding of tubes for squareness before welding. I don't have tig so the wire feed had to do.
Nothing else to do in MN when it's -10.

Just built these. 1 7/8" mild steel. First time. Need to clean up the welds a bit. Going in a 67 Nova with Heidt superide front clip.
It was time consuming. Hooker makes little sheet metal sleeves that help align the the tubes.
Next time I will go 1 7/8" to 2". The 2" just slide ove the 1 7/8" tube making aligment and welding easier.
Tried to go with a gentle of radius out of the port as I could. Suspension wouldn't let me pull the rear tubes any farther forward for more equal length.
It was time consuming. Hooker makes little sheet metal sleeves that help align the the tubes.
Next time I will go 1 7/8" to 2". The 2" just slide ove the 1 7/8" tube making aligment and welding easier.
Tried to go with a gentle of radius out of the port as I could. Suspension wouldn't let me pull the rear tubes any farther forward for more equal length.
 I'll probably use a strong packing tape or aluminum tape to hold the pieces together before I tack them.
02-22-2013, 10:10 PM
I'll probably use a strong packing tape or aluminum tape to hold the pieces together before I tack them.
02-22-2013, 10:10 PM
#11
11 Second Club
Thread Starter
Pulled the fenders, bumper, suspension, radiator, all engine harnesses and dropped the engine/tranny today. It's amazing how quick you can have everything apart on these cars. It only took me about 4-5 hours taking my time. I wasn't able to pull the passenger side Sanderson shorty header with the engine/subframe installed, so I highly doubt I'll be able to do it with the long tubes.
Tomorrow I plan to play with the header Lego's all day
Tomorrow I plan to play with the header Lego's all day
02-24-2013, 12:44 PM
#12
11 Second Club
Thread Starter
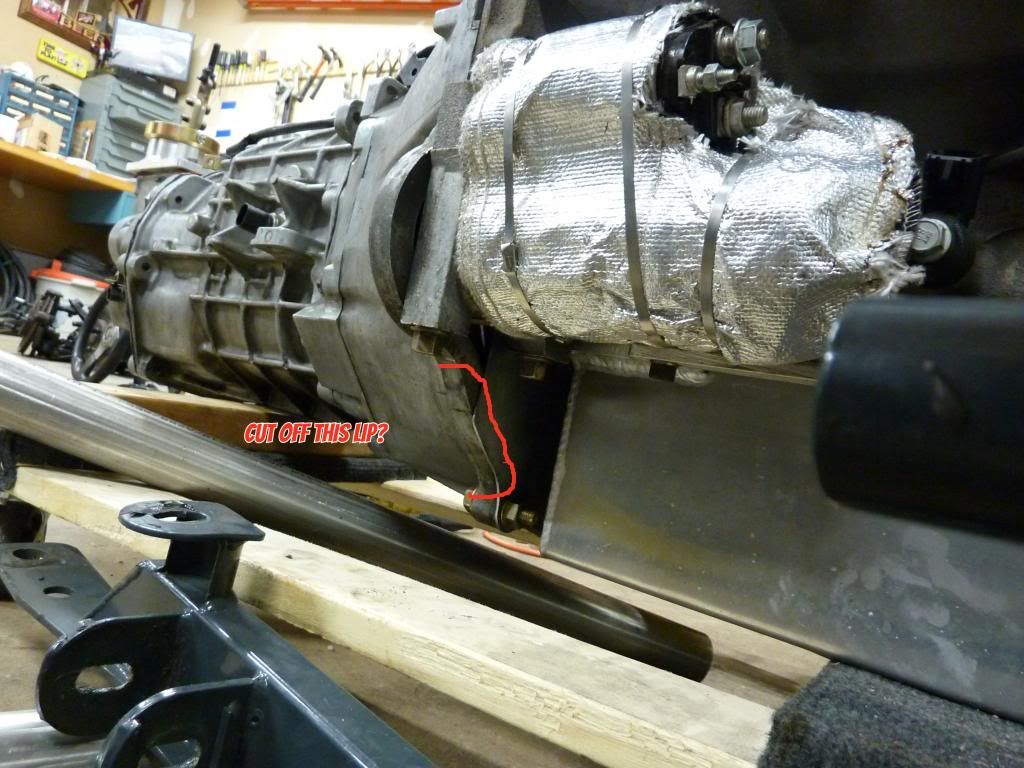
The passenger side is very tight where the primaries pass next to the rear of the block/bellhousing. So I was thinking I could trim a little off the edge of the bellhousing underneath the starter to give myself plenty of ground clearance.
Since the lower portion of the bellhousing no longer bolts to the oil pan, do you think that notching a portion of it off would affect it's strength?
Since the lower portion of the bellhousing no longer bolts to the oil pan, do you think that notching a portion of it off would affect it's strength?
02-24-2013, 10:31 PM
#13
Just a quick note. I looked at the templates you attached. I went to the local Fleet Farm and they had many types of exhaust tube splices. About 4 inches long. Luck would have it they had a 2 inch id that fit the 1 7/8 tube I was using snuggly but not too tight. Welded them together as group of four for my aiming point.
Keep in mind you may be able to aim the primaries slightly down and the use the collector to correct and level it out under the car.
I also made a little clamp out of 2 inch tube split down the middle with a hinge with welding slots to help align tubes. Sounds complicated but it helped hold tubes square.
 03-02-2013, 01:53 PM
#15
11 Second Club
Thread Starter
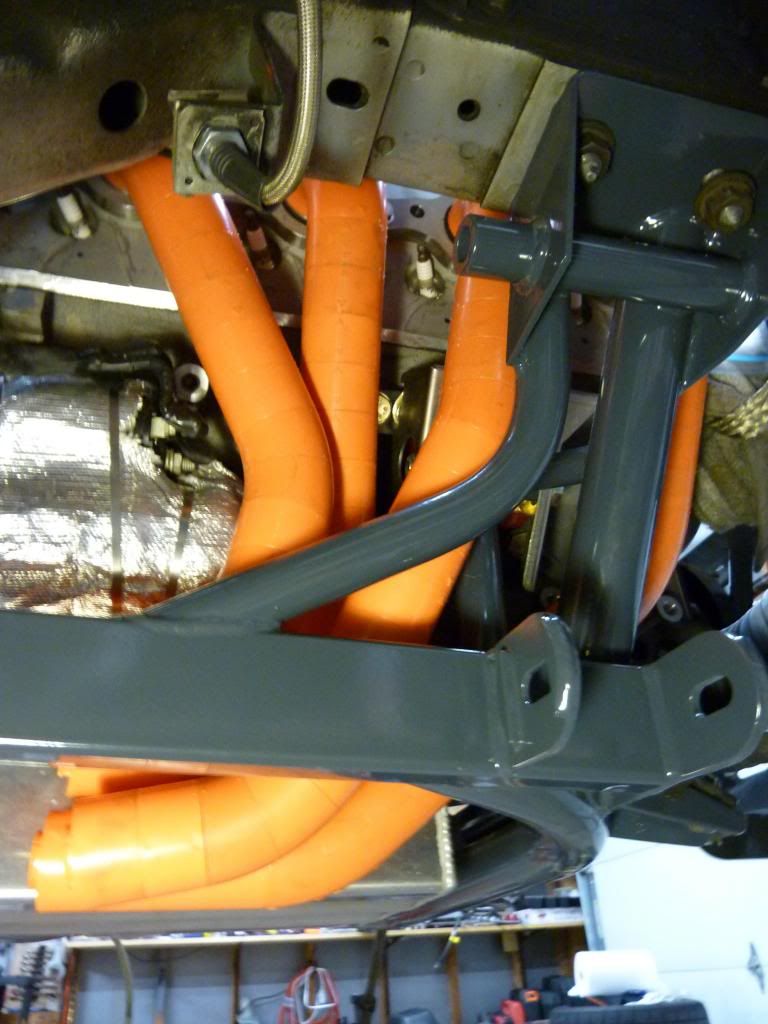
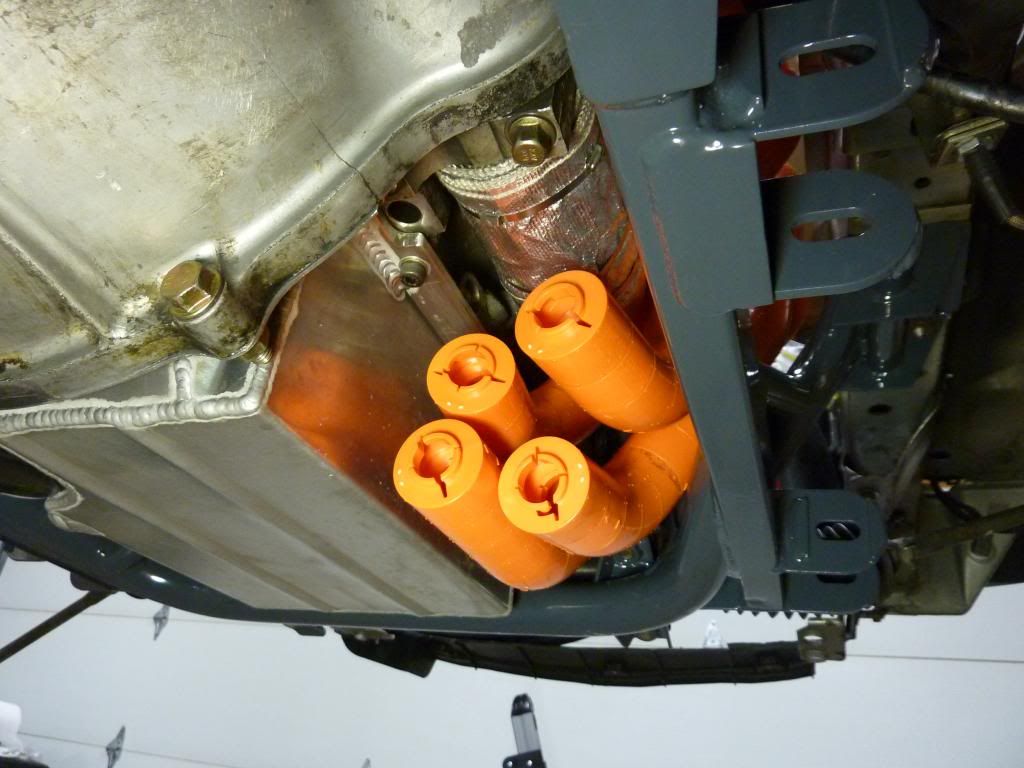
Played around with the lego's some more today. I've determined that the 3" radius pipes won't clear the chassis on any of the passenger side primaries and a couple on the drivers side. Here's a pic of how close the 3" CLR (Center Line Radius) bends are to the chassis. This is without cheating the tangent of the bend coming out of the flange like the Sandersons do. It could probably be made to work but it would still be really close.
Next I tried the same thing with the tighter 2" CLR lego's. Much more room this time. Here's a shot of how the 2" CLR bends look coming out of the flange...again, not cheating the tangent.
Here's a couple shots of the routing I came up with. I chose to route the #2 runner in front of the subframe to leave enough room for the other runners. The angles of the lego's don't allow for a perfect but it gives you an idea of where I'd like the pipes to end up.
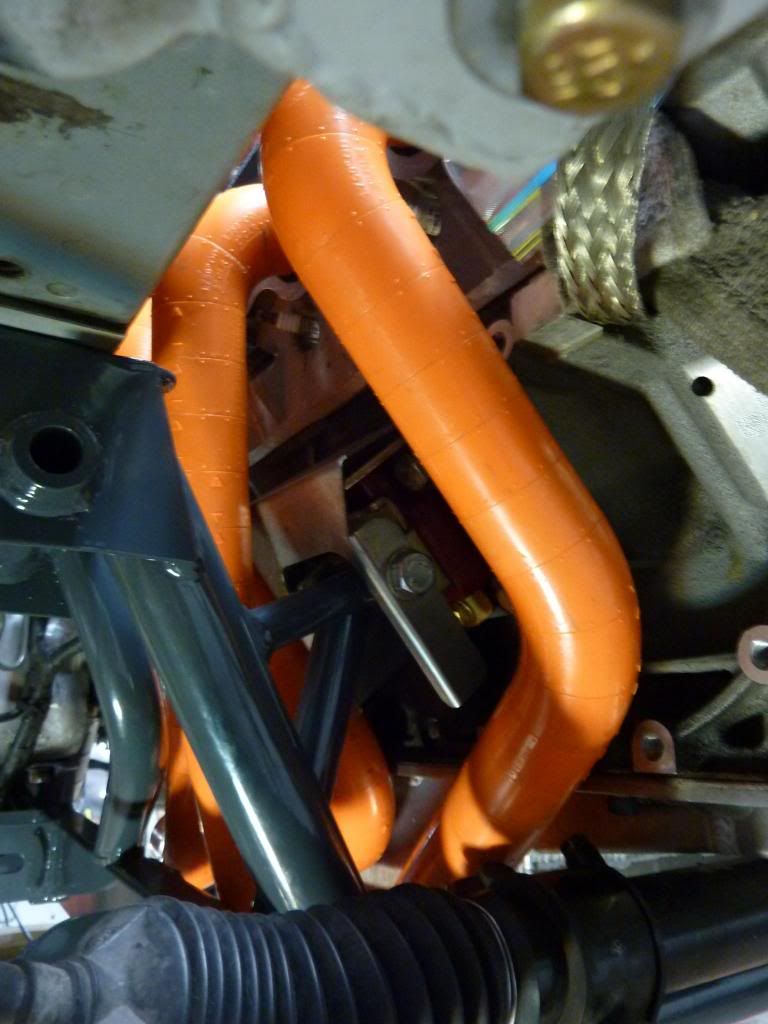
#2 = Inside bottom
#4 = Outside bottom
#6 = Inside top
#8 = Outside top
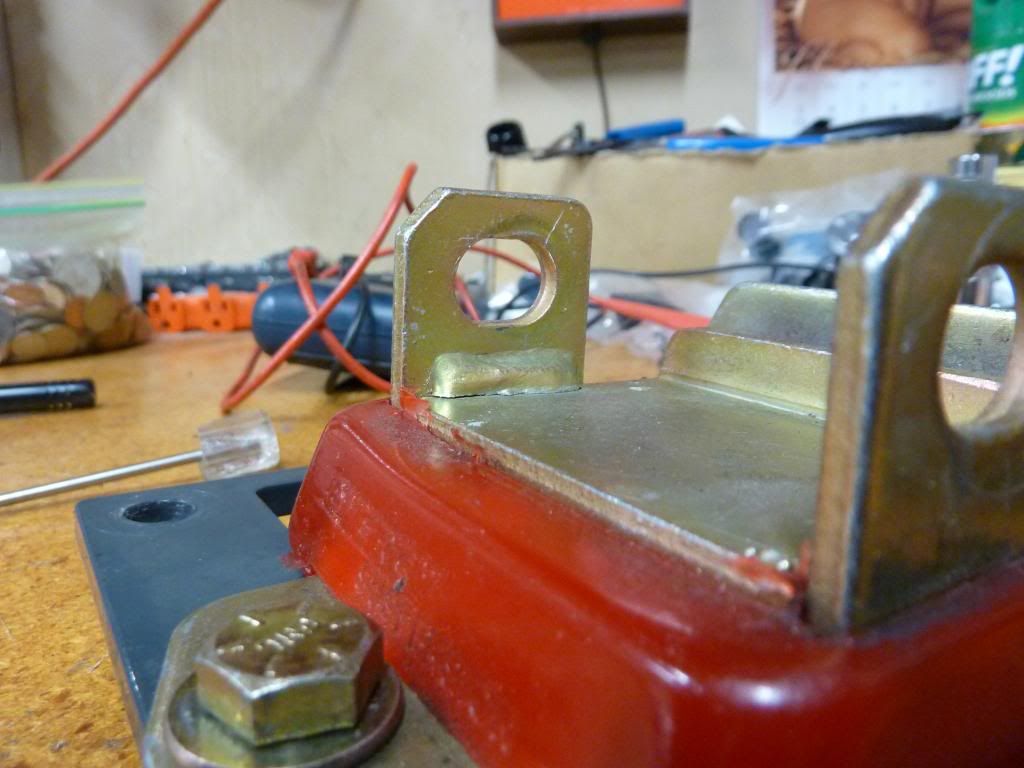
Found a failed weld on one of the motor mounts. Not sure what would have caused the weld to fail after 4-5K street miles but it appears that it's a common off the shelf part available all over the place. To me this looks like it was a bad weld to begin with. Heres The Part
Next I tried the same thing with the tighter 2" CLR lego's. Much more room this time. Here's a shot of how the 2" CLR bends look coming out of the flange...again, not cheating the tangent.
Here's a couple shots of the routing I came up with. I chose to route the #2 runner in front of the subframe to leave enough room for the other runners. The angles of the lego's don't allow for a perfect but it gives you an idea of where I'd like the pipes to end up.
#2 = Inside bottom
#4 = Outside bottom
#6 = Inside top
#8 = Outside top
Found a failed weld on one of the motor mounts. Not sure what would have caused the weld to fail after 4-5K street miles but it appears that it's a common off the shelf part available all over the place. To me this looks like it was a bad weld to begin with. Heres The Part
 03-02-2013, 03:37 PM
#17
Played around with the lego's some more today. I've determined that the 3" radius pipes won't clear the chassis on any of the passenger side primaries and a couple on the drivers side. Here's a pic of how close the 3" CLR (Center Line Radius) bends are to the chassis. This is without cheating the tangent of the bend coming out of the flange like the Sandersons do. It could probably be made to work but it would still be really close.
Next I tried the same thing with the tighter 2" CLR lego's. Much more room this time. Here's a shot of how the 2" CLR bends look coming out of the flange...again, not cheating the tangent.
Next I tried the same thing with the tighter 2" CLR lego's. Much more room this time. Here's a shot of how the 2" CLR bends look coming out of the flange...again, not cheating the tangent.
I was looking at the kits made by ICEngineworks, but have not ordered yet.
Thanks,
Chris
03-02-2013, 04:00 PM
#18
11 Second Club
Thread Starter
Yep that's what this kit is. It's the 1 3/4" kit. My headers are going to be 1 7/8" but it's close enough to figure out how I want to route everything. I was lucky enough to have a friend lend them out to me for a while. These kits are pretty pricey but they sure are easier than piecing together PVC pipes.
03-02-2013, 07:35 PM
#19
Yep that's what this kit is. It's the 1 3/4" kit. My headers are going to be 1 7/8" but it's close enough to figure out how I want to route everything. I was lucky enough to have a friend lend them out to me for a while. These kits are pretty pricey but they sure are easier than piecing together PVC pipes.
03-02-2013, 11:24 PM
#20
On The Tree

Join Date: Apr 2011
Location: Vancouver, WA
Posts: 129
Likes: 0
Received 0 Likes
on
0 Posts

I have been considering building my own for my car. I'm very interested in seeing what you come up with.
Would there be any advantage to running the tubes to the collector in firing order for that side? Or would that just be a waste of time?
Good luck with your project.
Would there be any advantage to running the tubes to the collector in firing order for that side? Or would that just be a waste of time?
Good luck with your project.