Conversions & Swaps LSX Engines in Non-LSX Vehicles
Sponsored by:
Sponsored by:

66 Chevelle LS3/4L80

Thread Tools
 
Search this Thread
 
Old Feb 18, 2018 | 11:49 AM
  #1  
Mr.Bu's Avatar
Thread Starter
On The Tree
15 Year Member
Photogenic
Photoriffic
Shutterbug
 
Joined: Dec 2009
Posts: 174
Likes: 2
From: Aurora IL
Default 66 Chevelle LS3/4L80

This is my first LS swap, just got it running. A few of the build pics.

Couple pics of the car from last year before swap.

66 Chevelle LS3/4L80-9yjltxnl.jpg


66 Chevelle LS3/4L80-6xssw4zl.jpg

First thing I did was make 2 fuse panels and mount equipment for the hdx Dakota Digital gauges. One panel is keyed 12v the other constant.

66 Chevelle LS3/4L80-u46w2n9l.jpg


66 Chevelle LS3/4L80-g4ax8p6l.jpg

Gauges installed.

66 Chevelle LS3/4L80-quvpv6uh.jpg

Last edited by Mr.Bu; Feb 18, 2018 at 06:52 PM.
Reply
Old Feb 18, 2018 | 11:57 AM
  #2  
Mr.Bu's Avatar
Thread Starter
On The Tree
15 Year Member
Photogenic
Photoriffic
Shutterbug
 
Joined: Dec 2009
Posts: 174
Likes: 2
From: Aurora IL
Default

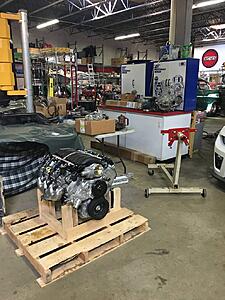
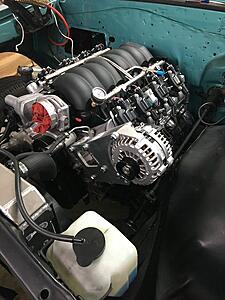
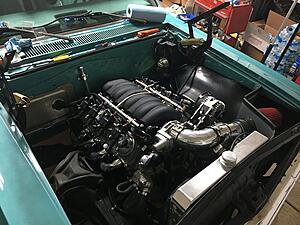
Long story short, had the ls3 delivered to Nickey Performance in St.Charles for their stage 1 cam, springs, trunion upgrade, throttle body porting ect. Got it home, threw some parts at it and dropped her in.

66 Chevelle LS3/4L80-mr0cdpxh.jpg

66 Chevelle LS3/4L80-0knbbdth.jpg

66 Chevelle LS3/4L80-bwedmcfh.jpg

66 Chevelle LS3/4L80-h1fmlsdh.jpg
Reply
Old Feb 18, 2018 | 11:59 AM
  #3  
Mr.Bu's Avatar
Thread Starter
On The Tree
15 Year Member
Photogenic
Photoriffic
Shutterbug
 
Joined: Dec 2009
Posts: 174
Likes: 2
From: Aurora IL
Default

Also, dropped in the sending unit, fuel pump and bolted in the gas tank from Tanks Inc. Plumbed and ran the lines, routed wires to under the dash.

66 Chevelle LS3/4L80-gf1fkrtl.jpg

66 Chevelle LS3/4L80-qrjoaejh.jpg
Reply
Old Feb 18, 2018 | 12:01 PM
  #4  
Mr.Bu's Avatar
Thread Starter
On The Tree
15 Year Member
Photogenic
Photoriffic
Shutterbug
 
Joined: Dec 2009
Posts: 174
Likes: 2
From: Aurora IL
Default

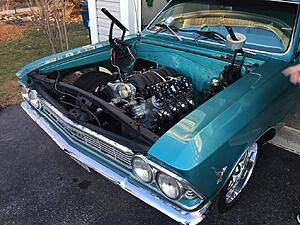
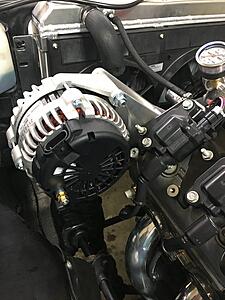
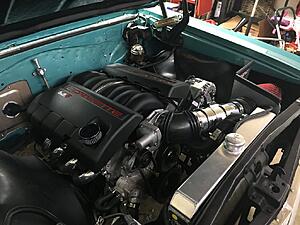
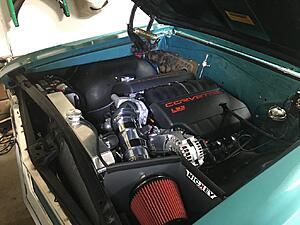
New kwik performance alt. bracket on. Tons of room by the temp sensor now. Only thing I don’t like is the long run from the crank to alt. with no idler. Should be ok though.

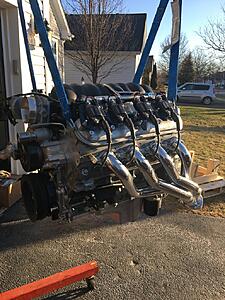
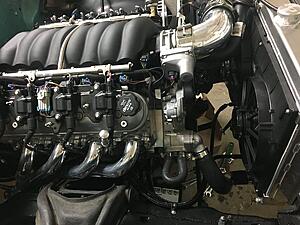
Edit:also had to change the plug wires due to header clearance on a few cylinders. No biggie but something to consider if someone else was interested in these headers for their build. The cheaper route would’ve been those foreskin socks that cover the plug end but I’m not a fan of the way they look.


66 Chevelle LS3/4L80-uegq3yxl.jpg

66 Chevelle LS3/4L80-kjcdyosl.jpg


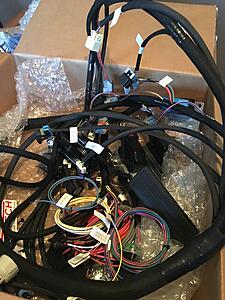
The Speartech harness came in today. Really well made and labeled.

66 Chevelle LS3/4L80-wj6txedl.jpg

66 Chevelle LS3/4L80-3aef7chl.jpg
Reply
Old Feb 18, 2018 | 12:02 PM
  #5  
Mr.Bu's Avatar
Thread Starter
On The Tree
15 Year Member
Photogenic
Photoriffic
Shutterbug
 
Joined: Dec 2009
Posts: 174
Likes: 2
From: Aurora IL
Default

66 Chevelle LS3/4L80-swlqe7hl.jpg

Trans in for good finally. Frame drilled and cross member bolted in. Drive angle looks good to me.


Yank pas3400 converter a hair over 1/8” away which is within spec.


66 Chevelle LS3/4L80-jaa6pi0l.jpg


Giddy up.
Reply
Old Feb 18, 2018 | 12:04 PM
  #6  
Mr.Bu's Avatar
Thread Starter
On The Tree
15 Year Member
Photogenic
Photoriffic
Shutterbug
 
Joined: Dec 2009
Posts: 174
Likes: 2
From: Aurora IL
Default

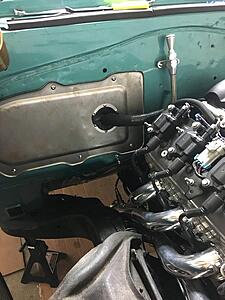
Finally bolted converter to flexplate. Threw starter in, and routed trans lines to cooler. Also was able to bolt up heater delete plate and trans dip stick. I used chrome button head bolts so it looks halfway decent. Heater plate will be painted to match firewall when this is all done.

66 Chevelle LS3/4L80-sxgnlsel.jpg

66 Chevelle LS3/4L80-rcsob6ll.jpg

66 Chevelle LS3/4L80-kmxvblnl.jpg


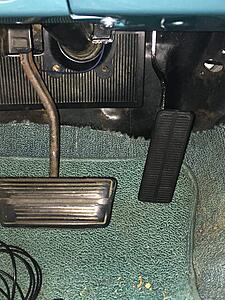
Bolted in the drive by wire pedal. It’s about an inch or two further back than the original but it’s perfect because I can stretch a little more. Full travel no problem.

66 Chevelle LS3/4L80-6lw9n6hl.jpg


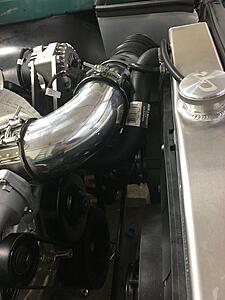
Also found an upper radiator hose that fit great after a little trimming! But it’s touching the intake so I may have to rework that.

66 Chevelle LS3/4L80-gvhi6xgl.jpg
Reply
Old Feb 18, 2018 | 12:06 PM
  #7  
Mr.Bu's Avatar
Thread Starter
On The Tree
15 Year Member
Photogenic
Photoriffic
Shutterbug
 
Joined: Dec 2009
Posts: 174
Likes: 2
From: Aurora IL
Default

Facebook Post
Reply
Old Feb 18, 2018 | 12:19 PM
  #8  
Mr.Bu's Avatar
Thread Starter
On The Tree
15 Year Member
Photogenic
Photoriffic
Shutterbug
 
Joined: Dec 2009
Posts: 174
Likes: 2
From: Aurora IL
Default

I’ve obviously skipped a lot of details but if anyone has questions with their similar swap I’m happy to answer what I can.
Reply
Old Feb 18, 2018 | 01:02 PM
  #9  
2ToeRacing's Avatar
TECH Enthusiast
15 Year Member
Liked
Loved
Community Favorite
iTrader: (5)
 
Joined: Aug 2010
Posts: 585
Likes: 17
From: Atlanta Ga,
Default

Verry nice....I've always wanted to build a 66/67. You're doing it the same way I'd do it. As long as it has 450-ish to the wheels I'll be happy
Reply
Old Feb 18, 2018 | 02:05 PM
  #10  
1973 STEP A SIDE's Avatar
Launching!
iTrader: (4)
 
Joined: Dec 2012
Posts: 261
Likes: 7
Default

Originally Posted by Mr.Bu
I’ve obviously skipped a lot of details but if anyone has questions with their similar swap I’m happy to answer what I can.
Looking Good !! Can you tell me where you got the grommet running thru the heater delete plate ?
Reply
Old Feb 18, 2018 | 03:20 PM
  #11  
Mr.Bu's Avatar
Thread Starter
On The Tree
15 Year Member
Photogenic
Photoriffic
Shutterbug
 
Joined: Dec 2009
Posts: 174
Likes: 2
From: Aurora IL
Default

Originally Posted by 2ToeRacing
Verry nice....I've always wanted to build a 66/67. You're doing it the same way I'd do it. As long as it has 450-ish to the wheels I'll be happy
Thank you.

That’s about where I figure I’ll be. Auto 5th gens with this cam put down 470’s. I was told the 4l80 eats more power than the 6l80, as will my 9”. Should be pretty fun at 32-3300lbs.

Originally Posted by 1973 STEP A SIDE
Looking Good !! Can you tell me where you got the grommet running thru the heater delete plate ?
It’s a seals-it split firewall grommet. They have all kinds of different sized id/od grommets. Thank you.
Reply
Old Feb 18, 2018 | 04:46 PM
  #12  
1973 STEP A SIDE's Avatar
Launching!
iTrader: (4)
 
Joined: Dec 2012
Posts: 261
Likes: 7
Default

Thanks Mr.Bu
Reply
Old Feb 18, 2018 | 06:00 PM
  #13  
Jimbo1367's Avatar
TECH Senior Member
15 Year Member
Liked
Loved
Community Favorite
 
Joined: Jul 2009
Posts: 8,028
Likes: 660
Default

Looks like Speartech finally came out with a covering option now. I wish they did when I got mine.
Reply
Old Feb 18, 2018 | 06:45 PM
  #14  
Motown 454's Avatar
TECH Enthusiast
iTrader: (15)
 
Joined: Mar 2007
Posts: 686
Likes: 17
From: S.E. Ma.
Default

Mr.Bu That's a beautiful car!! It's going to be a fun ride for sure! Nice work.
Reply
Old Feb 22, 2018 | 08:43 AM
  #15  
bodomram07's Avatar
Teching In
 
Joined: Feb 2018
Posts: 29
Likes: 0
Default

Mr.Bu, you car is just Amazing, good job !!!!
Reply
Old Feb 22, 2018 | 09:05 AM
  #16  
NOS327's Avatar
8 Second Club
15 Year Member
iTrader: (30)
 
Joined: Apr 2006
Posts: 207
Likes: 2
From: Wichita, KS
Default

Well done man. Nice car and nice parts, bet it's a joy to drive.
Reply
Old Mar 18, 2018 | 07:07 PM
  #17  
Mr.Bu's Avatar
Thread Starter
On The Tree
15 Year Member
Photogenic
Photoriffic
Shutterbug
 
Joined: Dec 2009
Posts: 174
Likes: 2
From: Aurora IL
Default

Thank you everyone but she isn’t done yet. That’s just the work I’ve done the last month. I’m almost done though.

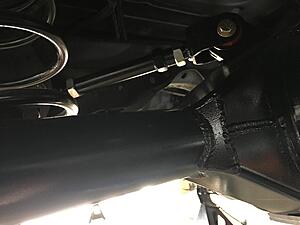
Bushings are in, and tape is off after another can of paint the other day. Looking back, I should’ve saved the money and went with an iron center section and used some of that money towards a nice powder coat. Couple hundred bucks extra but google says it’s only about 20lbs lighter.

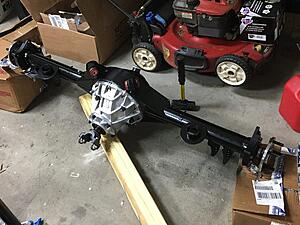
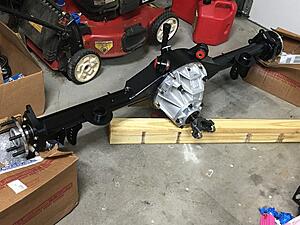
Anyway, here’s that sexy thang. Strange 9” with HD Pro alum center section.

66 Chevelle LS3/4L80-cox2owfl.jpg

66 Chevelle LS3/4L80-louc4bol.jpg

Last edited by Mr.Bu; Mar 18, 2018 at 08:41 PM.
Reply
Old Mar 18, 2018 | 07:09 PM
  #18  
Mr.Bu's Avatar
Thread Starter
On The Tree
15 Year Member
Photogenic
Photoriffic
Shutterbug
 
Joined: Dec 2009
Posts: 174
Likes: 2
From: Aurora IL
Default

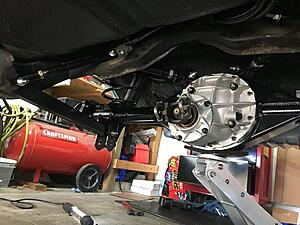
Pulled 10 bolt out yesterday and slid my 9” in....gently.


66 Chevelle LS3/4L80-2uusycil.jpg

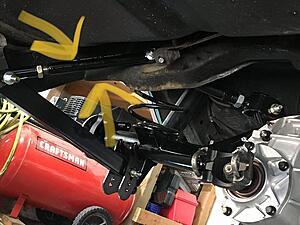
Dbl adjustable uppers. eBay ftw

66 Chevelle LS3/4L80-j1huihkl.jpg


Now this was pretty cool. It ties the front mounting points of the uppers to the lowers to strengthen chassis. No brainer for $120. Place called pure muscle makes them. Others do too but these were 10 bucks cheaper than umi.

66 Chevelle LS3/4L80-zrxfarfl.jpg


Things left:
Disc brake conversion up front, master cylinder, and running new line to rear brakes.
Measure for driveshaft.
Exhaust
Tune
Reply
Old Mar 18, 2018 | 07:15 PM
  #19  
Mr.Bu's Avatar
Thread Starter
On The Tree
15 Year Member
Photogenic
Photoriffic
Shutterbug
 
Joined: Dec 2009
Posts: 174
Likes: 2
From: Aurora IL
Default

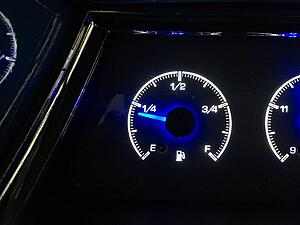
After trying to fix it for almost two weeks I gave up on the universal style fuel sender and bought the float less style unit. So much damn easier. Dropped the tank for the last time hopefully.

Gauge reading with around 4 or 5 gallons.

66 Chevelle LS3/4L80-xiygj7kl.jpg

66 Chevelle LS3/4L80-l3asdmpl.jpg
Reply
Old Mar 18, 2018 | 07:16 PM
  #20  
Mr.Bu's Avatar
Thread Starter
On The Tree
15 Year Member
Photogenic
Photoriffic
Shutterbug
 
Joined: Dec 2009
Posts: 174
Likes: 2
From: Aurora IL
Default

Lokar Trans linkage on. I went with the rod over the cable. 2 bends and a cut and it went in.


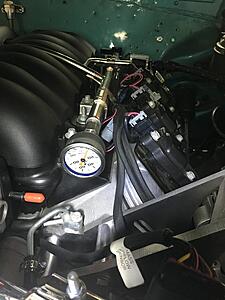
New fuel rail fitting. The first one had plastic retainer clips that held it on the rail which I wasn’t sure about. After a search holy **** I was right. People are burning or almost burning their cars down. Bought a new fitting with 4 metal retaining clips and a safety lock on the outside. I’ll be the first to admit I’m a carburetor guy so this is new to me.

66 Chevelle LS3/4L80-33shlsyl.jpg


Moved the fuel pressure gauge down and straight instead of the 90 because...

66 Chevelle LS3/4L80-eoqgj9fl.jpg

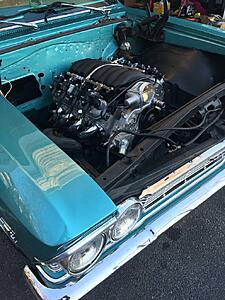
I bought some ls3 engine covers. I think it looks way better

66 Chevelle LS3/4L80-kmyczhwh.jpg

66 Chevelle LS3/4L80-lvjwrjtl.jpg

66 Chevelle LS3/4L80-r1bep2kh.jpg


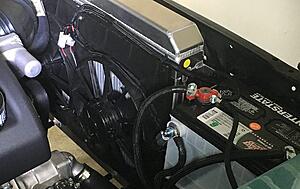
Also changed all the loom on the wiring I did (fans/battery ect) to match the speartech harness. A lot of effort to still be ugly, like me :rofl:. I hate seeing wires.

66 Chevelle LS3/4L80-hl5wjigl.jpg
Reply


All times are GMT -5. The time now is 08:49 PM.