When you click on links to various merchants on this site and make a purchase, this can result in this site earning a commission. Affiliate programs and affiliations include, but are not limited to, the eBay Partner Network.
But I believe Dannyual has got this one under control. My 2 cents -- With it up on jack stands - take some careful measurements to be sure things are true/straight/not--twisted -- and get your subframe connectors welded in BEFORE you start monkeying-around-with/mocking-up the heavy bits.
Thanks, Michael! When I installed the Maximum Motorsports MMKM1 earlier in 2020, I had to take all of the installation alignment measurements using plumb bobs. Everything checked out just fine and I was able to align the K member within Maximum Motorsports' specifications.
Everything looked very nice under the car with the only bent metal being the driver's side "frame" under the driver's floorboard. The previous owner had improperly used jacks there bending that metal upward. It made it difficult to tightly fit the Maximum Motorsports full length subframe connectors on the driver's side. I got the SFCs welded in about a month ago. I'll detail all of this work as my thread's story line progresses.
Andrew, I bought my Holley Terminator kit right before the end of December 2018 during Holley's Christmas sale. I'll have to check but I'm pretty sure it's this one:
About 3 months later you posted your famous, "Swaps just got way easier...Holley Terminator X" thread. I could've saved a lot of money if I had looked into my crystal ball and known that the Terminator X was coming out .
You can't go wrong with the Dominator ECU. Don't regret your buying decision. If you need help with wiring and tuning, please don't hesitate to contact me. This is what I do!
Thanks, Michael! When I installed the Maximum Motorsports MMKM1 earlier in 2020, I had to take all of the installation alignment measurements using plumb bobs. Everything checked out just fine and I was able to align the K member within Maximum Motorsports' specifications.
Everything looked very nice under the car with the only bent metal being the driver's side "frame" under the driver's floorboard. The previous owner had improperly used jacks there bending that metal upward. It made it difficult to tightly fit the Maximum Motorsports full length subframe connectors on the driver's side. I got the SFCs welded in about a month ago. I'll detail all of this work as my thread's story line progresses.
If you haven�t purchased expensive Sub frame connectors I would recommend Maximum Motorsport, they�re really nicely bent to tuck up close to your underside and are square vs flat eBay cheaper ones. Super nice after installed.
64post, thank you for the link to your build thread. It looks like you used an ICT Billet front end accessory drive. I'm planning on using the same because:
1. They're priced right
2. I want to keep and use my OEM Ford power steering pump
3. I want to keep and use my OEM Ford air conditioning compressor
4. Last but certainly not least, they're made in the USA!
My main con for the ICT Billet FEAD is that I don't have the choice of keeping my LS376/480 crate engine's Corvette spacing. If I go ICT Billet, I'll need either a truck or Camaro harmonic balancer/pulley and I'll need a water pump spacer that ICT also has available.
If you haven�t purchased expensive Sub frame connectors I would recommend Maximum Motorsport, they�re really nicely bent to tuck up close to your underside and are square vs flat eBay cheaper ones. Super nice after installed.
Yes, I welded in Maximum Motorsport full length SFCs. I've spent a lot of money with them for this project!
You can't go wrong with the Dominator ECU. Don't regret your buying decision. If you need help with wiring and tuning, please don't hesitate to contact me. This is what I do!
Andrew
Andrew, I see a lot of your posts concerning tuning and I know you're experienced with this computer stuff. Other than holding my Holley ECU in my hands, I have no experience with it! I'm sure I'll be picking your brain for help when the time comes to try to get my engine running.
I never made any mention of what my goals are with this car. This car will be a nice, high performance street car with street manners including air conditioning and as much insulation and sound deadening as I can reasonably add to the car. I know from driving my '91GT for 25 years how rattle filled and tinny sounding these Fox bodies can be. My Maximum Motorsports torque arm and panhard bar are going to add some noise, vibration and harshness (NVH) so some extra sound deadening material will be a must. I'd like to be able to take the car to the strip on occasion and maybe even try a road course.
The bottom line is I want the car to be a reliable street car that I can drive in the Houston summer heat.
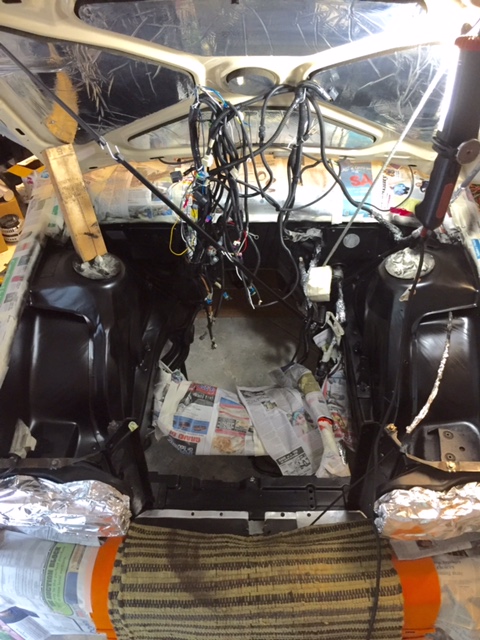
By the time I was deep into prepping the engine compartment for paint, it was already February 2019. My plan was to paint it before all the yellow oak tree pollen started falling right at the beginning of March. Not only that but the bugs would be minimal.
Taking the front fenders and cap off the car has made it so much easier to work on!
The hood was also removed soon after these pictures were taken
In 2019, the pollen started falling early; about the middle of February and the pollen was heavy. My first "Mount Everest" of the project. The pollen was so heavy that I thought there was no way I could paint that engine bay white and not have pollen show. I was probably wrong but I was so wrapped around the axle concerning the pollen that I thought it best to construct a makeshift paint booth. The paint booth became a project in and of itself!
I'm just going to admit to all of you that my frustration was pretty high because of the pollen. I probably wasted more time complaining and being angry about it than I did trying to make my paint booth. The booth's construction should've been easy and in the pictures below, it'll appear easy. For some reason, it wasn't . The next thing I knew, it was May 2019! Family vacation time (Royal Caribbean cruise) and then the arrival of 98 degree Houston summer weather. I literally threw in the towel and didn't touch the car project from early summer until October 2019!
I decided to use my 4 post lift as the “frame” for the paint booth. You can see my red, donor car in this picture.
Backside of the booth.
I knew I’d need to be able to get in and out so I had to make a door.
Last edited by dannyual777; 12-21-2020 at 08:04 AM.
I needed filtered air going in. This is a household air conditioning filter.
As much as I wanted this barrel fan to be outside of the booth, electric fans are much more efficient at pulling air than they are at pushing air. I tried using it as a pusher and it pushed only about half as much air as it did pulling!
I had to make an addition to the front so that I had plenty of room to work at the front of the car. That hole is the air exit.
Looking at the car through the front air exit hole.
You can plainly see that the fan pressurized up the booth.
Last edited by dannyual777; 12-21-2020 at 08:23 AM.
Andrew, I bought my Holley Terminator kit right before the end of December 2018 during Holley's Christmas sale. I'll have to check but I'm pretty sure it's this one:
About 3 months later you posted your famous, "Swaps just got way easier...Holley Terminator X" thread. I could've saved a lot of money if I had looked into my crystal ball and known that the Terminator X was coming out .
I have a terminator x NOT max and ready to upgrade to a dominator. willing to work something out if you would like to free up some capital.
Wow, building your own spray booth....that’s dedication, there. Yes to Holley vs. Fitech, I switched to Terminator X, When I installed the LS3, much better set up IMO. I am running Holley HP on the the other car, HP will run low impedance injectors that’s about the the biggest difference between it and Ter-x. Dominator better for dedicated race car or boosted apps.
Op, nothing wrong with fbody belt spacing. Get yourself a quality SFI balancer and buy a pin kit, they’re not expensive, easy to use and have the added security of your damper not spinning on the crank. I spun an aftermarket balancer on a stock crank once and it made a mess of the snout. I think it was because of the after market bolt I used. If you were using an aftermarket crank with dual key ways then there would no problem.
Yeah. I couldn't see the forest for the trees. I should've just said to heck with it and sprayed the engine bay in the midst of the pollen in Feb 2019. I finally painted it in early October, 2019.
I really don't want to have to remove a perfectly good, factory installed, Corvette spacing harmonic balancer. I think the torque specification for that bolt (aftermarket) is really high as well. I know my torque wrench only goes up to 150 ft-lbs so I don't think that it's going to work on that bolt. In the end, if I want to use ICT Billet's FEAD, I'm going to have to do all of that.
I am pretty sure that the C5/6/Holley high mount fits in a Fox body and you can retain the Corvette balancer.
I am pretty sure that the C5/6/Holley high mount fits in a Fox body and you can retain the Corvette balancer.
Andrew
I guess that I'm going to have to do some more research and determine what the net cost of each system will be along with factoring in any extra work. The ICT Billet initial cost is much less money but I'll have to buy another balancer and a water pump spacer to move me out to either the Camaro or truck spacing. The Holley high mount would eliminate any extra work.
As this thread progresses, I'll keep coming back in here and posting what I've found and/or what I've decided to do.
I've still got a lot of pictures of completed work as well as work that I'm currently doing. I'll keep posting. Thank you to everyone for your comments as well as any information/links/suggestions that you've given. They are all very, very much appreciated!
Last edited by dannyual777; 12-21-2020 at 05:12 PM.
I used this Italian made, ANI mini spray gun that came highly recommended online by the YouTube guy, �The Gunman.� PPG Shopline paints used. Urethane primer and single stage Oxford White.
I used this full face 3M face mask respirator. I can�t rave enough at how awesome it was. It fit perfect and I never once smelled any of the paint fumes because it seals so much better than a standard half face respirator.
Almost ready to shoot paint.
It was 95�F the day I sprayed the engine bay in early Oct 2019.


 12-20-2020, 08:21 PM


 .
.


 . The next thing I knew, it was May 2019! Family vacation time (Royal Caribbean cruise) and then the arrival of 98 degree Houston summer weather. I literally threw in the towel and didn't touch the car project from early summer until October 2019!