

1970 GTO Version 2.0
 03-17-2008, 05:25 PM
#21
Staging Lane

Join Date: Nov 2007
Posts: 51
Likes: 0
Received 0 Likes
on
0 Posts
We are just about to start on the 1st gen F-body in the next week if all goes well. I did the crate engine headers first and then the headerback. Expect to see LSx pieces on the shelf sometime in the summer. The engine adapter plates will be the sameones as the A-body.


 03-17-2008, 08:39 PM
#23
TECH Resident
iTrader: (3)
Join Date: Oct 2006
Location: edmonton alberta canada
Posts: 858
Likes: 0
Received 0 Likes
on
0 Posts

Andrew , I used to post on the rx7 boards alot and we talked a bit about the turbo 5.3 in my mustang , not sure if you remember or not? ANYWAY .... I remember reading about the car long ago in the real street eliminator and always wondered if you still had it .
Great to see it coming back to life and better then ever !!!!!!! I cant wait to see it all back together . My only question is now whats gonna happen to the shaker?
Great to see it coming back to life and better then ever !!!!!!! I cant wait to see it all back together . My only question is now whats gonna happen to the shaker?
 03-18-2008, 10:20 AM
#25
Staging Lane
Join Date: Nov 2007
Posts: 51
Likes: 0
Received 0 Likes
on
0 Posts
I would like to give you a locked down date, but like in all things it can get away from us. I would think July/August is a better guess.......and I do mean guess. Sorry I can't be more specfic.
03-18-2008, 06:44 PM
#26
TECH Senior Member
Thread Starter
iTrader: (7)

Parts are slowly starting to trickle in. I got the proper cam gear to use with the LS7 cam. I also got a take off C6 water pump.
For the sake of my sanity, I removed the lifter valley cover just to double check that this engine does not have Displacement on Demand. It does not.
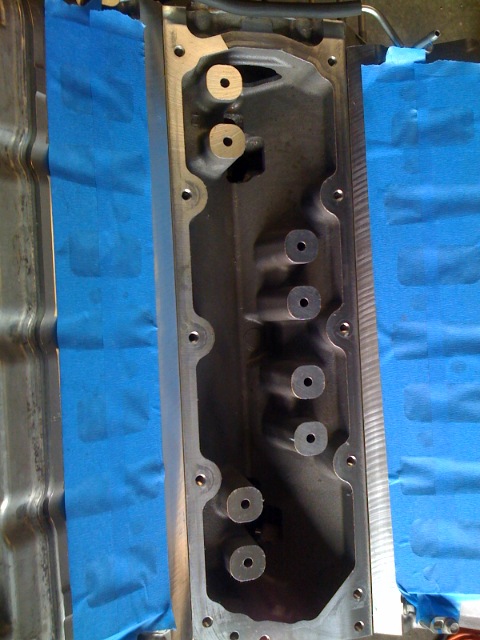
Andrew
For the sake of my sanity, I removed the lifter valley cover just to double check that this engine does not have Displacement on Demand. It does not.
Andrew
03-18-2008, 10:42 PM
#27
TECH Fanatic
iTrader: (15)
Join Date: Jun 2006
Location: Janesville WI
Posts: 1,155
Likes: 0
Received 0 Likes
on
0 Posts
I was under the impression it did not have DOD. But, I'm glad you confirmed it.
Man that engine looks nice, new, and clean inside. I think the guy should have charged you more for it!
Just funnin. Keep the pics coming Andrew. This is exciting!
Man that engine looks nice, new, and clean inside. I think the guy should have charged you more for it!
Just funnin. Keep the pics coming Andrew. This is exciting!

 03-21-2008, 07:02 PM
#35
TECH Senior Member
Thread Starter
iTrader: (7)
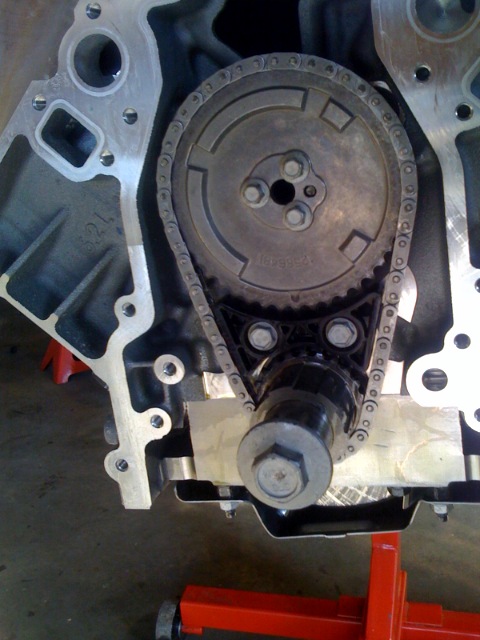
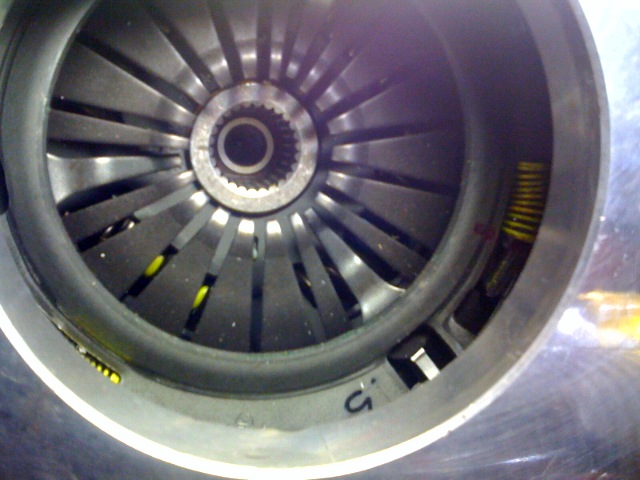
Today I took off the truck balancer and the front cover. This is what the VVT system looks like:
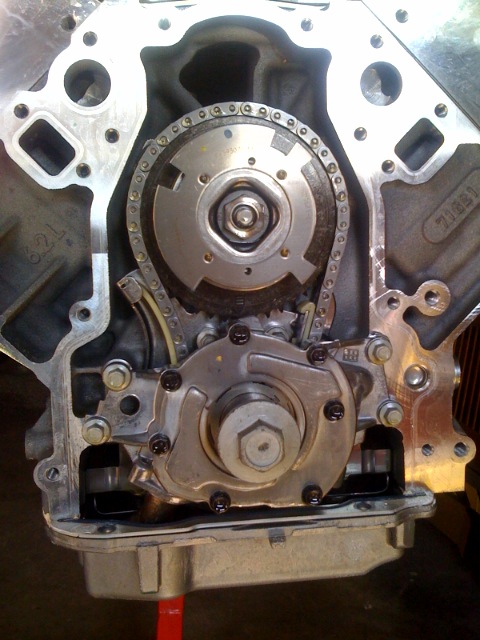
The VVT cam use a single bolt to attach the cam gear and VVT mechanism:
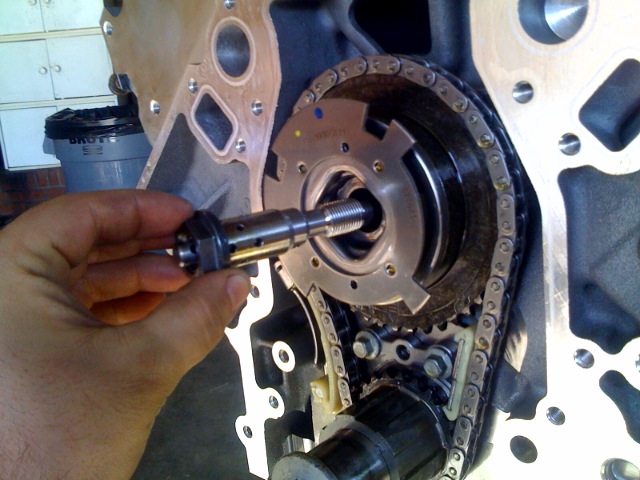
The LS7 cam uses the typical 3 bolt style cam gear. You just have to make sure to get the correct gear with the right pattern of bumps for the cam sensor. I got mine as a handy little kit from Lingenfelter.
Once the cam was installed I bolted on an LS2 from cover along with a C6 water pump and balancer. With the exception of the hollow stem valves, and of course the LS7 cam, this is pretty much an LS3 now.
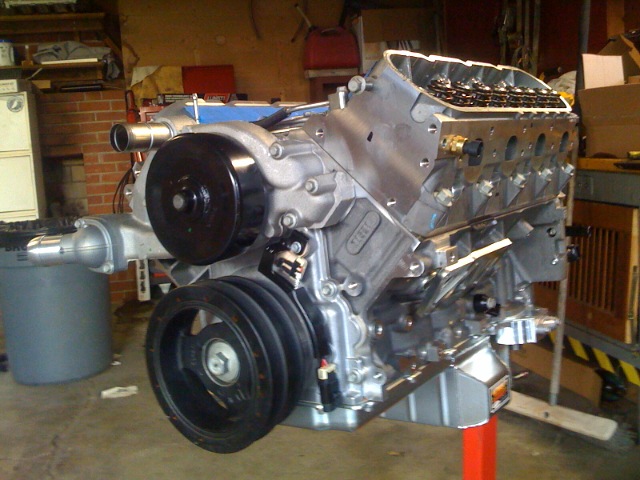
I also installed the AutoKraft oilpan. I really wanted to use an OEM style cast pan, but no one seems to agree what pan will work best. So I went with something that is proven to fit and retains the oil filter in the stock location.
Tomorrow I will be installing some Patriot Gold dual springs and doing some minor detailing.
Andrew
The VVT cam use a single bolt to attach the cam gear and VVT mechanism:
The LS7 cam uses the typical 3 bolt style cam gear. You just have to make sure to get the correct gear with the right pattern of bumps for the cam sensor. I got mine as a handy little kit from Lingenfelter.
Once the cam was installed I bolted on an LS2 from cover along with a C6 water pump and balancer. With the exception of the hollow stem valves, and of course the LS7 cam, this is pretty much an LS3 now.
I also installed the AutoKraft oilpan. I really wanted to use an OEM style cast pan, but no one seems to agree what pan will work best. So I went with something that is proven to fit and retains the oil filter in the stock location.
Tomorrow I will be installing some Patriot Gold dual springs and doing some minor detailing.
Andrew
03-23-2008, 06:48 PM
#36
TECH Senior Member
Thread Starter
iTrader: (7)
More progress over the weekend. I finished installing the Patriot Gold dual springs and hardened pushrods. I am pretty sure I went overkill on the springs, but I figure if I don't like this LS7 cam, I can just stab another one in it without having to worry about the springs.
Next I wanted to check the alignment of the Keisler bellhousing. I took the engine off the stand and placed the bellhousing against the block. Tick, tick, tick, tick...it was rocking back and forth. No good. I inspected it and it looks like someone dropped the bellhousing after it was machined. It put a slight dent on the corner and didn't allow the bellhousing to sit flat against the block. Little work with the file and it was good to go. This is a perfect example of why parts should be mocked up before installing them in the car. I may not have noticed this if I was on my back, under the car, trying to install it.
Next I wanted to check the alignment. I first measured the flatness. Very impressive, at .001".
Next I wanted to check the runout. I installed the dial indicator so it would ride on the inside of the bearing retainer register. This is what centers the transmission in the bellhousing. I set the indicator to zero.
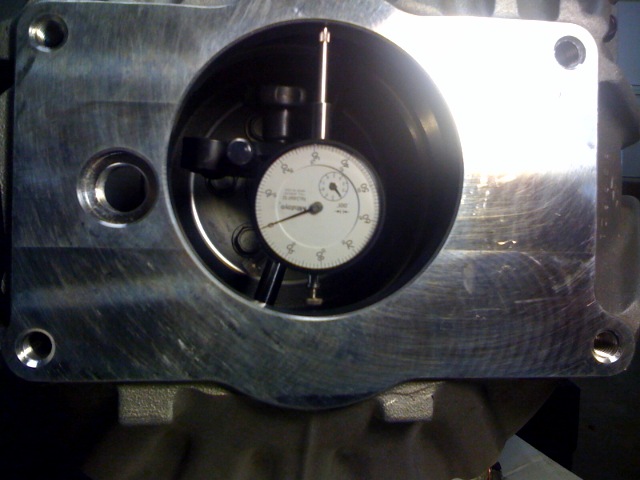
Rotated the engine 90 degrees. Still zero. Good.
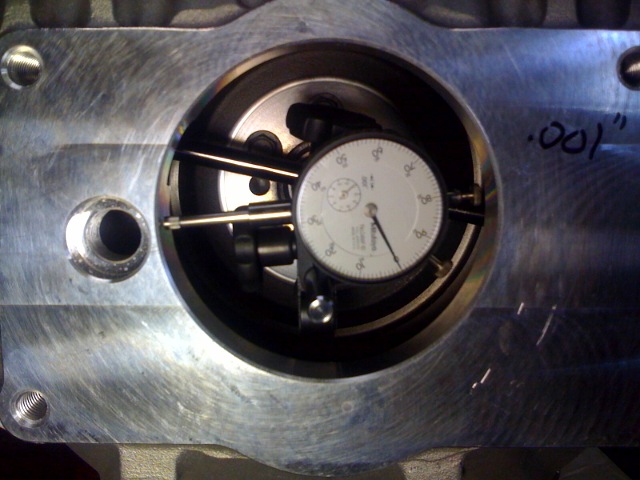
Rotated another 90 degrees. .005". Not bad.
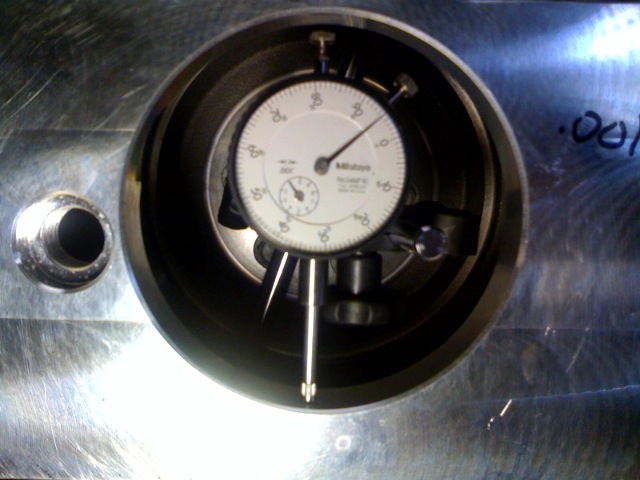
Rotated another 90 degrees. .004". Great.
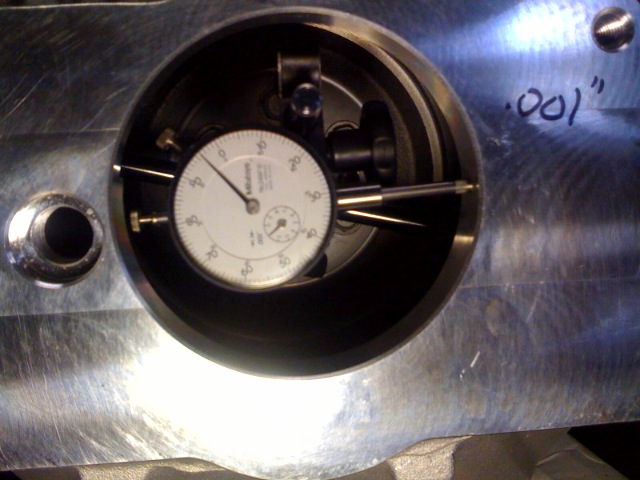
So the most the needle moved was .005". Divide that by 2 and you get total runout of .0025". Well under the recommended .005". Other than the minor issue with the bellhousing, I am pretty impressed.
Next it was time to see how the input shaft engages the pilot bearing. I am using a stock LS7 pilot bearing. I am happy with the engagement.

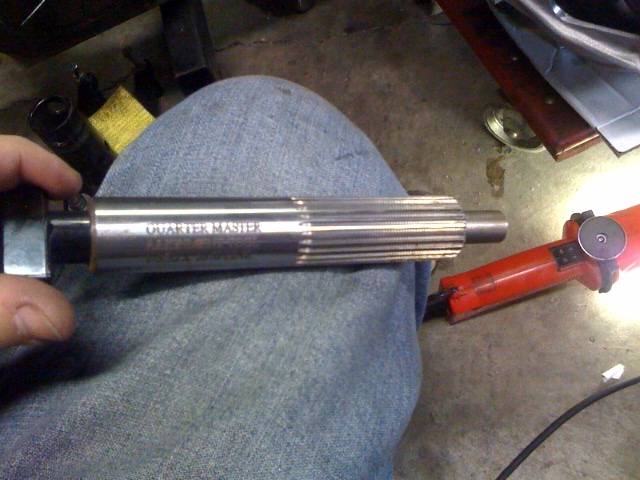
Then I wanted to install the clutch so that I can take some measurements for getting the right hydraulic throw out bearing. Everyone should have a nice clutch alignment took. This one is from Quarter Master and is way better than a plastic one.
There you have it, clutch and bellshousing installed. I am using a stock LS7 clutch on an LS2 flywheel. Heavy, but it will drive great. The distance from the clutch fingers to the outside of the bellhousing was 3.25". I will elaborate on why that's important later.
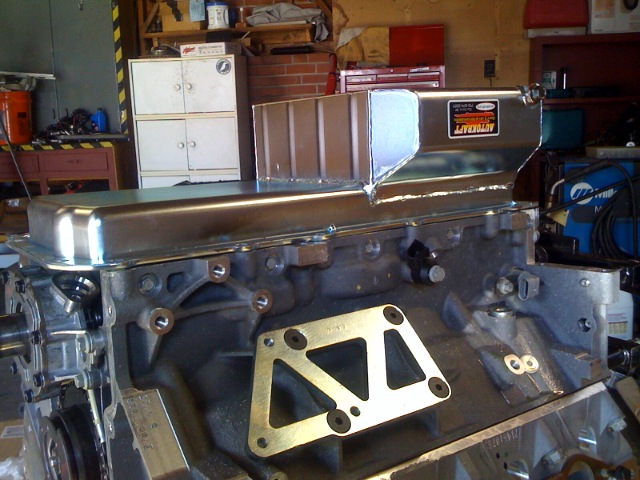
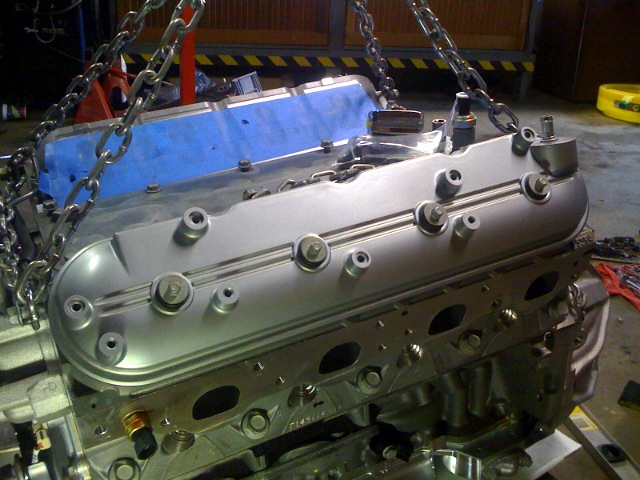
I used some high temp "cast aluminum" paint to add a little detail to the valve covers.
Time to start working on the car and get it ready for the engine. I want to redo some of the wiring as well as some of the fuel lines in the engine compartment.
Andrew
Next I wanted to check the alignment of the Keisler bellhousing. I took the engine off the stand and placed the bellhousing against the block. Tick, tick, tick, tick...it was rocking back and forth. No good. I inspected it and it looks like someone dropped the bellhousing after it was machined. It put a slight dent on the corner and didn't allow the bellhousing to sit flat against the block. Little work with the file and it was good to go. This is a perfect example of why parts should be mocked up before installing them in the car. I may not have noticed this if I was on my back, under the car, trying to install it.
Next I wanted to check the alignment. I first measured the flatness. Very impressive, at .001".
Next I wanted to check the runout. I installed the dial indicator so it would ride on the inside of the bearing retainer register. This is what centers the transmission in the bellhousing. I set the indicator to zero.
Rotated the engine 90 degrees. Still zero. Good.
Rotated another 90 degrees. .005". Not bad.
Rotated another 90 degrees. .004". Great.
So the most the needle moved was .005". Divide that by 2 and you get total runout of .0025". Well under the recommended .005". Other than the minor issue with the bellhousing, I am pretty impressed.
Next it was time to see how the input shaft engages the pilot bearing. I am using a stock LS7 pilot bearing. I am happy with the engagement.
Then I wanted to install the clutch so that I can take some measurements for getting the right hydraulic throw out bearing. Everyone should have a nice clutch alignment took. This one is from Quarter Master and is way better than a plastic one.
There you have it, clutch and bellshousing installed. I am using a stock LS7 clutch on an LS2 flywheel. Heavy, but it will drive great. The distance from the clutch fingers to the outside of the bellhousing was 3.25". I will elaborate on why that's important later.
I used some high temp "cast aluminum" paint to add a little detail to the valve covers.
Time to start working on the car and get it ready for the engine. I want to redo some of the wiring as well as some of the fuel lines in the engine compartment.
Andrew

 03-24-2008, 07:17 PM
#38
TECH Senior Member
Thread Starter
iTrader: (7)
Anyone still using those plastic donkey dick alignment tools should really get one of these. It squares the disk perfectly and the transmission just slides in without hassles. Best 30 bucks you will ever spend.
Andrew
03-26-2008, 09:46 PM
#40
TECH Senior Member
Thread Starter
iTrader: (7)
Today I got a few more pieces of the puzzle. I was exploring the Keisler website and I looked in the "clutch actuation" section. Their hydraulic kit seemed like exactly what I was looking for. I only got the partial kit that does not include the hydraulic throwout bearing. Keisler is in the market of selling Tremec transmissions, so the TOB is designed to mount on a TKO. I have a Richmond, so I will connect the dots from the MC. Looks like a quality piece and exactly what I need. The MC has a 3/4" bore and a travel of 1.5". That should make just about any hydraulic bearing puke its guts, so I will have to mock everything up and make sure that the bearing is not being over extended.

I also ordered a Quarter Master street throw out bearing.
http://www.racingclutches.com/produc...=53&cat_key=89
Andrew
I also ordered a Quarter Master street throw out bearing.
http://www.racingclutches.com/produc...=53&cat_key=89
Andrew