1SC stripper build
great progress man!!! you make it look too easy 
you might want to cut or relocate the E-brake cable bracket in the tunnel , the torque arm will hit it as soon as you hit any bump. (are you even using the E-brake anymore?)
you might want to cut or relocate the E-brake cable bracket in the tunnel , the torque arm will hit it as soon as you hit any bump. (are you even using the E-brake anymore?)
Thread Starter
Joined: Sep 2008
Posts: 473
Likes: 12
From: Woodinville, WA.
The ebrake is going away. Rearend is getting narrowed up 3.25" per side. One of the things on my list is to remove the ebrake cable going to the ebrake lever.
Thread Starter
Joined: Sep 2008
Posts: 473
Likes: 12
From: Woodinville, WA.
The Weld RTS is currently at the top of my list.
http://weldracing.com/aitdownloadabl...itfile_id/309/
Weld RTS # 71MP-509B45A
15x9.33
5x4.75 BC
4.50 BS
Medium mounting pad
16.7 LBS.
http://weldracing.com/aitdownloadabl...itfile_id/309/
Weld RTS # 71MP-509B45A
15x9.33
5x4.75 BC
4.50 BS
Medium mounting pad
16.7 LBS.
thats looks great!
more info on thouse nutcetrs, and the gun? got any upclose pics?
How much do thouse bump stopes weight? I still have mine trimmed down . its like 3-4 layers of metal tho. Are you glad you cut them out, still think its strong?
more info on thouse nutcetrs, and the gun? got any upclose pics?
How much do thouse bump stopes weight? I still have mine trimmed down . its like 3-4 layers of metal tho. Are you glad you cut them out, still think its strong?
Thread Starter
Joined: Sep 2008
Posts: 473
Likes: 12
From: Woodinville, WA.
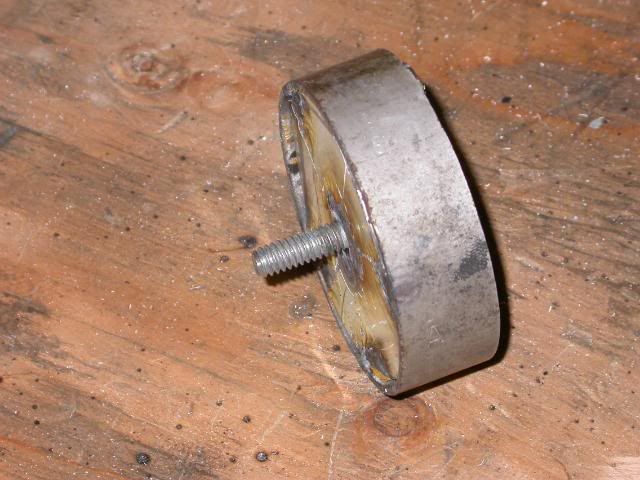
How much do thouse bump stopes weight?
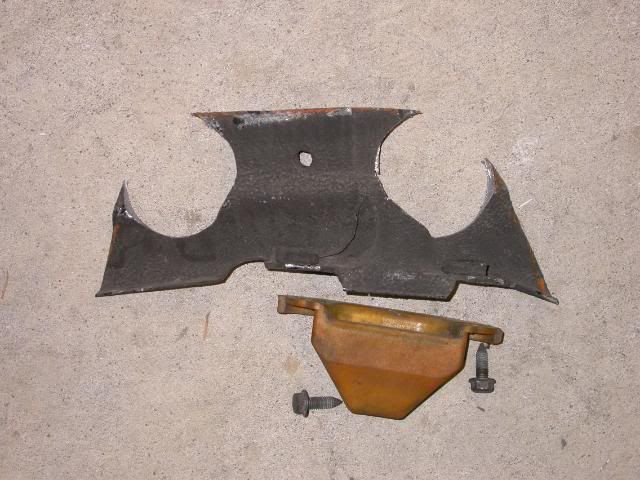
Are you glad you cut them out, still think its strong
Drivers side
Passenger
The Weld RTS is currently at the top of my list.
http://weldracing.com/aitdownloadabl...itfile_id/309/
Weld RTS # 71MP-509B45A
15x9.33
5x4.75 BC
4.50 BS
Medium mounting pad
16.7 LBS.
http://weldracing.com/aitdownloadabl...itfile_id/309/
Weld RTS # 71MP-509B45A
15x9.33
5x4.75 BC
4.50 BS
Medium mounting pad
16.7 LBS.
Love to see pics when you get them mounted up.
Mike
Thread Starter
Joined: Sep 2008
Posts: 473
Likes: 12
From: Woodinville, WA.
more info on thouse nutcetrs, and the gun? got any upclose pics?
I borrowed one that was purchased through Snap-On.
This will give you an idea what is available.
http://www.jhpfasteners.com/rivet-nuts-c-43-l-en.html
LS1 Tech Stories
The Best V8 Stories One Small Block at Time

Amazing '71 Camaro Restomod Is Modern Muscle Car Under the Skin
Verdad Gallardo
6 Common C5 Corvette Failures and What's Involved In Repairing Them
Pouria Savadkouei
Retro Modern Bandit Pontiac Trans AM Comes With Burt Reynolds' Autograph
Verdad Gallardo
Top 10 Greatest Cadillac V Series Performance Models Ever, Ranked
Pouria Savadkouei
Top 10 Most Powerful Chevy Trucks Ever Made!

Hennessey's New Supercharged Silverado ZR2 Has 700 HP
Verdad Gallardo
Coachbuilt N2A Anteros Is an LS2-Powered C6 Corvette In Italian Clothes
Verdad Gallardo
Awesome K5 Blazer Restomod Comes With C7 Corvette Power
Verdad Gallardo
10 Camaros You Should Never Buy
Thread Starter
Joined: Sep 2008
Posts: 473
Likes: 12
From: Woodinville, WA.
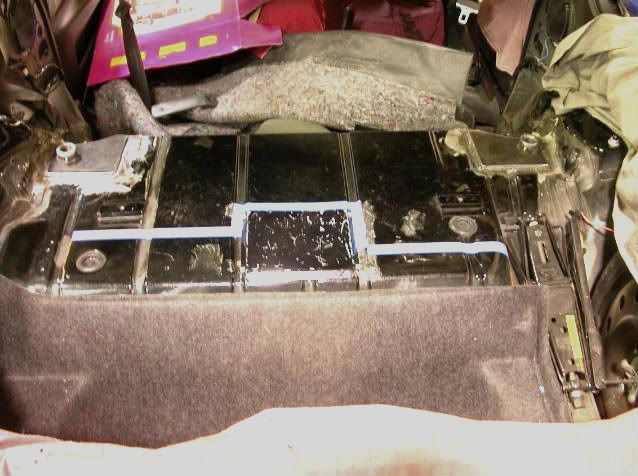
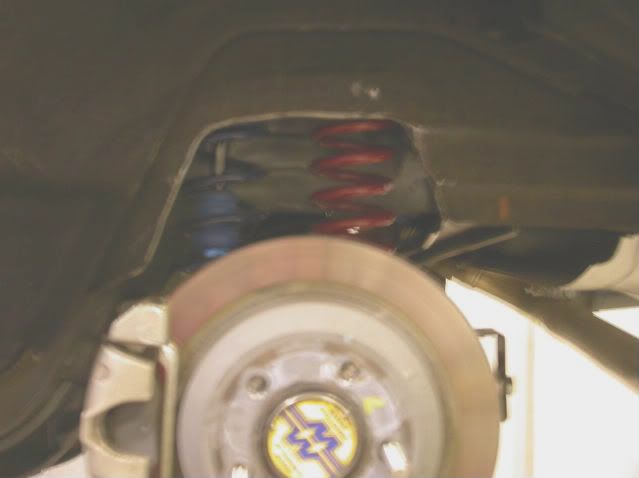
Decided to remove the rear coilover and put the spring in the stock location. Spent some time over the holiday designing an in car ride height adjuster set-up and incorperated the roll bar pad area.
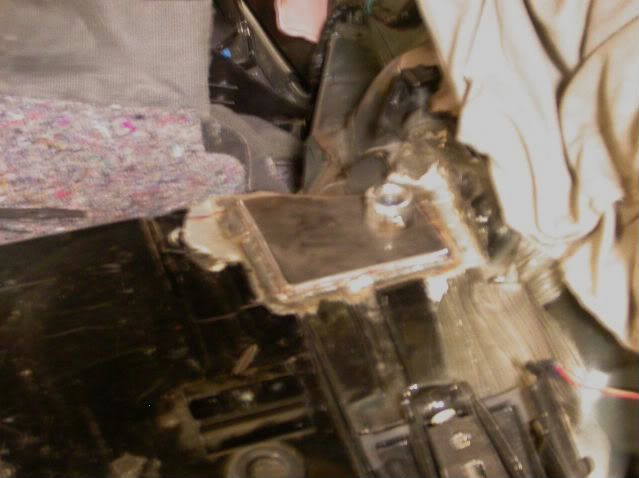
Time to cut and see what I find.
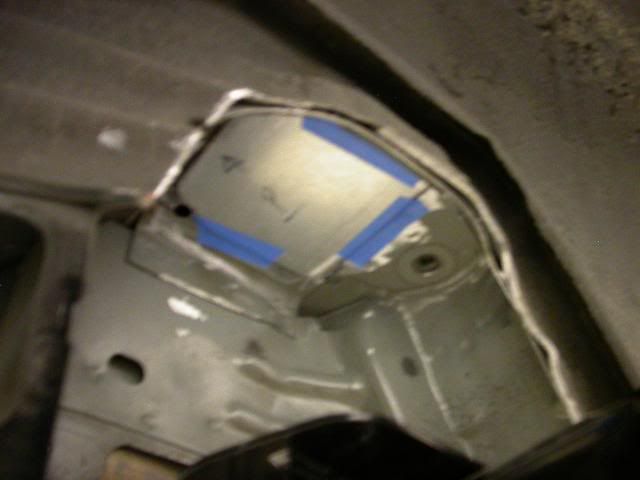
Right rear, inside car, over stock spring bucket area.
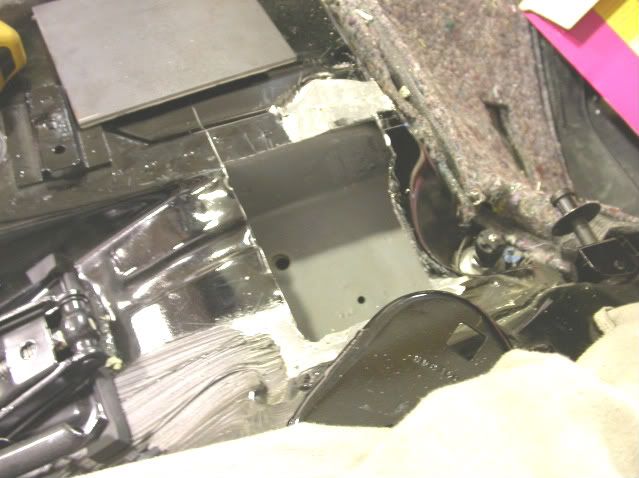
This area needed some structural help if I was going to incorperate it into the rollcage. I plated 3 sides. The area to the front of the car (shock area)appears to be 16 or 18 guage, should be strong enough.
Waiting for the jack bolts to get here so I can keep going.
Time to cut and see what I find.
Right rear, inside car, over stock spring bucket area.
This area needed some structural help if I was going to incorperate it into the rollcage. I plated 3 sides. The area to the front of the car (shock area)appears to be 16 or 18 guage, should be strong enough.
Waiting for the jack bolts to get here so I can keep going.
Last edited by Heyfred; Jan 4, 2012 at 02:14 AM.
Thread Starter
Joined: Sep 2008
Posts: 473
Likes: 12
From: Woodinville, WA.
Last night, I needed to get something done, so I removed the ebrake handle and cable.
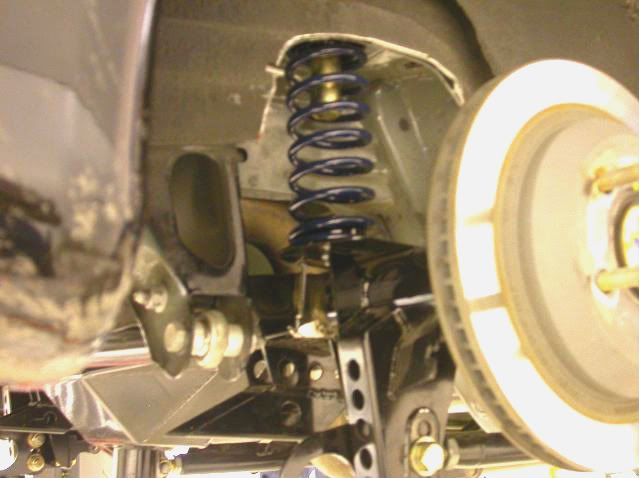
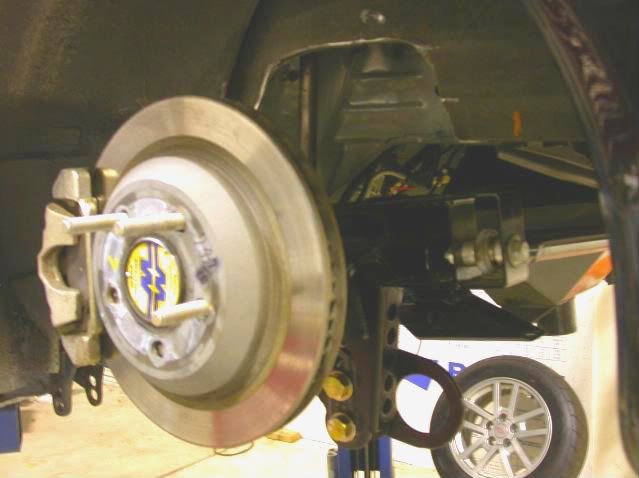
Purchased a 4" holesaw this morning and removed the stock upper spring locators.

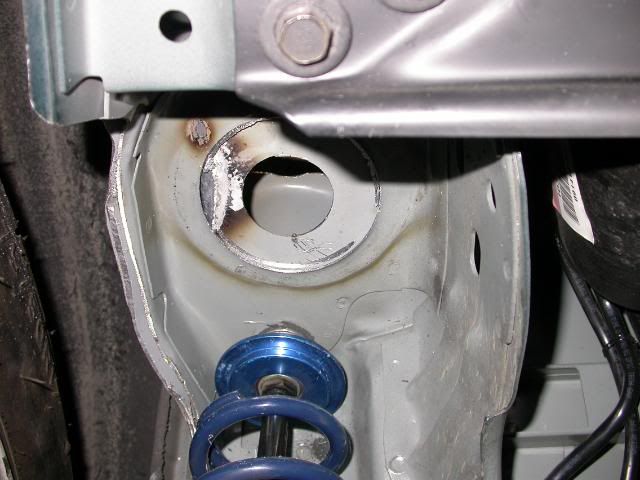
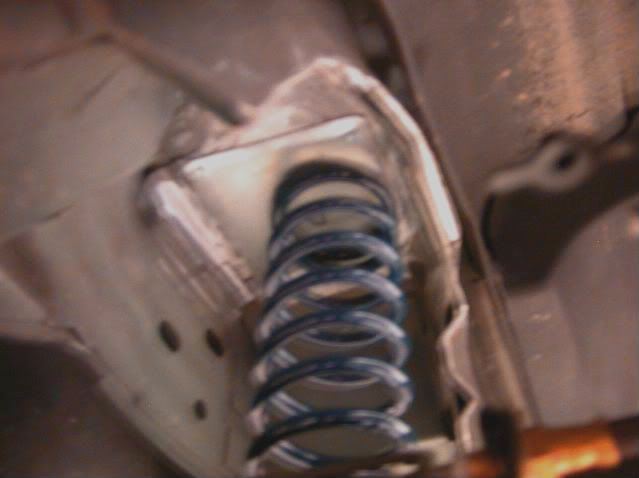
Located a 10" spring for testing and built a temporary spring locator that bolts to the housing.
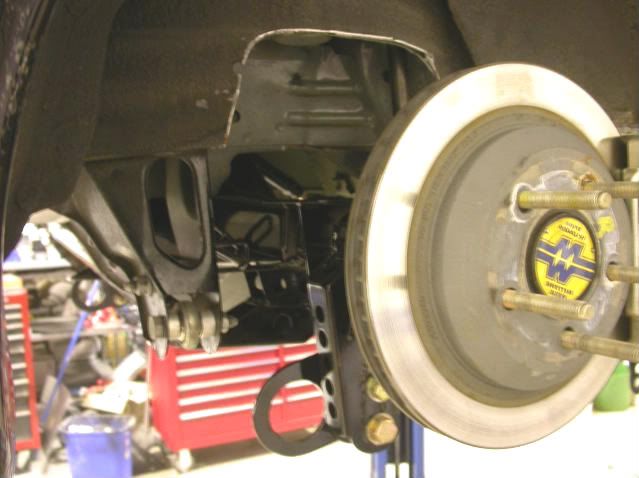
Installed the spring, raised the rearend till tension is on the spring and 90 degrees to the spring pad.
Looking up into the stock upper spring bucket, the coil spring is going to be positioned back from the stock location.
Purchased a 4" holesaw this morning and removed the stock upper spring locators.
Located a 10" spring for testing and built a temporary spring locator that bolts to the housing.
Installed the spring, raised the rearend till tension is on the spring and 90 degrees to the spring pad.
Looking up into the stock upper spring bucket, the coil spring is going to be positioned back from the stock location.


Thread Starter
Joined: Sep 2008
Posts: 473
Likes: 12
From: Woodinville, WA.
The new 10" springs came in. Waiting for several parts to arrive to complete the project. The prep work is done and ready for welding once the rest of the parts arrive.
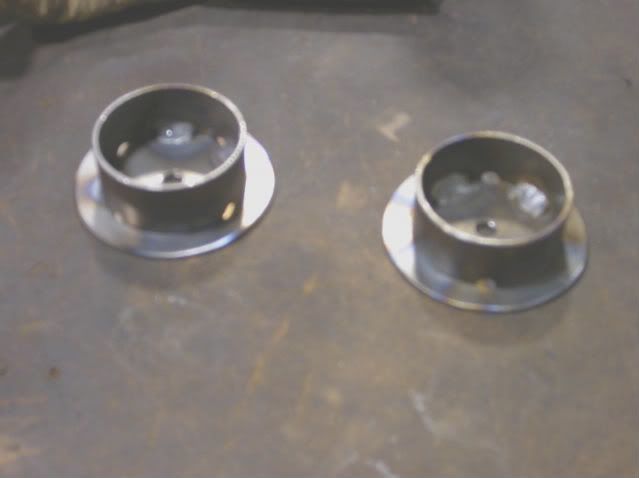
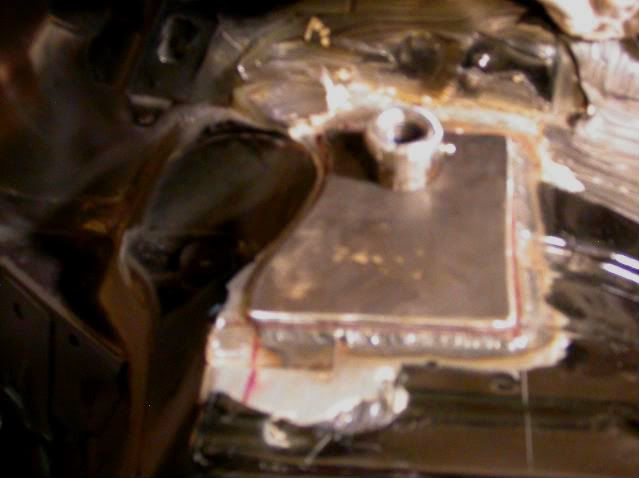
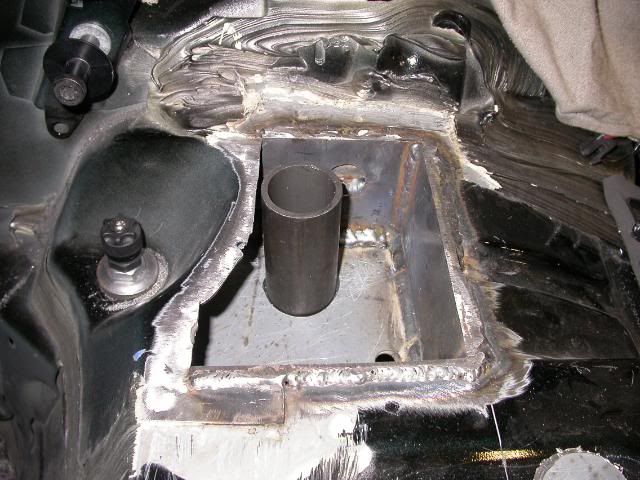
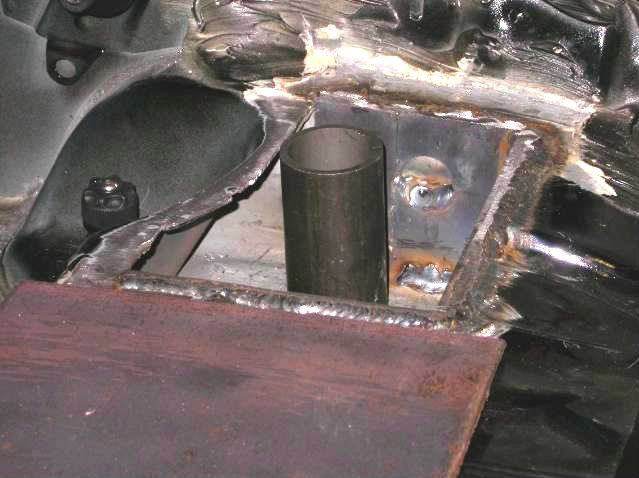
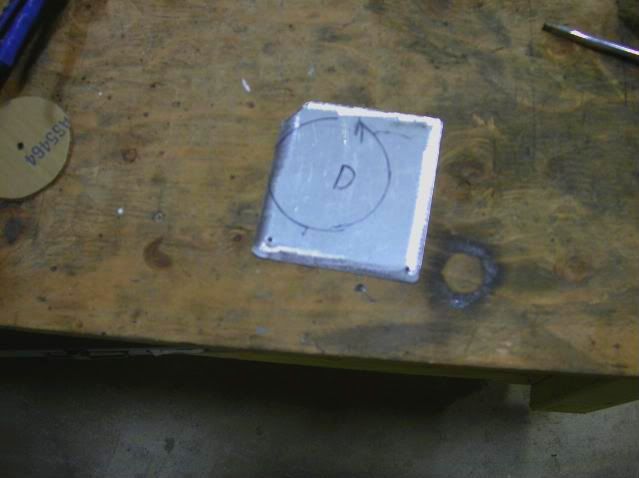
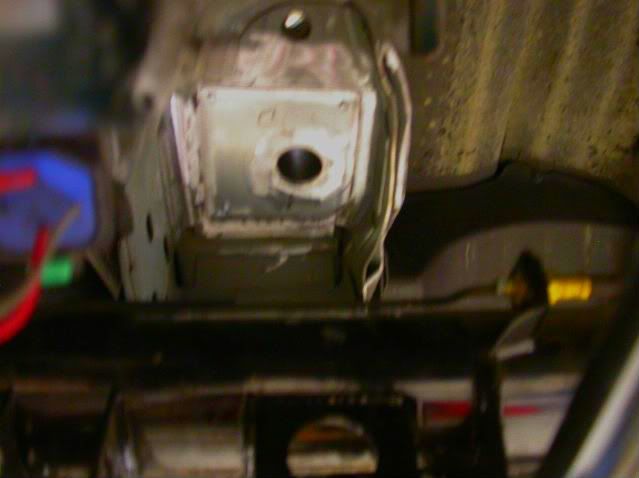
Made plates to be welded in on the bottom side of the spring bucket. Held them on with tech screws until welded. By doing this they will locate the same every time.
Installed my temporary spring locators on the rearend, both springs and raised the rearend to ride height while springs were pressing against the plates. Took a torpedo level, squared the springs front to back and side to side. With a Sharpie, traced around the outside of the spring where it contacts the plate.
Removed the spring and plate. To make it simple to locate center, I made a template. Center punched center and used a hole saw to cut the hole for the tubing.
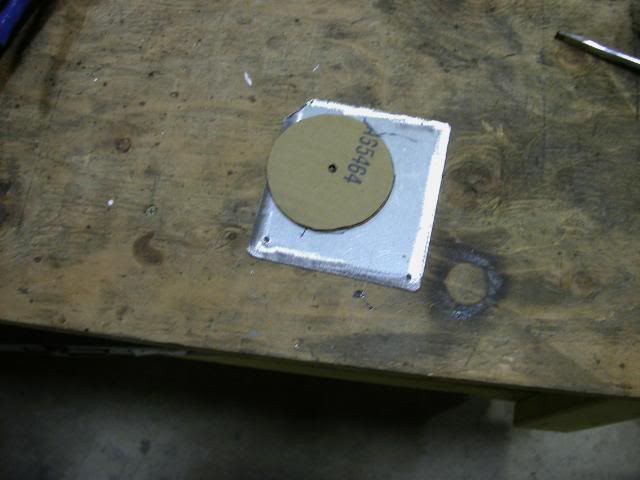
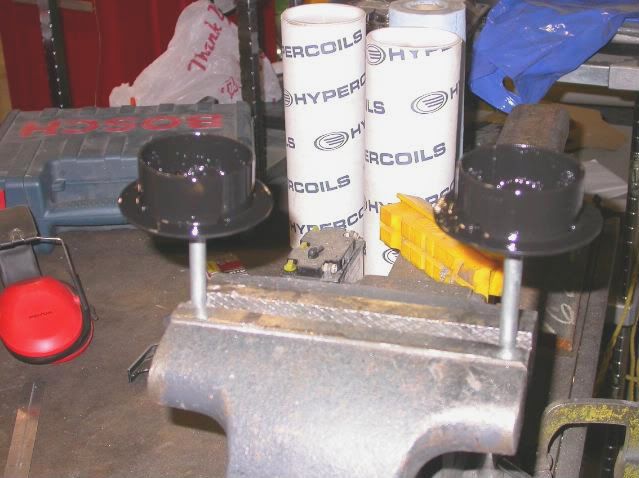
Inserted the tubing and installed the plates back in the car. The tubing is pressed in, don't want to weld in until the rest of the parts arrive.
Passenger
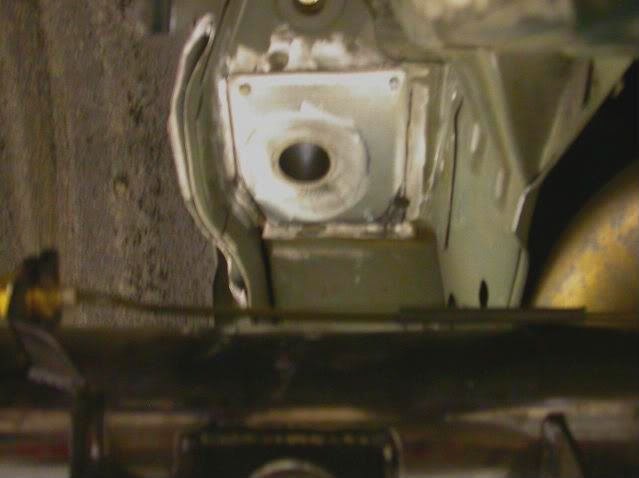
Driver
Made plates to be welded in on the bottom side of the spring bucket. Held them on with tech screws until welded. By doing this they will locate the same every time.
Installed my temporary spring locators on the rearend, both springs and raised the rearend to ride height while springs were pressing against the plates. Took a torpedo level, squared the springs front to back and side to side. With a Sharpie, traced around the outside of the spring where it contacts the plate.
Removed the spring and plate. To make it simple to locate center, I made a template. Center punched center and used a hole saw to cut the hole for the tubing.
Inserted the tubing and installed the plates back in the car. The tubing is pressed in, don't want to weld in until the rest of the parts arrive.
Passenger
Driver
Last edited by Heyfred; Jan 7, 2012 at 10:39 PM.