


My build - Lots of pics
Just got done doing a little electric for the Ta's new friend.
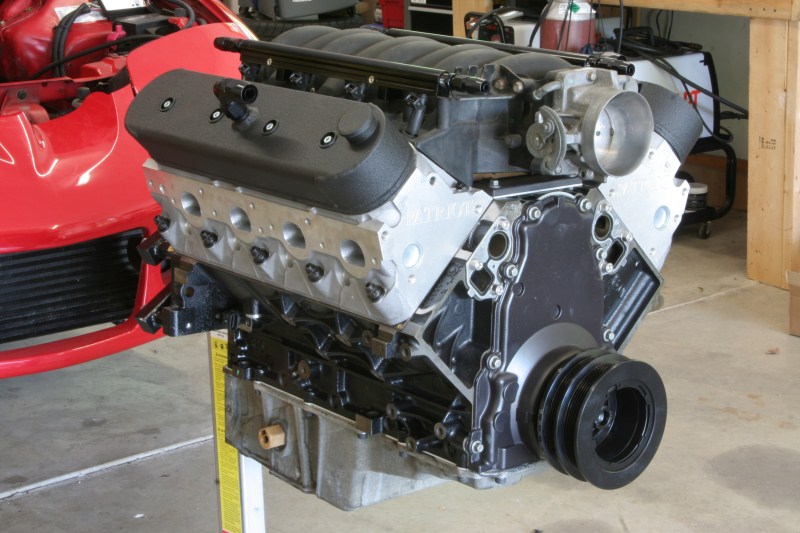
Motor will be delivered monday.. Now i just need 2 weeks off work to make a dent in the car.
Chris
Motor will be delivered monday.. Now i just need 2 weeks off work to make a dent in the car.
Chris
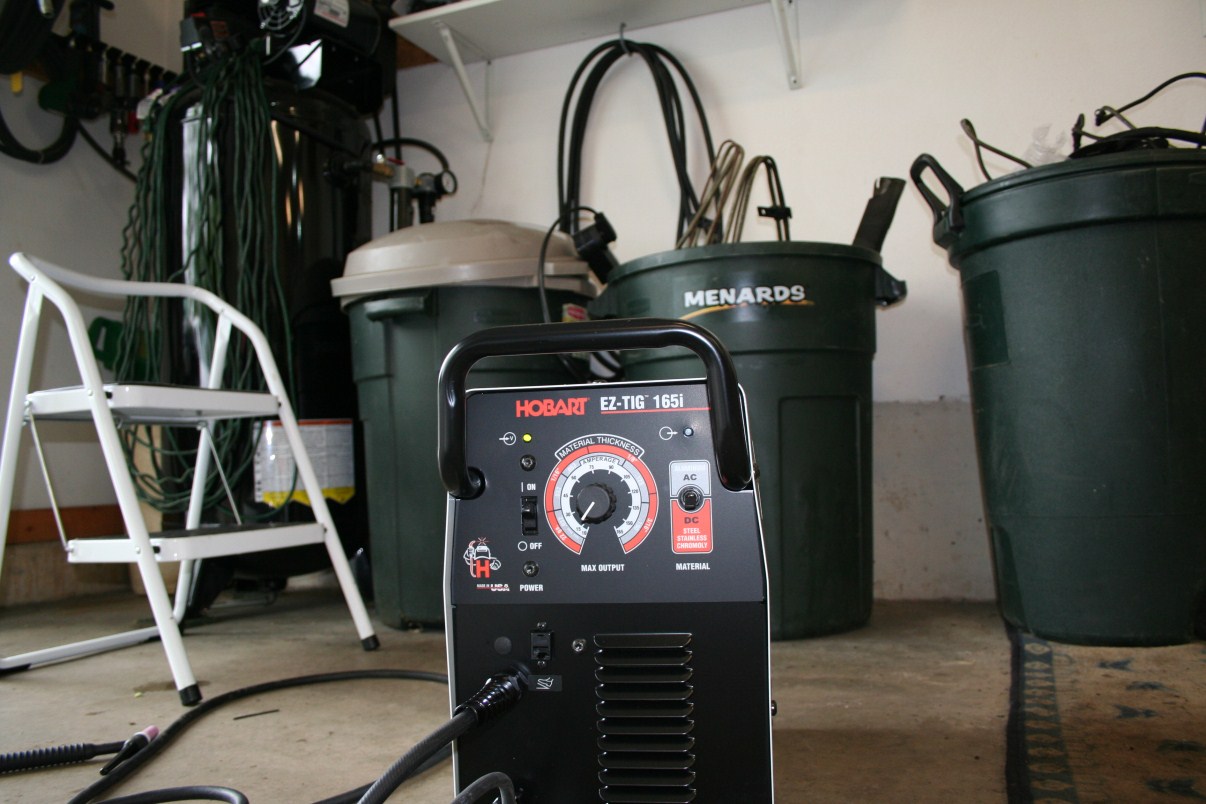
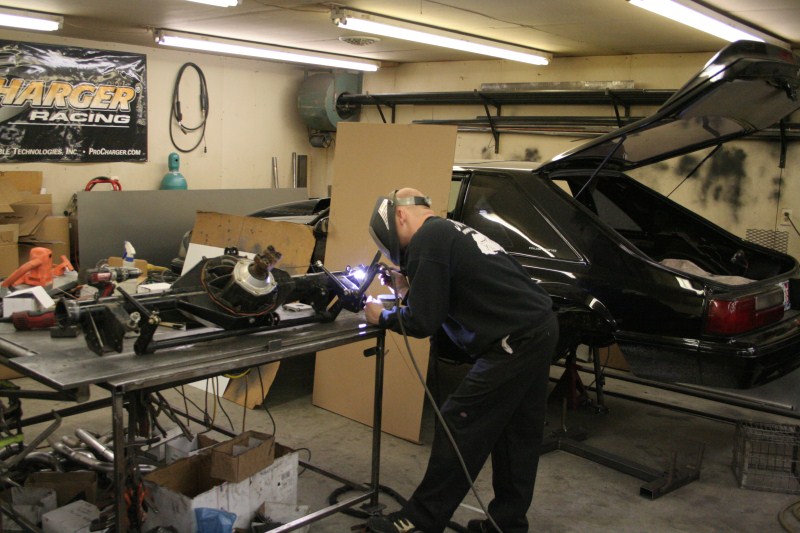
I didn't have any breakers open in the garage. Only had a 6 space 60 amp panel. Luckily for me, i am an electrician. i added another sub panel so i can add more stuff, and get the feed for the tig done. The tig only draws 23 Amps at max setting in dc, and 20 amps @ max setting in ac. this is all 240, so i just ran 10 gauge so cord, with a plug end for it. Works perfect.
Chris
i added another sub panel so i can add more stuff, and get the feed for the tig done. The tig only draws 23 Amps at max setting in dc, and 20 amps @ max setting in ac. this is all 240, so i just ran 10 gauge so cord, with a plug end for it. Works perfect.Chris
 There are quite a few spots left on the panel. I bought a 60 amp breaker because it draws 57 amps at max setting.
 I just haven't taken the plunge to see how to do it. Kinda don't wanna get electrocuted

LS1 Tech Stories
The Best V8 Stories One Small Block at Time

6 Common C5 Corvette Failures and What's Involved In Repairing Them
Pouria Savadkouei
Retro Modern Bandit Pontiac Trans AM Comes With Burt Reynolds' Autograph
Verdad Gallardo
Top 10 Greatest Cadillac V Series Performance Models Ever, Ranked
Pouria Savadkouei
Top 10 Most Powerful Chevy Trucks Ever Made!

Hennessey's New Supercharged Silverado ZR2 Has 700 HP
Verdad Gallardo
Coachbuilt N2A Anteros Is an LS2-Powered C6 Corvette In Italian Clothes
Verdad Gallardo
Awesome K5 Blazer Restomod Comes With C7 Corvette Power
Verdad Gallardo
10 Camaros You Should Never Buy

10 LS Engine Myths That Refuse to Die
Verdad Gallardothen sit back and enjoy!
Chris
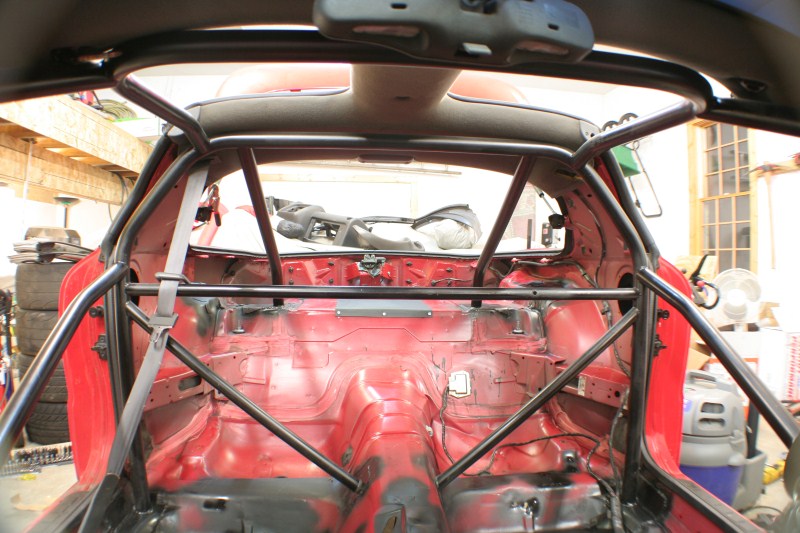
your project looks bad ***. I just finished up teaching myself to TIG as well, but I have a shitty welder compared to you... But it welds just fine. I just finished welding in my 6 point cage in the car.
I love the way it's put together. Ever thought of making your own manifolds?
I love the way it's put together. Ever thought of making your own manifolds?
9 Second Club


Joined: Oct 2006
Posts: 1,192
Likes: 243
From: IL
your project looks bad ***. I just finished up teaching myself to TIG as well, but I have a shitty welder compared to you... But it welds just fine. I just finished welding in my 6 point cage in the car.
I love the way it's put together. Ever thought of making your own manifolds?
I love the way it's put together. Ever thought of making your own manifolds?

Sean

9 Second Club
Joined: Oct 2006
Posts: 1,192
Likes: 243
From: IL
Alright kiddies, this week sees some visible progress finally! Ill just skip to the pictures this time around!
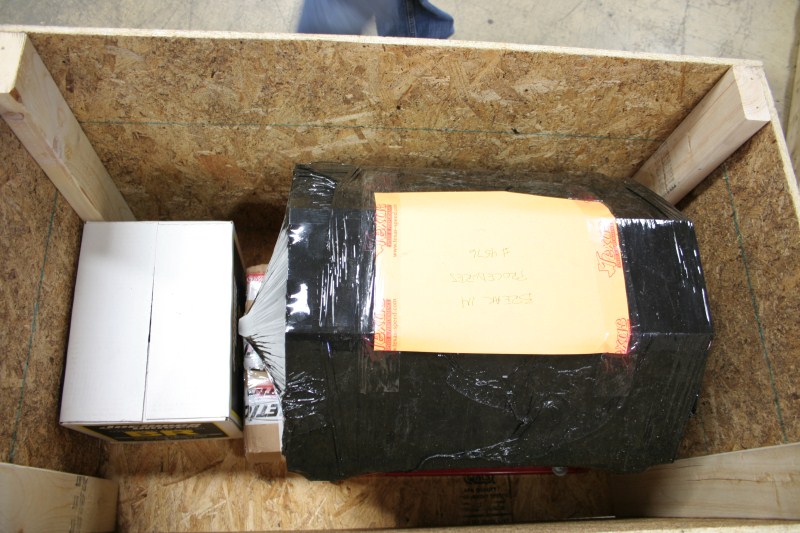
Got the motor back to the house and un-crated (They did an awesome job crating this thing up, as noted by the cradle)
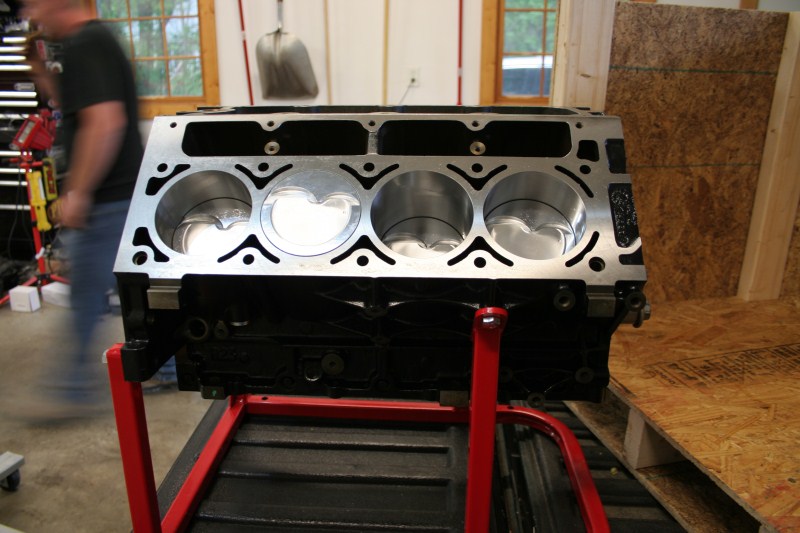
We had to muscle it onto the stand since we don't have a cherry picker, but it all worked out just fine.
Not to exciting, but here is the bottom side
Next on my list of **** to do was getting rid of the clutch pedal. Here is what I started with
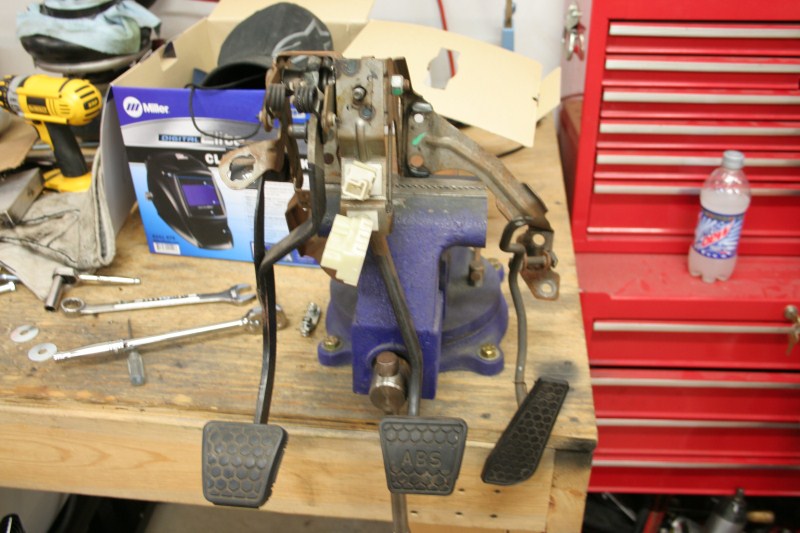
Took it apart
Found the two welds that attached the clutch part of the assembly to the rest of what actually bolts into the car
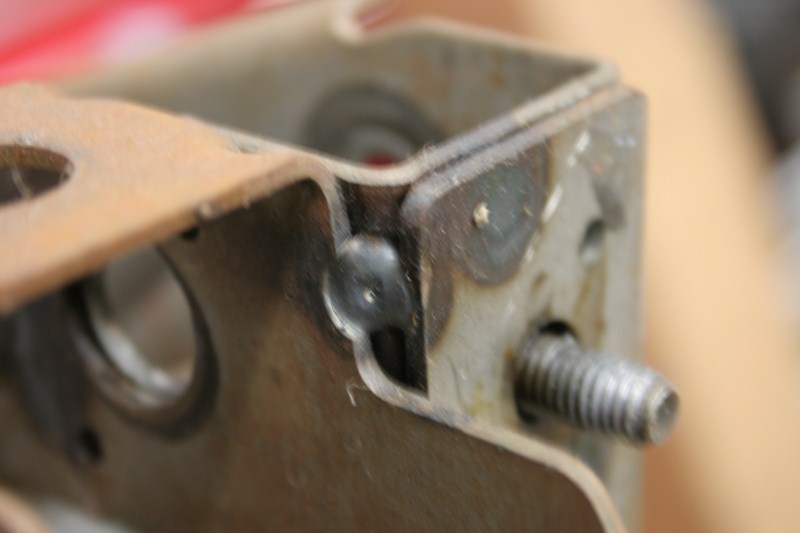
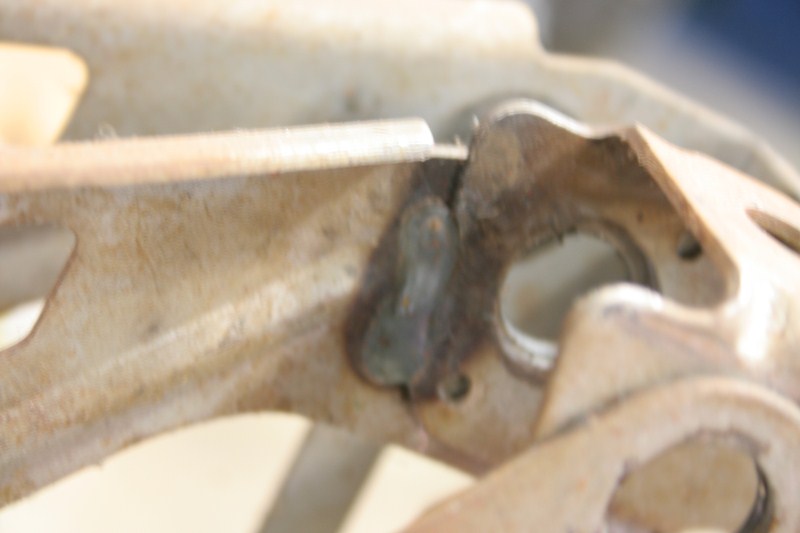
Ground them out
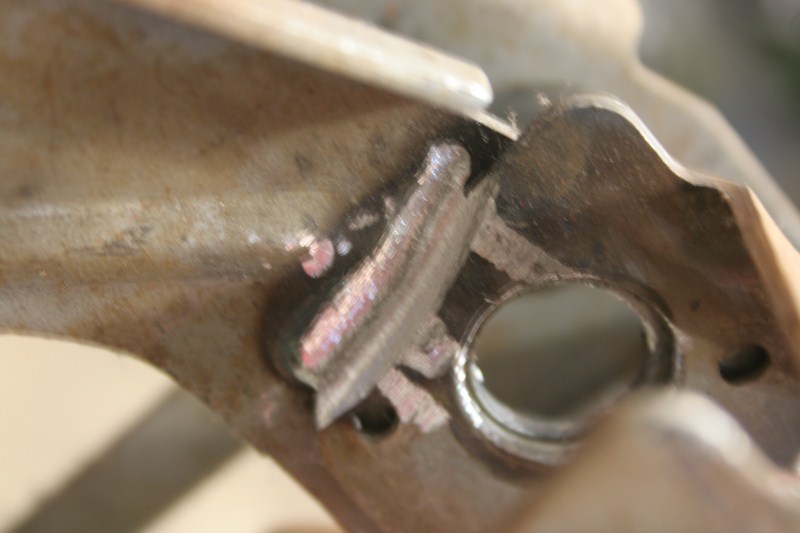
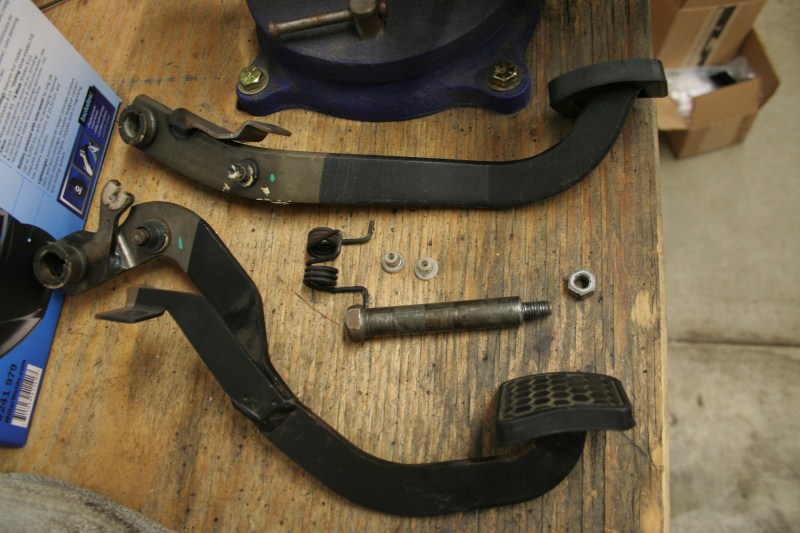
Then just pooped it off and smoothed it all out
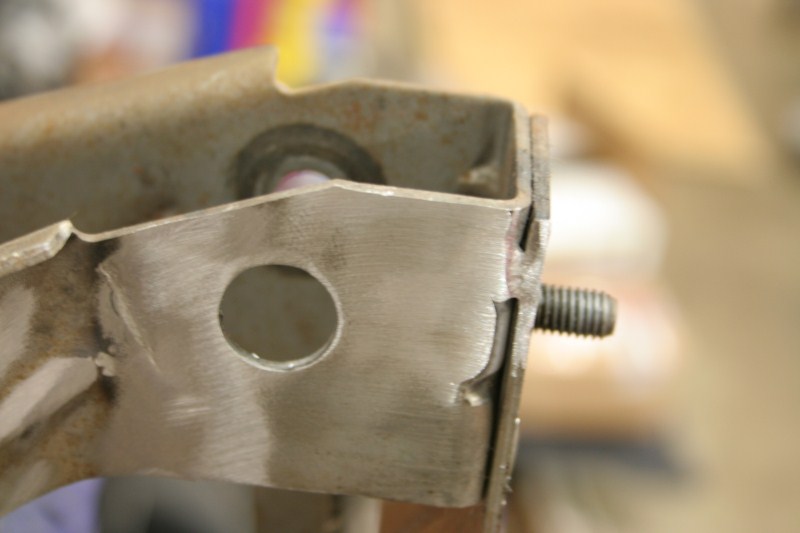
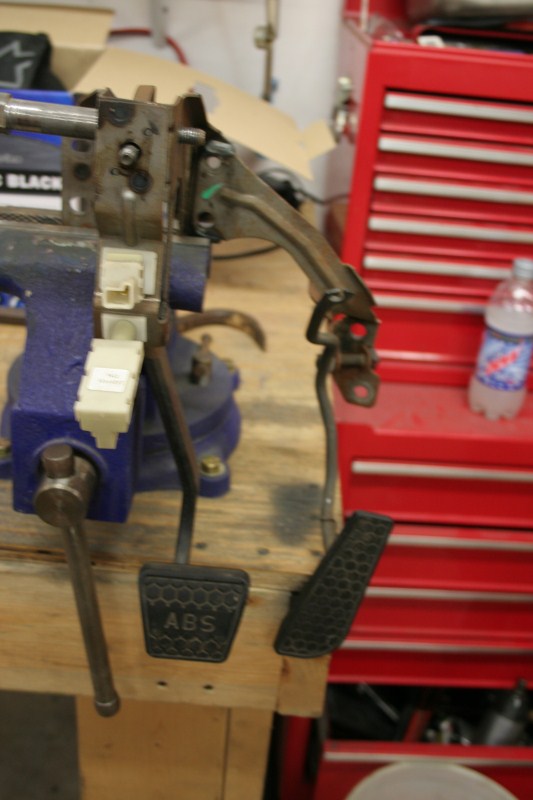
And there you have it, no more clutch pedal and it still bolts to the car the same way so no strength has been lost. I will have to make a piece for the brake pedal to hinge on though.
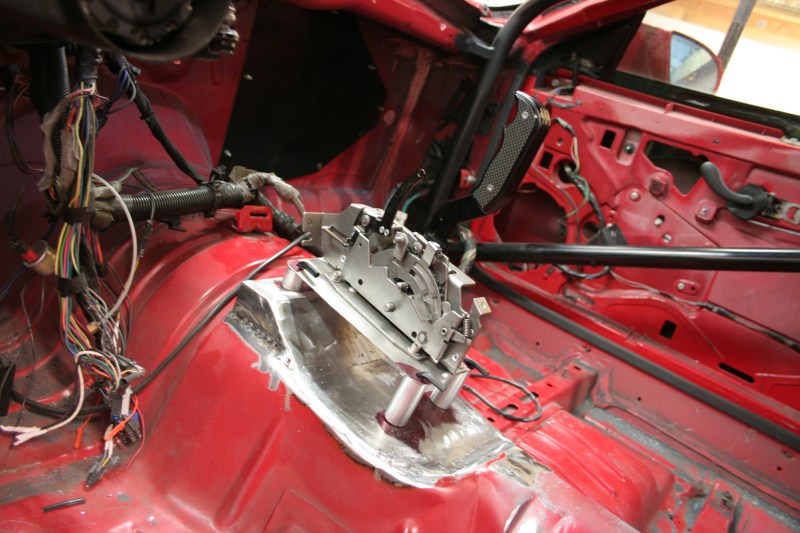
Finally drilled the holes for the shifter mount (on the car side) so we tossed it in there to check it out. Don't mind the baller bolts
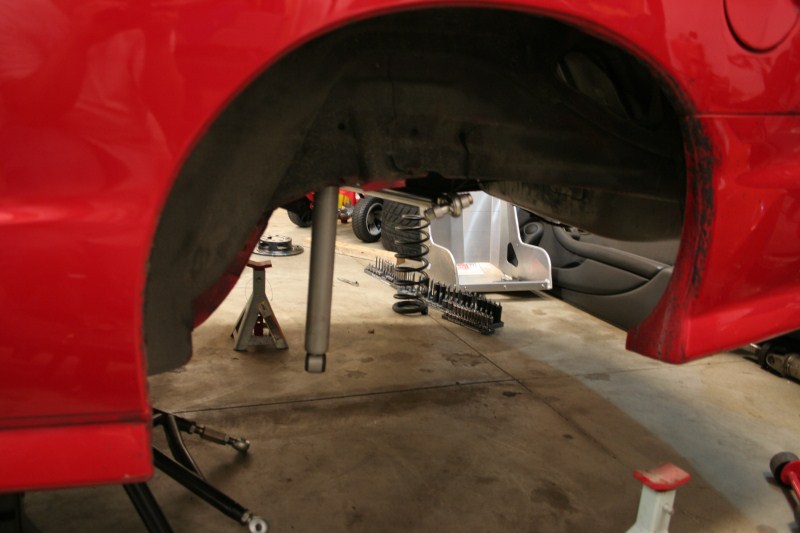
While I was doing that, Chris was busy pulling out the rear end so he can take it to get it shortened next week.
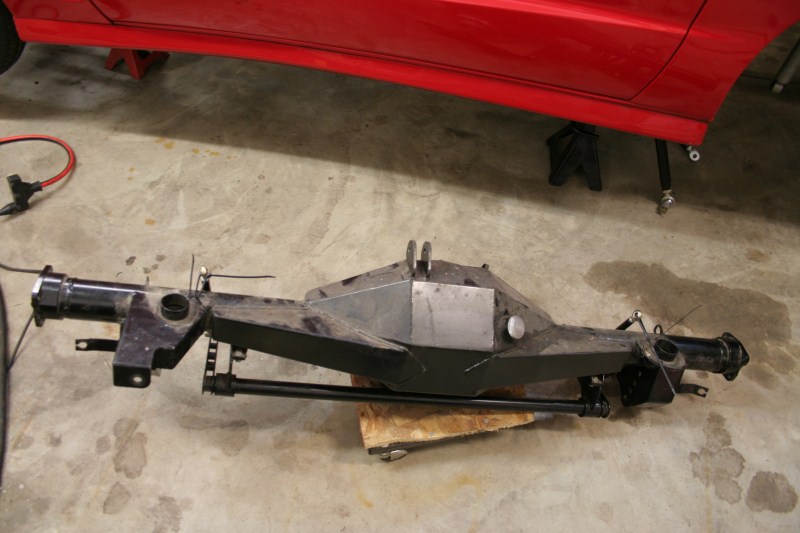
So empty
He also cleaned the **** out of the engine bay, and the interior. Then he painted all the bare metal inside to get it all ready for carpet. I wont bother putting pictures of this stuff up. But I will put this one up just because
Saturday morning, and we are ready for carpet! Here is Chris smoothing it out before we got started.
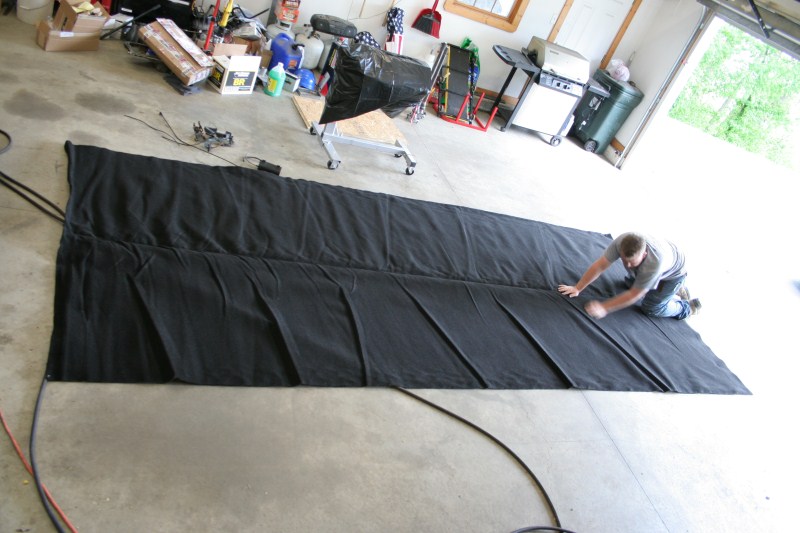
Getting started
Bolted in the shifter for the first time.
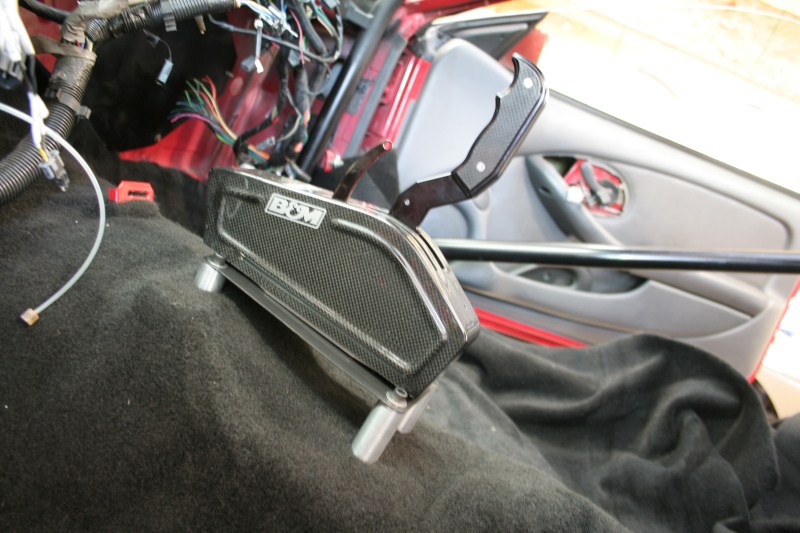
It is harder than you think...
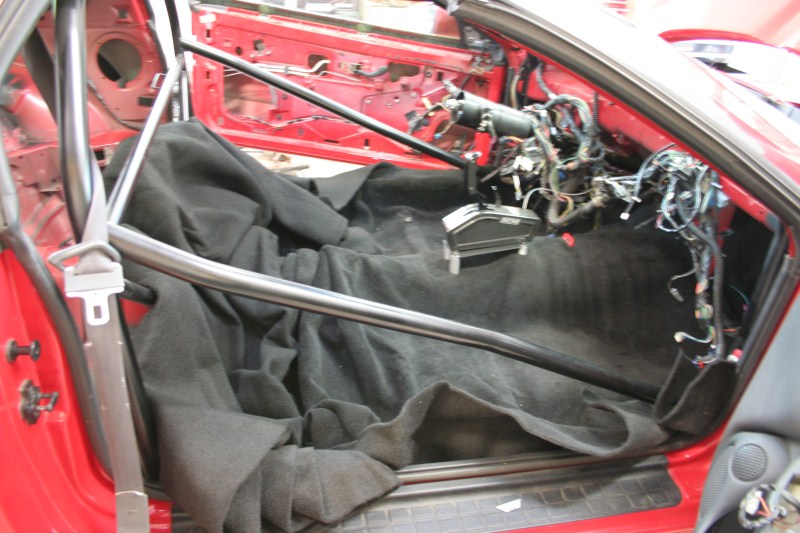
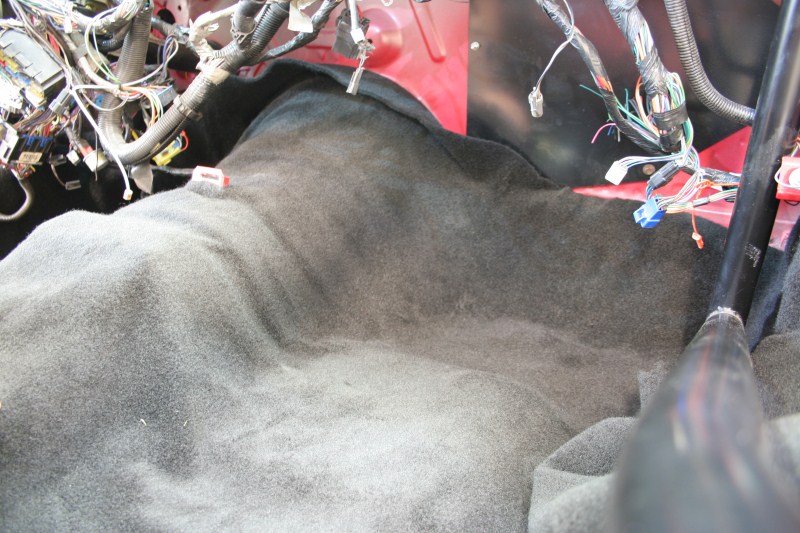
This is about as far as the carpet got this weekend, I didn't want to try and tackle the rear bars all alone.
Other than what you see in the pics we finally wrapped up all the small work under the car. All thats left is to clean it which Chris will get done during the week. Next weekend we will start getting the motor together so we can at least get the measurement for push rods. As I said before the rear end is going to Midwest Chassis to get shortened up 3" per side as well. And maybe we can get the carpet finished up so the interior plastics can go back in. Thanks for looking!
Sean
Got the motor back to the house and un-crated (They did an awesome job crating this thing up, as noted by the cradle)
We had to muscle it onto the stand since we don't have a cherry picker, but it all worked out just fine.
Not to exciting, but here is the bottom side
Next on my list of **** to do was getting rid of the clutch pedal. Here is what I started with
Took it apart
Found the two welds that attached the clutch part of the assembly to the rest of what actually bolts into the car
Ground them out
Then just pooped it off and smoothed it all out
And there you have it, no more clutch pedal and it still bolts to the car the same way so no strength has been lost. I will have to make a piece for the brake pedal to hinge on though.
Finally drilled the holes for the shifter mount (on the car side) so we tossed it in there to check it out. Don't mind the baller bolts
While I was doing that, Chris was busy pulling out the rear end so he can take it to get it shortened next week.
So empty
He also cleaned the **** out of the engine bay, and the interior. Then he painted all the bare metal inside to get it all ready for carpet. I wont bother putting pictures of this stuff up. But I will put this one up just because
Saturday morning, and we are ready for carpet! Here is Chris smoothing it out before we got started.
Getting started
Bolted in the shifter for the first time.
It is harder than you think...
This is about as far as the carpet got this weekend, I didn't want to try and tackle the rear bars all alone.
Other than what you see in the pics we finally wrapped up all the small work under the car. All thats left is to clean it which Chris will get done during the week. Next weekend we will start getting the motor together so we can at least get the measurement for push rods. As I said before the rear end is going to Midwest Chassis to get shortened up 3" per side as well. And maybe we can get the carpet finished up so the interior plastics can go back in. Thanks for looking!
Sean
Thats a great idea with the stock pedals, I may have to do that soon.
You ditching the factory console? I sure hope so, otherwise that shifter is gonna sit way high! (I just finished putting the same one under a factory M6 console)
You ditching the factory console? I sure hope so, otherwise that shifter is gonna sit way high! (I just finished putting the same one under a factory M6 console)
9 Second Club
Joined: Oct 2006
Posts: 1,192
Likes: 243
From: IL
Thank you! The only down side is making a sleeve for a bolt to hold the brake pedal. The one that was in there (can be seen in some pics) went though both the clutch and the brake so its too long.
We are not running a console, and yes I know that the red tab is for the console. I wasn't sure if it was for the dash or the console and I didn't look till after the fact
Sean
We are not running a console, and yes I know that the red tab is for the console. I wasn't sure if it was for the dash or the console and I didn't look till after the fact
Sean
9 Second Club
Joined: Oct 2006
Posts: 1,192
Likes: 243
From: IL
Here we are, week 4 (I think) and shes moving along. I would say that this weekend was full of ups and downs. The plan for this weekend was somewhat simple, finish the carpet (and get the plastics in), assemble the motor as far as we could, and get the rear end narrowed. I guess we will start with the carpet/interior then.
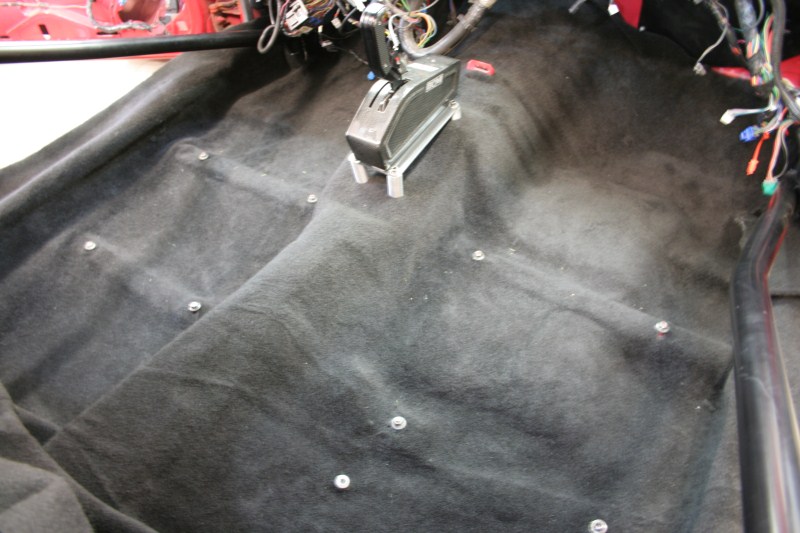
Here is the carpet finished, and the plastics back in

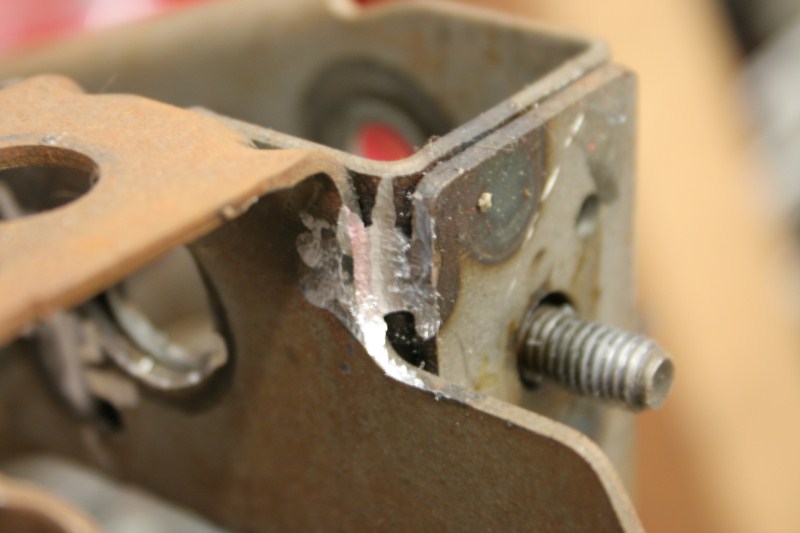
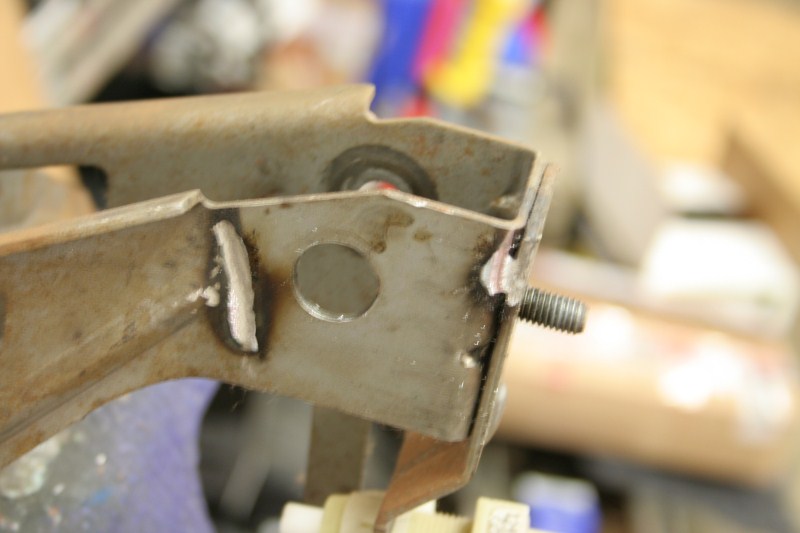
Next up is the brake pedal, if you remember last week I had cut off the clutch pedal. Well that caused one small issue, the bolt that held in the clutch pedal also held in the brake pedal. No big deal, chopped it down, bored a hole and wa-lah a perfect fit spacer!
Toss in a grade 8 bolt, and its all set.
I still have to drill the pedal for the manual master, but then it can go back in the car (next weekend).
Next we will travel down to Midwest Chassis where Eric narrowed the rear end 3" each side. We left to get some food so we missed the cutting part, BUT we came back in time for safety 101
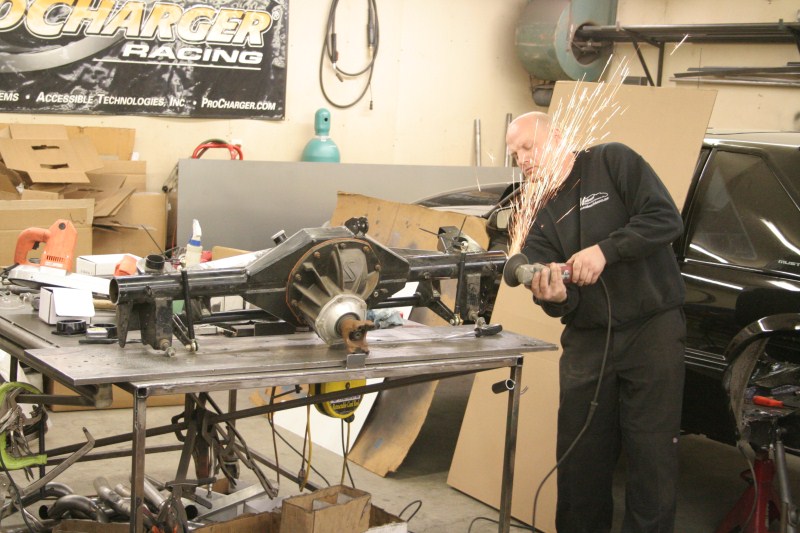
Here is the chunk he chopped off
The new end
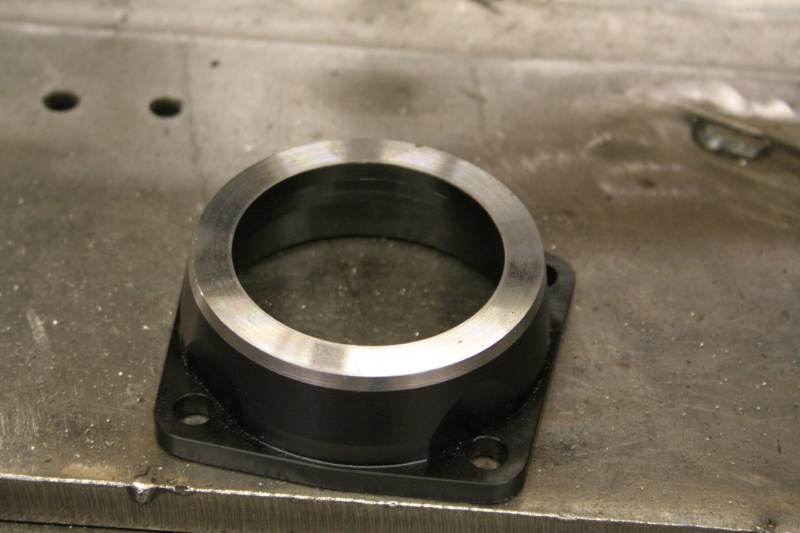
Welding it up
All done and back home
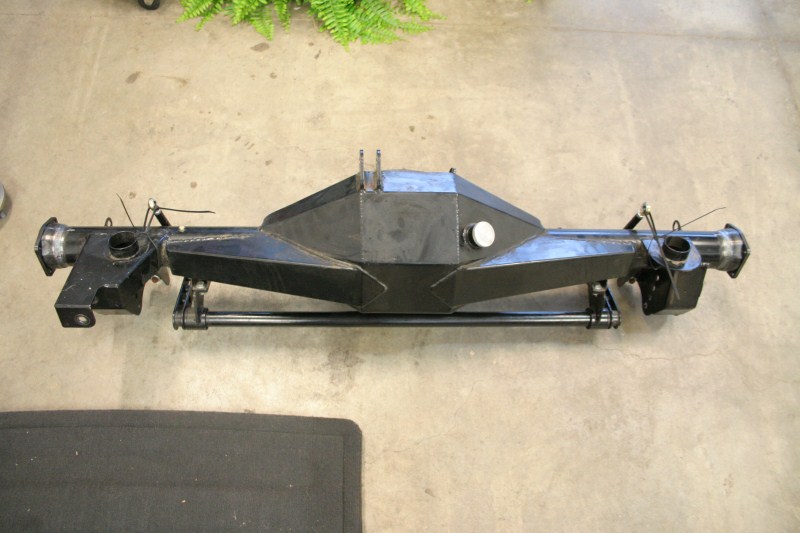
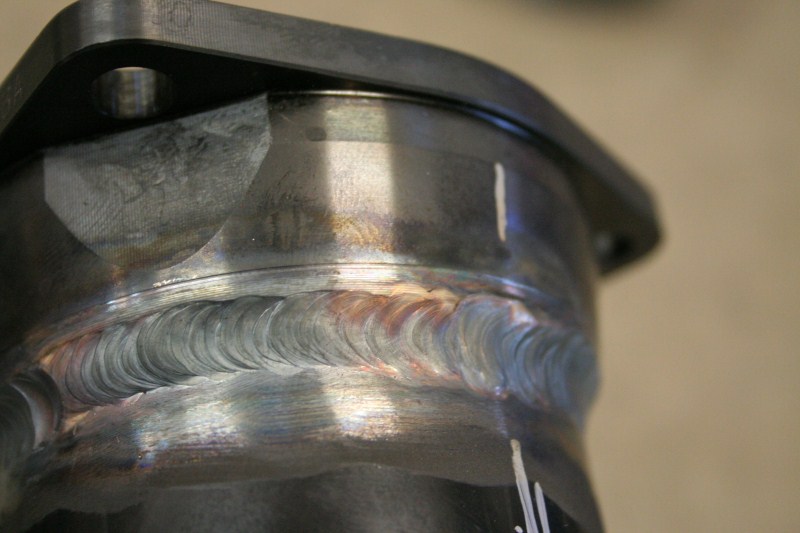
Close up of the welds
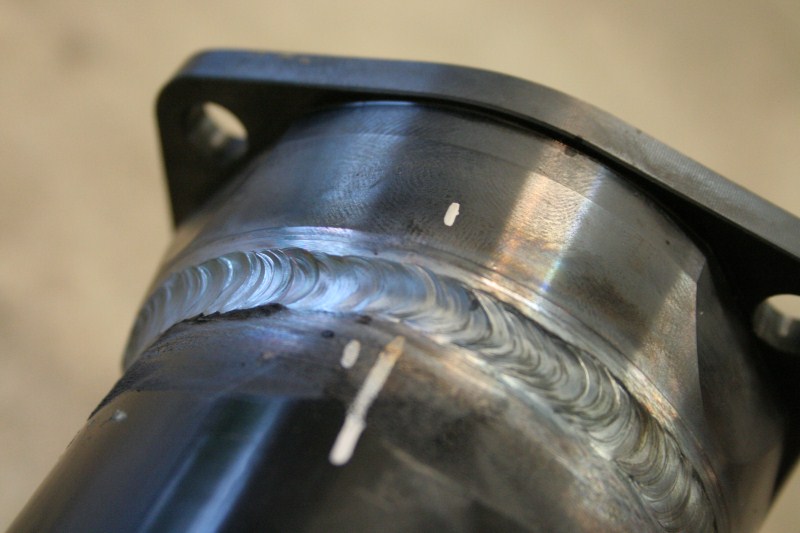
We have to send the axles back to Moser to get narrowed, so no pictures of it all finished.
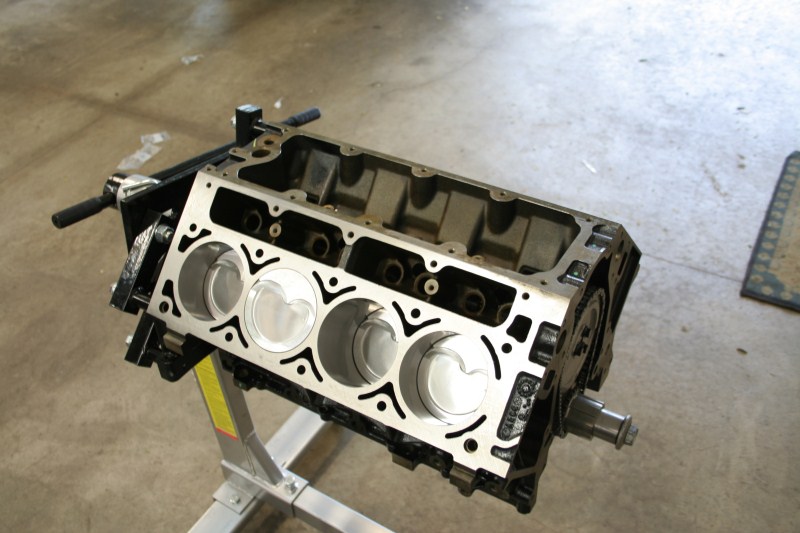
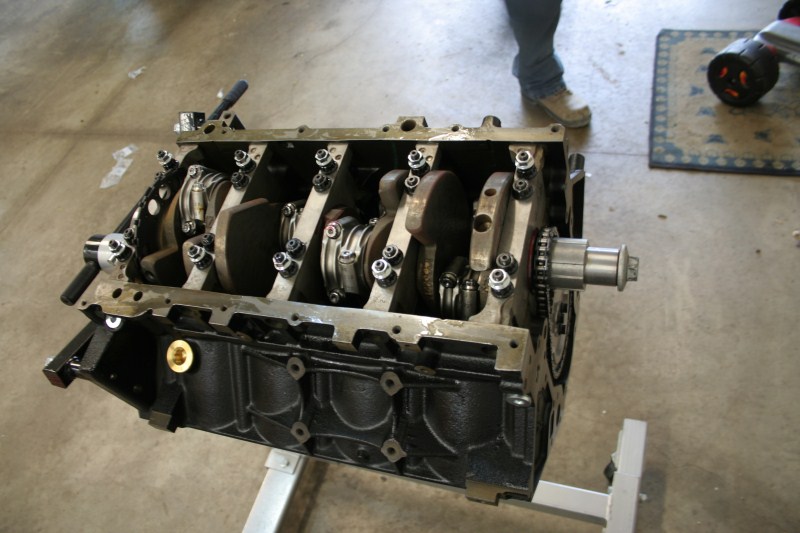
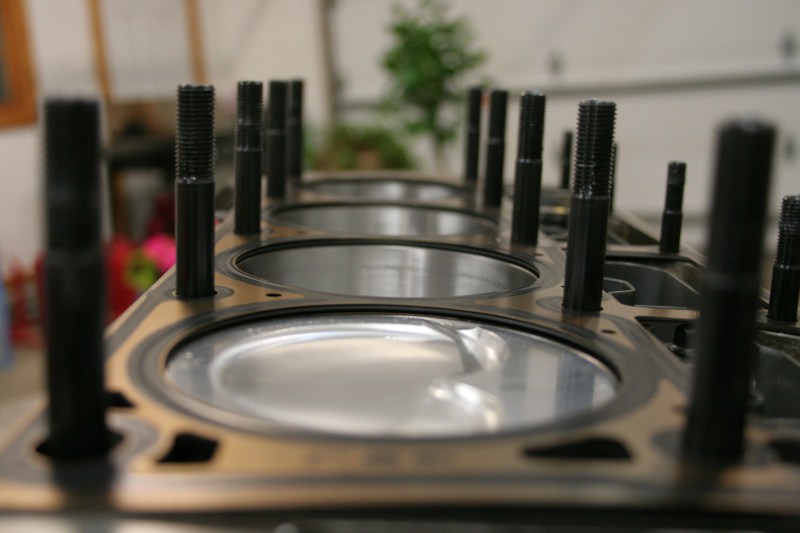
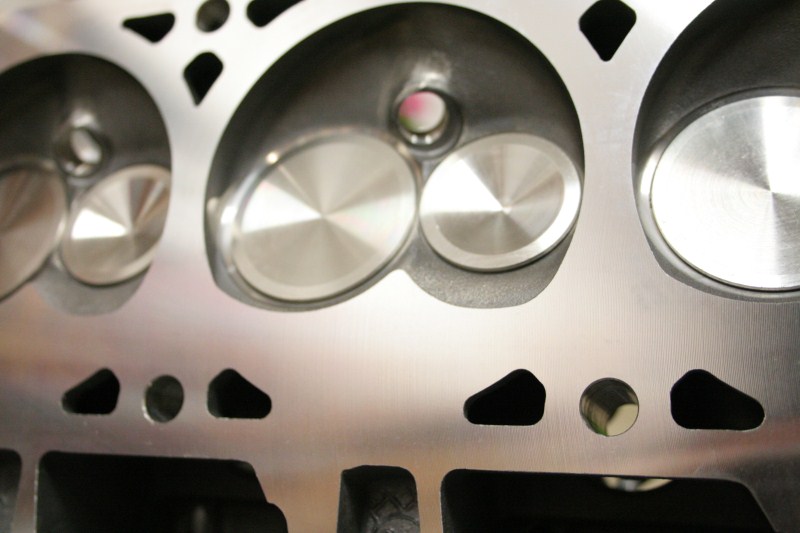
On to the good stuff, the motor!!! Chris had installed the heads during the week, so this is how we started out this weekend.
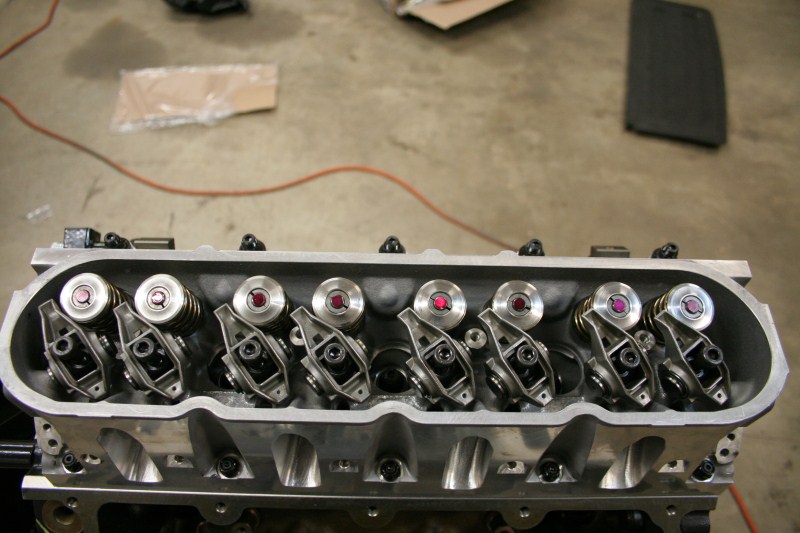
Put the rockers in, and marked the valves so we could measure for push rod length
Thats when problem #1 came up. We bent the push rod checker and it got wedged in the motor, so we had to pull the head off. At least I was able to take some pictures then
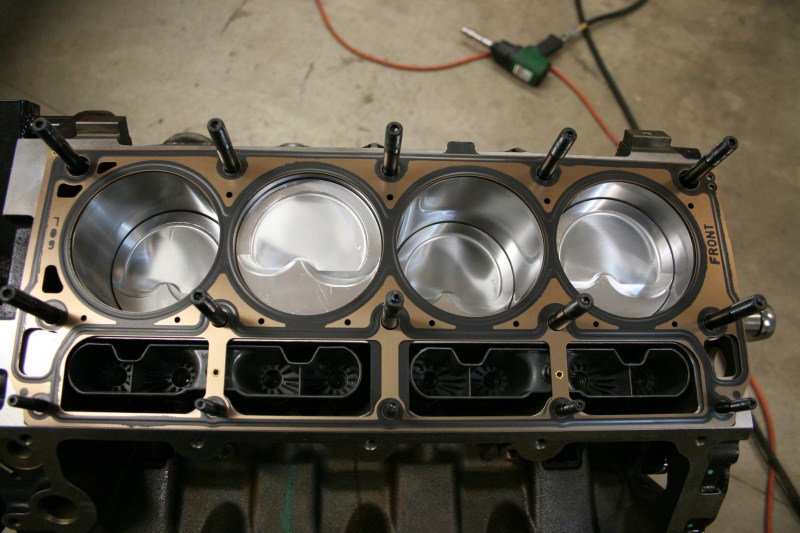
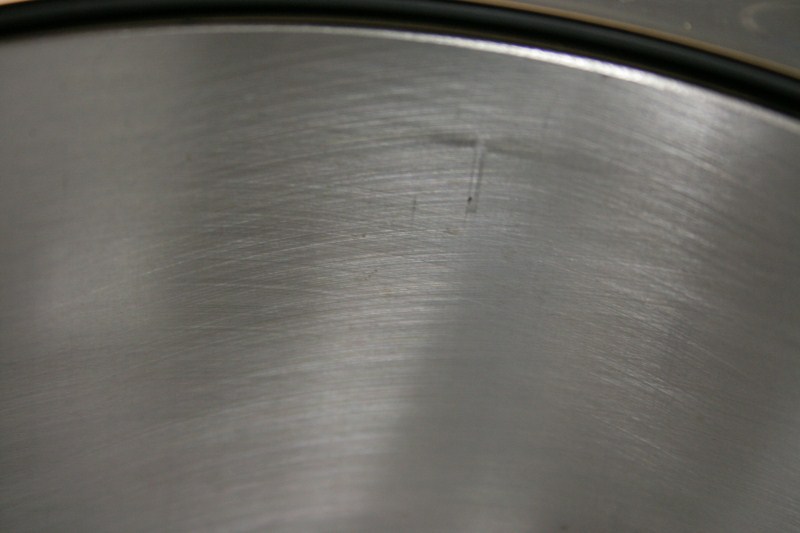
Nice crosshatching
Artsy motor shot
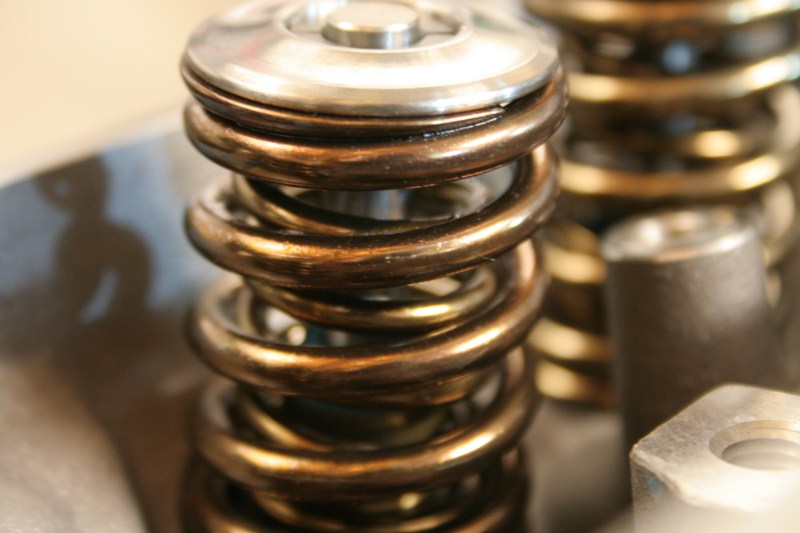
Artsy valve spring shot
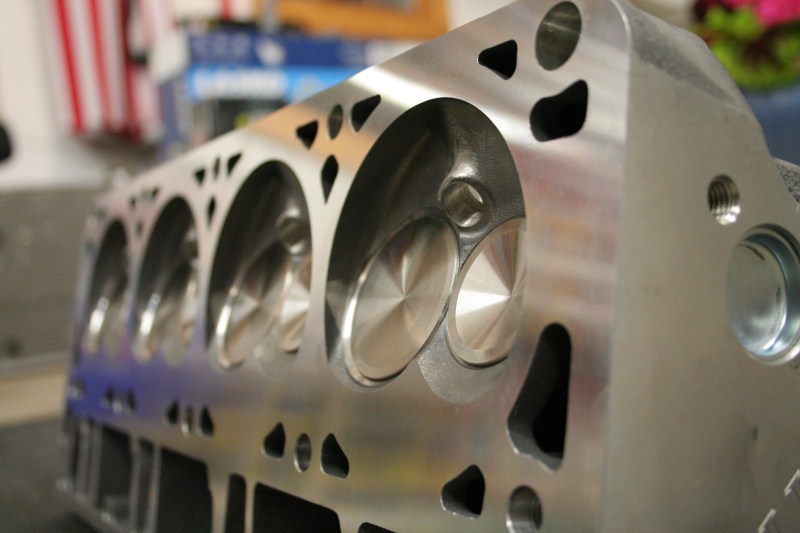
Artsy head shot
Chamber pic
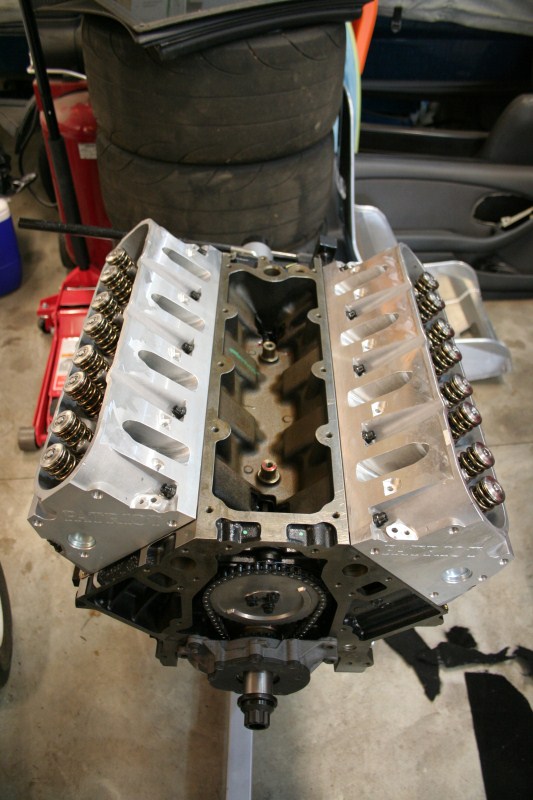
OK now that that is over with, head back on and torqued, and the valley cover installed
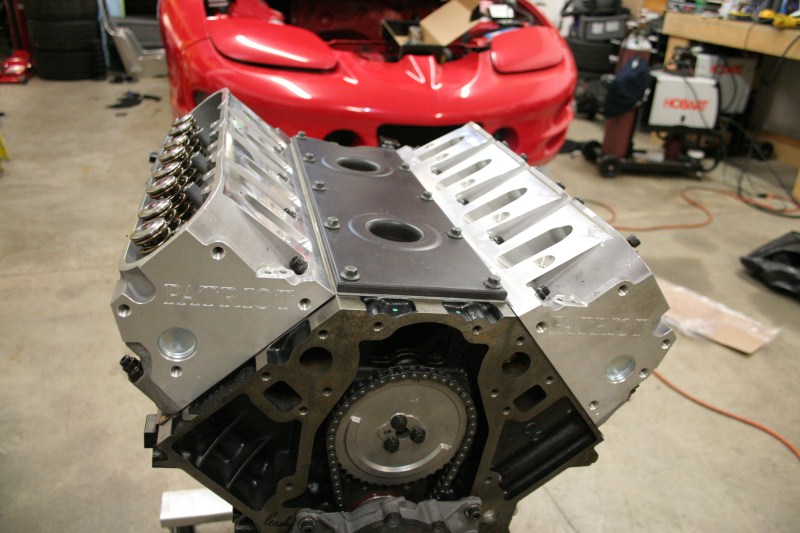
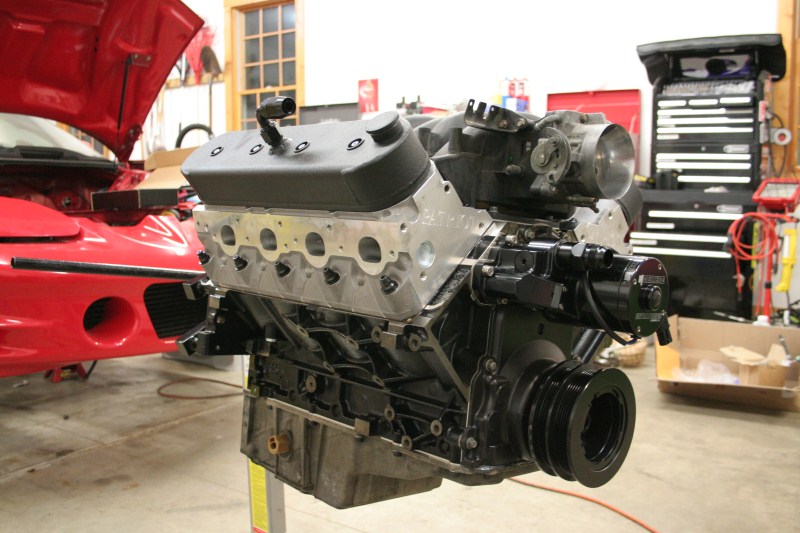
Front cover, crank pulley, and valve covers on
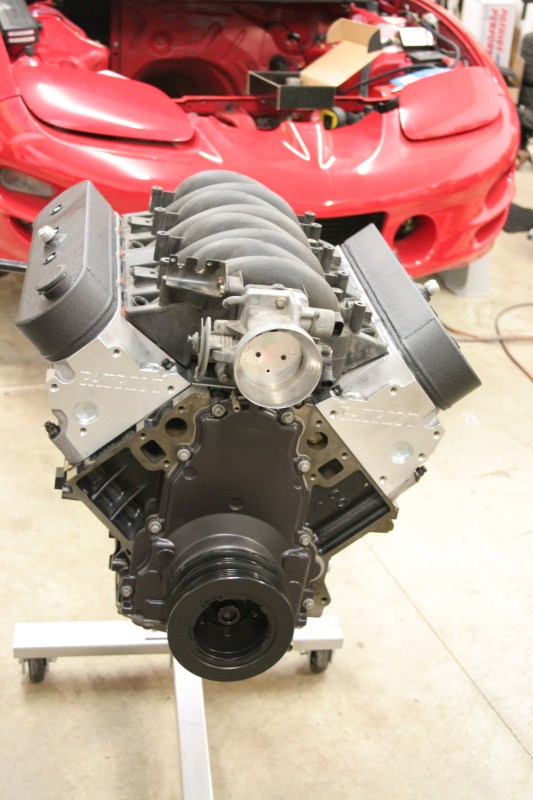
Water pump on, and the start of problem #2
Because of the way the turbo kit is built (using forward facing truck manifolds) the alternator had to be located on the top side of the motor. Since that is all we have left to run a belt to, the water pump is directly in the way. So it came right back off and boxed back up. We are not 100% set on a solution yet, but we will get it figured out.
Moving on, here is a picture of the motor as we left it for the weekend.
Thats all for this installment, as always thanks for looking!
Sean
Here is the carpet finished, and the plastics back in
Next up is the brake pedal, if you remember last week I had cut off the clutch pedal. Well that caused one small issue, the bolt that held in the clutch pedal also held in the brake pedal. No big deal, chopped it down, bored a hole and wa-lah a perfect fit spacer!
Toss in a grade 8 bolt, and its all set.
I still have to drill the pedal for the manual master, but then it can go back in the car (next weekend).
Next we will travel down to Midwest Chassis where Eric narrowed the rear end 3" each side. We left to get some food so we missed the cutting part, BUT we came back in time for safety 101
Here is the chunk he chopped off
The new end
Welding it up
All done and back home
Close up of the welds
We have to send the axles back to Moser to get narrowed, so no pictures of it all finished.
On to the good stuff, the motor!!! Chris had installed the heads during the week, so this is how we started out this weekend.
Put the rockers in, and marked the valves so we could measure for push rod length
Thats when problem #1 came up. We bent the push rod checker and it got wedged in the motor, so we had to pull the head off. At least I was able to take some pictures then
Nice crosshatching
Artsy motor shot
Artsy valve spring shot
Artsy head shot
Chamber pic
OK now that that is over with, head back on and torqued, and the valley cover installed
Front cover, crank pulley, and valve covers on
Water pump on, and the start of problem #2
Because of the way the turbo kit is built (using forward facing truck manifolds) the alternator had to be located on the top side of the motor. Since that is all we have left to run a belt to, the water pump is directly in the way. So it came right back off and boxed back up. We are not 100% set on a solution yet, but we will get it figured out.
Moving on, here is a picture of the motor as we left it for the weekend.
Thats all for this installment, as always thanks for looking!
Sean
Sick build up. Since i didn't have time to read it all, how did the chisel and al chunk work out to cut an line?
Another Q: How did the carpet mold to the floor pan? my molded carpet was a minor pita
Another Q: How did the carpet mold to the floor pan? my molded carpet was a minor pita
Carpet was a major pain in the ***.. It looks pretty good, but at the end of the day, its a drag car, not a show car
Chris
Last edited by Sideways240sx; May 30, 2010 at 11:26 PM.
9 Second Club
Joined: Oct 2006
Posts: 1,192
Likes: 243
From: IL
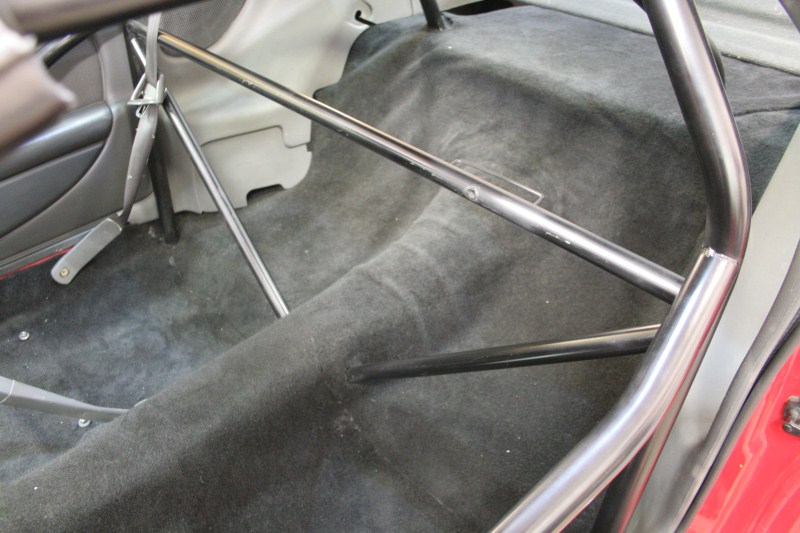
The carpet wasnt too bad, the front went really well. The back seats were the worst, and getting around all the bars sucked. I dont want to point out flaws, but you can see where I seamed the carptet right infront of the main hoop and diagonals. We also had some problems in the very back by the down bars, but we have a solution for that. All in all it was OK to do, but we are NOT interior guys. So in the end it looks good, but not perfect.
Sean