
WS6 w/ 4" Single Mandrel Y over a Ford 9"
 06-11-2013, 02:28 PM
#1
Launching!
Thread Starter

Figured I should share some pictures of the latest and greatest addition to my car, with the fact that I never post anything and read most of the time, so this should be a good start.
The long term plan with the car is running a very hopped up LS7 (which i have sitting in the garage)
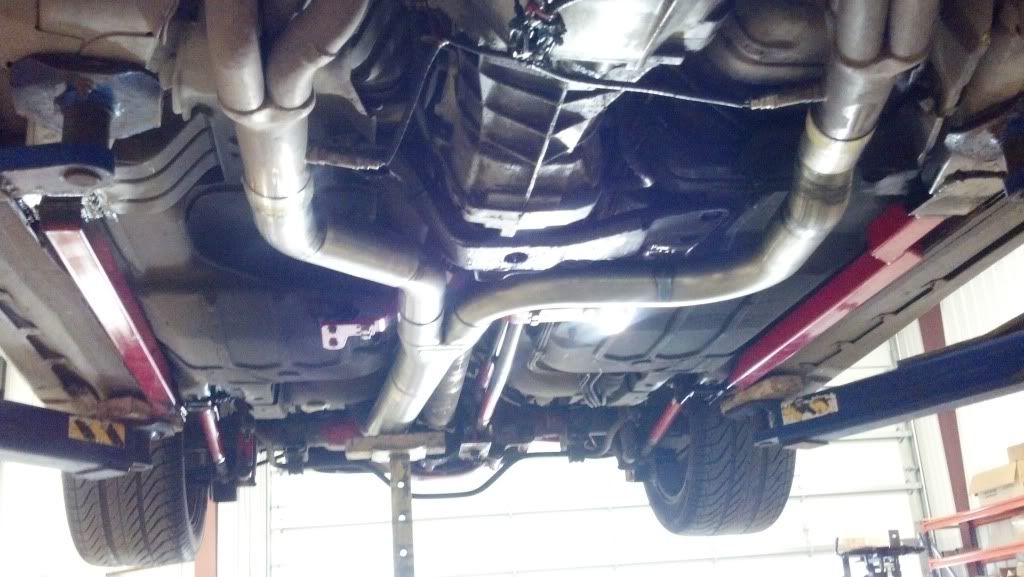
Basically I was looking to run as much pipe as possible, without losing ground clearance like everybody else, and without losing power based on pipe size (4" single outflows dual 2.5)
So this is what a good friend of mine and myself came up with.
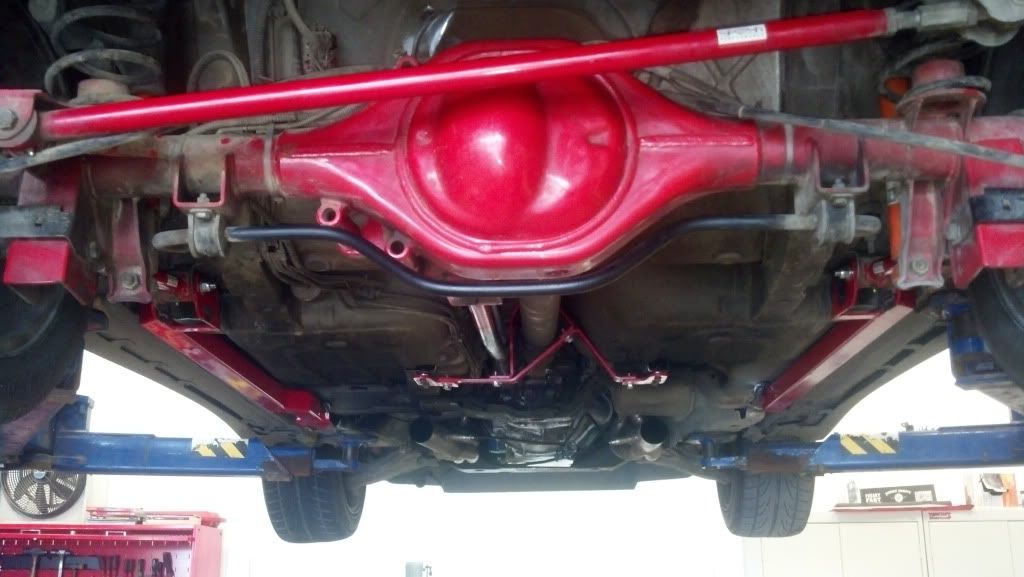
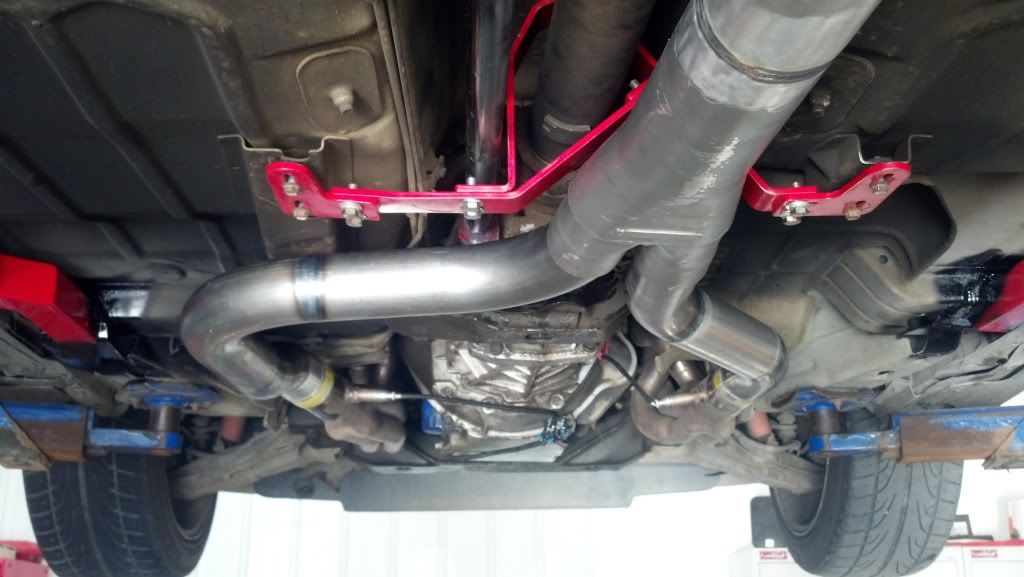
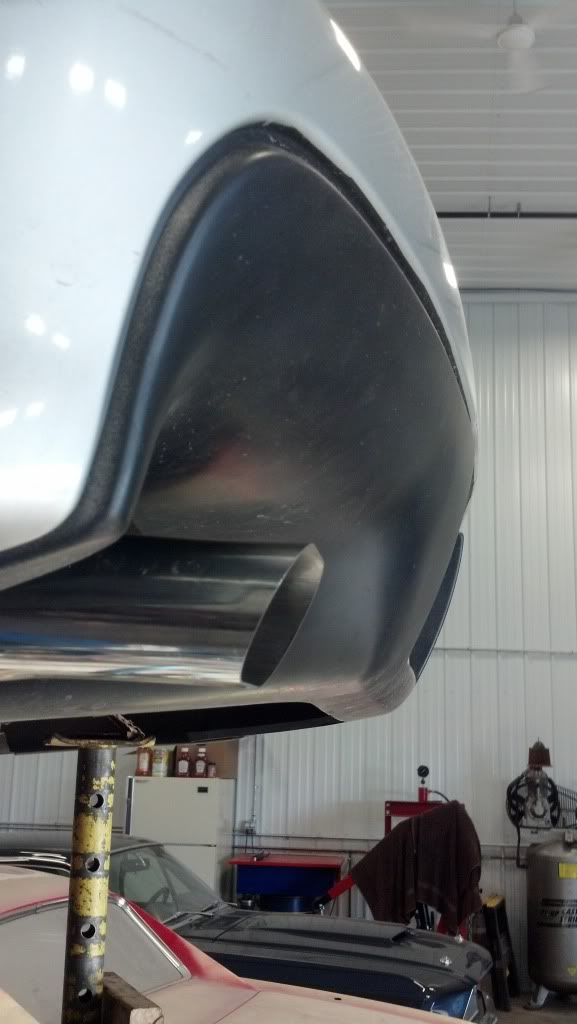
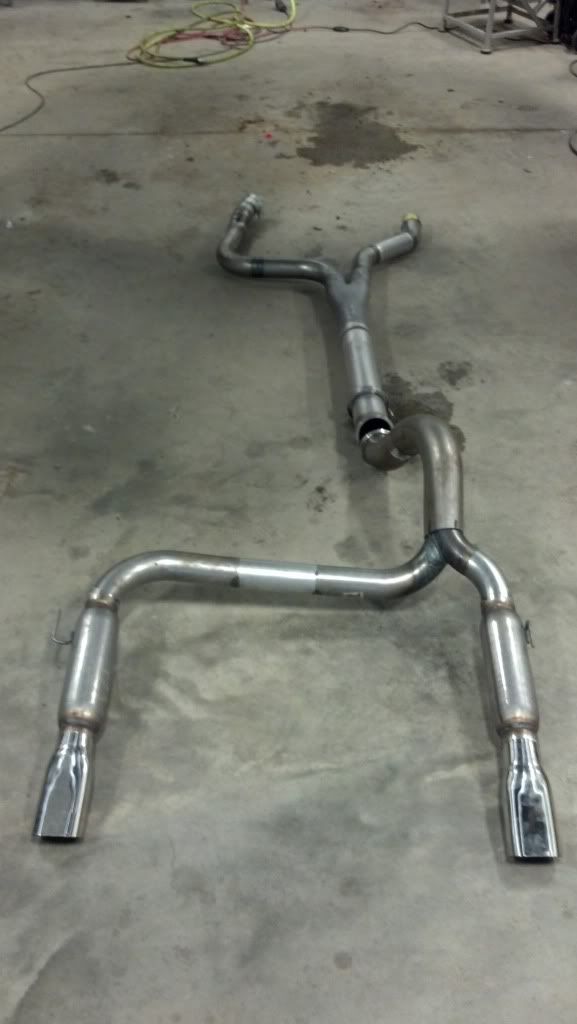
The headers themselves are LSXtreme 1 3/4 primary 3" stainless longtubes. From there it goes to a Flowmaster dual 3" to single 4" Y pipe, down the side, into a V band, and then over the axle. At the top of the axle tube there is a custom Y to split back off into dual 3", with 12" Dynomax bullets, and some Pypes exhaust tips.
I just installed UMI subframe connectors and my Spohn safety loop.
The Spohn torque arm doesnt clear their safety loop for whatever reason, so I had a local chassis guy modify it with some chromoly tubing, and it fits no problem now.
So on with the pics. I'll post more as the back gets done.

The long term plan with the car is running a very hopped up LS7 (which i have sitting in the garage)
Basically I was looking to run as much pipe as possible, without losing ground clearance like everybody else, and without losing power based on pipe size (4" single outflows dual 2.5)
So this is what a good friend of mine and myself came up with.
The headers themselves are LSXtreme 1 3/4 primary 3" stainless longtubes. From there it goes to a Flowmaster dual 3" to single 4" Y pipe, down the side, into a V band, and then over the axle. At the top of the axle tube there is a custom Y to split back off into dual 3", with 12" Dynomax bullets, and some Pypes exhaust tips.
I just installed UMI subframe connectors and my Spohn safety loop.
The Spohn torque arm doesnt clear their safety loop for whatever reason, so I had a local chassis guy modify it with some chromoly tubing, and it fits no problem now.
So on with the pics. I'll post more as the back gets done.


 06-12-2013, 08:46 AM
#6
Launching!
Thread Starter
ill be back on it again today after work. lining up the mufflers and tips in the bumper slots is whats left, along with welding the custom rear Y. it'll be a long night.
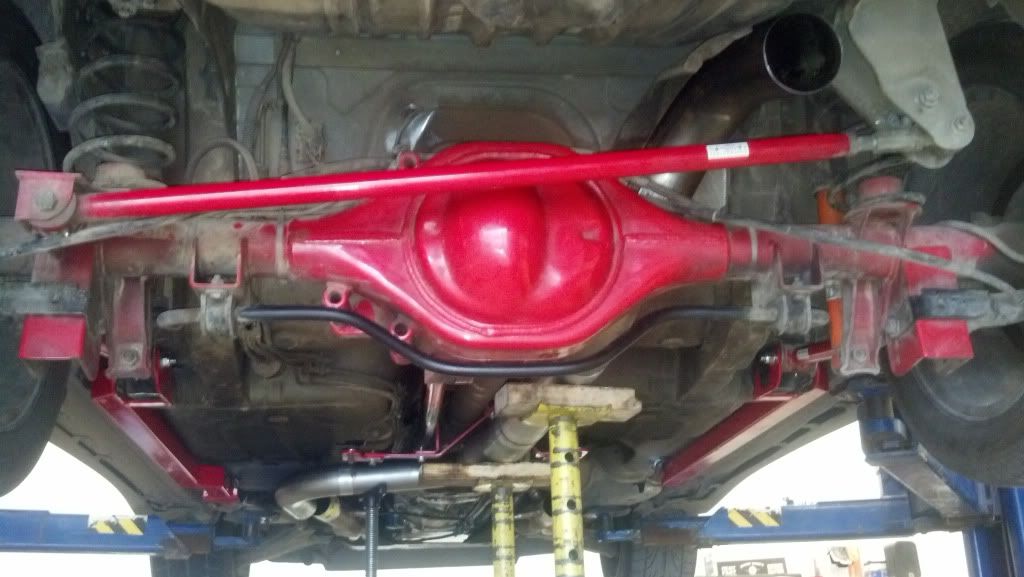
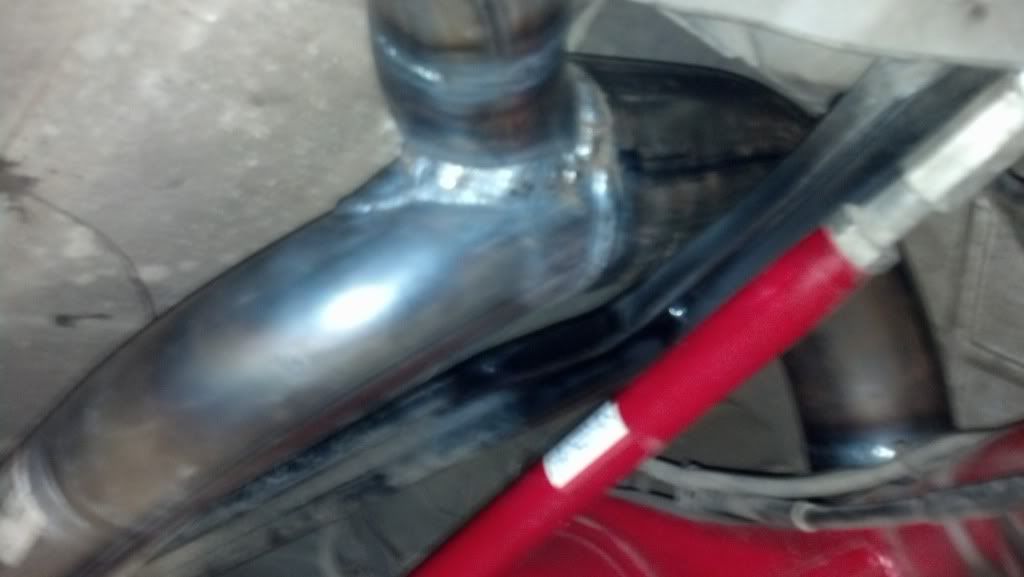
i can tell you right now that the 4 inch section of pipe is laying on the lower panhard bar at ride height, and the upper panhard is being fabbed by the same chassis guy as soon as the rest is done. theres a ton of clearance when its sitting on the ground.
@00ta, where did you have a clearance issue?
06-13-2013, 03:00 PM
#7
Launching!
Thread Starter
got off work at about 7 and we slaved away until 1 and called it good.
everything is in and the exhaust sounds AWESOME. no crackles, pops, rasp ect. it sounds very clear and smooth, and the best part is I CAN TALK inside my car now without yelling!
so heres the finished product.
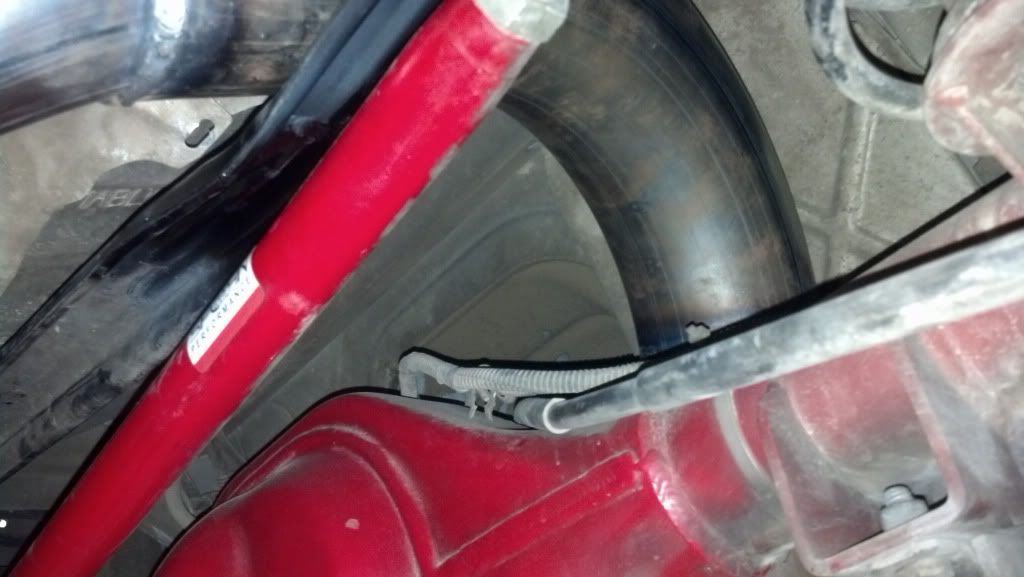
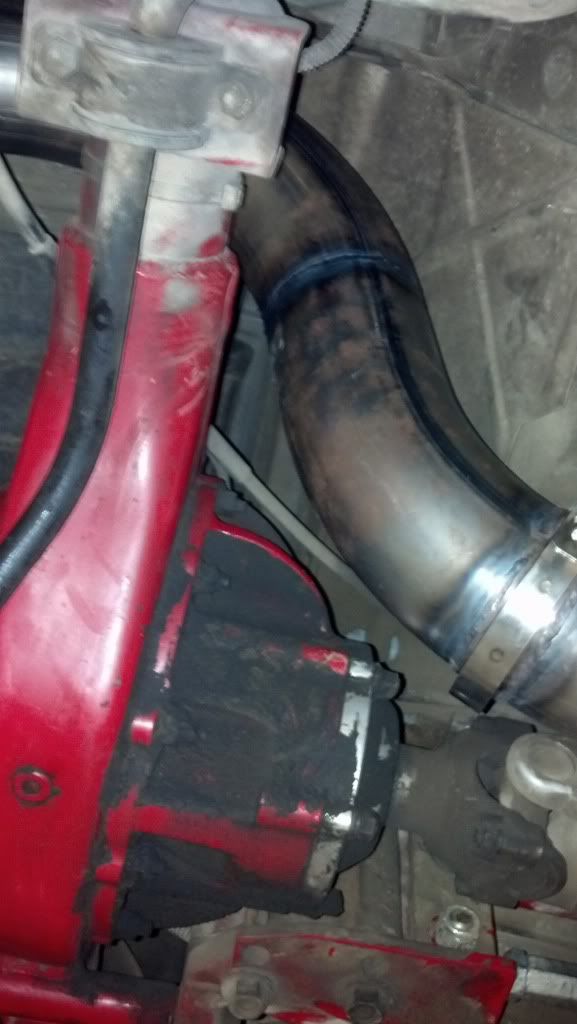
about 3/8 of an inch of clearance to the factory upper panhard, which was also slightly modified so the pipe would clear without issue.
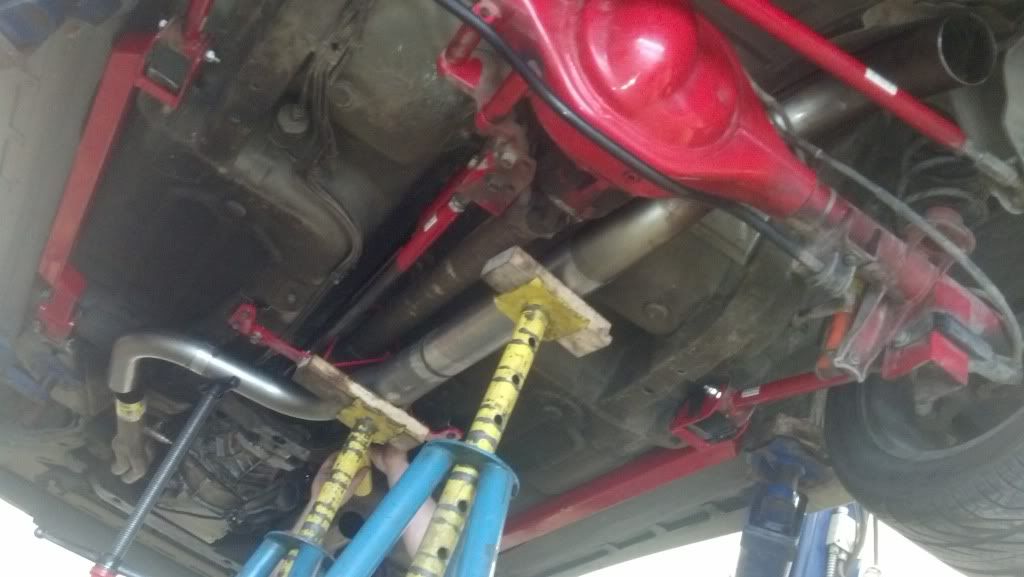
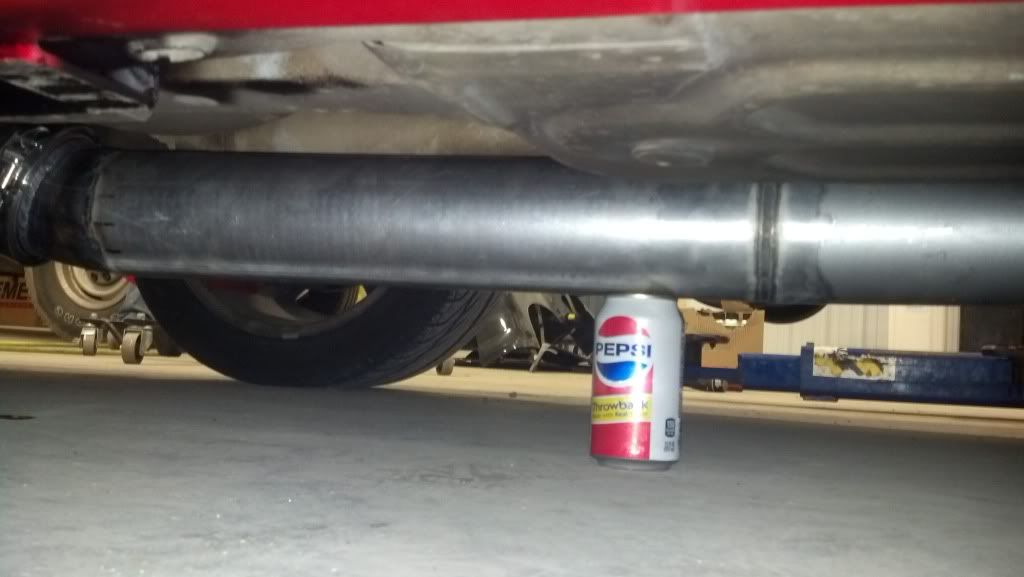
and the final money shot. an entire soda can of clearance, after i sat in it and fired it up (and not just after i set the hoist down)
I have to run it on the alignment rack hoist at work and set my pinion angles back to where they were, and i'll get some more photos with it sitting at ride height to verify the clearances. there's some chassis pieces i have to lubricate and retighten as well too so i don't have a "clunk" every corner i take from the lower control arm bolt moving.
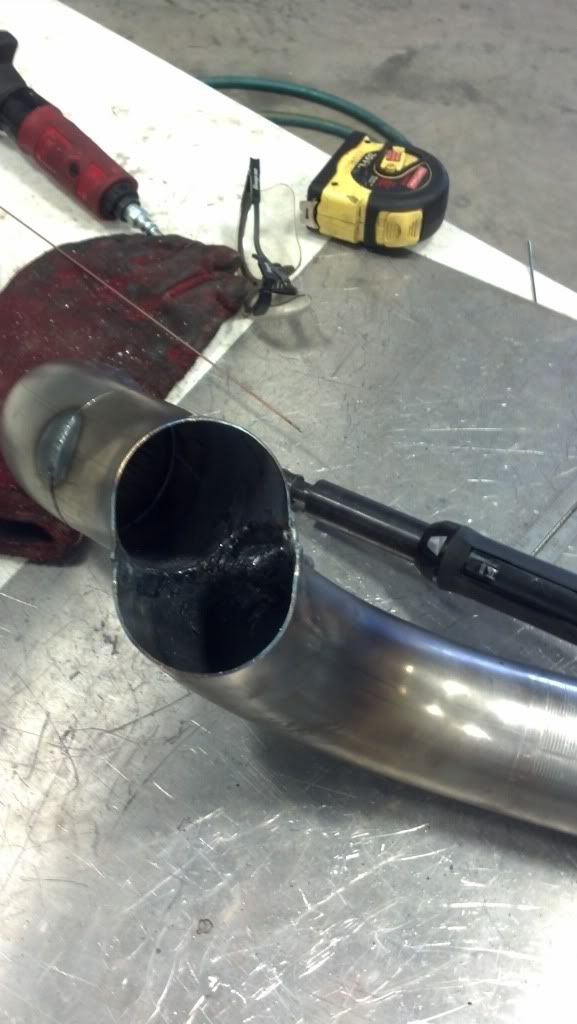
but yeah. that's the jist of it i guess. I really like the V band clamp to hold it all together, its super slick to put in and take out i wish more exhausts were that simple. the header uses a 3" ID pipe slipped over, and then a stepped flat style clamp to hold the front.
I'm estimating at least 22 hours of work between the frame connectors, modifying some components, and installing all the exhaust.
Well worth it.
everything is in and the exhaust sounds AWESOME. no crackles, pops, rasp ect. it sounds very clear and smooth, and the best part is I CAN TALK inside my car now without yelling!
so heres the finished product.
about 3/8 of an inch of clearance to the factory upper panhard, which was also slightly modified so the pipe would clear without issue.
and the final money shot. an entire soda can of clearance, after i sat in it and fired it up (and not just after i set the hoist down)
I have to run it on the alignment rack hoist at work and set my pinion angles back to where they were, and i'll get some more photos with it sitting at ride height to verify the clearances. there's some chassis pieces i have to lubricate and retighten as well too so i don't have a "clunk" every corner i take from the lower control arm bolt moving.
but yeah. that's the jist of it i guess. I really like the V band clamp to hold it all together, its super slick to put in and take out i wish more exhausts were that simple. the header uses a 3" ID pipe slipped over, and then a stepped flat style clamp to hold the front.
I'm estimating at least 22 hours of work between the frame connectors, modifying some components, and installing all the exhaust.
Well worth it.
Last edited by dckmn52; 06-13-2013 at 03:10 PM.
Trending Topics
06-13-2013, 05:59 PM
#9
Had you considered going with either a 6" diameter round mufflers, or even oval mufflers, or is there not enough clearance for anything larger?
A pair of Dynomax Ultra Flo #17267, or even a pair of Borla XR-1 #40943 would sound really good if they would fit!
A pair of Dynomax Ultra Flo #17267, or even a pair of Borla XR-1 #40943 would sound really good if they would fit!
06-13-2013, 06:48 PM
#10
Launching!
Thread Starter
Technically I could have mounted a single muffler with 4" inlet like the factory one, but for the sake of flow decided to do it this way.
It sounds very clean and I'm really happy with it.