


Home porting pics
Thread Starter
TECH Fanatic
iTrader: (15)
Joined: Nov 2005
Posts: 1,889
Likes: 0
From: Alexandria, LA
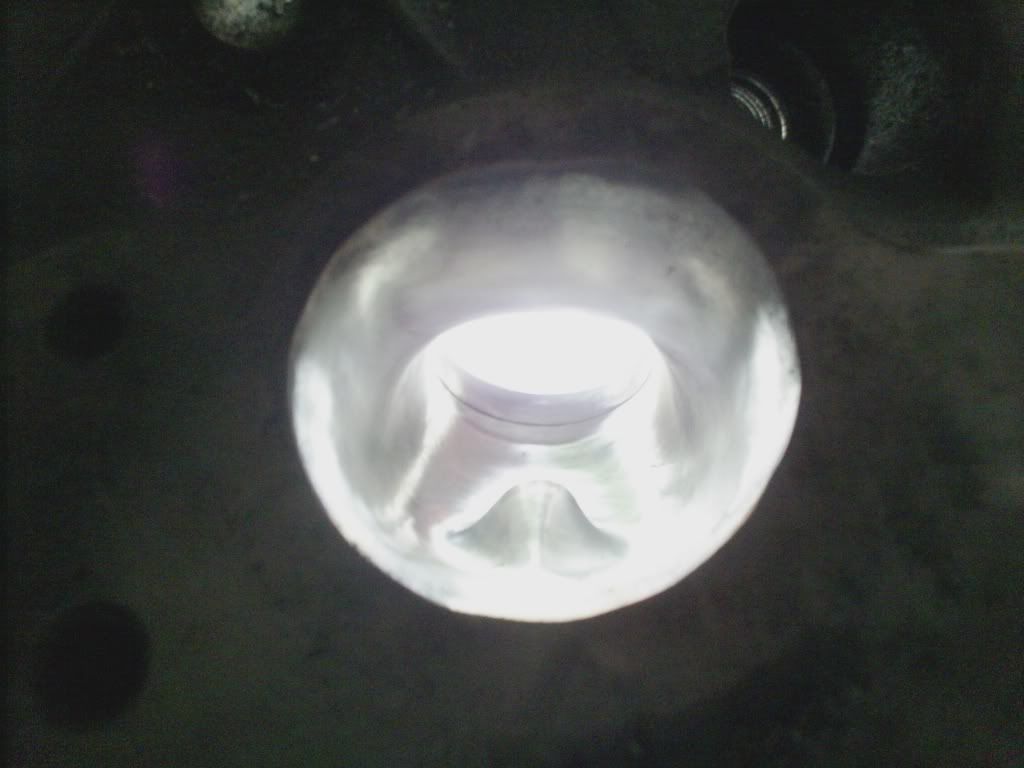
These are not finished yet, we had to get a longer bit!! These are LS6 243's milled .010! Let me know what you think of them so far. and what else we can do or how much more we can go with them


That looks pretty rough. I'd start off with some sanding cartidges and get a hand with how those remove material. Then move onto the carbide cutters. That'll help you with the chatter marks you're seeing.
Hard to tell from pics. Put a better "tear drop" on the valve guides. I see lots of sharp edges in there. Hogging the runner out isn't going to help as much as you think. It's not as much about removing material as it is helping air get through the head. Try to keep a consistant CSA. Here's a "get started" article you may want to read.
http://www.popularhotrodding.com/eng...ing/index.html
http://www.popularhotrodding.com/eng...ing/index.html
Trending Topics
Thread Starter
TECH Fanatic
iTrader: (15)
Joined: Nov 2005
Posts: 1,889
Likes: 0
From: Alexandria, LA
yea ill be blending the bowl area some more and working on the sharp edges when i get the longer bit all i had was a 2" bit and we ordered a 6" to reach better
LS1 Tech Stories
The Best V8 Stories One Small Block at Time

Topdon ONE vs. Artidiag 800 BT2: Which is the Diagnostic Tablet For You?
Pouria Savadkouei
Gas Monkey Built a 6-Wheel Ferrari Testarossa With a Corvette LT4 Engine
Verdad Gallardo
7 Most Reliable High-Performance Engines GM Has Ever Built
Verdad Gallardo
Amazing '71 Camaro Restomod Is Modern Muscle Car Under the Skin
Verdad Gallardo
6 Common C5 Corvette Failures and What's Involved In Repairing Them
Pouria Savadkouei
Retro Modern Bandit Pontiac Trans AM Comes With Burt Reynolds' Autograph
Verdad Gallardo
Top 10 Greatest Cadillac V Series Performance Models Ever, Ranked
Pouria Savadkouei
Top 10 Most Powerful Chevy Trucks Ever Made!

Hennessey's New Supercharged Silverado ZR2 Has 700 HP
Verdad Gallardo
I would say profile the exhaust side guide some more. That is one of the biggest restrictions on the exhaust side. Think about the velocity of the gases hitting that nice flat surface. def slows things down a bit. Just don't take material off the top of it or you will ruin the contour you want.
Like KMS said hogging out the runner doesn't help much just smooth them out and that will be enough. Also even though some may argue I believe a nice smooth finish on the exhaust side helps it "shed" carbon deposits better than a rougher finish. You don't need or want as smooth of a finish on the intake side as a rough finish (40-60 grit) aids in creating a boundry layer to help keep the fuel in suspension. (more important with a carb) Take your time and make sure the ports are as even as possible. Also if you haven't already find some pictures of some heads that have been sliced at the ports so you know how much material you are dealing with in all the areas that you are working. You definatly don't want thin spots on the exhaust side. Also careful on the intake side openings don't open them up much, or you could inadvertently compromise the intake sealing surface of the head.
So far good effort just take your time and you may be pleasantly suprised with the results. Even Pro's started somewhere LOL.

Thats a start. Like said you need to remove more, tear shape it and then blend it all in. Here is a pic of my "home ported" exhaust port. This still needed a little finishing work to it but you get the idea. It is hard to get pics of the ports with my crappy camera. It is smoothed all the way to the guide. I was also using a 6" carbide cutter on my air die grinder, cuts it like butter!
Thread Starter
TECH Fanatic
iTrader: (15)
Joined: Nov 2005
Posts: 1,889
Likes: 0
From: Alexandria, LA
thanks man! all im really going to do on the intake side is remove the rocker boss and blend the bowl, i dont know enough yet to tackle the runners so i just kinda smoothed them up. the exhaust side i opened the face to match the gasket then blended back into the runner, and removed some in the area behind the valve guide it had a big hump
thanks man! all im really going to do on the intake side is remove the rocker boss and blend the bowl, i dont know enough yet to tackle the runners so i just kinda smoothed them up. the exhaust side i opened the face to match the gasket then blended back into the runner, and removed some in the area behind the valve guide it had a big hump
If you go through dont panic just dont hog that area out. In fact if you look at most CNC port jobs they go in to the rocker boss also. just use some silicone when bolting the rocker down so oil wont get into the intake port.
Also try to make sure each port is as consistent to each other as possible.
You dont want 1 port flowing better than the rest.
Thread Starter
TECH Fanatic
iTrader: (15)
Joined: Nov 2005
Posts: 1,889
Likes: 0
From: Alexandria, LA
 thanks man!! i was looking at it and thought the same thing and im trying to get them to resemble some patriots that i saw first hand so i wasnt worried about cutting through a little bit.
 I have about 75 pics of ported LS1 heads that I was collecting to get an idea of the shape I wanted. If you want them send me a PM with an email address and I will zip them and send them over to ya.
I wonder how they became pro's must have just awaken one mourning with all they needed to know about porting heads.
Anyway just do a little at a time dont go crazy and hog them out, bigger isnt always better. I know there use to be several DIY poting threads with some good pics on here. Good luck.
Anyway just do a little at a time dont go crazy and hog them out, bigger isnt always better. I know there use to be several DIY poting threads with some good pics on here. Good luck.
Thread Starter
TECH Fanatic
iTrader: (15)
Joined: Nov 2005
Posts: 1,889
Likes: 0
From: Alexandria, LA
yep ive been reading all of those threads and looking at the pics i recieved from silver86. the 6" bit should be here today so maybe i can get back to toying with them
Lots of good info and pictures here: https://ls1tech.com/forums/generatio...ml#post4407860


