When you click on links to various merchants on this site and make a purchase, this can result in this site earning a commission. Affiliate programs and affiliations include, but are not limited to, the eBay Partner Network.
I know there are several that run 275s on the oem 8.5 and while all the numbers say no it can and is commonly done at the expense of tread life
vroom_vroom,
Take a look at the manufacturer's site to see the actual tire dimensions, there is quite the range between manufacturers, and even within types, some may fit, others not so much. I had a set of R888 in 265 which just cleared stock rear.
Well my wheel saga is coming to a close thank god. Got my last bent wheel off the car thanks to my last one being straight (the spare) My front driver was tweaked at the hub......
So close out my wheels I need to ask a stupid tire question. I know there are several that run 275s on the oem 8.5 and while all the numbers say no it can and is commonly done at the expense of tread life. Well tires last 2 years max with me so I really don't care too much. If I go up to a 275 sport comp will it really make much of a difference in traction?
275's will fit the stock 8.5" wheel sure. The sidewalls will bulge and make the rear end feel wobbly though. You won't be utilizing the full tread of the 275, so I would say its not worth it in that respect, and the fact that the car will not handle as good anymore is another reason to avoid it. A 255 would be the better alternative for a stock 8.5" wheel.
If I recall correctly the R888's run larger than their advertised sizes so that would just compound the "problems" of running a 275 on the stock 8.5" wheel. One of these days somebody will hold these tire manufacturers to their labels so that there can be apples to apples comparisons between brands. Don't hold you breathe though.
They are installing the stainless steel braided brake lines.
I hate working second shift sometimes. Tomorrow morning I'm bringing that sexy chica home.
New motor mounts, acell ceramic wires, ported and painted fast 92 intake with adapter kit, ACT twin disc, tilton 6000 slave, agency power brake lines, new valley cover seal, new rear engine cover seal, new rear main seal, driveline alignment.
Bunch of stuff done, it's going to be worth the wait.
In an effort to keep brake dust down, I've replaced pads with Hawk ceramics, and cleaned the wheels. Washed, clayed(nano), then coated passenger side with Meguiar's M21 Sealant , and drivers side with Armor All brake dust repellant. We will see which one does better on the dust.
How it sounds with the new intake and everything else. Click on the picture to take you to my image and video host site to load the video or you will loose some sound quality. Easier to post stuff that way also.
Long tubes, 400 cell cats, H pipe, stock mufflers 3.5" tips.
Its a little louder than pre intake and clutch, you can hear how much faster it revs with the much lighter rotating assembly.
Throw out bearing is coming alive with the existing fluid, I have not yet swapped it.
I'm going to be running a lower viscosity ATE brake fluid, dot 4 class 6 in an effort to tame the tilton throw out bearing a bit.
Tilton literature says fluids with less than 550 f temps should be used as higher temps have additives that swell the seal and can cause slow release.
Redline rl100 produced a fairly stiff pedal effort in the last setup as well, but it lasted longer with the failed slave cylinder than anything else.
Motul is out as its got the same additives, though it is a less viscous fluid. The ATE 200 Dot 4 plus, class 6 seems like it would have the viscosity of motul, which produced a light pedal effort on my ls7 setup, but without the additional additives to swell the seal.
Its a high initial push, but smooth as silk afterwards. Like a good revolver double action is how I would describe it. It is the high initial push I am trying to reduce.
uh. Lets see. Last couple of weeks.
Two stage cut and polish followed by a layer of wax.
Replaced the seeping rad. Replaced the steering wheel position sensor.
Rad was damaged and leaking from Rockauto's lack of packaging for a AC Delco rad. SWPS wasnt the problem with Service Stability message.
Ordered a cloned tech 2 to find out it was the ECBM spitting codes.
Got another rad locally and shipped Rockauto back theirs. Checked the wires and connections on the ECBM to find it worked when I plugged it back in. Message is gone. yay. A cheap fix. Sort of...
Got an exhaust leak on the driver side. Do the stock manifolds have a common spot they crack? Couldn't see anything obvious from the top.
Are all of the exhaust manifold bolts present? It's possible one of the bolt heads popped off. The rears would be most likely to allow an exhaust leak. LS motors are notorious for their exhaust manifold bolts.
Are all of the exhaust manifold bolts present? It's possible one of the bolt heads popped off. The rears would be most likely to allow an exhaust leak. LS motors are notorious for their exhaust manifold bolts.
No broken bolts. I already went through that on the passenger side.
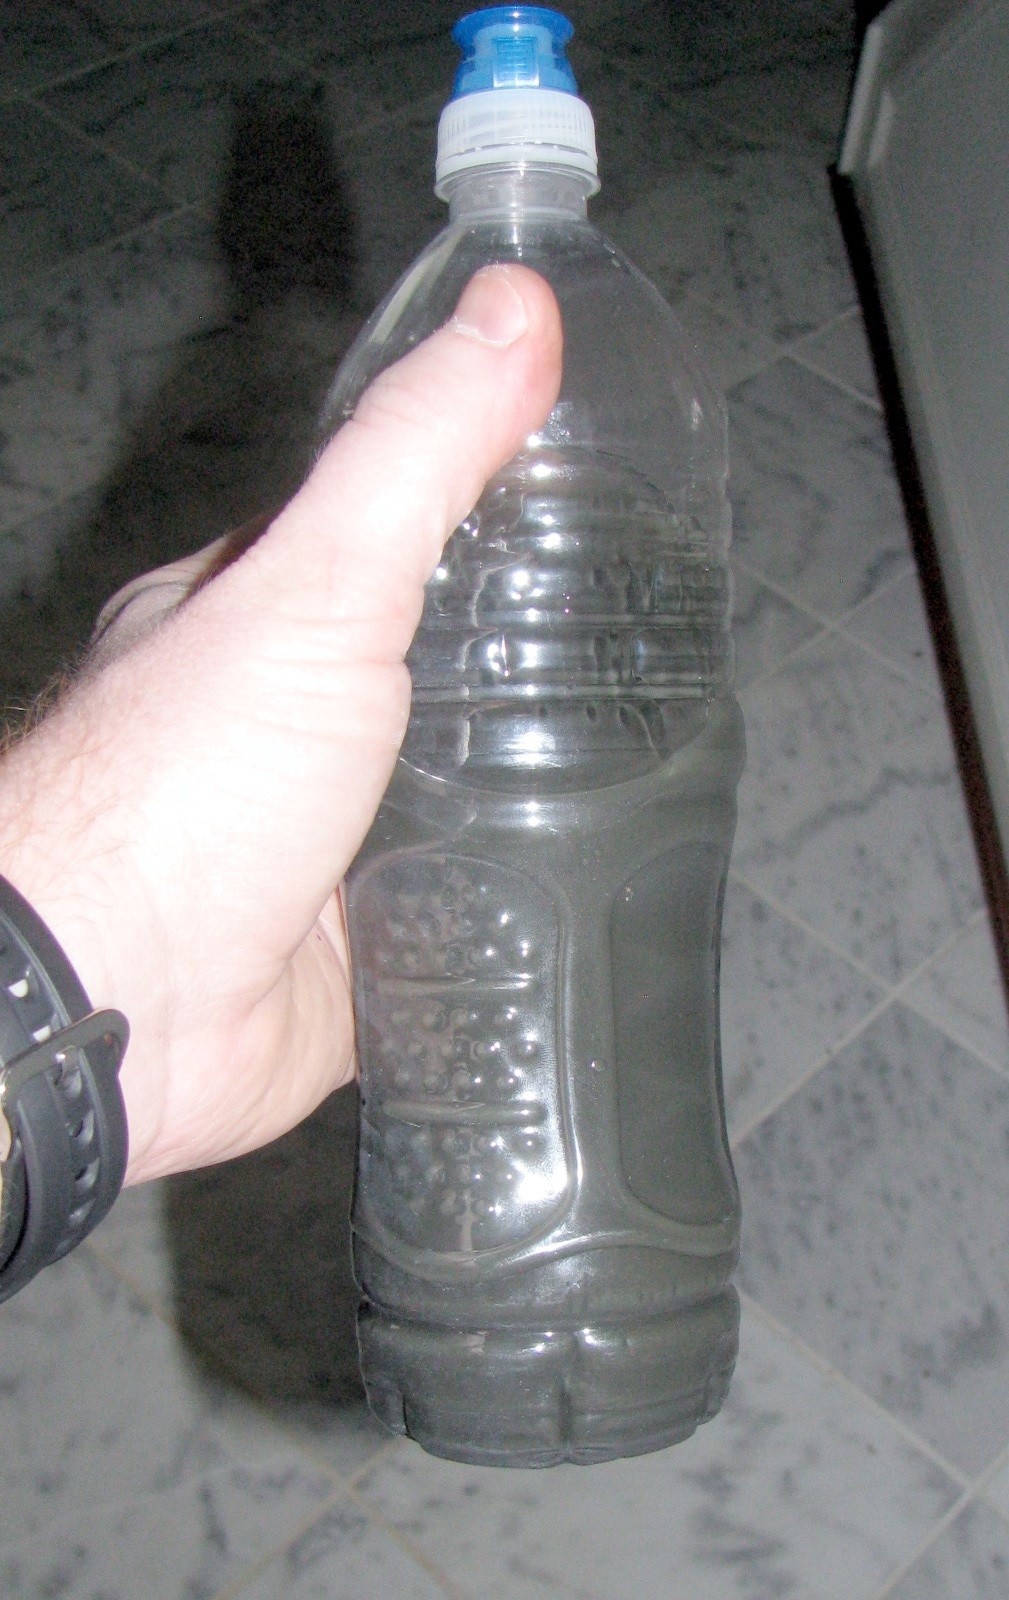
- Completed flushing nasty fluid out of the clutch slave. The fluid that came out of the PMC was pretty contaminated (wear particles from the dying MC, I think), so I wanted to flush the slave before I install a new clutch MC.
I used my Motive bleeder to back-flush the slave initially, in through the extended bleeder line and out through the supply line (which has no MC hooked up to it yet). Happened to have a 4AN-to-1/8" NPT adapter (not sure why ), so I just needed to get an NPT-to-hose nipple adapter so I could hook up the Motive. The nasty fluid above is a result of the back-flush.
Then I flushed the other way a bit, then dumped out the bottle, and flushed a bit more so I could see that the fluid was no longer coming out looking like that. Success!
- Moved on to installing the new (OEM) clutch MC, but had no luck there. Despite what the FSM may tell you to do, as far as I can tell it is physically impossible to twist the MC to the proper position so that the lugs on the MC will engage the mounting bracket; the brake booster gets in the way. This did not come as a surprise - I do recall that the booster was in the way of removing the stock MC, and I had to make a stubby 19mm wrench to be able to take off the outlet hose so that the MC would rotate far enough to disengage. Despite that, I was hoping by some bit of magic I would find that I was able to install the MC without having to go through that process in reverse. Alas, that magic has not happened...
I took a look in the FSM to see how hard it is to remove the brake booster, just so I could shift the thing aside a bit to make room for installing the clutch MC. Well, whaddyaknow, one of the steps in removing the brake booster is to remove the clutch MC! Oh, and it specifically says that you don't need to disconnect any hoses, you just have to remove the MC and move it aside. The folks who wrote the FSM must not have ever actually worked on the car, because I have come across **** like this on multiple occasions.
I put a booster on one of my Vs not long ago and I didn't take the clutch master off. There is a "special tool" they call for and maybe you need to take the clutch master off for clearance to this special tool but o didn't need it.
agajn, I always go to junkyard and rip one open just to see how it all works.
I put a booster on one of my Vs not long ago and I didn't take the clutch master off. There is a "special tool" they call for and maybe you need to take the clutch master off for clearance to this special tool but o didn't need it.
I agree, I can't see any reason that you would need to remove the clutch MC to get the brake booster out. I just thought it was funny / annoying that the FSM tells you to remove the clutch master to get the booster out, when in fact it should be the other way around!
I exchanged emails with Robert, the V tech @ Lindsay, and he confirmed that every time he's done a clutch master he has removed the brake booster. So, that's what I did today.
- Unbolted the brake master cylinder from the booster and moved it aside (without disconnecting the brake lines). There's a retainer clip that holds the 2 brake lines on the driver strut tower; I popped that pin out of the sheet metal, and that gave the lines enough flex/slop to move the brake MC.
- Unbolted the coolant reservoir and moved it out of the way, too. I only had to disconnect the small hose coming from the radiator.
- Disconnected the brake booster pushrod from the brake pedal.
- Removed the brake booster. You have to rotate the booster ~45deg CCW (viewed from the front of the car) to disengage it from the firewall. As ls1247 said, there's a special tool that the FSM says to use - it bolts on in place of the MC, and allows you to use a 1/2" ratchet / breaker bar. Well, I didn't have that tool, and it costs $170, so I'm not going to have that tool. Reading online it seems like some folks were able to rotate the booster pretty easily, but mine was not cooperative. I ended up using my 3# hammer and a chunk of steel to knock against one of the notches on the perimeter of the booster. Even with that it took a little while to get the thing to move. Once it was free from the firewall I shifted it towards the center of the car and used a bungee cord to hold it out of the way.
- Installed the OEM clutch master cylinder. Getting the lugs on the MC to line up with the bracket inside the car took some work, had to go back and forth between trying to line it up, then get back under the dash and eyeball how it's lining up, adjust again, repeat. Once I got it lined up it was a tight fit, so I went with the mallet and a piece of wood on the outlet and lightly tapped on that to help get it started, then was able to rotate it the rest of the way by hand.
- Once the clutch MC was in, I reinstalled the coolant reservoir, brake booster, and brake MC, and hooked up the brake and clutch pushrods.
Tomorrow I should have time after work to connect the line to the clutch slave and bleed the system.
- Tuesday I reinstalled the factory dry-break disconnect (with 4AN adapter fitting) onto the clutch slave supply line, and hooked the new clutch master up.
- Flushed/bled the clutch using the old-fashioned manual method, and using a Motive power bleeder. Pedal feels pretty good, but I haven't actually driven the car yet, so we'll see...
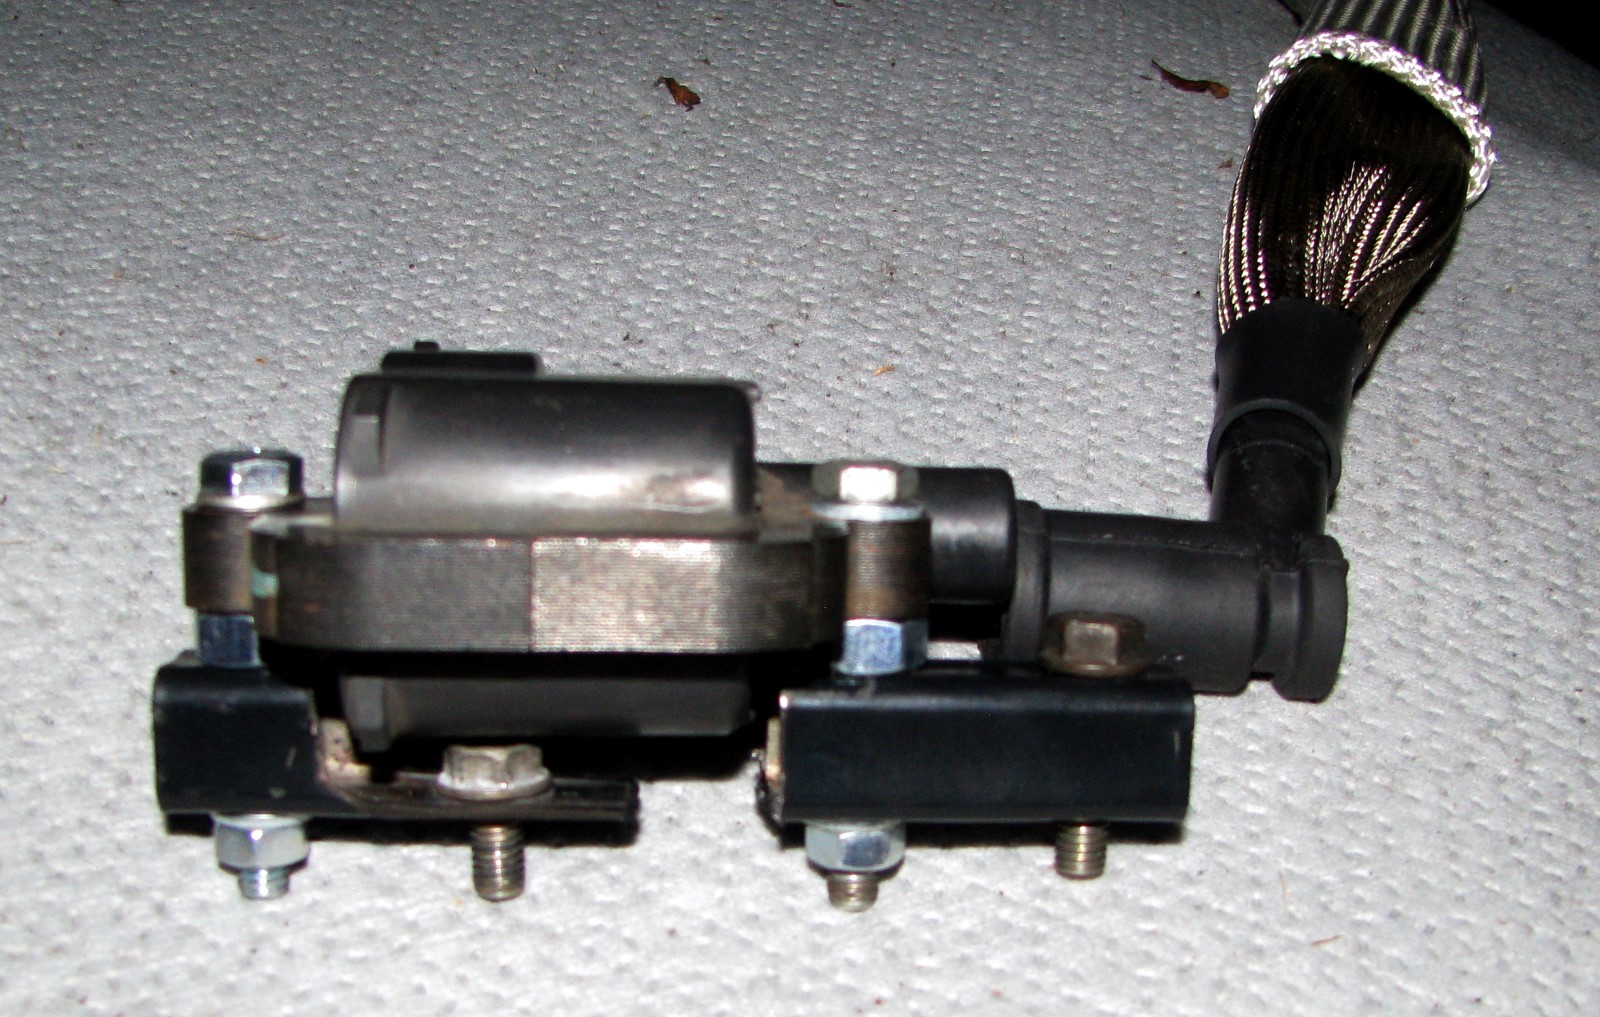
- Installed some new super-custom spacers to shift the position of the #7 coil pack so that the plug wire is a bit farther from the header. I had previously used some round steel spacers that I had in my random hardware bin, but they didn't increase the clearance as much as I wanted. The new spacers lift the coil up away from the valve cover, and then move the coil towards the center of the engine ~1".
How did I "fabricate" these sweet spacers/brackets, you ask? Well, earlier this year I demolished an old love seat and broke it down into small enough pieces that I could fit it into my garbage can (because I refused to pay the garbage company $150 to come pick the thing up ). Some of the frame was wood, and some was steel; some of the steel went to the scrap yard for probably a dollar , and a few pieces I kept because they looked like they might come in handy someday. Sure enough, I was able to cut the ends off one of the brackets I had kept, did a little work with the grinder, slapped some paint on there, and voila! The wiring harness to the coil pack has enough slack that it is able to connect without being stretched, and the new position moves the plug wire well clear of the header. (The picture above is a bit of an optical illusion - it shows that the plug wire has good clearance, but makes it look like the A/C pressure sensor is right on top of the header primary, which is not actually the case.)
- Last night I hooked up the battery and reinstalled all of the interference that was out for the clutch MC install. Once it was all back together I pop-started the car rolling backwards out of the driveway, then pulled back in. Clutch works! Starter still doesn't, so that's the next project.
- Finally swapped back to street brakes. Since the car was towed back from the track, dead, it's just been parked in the driveway while I waited to get the clutch MC addressed. I hadn't bothered to swap the brakes back over, so I knocked that out (in the rain) last night.
Gas Monkey Built a 6-Wheel Ferrari Testarossa With a Corvette LT4 Engine
Slideshow: The controversial Ferrari F6 swaps its original flat-12 for a Corvette Z06-derived LT4 V8 and sends power to four rear wheels through a custom-built drivetrain.
7 Most Reliable High-Performance Engines GM Has Ever Built
Slideshow:These GM engines didn't just make huge power, they survived abuse, boost, track days, and six-digit mileage with a reputation for refusing to quit.
6 Common C5 Corvette Failures and What's Involved In Repairing Them
Slideshow: From wobbling harmonic balancers to failed EBCMs, these are the issues that define long-term C5 ownership and what repairs typically involve.
Retro Modern Bandit Pontiac Trans AM Comes With Burt Reynolds' Autograph
Slideshow: A modern Camaro transformed into a retro icon, this limited-run "Bandit" build blends nostalgia with brute force in a way few revivals manage.
Top 10 Greatest Cadillac V Series Performance Models Ever, Ranked
Slideshow: Cadillac didn't just crash the high-performance luxury vehicle party, it showed up loud, supercharged, and occasionally a little unhinged...


 ), so I just needed to get an NPT-to-hose nipple adapter so I could hook up the Motive. The nasty fluid above is a result of the back-flush.


 ). Some of the frame was wood, and some was steel; some of the steel went to the scrap yard for probably a dollar
  , and a few pieces I kept because they looked like they might come in handy someday. Sure enough, I was able to cut the ends off one of the brackets I had kept, did a little work with the grinder, slapped some paint on there, and voila! The wiring harness to the coil pack has enough slack that it is able to connect without being stretched, and the new position moves the plug wire well clear of the header. (The picture above is a bit of an optical illusion - it shows that the plug wire has good clearance, but makes it look like the A/C pressure sensor is right on top of the header primary, which is not actually the case.)