
Sound Deadening Project in a 2002 Camaro
 10-06-2011, 11:44 PM
#1
Teching In
Thread Starter
I kind of hijacked another thread about Edead80 and I wanted to start another thread on here to show everyone how easy the project is and how much of a difference it will make to the enjoyment of your vehicle. This is my Wife's 2002 Camaro SS that she bought back in the spring of 2003.
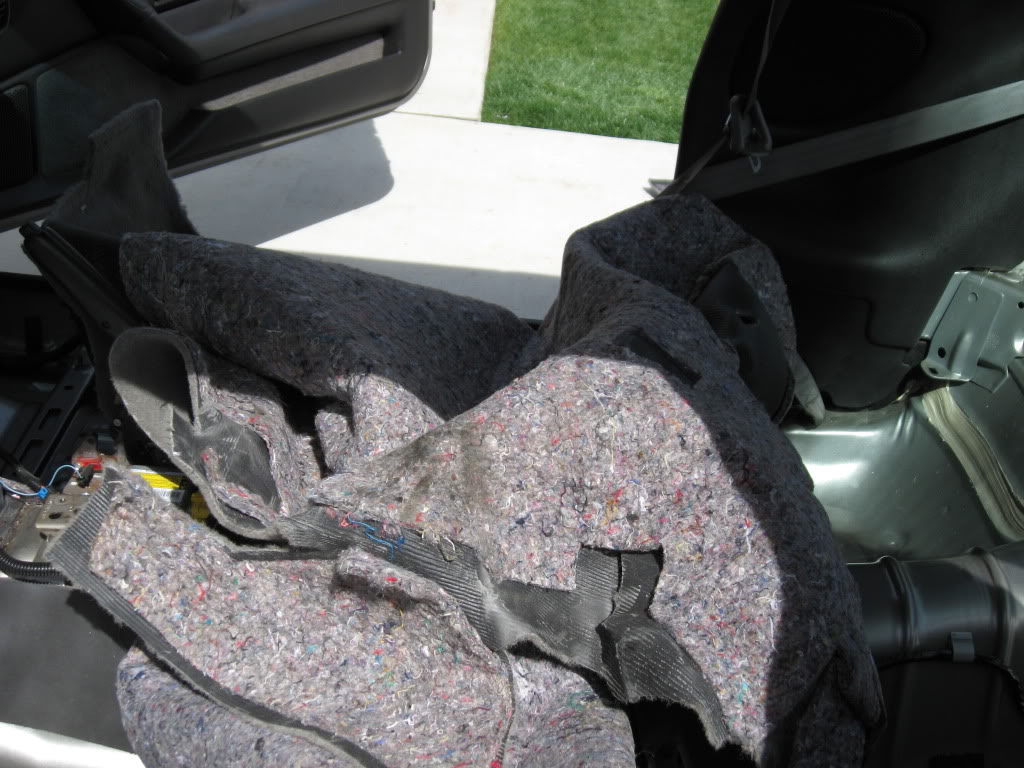
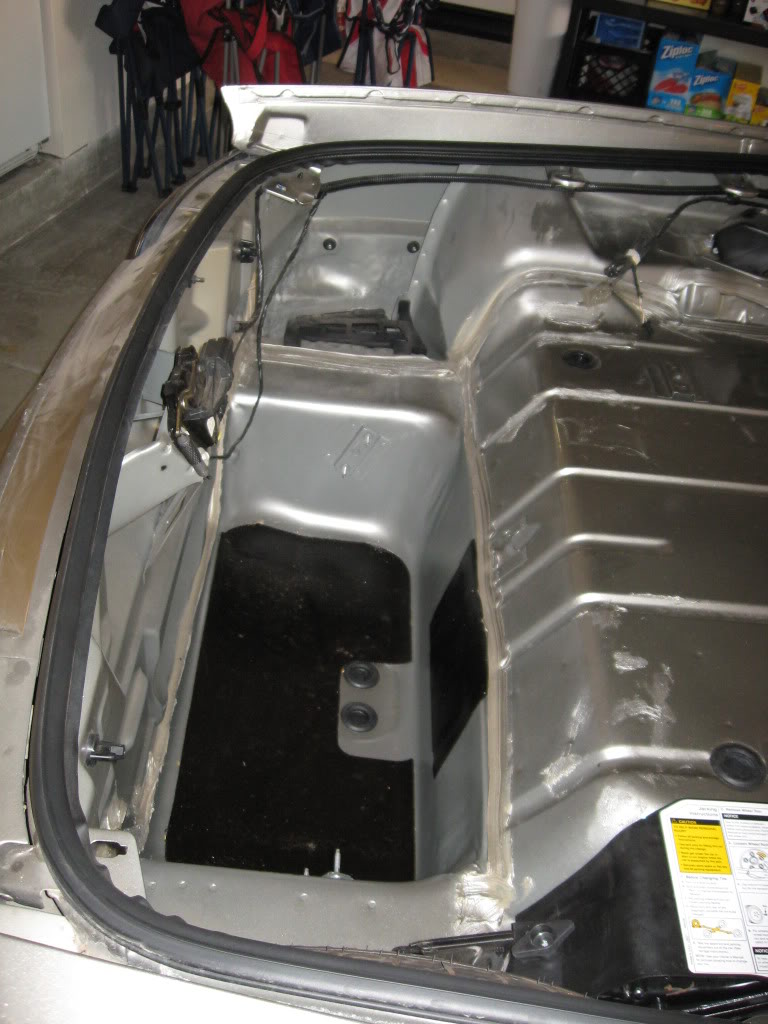
To begin with I think that this is a very in-depth project (my project ended up being about 35-40 hours to complete) and you will have to have a catalyst to start the project. For me, I had some serious water damage from a simple mistake of thinking the windows were all the way up... OOps??? picture was taken after we soaked up all water in carpet and vehicles was aired out for two weeks
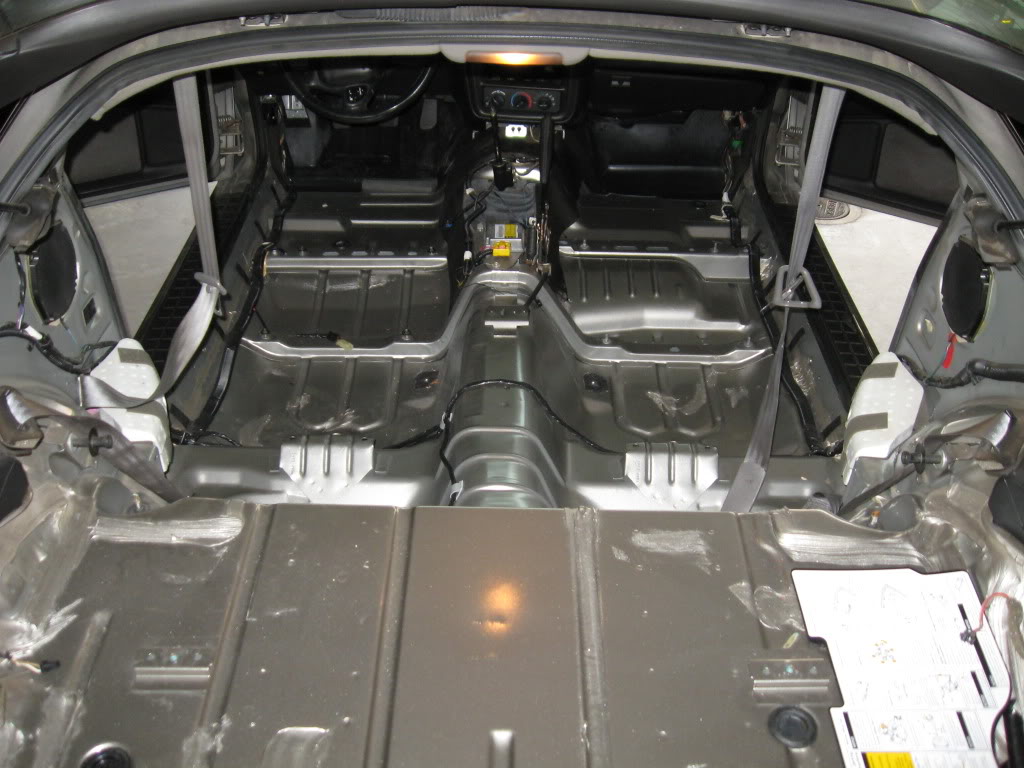
First Step: remove the interior, the more you can get out the better, and the easier it will be. Tricks on removal of key components can be found around LS1 Forum, or you can ask the question on here and I will answer the best that I can.
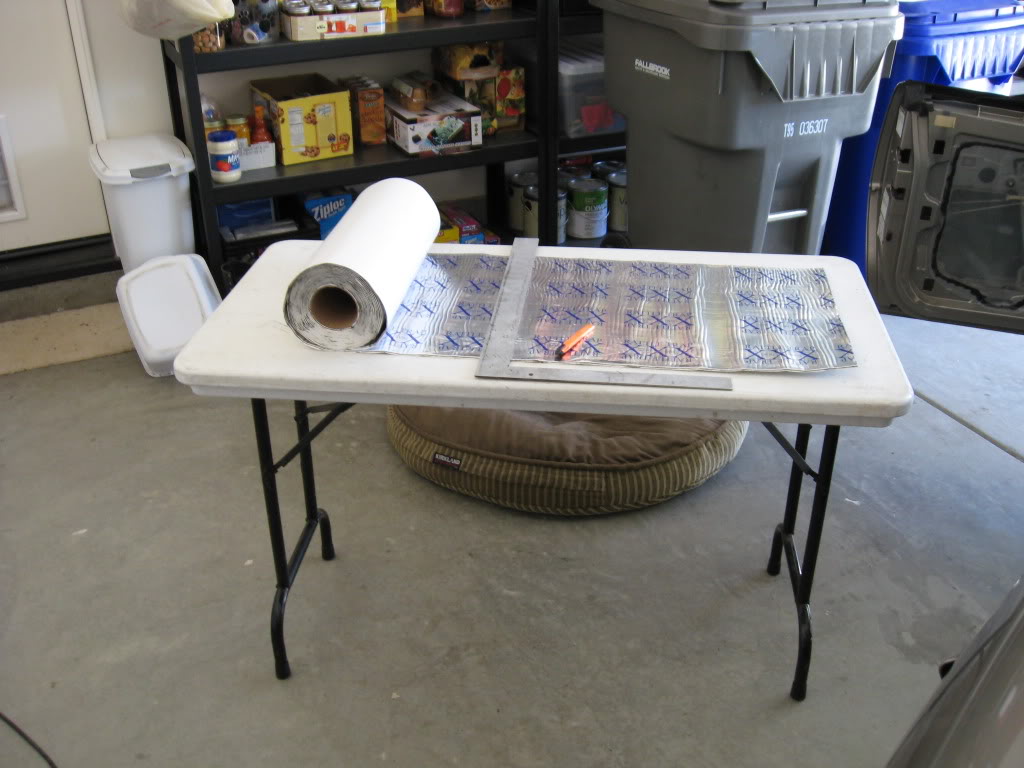
Second Step will be to determine which kind of deadener that you want to use. I hear VERY GOOD things about the Edead products but they were very expensive. You can do a simple internet search for sound deadening material and see the difference in pricing. I found the best value for the quality to be Fat MAt's "Rattle Trap", I bought 200 Sqr Ft. for about $310.00 delivered, and that included two install kits with rollers, and razor knifes. As you get ready you want to setup an area in your work space that is dedicated to the project at hand, here are some usefull tools:
- Wood Roller
- Razor Knife
- Sharpie Pen
- Carpenter's Square
- Tape Measurer
- Small portable folding table, or table height workspace
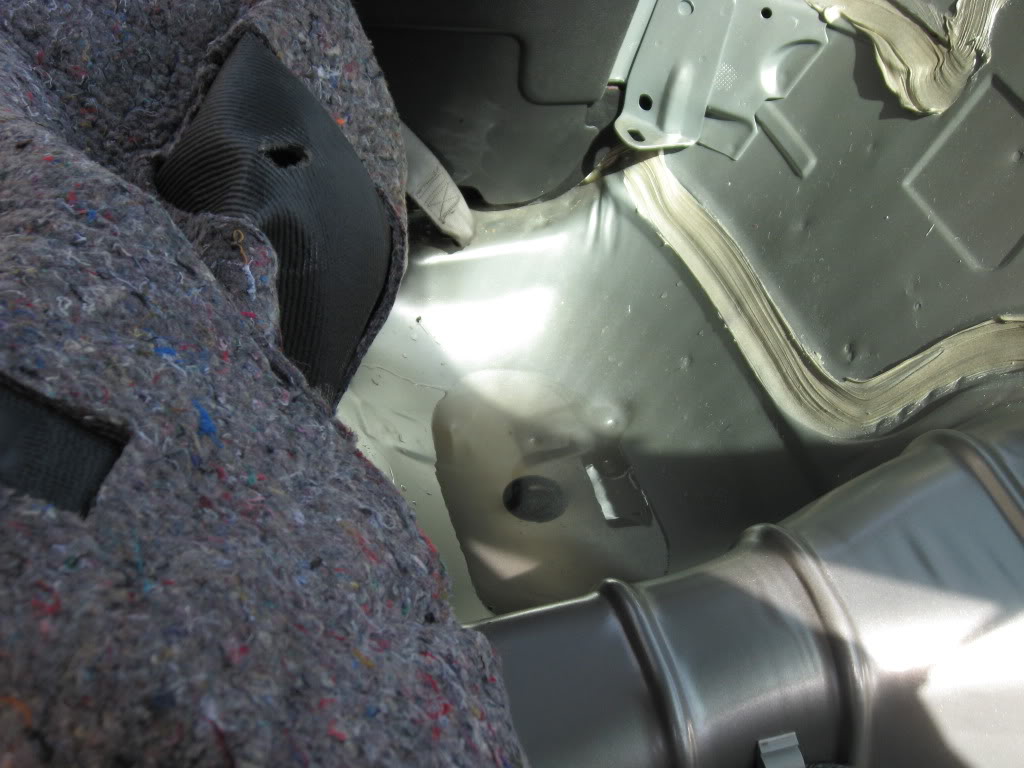
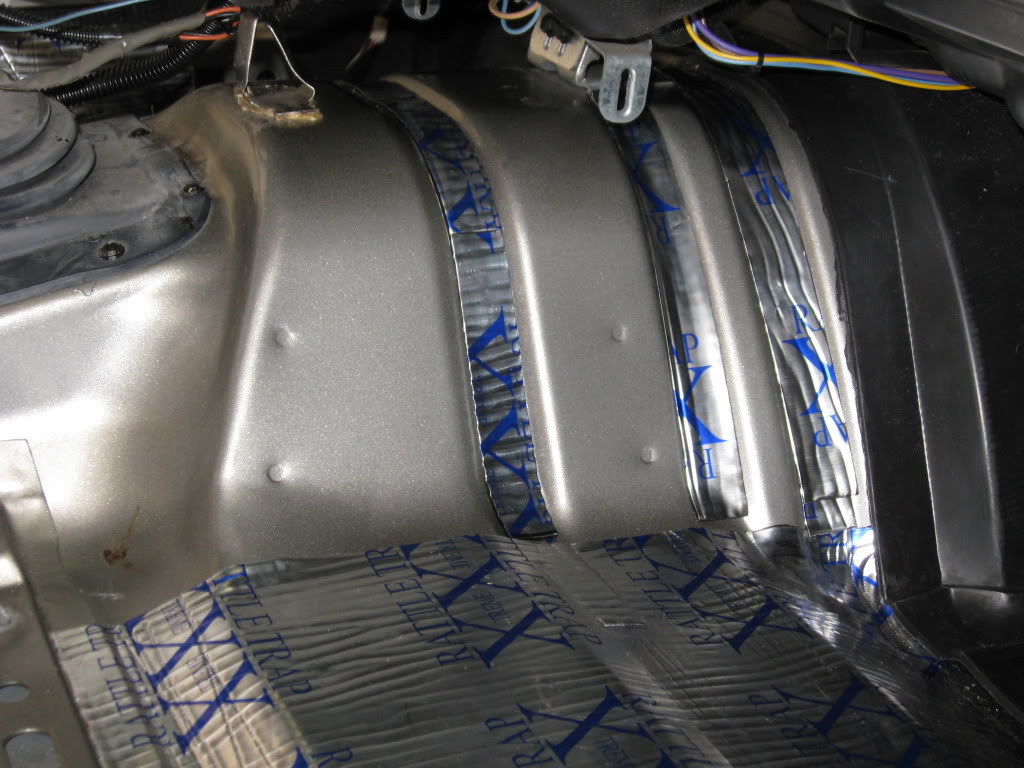
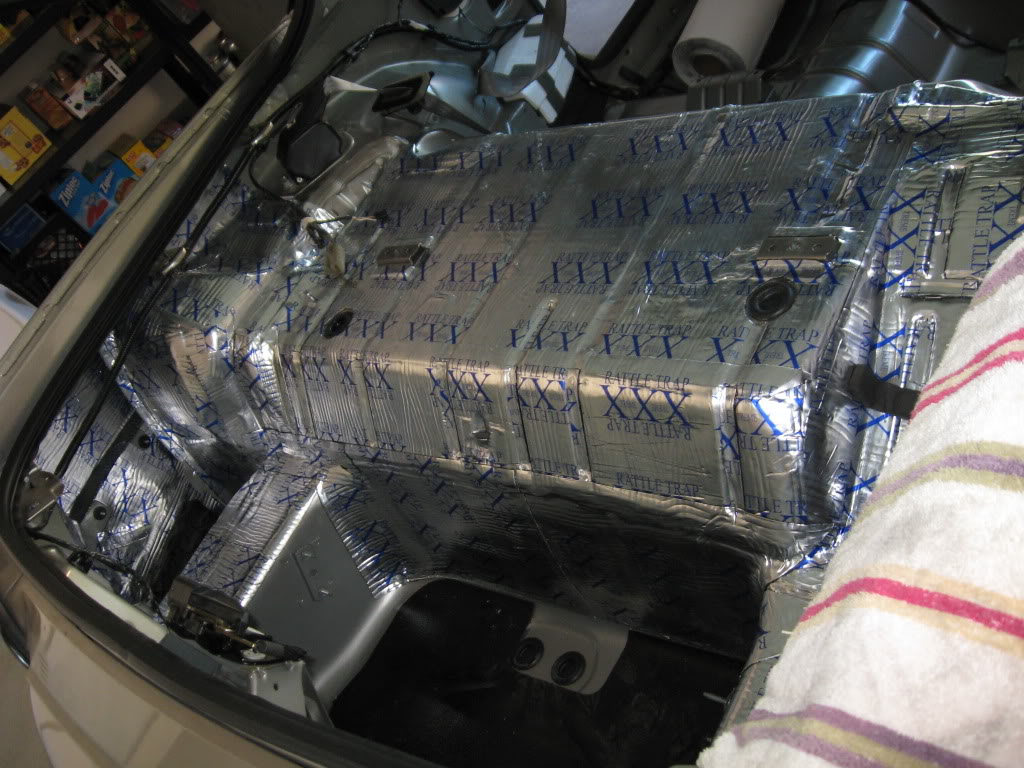
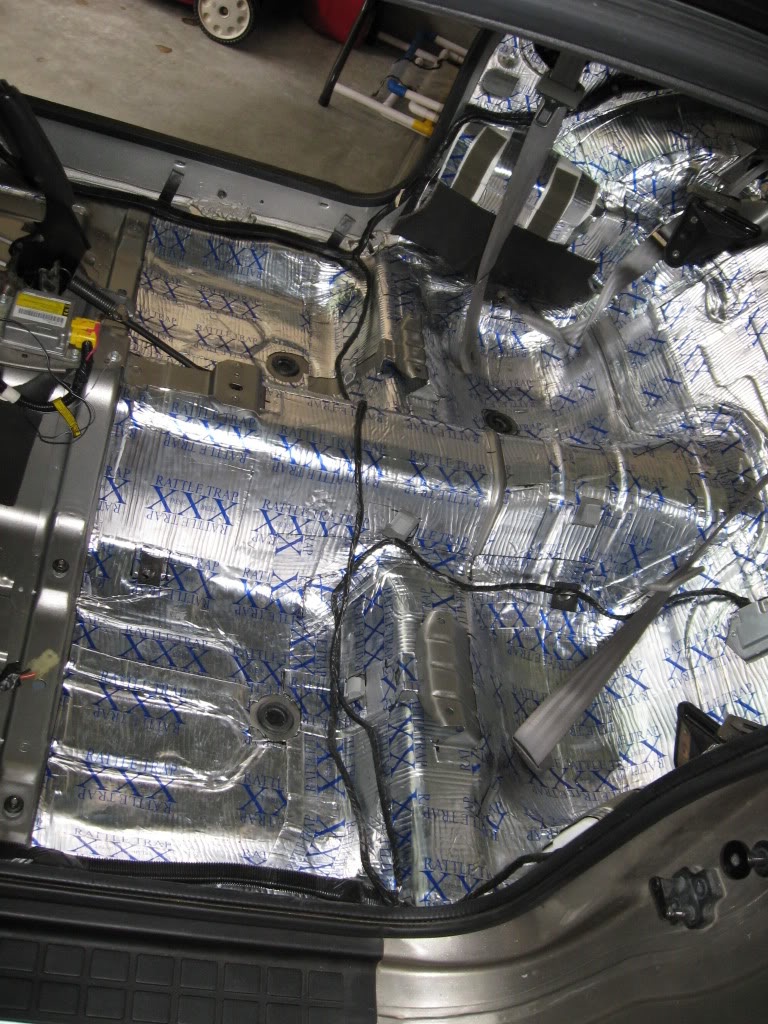
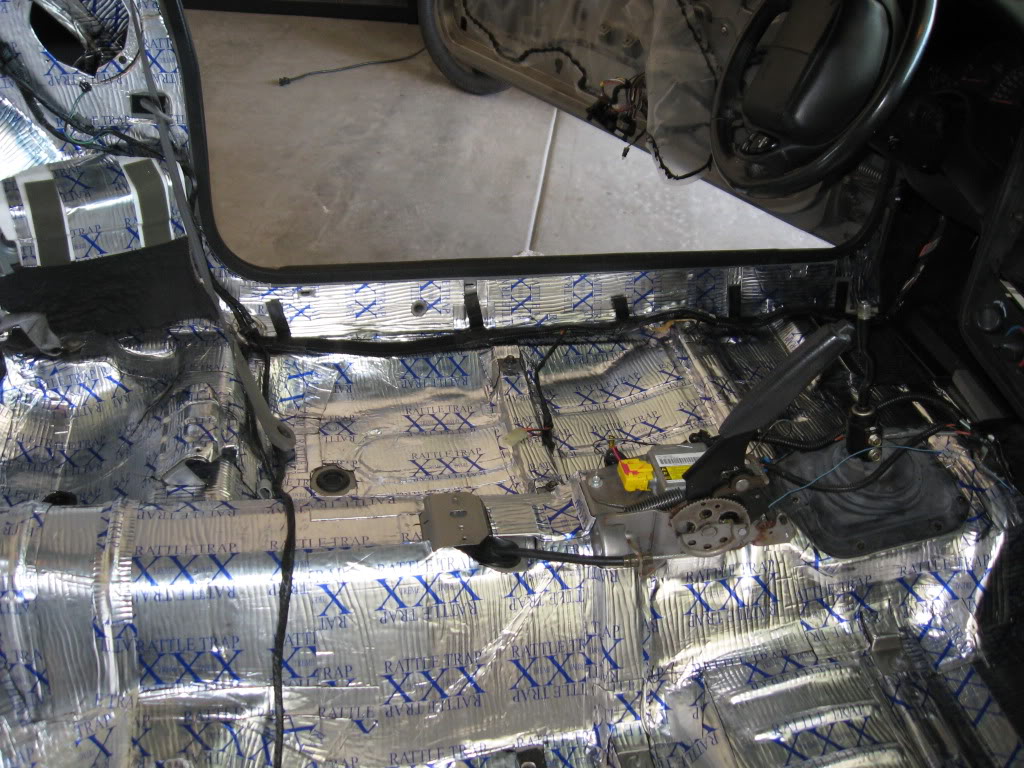
Next portion of the project is getting started, before you start applying I recommend a good vacuuming and wipe down with simple green. I would recommend starting in an area that is flat so that you can get a feel for how to work with the deadener. The warmer the day, the easier it is to work with the deadener. I started in the rear trunk area. I personally am very **** retentive so all of the small valleys that were put into the floor pans for either drainage or for structural strength, I filled those in with 2 or three .75" wide strips stacked on top of each other so I would not have to worry about trying to get the material to stick in the groves. I included an example of the drive line hump because I forgot to take pics in the trunk
Once you get the initial dimensions of a piece of material you do a rough cut on the work bench (scissors will not work well with this style of sound deadener because it gets the blades all sticky). Then you fit the piece with the backing still on it, where you want it to be. If there are any cut out required you can mark with a sharpie and then cut. Test fit again to make sure you are good, once this stuff is applied, you will have a hard time removing it.

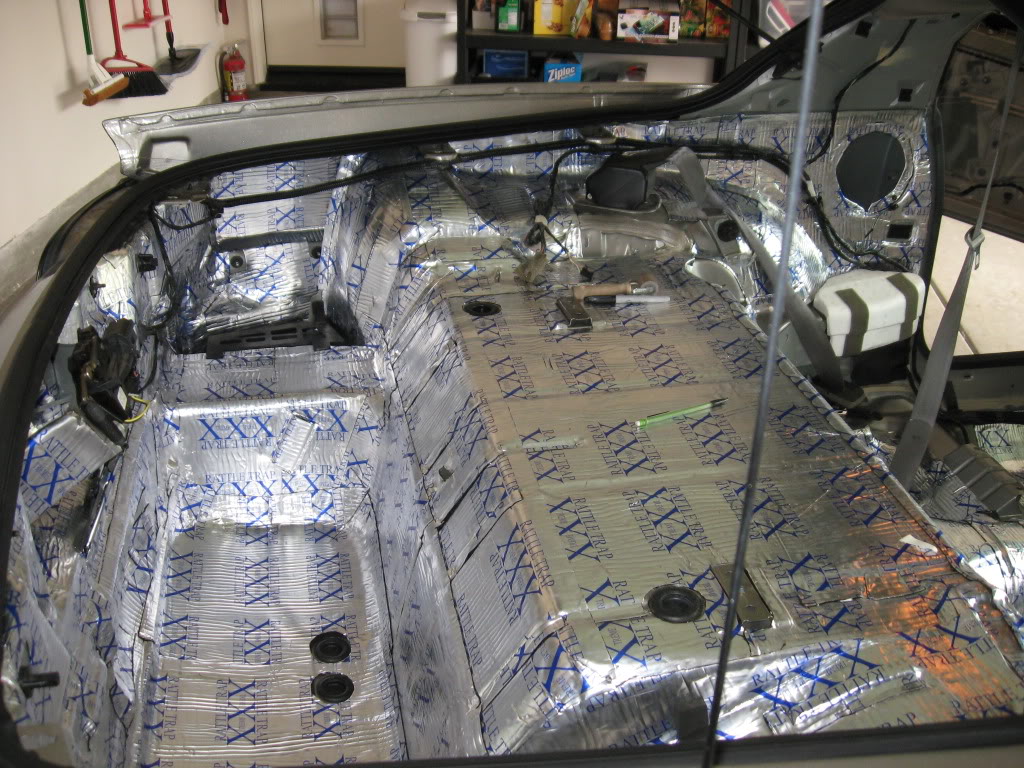
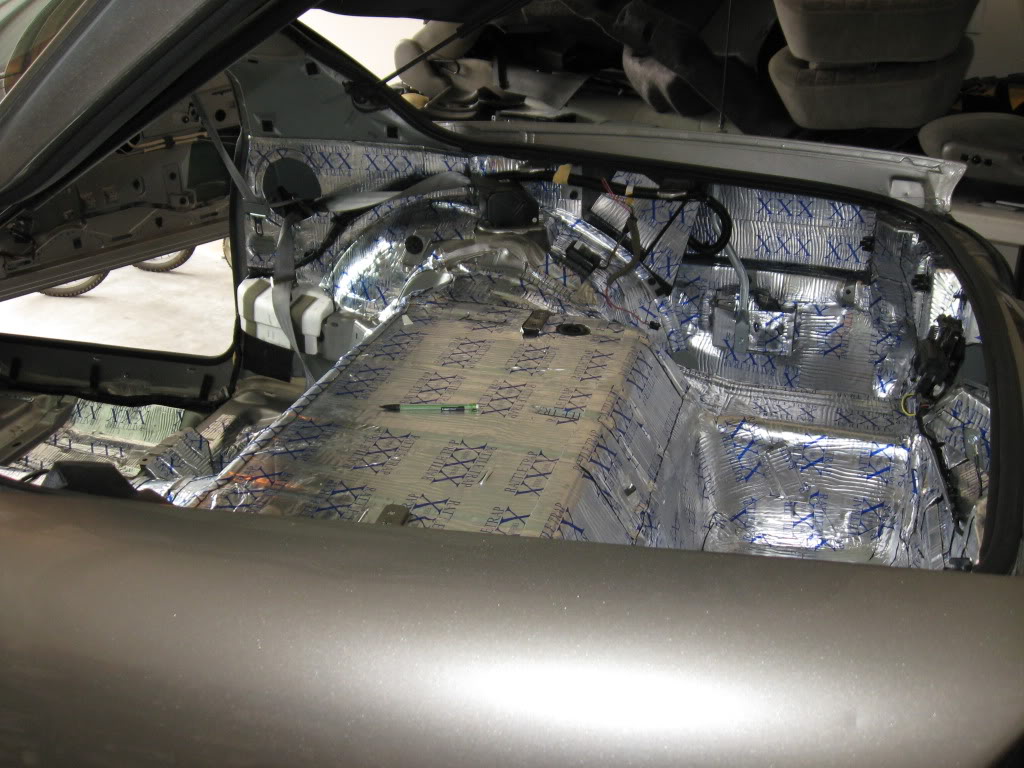
You have a few flat spots in the car but you will end up getting to contoured pieces of the vehicle. There are two ways to accomplish applying the deadener on this type of shape. You either cut small pieces and apply them overlapping them on eachother, or you cut larger pieces and you work with it as you apply it. I chose option B so if I was applying to convex surface like the bottom of the trunk, I would get the piece od deadener lined up and stick the middle of it down, then work out to the edges. As you get closer to corners the material will start to crease, simply use the razor knife to cut along the ridge of the crease, push one side of the cut down onthe metal and then the other side will overlap onto that piece. Use the roller to make sure it is all down and sticking to everything. I liked to use the edge of the roller to criss-cross the deadener to make sure I was getting good adhesion. If you get any air bubbles in the middle of the deadener, slice open with knife and then roll it flat with the roller. It is very similar for going over bumps, and the material stretches quite a bit so do not be afraid to apply it and roll it into corners because you may not need to cut the material in some cases.

To begin with I think that this is a very in-depth project (my project ended up being about 35-40 hours to complete) and you will have to have a catalyst to start the project. For me, I had some serious water damage from a simple mistake of thinking the windows were all the way up... OOps??? picture was taken after we soaked up all water in carpet and vehicles was aired out for two weeks
First Step: remove the interior, the more you can get out the better, and the easier it will be. Tricks on removal of key components can be found around LS1 Forum, or you can ask the question on here and I will answer the best that I can.
Second Step will be to determine which kind of deadener that you want to use. I hear VERY GOOD things about the Edead products but they were very expensive. You can do a simple internet search for sound deadening material and see the difference in pricing. I found the best value for the quality to be Fat MAt's "Rattle Trap", I bought 200 Sqr Ft. for about $310.00 delivered, and that included two install kits with rollers, and razor knifes. As you get ready you want to setup an area in your work space that is dedicated to the project at hand, here are some usefull tools:
- Wood Roller
- Razor Knife
- Sharpie Pen
- Carpenter's Square
- Tape Measurer
- Small portable folding table, or table height workspace
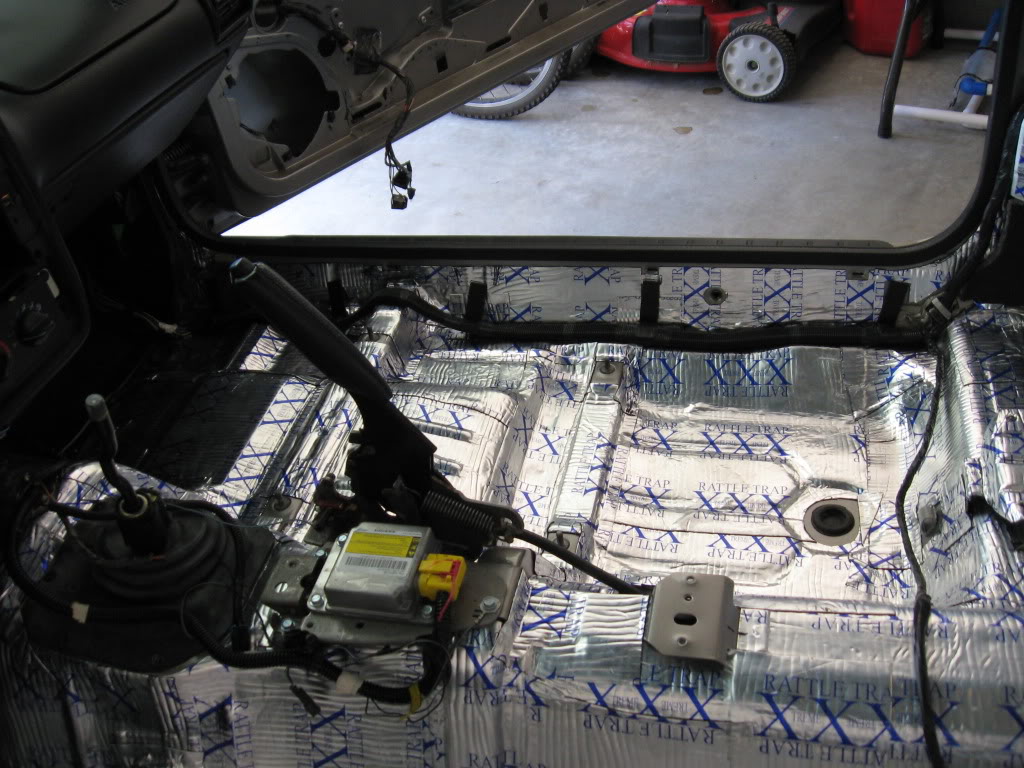
Next portion of the project is getting started, before you start applying I recommend a good vacuuming and wipe down with simple green. I would recommend starting in an area that is flat so that you can get a feel for how to work with the deadener. The warmer the day, the easier it is to work with the deadener. I started in the rear trunk area. I personally am very **** retentive so all of the small valleys that were put into the floor pans for either drainage or for structural strength, I filled those in with 2 or three .75" wide strips stacked on top of each other so I would not have to worry about trying to get the material to stick in the groves. I included an example of the drive line hump because I forgot to take pics in the trunk
Once you get the initial dimensions of a piece of material you do a rough cut on the work bench (scissors will not work well with this style of sound deadener because it gets the blades all sticky). Then you fit the piece with the backing still on it, where you want it to be. If there are any cut out required you can mark with a sharpie and then cut. Test fit again to make sure you are good, once this stuff is applied, you will have a hard time removing it.
You have a few flat spots in the car but you will end up getting to contoured pieces of the vehicle. There are two ways to accomplish applying the deadener on this type of shape. You either cut small pieces and apply them overlapping them on eachother, or you cut larger pieces and you work with it as you apply it. I chose option B so if I was applying to convex surface like the bottom of the trunk, I would get the piece od deadener lined up and stick the middle of it down, then work out to the edges. As you get closer to corners the material will start to crease, simply use the razor knife to cut along the ridge of the crease, push one side of the cut down onthe metal and then the other side will overlap onto that piece. Use the roller to make sure it is all down and sticking to everything. I liked to use the edge of the roller to criss-cross the deadener to make sure I was getting good adhesion. If you get any air bubbles in the middle of the deadener, slice open with knife and then roll it flat with the roller. It is very similar for going over bumps, and the material stretches quite a bit so do not be afraid to apply it and roll it into corners because you may not need to cut the material in some cases.

The following users liked this post:
ws6outlaw (07-11-2023)
10-07-2011, 12:07 AM
#3
Teching In
Thread Starter
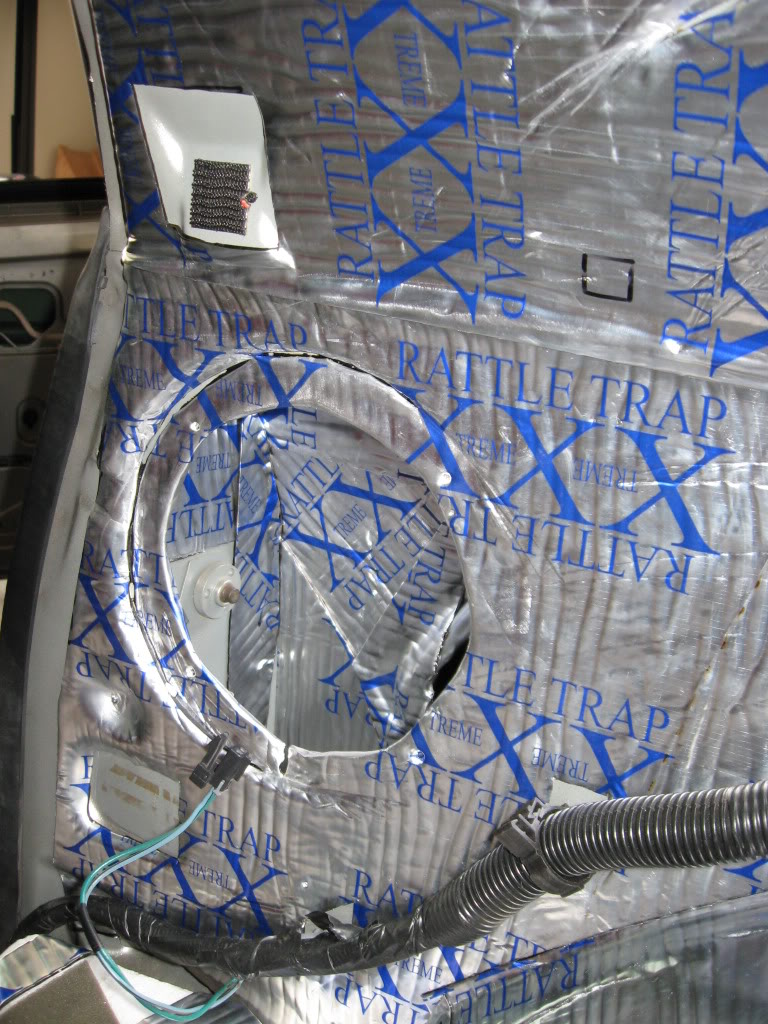
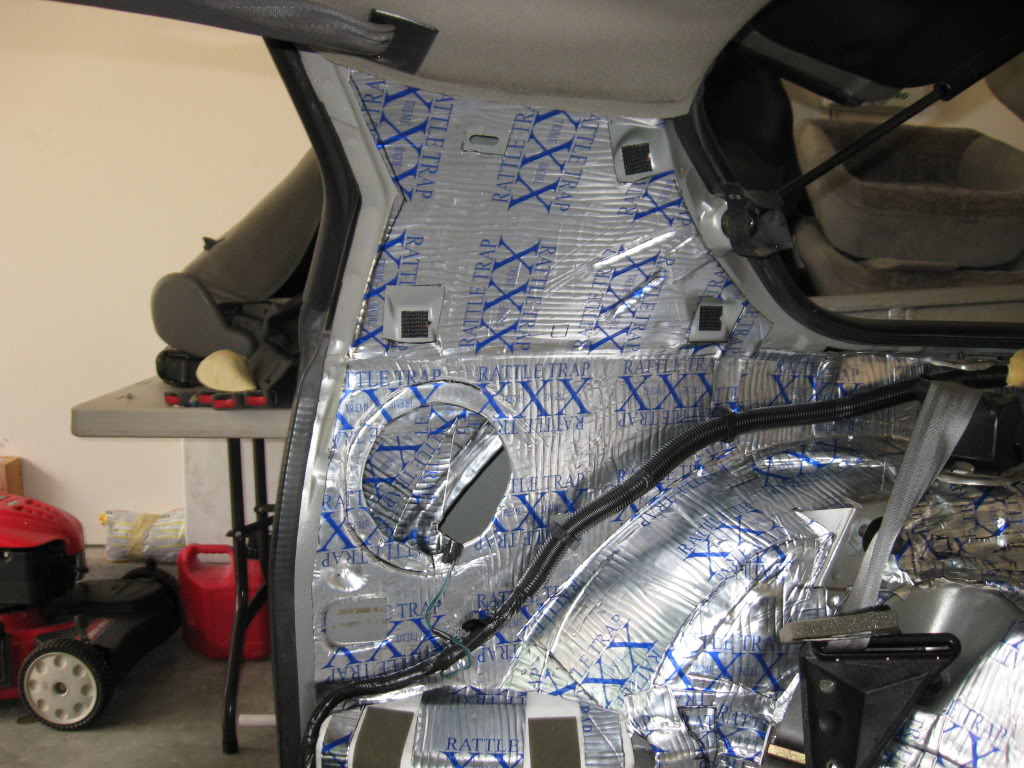
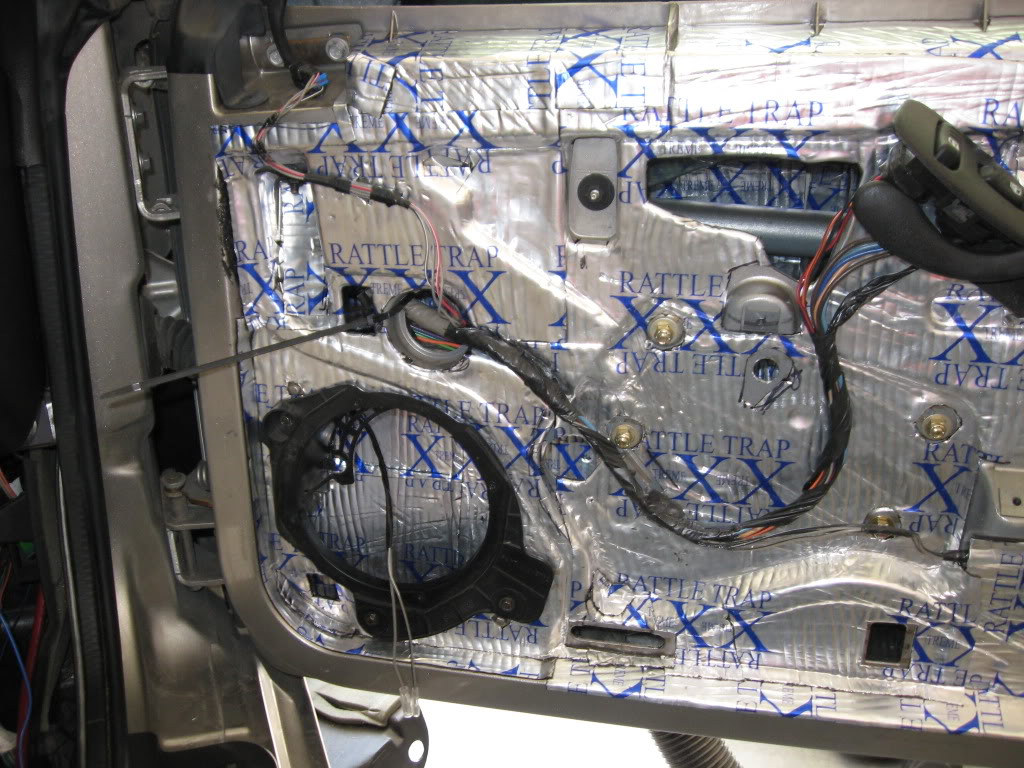
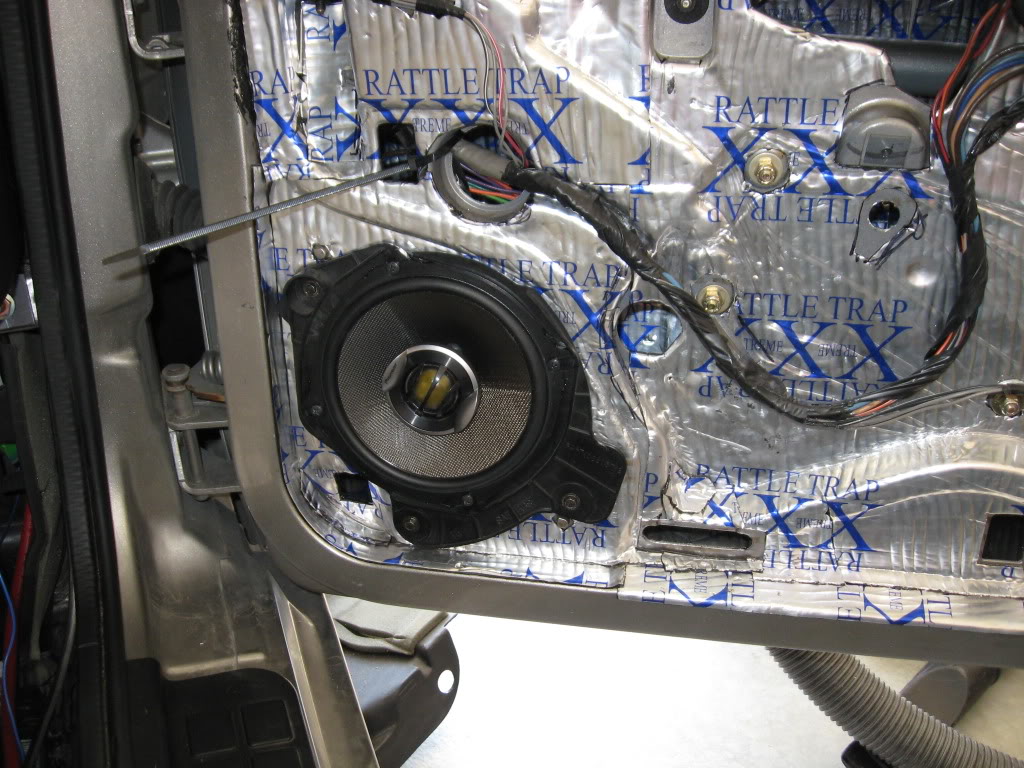
Be sure to spend some time on,and around the speaker area's as this will greatly help the stereo after completed.
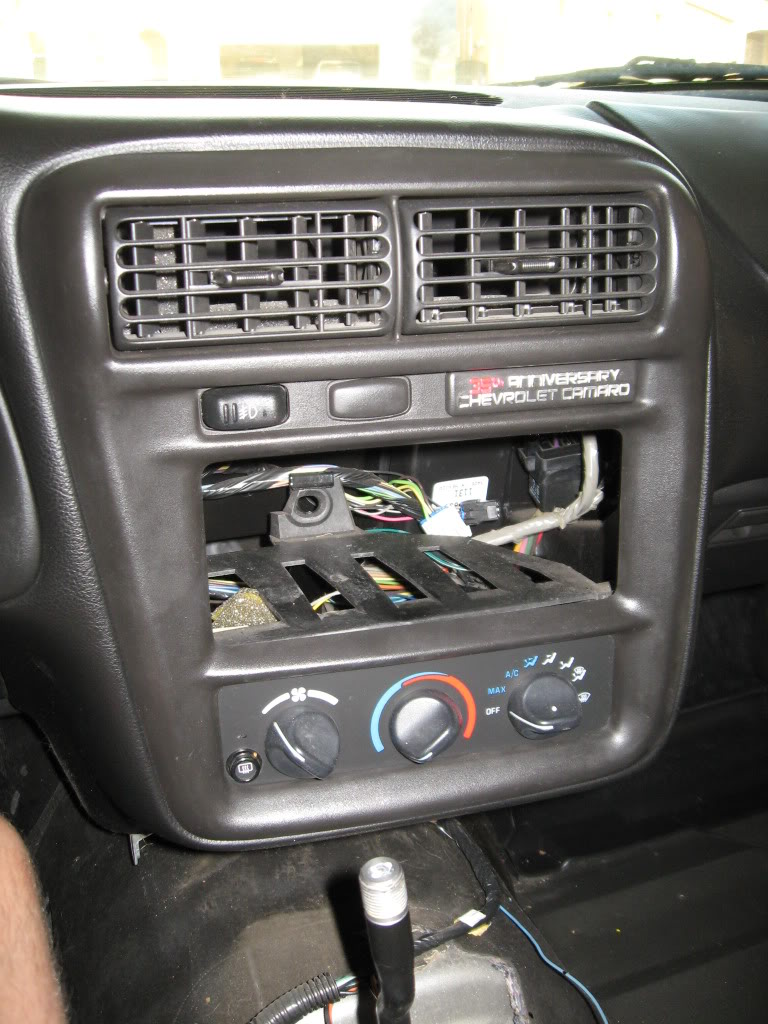
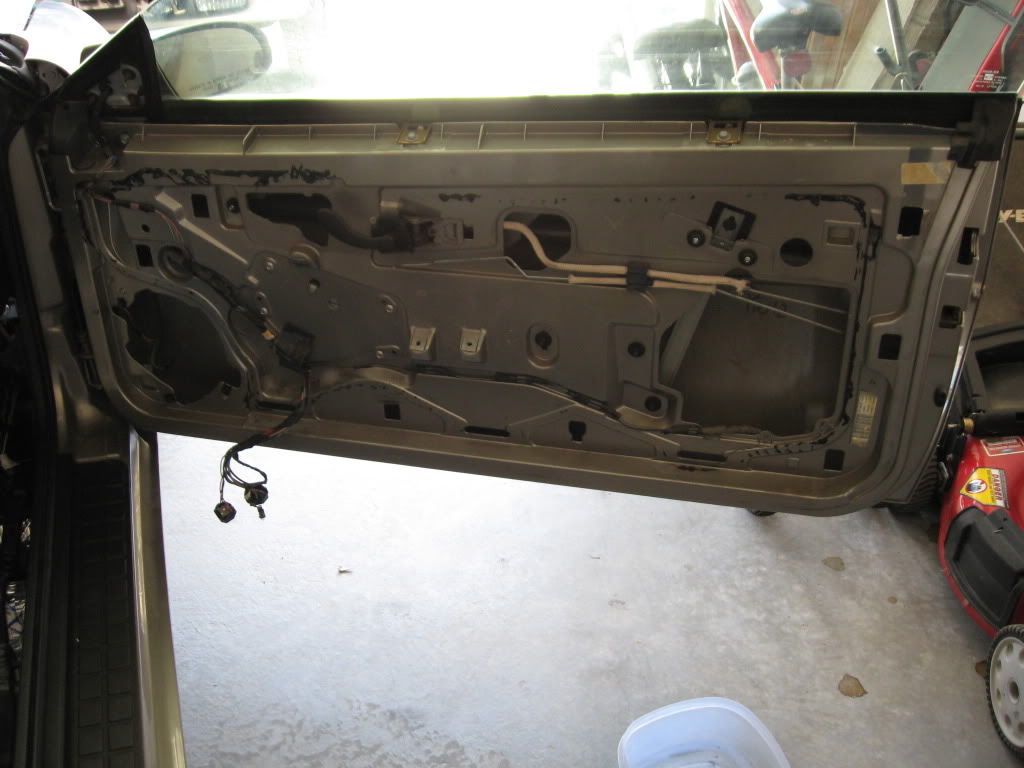
At this point it is good to mention that you should plan any major repairs or madifications in conjunction with this project because you already have the interior apart, in my case it was the window, regulators, upgrading sound system, with the addition of a 2DIN touchscreen navigation head unit.
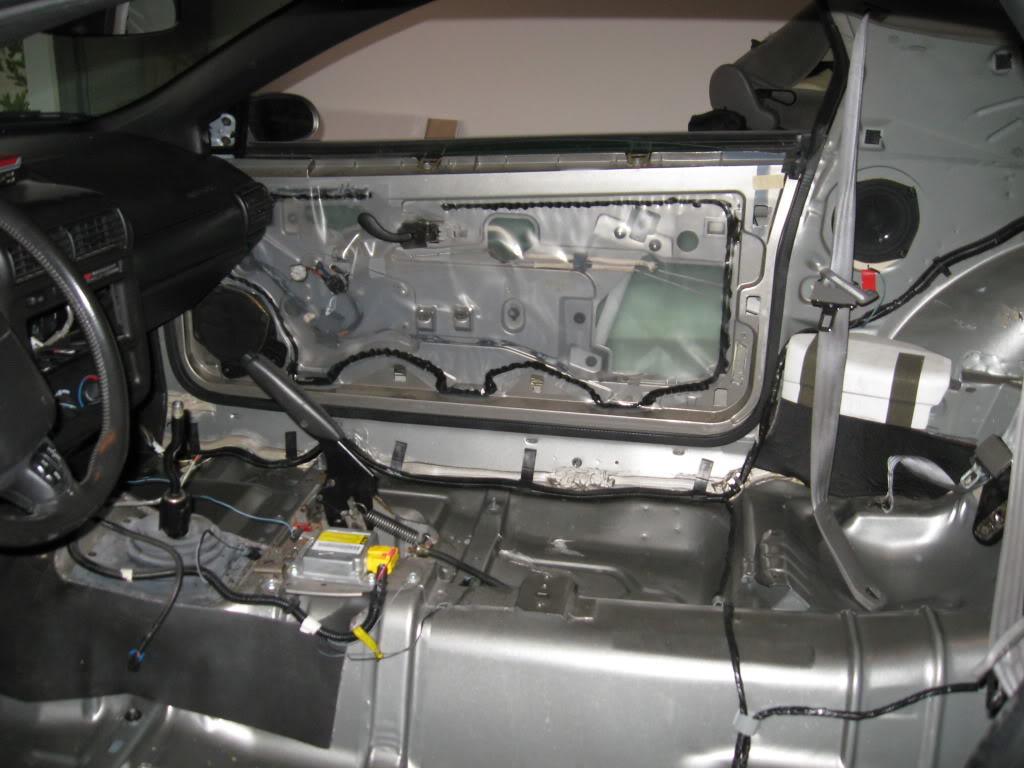
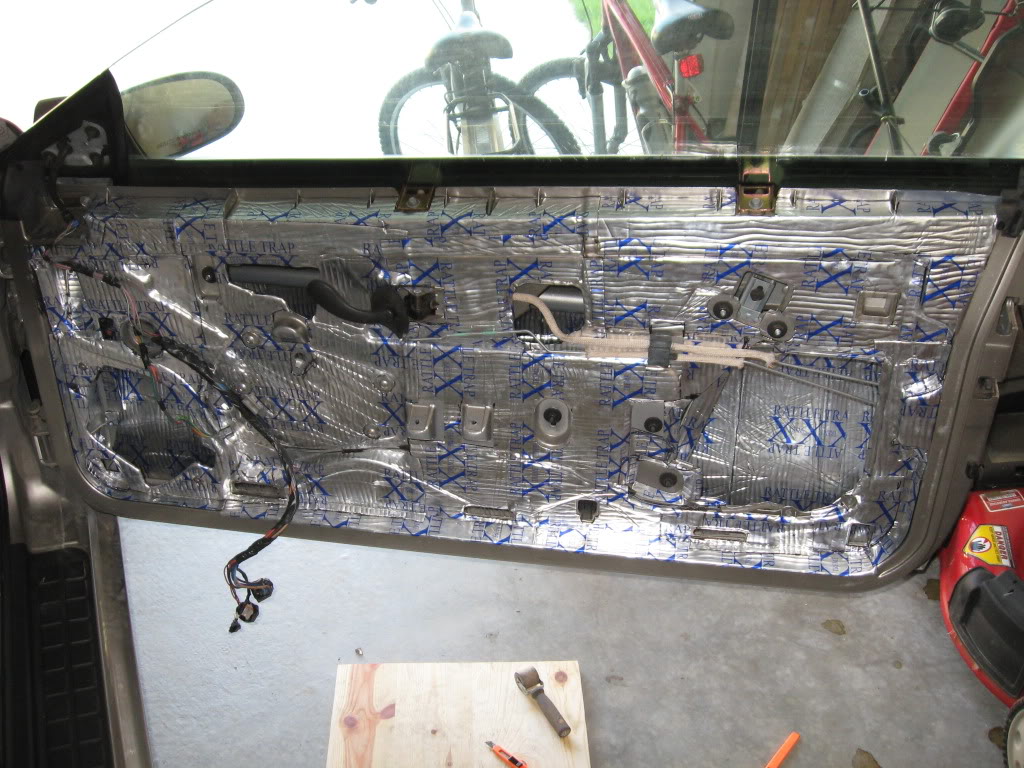
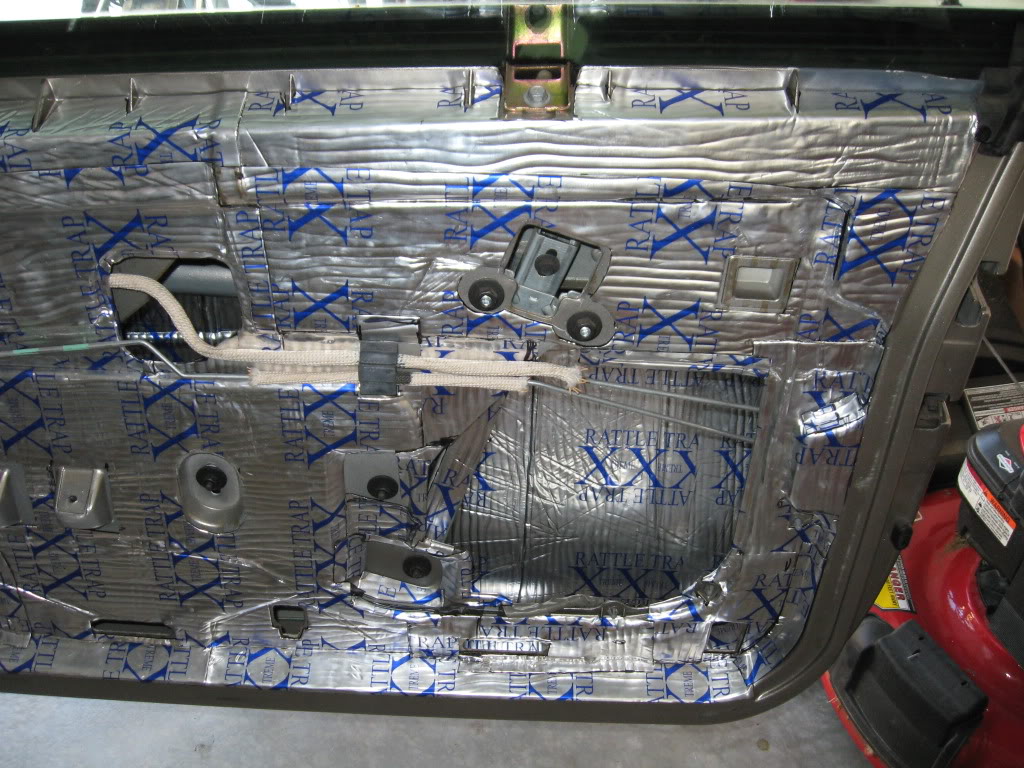
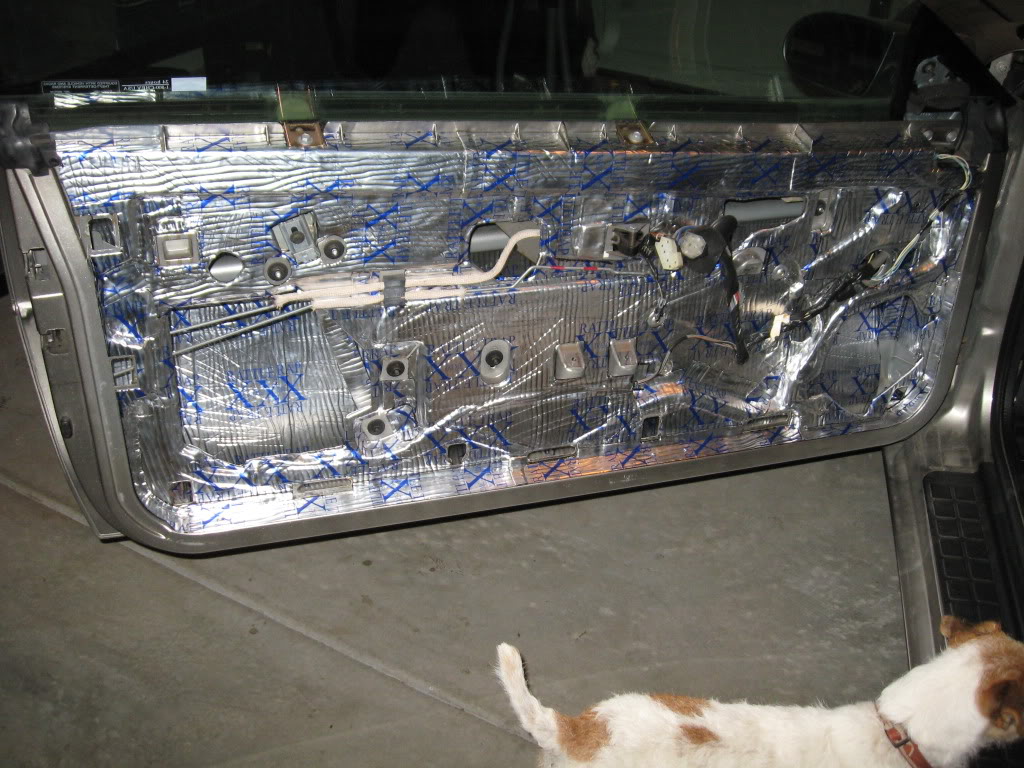
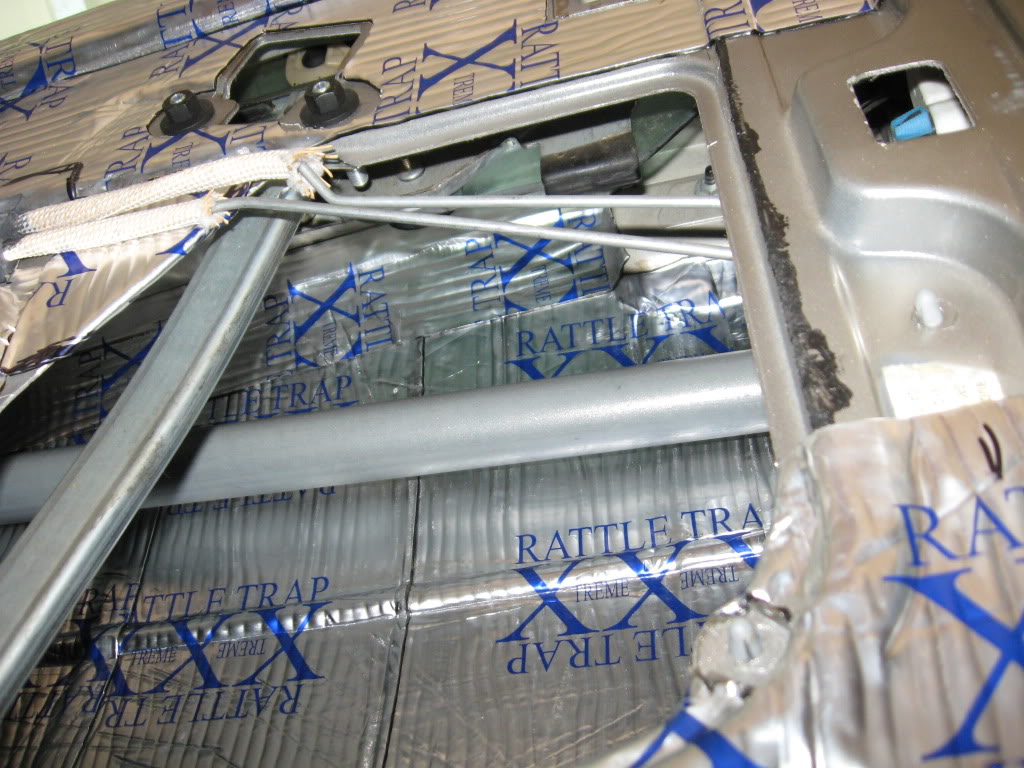
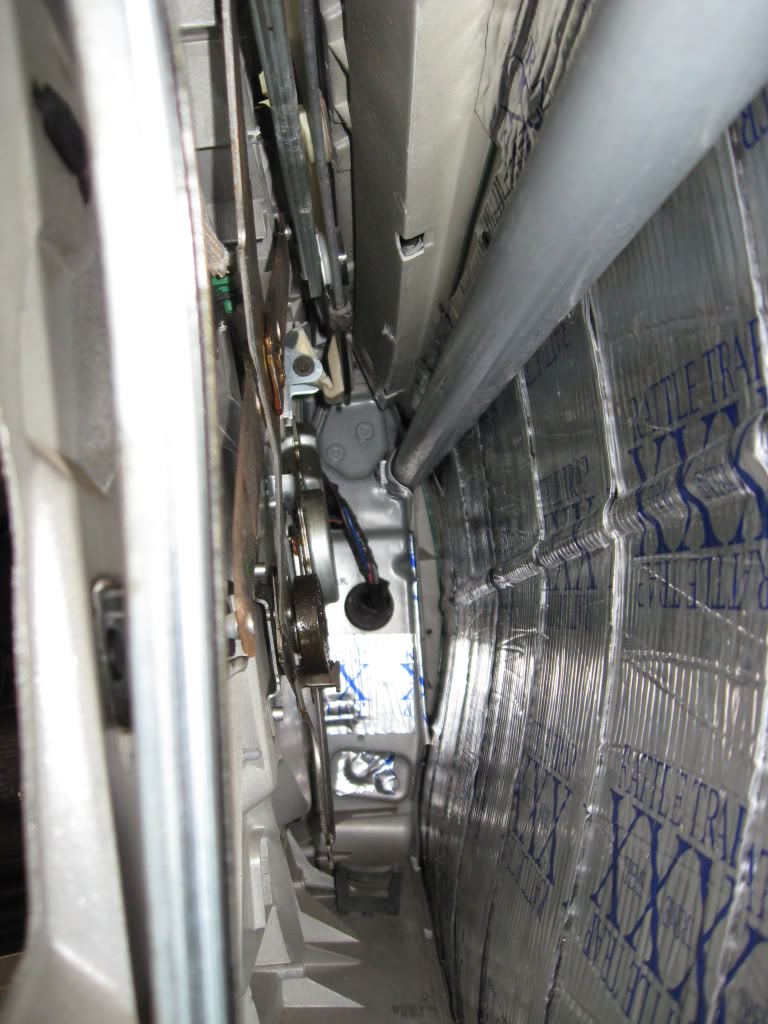
Major Step is the doors. All I can say is take your time, I tried to cut larger pieces, apply them and then cut out the holes with the razor knife. Keep in mind you can often cut an X in an opening and fold the created flaps around the edge making a very clean, and quick solution. On the inside of the doors I cut 6" strips, it comes 18" wide, so 6"X18" ended up working great applied vertically in the doors, just about the perfect height, and 6" wide allows youto fit the pieces through the openings and still be able to somewhat work with it. It helped me to wrap the deadener over the saftey bar (on the silver side), and I could slide the deadener the length of the door without it sticking to the outer door skin, helped out alot. Play with different options her but the smaller the pieces are on the inside, the easier it will be.
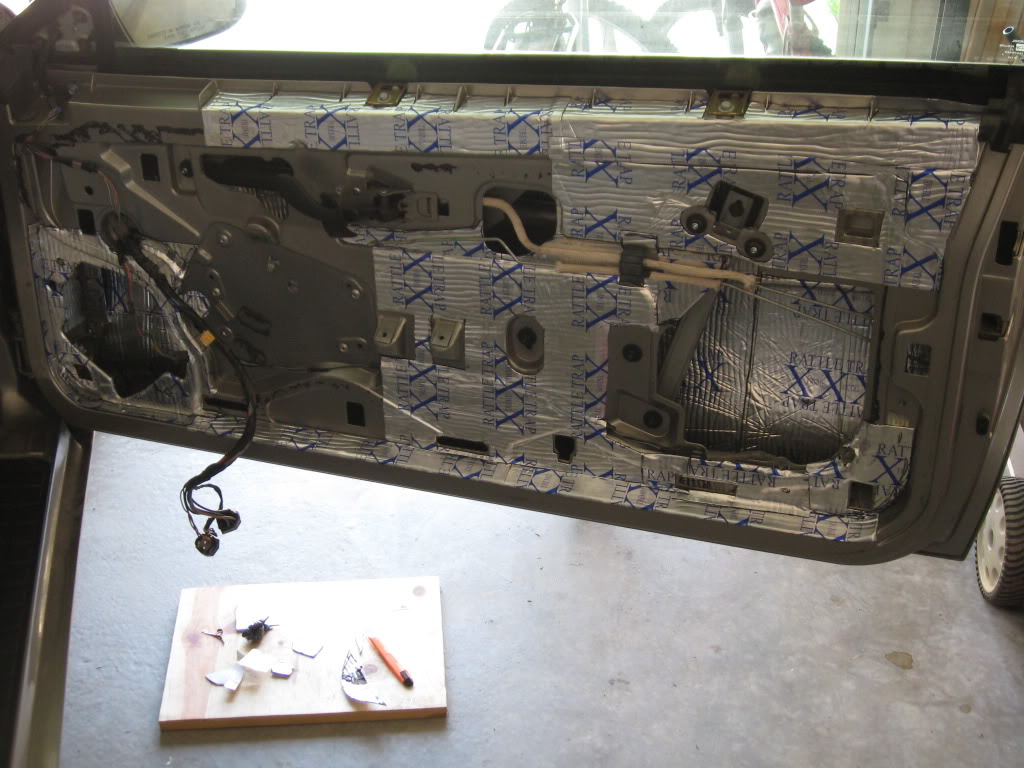
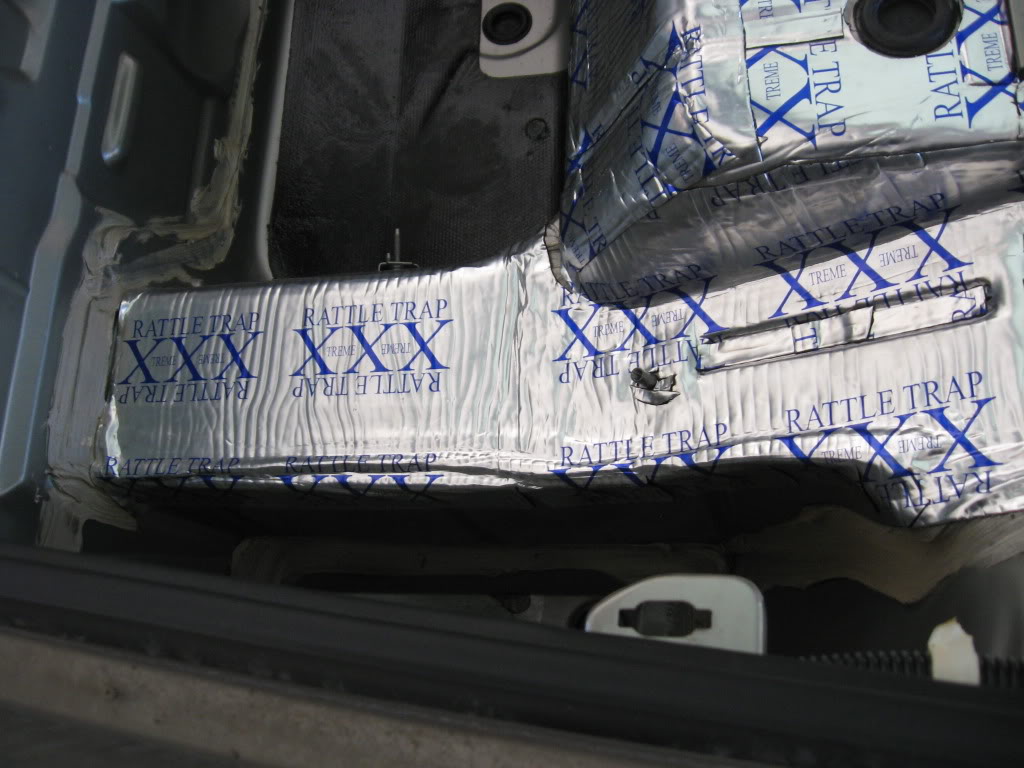
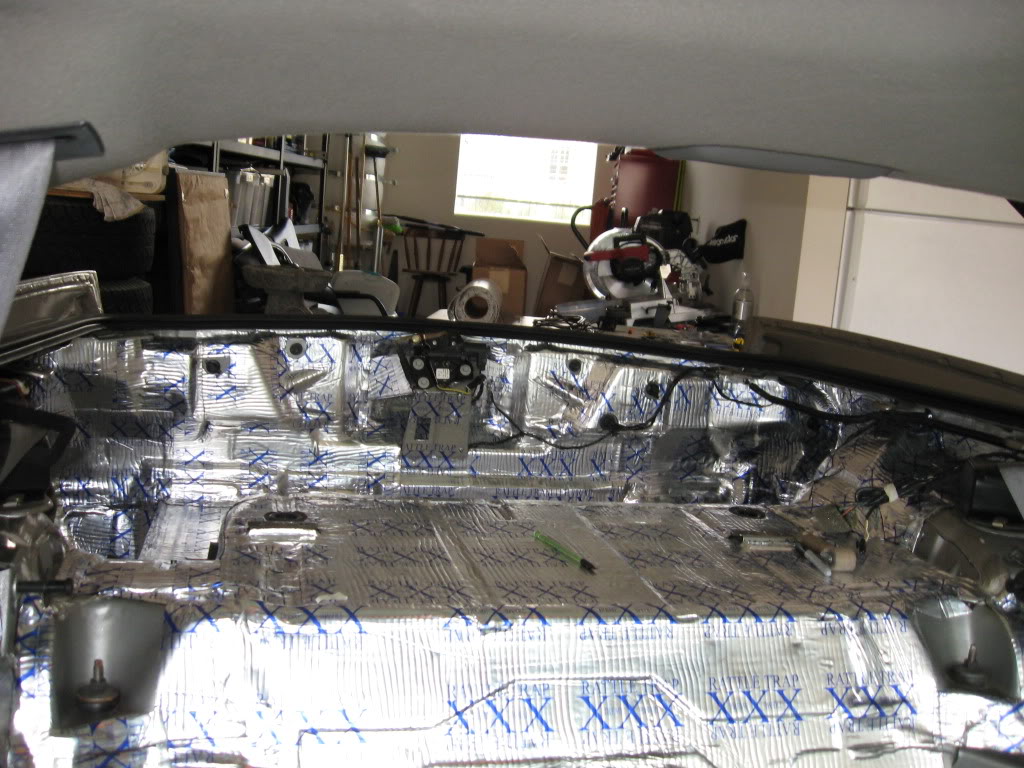
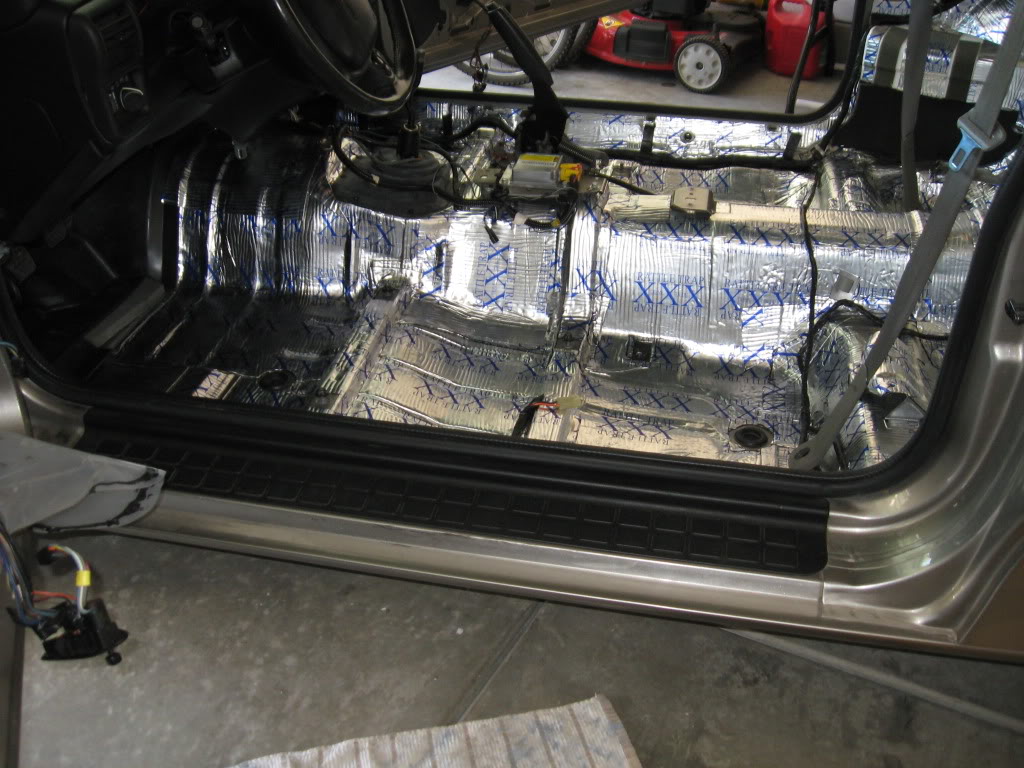
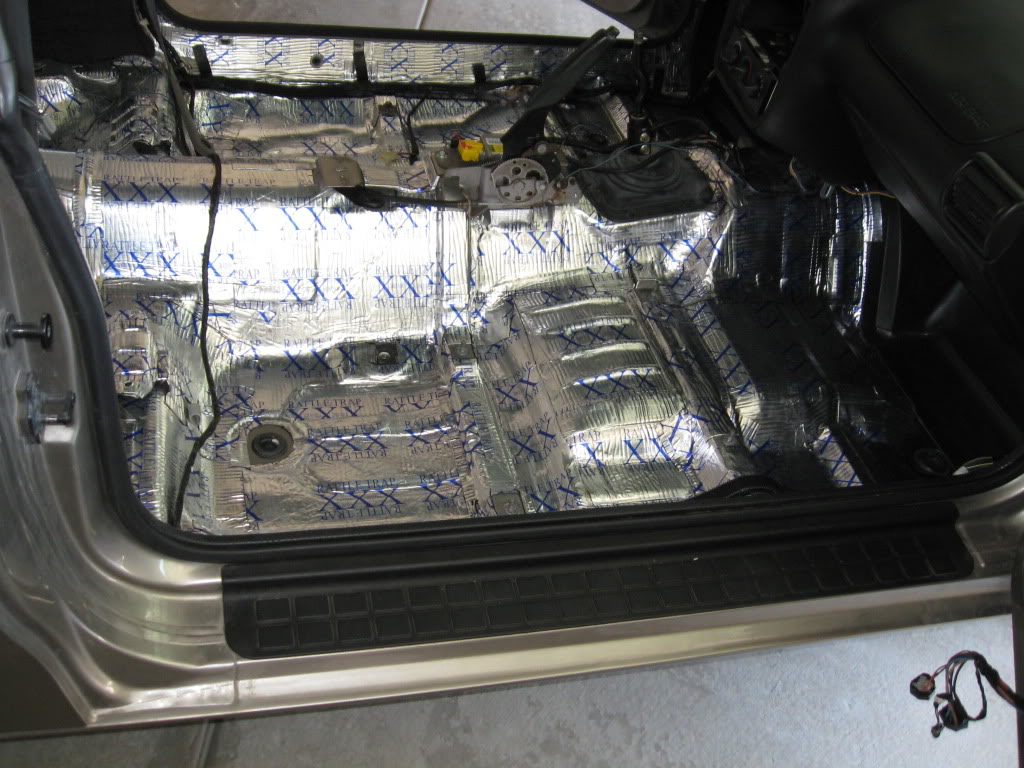
I ended up using about 170 Sqr Ft. of material to complete the project and I doubled up the matting on all the major flat areas, or areas that are prone to noise like the trunk area, drive line tunnel, and the floor pan area. It already sounds 1000 times better and I can't wait to see how the carpet from custom interiors with the backing will deaden sound even more!
Now that you have the sound deadening completed you can start on the rest of the project...

More to follow as the project continues!!!!!!!!!!!!!!!!!!!!!!
At this point it is good to mention that you should plan any major repairs or madifications in conjunction with this project because you already have the interior apart, in my case it was the window, regulators, upgrading sound system, with the addition of a 2DIN touchscreen navigation head unit.
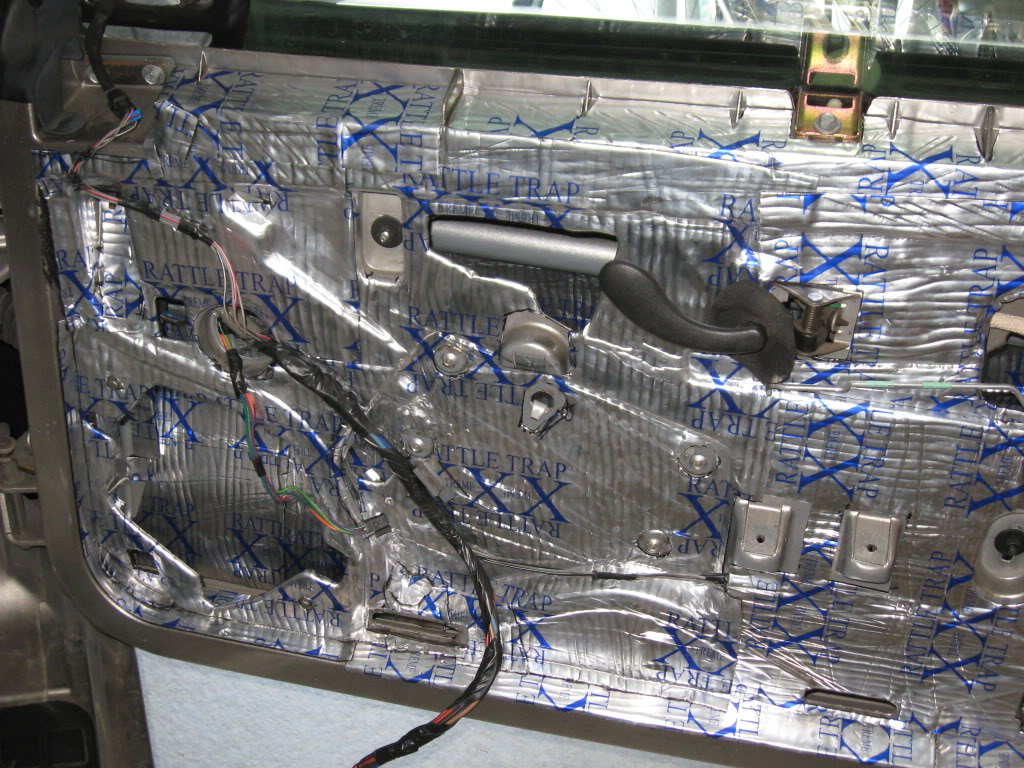
Major Step is the doors. All I can say is take your time, I tried to cut larger pieces, apply them and then cut out the holes with the razor knife. Keep in mind you can often cut an X in an opening and fold the created flaps around the edge making a very clean, and quick solution. On the inside of the doors I cut 6" strips, it comes 18" wide, so 6"X18" ended up working great applied vertically in the doors, just about the perfect height, and 6" wide allows youto fit the pieces through the openings and still be able to somewhat work with it. It helped me to wrap the deadener over the saftey bar (on the silver side), and I could slide the deadener the length of the door without it sticking to the outer door skin, helped out alot. Play with different options her but the smaller the pieces are on the inside, the easier it will be.
I ended up using about 170 Sqr Ft. of material to complete the project and I doubled up the matting on all the major flat areas, or areas that are prone to noise like the trunk area, drive line tunnel, and the floor pan area. It already sounds 1000 times better and I can't wait to see how the carpet from custom interiors with the backing will deaden sound even more!
Now that you have the sound deadening completed you can start on the rest of the project...
More to follow as the project continues!!!!!!!!!!!!!!!!!!!!!!
10-07-2011, 12:13 AM
#4
Teching In
Thread Starter
10-08-2011, 10:07 AM
#7
TECH Addict

Line your floors with Second Skin Luxury Liner and your road noise from the floor will almost fully disappear... I did that with mine. 2 layers of it plus the stock jute on the carpet. It was overkill.
Trending Topics
10-10-2011, 09:35 AM
#9
Great job!
But for us poor/lazy folks, what areas would you get the best "bang for the buck?" I'm assuming the floor would be the best area to focus, but the doors also seem to transmit a lot of rattles.
But for us poor/lazy folks, what areas would you get the best "bang for the buck?" I'm assuming the floor would be the best area to focus, but the doors also seem to transmit a lot of rattles.
10-10-2011, 09:54 AM
#10
TECH Addict
And I recommend RAAMMat from (non-sponsor link removed)
I did not and will not be putting CLD on my floor. It doesn't resonate. The only thing it will do is make a heavy car even heavier.
Last edited by WhiteBird00; 10-10-2011 at 06:27 PM. Reason: non-sponsor link removed
10-11-2011, 10:46 PM
#11
TECH Resident
iTrader: (12)
Join Date: Jul 2004
Location: Georgetown, IL 61846-1105
Posts: 987
Likes: 0
Received 1 Like
on
1 Post

Good start.....what you are installing is a vibration dampner, not a complete insulation. Still will make a good difference. What the true NEXT STEP is a closed cell foam for noise isolation & true insulation followed by a a rubber level..
Look up SecondSkin Audio for more information of the steps.
None the less, just wanted to shed a lil more light if you would like to go further with it. Keep up the good work, nice to see a good install that actually appears to be ROLLED properly onto the vehicle. Another tip be sure to tape any wires down (or on a door drill 2 small holes and zip tie anchor) as well as tape to help harness' from making noise bouncing around (yes it happens)
10-14-2011, 10:50 PM
#13
Teching In
Thread Starter
All great suggestions and I am looking into some of them for additional steps! I would recommend and larg flat areas personally that can vibrate and reverberate road noise, floor pans, outer door skins, trunk area etc...!
11-03-2011, 11:02 AM
#14
On The Tree

Join Date: Aug 2007
Location: illinois
Posts: 117
Likes: 0
Received 0 Likes
on
0 Posts
nice work, i emailed second skin and asked for there input on what products i should use and they suggested the damplifier pro and luxury liner pro. it would be 2 layers also doubling the cost. are there any problems with getting the carpeting back over this stuff? im new to this sound deadening stuff and im having a hard time figuring out whats what. thanks

 11-04-2011, 08:32 AM
#18
TECH Addict
nice work, i emailed second skin and asked for there input on what products i should use and they suggested the damplifier pro and luxury liner pro. it would be 2 layers also doubling the cost. are there any problems with getting the carpeting back over this stuff? im new to this sound deadening stuff and im having a hard time figuring out whats what. thanks
11-22-2011, 09:52 PM
#19
Teching In
Thread Starter
Hello All, Update... I will try to grab some more pictures over the weekend of the finished product be we are very close. The project was a COMPLETE success, I would say about 95% of previous road noise, rattles, clunks, clanks and misc. noises have been eliminated. I could not be any more happy with the project. I am currently finishing up things like ordering a new shifter ****, shift boot retaining bracket, and replacing all of the small plastic tabs that I may have broken during disassembly. Like I said, I will try to get some pictures up this weekend of the completed project, but completely worth the work, it is just like riding in a brand new cadilac.
11-22-2011, 09:59 PM
#20
Teching In
Thread Starter
I chose FatMAt because it was the best value. The more I read about the products the more I wanted Edead80, but I was able to get 200 Sqr Ft of Rattle Trap for about $312 delivered, and I think it was about $500 for the same amount of Edead, in the end I figured it was like speakers "You can get speakers for $20 a pair, and you can get them for $1000's per pair, I am not sure that the average person (me) cannot tell the difference between the $100 pair and the $150 pair." Although it is nothing compared to the additional thousands I could have spent on Edead, Luxury Liner, Foam filling panels etc... it is better than I ever imagined as-is. Hope this helps, and good luck with your project