
Bi-xenon projector Retrofit on my 95 TA, with pics

Thread Starter

Joined: Jun 2005
Posts: 376
Likes: 0
From: Charlotte, NC
First off, this is not the easiest thing to do. It wasn't really that hard, but a bit time consuming. If you do not have patience, do not try this at home! lol
I got it from here...
https://ls1tech.com/forums/appearanc...-write-up.html
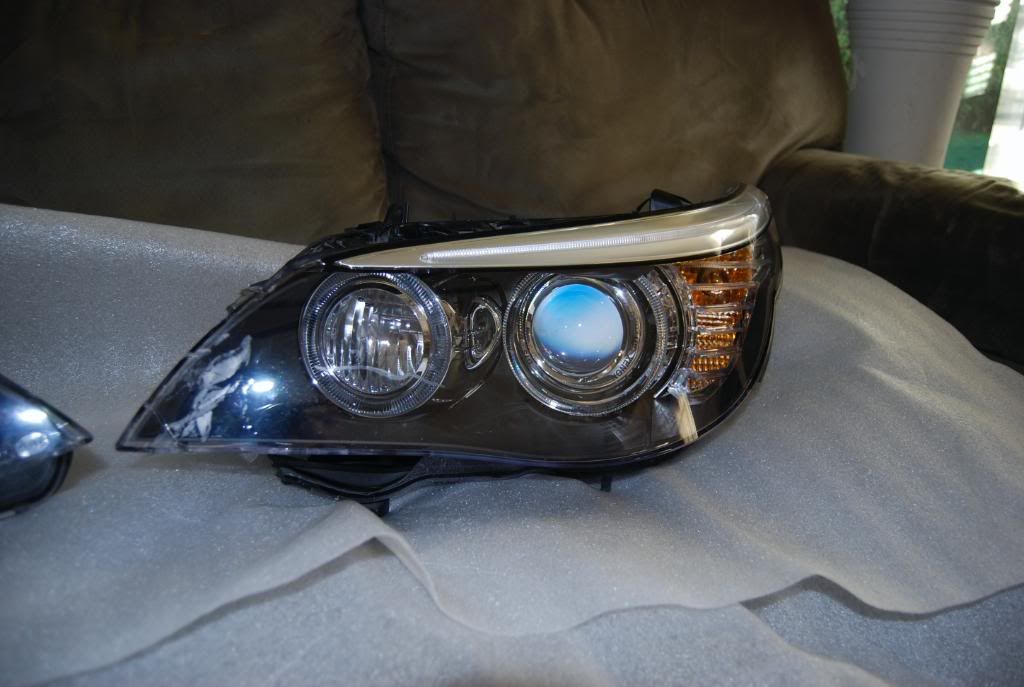
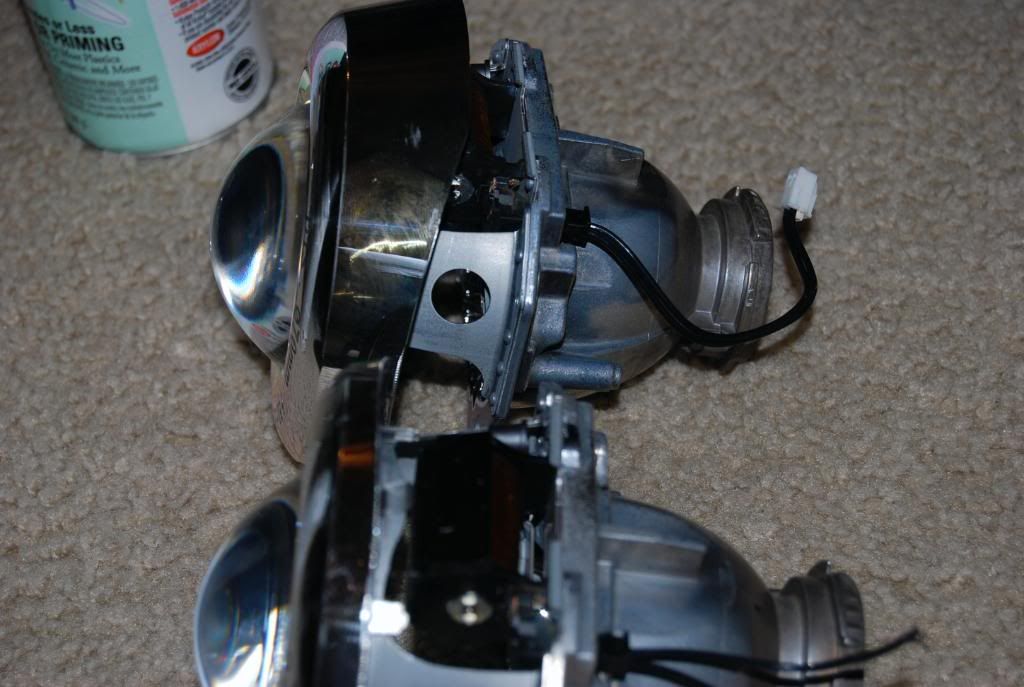
Started off with Headlights out of a 2008 BMW 5-series. I got a great deal on these. Otherwise, you can buy a set of bi-xenon projectors on ebay for about $125ish. I DO NOT recommend these considering they require you to cut out the back of your headlight assembly/and part of the radiator support. (Can't be seen, but still more work than you want to do). Blackbirdws6 used fx projectors which are shorter in length, and did not require him to cut anything out from behind.

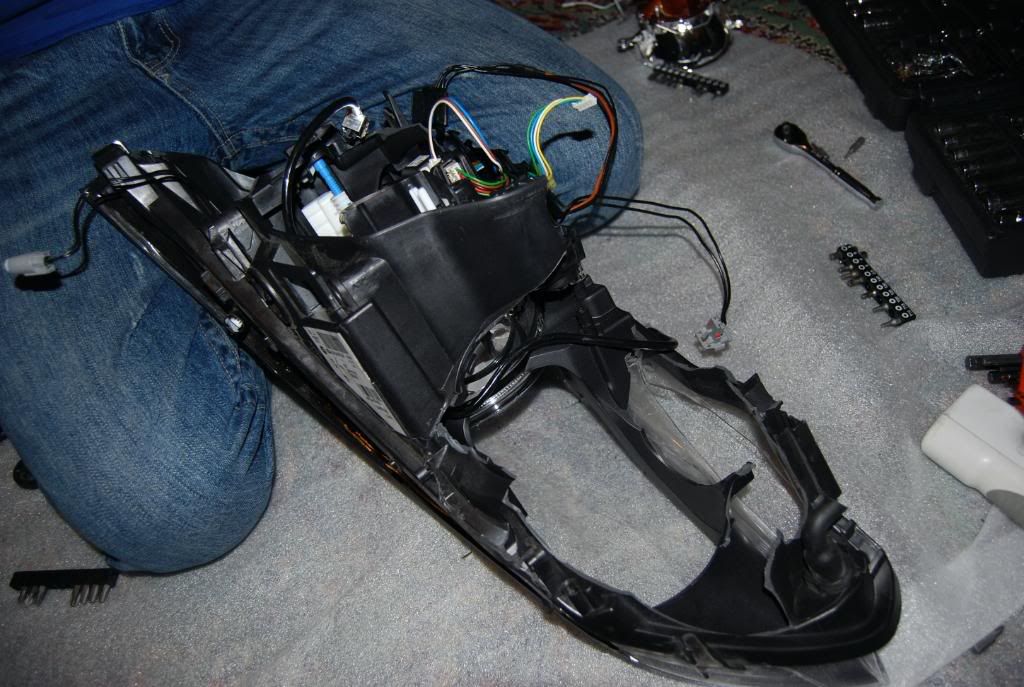
Then i had to tear it all apart, and get the good stuff from inside.
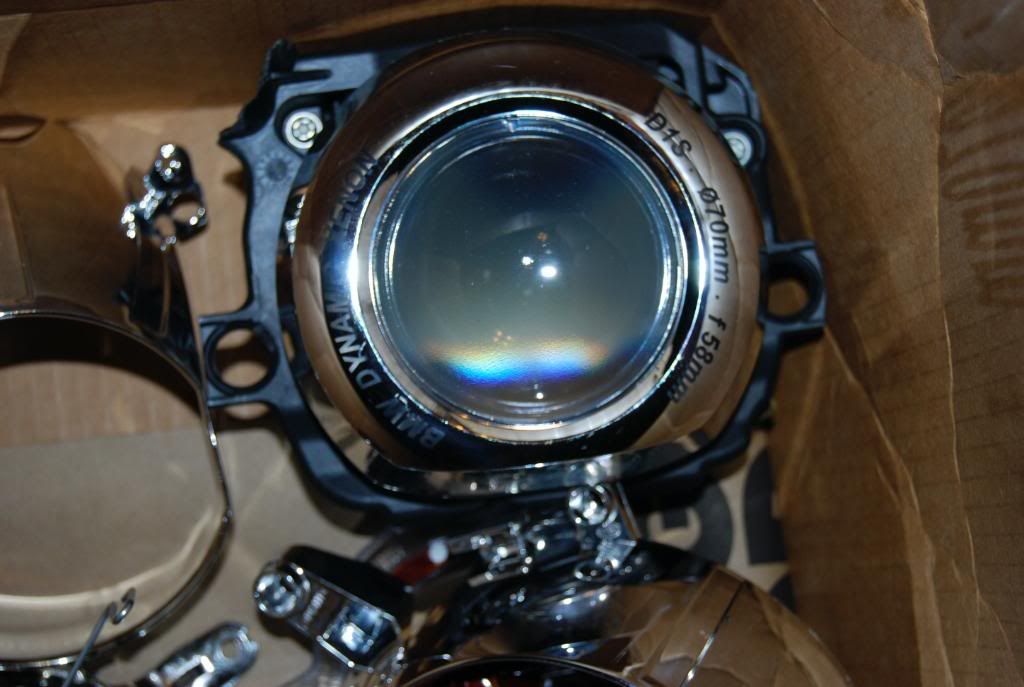
After doing one headlight....The good in one box, the bad in the other.
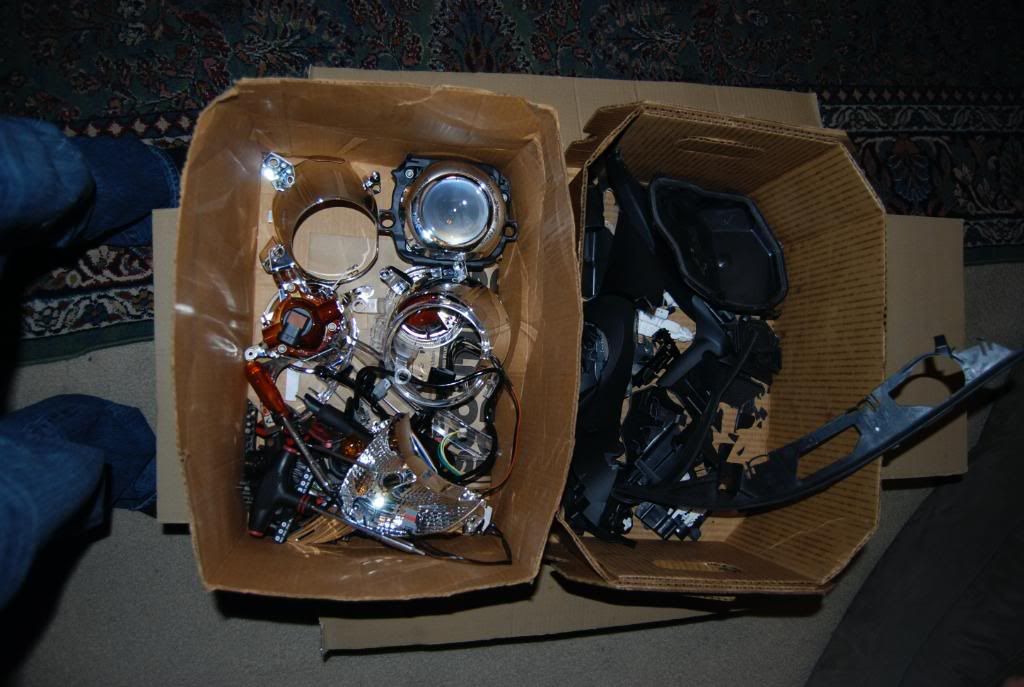
So i took both all apart.
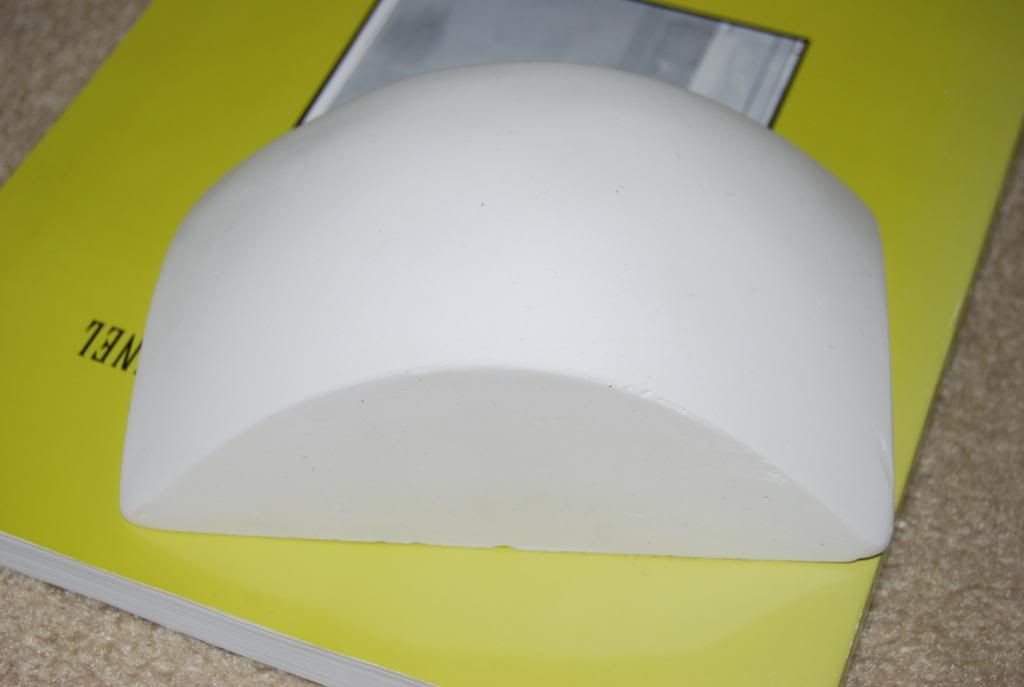
(No pics on this part)Next I Cracked open a stock headlamp. Filled the backside up with plaster, and let it dry. After it dried, i took it out, and sanded it down until it was smooth, and mostly even.
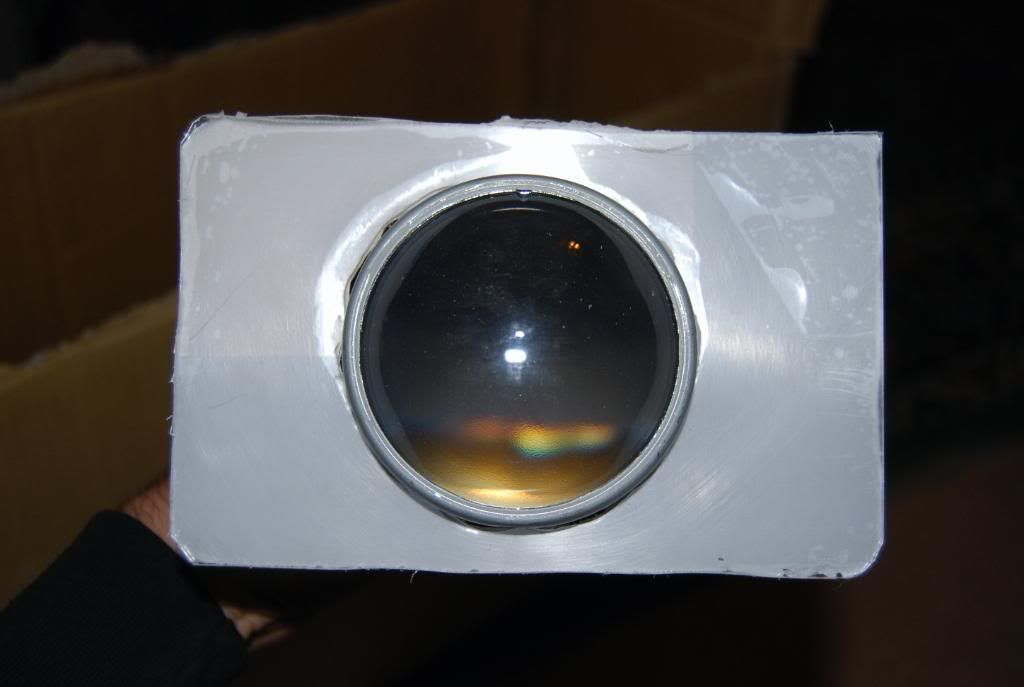
After that, i took some plexiglass, I bought 2 sheets, each 8x10, .80 acrylic.
Heated the oven to about 300, let it pre-heat. I grabbed a few paint stirring stick from lowes, and used those as a border for the plexiglass. I used big metal paper clamp/clips to hold the wood to the plastic.
I grabbed a 3" deep baking pan, and set the plexiglass/attached to the wooden frame, on the pan. (It sat on the borders of the pan) It being deep, allows room for the glass to go down when it starts to sag from the heat. I tossed it in the oven for about 5-6 minutes. After that, you take it out, fast, and wearing thick gloves, you place it over the mold that you made. Then you quickly take the headlight bezel/trim and force it down on the plexiglass around the mold. This allows the edges of the bezel to line up with the plexi. This does take trial and error. I went through about 5 of these sheets, and even the last ones i made, aren't perfect. This was my weakest part in doing all of this.
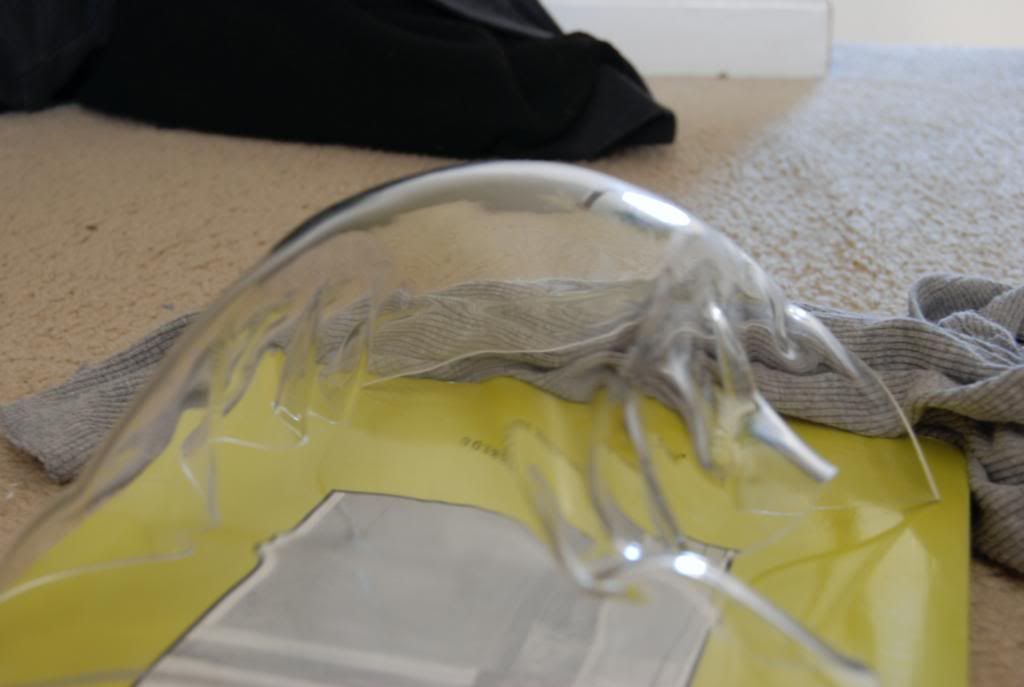
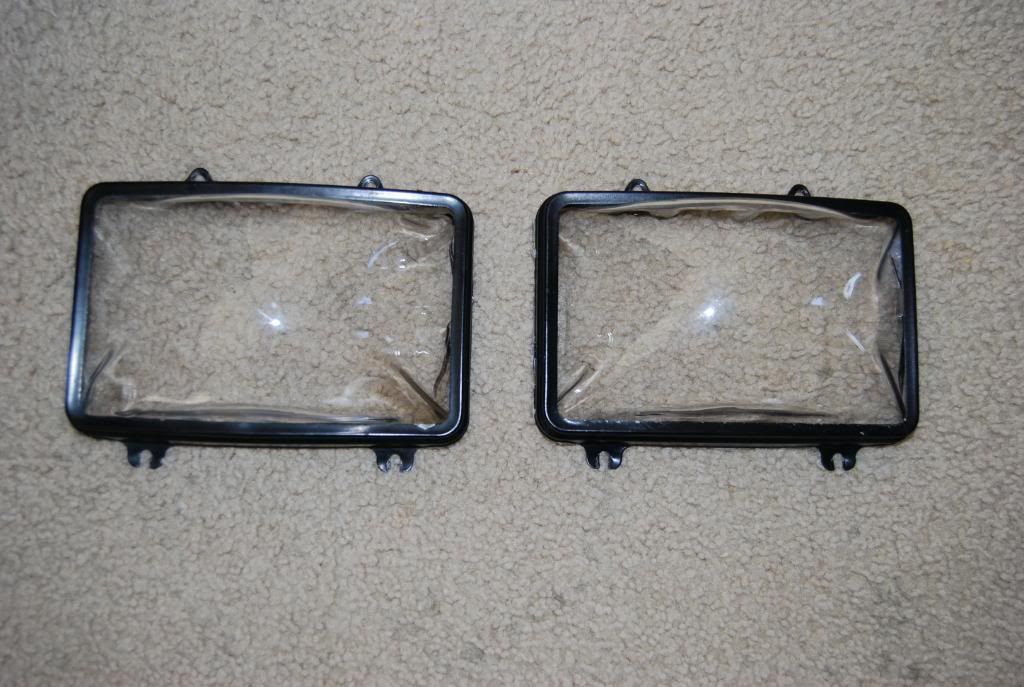
After you are satisfied with a set that you made, you can then cut them out, and use RTV to seal them up with the headlight trim pieces. (I wasn't satisfied, but got a hold of more Headlight Trim pieces, so i can make more later, and change these out when I have time to make them perfect) 1983 Chevy Caprice's use the same bezels!
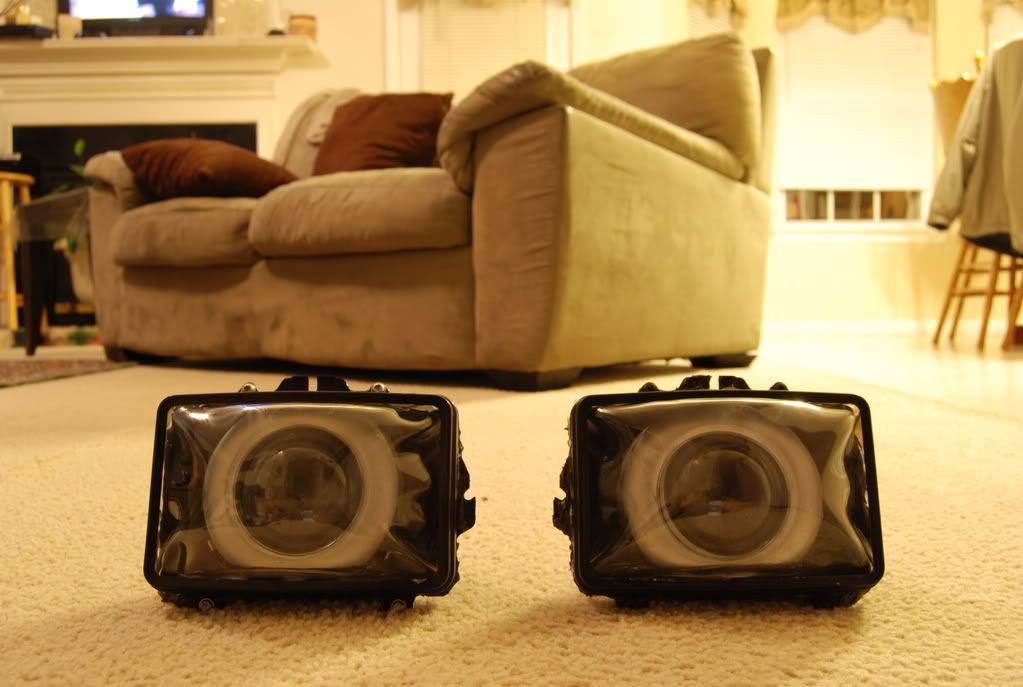
Next, you take LEXAN glass, and cut a circle in the middle, almost the diameter of the projector. (With the metal, not just the glass)
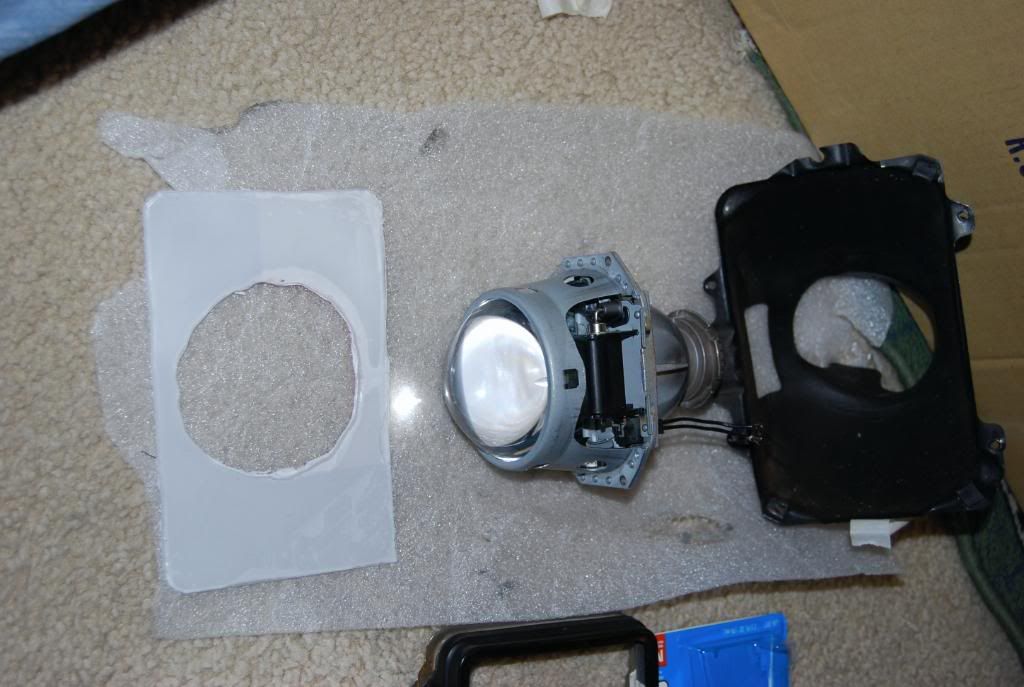
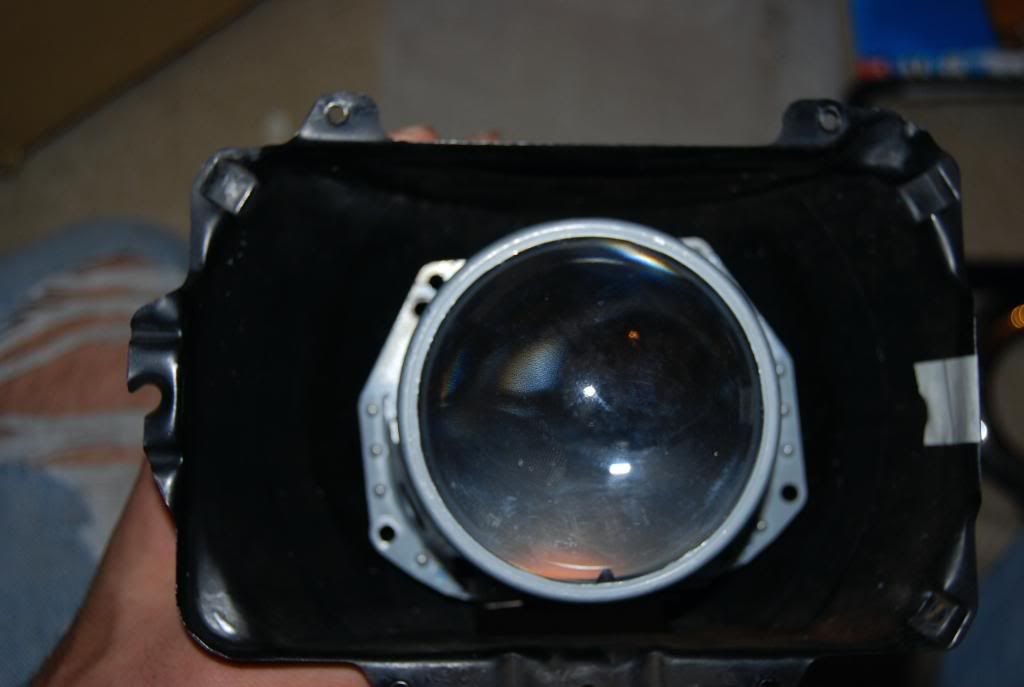
Then i had to cut/trim the Shrouds i had, because they were too big.
I may have done this part differently than blackbirdws6, but its similar. I cut the Lexan glass, so it would fit nicely inside the factory black headlight box thing. After cleaning the projectors, i placed the lexan glass around them, and RTV'd them into the headlight box, to give them a nice seal around the front. I then, placed the shrouds around the projectors, and rtv'd them there. (Carefully)
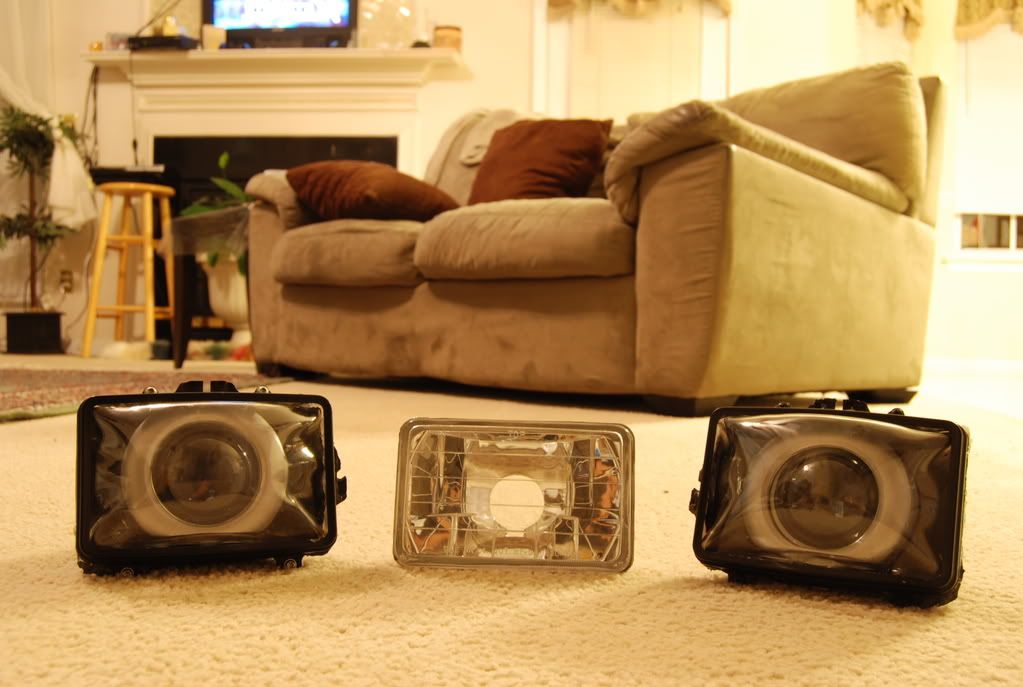
My old headlamps are in the middle.
And that is as far as I have gotten so far. Within the next few days hopefully, or maybe this weekend, I will cut out part of the radiator support, and post pictures of how they look.
The only thing I am not satisfied with is the covers. I am going to Redo them whenever i have time, and swap them out.
If you have trouble understanding any of this, you can look here, and it might be explained differently.
https://ls1tech.com/forums/appearanc...-write-up.html
I got it from here...
https://ls1tech.com/forums/appearanc...-write-up.html
Started off with Headlights out of a 2008 BMW 5-series. I got a great deal on these. Otherwise, you can buy a set of bi-xenon projectors on ebay for about $125ish. I DO NOT recommend these considering they require you to cut out the back of your headlight assembly/and part of the radiator support. (Can't be seen, but still more work than you want to do). Blackbirdws6 used fx projectors which are shorter in length, and did not require him to cut anything out from behind.
Then i had to tear it all apart, and get the good stuff from inside.
After doing one headlight....The good in one box, the bad in the other.
So i took both all apart.
(No pics on this part)Next I Cracked open a stock headlamp. Filled the backside up with plaster, and let it dry. After it dried, i took it out, and sanded it down until it was smooth, and mostly even.
After that, i took some plexiglass, I bought 2 sheets, each 8x10, .80 acrylic.
Heated the oven to about 300, let it pre-heat. I grabbed a few paint stirring stick from lowes, and used those as a border for the plexiglass. I used big metal paper clamp/clips to hold the wood to the plastic.
I grabbed a 3" deep baking pan, and set the plexiglass/attached to the wooden frame, on the pan. (It sat on the borders of the pan) It being deep, allows room for the glass to go down when it starts to sag from the heat. I tossed it in the oven for about 5-6 minutes. After that, you take it out, fast, and wearing thick gloves, you place it over the mold that you made. Then you quickly take the headlight bezel/trim and force it down on the plexiglass around the mold. This allows the edges of the bezel to line up with the plexi. This does take trial and error. I went through about 5 of these sheets, and even the last ones i made, aren't perfect. This was my weakest part in doing all of this.
After you are satisfied with a set that you made, you can then cut them out, and use RTV to seal them up with the headlight trim pieces. (I wasn't satisfied, but got a hold of more Headlight Trim pieces, so i can make more later, and change these out when I have time to make them perfect) 1983 Chevy Caprice's use the same bezels!
Next, you take LEXAN glass, and cut a circle in the middle, almost the diameter of the projector. (With the metal, not just the glass)
Then i had to cut/trim the Shrouds i had, because they were too big.
I may have done this part differently than blackbirdws6, but its similar. I cut the Lexan glass, so it would fit nicely inside the factory black headlight box thing. After cleaning the projectors, i placed the lexan glass around them, and RTV'd them into the headlight box, to give them a nice seal around the front. I then, placed the shrouds around the projectors, and rtv'd them there. (Carefully)
My old headlamps are in the middle.
And that is as far as I have gotten so far. Within the next few days hopefully, or maybe this weekend, I will cut out part of the radiator support, and post pictures of how they look.
The only thing I am not satisfied with is the covers. I am going to Redo them whenever i have time, and swap them out.
If you have trouble understanding any of this, you can look here, and it might be explained differently.
https://ls1tech.com/forums/appearanc...-write-up.html
Last edited by MOE_TAWS6; Feb 19, 2009 at 01:41 AM.
Copy & Paste Moderator


Joined: Apr 2002
Posts: 9,761
Likes: 206
From: Eastern MA
Good work so far.
Couple questions:
* Are those bi-xenon projectors? At first I thought not since the original housings appear to have a separate halogen high beam, but then I noticed what might be a solenoid in the projector.
* What does the back of what you've made look like? How did you seal it?
As for the front lens, there are some home-made vacu-forming threads on HID planet that you may want to take a look at. It may help you out.
Thread Starter
Joined: Jun 2005
Posts: 376
Likes: 0
From: Charlotte, NC
Yes, they are Bi-xenon. The halogen, was a daytime light, and it lit the Halo's in the headlamps as well. I am still working on sealing the backside of it now. And thanks for the info, I will be looking up the vacu-forming info!
Copy & Paste Moderator
Joined: Apr 2002
Posts: 9,761
Likes: 206
From: Eastern MA
Here are a couple threads on vacuum forming:
http://www.hidplanet.com/forums/viewtopic.php?t=31577
http://www.hidplanet.com/forums/viewtopic.php?t=46780
BTW, I've added this thread to the Lighting FAQ.
http://www.hidplanet.com/forums/viewtopic.php?t=31577
http://www.hidplanet.com/forums/viewtopic.php?t=46780
BTW, I've added this thread to the Lighting FAQ.
Last edited by VIP1; Feb 19, 2009 at 12:50 AM.
Trending Topics


Great work and keep at it with the lenses. I'm jealous of the look of your projector shrouds and the nice halo ring you will have. Make sure you test fit these in the car and see how close the acrylic covers come to the front bumper. I got lucky and my depth had just the right amount of clearance.
I would hate to have you hook these up, put the lights down and crunch! Once I get in my new house, I'm going to look at creating a proper vacuum forming setup to make these covers on a large scale. Unfortunately, life keeps putting this on the back burner.
Let me know if you need any info or help to finish things up.
If I haven't gotten around to doing this setup by then, then I'll be your first customer!
Thread Starter
Joined: Jun 2005
Posts: 376
Likes: 0
From: Charlotte, NC
Great work and keep at it with the lenses. I'm jealous of the look of your projector shrouds and the nice halo ring you will have. Make sure you test fit these in the car and see how close the acrylic covers come to the front bumper. I got lucky and my depth had just the right amount of clearance.
I would hate to have you hook these up, put the lights down and crunch! Once I get in my new house, I'm going to look at creating a proper vacuum forming setup to make these covers on a large scale. Unfortunately, life keeps putting this on the back burner.
Let me know if you need any info or help to finish things up.
I would hate to have you hook these up, put the lights down and crunch! Once I get in my new house, I'm going to look at creating a proper vacuum forming setup to make these covers on a large scale. Unfortunately, life keeps putting this on the back burner.
Let me know if you need any info or help to finish things up.
If I feel really comfortable with the product, and decide to sell them, I will be sure to get in touch with you.
Thread Starter
Joined: Jun 2005
Posts: 376
Likes: 0
From: Charlotte, NC
Ok, so maybe it's been a little over a week. haha But i got around to it, and now they are in, and done. i have to make a few final adjustments. I'll post pics soon.

TECH Regular
Joined: Feb 2005
Posts: 400
Likes: 2
Do you have a schematic of the wiring for your projectors? I'm working on an E46 projector retrofit for my 1994 TA, and I need to know how to keep the low beam circuit energized when the high beam is on too. If I understand the correctly, the factory wiring turns the lows off when the highs come on.
I saw the wiring diagram in this thread https://ls1tech.com/forums/appearanc...-write-up.html but I can't figure out how the diode is wired Is the end not connected to the high beam wire grounded?
I saw the wiring diagram in this thread https://ls1tech.com/forums/appearanc...-write-up.html but I can't figure out how the diode is wired