My Interior and Engine Bay.......Build Thread
Well I havent really been posting in the Appearance section much, but i read through all your threads looking for inspiration. 
I have a build thread in the Gen IV Internal Section, but ill leave that for my engine work. Which will be a LSX 454/PRC 265 Heads/LS7 Intake..blah blah..(Well...Its all in my sig.)
INTERIOR
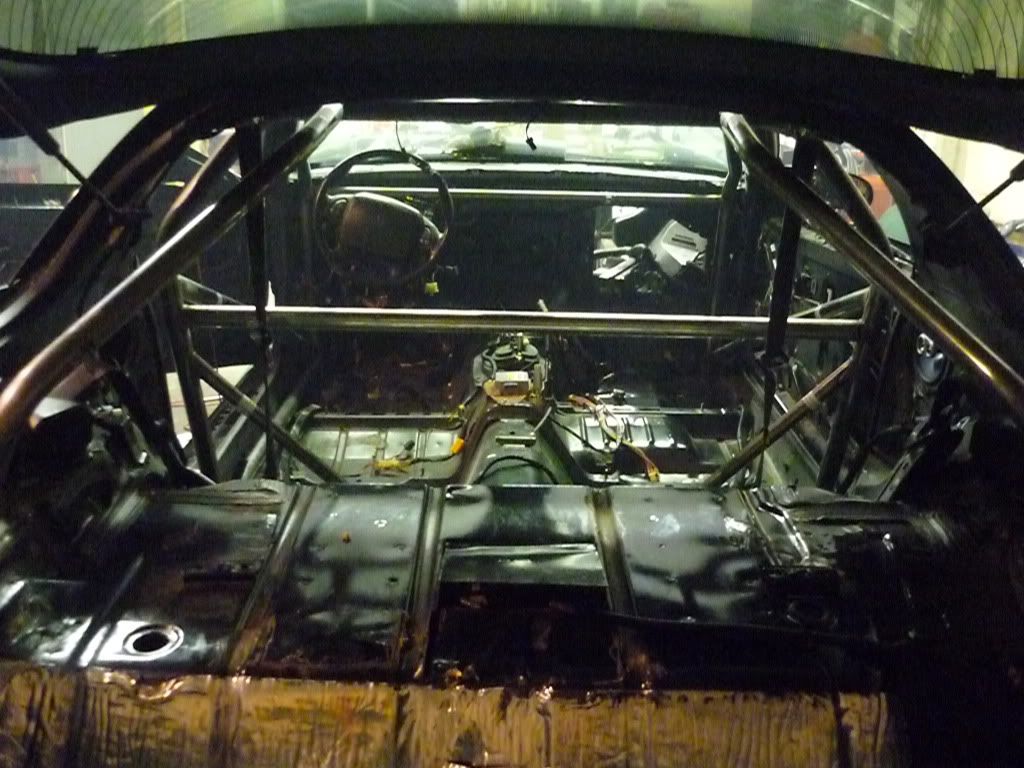
I started 5 months ago, tore my car apart and welded in a 10pt cage.

Then i put down a layer(or more in some places) of Raamat
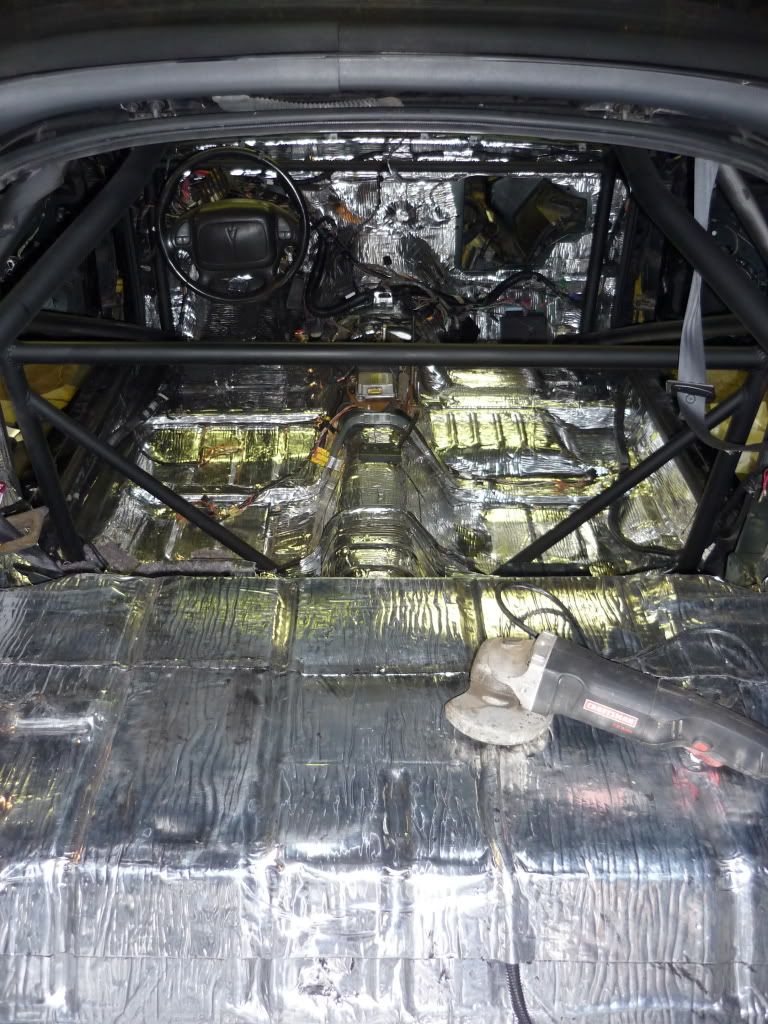
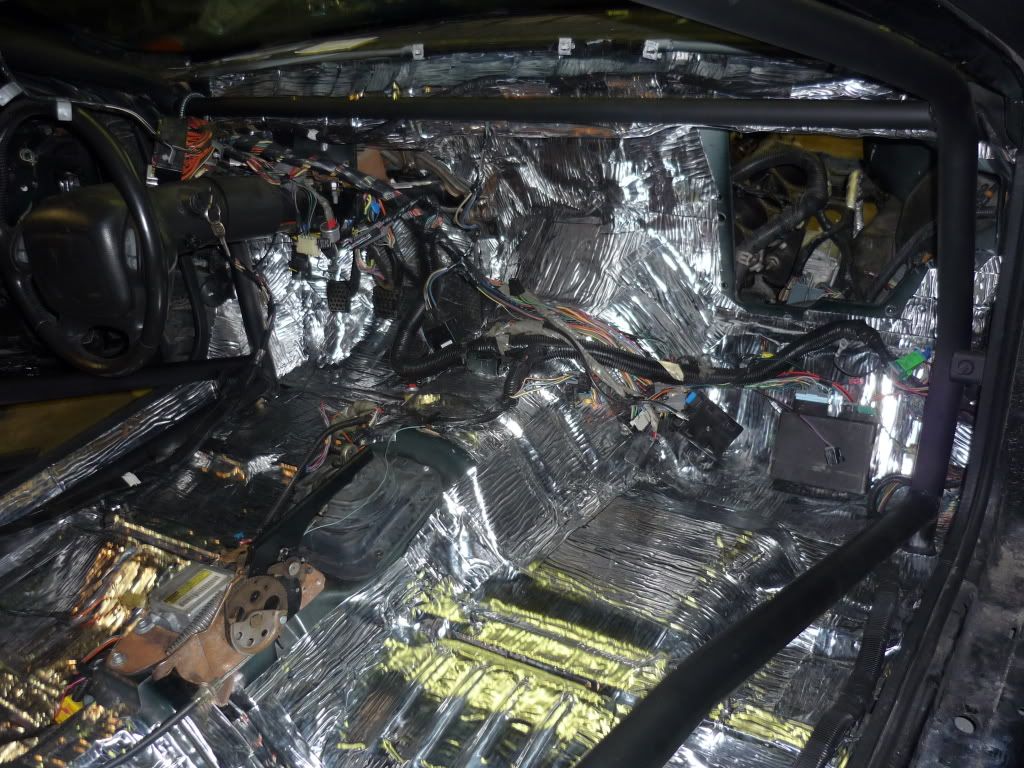
I guess I dont have any pics of the ensolite, but i put that on also. and right now im procrastinating, working on the carpet. Cutting the holes and such.
ENGINE BAY
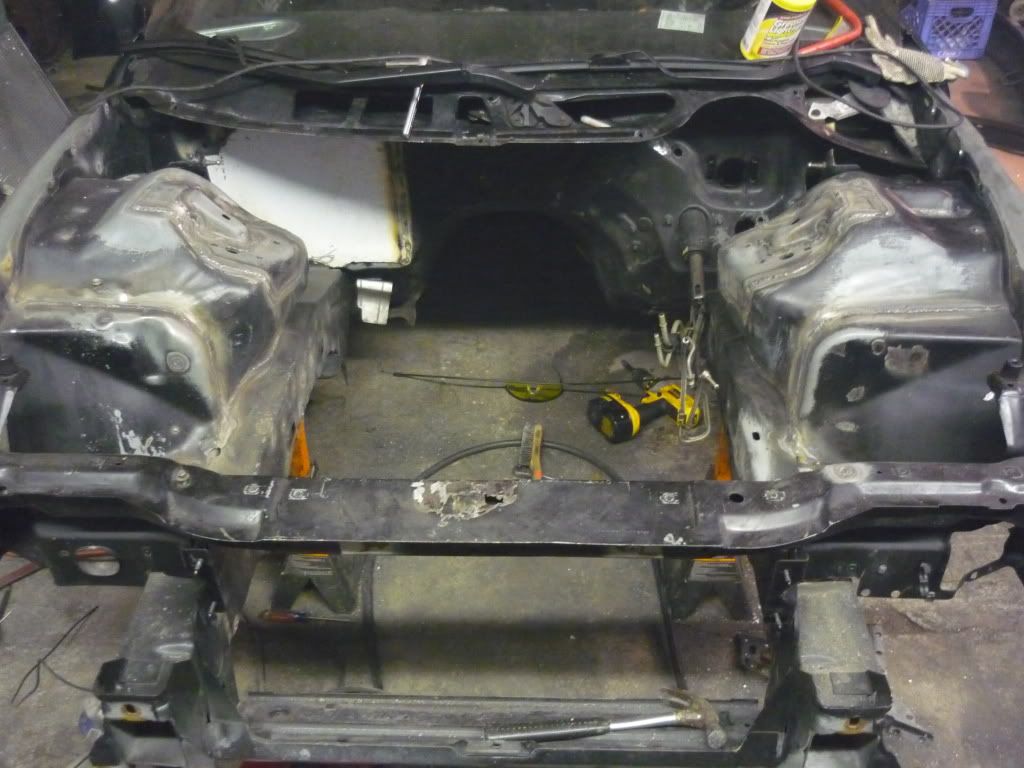
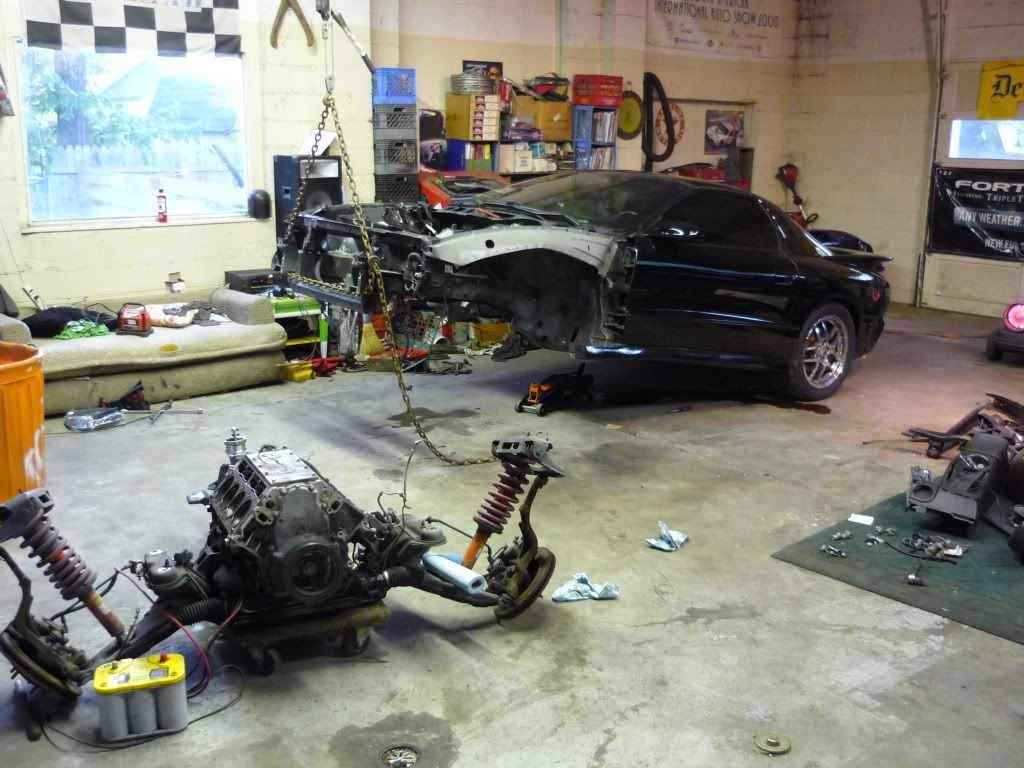
Yesterday i had a friend come over and help me drop the engine.
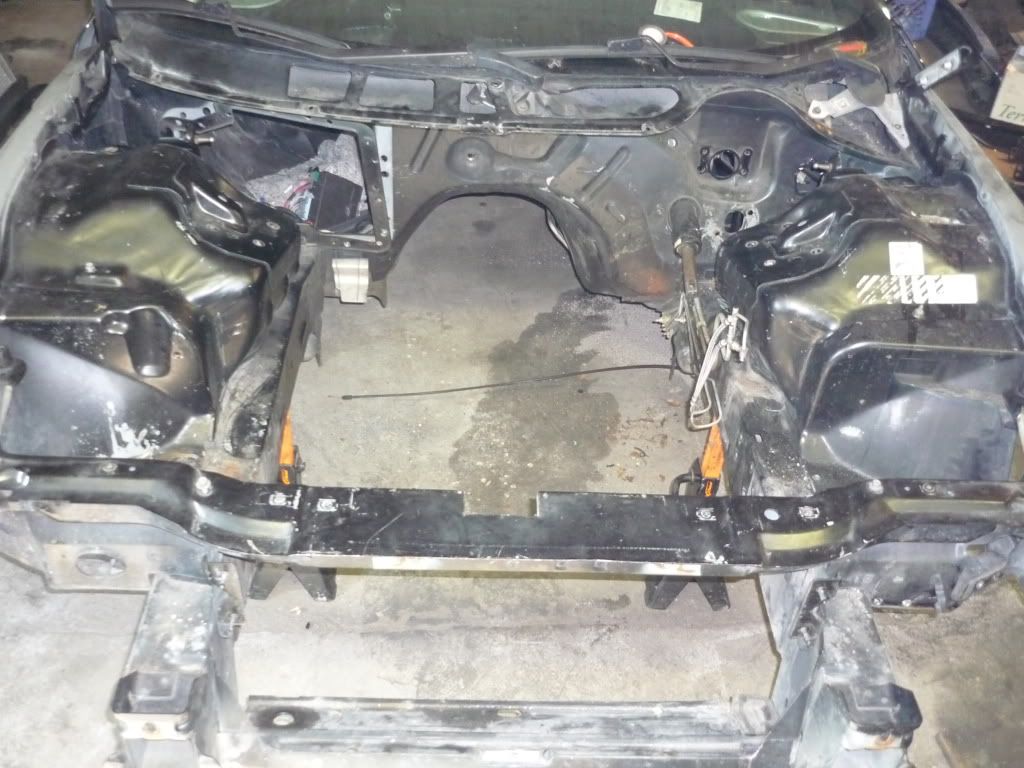
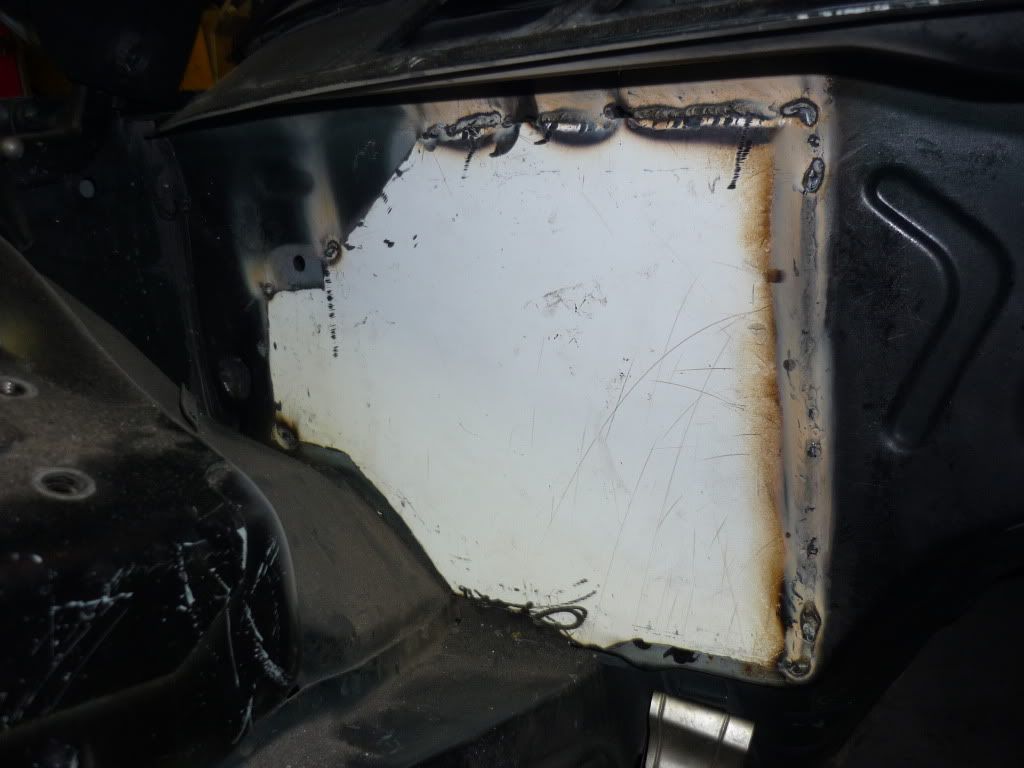
Today i pulled the wiring harnesses and began drilling the spot welds out. I also started fabing a cover to weld over the hole where the A/C used to be.
PLANS
I will be relocating the computer inside. The battery will go to the back.
The fuses will be dropped under where they currently sit(somehow).
I will be deleting ABS (along with basically everything else i can) and adding LL and a PV, these will be mounted on the frame rail somewhere.
New lines will be custom bent so there out of the way.
Also i will run braided fuel lines
Both the fuel and brake lines will be moved away from the exhaust when i re-run them
I also am looking for a way to "Wire mod" the big group of wires to the fuse box
If you have any ideas or suggestions let me know. (Positive or Negative ) I can handle it
I have a build thread in the Gen IV Internal Section, but ill leave that for my engine work. Which will be a LSX 454/PRC 265 Heads/LS7 Intake..blah blah..(Well...Its all in my sig.)
INTERIOR
I started 5 months ago, tore my car apart and welded in a 10pt cage.
Then i put down a layer(or more in some places) of Raamat
I guess I dont have any pics of the ensolite, but i put that on also. and right now im procrastinating, working on the carpet. Cutting the holes and such.
ENGINE BAY
Yesterday i had a friend come over and help me drop the engine.
Today i pulled the wiring harnesses and began drilling the spot welds out. I also started fabing a cover to weld over the hole where the A/C used to be.
PLANS
I will be relocating the computer inside. The battery will go to the back.
The fuses will be dropped under where they currently sit(somehow).
I will be deleting ABS (along with basically everything else i can) and adding LL and a PV, these will be mounted on the frame rail somewhere.
New lines will be custom bent so there out of the way.
Also i will run braided fuel lines
Both the fuel and brake lines will be moved away from the exhaust when i re-run them
I also am looking for a way to "Wire mod" the big group of wires to the fuse box
If you have any ideas or suggestions let me know. (Positive or Negative
) I can handle it Last edited by PUNISHER TA; May 18, 2009 at 06:52 PM.
Damn dude.. Gonna be a big project. I wish I had somewhere to do all that work. How was it getting everything in the interior out? How long did that take?
Good luck man, keep us posted!
Good luck man, keep us posted!
I did the !wire mod to the front of mine like I think you are talking about. The big bunch that goes to the fuse boxes. You know how you see it right there under the air lid? I ran that bunch behind the frame under that black plastic shield and between the radiator. Theirs just enough room and works just fine! I have not burnt anything either.
Looks good man!
Looks good man!
Yea, im really not good at taking things slow, or doing something half ***.
I did the !wire mod to the front of mine like I think you are talking about. The big bunch that goes to the fuse boxes. You know how you see it right there under the air lid? I ran that bunch behind the frame under that black plastic shield and between the radiator. Theirs just enough room and works just fine! I have not burnt anything either.
Looks good man!
Looks good man!
Yea. well i have everything out right now, so its hard to picture. But yea. that sound like a good idea.
I also wanna do the wires, that go to the fuse box from the firewall somehow.
btw, your engine bay turns out very clean. I would like mine to be emptier... lol well see how it turned out
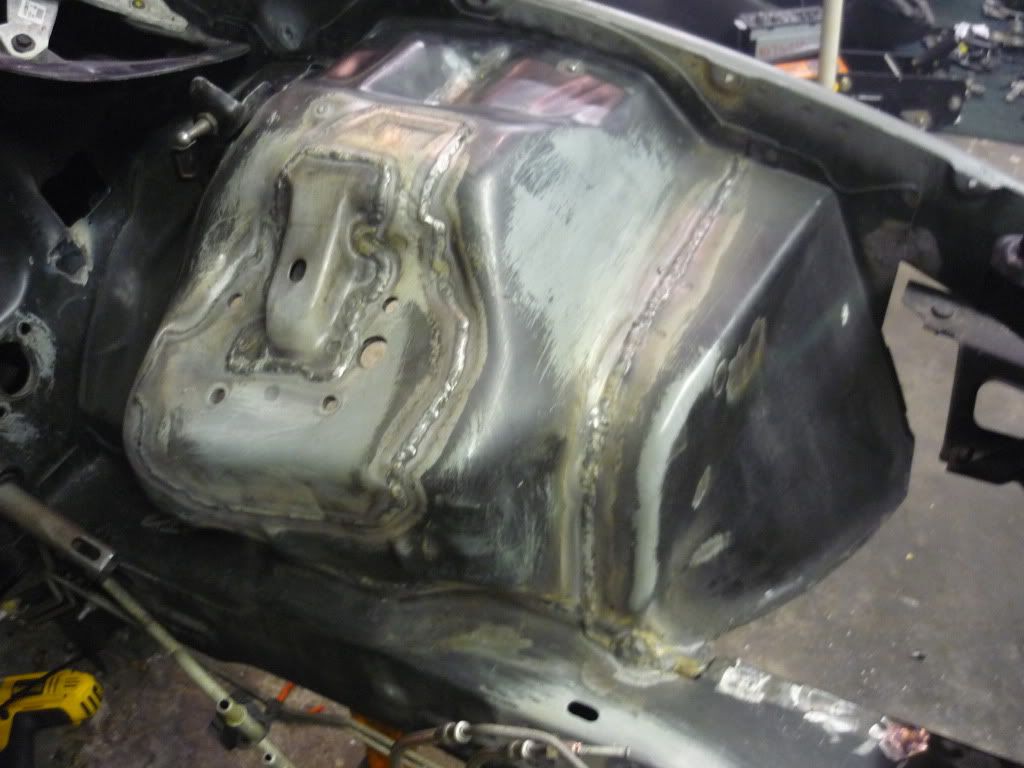
Well I got my A/C Delete Panel welded in part way.
Also I cut out the panel under where the Fuse Panel sits. Ill be welding in a falt panel. and obviously smoothing that out.
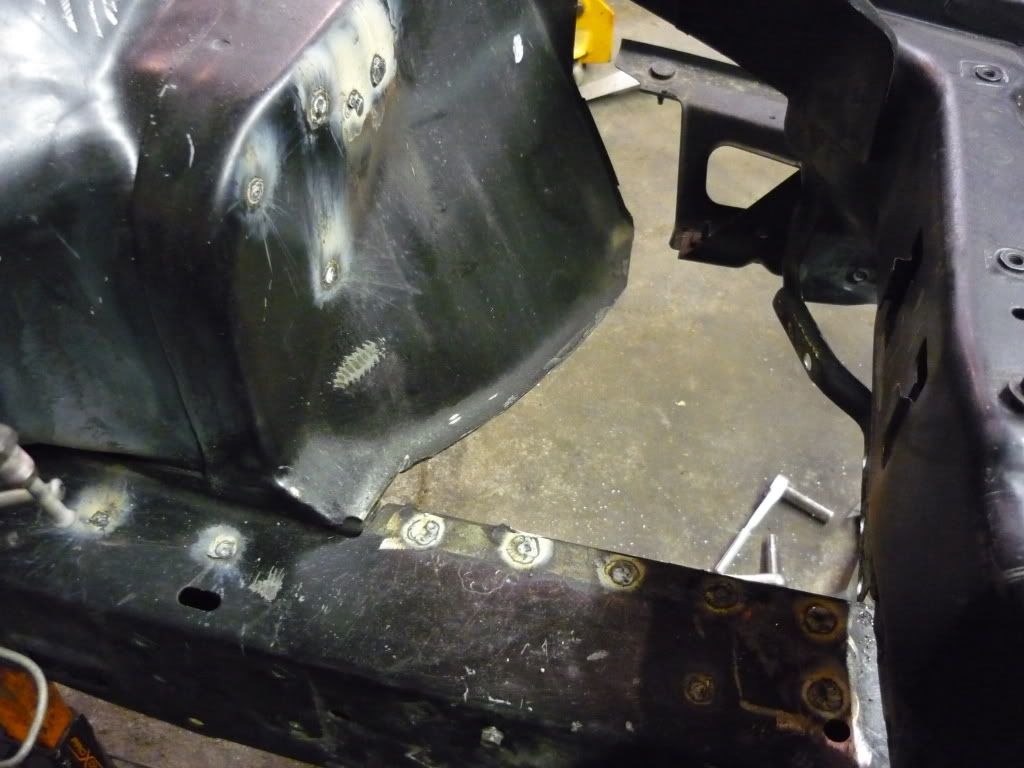
Also I cut out the panel under where the Fuse Panel sits. Ill be welding in a falt panel. and obviously smoothing that out.
OP looks great. lot of work. i think you may want to change out the Borla.. Going to be raspy...... But that is JMO
Good Luck
Seats first. then i slowly popped off the side panels.
The dash you really just gotta take your time. I thought i was done. and then i found 4 more bolts.

Thanks.
Yea. I saw in another thread you mentioned the borla with headers/y was raspy.
I havent bought it yet. That just what i was planning. I will have 2" Kooks. but i heard someone else say to just put a spiralflow after the Y
Trending Topics
LS1 Tech Stories
The Best V8 Stories One Small Block at Time

Topdon ONE vs. Artidiag 800 BT2: Which is the Diagnostic Tablet For You?
Pouria Savadkouei
Gas Monkey Built a 6-Wheel Ferrari Testarossa With a Corvette LT4 Engine
Verdad Gallardo
7 Most Reliable High-Performance Engines GM Has Ever Built
Verdad Gallardo
Amazing '71 Camaro Restomod Is Modern Muscle Car Under the Skin
Verdad Gallardo
6 Common C5 Corvette Failures and What's Involved In Repairing Them
Pouria Savadkouei
Retro Modern Bandit Pontiac Trans AM Comes With Burt Reynolds' Autograph
Verdad Gallardo
Top 10 Greatest Cadillac V Series Performance Models Ever, Ranked
Pouria Savadkouei
Top 10 Most Powerful Chevy Trucks Ever Made!

Hennessey's New Supercharged Silverado ZR2 Has 700 HP
Verdad Gallardo

BTW. Ill be ordering some SS Badges from you before this is done.
Thanks, Its a bigger project than i EVER planned.
lolI keep getting more and more ideas.

Thanks
Thanks
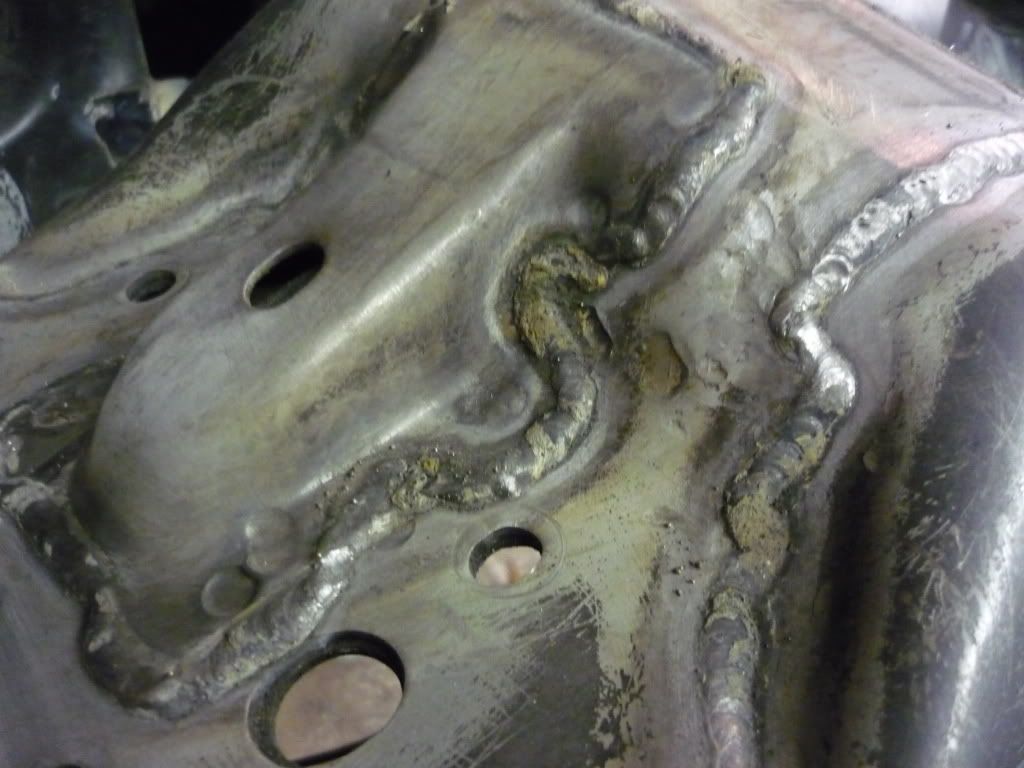
Im wondering why nobody smooths the line where the two pieces are spot welded together. Some people smooth the spot welds but not the "line"
EDIT:
NOTE: Ive never done body work, so this is all new to me. I am learning as i go. As usual.
EDIT:
NOTE: Ive never done body work, so this is all new to me. I am learning as i go. As usual.
Last edited by PUNISHER TA; May 19, 2009 at 02:18 PM.
You can weld/grind it, then use body filler. If you just use body filler it might end up cracking on you if that area is prone to any flex.
I welded all those holes shut from the wire mod and TCS delete; followed it with some bondo and some paint. Looks nice.
I welded all those holes shut from the wire mod and TCS delete; followed it with some bondo and some paint. Looks nice.
Do it up. When I pull the motor for a new one I will be doing it. It's just a lot of work. Most people could give two ***** less about small details like that but that is what makes certain engine bays "pop". When I see a CLEAN engine bay, I admire the time and attention to detail put into it.
Do it up. When I pull the motor for a new one I will be doing it. It's just a lot of work. Most people could give two ***** less about small details like that but that is what makes certain engine bays "pop". When I see a CLEAN engine bay, I admire the time and attention to detail put into it.
Still need to finish my interior... lol
Trimming the carpet isnt gonna be fun.