
Ask a Professional Detailer
 03-18-2012, 04:34 PM
#1121
Well, the issue was that I wasn't quite getting the correction I was hoping for. I was working it at about an inch per second in a cross hatch pattern. Tried both pad priming methods (the Kevin Brown method and the Chemical Guys pad primer spray w/ 4 dime sized blots of M105). Using the KB pad priming method I got a little better results, but I wasn't sure if that was because I was technically using more compound via the priming technique. Unfortunately, I don't have any D300 to add to the mix. I do however have a small amount of Megs Ultimate Compound. Is there any chance I could add some of that to the M105 on the LC orange flat pad? Then if that dries up, add some distilled water?
Let's just say that I now understand the value of products with long working times! AG has a buy one get one special on the Car Pro Fixer Polishing Compound that I've been debating grabbing. Any experience with that?
Let's just say that I now understand the value of products with long working times! AG has a buy one get one special on the Car Pro Fixer Polishing Compound that I've been debating grabbing. Any experience with that?
CarPro makes some great and innovative products yet I have heard nothing on the forums about their polishes, so I don't know. Let me put it this way.....I'd rather run out of toilet paper than run out of M105 and I'd rather run out of clean water than run out of M101.
 03-18-2012, 04:47 PM
#1122
Four dime sized drops is about four times too much product, that will assist it drying out so fast and loading up the pad which creates heat and heat dries it out. The UC doesn't work nicely with 105 on most paints, but give it a try....it might help a little. But only use a pea sized drop. 105 has a short working time and other than adding some D300 to it, you can't really increase the working time very much.
CarPro makes some great and innovative products yet I have heard nothing on the forums about their polishes, so I don't know. Let me put it this way.....I'd rather run out of toilet paper than run out of M105 and I'd rather run out of clean water than run out of M101.
CarPro makes some great and innovative products yet I have heard nothing on the forums about their polishes, so I don't know. Let me put it this way.....I'd rather run out of toilet paper than run out of M105 and I'd rather run out of clean water than run out of M101.
03-18-2012, 04:52 PM
#1123
So are you suggesting I do away with the KB pad priming method (at least with M105) and simply use less product along with the CG pad priming solution? I'm really trying to get the best correction possible here without taking her to a professional. I've seen some positive results with the M105, just hate the fact that you can't work it more/to my liking. Also, is M101 available to the public? Can't find it on AG.
M101 is available in Europe only. I paid through the nose (very painful) to get some of it out here. Its pretty much worth its weight in gold right now.
03-18-2012, 05:43 PM
#1124
No, but I rarely do the priming method anyway. If you want that much correction its time to switch up to a megs MF cutting pad or Surbuf to get the cut you're looking for and definitely pick up D300 while you're at it. I like a lot of CG products but there is no need for pad priming solution.
M101 is available in Europe only. I paid through the nose (very painful) to get some of it out here. Its pretty much worth its weight in gold right now.
M101 is available in Europe only. I paid through the nose (very painful) to get some of it out here. Its pretty much worth its weight in gold right now.
Ok, that makes more sense now. I've heard of people achieving fantastic results with the surbuf cutting pads with the 105/205 combo. I guess I'll be placing another order with Auto Geek

As always, thanks for your time Jeff!
Any chance we'll be seeing the 150+ hour Bently correction thread anytime soon? Looks like that was a correction from hell!
03-18-2012, 06:20 PM
#1125
Ok, that makes more sense now. I've heard of people achieving fantastic results with the surbuf cutting pads with the 105/205 combo. I guess I'll be placing another order with Auto Geek
As always, thanks for your time Jeff!
Any chance we'll be seeing the 150+ hour Bently correction thread anytime soon? Looks like that was a correction from hell!
As always, thanks for your time Jeff!
Any chance we'll be seeing the 150+ hour Bently correction thread anytime soon? Looks like that was a correction from hell!
The Bentley is coming....I've also got a AM V8 Vantage to post, a 996 GT3, GS430, and oh yeah.....the entire Shelby 50th Anniv bash in Las Vegas!!!! Just that one is over 700 pics...I've got a lot of sorting to do and cutting down the pics.
03-18-2012, 07:55 PM
#1126
TECH Fanatic
iTrader: (1)
Join Date: Jul 2008
Location: Georgia
Posts: 1,861
Likes: 0
Received 0 Likes
on
0 Posts

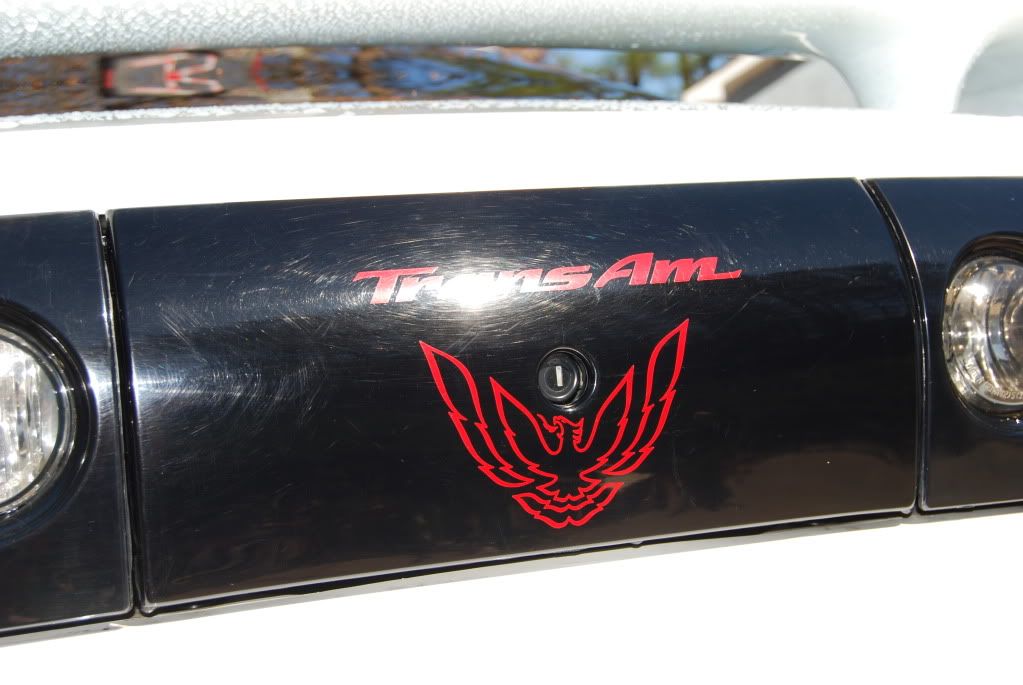
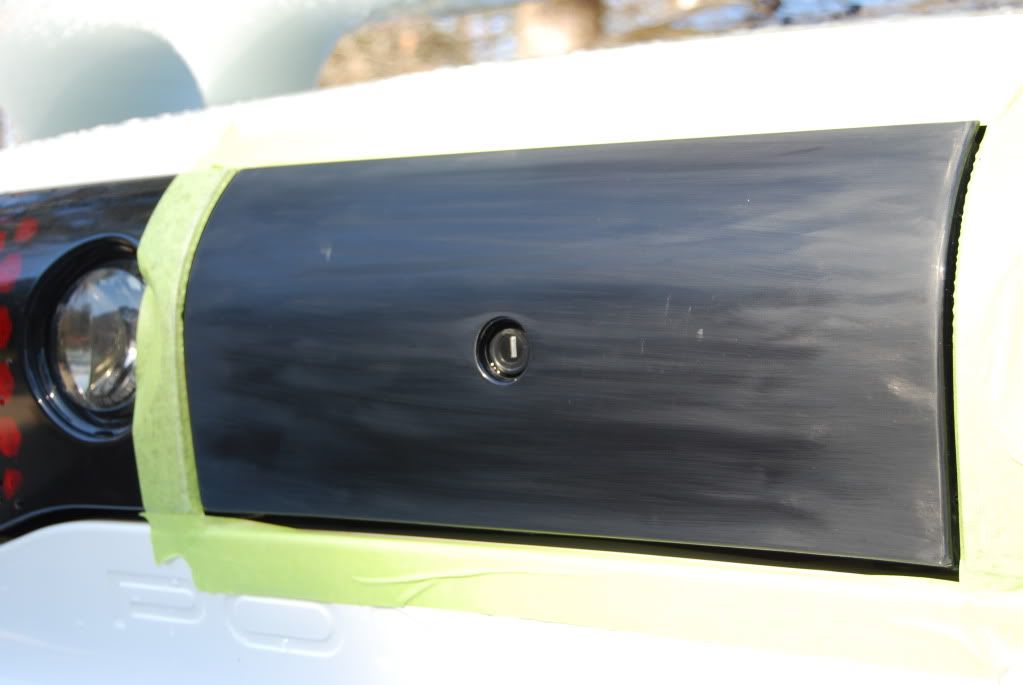
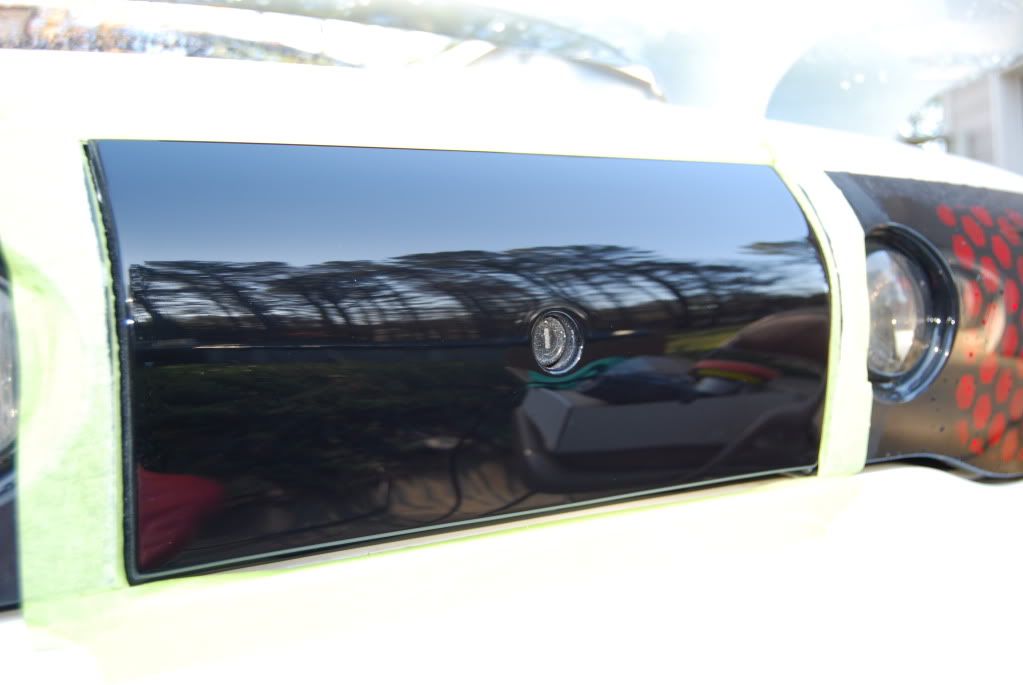
GoFast thanks for all the replies! Last weekend I removed the bird and "Trans Am" writing on my filler panel. I wet sanded with 600 horizontally, 1000 vertically, then 1500 horizontally. Looked like hell after that step. Then I went over it with M105 on an orange pad and holy crap it shined up and looked incredible. Went over it again with a few passes since it was my first time using the pc since I got it and I think I have the right speed combination. It seemed to remove all the swirls working it at a slower pace.
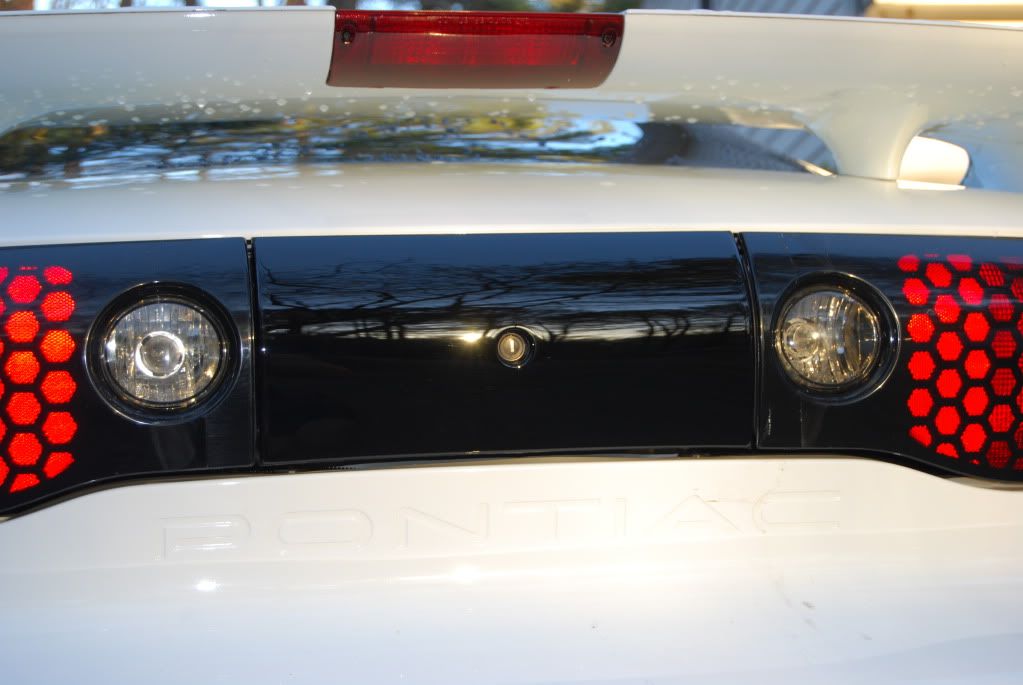
Then I hit it with M205 on the white pad and to my surprise it looked even better than the previous step. It looked like glass once I finished. Topped it off with bfwd and it looked great.
I ran out of daylight and wasn't able to correct the taillights, hopefully I will get to those soon! They are swirled to hell from the previous owner. Here's some pictures I took along the way, they aren't the best but tell me what you think..
Sun was going down so I tried my best to include it in the pic. I need to get full sunshine after shots. The white dots were dust.
Before
After wet sanding
I think this was after m105
Finished
03-18-2012, 08:49 PM
#1127
600 is overly aggressive as a starting point and you ideally should finish with 2500 or 3000 before compounding it out. But it looks pretty good! Glad I was able to help!
BTW, plastic needs to be treated with slower speeds than the paint. Good you picked up on that
BTW, plastic needs to be treated with slower speeds than the paint. Good you picked up on that
03-18-2012, 09:19 PM
#1128

Damn dabest, that looks like it's freshly painted. How do your sail panels look?
Jeff, what's the ideal starting grit for wetsanding clear on paint? Not that I'm going to do it, I'd just like to know. I'm afraid if I attempted it on my hood and front bumper I'll go through the clear. Those are really the only parts that could use new paint.
Looking forward to upcoming correction threads.
03-18-2012, 09:54 PM
#1129
TECH Fanatic
iTrader: (1)
Join Date: Jul 2008
Location: Georgia
Posts: 1,861
Likes: 0
Received 0 Likes
on
0 Posts
Are you talking about the paint or the plastic triangle piece on the sail panel?
 03-19-2012, 08:57 AM
#1133
Just be careful....Surbuf + 105 is Extremely aggressive. You can burn an edge with the quickness even with a PC and that combo. Drop the speed to like 4 or 5 at the highest.
The Bentley is coming....I've also got a AM V8 Vantage to post, a 996 GT3, GS430, and oh yeah.....the entire Shelby 50th Anniv bash in Las Vegas!!!! Just that one is over 700 pics...I've got a lot of sorting to do and cutting down the pics.
The Bentley is coming....I've also got a AM V8 Vantage to post, a 996 GT3, GS430, and oh yeah.....the entire Shelby 50th Anniv bash in Las Vegas!!!! Just that one is over 700 pics...I've got a lot of sorting to do and cutting down the pics.
Cant wait for those write ups. That Bentley looked like it ran through a gas station car wash from hell...multiple times. Cant wait to see finished product
Last edited by Rare96LT1Formula; 03-19-2012 at 10:50 AM.
 03-19-2012, 09:26 PM
#1135
TECH Fanatic
iTrader: (1)
Join Date: Jul 2008
Location: Georgia
Posts: 1,861
Likes: 0
Received 0 Likes
on
0 Posts
They are just as bad, if not worse, than the filler panel was before I worked on it. I'm going to go over those when I pc the paint on the car, which is also swirled to hell. An older lady owned the car before me, she must not have known how to properly wash it!
 03-20-2012, 02:43 PM
#1138
might be a silly question but whatever.
Ive been watching some videos and most say to work in smaller (>2 sq ft) sections while you work in polish and sealant etc. So my question is two-fold
1. Do you do polish the whole car and then seal the whole car? or do you polish and seal section one, polish and seal section two etc)
2. Other than taping off trim, mouldings etc, do you tape off EVERY 2sq ft section on the vehicle or do you eyeball it in most areas? Pictures might help if you have any. Thanks bud
03-21-2012, 12:34 PM
#1140

I applied (by hand) Meguiars Ultimate compound along with Ultimate wax to fix mine up. They look like your tail panel that you did a lot of work to with the wet sanding and rotary. Not sure if it will have the "lasting appeal," but it was super easy, cheap, and they look like glass.